Channels lising page
All videos archived of GreatScott!

R17IPmIz0fU | 28 Dec 2025
What was going on in 2024 and 2025 on the GreatScott! YouTube channel and when will the videos return? Find out in this Channel Update ;-) Previous video: https://youtu.be/zT0CvQKSKVQ Channel Update 2023: https://youtu.be/Eh6KNVfC4YE Ceiling Speaker Project: https://youtu.be/6Ej2rrm9xfY Light Up Stairs Project: https://youtu.be/Dujx3L1Evw8 HomeAssistant Project: https://youtu.be/FntUPnPGfM8 Facebook: https://www.facebook.com/greatscottlab Twitter: https://twitter.com/GreatScottLab Instagram: https://www.instagram.com/great.scott.lab/ TikTok: https://www.tiktok.com/@greatscottlab Discord: https://discord.gg/zuAvkAuhsY Support me for more videos: https://www.patreon.com/GreatScott?ty=h 0:00 The Big Update! 4:01 Where was the 2024 Update? 6:26 View Count in 2024/2025 10:26 Unused/Failed Projects? 11:15 Go To MOSFET? 11:45 What Project do you use frequently? 13:20 If Time/Money are not important? 14:29 Family Vlog? 17:12 You have a Gaming PC? 18:45 Open Sauce? Embedded World? 22:05 When will your PV System pay off? 24:12 Happy with Smart Home? 25:40 Verdict

nC0o99nN2D0 | 30 Nov 2025
Click this link https://boot.dev/?promo=GREATSCOTT and use my code GREATSCOTT to get 25% off your first payment for boot.dev. Previous LoRa videos: https://youtu.be/ItZwa1AdrpU https://youtu.be/2YJHcGQnpAk You can get the shown components here: (affiliate links) Amazon.com: https://amzn.to/49K7EZZ Meshnology Website: https://goo.su/cfMWSE Heltec ESP32 LoRa V3: https://s.click.aliexpress.com/e/_c31GNXOf Heltec GPS LoRa: https://s.click.aliexpress.com/e/_c3tqg3Hd Light Barrier: https://s.click.aliexpress.com/e/_c41NUGyR Facebook: https://www.facebook.com/greatscottlab Twitter: https://twitter.com/GreatScottLab Instagram: https://www.instagram.com/great.scott.lab/ TikTok: https://www.tiktok.com/@greatscottlab Discord: https://discord.gg/zuAvkAuhsY Support me for more videos: https://www.patreon.com/GreatScott?ty=h In this video we will be having a closer look at Meshtastic and LoRa. Now LoRa is a long range wireless communication method that I previously used around 5 years ago. Back then the selection of dev boards was limited and the available code and software was not the easiest. But now we get Meshtastic which apparently makes LoRa easy. Is that true? We will find out in this video by making my shed a bit more secure ;-) Let's get started! Websites that were shown in the video: https://flasher.meshtastic.org/ https://meshtastic.org/ https://github.com/meshtastic/home-assistant https://github.com/jgromes/RadioLib https://github.com/ropg/heltec_esp32_lora_v3 https://github.com/beegee-tokyo/Meshtastic-Sensor-Network https://github.com/sandeepmistry/arduino-LoRa Thanks to Boot.dev for sponsoring this video 0:00 My Wireless Problem! 3:03 Hardware Overview 4:07 Flashing Meshtastic 4:43 Configuring Meshtastic 5:18 My Range Test 7:20 Meshtastic for my DIY Project? 8:37 RadioLib Alternative 9:45 Verdict

VyqljSodp6k | 05 Oct 2025
Get $360 coupons for JLCPCB Layout Service: https://design.jlcpcb.com/?from=Greatscott1 Register to get $70 New customer coupons: https://jlcpcb.com/?from=AAA Sign up for Altium Develop and see the difference: http://altium.com/yt/greatscott! (AD, Paid Promotion) You can get the featured products here: (affiliate links) Tiny Linux Board: https://s.click.aliexpress.com/e/_onbp7Dn 2 in 1 Cup Holder: https://s.click.aliexpress.com/e/_oF4zbsN Mosquitto Wristband: https://s.click.aliexpress.com/e/_oCGDodT Makita Battery Charger: https://s.click.aliexpress.com/e/_oEGM76v WiFi SD Card: https://s.click.aliexpress.com/e/_op8RHwD PTC Heater: https://s.click.aliexpress.com/e/_oo2aoq9 Previous video: https://youtu.be/l3d8uFKsJiY Previous Aliexpress video: https://youtu.be/Jj6VQgw1ZvM Facebook: https://www.facebook.com/greatscottlab Twitter: https://twitter.com/GreatScottLab Instagram: https://www.instagram.com/great.scott.lab/ TikTok: https://www.tiktok.com/@greatscottlab Discord: https://discord.gg/zuAvkAuhsY Support me for more videos: https://www.patreon.com/GreatScott?ty=h In this video we will be having a closer look at 6 different products I got from Aliexpress. Aliexpress is famous for featuring the newest products/ICs when it comes to electronics but finding those can be a bit difficult. So I tried finding the hidden Gems not only electronics related but in general what I think could be useful. Let's get started! Thanks to JLCPCB for sponsoring this video. Visit https://jlcpcb.com to get professional PCBs for low prices. 0:00 Hidden Gems?! 1:03 Intro 2:03 Tiny Linux Board 4:35 2 in 1 Cup Holder 6:57 Mosquitto Wristband 8:34 Battery Charger/Powerbank 10:46 WiFi SD Card 12:18 PTC Heater 13:50 Verdict

l3d8uFKsJiY | 21 Sep 2025
Check out TRMNL here and save $10: https://usetrmnl.com/go/greatscott10 You can get the shown FPGA Board here: (affiliate link) https://s.click.aliexpress.com/e/_onwYFYf Previous video: https://youtu.be/_R7HFDz1AdU Previous FPGA Video: https://youtu.be/ZNunxg7o8l0 Arduino Logic Gate Video: https://youtu.be/lzXMImK_wyM AliExpress video with FPGA: https://youtu.be/BcUzuwP-WPI In this video we will be having a closer look at a budget friendly FPGA board. Now FPGAs are super fast and can do pretty much anything when it comes to digital electronics. So way better than microcontrollers, right? Well, I will show you how easy you can use them and why I would often times avoid them. Let's get started! Facebook: https://www.facebook.com/greatscottlab Twitter: https://twitter.com/GreatScottLab Instagram: https://www.instagram.com/great.scott.lab/ TikTok: https://www.tiktok.com/@greatscottlab Discord: https://discord.gg/zuAvkAuhsY Support me for more videos: https://www.patreon.com/GreatScott?ty=h Websites that were shown/used during the video: https://wiki.sipeed.com/hardware/en/tang/Tang-Nano-9K/Nano-9K.html https://github.com/sipeed/TangNano-9K-example https://dl.sipeed.com/shareURL/TANG/Nano%209K/6_Chip_Manual/EN/General%20Guide https://github.com/Martoni/GbHdmi https://github.com/harbaum/Pacman-TangNano9k https://www.arduino.cc/maker https://forum.arduino.cc/ Thanks to TRMNL for sponsoring this video. 0:00 FPGAs are AWESOME? 1:29 Intro 2:40 FPGA First Steps 3:16 Microcontroller LED Example 4:21 Inside an FPGA 5:31 FPGA LED Example 7:48 I2C and PWM Example 9:38 Verdict

_R7HFDz1AdU | 07 Sep 2025
Discover Easy, Affordable, and Reliable PCB manufacturing with JLCPCB! Register to get $70 New customer coupons: https://jlcpcb.com/?from=AAA Save $30 Now! → Claim Your 6-Layer PCB Discount Today: https://jlcpcb.com/6-layer-pcb?from=AAA You can get the schematic, code, gerber files and more here: https://www.patreon.com/posts/138098669 Previous video: https://youtu.be/D86an4uN7FE Facebook: https://www.facebook.com/greatscottlab Twitter: https://twitter.com/GreatScottLab Instagram: https://www.instagram.com/great.scott.lab/ TikTok: https://www.tiktok.com/@greatscottlab Discord: https://discord.gg/zuAvkAuhsY Support me for more videos: https://www.patreon.com/GreatScott?ty=h In this episode of DIY or Buy we will be having a closer look at BLE beacons. I think the most popular example is an Air Tag. Basically a low power thingy that lasts for years that you can find with your smartphone. It is pretty handy and comes with lots of features. But can it be done cheaper by creating a DIY circuit? Let's find out! ;-) Websites that were shown during the video: https://atmosic.com/products/the-atm33-series/ https://www.nordicsemi.com/Products/Wireless/Bluetooth-Low-Energy?lang=en#infotabs https://www.nordicsemi.com/Products/nRF52840 https://docs.nordicsemi.com/bundle/ps_nrf52840/page/ref_circuitry.html https://nrf52.jpconstantineau.com/docs/programmer/ Thanks to JLCPCB for sponsoring this video. Visit https://jlcpcb.com to get professional PCBs for low prices. 0:00 What Handy Gadget?! 1:22 Intro 2:12 All Features of a Smart Tag 3:01 What is BLE? 3:53 Power Demand of Buy 4:49 What Microcontroller for DIY? 5:53 First BLE Test! 7:02 Creating the PCB 8:59 First Tests & Fails 9:45 Final Test 10:29 Verdict

D86an4uN7FE | 24 Aug 2025
Check out Mouser Electronics here: https://mou.sr/new-gs-2025 Radar Reference Guide: https://mou.sr/greatscott-mmwave-2025 You can get the shown dev boards here: Qorvo QPG6200LDK-01 IoT Development Kit: https://mou.sr/3JaV0rA ams OSRAM TCS3448_EVM_KT Optical Sensor Evaluation Kit: https://mou.sr/45dnklU Microchip Technology MCP22301 USB PD Sink Board: https://mou.sr/4m9NmMG Texas Instruments IWRL6432FSPEVM Sensor Evaluation Module: https://mou.sr/3JrrH41 Adafruit MCP2221A USB to GPIO ADC I2C Breakout Board: https://mou.sr/3UUspJD Previous video: https://youtu.be/LOIVrVVYBfA Future Tech Part 1: https://youtu.be/TpnBQ9bW4K8 Future Tech Part 2: https://youtu.be/NUBv1RQaIX4 Facebook: https://www.facebook.com/greatscottlab Twitter: https://twitter.com/GreatScottLab Instagram: https://www.instagram.com/great.scott.lab/ TikTok: https://www.tiktok.com/@greatscottlab Discord: https://discord.gg/zuAvkAuhsY Support me for more videos: https://www.patreon.com/GreatScott?ty=h In this video I will be once again having a closer look at future technology development boards that you can use today. That will include advanced radar technology that can track you in 3D, the newest USB-C PD Board, a spectral sensor that you can use to make the perfect light source and a low power BLE, Zigbee,.....microcontroller. Let's get started! Websites that were shown in the video: https://www.mouser.de/new/embedded-solutions/engineering-tools/ti-iwrl6432fspevm-evaluation-module/n-8mwysZ31rva6 https://dev.ti.com/tirex/explore/node?node=A__AEIJm0rwIeU.2P1OBWwlaA__RADAR-ACADEMY__GwxShWe__LATEST https://www.mouser.de/new/embedded-solutions/engineering-tools/microchip-ev71v36a-board/n-8mwysZ260liq https://www.mouser.de/new/embedded-solutions/engineering-tools/ams-osram-tcs3448-evm-kt-eval-kit/n-8mwysZ23f3mn https://www.mouser.de/new/embedded-solutions/engineering-tools/qorvo-qpg6200ldk-01-iot-dev-kit/n-8mwysZ382q91 https://qorvo_sdk.gitlab.io/public/devkits/qpg6200-iot-sdk/QPG62000-IoT-SDK/2.0.0/index.html Thanks to Mouser Electronics for sponsoring this video. 0:00 Useful Future Tech? 0:50 Intro 1:30 Radar Board 4:54 USB-C PD Board 7:20 Multi-Spectral Sensor Board 9:50 Low Power Multi-Standard SoC 11:45 Verdict

LOIVrVVYBfA | 10 Aug 2025
Go to https://melscience.com/sBfq/ and use the code "SCOTT50" to get 50% off your first month! Previous video: https://youtu.be/Jj6VQgw1ZvM Previous USB-C Cable video: https://youtu.be/ZikvlsVDiQY Facebook: https://www.facebook.com/greatscottlab Twitter: https://twitter.com/GreatScottLab Instagram: https://www.instagram.com/great.scott.lab/ TikTok: https://www.tiktok.com/@greatscottlab Discord: https://discord.gg/zuAvkAuhsY Support me for more videos: https://www.patreon.com/GreatScott?ty=h In this video we will have a final look at USB-C cables. I already created the "perfect" USB-C PD cable that can transfer 240W with minimal losses. But viewers asked for a High-Speed USB-C cable instead. So how hard can it be? Well, let's say shielding, twisted wires, EMI and much more will be topic of this video ;-) Let's get started! Thanks to Mel Science for sponsoring this video! 0:00 You Dislike my USB-C Cable 2:16 Data Transfer does not work? 4:45 Shielding is IMPORTANT 6:43 Making a High-Speed USB-C Cable 9:04 Twisted Wires are IMPORTANT 10:13 Final Test & Verdict

Jj6VQgw1ZvM | 27 Jul 2025
Click this link https://boot.dev/?promo=GREATSCOTT and use my code GREATSCOTT to get 25% off your first payment for boot.dev Sign up for Altium 365 and see the difference: http://altium.com/yt/greatscott! (AD, Paid Promotion) You can get the featured products here: (affiliate links) Electric Pump: https://s.click.aliexpress.com/e/_oodAvYi LiDAR Module: https://s.click.aliexpress.com/e/_oopItAO Turbo Fan: https://s.click.aliexpress.com/e/_ol8g7pM Portable Soldering Iron: https://s.click.aliexpress.com/e/_okKrylC Rodin Coil: https://s.click.aliexpress.com/e/_olPhP4E Tiny USB-C Charger: https://s.click.aliexpress.com/e/_on14b1k Anti-Loss Card: https://s.click.aliexpress.com/e/_oCgtLf0 Previous video: https://youtu.be/cmRGhoF_ZEM Previous Aliexpress video: https://youtu.be/28ZtAfzxvo8 Facebook: https://www.facebook.com/greatscottlab Twitter: https://twitter.com/GreatScottLab Instagram: https://www.instagram.com/great.scott.lab/ TikTok: https://www.tiktok.com/@greatscottlab Discord: https://discord.gg/zuAvkAuhsY Support me for more videos: https://www.patreon.com/GreatScott?ty=h In this video we will be having a closer look at 6 different products I got from Aliexpress. Aliexpress is famous for featuring the newest products/ICs when it comes to electronics but finding those can be a bit difficult. So I tried finding the hidden Gems not only electronics related but in general what I think could be useful. Let's get started! Thanks to Boot.dev for sponsoring this video! 0:00 AliExpress Hidden Gems? 2:10 Electric Air Pump 4:40 LiDAR Module 6:38 Turbo Fan & Soldering Iron 8:25 Rodin Coil 9:55 Tiny USB-C Battery Charger 11:30 Anti Loss Tracking Card

cmRGhoF_ZEM | 13 Jul 2025
Get $10 Off Now! → Claim Your Flexible PCB Coupon here: https://jlcpcb.com/resources/flexible-pcb?from=AAA Discover Easy, Affordable, and Reliable PCB manufacturing with JLCPCB! Register to get $70 New customer coupons: https://jlcpcb.com/?from=AAA Sign up for Altium 365 and see the difference: http://altium.com/yt/greatscott! (AD, Paid Promotion) Previous video: https://youtu.be/4UTzerFjycg Encoder video: https://youtu.be/d3IH8zwUVYU FOC video: https://youtu.be/Nhy6g9wGHow DC/BLDC Motor video: https://youtu.be/UteZJ_7C4Mg Stepper Motor video: https://youtu.be/bkqoKWP4Oy4 Induction Motor video: https://youtu.be/EzJsKWW-cDU Facebook: https://www.facebook.com/greatscottlab Twitter: https://twitter.com/GreatScottLab Instagram: https://www.instagram.com/great.scott.lab/ TikTok: https://www.tiktok.com/@greatscottlab Discord: https://discord.gg/zuAvkAuhsY Support me for more videos: https://www.patreon.com/GreatScott?ty=h In this video we will be having a closer look at the most important motor type for the future. The PMSM aka the Permanent Magnet Synchronous Motor. Sounds complicated, but it is actually not that hard to see and understand the differences this motor type comes with. So let me show you why they are awesome and how "easy" are to control for your next project ;-) Let's get started! Thanks to JLCPCB for sponsoring this video. Visit https://jlcpcb.com to get professional PCBs for low prices. 0:00 What Motor? 0:56 Intro 1:46 PMSM Applications! 2:32 PMSM = BLDC?? 3:02 How do BLDC behave? 4:13 How do PMSM behave? 4:58 Driving PMSM with Sine Wave Controller! 7:15 BIG Advantages of PMSM 9:07 Verdict

4UTzerFjycg | 29 Jun 2025
Save $30 Now! → Claim Your 6-Layer PCB Discount Today: https://jlcpcb.com/6-layer-pcb?from=AAA Discover Easy, Affordable, and Reliable PCB manufacturing with JLCPCB! Register to get $70 New customer coupons: https://jlcpcb.com/?from=AAA Sign up for Altium 365 and see the difference: http://altium.com/yt/greatscott! (AD, Paid Promotion) You can get the required components here: (affiliate links) ESP32-S3: https://s.click.aliexpress.com/e/_oDL9Ygq INMP441 Mic: https://s.click.aliexpress.com/e/_okk0KKE MAX98357 Amp: https://s.click.aliexpress.com/e/_omkme8m Speaker: https://s.click.aliexpress.com/e/_opnZoP4 LED Ring: https://s.click.aliexpress.com/e/_oDxzKlC USB-C Jack: https://s.click.aliexpress.com/e/_oF05xYE You can download my schematic, code, 3D files here: https://www.patreon.com/posts/132347030 Previous video: https://youtu.be/ZikvlsVDiQY AI Robot Video: https://youtu.be/EvK2ZQbMn8o Facebook: https://www.facebook.com/greatscottlab Twitter: https://twitter.com/GreatScottLab Instagram: https://www.instagram.com/great.scott.lab/ TikTok: https://www.tiktok.com/@greatscottlab Discord: https://discord.gg/zuAvkAuhsY Support me for more videos: https://www.patreon.com/GreatScott?ty=h In this video we will be having a closer look at voice assistant, voice command, voice recognition or however you want to call it. Now my girlfriend uses such voice commands to control our smart home devices. Only problem is that Alexa is not always reliable. That is why I will be exploring alternatives in this video and hopefully end up with something even better ;-) Let's get started! Websites that were shown in the video: https://www.kaggle.com/code/ilyamich/mfcc-implementation-and-tutorial https://oshwlab.com/carsfan5/spartan6-fpga https://oshwlab.com/samgilligan/fpga-module-cyclone-10-lp_copy https://github.com/espressif/esp-skainet https://www.espressif.com/en/products/socs/esp32-s3 https://wiki.dfrobot.com/SKU_SEN0539-EN_Gravity_Voice_Recognition_Module_I2C_UART#target_6 https://www.dfrobot.com/product-2665.html https://esphome.io/components/voice_assistant.html https://www.home-assistant.io/voice_control/builtin_sentences https://tristam.ie/2024/1126/ Thanks to JLCPCB for sponsoring this video. Visit https://jlcpcb.com to get professional PCBs for low prices. 0:00 Alexa Problems?! 1:20 Intro 2:10 How does Voice Recognition Work? 4:20 Trying ESP-Skainet 6:00 Trying a Dedicated Module 8:04 Final ESPNow & HomeAssistant Solution 9:56 Final Assembly & Verdict

ZikvlsVDiQY | 15 Jun 2025
Share your OpenSource Engineering Story with JLCPCB,Get $448 in Coupons instantly and a chance to win $1000 Cash: https://jlcpcb.com/open-source-engineers-story?from=AAA Discover Easy, Affordable, and Reliable PCB manufacturing with JLCPCB! Register to get $70 New customer coupons: https://jlcpcb.com/?from=AAA Sign up for Altium 365 and see the difference: http://altium.com/yt/greatscott! (AD, Paid Promotion) You can get the components here: (affiliate links) FNB58 USB Tester: https://s.click.aliexpress.com/e/_omGtjAq USB-C Connector & EMarker (240W): https://s.click.aliexpress.com/e/_oFjc4Mq USB-C Silicone Cable: https://s.click.aliexpress.com/e/_ok3JChY USB-C Shell: https://s.click.aliexpress.com/e/_oDT6IKK Previous video: https://youtu.be/kzuOezZ_quI Previous USB-C Cable video: https://youtu.be/vKJWwBXRPuI Facebook: https://www.facebook.com/greatscottlab Twitter: https://twitter.com/GreatScottLab Instagram: https://www.instagram.com/great.scott.lab/ TikTok: https://www.tiktok.com/@greatscottlab Discord: https://discord.gg/zuAvkAuhsY Support me for more videos: https://www.patreon.com/GreatScott?ty=h In this episode of DIY or Buy, we will have a closer look at modern USB-C Cables. Now I do love the USB-C technology! You can quickly transfer data, charge with upto 240W and use it for video and audio. USB-C cables on the other hand are sometimes a nightmare. They are not labelled meaning you have no idea whether it can even transfer data or what kind of power (60W? 100W? 240?) So I will test all the USB-C Cables I have lying around and will also come up with a superior DIY version. Let's get started! Websites that were shown in the video: https://www.usb.org/document-library/usb-type-cr-cable-and-connector-specification-release-24 https://jlcpcb.com/partdetail/INJOINIC-IP2133/C48606484 http://www.injoinic.com/wwwroot/uploads/files/20240903/b73622b6ca3864cc503defdd8f2bd439.pdf Thanks to JLCPCB for sponsoring this video. Visit https://jlcpcb.com to get professional PCBs for low prices. 0:00 USB-C Cable Problem! 1:25 Intro 2:14 Results from the last Video 3:00 Comparing my Buy Cables 5:34 DIY USB-C Connector 8:25 DIY 1st Prototype 8:53 DIY Cable 9:28 DIY Final Build 10:26 Verdict

kzuOezZ_quI | 01 Jun 2025
For more information on Silicon Carbide from Infineon click here: https://scom.ly/KNRd68k For more information on Photovoltaic from Infineon click here: https://scom.ly/lqyE0wD Sign up for Altium 365 and see the difference: http://altium.com/yt/greatscott! (AD, Paid Promotion) Previous video: https://youtu.be/28ZtAfzxvo8 Facebook: https://www.facebook.com/greatscottlab Twitter: https://twitter.com/GreatScottLab Instagram: https://www.instagram.com/great.scott.lab/ TikTok: https://www.tiktok.com/@greatscottlab Discord: https://discord.gg/zuAvkAuhsY Support me for more videos: https://www.patreon.com/GreatScott?ty=h Solar Power is awesome and it is getting cheaper and cheaper. But is that good? I mean are the inverters getting worse because they get cheaper? Well, in this video I will be having a closer look at an absolute cheapy. I will test its performance, efficiency and have a look inside to see what is going on. At the end I will then try to upgrade it using the newest and greatest SiC MOSFETs. Let's get started! Websites that were shown in the video: https://www.mouser.de/datasheet/2/196/Infineon_IMW120R020M1H_DataSheet_v01_30_EN-3362492.pdf https://www.infineon.com/cms/en/product/power/mosfet/silicon-carbide/ https://www.bau-tech.shop/markensuche/victron/geraetekombinationen/48v/victron-multiplus-ii-48-5000-70-50-230v-wechselrichter-ladegeraet-0-mwst https://www.js-solartechnik.de/p/hybrid-wechselrichter-5kw-5000w-48v-off-grid-solar-pv-photovoltaik-laderegler-ivem5048 https://solarhandel24.de/products/ja-solar-450w-bifazial-glas-glas-black-frame-jam54d40-ab-6-modulen?_pos=3&_fid=1d5bffaa6&_ss=c https://ourworldindata.org/grapher/installed-solar-pv-capacity?time=2007..latest https://static6.arrow.com/aropdfconversion/b6ec414d89567dbb18f3f805168f66ae48ece692/kgf75n65kdf.pdf Thanks to Infineon Technology for sponsoring this video! 0:00 Is Cheaper always Better?! 1:06 Intro 1:29 Cheap Inverter Overview 3:33 Load/Efficiency Test 4:37 Power Loss Source? 6:33 IGBT Conduction Losses 8:17 IGBT Switching Losses 10:36 SiC MOSFET in Inverter & Test 11:15 Verdict

28ZtAfzxvo8 | 18 May 2025
Get $10 Off Now! → Claim Your Flexible PCB Coupon here: https://jlcpcb.com/resources/flexible-pcb?from=AAA Discover Easy, Affordable, and Reliable PCB manufacturing with JLCPCB! Register to get $70 New customer coupons: https://jlcpcb.com/?from=AAA Sign up for Altium 365 and see the difference: http://altium365.com/yt/greatscott! (AD, Paid Promotion) You can get the featured products here: (affiliate links) Cooling Fan Vest: https://s.click.aliexpress.com/e/_oCj7LYR Thermal Camera: https://s.click.aliexpress.com/e/_ol9fWkx Privacy Film: https://s.click.aliexpress.com/e/_olPfOcF Battery Tester: https://s.click.aliexpress.com/e/_ok3Ugsj Endoscope Camera: https://s.click.aliexpress.com/e/_ooBYOSn Radar Light Bulb: https://s.click.aliexpress.com/e/_on6GOGT Previous video: https://youtu.be/sCJoAe9tJw4 Previous Aliexpress video: https://youtu.be/bvLeIsqz1zc PIR Sensor video: https://youtu.be/pvHIV0bNRe4 Facebook: https://www.facebook.com/greatscottlab Twitter: https://twitter.com/GreatScottLab Instagram: https://www.instagram.com/great.scott.lab/ TikTok: https://www.tiktok.com/@greatscottlab Discord: https://discord.gg/zuAvkAuhsY Support me for more videos: https://www.patreon.com/GreatScott?ty=h In this video we will be having a closer look at 6 different products I got from Aliexpress. Aliexpress is famous for featuring the newest products/ICs when it comes to electronics but finding those can be a bit difficult. So I tried finding the hidden Gems not only electronics related but in general what I think could be useful. Let's get started! Thanks to JLCPCB for sponsoring this video. Visit https://jlcpcb.com to get professional PCBs for low prices. 0:00 Hidden Gems? 0:58 Intro 1:48 Cooling Fan Vest 4:09 Thermal Imaging Camera 6:22 Window Privacy Film 8:32 Battery Testing Tool 10:01 Endoscope Camera 11:26 Radar Light Bulb 12:55 Verdict

sCJoAe9tJw4 | 04 May 2025
Check out the Elektor Magazine Offer (50% Discount) here: https://www.elektormagazine.com/greatscott-elektor-offer-25 Coupon Code: greatscott2550 Sign up for Altium 365 and see the difference: http://altium365.com/yt/greatscott! (AD, Paid Promotion) Previous video: https://youtu.be/Y6ZND7Ed70k Facebook: https://www.facebook.com/greatscottlab Twitter: https://twitter.com/GreatScottLab Instagram: https://www.instagram.com/great.scott.lab/ TikTok: https://www.tiktok.com/@greatscottlab Discord: https://discord.gg/zuAvkAuhsY Support me for more videos: https://www.patreon.com/GreatScott?ty=h In this video we will be having a closer look at 4 Electronics Myths I heard quite often over the year. That includes using tin foil as a fuse, using a motor as an inductor, using 2 power supplies in parallel and coupling signals from and to a mains power line using capacitors. Really interesting stuff! But is it all true and possible or just a myth?! Let's find out! :-) Websites that were shown in the video: https://www.ti.com/lit/ds/symlink/afe031.pdf?ts=1744584522603 Thanks to Elektor for sponsoring this video! 0:00 Electronics Myths?! 1:13 Intro 1:32 Myth 1: Tin Foil Fuse? 4:43 Myth 2: 2 Power Supplies in Parallel? 7:22 Myth 3: Couple Signal to Mains Wire? 10:26 Myth 4: Motor as Inductor?

Y6ZND7Ed70k | 19 Apr 2025
Get your Mouser Reference Guide here: https://mou.sr/4486R1W Components that were used in the video: Arduino Opta: https://mou.sr/arduino-akx-starterkit Arduino Opta Expansion Module: https://mou.sr/arduino-opta-d1608 Previous video: https://youtu.be/ocj9UobGSa4 Facebook: https://www.facebook.com/greatscottlab Twitter: https://twitter.com/GreatScottLab Instagram: https://www.instagram.com/great.scott.lab/ TikTok: https://www.tiktok.com/@greatscottlab Discord: https://discord.gg/zuAvkAuhsY Support me for more videos: https://www.patreon.com/GreatScott?ty=h In this electronics basics episode we will be having a closer look at PLCs aka Programmable Logic Controllers. Most people are familiar with Arduino microcontrollers that you can program and they manage inputs and outputs. This is basically what a PLC can do as well, but it is way easier. So why are people not using them? Well, in this video we will learn all about it! Let's get started! Websites that were shown in the video: https://docs.arduino.cc/hardware/opta/ https://docs.arduino.cc/tutorials/portenta-machine-control/pmc-opta-temp-ctrl/ Thanks to Mouser Electronics for sponsoring this video. 0:00 PLC is Better? 1:18 Intro 1:56 PLC Hardware 3:32 Microcontroller Hardware 3:59 Price? 4:24 PLC LED Example 5:50 PLC LED Delay Example 6:23 Live Debug is AWESOME! 6:51 Conveyor Belt Hardware 8:27 Conveyor Belt Logic 9:25 Verdict

ocj9UobGSa4 | 06 Apr 2025
Get $10 Off Now! → Claim Your Flexible PCB Coupon here: https://jlcpcb.com/resources/flexible-pcb?from=AAA Discover Easy, Affordable, and Reliable PCB manufacturing with JLCPCB! Register to get $60 New customer coupons: https://jlcpcb.com/?from=AAA You can get my shown projector here: (affiliate link) https://s.click.aliexpress.com/e/_oDTp3iV Previous video: https://youtu.be/kcmpGbR6xZc Facebook: https://www.facebook.com/greatscottlab Twitter: https://twitter.com/GreatScottLab Instagram: https://www.instagram.com/great.scott.lab/ TikTok: https://www.tiktok.com/@greatscottlab Discord: https://discord.gg/zuAvkAuhsY Support me for more videos: https://www.patreon.com/GreatScott?ty=h I recently got into projectors! Now back in the old days, projector were quite expensive. At least if you want a decent one. But apparently prices went down quite a bit and thus I got myself a pretty decent projector for around 200€ recently. Only problem is, that its cooling fan is way too loud. So in this video, we will explore the world of heatsink systems and hopefully come up with a plan in order to make the fan of my (or your) projector quieter. Let's get started! Websites that were shown during the video: https://www.quebec.ca/en/health/advice-and-prevention/health-and-environment/the-effects-of-environmental-noise-on-health/noise-measurement chrome-extension://efaidnbmnnnibpcajpcglclefindmkaj/https://img.waimaoniu.net/1510/8025-B%20DC%20FAN.pdf 0:00 My Projector Problem! 1:33 Intro 2:30 Teardown of the Projector 3:30 Loud Fan Noise? 4:19 LED Change? 5:15 Passive Heatsink! 6:22 Active Heatsink! 6:55 Thermal Paste Replacement? 7:51 Fan Replacement? 9:47 Surprise (2nd) Fan?! 11:11 Final Test & Verdict

kcmpGbR6xZc | 23 Mar 2025
Visit JLCPCB Coupon Center now and claim exclusive discounts: https://jlcpcb.com/coupon-center?from=AAA Save $30 Now! → Claim Your 6-Layer PCB Discount Today: https://jlcpcb.com/6-layer-pcb?from=AAA You can get the Breakout Board here: https://www.tindie.com/products/centylab/rotopd-usb-pd-breakout-support-150w-avs/ Or the Gerber files/BOM here: https://github.com/CentyLab/RotoPD Previous video: https://youtu.be/bvLeIsqz1zc Previous USB-C Videos: https://youtu.be/OwAZqJ4wpJg https://youtu.be/DQLrZA5RMjQ https://youtu.be/vKJWwBXRPuI Facebook: https://www.facebook.com/greatscottlab Twitter: https://twitter.com/GreatScottLab Instagram: https://www.instagram.com/great.scott.lab/ TikTok: https://www.tiktok.com/@greatscottlab Discord: https://discord.gg/zuAvkAuhsY Support me for more videos: https://www.patreon.com/GreatScott?ty=h USB-C is awesome. I showed that during several previous videos. But I was missing out on 1 feature that USB-C also offers. PPS! Or Programmable Power Supply. By using that you can basically turn your USB-C power source into a variable power supply with adjustable voltage, current limit and much much more. So how easy is that to use and how well does it work? Let's find out! Websites that were shown during the video: https://hackaday.io/project/198384-picopd-pro-usb-c-pd-31-pps-avs-with-rp2040 https://hackaday.io/project/201953-rotopd-usb-c-pd-31-breakout-i2c https://www.mouser.de/ProductDetail/Diodes-Incorporated/AP33772SDKZ-13-FA01?qs=2wMNvWM5ZX4CLYQ4%252BLyimw%3D%3D https://github.com/CentyLab/AP33772S-CentyLab https://frame.work/de/en/products/16-power-adapter?v=FRANCR000F https://usb.org/document-library/usb-power-delivery Thanks to JLCPCB for sponsoring this video. Visit https://jlcpcb.com to get professional PCBs for low prices. 0:00 USB-C PPS?? 1:33 Intro 2:36 What can PD, PPS do? 3:14 What IC can do that? 4:38 PPS Breakout Board! 5:22 PD Profiles Detect 6:19 Setting a PD Voltage 7:10 Setting a PPS Voltage 8:24 Current/Voltage Monitor 8:50 Max Voltage Resolution 9:11 Charging a LiPo with PPS 10:01 Breakout Board Results 10:12 AVS Feature? 11:10 Final Verdict

bvLeIsqz1zc | 09 Mar 2025
Save $30 Now! → Claim Your 6-Layer PCB Discount Today: https://jlcpcb.com/6-layer-pcb?from=AAA Discover Easy, Affordable, and Reliable PCB manufacturing with JLCPCB! Register to get $60 New customer coupons: https://jlcpcb.com/?from=AAA You can get the featured products here: (affiliate links) Induction Heater: https://s.click.aliexpress.com/e/_oEvcUJM WIFI Weather Station: https://s.click.aliexpress.com/e/_oCp3qrk or https://s.click.aliexpress.com/e/_olU03aW Metal Detector: https://s.click.aliexpress.com/e/_on705XY LCR Tweezers: https://s.click.aliexpress.com/e/_onFebmQ Rotary Laser Level: https://s.click.aliexpress.com/e/_on6zWPk Power Strip: https://s.click.aliexpress.com/e/_ol55WyI Previous video: https://youtu.be/7er194F4erE Previous Aliexpress video: https://youtu.be/netFl8pcwP8 Induction Heater video: https://youtu.be/_v5Hg2zfLjs EMC video: https://youtu.be/zvkfWfbQ4KA Facebook: https://www.facebook.com/greatscottlab Twitter: https://twitter.com/GreatScottLab Instagram: https://www.instagram.com/great.scott.lab/ TikTok: https://www.tiktok.com/@greatscottlab Discord: https://discord.gg/zuAvkAuhsY Support me for more videos: https://www.patreon.com/GreatScott?ty=h In this video we will be having a closer look at 6 different products I got from Aliexpress. Aliexpress is famous for featuring the newest products/ICs when it comes to electronics but finding those can be a bit difficult. So I tried finding the hidden Gems not only electronics related but in general what I think could be useful. Let's get started! Websites that were shown during the video: https://community.home-assistant.io/t/installing-esphome-on-geekmagic-smart-weather-clock-smalltv-pro/618029 https://puddleofcode.com/story/my-own-geekmagic-smalltv/ https://oshwlab.com/adamseamster/pspi-zero-version-5_copy_copy Thanks to JLCPCB for sponsoring this video. Visit https://jlcpcb.com to get professional PCBs for low prices. 0:00 AliExpress? 0:52 Intro 1:44 Handheld Induction Heater 4:22 WiFi Weather Station 6:31 Metal Detector 8:34 LCR Tweezers 10:06 Rotary Laser Level 12:42 Power Strip 14:44 Verdict

7er194F4erE | 23 Feb 2025
Get your Mouser Reference Guide here: https://mou.sr/greatscott-TI-2025 Components that were used in the video: BQ25750EVM Board: https://mou.sr/3CB2EZo BQ25750 IC: https://mou.sr/42IcfZ4 USB2ANY Interface: https://mou.sr/3Q3yUHD Previous video: https://youtu.be/6Ej2rrm9xfY Wind Generator video: https://youtu.be/oiB1Sm_f48w Boost Converter video: https://youtu.be/QnUhjnbZ0T8 Facebook: https://www.facebook.com/greatscottlab Twitter: https://twitter.com/GreatScottLab Instagram: https://www.instagram.com/great.scott.lab/ TikTok: https://www.tiktok.com/@greatscottlab Discord: https://discord.gg/zuAvkAuhsY Support me for more videos: https://www.patreon.com/GreatScott?ty=h In this video we will have a closer look at MPPT Charge Controller and find out why they are crucial for solar panels and wind generators. Along the way we will have a look at a commercial solution, come up with our own DIY solution and have some fun with promising looking ICs. This way we will learn the most important things about MPPT ;-) Let's get started! Websites that were shown in the video: https://www.ti.com/lit/ds/symlink/bq25750.pdf?ts=1739261701831&ref_url=https%253A%252F%252Fduckduckgo.com%252F Thanks to Mouser Electronics for sponsoring this video. 0:00 Wind Generator Problem! 1:18 Intro 1:59 Why MPPT? 4:10 Wind Controller Test 4:56 Mystery Solved! (Power Converter) 6:01 DIY MPPT Boost Converter 6:48 Perturb & Observe Technique 7:50 DIY Test! 9:21 BQ25750 IC Test! 10:55 Amazon MPPT Board Test! 11:33 Verdict

6Ej2rrm9xfY | 09 Feb 2025
Special Deal: Get a $30 coupon and pay just $5 for premium 6-layer PCBs: https://jlcpcb.com/6-layer-pcb?from=AAA Discover Easy, Affordable, and Reliable PCB manufacturing with JLCPCB! Register to get $60 New customer coupons: https://jlcpcb.com/?from=AAA Components for this project: (partly affiliate links) Speaker: https://aquasound.eu/en/product/spkjiveeco-w/ BT Receiver: https://s.click.aliexpress.com/e/_olP6XuD Resistors: https://s.click.aliexpress.com/e/_olcDrml Capacitors: https://s.click.aliexpress.com/e/_oE6iLMh OpAmp: https://www.mouser.de/ProductDetail/926-LM4562NA-NOPB Transistors: https://s.click.aliexpress.com/e/_olw2Pgv Diode: https://s.click.aliexpress.com/e/_om7VLWN You can download the schematic, pics,.... here: https://www.patreon.com/posts/121183758 Previous video: https://youtu.be/niqtYxXy6KQ Class A Amp video: https://youtu.be/ncu1Ep2Um2A Previous Ceiling Speaker video: https://youtu.be/oGTXczCV30A Facebook: https://www.facebook.com/greatscottlab Twitter: https://twitter.com/GreatScottLab Instagram: https://www.instagram.com/great.scott.lab/ TikTok: https://www.tiktok.com/@greatscottlab Discord: https://discord.gg/zuAvkAuhsY Support me for more videos: https://www.patreon.com/GreatScott?ty=h I love to listen to music while taking a shower! But my Bluetooth speaker sucks! So in this video I came up with a new awesome sounding Bluetooth Music System that you can put in your ceiling. It works like a charm, is super loud and sounds amazing. Let me show you how to make this awesome home upgrade! Let's get started! ;-) Websites shown/used in the video: https://oshwlab.com/sentsor-project/sentsor-core-esp32-micro https://oshwlab.com/lysergicenemy/bldc_controller_f334_copy https://en.wikipedia.org/wiki/IP_code https://aquasound.eu/en/product/spkjiveeco-w/ https://www.ti.com/lit/ds/symlink/sa5534a.pdf?ts=1738306184306&ref_url=https%253A%252F%252Fwww.google.com%252F https://www.mouser.de/datasheet/2/408/2SC5200_datasheet_en_20160107-1649945.pdf https://www.mouser.de/datasheet/2/408/2SA1943_datasheet_en_20160107-1649828.pdf Thanks to JLCPCB for sponsoring this video. Visit https://jlcpcb.com to get professional PCBs for low prices. 0:00 Shower Speaker? 1:18 Intro 2:02 Speaker Selection 3:16 Old "Faulty" Circuit 4:39 Power Supply? 5:17 Bluetooth Music Receiver 7:13 Audio Amplifier (Class AB) 10:48 Final Assembly & Verdict

niqtYxXy6KQ | 26 Jan 2025
Discover Easy, Affordable, and Reliable PCB manufacturing with JLCPCB! Register to get $60 New customer coupons: https://jlcpcb.com/?from=AAA Special deal: Get a $30 coupon and pay just $5 for premium 6-layer PCBs: https://jlcpcb.com/6-layer-pcb?from=AAA Sign up for Altium 365 and see the difference: http://altium365.com/yt/greatscott! You can get the products shown in the video here: (affiliate links) 1 Channel Smart Button: https://s.click.aliexpress.com/e/_oF5V365 2 Channel Smart Button: https://s.click.aliexpress.com/e/_omn0wQt Temp/Hum Sensor/Display: https://s.click.aliexpress.com/e/_oFwItv3 RGBW LED Bulb: https://s.click.aliexpress.com/e/_oDn1l7n Zigbee Dongle: https://s.click.aliexpress.com/e/_opsHDN3 ESP32-C6: https://s.click.aliexpress.com/e/_olICGYH ESP32-H2: https://s.click.aliexpress.com/e/_oBGGpcv Previous Wireless Method Video: https://youtu.be/sLW_r0OVyok Previous video: https://youtu.be/B8ss4KqcuXU Facebook: https://www.facebook.com/greatscottlab Twitter: https://twitter.com/GreatScottLab Instagram: https://www.instagram.com/great.scott.lab/ TikTok: https://www.tiktok.com/@greatscottlab Discord: https://discord.gg/zuAvkAuhsY Support me for more videos: https://www.patreon.com/GreatScott?ty=h Wireless communication is awesome! Right? Only problem is that there are many different methods and techniques which all use different frequencies and sometimes require extra hardware. And while I explored a big selection of wireless methods in a previous video, it is now time to have a closer look at Zigbee. It not only gets used with Smart Home Devices, but also is now features in two ESP32 microcontrollers. So in this video, let's find out how Zigbee works, how we can use it and what advantages/disadvantages it comes with. Let's get started! Websites shown/used in the video: https://www.home-assistant.io/integrations/zha/ https://docs.espressif.com/projects/esp-zigbee-sdk/en/latest/esp32/introduction.html https://github.com/espressif/esp-idf/issues/14163 https://www.espressif.com/sites/default/files/documentation/esp32-c6_datasheet_en.pdf https://www.espressif.com/en/products/socs/esp32-c6 https://www.espressif.com/en/products/socs/esp32-h2 https://www.mouser.de/ProductDetail/Espressif-Systems/ESP32-H2-MINI-1-N2 https://www.mouser.de/ProductDetail/Espressif-Systems/ESP32-C6-MINI-1-N4 Thanks to JLCPCB for sponsoring this video. Visit https://jlcpcb.com to get professional PCBs for low prices. 0:00 Wireless Is AWESOME! 1:30 Intro 2:27 How to use Zigbee Products 4:24 Zigbee is Local? 5:10 ESP32 Zigbee Programming 7:00 ESP32 Zigbee Range Test 8:03 Zigbee Extenders? 9:06 Zigbee Data Rate 9:40 Zigbee Low Power Test 11:11 Verdict

B8ss4KqcuXU | 12 Jan 2025
Register with JLCPCB now to get a $60 coupon to buy high-quality PCBs: https://jlcpcb.com/?from=AAA Get a $30 coupon and experience JLCPCB's 6-layer PCBs : https://jlcpcb.com/6-layer-pcb?from=AAA You can get the Buy version here: (affiliate link) https://s.click.aliexpress.com/e/_oD6UBUf You can get the Components for the DIY version here: (affiliate links) Ultrasonic Transmitter: https://s.click.aliexpress.com/e/_oDQFVBd Arduino Nano: https://s.click.aliexpress.com/e/_okX3avH AD9833: https://s.click.aliexpress.com/e/_oDeuagx MCP602: https://s.click.aliexpress.com/e/_oEDZwl9 LM393: https://s.click.aliexpress.com/e/_oFZpp8n Resistors: https://s.click.aliexpress.com/e/_onvcJTz Potentiometers: https://s.click.aliexpress.com/e/_oCBUSh9 H-Bridge: https://s.click.aliexpress.com/e/_oopCfcP You can download the DIY project files here: https://www.patreon.com/posts/119558088 Previous video: https://youtu.be/netFl8pcwP8 Facebook: https://www.facebook.com/greatscottlab Twitter: https://twitter.com/GreatScottLab Instagram: https://www.instagram.com/great.scott.lab/ TikTok: https://www.tiktok.com/@greatscottlab Discord: https://discord.gg/zuAvkAuhsY Support me for more videos: https://www.patreon.com/GreatScott?ty=h In this episode of "DIY or Buy", we will be having a closer look at directional speakers. The usage of such speaker is "fairly" new and quite interesting. As the name would suggest, they can playback audio in a very directional straight beam. So how does this sound? How does it work? And why is it so expensive and can we maybe create a cheaper DIY version? Let's find out! Websites that were shown during the video: https://cocosonics.myshopify.com/ https://github.com/TheSpaceEgg/SimpleAD9833 https://www.analog.com/media/en/technical-documentation/data-sheets/ad9833.pdf https://www.estudioelectronica.com/wp-content/uploads/2018/09/SHT-USW-1.pdf Thanks to JLCPCB for sponsoring this video. Visit https://jlcpcb.com to get professional PCBs for low prices. 0:00 Directional Speakers are TOO PRICEY! 1:35 Intro 2:20 How does it Work? (Simple) 3:55 Repairing the Buy version 4:56 Testing the Buy version 6:31 How does it Work? (Amplitude Modulation) 7:55 Creating a DIY version! 10:30 Testing DIY VS Buy! 11:45 Verdict

netFl8pcwP8 | 15 Dec 2024
Save $10 on vibrant color PCBs at JLCPCB's Xmas Sale: https://jlcpcb.com/resources/multicolor-silkscreen-pcb Get JLCPCB 6-layer PCBs for just $2! Register to get $60 Coupons: https://jlcpcb.com/AAA You can get the featured products here: (affiliate links) 3 in 1 Tool: https://s.click.aliexpress.com/e/_DEZwdNP Light Outlet Socket Adapter: https://s.click.aliexpress.com/e/_DD8zaTP ESP Automation Board: https://s.click.aliexpress.com/e/_DlTCtlR Milli Ohm Meter: https://s.click.aliexpress.com/e/_DCTezHn Liquid Electrical Tape: https://s.click.aliexpress.com/e/_DkbZIaN Belt Sander Angle Grinder: https://s.click.aliexpress.com/e/_DD09UkZ Digital Handheld Microscope: https://s.click.aliexpress.com/e/_DmzBcVx Previous video: https://youtu.be/yOUz4l5Svyo Previous Aliexpress video: https://youtu.be/pSFExYlX_SU Facebook: https://www.facebook.com/greatscottlab Twitter: https://twitter.com/GreatScottLab Instagram: https://www.instagram.com/great.scott.lab/ TikTok: https://www.tiktok.com/@greatscottlab Discord: https://discord.gg/zuAvkAuhsY Support me for more videos: https://www.patreon.com/GreatScott?ty=h In this video we will be having a closer look at 6 different products I got from Aliexpress. Aliexpress is famous for featuring the newest products/ICs when it comes to electronics but finding those can be a bit difficult. So I tried finding the hidden Gems not only electronics related but in general what I think could be useful. Let's get started! Thanks to JLCPCB for sponsoring this video. Visit https://jlcpcb.com to get professional PCBs for low prices. 0:00 AliExpress?! 1:07 Intro 1:53 Handheld 3 in 1 Tool 5:10 Light Socket Outlet Adapter 7:10 ESP Home Automation Board 9:35 Milli Ohm Meter 11:37 Liquid Electrical Tape 12:12 Belt Sander Angle Grinder Adapter 13:20 Portable Digital Microscope 14:32 Verdict

yOUz4l5Svyo | 01 Dec 2024
Get JLCPCB Black Friday $252 Coupons Now: https://jlcpcb.com/black-friday-2024 JLCPCB 6-layer PCBs for just $2! Register to get $60 Coupons: https://jlcpcb.com/ You can get the Components shown in the video here: (affiliate links) Peltier Module: https://s.click.aliexpress.com/e/_DeY12FX Water Cooling Block: https://s.click.aliexpress.com/e/_DeYbvEt Tubes: https://s.click.aliexpress.com/e/_DdUjc93 12V Pump: https://s.click.aliexpress.com/e/_DkEGDah MPPT Tracker: https://www.victronenergy.com/solar-charge-controllers/smartsolar-mppt-75-10-75-15-100-15-100-20 Thermal Paste: https://s.click.aliexpress.com/e/_DFMrL4V Previous Wind Generator video: https://youtu.be/oiB1Sm_f48w Previous Video: https://youtu.be/ncu1Ep2Um2A Facebook: https://www.facebook.com/greatscottlab Twitter: https://twitter.com/GreatScottLab Instagram: https://www.instagram.com/great.scott.lab/ TikTok: https://www.tiktok.com/@greatscottlab Discord: https://discord.gg/zuAvkAuhsY Support me for more videos: https://www.patreon.com/GreatScott?ty=h In this video we will be having a closer look at generating electrical energy with heat. Directly converting heat into electricity is possible to do with so-called Peltier Modules. That is why we will test a few of them in this video and then build a hopefully functional heat generator with them that will turn the heat of my fireplace into electricity. Will this be enough to power my home? phone? TV? We will see ;-) Let's get started! Thanks to JLCPCB for sponsoring this video. Visit https://jlcpcb.com to get professional PCBs for low prices. 0:00 My Winter Energy Problem 1:18 Intro 2:11 Basics of Peltier Modules 3:14 Best Peltier Module? 5:01 Theory of my Heat Generator 5:52 Building the Heat Generator 7:47 Preparing the Test Setup 8:54 First Test 9:43 Building/Testing V2 Heat Generator 10:37 Verdict
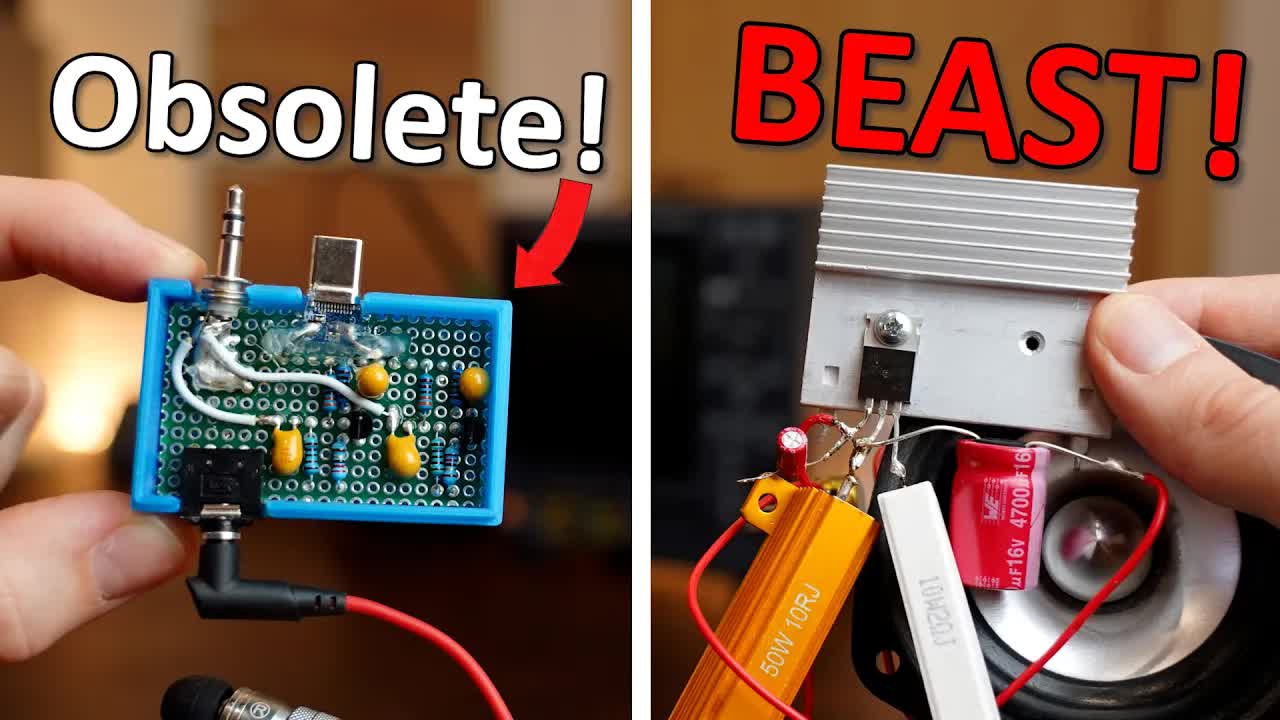
ncu1Ep2Um2A | 17 Nov 2024
Check out the nRF54L15 here: http://nordicsemi.com/nRF54L15-DK To learn how to use it with the nRF Connect SDK, visit: http://academy.nordicsemi.com/ Previous Class A Audio Amp video: https://youtu.be/7Pv-j_R3YP4 BJT as a Switch Basics video: https://youtu.be/WRm2oUw4owE MOSFET as a Switch Basics video: https://youtu.be/o4_NeqlJgOs Facebook: https://www.facebook.com/greatscottlab Twitter: https://twitter.com/GreatScottLab Instagram: https://www.instagram.com/great.scott.lab/ TikTok: https://www.tiktok.com/@greatscottlab Discord: https://discord.gg/zuAvkAuhsY Support me for more videos: https://www.patreon.com/GreatScott?ty=h In this video we will be having a look at my previous simplest audio amp that was made for wired headphones. It is a Class A amp that now needs a boost in power to drive a loudspeaker. I will show you how to do that and also try to use a MOSFET as a "better" audio amp. Will it be better though? Let's find out ;-) Websites that were used in the video: https://www.st.com/resource/en/datasheet/tip142.pdf https://www.infineon.com/dgdl/Infineon-IRFZ44N-DataSheet-v01_01-EN.pdf?fileId=5546d462533600a40153563b3a9f220d https://images.google.com/ Thanks to Nordic Semiconductor for sponsoring this video. 0:00 The Problem of my old Audio Amp 1:29 Intro 2:33 Old BJT Amplifier 3:34 Darlington Transistor Solution? 4:57 New Complementary Components 7:33 Darlington Amp Final Test 7:48 MOSFET Amp? 10:18 MOSFET Amp Final Test 10:56 Darlington VS MOSFET Amp 12:58 Verdict

Q-1jHNS1qwc | 03 Nov 2024
Enter the Mouser Electronics Giveaway here: https://mou.sr/3XZ1vS8 Components that were used for the project: ATtiny804: https://mou.sr/4dNpPfv ADXL345 Accelerometer: https://mou.sr/4h8x2d4 Blue LED: https://mou.sr/4heEzad 220 ohm Resistor: https://mou.sr/3BVT5Up DIP Switch: https://mou.sr/4f6wra0 Button Cell Holder: https://mou.sr/40gnZRc You can find the schematic/code here: https://www.patreon.com/posts/114950535 Previous video: https://youtu.be/Dujx3L1Evw8 Facebook: https://www.facebook.com/greatscottlab Twitter: https://twitter.com/GreatScottLab Instagram: https://www.instagram.com/great.scott.lab/ TikTok: https://www.tiktok.com/@greatscottlab Discord: https://discord.gg/zuAvkAuhsY Support me for more videos: https://www.patreon.com/GreatScott?ty=h In this project I will face a problem that I encountered quite a while ago. When using my cordless drill, then I can not always go completely straight (level) through the material. This also happens when I try to drill top down into the wood. Attaching mechanical spirit levels, was not an option for me. So in this video I used an accelerometer IC and a smart feedback system to create a way better digital (kind of) spirit level. Let's get started! Websites that were used in the video: https://www.kickstarter.com/projects/928505817/bullseyebore-core?ref=2kl413 https://github.com/wollewald/ADXL345_WE?tab=readme-ov-file https://www.analog.com/media/en/technical-documentation/data-sheets/adxl345.pdf Thanks to Mouser Electronics for sponsoring this video. 0:00 My Drill Problem 1:14 Intro 2:02 Accelerometer IC Solution! 4:53 Haptic Feedback System? 6:15 LED Feedback System! (Guide) 7:10 Housing Electronics 8:13 Final Electronics Setup (ATtiny) 9:23 Offset Problem 9:51 Final Assembly 10:13 Testing & Verdict
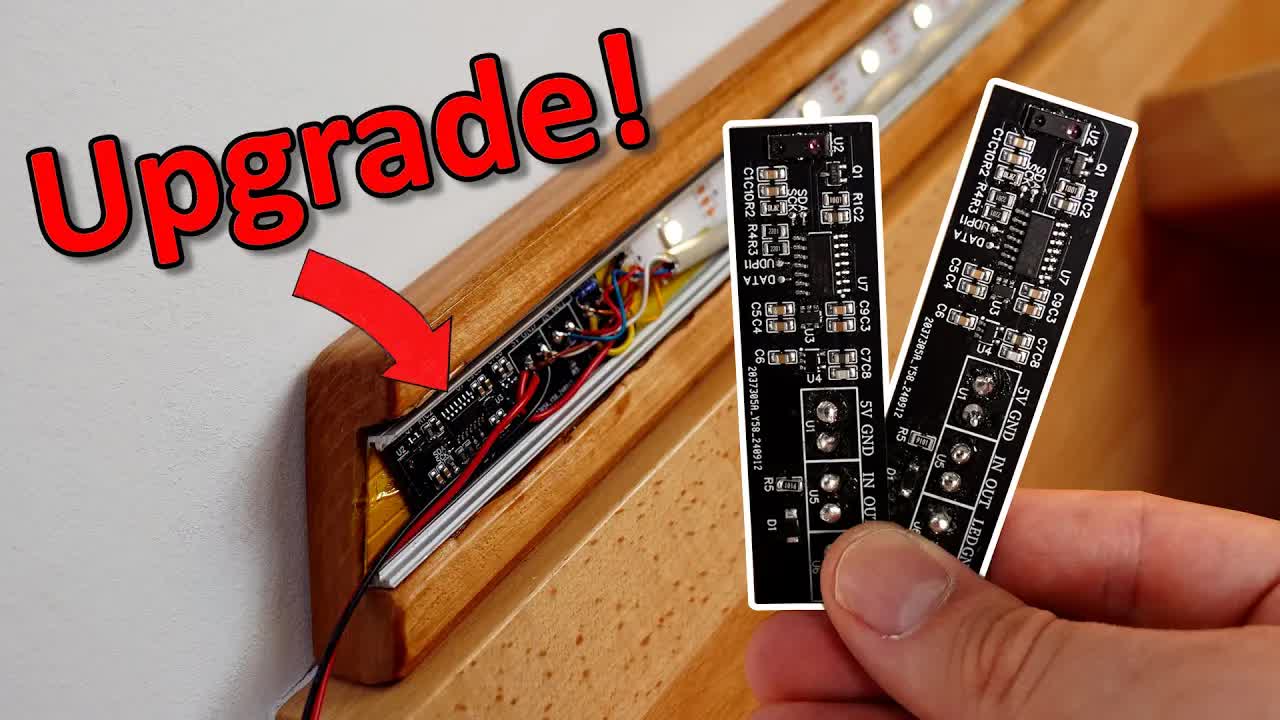
Dujx3L1Evw8 | 20 Oct 2024
Experience 6-layer PCBs for free via $30 coupon (not include Surface Finish fee): https://jlcpcb.com/6-layer-pcb Get JLCPCB Electronica invitation & win free gift, ticket or free flight to Munich: https://jlcpcb.com/Electronica Parts list for this project: (partly affiliate links) SK6812 LEDs: https://s.click.aliexpress.com/e/_DBIlsc1 ATtiny1604: https://www.mouser.de/ProductDetail/579-ATTINY1604-SSFR VCNL4200 Distance Sensor: https://www.mouser.de/ProductDetail/Vishay-Semiconductors/VCNL4200?qs=gt1LBUVyoHnG9%252BeWUQ9nRg%3D%3D SN74LV1 Level Shifter: https://www.mouser.de/ProductDetail/595-SN74LV1T32DBVRG4 LP2985-33 Voltage Regulator: https://www.mouser.de/ProductDetail/595-LP2985-33DBVR SI230 MOSFET: https://www.mouser.de/ProductDetail/781-SI2301BDS-GE3 0805 Capacitors: https://s.click.aliexpress.com/e/_DB4Pj0N 0805 Resistors: https://s.click.aliexpress.com/e/_DlPfk0D You can find the schematic & PCB files here: https://oshwlab.com/greatscott/stair-leds-v2 You can download my created code here: https://www.patreon.com/posts/113733464?pr=true Previous video: https://youtu.be/pSFExYlX_SU Previous Light Up Stair Video: https://youtu.be/5TFPrBQNWok Facebook: https://www.facebook.com/greatscottlab Twitter: https://twitter.com/GreatScottLab Instagram: https://www.instagram.com/great.scott.lab/ TikTok: https://www.tiktok.com/@greatscottlab Discord: https://discord.gg/zuAvkAuhsY Support me for more videos: https://www.patreon.com/GreatScott?ty=h In this project, I will create a truly amazing and satisfying Home Upgrade. It involves lighting up stairs in a way that it does not blind you during the night and also make it satisfying to watch/use at the same time. This involved using IR distance sensors, ambient light sensors, microcontrollers and an addressable RGBW LED strip. I truly love the result and hope that you might give a project like this a try ;-) Let's get started! Thanks to JLCPCB for sponsoring this video. Visit https://jlcpcb.com to get professional PCBs for low prices. 0:00 Light Up Stairs? 1:32 Intro 2:25 New LEDs (Addressable) 3:53 Hardware Changes (uC & Level Shifter & More) 7:24 Distance Sensor 7:45 PCB Design & Assembly 8:50 Testing of the PCB 10:07 Final Code & Demo 11:11 Final Mounting & Troubleshooting

pSFExYlX_SU | 06 Oct 2024
Watch the HD3 Event now: https://keysig.ht/xtDmN0 You can get the featured products here: (affiliate links) Metal Repair Glue: https://s.click.aliexpress.com/e/_DDpRLip Touch Sensor: https://s.click.aliexpress.com/e/_DdBT3Md Tweezer Soldering Station: https://s.click.aliexpress.com/e/_DlxAdNr 240W USB-C Adapter: https://s.click.aliexpress.com/e/_DDWvSi5 Mini Torque Wrench: https://s.click.aliexpress.com/e/_Dcvzi1T Laser Level: https://s.click.aliexpress.com/e/_DkQaIxR Previous video: https://youtu.be/2mNpYOYL7Ss Previous Aliexpress video: https://youtu.be/BcUzuwP-WPI Facebook: https://www.facebook.com/greatscottlab Twitter: https://twitter.com/GreatScottLab Instagram: https://www.instagram.com/great.scott.lab/ TikTok: https://www.tiktok.com/@greatscottlab Discord: https://discord.gg/zuAvkAuhsY Support me for more videos: https://www.patreon.com/GreatScott?ty=h In this video we will be having a closer look at 6 different products I got from Aliexpress. Aliexpress is famous for featuring the newest products/ICs when it comes to electronics but finding those can be a bit difficult. So I tried finding the hidden Gems not only electronics related but in general what I think could be useful. Let's get started! Websites shown in this video: https://www.jbctools.com/tools-category-5.html https://wurthtool.com/pages/warranty-policy Thanks to Keysight for sponsoring this video 0:00 Hidden Gems? 0:45 Intro 1:37 Metal Repair Glue 3:45 Touch Sensor 6:12 Tweezer Soldering Station 8:24 240W USB-C Display Adapter 10:18 Mini Torque Wrench 12:20 Laser Level 14:33 Verdict
2mNpYOYL7Ss | 22 Sep 2024
Watch the HD3 Virtual event now: https://keysig.ht/wOayZ2 You can get my board design here: https://oshwlab.com/greatscott/boreas-haptic-bos1921 Previous video: https://youtu.be/AsQ8I53SKPc I2C Basics Video: https://youtu.be/_fgWQ3TIhyE Facebook: https://www.facebook.com/greatscottlab Twitter: https://twitter.com/GreatScottLab Instagram: https://www.instagram.com/great.scott.lab/ TikTok: https://www.tiktok.com/@greatscottlab Discord: https://discord.gg/zuAvkAuhsY Support me for more videos: https://www.patreon.com/GreatScott?ty=h In this electronics basics episode we will be having a closer look at the I3C communication protocol. Now I2C was/is super popular as a data bus so that your microcontroller and sensors or other boards can talk to one another. But now we got a successor with I3C! So is it better? Is it worse? Should we use I3C from now on? Let's find out! Websites that were shown during the video: https://www.mouser.de/ProductDetail/Boreas-Technologies/BOS1921-KIT-B01?qs=HoCaDK9Nz5d50EsLe0CIgA%3D%3D https://www.mouser.de/ProductDetail/Boreas-Technologies/BOS1921CQR?qs=HoCaDK9Nz5eesZrKztNBcQ%3D%3D https://www.microchip.com/en-us/products/microcontrollers-and-microprocessors/8-bit-mcus/core-independent-and-analog-peripherals/communication-connectivity-peripherals/i3c https://hackaday.com/2022/08/25/i3c-no-typo-wants-to-be-your-serial-bus/ https://binho.io/blogs/i3c-reference/i3c-devices Thanks to Keysight for sponsoring this video 0:00 What is I3C? 1:40 Intro 2:25 Creating my Breakout Board 3:57 Assembling my Breakout Board 4:38 Troubleshooting.... 5:37 Final Test 6:05 I2C or I3C? 6:27 Open Collector Change (Timing) 7:52 Data Transfer 8:25 Dynamic Addressing 8:51 Common Command Codes 9:20 Hot Join 9:59 In-Band Interrupt 10:55 Verdict
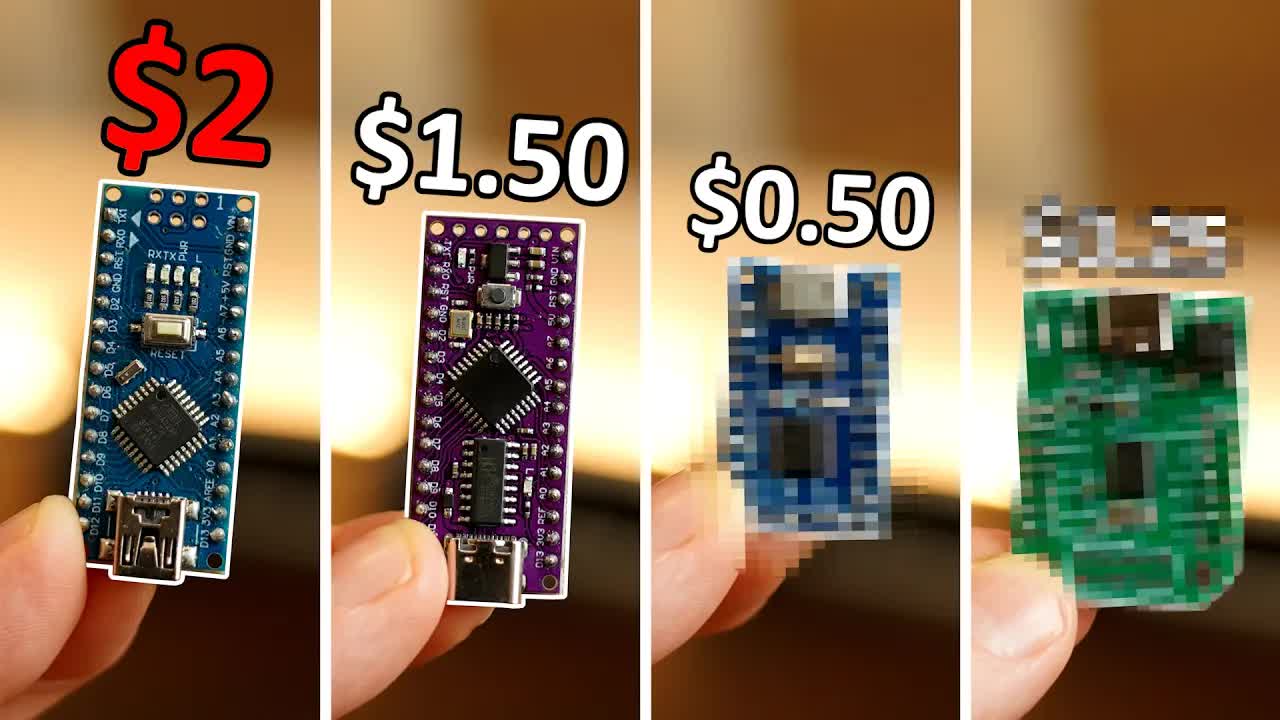
AsQ8I53SKPc | 08 Sep 2024
Check out the new HD3 Oscilloscope here: https://keysig.ht/xtDmN0 You can get the shown microcontroller here: (affiliate links) CH32V003 Board: https://s.click.aliexpress.com/e/_DkwcH0x CH32V003 IC: https://s.click.aliexpress.com/e/_DEw79xD LGT8F328P Board: https://s.click.aliexpress.com/e/_DBhQCj5 LGT8F328P IC: https://s.click.aliexpress.com/e/_Dejdj83 STM8S103 Board: https://s.click.aliexpress.com/e/_DF6vxNd STM8S103 IC: https://s.click.aliexpress.com/e/_DCBOSgX Previous video: https://youtu.be/oiB1Sm_f48w Previous Arduino Alternative video: https://youtu.be/9IFSPqSr6t8 Facebook: https://www.facebook.com/greatscottlab Twitter: https://twitter.com/GreatScottLab Instagram: https://www.instagram.com/great.scott.lab/ TikTok: https://www.tiktok.com/@greatscottlab Discord: https://discord.gg/zuAvkAuhsY Support me for more videos: https://www.patreon.com/GreatScott?ty=h In this video we will be having a look at 3 of the cheapest Arduino Alternatives you can get. They have all been suggested by viewers and I will test what features they offer for their price and how easy to program and compatible they are with the Arduino IDE. Let's get started! Websites that were shown during the video: https://www.wch-ic.com/products/CH32V003.html http://www.mounriver.com/download https://github.com/openwch/arduino_core_ch32?tab=readme-ov-file#CH32V00x-EVT-Boards https://wolles-elektronikkiste.de/en/lgt8f328p-lqfp32-boards https://github.com/dbuezas/lgt8fx https://tenbaht.github.io/sduino/ Thanks to Keysight for sponsoring this video 0:00 Your Cheap uC Suggestions 1:03 Intro 1:55 Creating 2 Test Circuits 3:00 CH32V003 (Cheapest Option) 7:10 LGT8F328P (Arduino Nano "Clone") 9:40 STM8S103 (Middle Ground) 12:38 Verdict
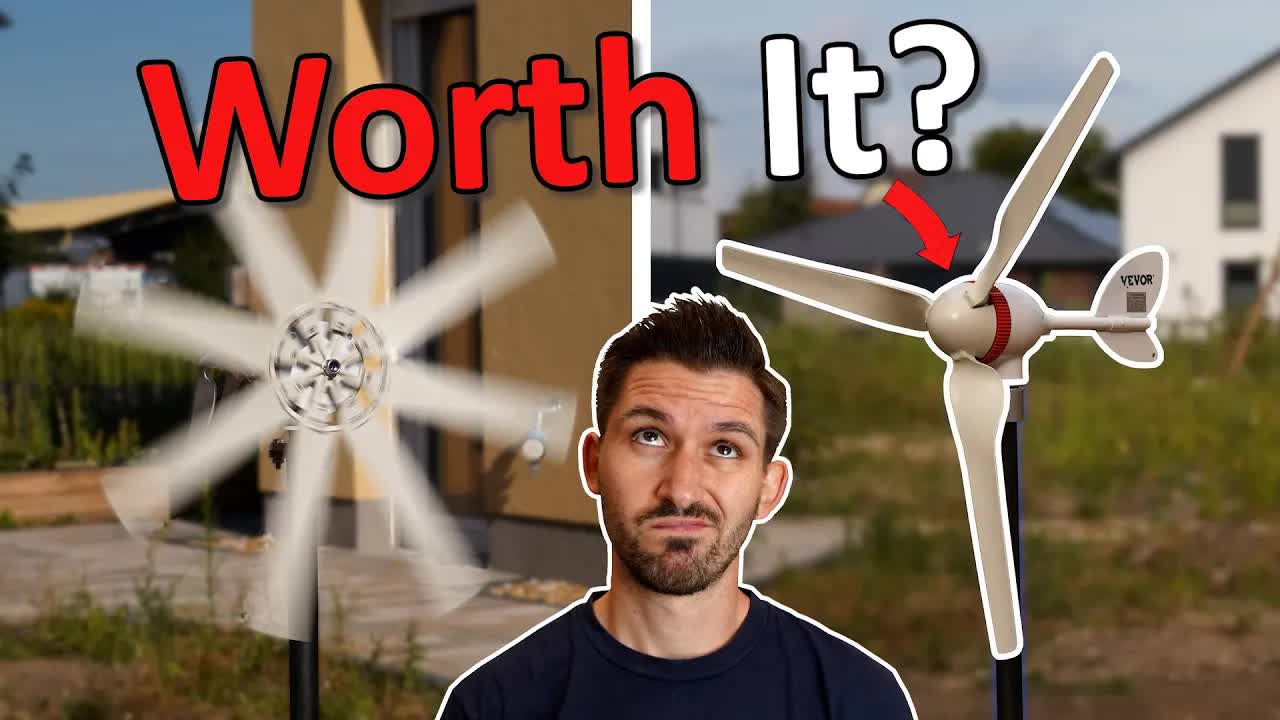
oiB1Sm_f48w | 25 Aug 2024
Check out Keysight's HD3 Event here: https://keysig.ht/xtDmN0 Check out Altium 365: http://altium365.com/yt/greatscott! You can get the shown Wind Generators here: (affiliate links) https://s.click.aliexpress.com/e/_DBqPZJz https://s.click.aliexpress.com/e/_DFwALfN Previous video:https://youtu.be/YgbrG_72a3A Wind Generator AliExpress video: https://youtu.be/7sGN0-YsiYw BLDC Motor Rewind video: https://youtu.be/KZ4cylB114E Facebook: https://www.facebook.com/greatscottlab Twitter: https://twitter.com/GreatScottLab Instagram: https://www.instagram.com/great.scott.lab/ TikTok: https://www.tiktok.com/@greatscottlab Discord: https://discord.gg/zuAvkAuhsY Support me for more videos: https://www.patreon.com/GreatScott?ty=h Websites that were shown/used during the video: https://en.wikipedia.org/wiki/Beaufort_scale https://toom.de/p/alu-rundrohr-25-x-100-cm/1704186 https://amzn.to/3M30keM https://amzn.to/3WAjxJK Thanks to Keysight for sponsoring this video 0:00 Why Wind Power? 1:21 Intro 2:03 Really a Generator? 3:29 Mounting the Wind Generator 6:52 First Wind Test 7:15 Wind Power Converter? 8:31 Proper Wind Tests 9:30 Verdict of First Wind Generator 10:25 Second Wind Generator 11:58 What Next?

YgbrG_72a3A | 11 Aug 2024
Do you want to know more about the Würth Elektronik EMC components? Then click here: https://www.we-online.com/GS-EMC-components EMC Service Page: https://www.we-online.com/GS-EMC-service Blog Post about EMC Guidelines: https://www.we-online.com/en/news-center/blog?d=what-is-emc-guidelines Blog Post about "What is EMC": https://www.we-online.com/en/news-center/blog?d=what-is-emc Würth Elektronik News: https://www.we-online.com/en/news-center/blog?d=ce-overviews Previous video: https://youtu.be/BcUzuwP-WPI Tiny Power Converter video: https://youtu.be/XAcW4c5qIMc Facebook: https://www.facebook.com/greatscottlab Twitter: https://twitter.com/GreatScottLab Instagram: https://www.instagram.com/great.scott.lab/ TikTok: https://www.tiktok.com/@greatscottlab Discord: https://discord.gg/zuAvkAuhsY Support me for more videos: https://www.patreon.com/GreatScott?ty=h In this video we will be having a look at three buck/boost converter boards built around the same IC, the TPS6302. One of these boards you can get for cheap from Asia. The other two ones are DIY designs I made myself. And the main question for this video is whether they pass EMC guidelines which are super important when you want to sell your board. We will be testing conductive and radiated EMC. And at the end I will show you how you can fix EMC problems of such boards. Let's get started! Websites that were shown/used during the video: https://www.ti.com/lit/ds/symlink/tps63020.pdf?ts=1695516437053 https://slpower.com/data/docs/Application_Notes/AN_EMI_Standards.pdf https://www.youtube.com/playlist?list=PLZJdRX1BvL0xaO2MeViGfcVxIG2Dkl1a2 https://redexpert.we-online.com/we-redexpert/en/#/home Thanks to the Würth Elektronik for supporting this video. 0:00 EMC Problems? 1:32 Intro 1:54 EMC Measurements at Home? 2:56 Conductive EMC Tests 4:38 Conductive EMC Results 5:29 Radiated EMC Tests & Results 6:32 Legal to Sell? 7:02 Fixing EMC Problems 10:03 Verdict

BcUzuwP-WPI | 28 Jul 2024
Go to https://ground.news/greatscott for a data-driven way to stay up to date with tech news and more. Subscribe though my link for 40% off unlimited access to Ground News. You can get the featured products here: (affiliate links) Electric Hand Drill Grinder: https://s.click.aliexpress.com/e/_DdbOMxz USB Data Cable Tester: https://s.click.aliexpress.com/e/_Dk7lA9h Magnetic Pogo Pin Connector: https://s.click.aliexpress.com/e/_DlIPuP9 Car Battery Monitor: https://s.click.aliexpress.com/e/_Dexa9QR Logic IC Tester: https://s.click.aliexpress.com/e/_DELVWkn Tang Nano 9K FPGA: https://s.click.aliexpress.com/e/_DBCCHu3 Round Digital Tape Measure: https://s.click.aliexpress.com/e/_DDKBH1z Li-Ion Cell 4S Holder & Protection: https://www.aliexpress.com/item/1005003207444854.html? Previous video: https://youtu.be/NUBv1RQaIX4 Previous Aliexpress video: https://youtu.be/gE_FuQuaKc0 Facebook: https://www.facebook.com/greatscottlab Twitter: https://twitter.com/GreatScottLab Instagram: https://www.instagram.com/great.scott.lab/ TikTok: https://www.tiktok.com/@greatscottlab Discord: https://discord.gg/zuAvkAuhsY Support me for more videos: https://www.patreon.com/GreatScott?ty=h In this video we will be having a closer look at 6 different products I got from Aliexpress. Aliexpress is famous for featuring the newest products/ICs when it comes to electronics but finding those can be a bit difficult. So I tried finding the hidden Gems not only electronics related but in general what I think could be useful. Let's get started! Websites shown in this video: https://wiki.sipeed.com/hardware/en/tang/Tang-Nano-9K/Nano-9K.html https://hdlbits.01xz.net/wiki/Main_Page https://github.com/sipeed/TangNano-9K-example https://github.com/Martoni/GbHdmi Thanks to Ground News for sponsoring this video. 0:00 AliExpress Hidden Gems? 1:05 Intro 1:17 Electric Hand Drill Grinder 2:40 USB Data Cable Tester 3:53 Magnetic Pogo Pin Connector 6:29 Car Battery Monitor 8:35 Logic IC Tester 9:57 Tang Nano 9K FPGA 11:26 Round Digital Tape Measure 12:38 Li-Ion Cell 4S Holder & Protection 14:39 Verdict

NUBv1RQaIX4 | 14 Jul 2024
Check out Mouser Electronics here: https://mou.sr/new2024 Arduino Uno reference guide: https://mou.sr/3SgGnF5 You can get the shown products here: https://mou.sr/4czh5tA https://mou.sr/3W0Gvt4 https://mou.sr/4eU0FxD https://mou.sr/4cu2Num Previous video: https://youtu.be/5T2DXo7TNHQ Previous Future Tech video: https://youtu.be/TpnBQ9bW4K8 Facebook: https://www.facebook.com/greatscottlab Twitter: https://twitter.com/GreatScottLab Instagram: https://www.instagram.com/great.scott.lab/ TikTok: https://www.tiktok.com/@greatscottlab Discord: https://discord.gg/zuAvkAuhsY Support me for more videos: https://www.patreon.com/GreatScott?ty=h In this video I will be once again having a closer look at future technology development boards that you can use today. That will include haptic feedback, solar energy harvester and a very special dev board that can do multi vital signal monitoring. Let's get started! Thanks to Mouser Electronics for sponsoring this video. 0:00 Future Technology? 1:13 Intro 1:49 What is Haptic Feedback? 4:44 Haptic Feedback Dev Board 6:29 Solar Energy Harvester 9:16 Multi Vital Signal Monitoring

5T2DXo7TNHQ | 30 Jun 2024
The first 500 people to use my link https://skl.sh/greatscott06241 will get a 1 month free trial of Skillshare premium! Here are the videos I was referring to: https://youtu.be/qsfaNTQ5-zo?si=lWtuB02HUPb7jDI8 https://youtu.be/WVO0wboKhA0?si=hzmk_Bu3G_lf-h8I https://youtu.be/6YtEmqM2-ns?si=Yu2aIijacndjqo5R Previous video: https://youtu.be/jriRW4rGQp4 Electronic Basics video playlist: https://www.youtube.com/watch?v=MzxBBXpgwrE&list=PLAROrg3NQn7cyu01HpOv5BWo217XWBZu0 Websites that were shown/used during the video: https://www.digikey.de/en/resources/conversion-calculators/conversion-calculator-555-timer https://www.quora.com/What-is-the-range-of-output-frequency-for-a-555-timer-IC#:~:text=About%20400kHz%20to%200.001Hz,in%20their%20operation%20and%20limitations. https://www.kbe-elektrotechnik.com/service/awg-tabelle/ https://www.web-bcs.com/transistor/tc/bf/BF195.php Facebook: https://www.facebook.com/greatscottlab Twitter: https://twitter.com/GreatScottLab Instagram: https://www.instagram.com/great.scott.lab/ TikTok: https://www.tiktok.com/@greatscottlab Discord: https://discord.gg/zuAvkAuhsY Support me for more videos: https://www.patreon.com/GreatScott?ty=h In this video we will be having a closer look at popular phone jammer & booster videos you can find on YouTube. Such circuits either block your phones reception or increase it. So I will build 2 very popular ones, show you how they work and whether you should maybe try them out as well. Let's get started! This video is sponsored by Skillshare 0:00 Why Jammer & Booster? 1:12 Intro 1:24 Jammer Schematic Problem 2:41 Building the Jammer 3:49 Testing the Jammer 6:23 How does it work? 8:14 Verdict Jammer 8:48 4G Jammer Test 9:43 Phone Booster Test 10:36 Final Verdict (Stop This)

jriRW4rGQp4 | 16 Jun 2024
Mid-Year Mega Sale $250 Coupon & More Surprise: https://jlcpcb.com/midyearsales Get $20 OFF on JLCPCB 6-Layer PCBs: https://jlcpcb.com/6-layer-pcb You can get the used products here: (affiliate links) Hydrostatic Sensor: https://s.click.aliexpress.com/e/_DBp3PiL Ultrasonic Sensor: https://s.click.aliexpress.com/e/_DFcIQuj ESP8266: https://s.click.aliexpress.com/e/_DFzQfIx CAT7 Wire: https://s.click.aliexpress.com/e/_DcuHUSX Junction Box: https://s.click.aliexpress.com/e/_Dne6OXh Enclosure: https://s.click.aliexpress.com/e/_DFAEPgP 5V Power Supply: https://s.click.aliexpress.com/e/_DnKzo5N Try the world's most trusted PCB design software, Altium Designer with 365, for free and 25% off your purchase: https://www.altium.com/yt/greatscott! Check out Altium 365: https://www.altium.com/altium-365 Check out OctoPart: https://octopart.com/ Here you can download the design files for my enclosure: https://www.patreon.com/posts/106053253 Websites that were shown/used during the video: https://www.amazon.de/F%C3%BCllstands-Anzeige-Ultraschall-Wasserstand-Sensor-Heiz-%C3%96ltank-Wassertank/dp/B0BD4Z4LF2 https://www.amazon.de/dp/B0CCK2F6TH https://esphome.io/index.html https://esphome.io/components/sensor/jsn_sr04t.html Previous video (Home Assistant Screen): https://youtu.be/gE_FuQuaKc0 Facebook: https://www.facebook.com/greatscottlab Twitter: https://twitter.com/GreatScottLab Instagram: https://www.instagram.com/great.scott.lab/ TikTok: https://www.tiktok.com/@greatscottlab Discord: https://discord.gg/zuAvkAuhsY Support me for more videos: https://www.patreon.com/GreatScott?ty=h In this episode of DIY or Buy, we will have a closer look at a very niche project. I have a cistern in my garden that stores all the rain water from my roofs. Only problem is that I have no idea how much water is in there meaning I need some kind of water level sensor. But the Buy options for such a "niche" application are not that great. That is why I came up with my own DIY solution that might be better ;-) Let's get started! Thanks to JLCPCB for sponsoring this video. Visit https://jlcpcb.com to get professional PCBs for low prices. 0:00 The Buy Options Suck! 1:26 Intro 2:21 Buy Option 1 (Hydrostatic Sensor) 3:32 Buy Option 2 (Ultrasonic Sensor) 5:23 DIY Solution 8:40 WiFi DIY Solution 9:43 Final Assembly 10:34 Verdict
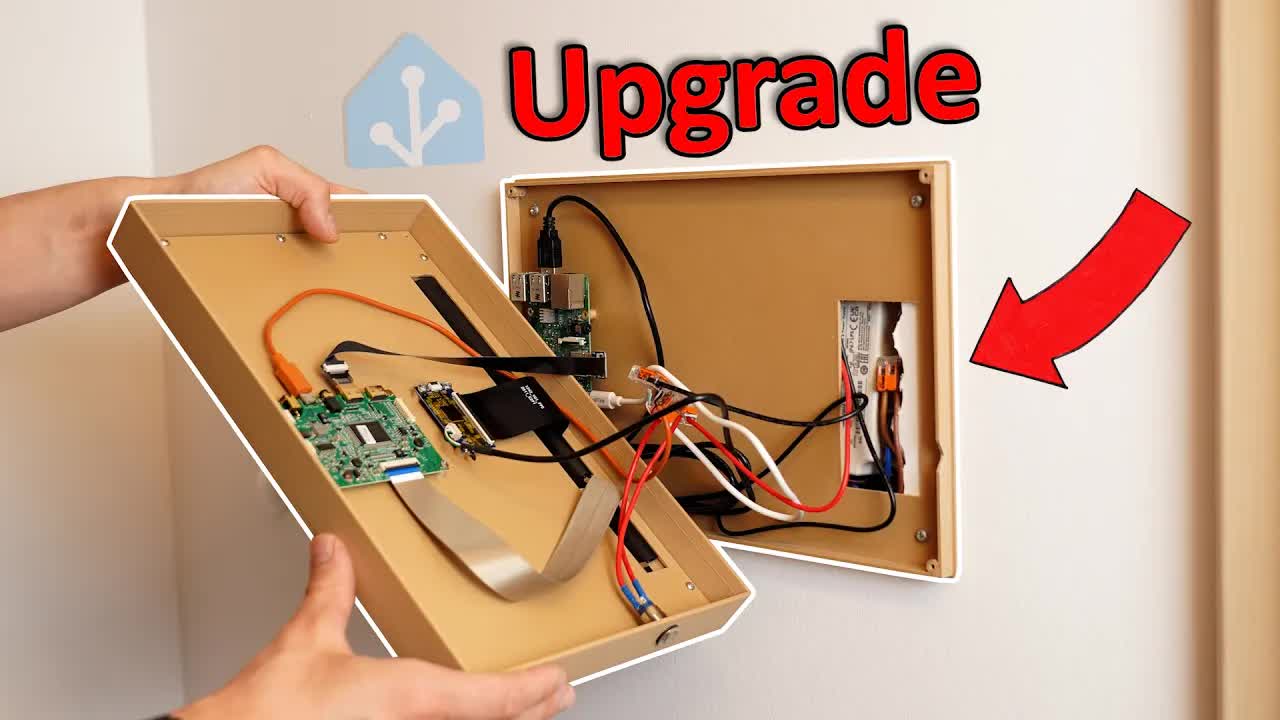
FntUPnPGfM8 | 02 Jun 2024
Mid-Year Mega Sale $250 Coupon & More Surprises: https://jlcpcb.com/midyearsales Apply for Combined Shipping of PCB,PCBA,3D Printing,CNC: https://forms.gle/YDXj8ZnFbxtjiGAF7 You can get the used products here: (affiliate links) Screen & Touchscreen: https://s.click.aliexpress.com/e/_DBxo8Pd Raspberry Pi 4: https://s.click.aliexpress.com/e/_DBxo8Pd Enclosure: https://s.click.aliexpress.com/e/_DEoVXbt Raspberry Pi 3: https://s.click.aliexpress.com/e/_DeYbX6r 5V 3A Power Supply: https://s.click.aliexpress.com/e/_DlyfI0B 5V 2.4A Power Supply: https://s.click.aliexpress.com/e/_Dkf8Wx5 Flat HDMI cable: https://s.click.aliexpress.com/e/_DE6b7GL Here you can download the design files for my enclosure: https://www.patreon.com/posts/105218408 Websites that were shown/used during the video: https://www.youtube.com/watch?v=4hN0_yGVdUQ https://github.com/MarkWattTech/MarkWattTech-Tutorials/tree/main/A%20DIY%20Home%20Assistant%20Kiosk https://reelyactive.github.io/diy/pi-kiosk/ Try the world's most trusted PCB design software, Altium Designer with 365, for free and 25% off your purchase: https://www.altium.com/yt/greatscott! Check out Altium 365: https://www.altium.com/altium-365 Check out OctoPart: https://octopart.com/ Previous video: https://youtu.be/gE_FuQuaKc0 Previous Home Assistant videos: https://youtu.be/IvI1RqYPO24 https://youtu.be/PSzkaSy5lHY https://youtu.be/qspHm1RKsPc AliExpress video with Screen Kit: Facebook: https://www.facebook.com/greatscottlab Twitter: https://twitter.com/GreatScottLab Instagram: https://www.instagram.com/great.scott.lab/ TikTok: https://www.tiktok.com/@greatscottlab Discord: https://discord.gg/zuAvkAuhsY Support me for more videos: https://www.patreon.com/GreatScott?ty=h Smart Home Devices are awesome! But problems arise when you have too many that all use their own app. So in this video I am reactivating my home assistant server on my Raspberry and more importantly create an awesome dashboard screen. And No! I will not use a tablet. I will build something custom with another Raspberry Pi ;-) Let's get started! Thanks to JLCPCB for sponsoring this video. Visit https://jlcpcb.com to get professional PCBs for low prices. 0:00 My Smart Home Problem 1:25 Intro 2:20 Home Assistant Installation 4:15 Kiosk Raspberry Pi Setup 5:39 Finding a Fitting Screen 7:53 Where to Position the Control Screen? 8:40 Building the Control Screen 10:10 Final Assembly & Verdict

gE_FuQuaKc0 | 19 May 2024
Quality 6 layer PCB for $2 & Get $10 Coupon: https://jlcpcb.com/AAA How does JLC Via-in-pad optimize routing efficiency? https://jlcpcb.com/6-layer-pcb You can get the featured products here: (affiliate links) High Speed Motor: https://s.click.aliexpress.com/e/_DlxswWX Battery Charger: https://s.click.aliexpress.com/e/_Dd4f59h Wireless HDMI Kit: https://s.click.aliexpress.com/e/_DeheIlH USB-C Laptop Charger: https://s.click.aliexpress.com/e/_DntiZn9 140W PD3.1 Powerbank PCB: https://s.click.aliexpress.com/e/_DBEBJf9 PD 3.1 Trigger Board: https://s.click.aliexpress.com/e/_Dk4OHt1 PD 3.1 USB-C Cable: https://s.click.aliexpress.com/e/_DDk9Q4F Digital Laser Tape Measure: https://s.click.aliexpress.com/e/_DetxIsj Previous video: https://youtu.be/sLW_r0OVyok Previous Aliexpress video: https://youtu.be/SG0eWf_Cbw0 Facebook: https://www.facebook.com/greatscottlab Twitter: https://twitter.com/GreatScottLab Instagram: https://www.instagram.com/great.scott.lab/ TikTok: https://www.tiktok.com/@greatscottlab Discord: https://discord.gg/zuAvkAuhsY Support me for more videos: https://www.patreon.com/GreatScott?ty=h In this video we will be having a closer look at 6 different products I got from Aliexpress. Aliexpress is famous for featuring the newest products/ICs when it comes to electronics but finding those can be a bit difficult. So I tried finding the hidden Gems not only electronics related but in general what I think could be useful. Let's get started! Thanks to JLCPCB for sponsoring this video. Visit https://jlcpcb.com to get professional PCBs for low prices. 0:00 Hidden Gems? 0:48 Intro 1:40 High Speed BLDC Motor 4:22 ISDT Q6 Nano Battery Charger 6:33 Wireless HDMI Kit 8:52 Laptop USB-C Charger 11:03 PD 3.1 Powerbank PCB 12:48 Digital Laser Tape Measure 14:24 Verdict
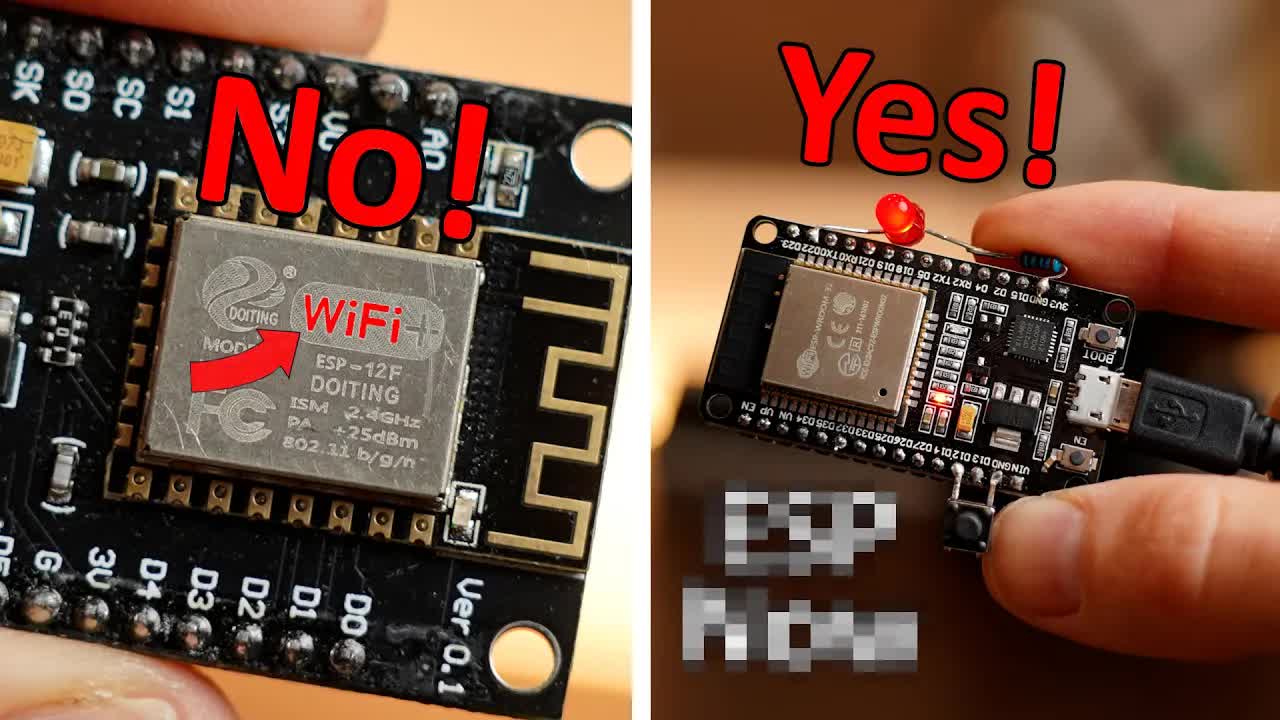
sLW_r0OVyok | 05 May 2024
Elektor Offer: Enjoy 50% off an annual subscription to Elektor GOLD (print + digital) or Elektor GREEN (digital). This offer is available in English, German, French, and Dutch. Valid until May 31, 2024. https://www.elektormagazine.com/greatscott-elektor-offer-24 Special Offer for the LiPo Supercharger: Valid until May 31, 2024 https://www.elektormagazine.com/greatscott-lipo-2024 Previous video: https://youtu.be/MzxBBXpgwrE ESP32 WiFi video: https://www.youtube.com/watch?v=ZAqNKaX3LQ0&t ESP32 Bluetooth video: https://www.youtube.com/watch?v=2SWj49ugr3A nRF24 videos: https://www.youtube.com/watch?v=SZYwvvh6m-s https://www.youtube.com/watch?v=Nd_Kc7BXa54 433MHz RF Module video: https://www.youtube.com/watch?v=PKowvbnIxso LoRa videos: https://www.youtube.com/watch?v=nP6YuwNVoPU https://www.youtube.com/watch?v=ItZwa1AdrpU https://www.youtube.com/watch?v=2YJHcGQnpAk&t=23s Facebook: https://www.facebook.com/greatscottlab Twitter: https://twitter.com/GreatScottLab Instagram: https://www.instagram.com/great.scott.lab/ TikTok: https://www.tiktok.com/@greatscottlab Discord: https://discord.gg/zuAvkAuhsY Support me for more videos: https://www.patreon.com/GreatScott?ty=h Wireless communication is awesome! Right? Only problem is that there are many different methods and techniques which all use different frequencies and sometimes require extra hardware. But if you do not want to spend extra money on hardware, then the ESP microcontroller boards offer WiFi and Bluetooth. Those only come with a "short" range though. So in this video I will test ESP-NOW which is a wireless communication method that can be used with the ESP boards. It gets rid of many disadvantages while not needing extra hardware. So let's see what it can do and ultimately push it to the limit by building a crude Walkie-Talkie. Let's get started! Websites shown/used in the video: https://www.elektormagazine.com/articles/diy-walkie-talkie-based-on-esp-now https://www.espressif.com/en/solutions/low-power-solutions/esp-now https://randomnerdtutorials.com/esp-now-esp32-arduino-ide/ Thanks to Elektor for sponsoring this video 0:00 A New Wireless Communication Method? 1:46 Intro 2:53 The Problem with WiFi & BT 4:22 Extra Hardware? 4:33 ESP-NOW Theory 5:10 First Test ESP-NOW 6:20 Range Test ESP-NOW 7:30 Comparison of all Wireless Methods 7:59 Walkie-Talkie Build with ESP-NOW 11:32 Verdict
MzxBBXpgwrE | 21 Apr 2024
Check out Mouser Electronics here: https://mou.sr/new2024 Mouser's updated Circuit Protection Reference Guide: https://mou.sr/3IYI0Sp You can get the shown Components here: https://mou.sr/4atIMTo https://mou.sr/3xkzz1k https://mou.sr/4aDpjj3 https://mou.sr/3PMHivp Try the world's most trusted PCB design software, Altium Designer with 365, for free and 25% off your purchase: https://www.altium.com/yt/greatscott! Check out Altium 365: https://www.altium.com/altium-365 Check out OctoPart: https://octopart.com/ Previous video: https://youtu.be/5TFPrBQNWok Mini PV System video: https://youtu.be/KEru5cODA-M Facebook: https://www.facebook.com/greatscottlab Twitter: https://twitter.com/GreatScottLab Instagram: https://www.instagram.com/great.scott.lab/ TikTok: https://www.tiktok.com/@greatscottlab Discord: https://discord.gg/zuAvkAuhsY Support me for more videos: https://www.patreon.com/GreatScott?ty=h In this electronics basics episode, we will be having a closer look at overvoltage/surge protection components. Now a voltage surge only occurs rarely through lightning, inductive switching in your grid or an electrostatic discharge. But if they hit your electronics, they can immediately destroy them. But with the 3 shown components you can easily and for pretty cheap save your circuits. Let's get started! Thanks to Mouser Electronics for sponsoring this video. 0:00 Overvoltage Problems! 1:25 Intro 2:08 Creating an Overvoltage Pulse for Testing 3:37 Test Circuit for the Experiment 4:04 Protection 1: TVS Diode 7:24 Protection 2: MOV 9:45 Protection 3: GDT 10:27 Comparison between all 10:47 Difference between Cheap/Expensive Surge Protection

5TFPrBQNWok | 07 Apr 2024
Cheaper PCB layout Service at JLCPCB: https://design.jlcpcb.com/ 6 Layers PCBs for $2(Free ENIG): https://jlcpcb.com/AAA Get 6 layers PCB coupon: https://www.facebook.com/groups/JLCPCB/ Components list: (partly affiliate links) 3.3V Regulator: https://www.mouser.com/ProductDetail/595-LP2985-33DBVR 5V Regulator: https://www.mouser.com/ProductDetail/595-LP2985-50DBVR ATtiny402: https://s.click.aliexpress.com/e/_DDtsuuH VCNL4200: https://www.mouser.com/ProductDetail/Vishay-Semiconductors/VCNL4200?qs=gt1LBUVyoHnG9%252BeWUQ9nRg%3D%3D AL8860: https://s.click.aliexpress.com/e/_DlTFdi9 0805 Resistor Kit: https://s.click.aliexpress.com/e/_DBeArjf 0805 Capacitor Kit: https://s.click.aliexpress.com/e/_DmFOspJ 3015 47uH Coil: https://s.click.aliexpress.com/e/_DFhprnn LEDs: https://www.lcsc.com/product-detail/Light-Emitting-Diodes-LED_Everlight-Elec-67-21ST-RKE-N305834Z15-SZM-2T_C694723.html SI2301 MOSFET: https://www.mouser.com/ProductDetail/781-SI2301BDS-GE3 FDLL1418 Diode: https://www.mouser.com/ProductDetail/512-FDLL4148 Project files: (Schematic/PCB Design/Code): https://oshwlab.com/greatscott/stairledlight The ATtiny Programming tutorial I used: https://www.electronics-lab.com/project/getting-started-with-the-new-attiny-chips-programming-the-microchips-0-series-and-1-series-attiny-with-the-arduino-ide/ Previous video: https://youtu.be/s6zcI1GrkK4 Facebook: https://www.facebook.com/greatscottlab Twitter: https://twitter.com/GreatScottLab Instagram: https://www.instagram.com/great.scott.lab/ TikTok: https://www.tiktok.com/@greatscottlab Discord: https://discord.gg/zuAvkAuhsY Support me for more videos: https://www.patreon.com/GreatScott?ty=h In this big project video, I basically tried to revolutionize LED lights. That means I wanted to create an awesome led light for my staircase that only reacts when a human passes by and when it is dark. At the beginning everything worked just fine the mechanical mounting as well as the electrical design with uC, LED driver and distance sensor. After the programming and final assembly, everything fell apart. Check it out ;-) Websites that were used/shown during the video: https://4donline.ihs.com/images/VipMasterIC/IC/VISH/VISH-S-A0011791776/VISH-S-A0011791776-1.pdf?hkey=CECEF36DEECDED6468708AAF2E19C0C6 https://github.com/SpenceKonde/megaTinyCore https://github.com/ElTangas/jtag2updi https://www.electronics-lab.com/project/getting-started-with-the-new-attiny-chips-programming-the-microchips-0-series-and-1-series-attiny-with-the-arduino-ide/ https://github.com/ktsai69/Vishay_VCNL4200 https://www.mouser.de/pdfdocs/Vishay_VCNL4200-SB.pdf https://www.amazon.com/dp/B075MB414D/ref=syn_sd_onsite_desktop_0?ie=UTF8&pf_rd_p=d77a94d7-221a-4129-af34-3c16ad136bb7&pf_rd_r=FRV357T1FRCR4BFENH9Z&pd_rd_wg=iXqJG&pd_rd_w=LBHdw&pd_rd_r=b3b70667-e5b2-4415-ad9b-c2adc748ab6a&aref=WRTpWcvnZ2&th=1 https://www.aliexpress.com/item/1005004866038739.html?spm=a2g0o.productlist.seoads.1.146bdb59rnb5Jf&p4p_pvid=202403240204225665922053693720003280458_1&s=p Thanks to JLCPCB for sponsoring this video. Visit https://jlcpcb.com to get professional PCBs for low prices. 0:00 My Staircase problem 1:34 Intro 2:39 Mechanical Enclosure 4:20 Initial Plan for the Electronics 6:08 Testing the Distance Sensor 7:05 Creating the final Schematic & PCB Design 8:51 First Assembly & Test 9:48 ATtiny Programming & Finished Prototype 10:41 Final Assembly 11:24 PROBLEMS & TROUBLESHOOTING 12:43 Verdict

s6zcI1GrkK4 | 24 Mar 2024
Be the First to Multi-color silkscreen at JLCPCB: https://bit.ly/49of813 Join our Facebook & Get A Coupon: https://www.facebook.com/groups/JLCPCB You can get Sodium-Ion Batteries here: (affiliate link) https://s.click.aliexpress.com/e/_DCIjXol Previous video: https://youtu.be/9IFSPqSr6t8 My Li-Ion Safety video: https://www.youtube.com/watch?v=bNNWbm681AI&t Another Li-Ion Safety video worth watching: https://www.youtube.com/watch?v=CUgbmCSmSNY Sodium-Ion Nail Puncture video: https://www.youtube.com/watch?v=W1ya_ls1zkA Facebook: https://www.facebook.com/greatscottlab Twitter: https://twitter.com/GreatScottLab Instagram: https://www.instagram.com/great.scott.lab/ TikTok: https://www.tiktok.com/@greatscottlab Discord: https://discord.gg/zuAvkAuhsY Support me for more videos: https://www.patreon.com/GreatScott?ty=h In this video we will be having a look at the possible future of battery technology, sodium-ion batteries. Unlike lithium batteries, the material of sodium batteries is much easier to find and thus cheaper and more environmental friendly. I was finally able to find some on AliExpress. Now the question is whether those are real and how they compare to more traditional lithium batteries. Let's find out! Websites that were used/shown during the video: https://hakadibattery.com/collections/sodium-ion-battery-cells-3v https://cdn.shopify.com/s/files/1/0592/3694/2029/files/HKD_18650-1300mAh-20C.pdf?v=1703754781 https://pubs.acs.org/doi/10.1021/acsenergylett.0c02181# https://www.akkuteile.de/lithium-ionen-akkus/18650?facets=82 https://drive.google.com/file/d/0B5ce5vDCG1uyZFlNa1hHdmFyYWs/view?resourcekey=0-cLOIGS2Opu5Ubc3oydOxbw Thanks to JLCPCB for sponsoring this video. Visit https://jlcpcb.com to get professional PCBs for low prices. 0:00 Salt Batteries? 1:40 Intro 2:41 Is Sodium-Ion Real?? 3:10 Charge/Discharge Curve 5:13 Pros/Cons of Charge/Discharge Curve 6:25 Energy Density of Sodium-Ion 7:37 How to Charge them? 8:27 Battery Management System? 8:59 Maximum Input/Output Power? 10:10 Safety? 10:59 Cycle Life? 11:30 Verdict

9IFSPqSr6t8 | 10 Mar 2024
Get $60 New Customers Coupons & Try JLCPCB at low cost: https://jlcpcb.com/AAA Join our group to get the instruction of Multi-Color Silkscreen PCB: https://www.facebook.com/groups/JLCPCB Try the world's most trusted PCB design software, Altium Designer with 365, for free and 25% off your purchase: https://www.altium.com/yt/greatscott! Check out Altium 365: https://www.altium.com/altium-365 Check out OctoPart: https://octopart.com/ You can get the Holtek Microcontrollers & Programmer here: (affiliate links) HT66F002: https://s.click.aliexpress.com/e/_DCUCVMD HT66F0176: https://s.click.aliexpress.com/e/_DDV19wN E-Link Programmer: https://s.click.aliexpress.com/e/_DlsY8bL You can download my created code here: https://www.patreon.com/posts/holtek-code-99366052 Previous video: https://youtu.be/SG0eWf_Cbw0 Register Manipulation video: https://youtu.be/EVm0qVJ56II Timer video: https://youtu.be/IdL0_ZJ7V2s Facebook: https://www.facebook.com/greatscottlab Twitter: https://twitter.com/GreatScottLab Instagram: https://www.instagram.com/great.scott.lab/ TikTok: https://www.tiktok.com/@greatscottlab Discord: https://discord.gg/zuAvkAuhsY Support me for more videos: https://www.patreon.com/GreatScott?ty=h In this video we will be having a look at another Arduino Microcontroller alternative: the Holtek Microcontrollers from Taiwan. These are some of the cheapest microcontrollers you can get and they offer lots of useful features. So how easy are they to program and would I recommend using them? Let's find out! Useful Websites for Holtek Programming: https://www.instructables.com/Getting-Started-With-Holtek-Microcontrollers/ https://www.holtek.com/webapi/116711/HT66F002_0025_003_004v230.pdf https://www.holtek.com/webapi/116711/HT66F0176v131.pdf https://www.holtek.com/WebAPI/Holtek_e-Link_for_8-bit_MCU_OCDS_User_s_Guide_En.pdf/84d53516-918f-4b14-a087-5c47381cfe3a https://www.holtek.com/WebAPI/UploadFiles/Documents/Media/HoltekDataMigration/188787/Holtek_e-Link_QA_Ver103_EN.pdf https://cika.com/soporte/Information/Holtek/Microcontrollers/8-bit/DevTools/HT-IDE3000_ProgrammersGuideClanguage.pdf https://www.bestmodulescorp.com/dev16nsop002.html https://www.holtek.com/webapi/116745/an0446e.pdf Thanks to JLCPCB for sponsoring this video. Visit https://jlcpcb.com to get professional PCBs for low prices. 0:00 I need a CHEAP uC! 1:40 Intro 2:30 What features do we need? 3:42 HT66F002 Feature Overview 4:17 How to Program it? 5:15 Output Feature Blink 7:07 Input Feature 7:48 PWM Feature 9:04 ADC Feature 10:07 Sleep Mode (Low Power) 10:45 I2C Problem! 11:53 Verdict

SG0eWf_Cbw0 | 25 Feb 2024
Get an even higher February deal using my link: https://www.displate.com/greatscott or my discount code "Scott" 1-2 = 22% OFF 3 = 33% OFF available until February 29th, 2024, excl. Limited Editions and Lumino. Discount applies automatically at checkout. You can get the featured products here: (affiliate links) Car Air Freshener: https://s.click.aliexpress.com/e/_DdB3TP7 GPS Tracker: https://s.click.aliexpress.com/e/_DetmvSh UV Resin Glue: https://s.click.aliexpress.com/e/_DFFBsNj 5.5 Inch OLED Touchscreen: https://s.click.aliexpress.com/e/_DmWfGsZ Signal Boosters: https://s.click.aliexpress.com/e/_DBuDJUd https://s.click.aliexpress.com/e/_DEGpbVJ Mini Handheld Oscilloscope: https://s.click.aliexpress.com/e/_DkUW6G1 Previous video: https://youtu.be/d3IH8zwUVYU Previous Aliexpress video: https://youtu.be/yj3DhasbTfE Facebook: https://www.facebook.com/greatscottlab Twitter: https://twitter.com/GreatScottLab Instagram: https://www.instagram.com/great.scott.lab/ TikTok: https://www.tiktok.com/@greatscottlab Discord: https://discord.gg/zuAvkAuhsY Support me for more videos: https://www.patreon.com/GreatScott?ty=h In this video we will be having a closer look at 6 different products I got from Aliexpress. Aliexpress is famous for featuring the newest products/ICs when it comes to electronics but finding those can be a bit difficult. So I tried finding the hidden Gems not only electronics related but in general what I think could be useful. Let's get started! Thanks to Displate for sponsoring this video 0:00 NASA Product? 0:38 Intro 1:46 Anti Freeze Snow Removal Tool 2:59 GPS Tracker 5:41 UV Resin Glue 8:22 OLED Touchscreen 10:32 Phone Signal Booster 12:02 Mini Handheld Oscilloscope
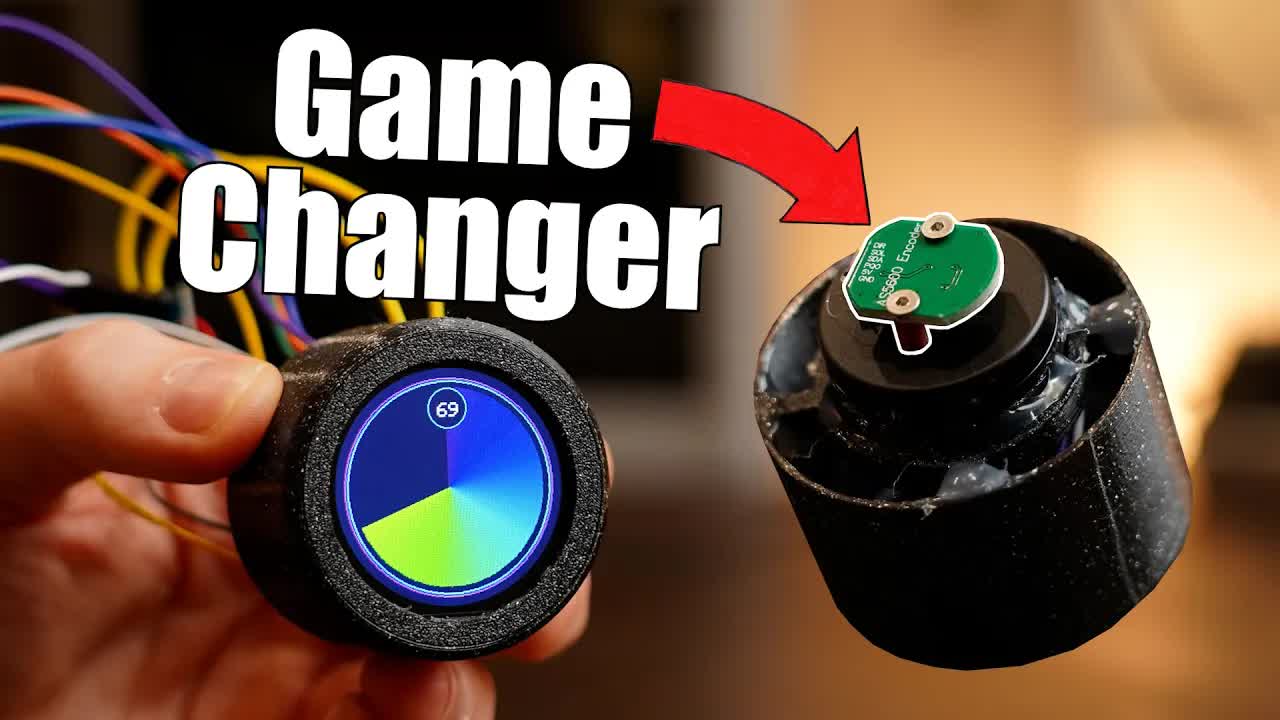
d3IH8zwUVYU | 11 Feb 2024
Check out SOLO Motor Controllers here: https://www.solomotorcontrollers.com/?ref=4 (affiliate link) https://www.youtube.com/@SOLOMotorControllers Try the world's most trusted PCB design software, Altium Designer with 365, for free and 25% off your purchase: https://www.altium.com/yt/greatscott! Check out Altium 365: https://www.altium.com/altium-365 Check out OctoPart: https://octopart.com/ You can get the shown components here: (affiliate links) Magnetic Encoder: https://s.click.aliexpress.com/e/_DcQBHPX AMT102 Encoder: https://s.click.aliexpress.com/e/_DlhgyBj Round LCD: https://s.click.aliexpress.com/e/_DCvJOnj Gimbal Motor: https://s.click.aliexpress.com/e/_DkLV6uV Previous video: https://youtu.be/XAcW4c5qIMc Stepper Motor video: https://youtu.be/bkqoKWP4Oy4 Facebook: https://www.facebook.com/greatscottlab Twitter: https://twitter.com/GreatScottLab Instagram: https://www.instagram.com/great.scott.lab/ TikTok: https://www.tiktok.com/@greatscottlab Discord: https://discord.gg/zuAvkAuhsY Support me for more videos: https://www.patreon.com/GreatScott?ty=h In this electronics basics episode we will have a closer look at motor encoders. Those can not only turn any motor into an awesome and satisfying input device for your projects; but can also turn any kind of motor into a kind of stepper motor. There are many different types of such encoders. So let me show you how they work, what they do and how you can use them. Let's get started ;-) Websites that were shown during the video: https://github.com/scottbez1/smartknob https://thesolaruniverse.wordpress.com/2023/09/01/meters-gauges-and-scales-arduino-nano-circular-gca901-240240-pixel-tft-display/ https://www.mouser.com/datasheet/2/670/amt10_v-1775837.pdf https://ams.com/documents/20143/36005/AS5200L_DS000585_1-00.pdf Thanks to Solo Motor Controller for sponsoring this video https://www.solomotorcontrollers.com/ 0:00 Motor Encoders? 1:23 Intro 2:16 Rotary Encoder Basics 4:40 Disadvantages of Rotary Encoder 5:38 Using a Magnetic Encoder 7:32 Why Precise Positioning of Motors? 8:45 Turning BLDC Motor into Stepper Motor 10:59 Verdict
XAcW4c5qIMc | 28 Jan 2024
Do you want to know more about the Würth Elektronik components? Then click here: https://www.we-online.com/katalog/en WE-MAIA SMT Power Inductors (shown in this video): https://www.we-online.com/en/components/products/WE-MAIA Design Kits: https://www.we-online.com/en/system/search.cfm?sword=design+kit+mapi Würth Elektronik Design Software: https://redexpert.we-online.com/we-redexpert/en/#/home Services for components: https://www.we-online.com/en/products/components/service Previous video: https://youtu.be/ty5JueA1wRc Shown AliExpress video: https://youtu.be/8hKpQvw1nNw Have a look at my PCB Design Files here: https://www.patreon.com/posts/97223774?pr=true Facebook: https://www.facebook.com/greatscottlab Twitter: https://twitter.com/GreatScottLab Instagram: https://www.instagram.com/great.scott.lab/ TikTok: https://www.tiktok.com/@greatscottlab Discord: https://discord.gg/zuAvkAuhsY Support me for more videos: https://www.patreon.com/GreatScott?ty=h In this project I will try to remake an AliExpress PCB. It is a very handy voltage converter that can take a varying battery voltage and convert it into 3.3V or 5V while only requiring very little current (25uA) on the input. Sounds awesome, but the board is way too huge. That is why I try to push the size limits in this video to the minimum. Will I succeed?? Let's find out! Websites that were shown/used during the video: https://www.ti.com/lit/ds/symlink/tps63020.pdf?ts=1695516437053 Thanks to the Würth Elektronik for supporting this video. 0:00 This Board is TOO BIG! 1:31 Intro 2:15 What Components to use? 5:02 Making DIY Version 1 7:08 Testing Version 1 8:35 AliExpress Board Comparison 9:10 Making/Testing Version 2 9:58 Making/Testing Version 3 (Tiny) 11:04 Verdict
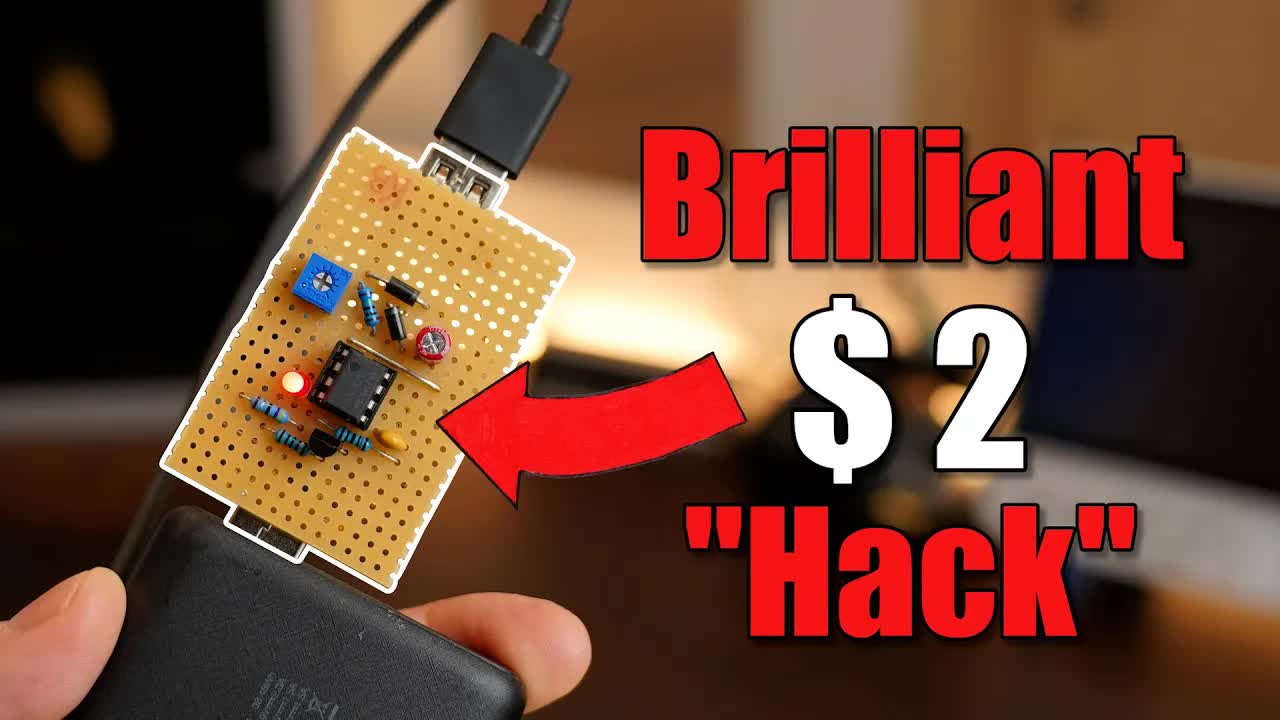
ty5JueA1wRc | 14 Jan 2024
Get A Coupon for Free flexible PCBs (100*100mm, yellow): https://jlcpcb.com/AAA JLCPCB 3D Printing from $0.3: https://3d.jlcpcb.com You can get the shown components/powerbanks here: (affiliate links) USB Tester: https://s.click.aliexpress.com/e/_DBjJEYN USB Load: https://s.click.aliexpress.com/e/_Dl0NhY1 My favorite Big Powerbank: https://s.click.aliexpress.com/e/_DelbpUt My favorite Small Powerbank: https://amzn.to/48LeavE USB Ports: https://s.click.aliexpress.com/e/_DBX7uKZ https://s.click.aliexpress.com/e/_DmRwAGz 555 Timer: https://s.click.aliexpress.com/e/_Dnqn0SZ Capacitor Kit: https://s.click.aliexpress.com/e/_Ddknutr Resistor Kit: https://s.click.aliexpress.com/e/_Dm1jDQ9 You can download the Pulse Circuit schematic here: https://www.patreon.com/posts/powerbank-pulse-96346146 Previous video: https://youtu.be/KV8U1cCo7UA 555 Timer IC Video: https://youtu.be/fLaexx-NMj8 Facebook: https://www.facebook.com/greatscottlab Twitter: https://twitter.com/GreatScottLab Instagram: https://www.instagram.com/great.scott.lab/ TikTok: https://www.tiktok.com/@greatscottlab Discord: https://discord.gg/zuAvkAuhsY Support me for more videos: https://www.patreon.com/GreatScott?ty=h In this video we will be having a closer look at powerbanks and their one flaw. Now I do love powerbanks because they are the perfect portable power source for your electronics projects. They provide 5V, are super easy to handle, safe and cheap. Only problem is that they turn off automatically when there is only a small load attached which can be a problem for some of my projects. So in this video I will explore 4 solutions or "hacks" in order to get rid of this problem. Let's get started! Websites that were shown during the video: http://www.sztuofeng.com/upload/1586854246.pdf Thanks to JLCPCB for sponsoring this video. Visit https://jlcpcb.com to get professional PCBs for low prices. 0:00 Powerbanks have 1 Big Problem 1:24 Intro 2:11 Why Auto Turn Off? 3:21 Solution 1 USB-C Powerbank 4:11 Solution 2 Constant Load 5:05 Solution 3 Pulse Circuit 7:25 Solution 4 Hardware Hacking 11:44 Verdict

Eh6KNVfC4YE | 30 Dec 2023
Instagram: https://www.instagram.com/great.scott.lab/ TikTok: https://www.tiktok.com/@greatscottlab Discord: https://discord.gg/zuAvkAuhsY Facebook: https://www.facebook.com/greatscottlab Twitter: https://twitter.com/GreatScottLab Support me for more videos: https://www.patreon.com/GreatScott?ty=h Music: George Street Shuffle by Kevin MacLeod is licensed under a Creative Commons Attribution 4.0 license. https://creativecommons.org/licenses/by/4.0/ Source: http://incompetech.com/music/royalty-free/index.html?isrc=USUAN1300035 Artist: http://incompetech.com/ 0:00 2023 was Crazy! 1:00 Overview 1:34 Why Short Videos? 7:23 Video Performance 2022 VS 2023 9:53 First Half 2023 Video Performance 11:30 Second Half 2023 Video Performance 12:33 Where is this Video Series? 15:08 Thank you 15:35 Heating in my House 18:07 Happy with your PV System? 20:36 New Technologies? 22:39 Best EDA Software? 23:14 How is Parenthood? 24:10 Electrical or Electronics? 25:12 Favorite Project of 2023? 26:48 More RF Stuff? 28:01 Discord
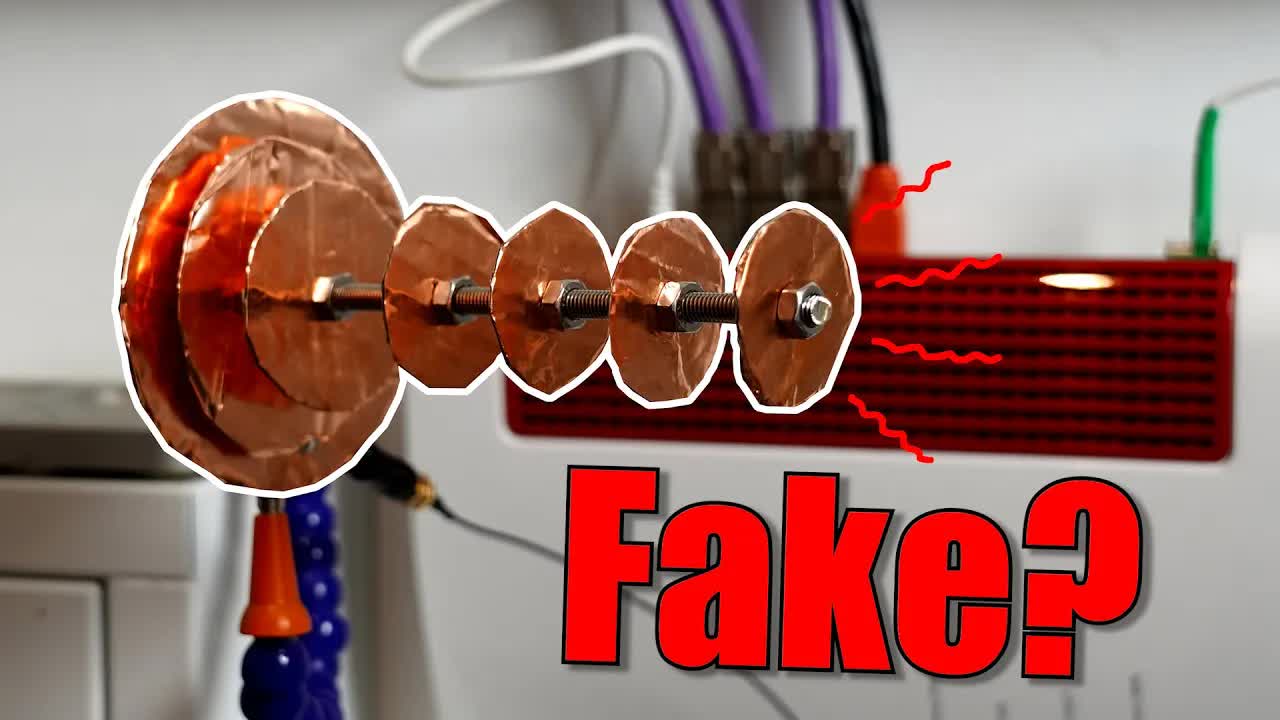
KV8U1cCo7UA | 17 Dec 2023
Learn more about how modern spectrum analyzers are designed and how they work. Download your complimentary Rohde & Schwarz Spectrum Analyzer Fundamentals here: https://shorturl.at/gAN89 You can get the shown antennas here: (affiliate links) 2.4GHz: https://s.click.aliexpress.com/e/_De7aQVP 5/2.4GHz: https://shorturl.at/gktK8 IPX to SMA converter: https://s.click.aliexpress.com/e/_DnaedWH Previous video: https://youtu.be/yj3DhasbTfE Shown WiFi Antenna video: https://youtu.be/Nk-nj_BwoBE?si=d3kBlMJdDKYeTHVg Facebook: https://www.facebook.com/greatscottlab Twitter: https://twitter.com/GreatScottLab Instagram: https://www.instagram.com/great.scott.lab/ TikTok: https://www.tiktok.com/@greatscottlab Discord: https://discord.gg/zuAvkAuhsY Support me for more videos: https://www.patreon.com/GreatScott?ty=h In this video I will try to overpower my WiFi. That means that I was not happy with the WiFi reception in my house. And this all started with me buying a new WiFi router. So here I will show you how I solved the problem which involves amplifiers, antennas and a bit of electronics knowledge ;-) Let's get started! Websites that were shown/used during the video: https://avm.de/service/wissensdatenbank/dok/FRITZ-Box-5590-Fiber/892_Stellt-WLAN-Strahlung-ein-Risiko-dar/#:~:text=Die%20WLAN-Sendeleistung%20der%20FRITZ,%2C35%20GHz)%2C%20bzw. https://wlan1nde.wordpress.com/2014/11/26/wlan-maximum-transmission-power-etsi/ https://www.mouser.de/c/semiconductors/wireless-rf-integrated-circuits/rf-amplifier/?operating%20frequency=2.4%20GHz%20to%202.5%20GHz&_gl=1%2Arssez9%2A_ga%2AMTE5MzQ1Mzg1NC4xNzAxNTExNTM5%2A_ga_15W4STQT4T%2AMTcwMTUxMTUzOC4xLjAuMTcwMTUxMTUzOC42MC4wLjA. https://en.avm.de/products/fritzbox/fritzbox-5590-fiber/technical-specifications/ https://boxmatrix.info/wiki/PCB-Offboard_WLAN_2.4/5GHz Thanks to Rohde & Schwarz for sponsoring this video. 0:00 My WiFi SUCKS! 1:10 Intro 1:56 Original WiFi Heatmap 2:37 2.4GHz or 5GHz? 3:47 How to Improve things? 4:17 WiFi Amplifier 5:21 2.4GHz Antenna 7:35 5GHz Antenna 8:42 Different 5GHz Channel 9:34 Testing a Directional Antenna (YouTube) 10:40 Verdict

yj3DhasbTfE | 03 Dec 2023
Download the Rohde & Schwarz Fundamentals of Vector Network Analyzers Primer: https://shorturl.at/rwBEY You can get the featured products here: (affiliate links) Ipad LCD: https://s.click.aliexpress.com/e/_Dms5yIj LCD Driver Board: https://s.click.aliexpress.com/e/_DeWfylp USB-C Connector: https://s.click.aliexpress.com/e/_Dncgimb Hidden Wireless Charger: https://s.click.aliexpress.com/e/_DFm2MGr Wire Twister Tool: https://s.click.aliexpress.com/e/_DFmumDZ Bluetooth Beacon: https://s.click.aliexpress.com/e/_Dm4XkIb Adjustable Power Supply: https://s.click.aliexpress.com/e/_Dc9fo4P Previous video: https://youtu.be/cNPIL7rhKUw Previous Aliexpress video: https://youtu.be/IhnJra0XD4E Future Tech Bluetooth Board video: https://youtu.be/TpnBQ9bW4K8 Facebook: https://www.facebook.com/greatscottlab Twitter: https://twitter.com/GreatScottLab Instagram: https://www.instagram.com/great.scott.lab/ TikTok: https://www.tiktok.com/@greatscottlab Discord: https://discord.gg/zuAvkAuhsY Support me for more videos: https://www.patreon.com/GreatScott?ty=h In this video we will be having a closer look at 6 different products I got from Aliexpress. Aliexpress is famous for featuring the newest products/ICs when it comes to electronics but finding those can be a bit difficult. So I tried finding the hidden Gems not only electronics related but in general what I think could be useful. Let's get started! Websites that were shown/used during the video: https://www.thingiverse.com/thing:2441251 Thanks to Rohde & Schwarz for sponsoring this video. 0:00 Weird Product Descriptions 0:46 Intro 1:34 IPad LCD & Driver Board 4:21 USB-C Connector 5:55 Long Distance Wireless Charger 8:19 Wire Twister Tool 9:46 Bluetooth Beacon 11:30 Adjustable Power Supply 13:07 Verdict
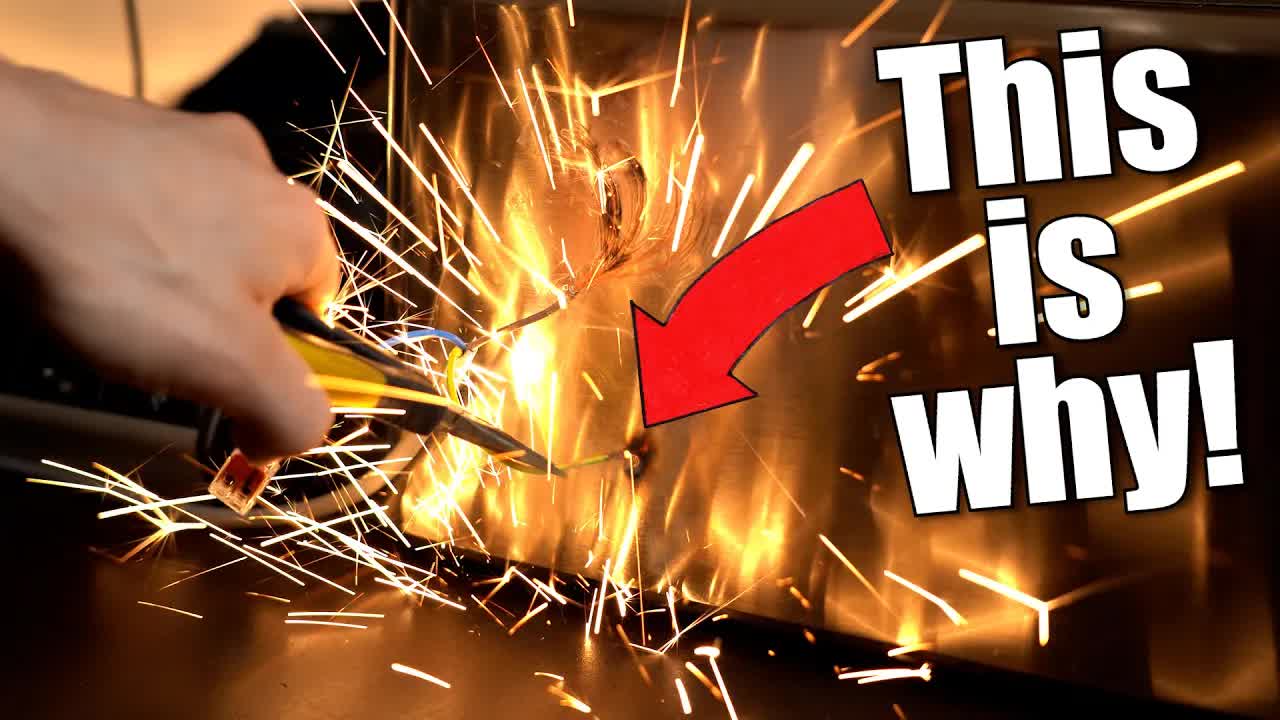
cNPIL7rhKUw | 26 Nov 2023
Get Black Friday Coupons up to $150: https://jlcpcb.com/coupon-center JLCPCB 3D Printing from $0.3: https://jlc3dp.com JLCPCB Mechatronic Parts Save 60%+: https://jlcmc.com Previous video: https://youtu.be/f-mWmhh7i0U Marco Reps Solar Panel video: https://youtu.be/U187LcqjcCI?si=QoMeNlUPe3T8H0je My Solar Panel video: https://youtu.be/KEru5cODA-M Facebook: https://www.facebook.com/greatscottlab Twitter: https://twitter.com/GreatScottLab Instagram: https://www.instagram.com/great.scott.lab/ TikTok: https://www.tiktok.com/@greatscottlab Discord: https://discord.gg/zuAvkAuhsY Support me for more videos: https://www.patreon.com/GreatScott?ty=h In this video we will be having a closer look at ground, earth, soil or however you want to call it. The stuff that is under our feet. In electronics you often hear ground when it comes to lots of different things. So I will do some experiment to show you why ground is super important and how it is getting used. Let's get started! Thanks to JLCPCB for sponsoring this video. Visit https://jlcpcb.com to get professional PCBs for low prices. 0:00 Ground is Awesome, but why so many? 1:22 Intro 2:04 AC Cable with Ground Wire 5:50 Earth Ground (Electrostatic Problem) 9:19 Schematic/PCB Ground 10:17 Verdict

f-mWmhh7i0U | 12 Nov 2023
Try PVCase for free here: https://pvcase.com/GreatScott You can get the most important shown components here: (affiliate links) All the heating pads I tried: https://s.click.aliexpress.com/e/_DkMfIoR https://s.click.aliexpress.com/e/_DDxbBbh https://s.click.aliexpress.com/e/_DlVTkZZ https://s.click.aliexpress.com/e/_DDJsxkx Temperature Controller: https://s.click.aliexpress.com/e/_DDodCTl You can get the rest of the components in your local hardware store. Previous video: https://youtu.be/TpnBQ9bW4K8 Facebook: https://www.facebook.com/greatscottlab Twitter: https://twitter.com/GreatScottLab Instagram: https://www.instagram.com/great.scott.lab/ TikTok: https://www.tiktok.com/@greatscottlab Discord: https://discord.gg/zuAvkAuhsY Support me for more videos: https://www.patreon.com/GreatScott?ty=h In this project I will have to solve a winter problem for the batteries of my PV system. The problem is that those can get only charged up over 5C and in my case they are placed inside a concrete garage that will get colder than that. So I will try to build a very well thermal insulated chamber that I can heat up electrically. I want to keep it save, low power and easy to use. Let's see how it turns out ;-) Thanks to PVCase for sponsoring this video. 0:00 My Winter Problem 1:23 Intro 2:10 How to Create Heat? 4:41 Building the Chamber 8:10 The Control Electronics 8:56 Final Tests & Verdict
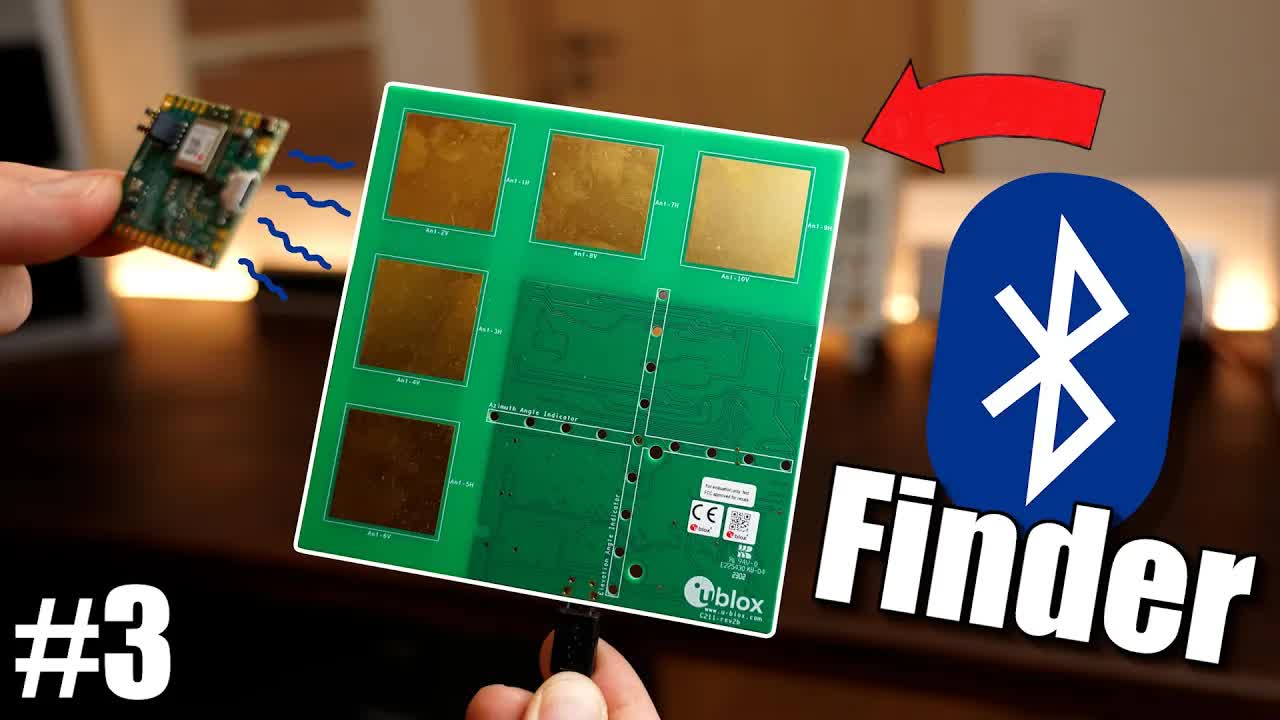
TpnBQ9bW4K8 | 29 Oct 2023
Check out Mouser Electronics here: https://mou.sr/new2023 Mouser Reference Guide for GreatScott! viewers ;-) https://mou.sr/3TYiqSc You can get the shown Dev Boards here: Capacitive Touch Sensor: https://mou.sr/AzoteqIQS231 BLDC Motor Board: https://mou.sr/InfineonBLDCTLE956X Current Sensor: https://mou.sr/CrocusCTD453 Bluetooth Positioning: https://mou.sr/ubloxXPLRAOA2 Try the world's most trusted PCB design software, Altium Designer with 365, for free and 25% off your purchase: https://www.altium.com/yt/greatscott! Check out Altium 365: https://www.altium.com/altium-365 Check out OctoPart: https://octopart.com/ Previous video: https://youtu.be/FtztBE1Zwu8 Facebook: https://www.facebook.com/greatscottlab Twitter: https://twitter.com/GreatScottLab Instagram: https://www.instagram.com/great.scott.lab/ TikTok: https://www.tiktok.com/@greatscottlab Discord: https://discord.gg/zuAvkAuhsY Support me for more videos: https://www.patreon.com/GreatScott?ty=h In this video we will be having a closer look at 4 of the newest ICs out there and their dev boards. ICs are integrated circuits and they can do pretty much anything nowadays. So in this video we will explore some motor controlling, touch sensing, Bluetooth positioning and current measuring ;-) Let's get started! Websites which were shown/used during the video: https://www.mouser.de/datasheet/2/42/Azoteq_3_2_2023_iqs231bev02_quick_start_guide-3106200.pdf https://www.mouser.de/datasheet/2/196/Infineon_BLDC_Shield_TLE956x_UserManual_v01_00_EN-3132122.pdf https://www.infineon.com/dgdl/Infineon-TLE9563-3QX-DataSheet-v01_00-EN.pdf?fileId=5546d4627883d7e00178ca35bade3876 https://motor-system-ic-tle956x.readthedocs.io/en/latest/sw-frmwk/arduino/arduino-api.html https://www.mouser.de/datasheet/2/779/CTD453_User_Guide_Rev0_0-3134990.pdf https://www.u-blox.com/en/product/xplr-aoa-2-kit https://content.u-blox.com/sites/default/files/XPLR-AOA-Explorer-kits_UserGuide_UBX-21004616.pdf https://s.click.aliexpress.com/e/_DF54Bxd Thanks to Mouser Electronics for sponsoring this video. 0:00 Why Dev Boards are AWESOME! 1:13 Intro 1:58 BLDC Motor Controller Board 6:06 Capacitive Touch & Movement Detection Board 8:07 Bluetooth Indoor Positioning System 11:24 Current Measure Sensor 14:00 Verdict
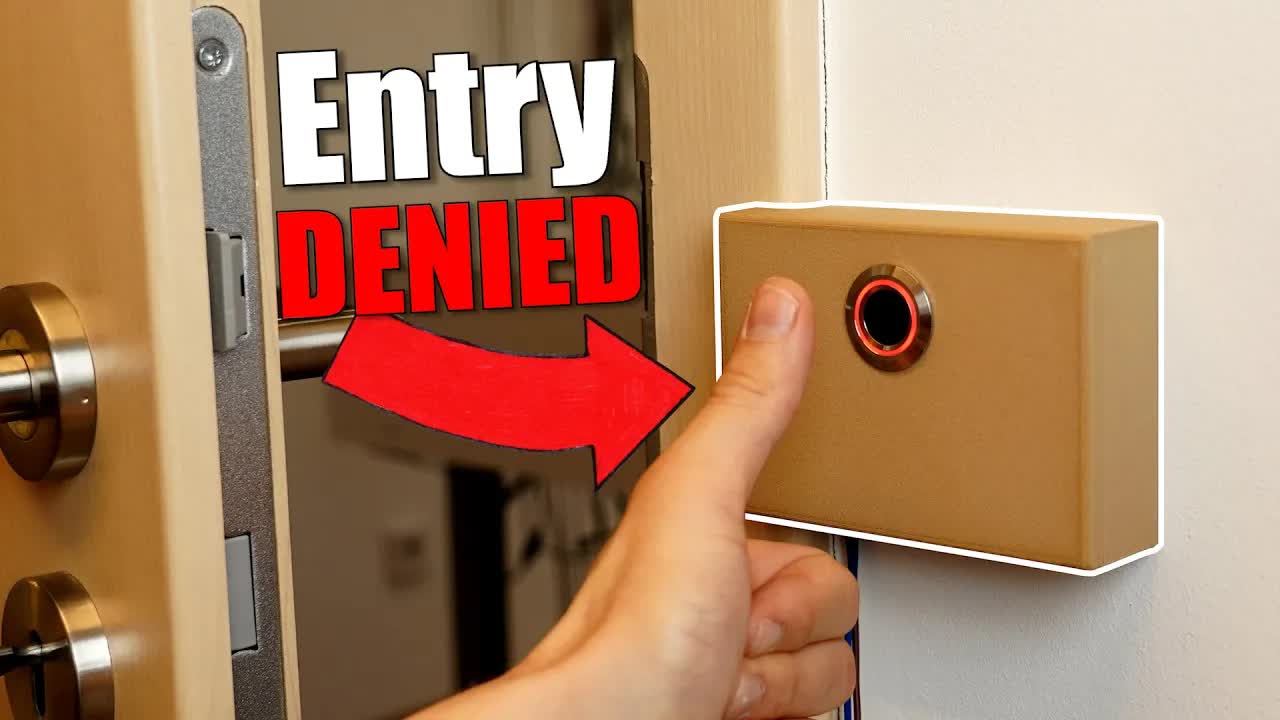
FtztBE1Zwu8 | 15 Oct 2023
Check out Spintronics here: https://upperstory.com/spintronics/?utm_source=YouTube&utm_medium=GreatScott And don't forget to use code GREATSCOTT to get 10% off your total purchase ;-) Try the world's most trusted PCB design software, Altium Designer with 365, for free and 25% off your purchase: https://www.altium.com/yt/greatscott! Check out Altium 365: https://www.altium.com/altium-365 Check out OctoPart: https://octopart.com/ Previous video: https://youtu.be/eIUuXEZtcsw AliExpress Video with Fingerprint Reader: https://youtu.be/1dKLF2Ma8nQ You can get the parts for this project here: (affiliate links): Electric Lock: https://s.click.aliexpress.com/e/_DlNJXLh Arduino Nano: https://s.click.aliexpress.com/e/_DeBK2jl Fingerprint Reader: https://s.click.aliexpress.com/e/_DdkvDkF 5V Regulator: https://s.click.aliexpress.com/e/_DlSy4rl Diode: https://s.click.aliexpress.com/e/_DB5l7z5 Resistors: https://s.click.aliexpress.com/e/_DD6M0XN Capacitors: https://s.click.aliexpress.com/e/_DlENjYL You can download code/schematic/pics for the project here: https://www.patreon.com/posts/fingerprint-door-90326812 Facebook: https://www.facebook.com/greatscottlab Twitter: https://twitter.com/GreatScottLab Instagram: https://www.instagram.com/great.scott.lab/ TikTok: https://www.tiktok.com/@greatscottlab Discord: https://discord.gg/zuAvkAuhsY Support me for more videos: https://www.patreon.com/GreatScott?ty=h In this video I try to create a lock system for the door of my lab/workshop. Commercial solutions do not really do the trick for me. But by combining some available components with custom designs, it should be possible to make an awesome DIY fingerprint reader door lock. So check it out and maybe get inspired to make one for yourself ;-) Let's get started! Thanks to UpperStory for sponsoring this video 0:00 My Lab is UNSAFE! 1:14 Intro 2:20 Trying to Come up with a Solution 3:23 Electric Lock Solution! 4:27 Modifying to make the Lock fit 5:46 Control Circuit 7:39 Enclosure & Mounting 8:32 Door Knob FIX 9:15 Power FIX 9:58 Verdict

eIUuXEZtcsw | 01 Oct 2023
Check out the Photon 2 here: https://part.cl/xfj Use Code GREATSCOTT20 to save 20% on all products in their store ;-) Try the world's most trusted PCB design software, Altium Designer with 365, for free and 25% off your purchase: https://www.altium.com/yt/greatscott! Check out Altium 365: https://www.altium.com/altium-365 Check out OctoPart: https://octopart.com/ Previous video: https://youtu.be/IhnJra0XD4E Check out my previous Coil/Inductor videos: https://youtu.be/kdrP9WbJIb8 https://youtu.be/XCnI6ZOYKes https://youtu.be/hYOtx_2hYTU You can get Colour Ring Inductors here: (affiliate link) https://s.click.aliexpress.com/e/_DBvJ5Ij https://amzn.to/3PPluQu https://amzn.to/3POMCz1 In this episode of Electronic Basics we will be having a closer look at colour ring inductors aka axial inductors. Now I had a kit of them laying around for 10 years now and never used them. So in this video I will put them to the test in order to find out what they are really capable of. That includes different application tests and measurements including saturation current. At the end you will then know whether you should get some as well ;-) Let's get started! Websites that were shown/used during the video: https://vi.aliexpress.com/item/1005005957579800.html https://datasheet.lcsc.com/lcsc/2302231300_FH--Guangdong-Fenghua-Advanced-Tech-LGA0510-102KP52E_C71586.pdf https://datasheet.lcsc.com/lcsc/2201241630_YJYCOIN-YAL0510-6R8K_C2971904.pdf Thanks to Photon for sponsoring this video. 0:00 I ignored this Component 1:28 Intro 1:35 Mini Project with the Photon 2 2:45 Overview of Colour Ring Inductor 3:26 MISSING Properties!! 4:41 Practical Test with Boost Converter 6:08 Main Job of a Coil 6:52 Saturation Current Measurement 9:25 Verdict

IhnJra0XD4E | 17 Sep 2023
Try PVCase for free here: https://pvcase.com/GreatScott Try the world's most trusted PCB design software, Altium Designer with 365, for free and 25% off your purchase: https://www.altium.com/yt/greatscott! Check out Altium 365: https://www.altium.com/altium-365 Check out OctoPart: https://octopart.com/ Previous video: https://youtu.be/KEru5cODA-M Previous Aliexpress video: https://youtu.be/8hKpQvw1nNw LCD GUI video: https://youtu.be/SIo_Gv7K7Fo ATX Power Supply video: https://youtu.be/QoGnOoTICGY Facebook: https://www.facebook.com/greatscottlab Twitter: https://twitter.com/GreatScottLab Instagram: https://www.instagram.com/great.scott.lab/ TikTok: https://www.tiktok.com/@greatscottlab Discord: https://discord.gg/zuAvkAuhsY Support me for more videos: https://www.patreon.com/GreatScott?ty=h You can find the featured products here: (affiliate links): VFD Display: https://s.click.aliexpress.com/e/_DnOYpo3 https://s.click.aliexpress.com/e/_DEvWRRt T-Splitter Connector: https://s.click.aliexpress.com/e/_DEOONVN Solar Panel Multimeter: https://s.click.aliexpress.com/e/_DlQIl7Z Battery Charger/Booster: https://s.click.aliexpress.com/e/_DDopJTD Damaged Screw Extractor: https://s.click.aliexpress.com/e/_DEu53nh ESP32 LCD Board: https://s.click.aliexpress.com/e/_DBNqsgr ATX Power Supply Board: https://s.click.aliexpress.com/e/_DCE1h9H In this video we will be having a closer look at 7 different products I got from Aliexpress. Aliexpress is famous for featuring the newest products/ICs when it comes to electronics but finding those can be a bit difficult. So I tried finding the hidden Gems not only electronics related but in general what I think could be useful. Let's get started! Websites that were shown/used during the video: https://wiki.makerfabs.com/Sunton_ESP32_2.8_inch_240x320_TFT_with_Touch.html https://github.com/topics/esp32-2432s028 Thanks to PVCase for sponsoring this video. 0:00 AliExpress?! 0:40 Intro 0:56 VFD Display 2:48 T-Splitter Connector 5:06 Solar Panel Multimeter 7:15 LiPo Charger/Booster 9:17 Damaged Screw Extractor Drill Bits 10:13 ESP32 LCD Board 11:20 ATX Power Supply Breakout Board 12:59 Verdict
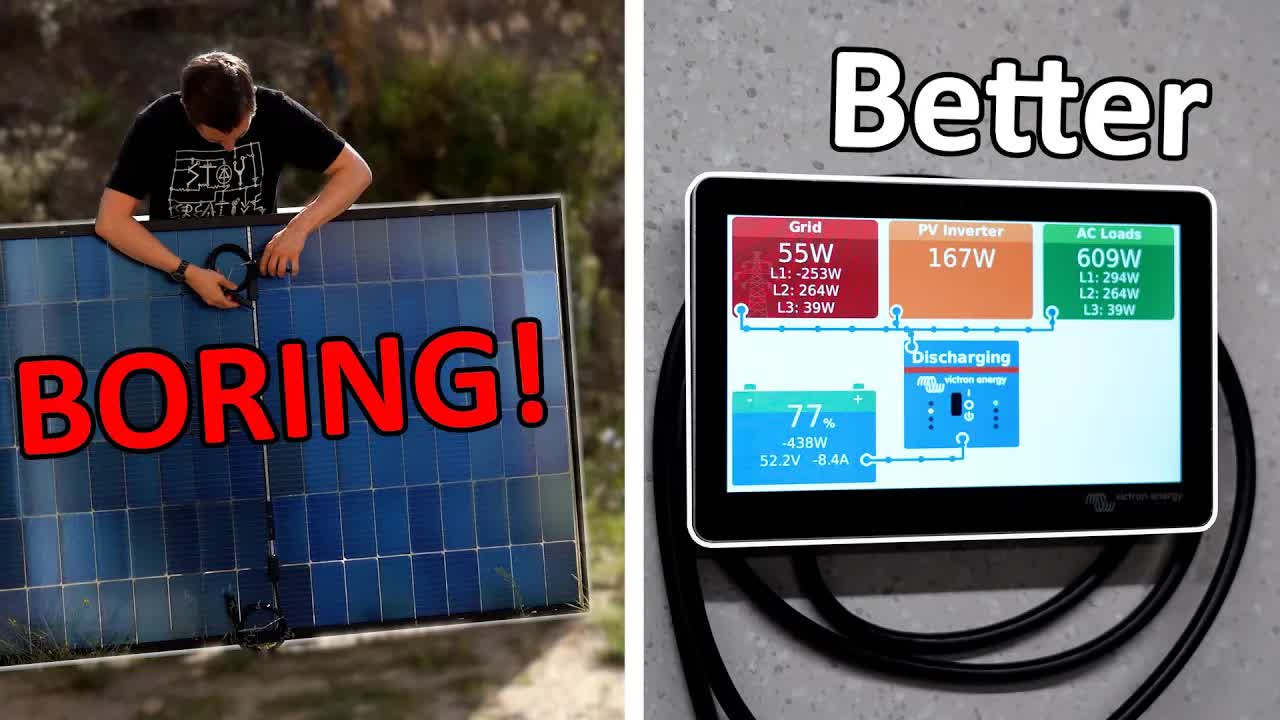
KEru5cODA-M | 03 Sep 2023
Check out Victron Energy here: https://www.victronenergy.com Try the world's most trusted PCB design software, Altium Designer with 365, for free and 25% off your purchase: https://www.altium.com/yt/greatscott! Check out Altium 365: https://www.altium.com/altium-365 Check out OctoPart: https://octopart.com/ Previous video: https://youtu.be/4wAqO5RtuPo Products shown/mentioned in the video: https://www.victronenergy.com/inverters-chargers/multiplus-ii https://www.victronenergy.com/panel-systems-remote-monitoring/cerbo-gx https://www.victronenergy.com/battery-monitors/smart-battery-shunt https://www.victronenergy.com/accessories/energy-meter Facebook: https://www.facebook.com/greatscottlab Twitter: https://twitter.com/GreatScottLab Instagram: https://www.instagram.com/great.scott.lab/ TikTok: https://www.tiktok.com/@greatscottlab Discord: https://discord.gg/zuAvkAuhsY Support me for more videos: https://www.patreon.com/GreatScott?ty=h In this video we will not only have a closer look at mini solar system that everyone can easily use; but we will also push it to its limit ;-) By that I mean I will show you how to create an energy storage system or ESS for short. With it you can use the excess solar power to charge a big battery pack and then use the energy in the batteries to later power your home. This way none of your solar power escapes to the power grid. Let's get started! Thanks to Victron Energy for sponsoring this video 0:00 The Problem with Mini Solar Systems 1:35 Intro 2:13 Installing my Solar System on the roof 4:15 Wiring for the Solar System 6:14 Big Fail! (Solar Panels) 6:54 Energy Storage System (ESS) Explained 7:59 Installing the ESS 9:57 Testing the ESS 11:22 Verdict

4wAqO5RtuPo | 20 Aug 2023
JLCPCB 3D Printing & CNC Machining: https://3d.jlcpcb.com/?from=AAA Get PCB & PCB Assembly Coupons: https://jlcpcb.com/coupon-center Try the world's most trusted PCB design software, Altium Designer with 365, for free and 25% off your purchase: https://www.altium.com/yt/greatscott! Check out Altium 365: https://www.altium.com/altium-365 Check out OctoPart: https://octopart.com/ Previous video: https://youtu.be/iMn2yVoEqPs Garage video: https://youtu.be/wsJONukJlLI Essential Tools video: https://youtu.be/7-djg27lJyQ Essential Components video: https://youtu.be/u4md32GMX28 Products shown mentioned in the video (partly affiliate links): LED Spots: https://amzn.to/45pKzGI LED Spots Dimmer: https://amzn.to/45jJFfe LED Strip Dimmer: https://amzn.to/3QOTygx Warm White LED strip: https://amzn.to/3KGYujB Workbenches: https://www.hornbach.de/shop/Arbeitsplatte-Buche-Natur-massiv-3000x900x40mm/5242258/artikel.html https://www.hornbach.de/shop/Konsta-Latte-Fichte-Tanne-28x48x3000-mm/3393337/artikel.html https://amzn.to/3VAwfGn Big Shelves: https://www.regalraum.com/en/shelving-units/boon-cube-storage-unit.html Label Maker: https://amzn.to/3sdghIF IKEA Shelves: https://www.ikea.com/de/de/p/alex-schubladenelement-auf-rollen-grautuerkis-50483449 PEG Boards: https://www.ikea.com/de/de/p/skadis-lochplatte-holz-90347172 3D Models shown in the video: https://www.printables.com/model/230356-modular-shelving-system-hobby-workshop-small-parts https://www.printables.com/model/313013-wall-mount-for-modular-shelving-system/files https://www.thingiverse.com/thing:5488992 https://www.printables.com/model/300265-ikea-skadis-skadis-hooks https://www.printables.com/model/377627-skadis-porte-cable-skadis-cable-holder https://www.printables.com/model/526443-skadis-skadis-deburring-tool https://www.printables.com/model/352540-tweezers-holder-ikea-skadis-skadis https://www.printables.com/model/165259-skadis-caliper-holder https://www.printables.com/model/113641-skadis-levitating-toolbox https://www.printables.com/model/111116-skadis-file-holder https://www.printables.com/model/511212-skadis-knipex-cutix-cutter-holder Facebook: https://www.facebook.com/greatscottlab Twitter: https://twitter.com/GreatScottLab Instagram: https://www.instagram.com/great.scott.lab/ TikTok: https://www.tiktok.com/@greatscottlab Discord: https://discord.gg/zuAvkAuhsY Support me for more videos: https://www.patreon.com/GreatScott?ty=h Thanks to JLCPCB for sponsoring this video. Visit https://jlcpcb.com to get professional PCBs for low prices. In this video I will show you my new lab/workshop. Finally the house project was finished and it was time to move; but how to set up the new lab? Well, during the last 6 months I prepared it and now turned it into my ideal work space. I want to share with you how exactly I did it so that you might get inspired to improve your own lab/workshop ;-) Let's get started! 0:00 A New Lab/Workshop? 0:59 Intro 1:48 Lighting 3:43 Workbenches 5:13 Storage (3D Printed Wall Cabinets) 8:18 Storage (Big Shelves) 9:34 More Storage Solutions 10:50 Additional Tips 11:23 Verdict
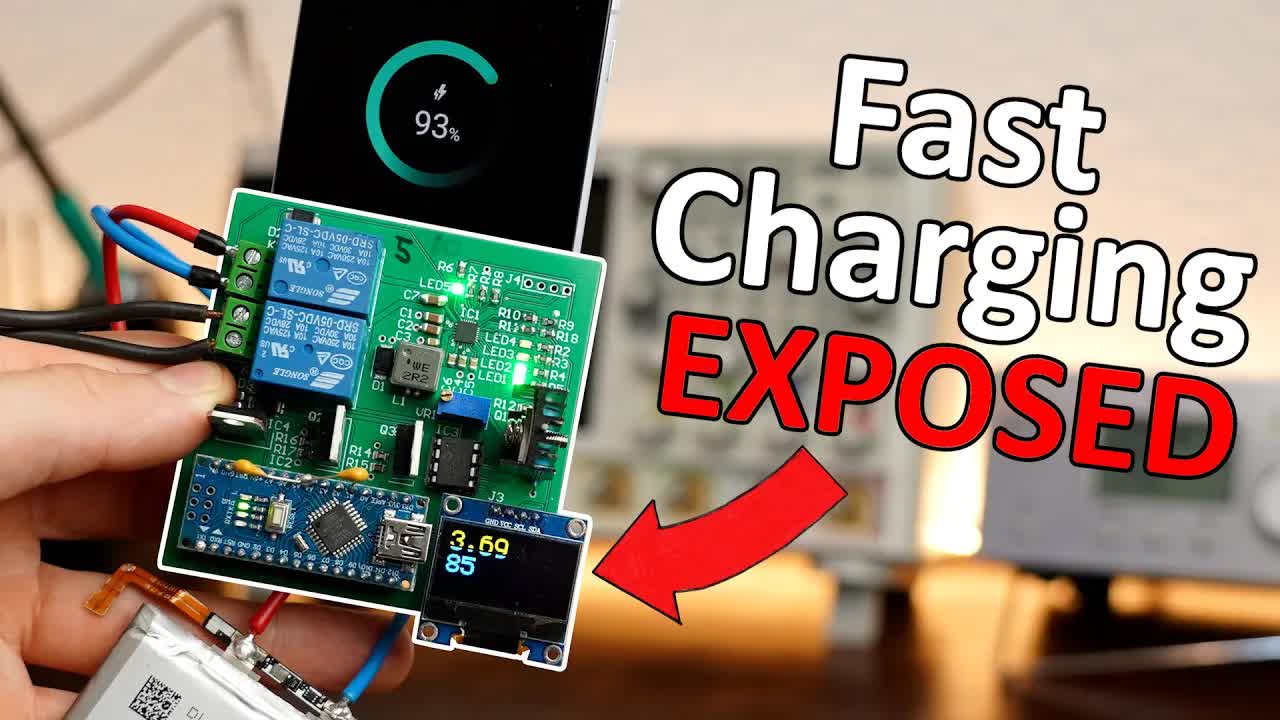
iMn2yVoEqPs | 06 Aug 2023
Get PCB & PCB Assembly Coupons: https://jlcpcb.com/coupon-center Economic CNC Machining Service : https://jlcpcb.com/3d-printing?from=3DP Try the world's most trusted PCB design software, Altium Designer with 365, for free and 25% off your purchase: https://www.altium.com/yt/greatscott! Previous video: https://youtu.be/3gmxv7AgOMw Project files: https://www.patreon.com/posts/86483763 Facebook: https://www.facebook.com/greatscottlab Twitter: https://twitter.com/GreatScottLab Instagram: https://www.instagram.com/great.scott.lab/ TikTok: https://www.tiktok.com/@greatscottlab Discord: https://discord.gg/zuAvkAuhsY Support me for more videos: https://www.patreon.com/GreatScott?ty=h Website which were shown during the video: https://www.monolithicpower.com/en/products/battery-management/chargers/1-series-cell-chargers/mp2639b.html https://www.monolithicpower.com/en/documentview/productdocument/index/version/2/document_type/Datasheet/lang/en/sku/MP2639B/ https://www.monolithicpower.com/en/ev2639b-r-00a.html https://www.monolithicpower.com/en/documentview/productdocument/index/version/2/document_type/Datasheet/lang/en/sku/EV2639B-R-00A/document_id/4851/ In this video we will be having a closer look at super fast charging that your phone can do. In this mode your phones battery gets charged up with 5A of current that makes it possible to fully charge it up in one hour. Normally your phone charges with 1A and that got me thinking how much your battery suffers during such super fast charging. So I spent way too much time making a testing circuit and then super fast charging batteries 100 times to find out whether there really is a difference noticeable ;-) Let's get started! Thanks to JLCPCB for sponsoring this video. Visit https://jlcpcb.com to get professional PCBs for low prices. Thanks to Altium for sponsoring this video. 0:00 Fast Charging is BAD? 1:16 Intro 1:40 My Testing System! 3:04 Discharge Circuit 4:27 Charge Circuit (5A 4.35V?) 6:05 Designing the PCB 7:33 Testing the First PCB 8:42 Full Experiment (5 Batteries/100 cycles) 10:38 Results

3gmxv7AgOMw | 23 Jul 2023
Free 6-8 Layer PCBs via Coupon (50*50mm): https://jlcpcb.com/AAA Get more Coupons: https://jlcpcb.com/coupon-center Try the world's most trusted PCB design software, Altium Designer with 365, for free and 25% off your purchase: https://www.altium.com/yt/greatscott! Previous video: https://youtu.be/czz16DFYbxI Lithium Ion Capacitor video: https://youtu.be/XlON0Uj2Zk0 Facebook: https://www.facebook.com/greatscottlab Twitter: https://twitter.com/GreatScottLab Instagram: https://www.instagram.com/great.scott.lab/ TikTok: https://www.tiktok.com/@greatscottlab Discord: https://discord.gg/zuAvkAuhsY Support me for more videos: https://www.patreon.com/GreatScott?ty=h Website which were shown during the video: https://www.asitaly.it/index.html In this video we will be having a closer look at a Graphene Super Capacitor I found on Ebay. According to its specs it should be able to replace lithium batteries which would be a huge step for energy storage solutions! So the question is whether the Graphene Super Capacitor is real. So in this video we will be doing some tests to find that out and learn about Graphene ;-) Let's get started! Thanks to JLCPCB for sponsoring this video. Visit https://jlcpcb.com to get professional PCBs for low prices. 0:00 Graphene Super Capacitor? 1:38 Intro 2:19 What is Graphene? 3:12 How does a Super Capacitor work? 5:06 Lithium Battery VS Super Capacitor 6:28 Closer Look at Graphene SuperCap 7:30 Is it Real? Discharge Curve 9:24 Is it Real? Hammering a Nail through it ;-) 10:10 Verdict

czz16DFYbxI | 09 Jul 2023
Check out the RF Webinar here: https://shorturl.at/wDJRT Try the world's most trusted PCB design software, Altium Designer with 365, for free and 25% off your purchase: https://www.altium.com/yt/greatscott! Previous video: https://youtu.be/SbIISdLQQKo Previous Vacuum OVERPOWER video: https://youtu.be/YNqGA-U0_MA Rctestflight video: https://youtu.be/mafjVYfFgg4 Facebook: https://www.facebook.com/greatscottlab Twitter: https://twitter.com/GreatScottLab Instagram: https://www.instagram.com/great.scott.lab/ TikTok: https://www.tiktok.com/@greatscottlab Discord: https://discord.gg/zuAvkAuhsY Support me for more videos: https://www.patreon.com/GreatScott?ty=h You can get the shown components and impeller files here: (affiliate links) Impeller Designs: https://www.patreon.com/posts/85244104?pr=true BLDC Motor: https://s.click.aliexpress.com/e/_DdQ6ahT FSESC: https://s.click.aliexpress.com/e/_Ddiqsp7 In this video I will try to OVERPOWER my Vacuum Cleaner one last time with the help of one of my viewers. He designed better impeller models and in combination with a new BLDC motor and driver, we want to find out whether we can beat the original design. So come along as I test static pressure, air flow and run into lots of problems during this last attempt. Let's get started! Thanks to Rohde & Schwarz for sponsoring this video. 0:00 DIY Vacuum Impeller got Destroyed! 1:12 Intro 1:57 Measuring Static Pressure of DC Motor 3:22 Old DIY Impeller Design Static Pressure 5:35 NEW DIY Impeller Designs 8:04 Practical Vacuuming Test + PROBLEMS 10:03 Verdict
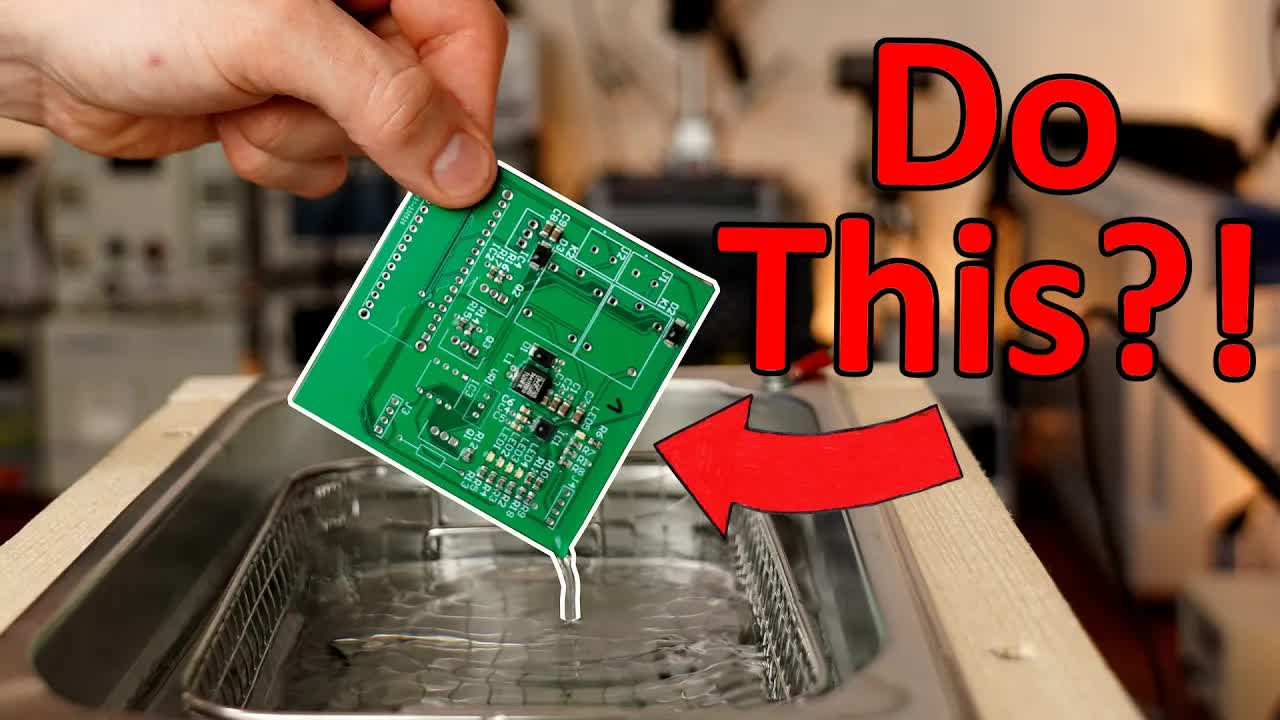
SbIISdLQQKo | 25 Jun 2023
Check out the KNIPEX App here: https://www.knipex.de/app Try the world's most trusted PCB design software, Altium Designer with 365, for free and 25% off your purchase: https://www.altium.com/yt/greatscott! Previous video: https://youtu.be/8hKpQvw1nNw Electronics & Water video: https://youtu.be/pGLUsQozT94 Facebook: https://www.facebook.com/greatscottlab Twitter: https://twitter.com/GreatScottLab Instagram: https://www.instagram.com/great.scott.lab/ TikTok: https://www.tiktok.com/@greatscottlab Discord: https://discord.gg/zuAvkAuhsY Support me for more videos: https://www.patreon.com/GreatScott?ty=h You can find the featured products here: (affiliate links): Buy Version: Amazon.com: https://amzn.to/3qLShvy Amazon.de: https://amzn.to/3Cxg0lN DIY Kit: https://s.click.aliexpress.com/e/_DFldCsN In this episode of DIY or Buy I will be having a closer look at a commercial Ultrasonic Cleaner and then also build my own DIY version. While doing so I will find out how they work, what they can clean, whether they are suitable for PCB cleaning and ultimately decide whether you should DIY one or Buy one ;-) Let's get started! Websites that were shown/used during the video: https://www.pcb-soldering.co.uk/flux-remover-and-pcb-ultrasonic-cleaner-solution-5-litre-cleaning-fluid Thanks to KNIPEX for sponsoring this video. 0:00 I HATE Cleaning! 1:44 Intro 2:37 First Look at Buy version 3:13 How does it Work? 4:37 Aluminum Foil Test 5:14 Basic Cleaning Tests 6:11 PCB Cleaning Tests 8:01 Buy Verdict 8:37 Building a DIY version 10:52 Testing the DIY version 11:29 Verdict
8hKpQvw1nNw | 11 Jun 2023
Check out Keysight World Innovate: https://keysig.ht/INml2j Try the world's most trusted PCB design software, Altium Designer with 365, for free and 25% off your purchase: https://www.altium.com/yt/greatscott! Previous video: https://youtu.be/YNqGA-U0_MA Previous Aliexpress video: https://youtu.be/NjNOGm3sCOQ Facebook: https://www.facebook.com/greatscottlab Twitter: https://twitter.com/GreatScottLab Instagram: https://www.instagram.com/great.scott.lab/ TikTok: https://www.tiktok.com/@greatscottlab Discord: https://discord.gg/zuAvkAuhsY Support me for more videos: https://www.patreon.com/GreatScott?ty=h You can find the featured products here: (affiliate links): Face Recognition Module: https://s.click.aliexpress.com/e/_DdSr937 Hot Plate: https://s.click.aliexpress.com/e/_DnSKSbn Rosin Dispenser: https://s.click.aliexpress.com/e/_Dc8COGh Magnetic USB Cables: https://s.click.aliexpress.com/e/_DD5O7KZ TPS Buck Boost Board: https://s.click.aliexpress.com/e/_DktBVXb Voice Synthesis Module: https://s.click.aliexpress.com/e/_DCioPJj In this video we will be having a closer look at 6 different products I got from Aliexpress. Aliexpress is famous for featuring the newest products/ICs when it comes to electronics but finding those can be a bit difficult. So I tried finding the hidden Gems not only electronics related but in general what I think could be useful. Let's get started! Websites that were shown/used during the video: http://h.hlktech.com/download/HLK-V40/1/HLK-V40%E8%AF%B4%E6%98%8E%E4%B9%A6_V1.03.pdf https://www.hlktech.com/en/Goods-218.html https://blakadder.com/hlk-tx510/ https://github.com/Chreece/FaceRec_ESPHome https://www.ti.com/lit/ds/symlink/tps63020.pdf Thanks to Keysight for sponsoring this video. 0:00 AliExpress Products?! 0:40 Intro 1:27 Face Recognition Module 4:00 Hot Plate 5:20 Rosin Dispenser 7:19 Magnetic USB Cable 9:24 TPS Buck Boost Board 12:23 Voice Synthesis Module 13:33 Verdict

YNqGA-U0_MA | 28 May 2023
Check out my element14 blog post here: https://community.element14.com/challenges-projects/element14-presents/b/blog/posts/overpowering-my-vacuum-cleaner-so-that-i-do-not-have-to-throw-it-away Try the world's most trusted PCB design software, Altium Designer with 365, for free and 25% off your purchase: https://www.altium.com/yt/greatscott! Previous video: https://youtu.be/6bicunweBAQ Rctestflight video: https://youtu.be/mafjVYfFgg4 Centrifugal Impeller Design video: https://youtu.be/6fzP92C6VJg Facebook: https://www.facebook.com/greatscottlab Twitter: https://twitter.com/GreatScottLab Instagram: https://www.instagram.com/great.scott.lab/ TikTok: https://www.tiktok.com/@greatscottlab Discord: https://discord.gg/zuAvkAuhsY Support me for more videos: https://www.patreon.com/GreatScott?ty=h Websites which were shown during the video: https://www.thingiverse.com/thing:590416 https://www.dosomething.org/us/facts/11-facts-about-e-waste#:~:text=E-waste%20represents%202%25%20of,are%20disposed%20worldwide%20every%20year. https://www.polymershapes.com/product/abs/#:~:text=ABS%20(Acrylonitrile%20Butadiene%20Styrene)%20is,ease%20of%20fabrication%20and%20thermoforming. In this video I will try to overpower my old vacuum cleaner. The problem is that its internal battery pack gave up and the suction power of the motor also somehow decreased. So in this video I will try to 3D print my own turbine/impeller and combine that with a BLDC motor in order to renew my old vacuum cleaner so that I do not have to throw it in the garbage. Let's get started! Thanks to element14 for sponsoring this video. 0:00 The Problem of my Old Vacuum Cleaner 1:22 Intro 1:57 Suction Power of my Old Vacuum 2:33 Choosing a Motor/ESC 4:48 First Turbine Prototype 6:15 Second Turbine Prototype 7:24 BIG PROBLEMS! 9:31 Successful Test! 9:52 Final Assembly & Testing
6bicunweBAQ | 14 May 2023
Sign up for Keysight Live from the Lab here: https://www.keysight.com/us/en/events/keysight-world/live-from-the-lab-greatscott.html Try the world's most trusted PCB design software, Altium Designer with 365, for free and 25% off your purchase: https://www.altium.com/yt/greatscott! Previous video: https://youtu.be/OWEU1eR3Tyw AliExpress video: https://youtu.be/NjNOGm3sCOQ Capacitor video: https://youtu.be/2v8zBj7_sxg Inductor video: https://youtu.be/hYOtx_2hYTU Filter video: https://youtu.be/1wzUqVFyQ7o You can get the mentioned products and capacitors here: (affiliate links) Power Supply: https://s.click.aliexpress.com/e/_DmzJv9f 5V UPS: https://s.click.aliexpress.com/e/_DcQteFr Mini Boost Converter: https://s.click.aliexpress.com/e/_DCwYdwh Capacitors: https://www.mouser.de/ProductDetail/Samsung-Electro-Mechanics/CL32A226KPJNNNE?qs=sGAEpiMZZMukHu%252BjC5l7YYSaqHT4BB0iHXlLVxBE%2FL8%3D https://www.mouser.de/ProductDetail/Samsung-Electro-Mechanics/CL31B105KAHNFNE?qs=h6Piwd%2FnvzliA%252BKuhKdPjw%3D%3D Facebook: https://www.facebook.com/greatscottlab Twitter: https://twitter.com/GreatScottLab Instagram: https://www.instagram.com/great.scott.lab/ TikTok: https://www.tiktok.com/@greatscottlab Discord: https://discord.gg/zuAvkAuhsY Support me for more videos: https://www.patreon.com/GreatScott?ty=h Websites which were shown during the video: https://www.prodigit.com/show/how-to-test-noise-from-the-output-of-power-supply.htm https://www.meanwelldirect.co.uk/glossary/what-is-output-noise/ https://cdn.hackaday.io/files/1829407826904960/Xysemi_XR2981.pdf https://www.ti.com/lit/an/snva871/snva871.pdf?ts=1682880670833&ref_url=https%253A%252F%252Fwww.google.com%252F https://www.ti.com/seclit/ml/slup384/slup384.pdf Thanks to Keysight for sponsoring this video. 0:00 The Problem of my AliExpress Products 1:16 Intro 2:04 Why is Noise/Ripple Bad? 3:39 How to Measure Noise Correctly 4:32 5V UPS Noise Problem 5:46 Solution 1: Post Regulation 7:51 Solution 2: Component Improvement 8:39 Capacitor Replacement 9:55 Other Component Problems 10:49 Mini Boost Converter Fix
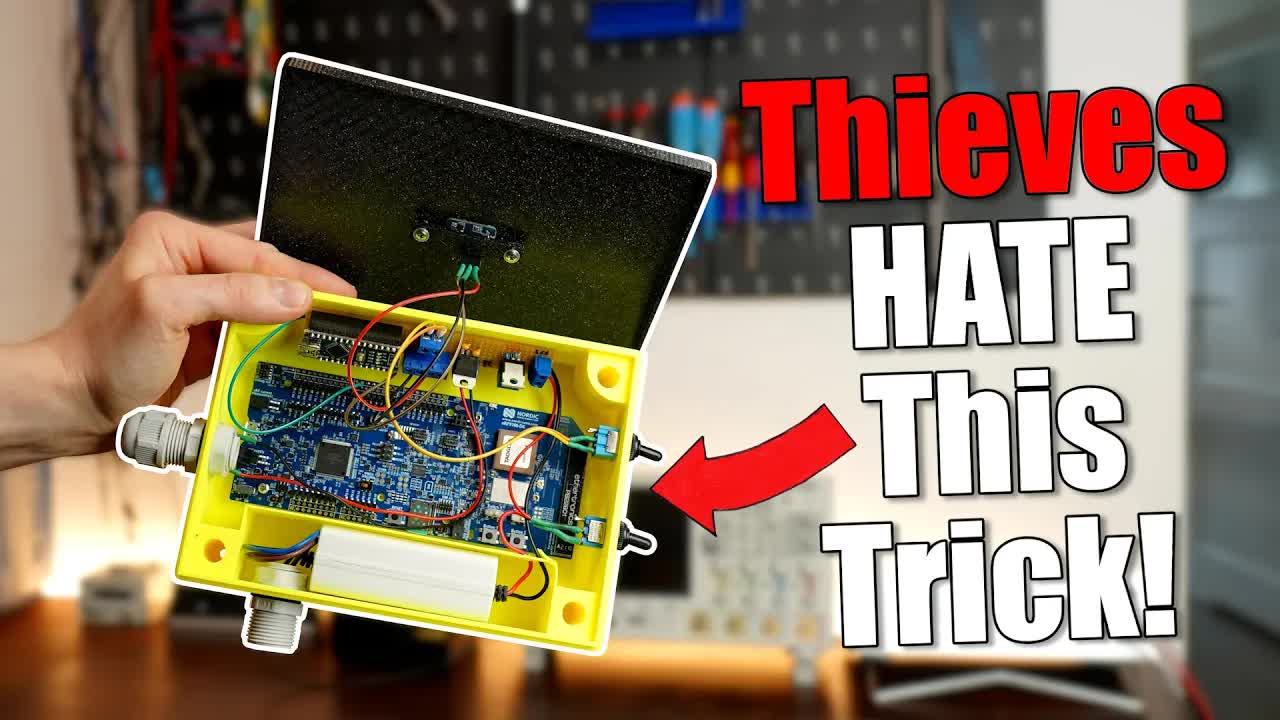
OWEU1eR3Tyw | 30 Apr 2023
Check out Nordic Semiconductor: https://www.nordicsemi.com/ Try the world's most trusted PCB design software, Altium Designer with 365, for free and 25% off your purchase: https://www.altium.com/yt/greatscott! Previous video: https://youtu.be/yUMbE_TQrQs Old 2G SMS Alarm System video: https://youtu.be/pvHIV0bNRe4 More project information here: https://www.patreon.com/posts/4g-alarm-system-82175117 Parts list (affiliate links): nRF9160: https://www.mouser.de/new/nordic-semiconductor/nordic-semiconductor-nrf9160-kit/ Arduino Nano: https://s.click.aliexpress.com/e/_Dl59iTL 12V Power Supply: https://s.click.aliexpress.com/e/_Dd6gQFb 5V Voltage Regulator: https://s.click.aliexpress.com/e/_DeFaDpT Capacitors: https://s.click.aliexpress.com/e/_DmP5c7T Radar Human Presence Sensor: https://s.click.aliexpress.com/e/_Dma2WFj Resistors: https://s.click.aliexpress.com/e/_DlnYFM1 IRLZ34N MOSFET: https://s.click.aliexpress.com/e/_DET7GnL BC547 NPN BJT: https://s.click.aliexpress.com/e/_DDvae7b Facebook: https://www.facebook.com/greatscottlab Twitter: https://twitter.com/GreatScottLab Instagram: https://www.instagram.com/great.scott.lab/ TikTok: https://www.tiktok.com/@greatscottlab Discord: https://discord.gg/zuAvkAuhsY Support me for more videos: https://www.patreon.com/GreatScott?ty=h Websites which were shown during the video: https://www.nordicsemi.com/Products/Development-hardware/nrf9160-dk https://academy.nordicsemi.com/lessons/lesson-1-nrf-connect-sdk-introduction/ https://academy.nordicsemi.com/lessons/lesson-1-cellular-fundamentals/ https://ibasis.com/solutions/iot-connectivity/network-coverage/ https://devzone.nordicsemi.com/nordic/nordic-blog/b/blog/posts/implementing-mqtt-over-wi-fi-on-the-nrf7002-development-kit#mcetoc_1goojt89i2 https://academy.nordicsemi.com/topic/lesson-4-exercise-1/ https://www.eaton.com/content/dam/eaton/products/safety-security-emergency-communications/fire/fulleon/rolp-solista-and-maxi/en/eaton-fire-devices-rolp-solista-manual-en-fr-pl-de-it-nl-es-se.pdf https://enqt.de/en/news/2g-shutdown-when-is-it-coming-and-what-will-be-the-impact/ https://www.nordicsemi.com/Products/Low-power-cellular-IoT/What-is-cellular-IoT In this project we will be using the 4G LTE Network and a Radar Human Presence sensor to create a new and modern alarm system. Due to the 4G Network and LTE-M you can send alarm notifications super fast to your phone, while it costs you pretty much nothing. Combine that with a precise radar and loud siren and you got yourself an awesome alarm system that will protect your treasures ;-) Let's get started! Thanks to Nordic Semiconductor for sponsoring this video. 0:00 The Problem with Thieves! 1:17 Intro 1:54 Game Plan! 2:31 Siren 3:15 Radar Human Presence Sensor 5:53 LTE 4G Board 8:58 Using the Radar with the 4G Board 9:50 Final Prototype & Testing 11:19 Verdict

yUMbE_TQrQs | 23 Apr 2023
$2 for 5 Rigid PCBs. $25 for 5 Flex PCBs: https://jlcpcb.com/AAA How to get $7 coupon at JLCPCB 3D models site : https://3d.jlcpcb.com Try the world's most trusted PCB design software, Altium Designer with 365, for free and 25% off your purchase: https://www.altium.com/yt/greatscott! Previous video: https://youtu.be/NjNOGm3sCOQ Robotics Kanti video: https://youtu.be/GyTGXrL5Vas Facebook: https://www.facebook.com/greatscottlab Twitter: https://twitter.com/GreatScottLab Instagram: https://www.instagram.com/great.scott.lab/ TikTok: https://www.tiktok.com/@greatscottlab Discord: https://discord.gg/zuAvkAuhsY Support me for more videos: https://www.patreon.com/GreatScott?ty=h Websites which were shown during the video: https://www.roboticskanti.com/post/laser-display https://www.infineon.com/dgdl/Infineon-IRFZ44N-DataSheet-v01_01-EN.pdf?fileId=5546d462533600a40153563b3a9f220d https://www.flyrobo.in/0.1mm-copper-soldering-solder-ppa-enameled-wire In this video we will be having a look at one of the worst fake electronics project videos I have ever seen. Now the original video itself is "well" faked, but the project itself comes with so many mistakes and things that do not make any sense, it is kind of embarrassing. So sit back and let me show you why this laser diode display project will never work and whether we can make it real ;-) Let's get started! Thanks to JLCPCB for sponsoring this video. Visit https://jlcpcb.com to get professional PCBs for low prices. 0:00 This Project is FAKE! 1:38 Intro 2:24 Building the Original Project 5:31 Testing the Original Project 6:16 Finding more Mistakes! 8:27 Making my own Real Version 10:30 Verdict

NjNOGm3sCOQ | 16 Apr 2023
Check out Rohde & Schwarz: https://www.shorturl.at/iLMNO Try the world's most trusted PCB design software, Altium Designer with 365, for free and 25% off your purchase: https://www.altium.com/yt/greatscott! Previous video: https://youtu.be/U5cqrrhq9TA Previous Aliexpress video: https://youtu.be/1dKLF2Ma8nQ Facebook: https://www.facebook.com/greatscottlab Twitter: https://twitter.com/GreatScottLab Instagram: https://www.instagram.com/great.scott.lab/ TikTok: https://www.tiktok.com/@greatscottlab Discord: https://discord.gg/zuAvkAuhsY Support me for more videos: https://www.patreon.com/GreatScott?ty=h You can find the featured products here: (affiliate links) (Better) LED Strip: https://s.click.aliexpress.com/e/_DeYv6Vx Heat Shrink Wire Connectors: https://s.click.aliexpress.com/e/_DCbAR05 5V Fan: https://s.click.aliexpress.com/e/_DC4kkup Wire Strippers: https://s.click.aliexpress.com/e/_DD0X7Df 5V/12V UPS: https://s.click.aliexpress.com/e/_DE26gUZ Buck Power Supply: https://s.click.aliexpress.com/e/_DloTat3 In this video we will be having a closer look at 8 different products I got from Aliexpress. Aliexpress is famous for featuring the newest products/ICs when it comes to electronics but finding those can be a bit difficult. So I tried finding the hidden Gems not only electronics related but in general what I think could be useful. Let's get started! Thanks to Rohde & Schwarz for sponsoring this video. 0:00 Intro 1:37 COB LED Strip 4:17 Heat Shrink Wire Connectors 6:08 5V Fan (Fume Extractor) 7:05 Wire Strippers 8:49 5V/12V UPS 10:43 Lab Bench Power Supply 12:42 Verdict

U5cqrrhq9TA | 02 Apr 2023
Check out Mouser Electronics here: https://mou.sr/new2023 Mouser Reference Guide for GreatScott! viewers ;-) : https://mou.sr/GreatScott-Reference-Guide Try the world's most trusted PCB design software, Altium Designer with 365, for free and 25% off your purchase: https://www.altium.com/yt/greatscott! Previous video: https://youtu.be/2SWj49ugr3A Inductor video: https://youtu.be/kdrP9WbJIb8 Capacitor video: https://youtu.be/otQGdPLyF3w Impedance video: https://youtu.be/W2VwAL7-8-o Power video: https://youtu.be/cxXmWZDwNEs PFC IC/Development board from Mouser: https://mou.sr/IFX-PFC https://mou.sr/IFX-PMIC-O1 Facebook: https://www.facebook.com/greatscottlab Twitter: https://twitter.com/GreatScottLab Instagram: https://www.instagram.com/great.scott.lab/ TikTok: https://www.tiktok.com/@greatscottlab Support me for more videos: https://www.patreon.com/GreatScott?ty=h In this episode of Electronics Basics, we will be having a closer look at Power Factor Correction Circuits aka PFCs. It sounds like a boring topic but it is super important for the electrical future of our power grid. Along the way we will find out about current waveforms, phase shifts, current harmonics and what passive and active PFCs are and can do. Let's get started! Websites which were shown/used during the video: https://www.mouser.de/ProductDetail/726-EVALPFC2ICE2PCS0 https://www.mouser.de/ProductDetail/726-ICE2PCS01GXUMA1 https://www.infineon.com/dgdl/Infineon-ICE2PCS03-DS-v02_01-en.pdf?fileId=db3a30431936bc4b01193b45457e52a1 https://www.ti.com/seclit/ml/slup390/slup390.pdf?ts=1636232123558&ref_url=https%253A%252F%252Ftraining.ti.com%252F#:~:text=A%20power%20factor%20correction%20(PFC,provides%20benefits%20in%20end%20applications. https://en.wikipedia.org/wiki/IEC_61000-3-2 https://www.jezzamon.com/fourier/ Thanks to Mouser Electronics for sponsoring this video. 0:00 The Big Problem of our Devices! 1:47 Intro 2:29 What kind of Power is Bad? 4:00 Passive PFC Usage! 5:35 Why Active PFC? 7:39 Testing of Active PFC! 9:18 How does Active PFC work? 10:45 Verdict

2SWj49ugr3A | 19 Mar 2023
Check out Keysight's 20 Minute Oscilloscope Guide: https://keysig.ht/mOQFAg Try the world's most trusted PCB design software, Altium Designer with 365, for free and 25% off your purchase: https://www.altium.com/yt/greatscott! Previous video: https://youtu.be/gm_3yxdFfd8 BLDC Motor video: https://youtu.be/W9IHEqlGG1s The MIT App Inventor Tutorial video: https://youtu.be/aM2ktMKAunw Facebook: https://www.facebook.com/greatscottlab Twitter: https://twitter.com/GreatScottLab Instagram: https://www.instagram.com/great.scott.lab/ TikTok: https://www.tiktok.com/@greatscottlab Support me for more videos: https://www.patreon.com/GreatScott?ty=h In this video I will try to manually control my robot vacuum. The problem is that sometimes my robot vacuum loses the ability to move one of its wheels which can be annoying because there is usually only one small spot left to clean. So let's see how easy it is to "hack" such a robot so that I can control it directly without using the manufacturers app. Let's get started! Thanks to Keysight for sponsoring this video. 0:00 The Problem with my Robot Vacuum 1:09 Intro 1:55 Taking the Robot apart 3:13 Theory of Adding Custom Control 3:30 Battery Pack 4:17 Wheel DC Motors 5:31 Vacuum BLDC Motor 8:05 Final Custom Control Hardware/Software 9:28 Fun Testing 9:51 Aborting this "Hack"

gm_3yxdFfd8 | 05 Mar 2023
1-8 Layers PCBs for $2. Flexible PCB coming soon: https://jlcpcb.com/AAA Try the world's most trusted PCB design software, Altium Designer with 365, for free and 25% off your purchase: https://www.altium.com/yt/greatscott! Previous video: https://youtu.be/sF0KOVWj9p8 555 Timer video: https://youtu.be/fLaexx-NMj8 The video that was sent to me: https://www.youtube.com/watch?v=i_yFhI1JRDM Facebook: https://www.facebook.com/greatscottlab Twitter: https://twitter.com/GreatScottLab Instagram: https://www.instagram.com/great.scott.lab/ Support me for more videos: https://www.patreon.com/GreatScott?ty=h Websites which were shown/used during the video: https://cdn.hackaday.io/files/257411101302944/batt%20desulfator.pdf https://thesai.org/Downloads/Volume8No7/Paper_72-Impact_of_Pulse_Voltage_as_Desulfator.pdf In this video we will be having a closer look at Desulfator circuits. A while ago a viewer sent me a link to a YouTube video in which someone made his own DIY design that he then used to "revive" and old lead acid battery. By doing that the original capacity of the battery got restored. That sounds too good to be true. So I made my own design, did tests for more than 30 days and ultimately decided whether all of this is fake or real. Let's get started! Thanks to JLCPCB for sponsoring this video. Visit https://jlcpcb.com to get professional PCBs for low prices. Thanks to Altium for sponsoring this video. 0:00 The Suspicious YouTube video 1:22 Intro 1:43 Desulfator Basics 2:59 My Car Battery is Done for 3:56 Testing my 2 Lead Acid Batteries 4:44 How does the Circuit from the Video function? 6:19 Testing the Circuit from the Video 7:03 My own (better) Desulfator Circuit 9:35 30 Day Test with my DIY Design 10:11 14 Day Test with Commercial Desulfators 10:44 Verdict
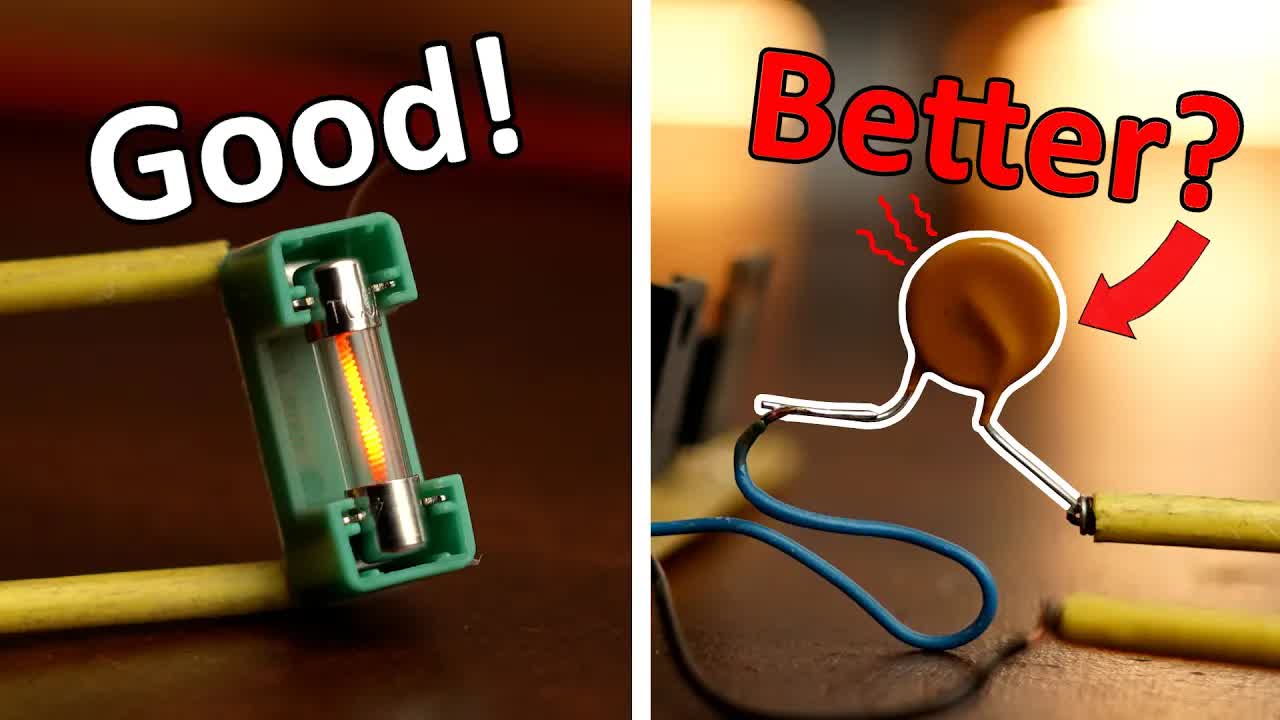
sF0KOVWj9p8 | 26 Feb 2023
Check out Mouser Electronics here: https://mou.sr/new2023 PPTC Fuses from Mouser Electronics: https://mou.sr/resettable-fuses-pptc Try the world's most trusted PCB design software, Altium Designer with 365, for free and 25% off your purchase: https://www.altium.com/yt/greatscott! Previous video: https://youtu.be/1dKLF2Ma8nQ eFuse Video: https://youtu.be/JOhQ3nsR7xo You can buy the shown resettable fuses here: https://mou.sr/BournsMFR050 https://mou.sr/BournsMFR090 Facebook: https://www.facebook.com/greatscottlab Twitter: https://twitter.com/GreatScottLab Instagram: https://www.instagram.com/great.scott.lab/ Support me for more videos: https://www.patreon.com/GreatScott?ty=h In this Electronics Basics episode we will be having a closer look at resettable fuses which I feel like not too many people know about. Traditional glass fuses are super popular and they basically "destroy" themselves when an overcurrent is flowing. Works perfectly fine, but that means you need to replace them and that can be a problem sometimes. Resettable Fuses do not have this problem, but they come with their own unique advantages and challenges. Let's find out more ;-) Websites which were shown/used during the video: https://www.mouser.de/datasheet/2/54/mf_r-777680.pdf https://www.mouser.com/pdfDocs/eaton-ptc-resettable-fuse-application-guidelines-4.pdf Thanks to Mouser Electronics for sponsoring this video. 0:00 Fuses are Important! 1:30 Intro 2:25 Resettable Fuses & Heat 3:39 How to Select one 5:14 Test Setup & Experiment (Trip) 7:56 Applications 8:23 Leakage Current & Power Losses 10:27 Verdict Resettable Fuse 10:45 Resettable Fuse VS Glass Fuse VS eFuse

1dKLF2Ma8nQ | 19 Feb 2023
Sign up for Keysight Live from the Lab here: https://go.keysight.com/greatscott Try the world's most trusted PCB design software, Altium Designer with 365, for free and 25% off your purchase: https://www.altium.com/yt/greatscott! Previous video: https://youtu.be/mbLQPuLR0Rs Previous Aliexpress video: https://youtu.be/7sGN0-YsiYw ElectroBoom USB Killer video: https://youtu.be/y_bbX_Ch1Z8 Facebook: https://www.facebook.com/greatscottlab Twitter: https://twitter.com/GreatScottLab Instagram: https://www.instagram.com/great.scott.lab/ Support me for more videos: https://www.patreon.com/GreatScott?ty=h You can find the featured products here: (affiliate links) USB Isolator: https://s.click.aliexpress.com/e/_DCMuYvb Heated Gloves: https://s.click.aliexpress.com/e/_DCT6nOp Heated Socks: https://s.click.aliexpress.com/e/_DCz1dCV Human Presence Radar: https://s.click.aliexpress.com/e/_DenBi3r WiFi Relay: https://s.click.aliexpress.com/e/_DElV6Jf Fingerprint Reader: https://s.click.aliexpress.com/e/_DeYuHjT In this video we will be having a closer look at 6 different products I got from Aliexpress. Aliexpress is famous for featuring the newest products/ICs when it comes to electronics but finding those can be a bit difficult. So I tried finding the hidden Gems not only electronics related but in general what I think could be useful. Let's get started! Websites which were shown/used during the video: https://www.analog.com/media/en/technical-documentation/data-sheets/adum3160.pdf https://qariya.net/product/optical-fingerprint/?lang=en https://de.aliexpress.com/item/1005002991181863.html? Thanks to Keysight for sponsoring this video. 0:00 Intro 1:35 USB Isolator 4:11 Heated Gloves 6:19 Heated Socks 6:55 Human Presence Radar 9:01 WiFi Relay 10:27 Fingerprint Reader 12:24 Verdict
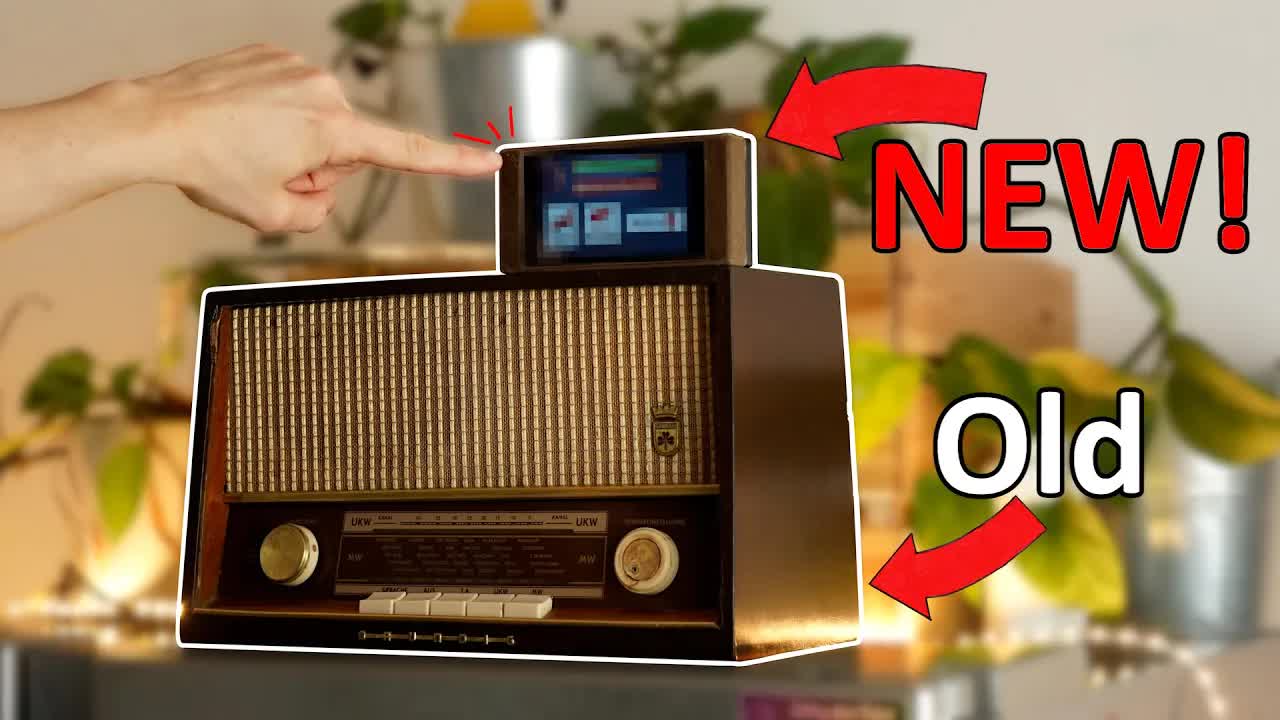
mbLQPuLR0Rs | 05 Feb 2023
Signup for the Onshape Free Plan here: https://Onshape.pro/GreatScott Try the world's most trusted PCB design software, Altium Designer with 365, for free and 25% off your purchase: https://www.altium.com/yt/greatscott! Previous video: https://youtu.be/JPZVLmU0MYI I2S Basics video: https://youtu.be/qNLvoSQCx60 Good explanation video on how to use the GPIOs of the touchscreen LCD: https://www.youtube.com/watch?v=rGxDZPYcWIs More project information here: https://www.patreon.com/posts/internet-radio-77765961 Parts list: (affiliate links) ESP32: https://s.click.aliexpress.com/e/_DFndNcR I2S Amp: https://s.click.aliexpress.com/e/_DFndNcR 20W Class D Amp: https://amzn.to/3XDioQJ Touchscreen: https://eu.mouser.com/ProductDetail/STMicroelectronics/STM32F469I-DISCO?qs=kWQV1gtkNndotCjy2DKZ4w%3D%3D 12V Power Supply: https://s.click.aliexpress.com/e/_DkkgZUr 5V Power Supply (Buck Boost): https://s.click.aliexpress.com/e/_DlIH1Xd Resistors: https://s.click.aliexpress.com/e/_DC44lxH Potentiometer (1K): https://s.click.aliexpress.com/e/_DC0a1F5 AC Socket: https://s.click.aliexpress.com/e/_DlNcuBh Facebook: https://www.facebook.com/greatscottlab Twitter: https://twitter.com/GreatScottLab Instagram: https://www.instagram.com/great.scott.lab/ Support me for more videos: https://www.patreon.com/GreatScott?ty=h In this project video I will show you how I turned a 50 year old radio from the flea market into a beautiful modern internet radio with touchscreen. That means I will show you how I refurbished the radio and created a new electronics system around an ESP32 Microcontroller and an STM32 Touchscreen LCD board. The end result was definitely worth the time and money ;-) Let's get started! Websites which were shown/used during the video: https://www.ti.com/cn/lit/ds/symlink/tas5711.pdf?ts=1667997669809&ref_url=https%253A%252F%252Flcsc.com%252F https://github.com/tierneytim/btAudio https://github.com/pschatzmann/ESP32-A2DP https://github.com/tierneytim/btAudio https://www.deutschlandfunknova.de/info/empfang https://www.deutschlandfunkkultur.de/livestream-102.html https://www.hitradio-rtl.de/programm/empfang/HITRADIO-RTL-Livestreams-Direktlinks-id679340.html#_HITRADIO-RTL-Region-Leipzig https://www.fmlist.org/sendertabelle/ukw-st_more.php?inputLand=D&inputRegion=73616e&inputPx=Radio+Brocken&inputPxHash=5d18c54aa7c0531099d03113e8927cdb8ef21a848dc39192db5221e366093f5f https://www.energy.de/programm/wlan-radios Thanks to Onshape for sponsoring this video. 0:00 WiFi/Bluetooth Radio Idea 1:09 Intro 2:12 Refurbishing the Radio 5:17 Bluetooth Music 6:13 Internet Radio 9:05 Touchscreen LCD 10:45 Final Assembly/Verdict

JPZVLmU0MYI | 22 Jan 2023
$2 for 1-8 Layer PCBs, free assembly - JLCPCB:https://jlcpcb.com/AAA Try the world's most trusted PCB design software, Altium Designer with 365, for free and 25% off your purchase: https://www.altium.com/yt/greatscott! Previous video: https://youtu.be/suOimZ4gmQg Soldering Hot Plate video: https://youtu.be/QarizoUnRfk You can check out the Carvera CNC here (affiliate link): https://bit.ly/3iBLX69 Facebook: https://www.facebook.com/greatscottlab Twitter: https://twitter.com/GreatScottLab Instagram: https://www.instagram.com/great.scott.lab/ Support me for more videos: https://www.patreon.com/GreatScott?ty=h Websites which were shown/used during the video: https://youtu.be/hSTJux9fCpo https://youtu.be/qVCwpuHwfyE https://www.galaad.net/coppercam-eng.html In this video we will be having a closer look at the Carvera CNC machine. I initially got interested in it because the makers of the CNC claimed that it is perfect for milling PCBs at home. So I obviously had to check it out ;-) So this video is kind of like a review in which I show you all the good and bad things about the Carvera and ultimately show you whether it is truly capable of making PCBs at home. Let's get started! Thanks to JLCPCB for sponsoring this video. Visit https://jlcpcb.com to get professional PCBs for low prices. Thanks to Altium for sponsoring this video. 0:00 Why Carvera CNC Machine? 1:30 Intro 2:17 Unboxing 3:47 First Power Up & Problems 5:35 Testing the Example Projects 7:37 BIG PROBLEM: Missing Software 8:16 PCB Milling 11:23 Verdict

OwOPIj7qX88 | 08 Jan 2023
Try the world's most trusted PCB design software, Altium Designer with 365, for free and 25% off your purchase: https://www.altium.com/yt/greatscott! Previous video: https://youtu.be/suOimZ4gmQg Facebook: https://www.facebook.com/greatscottlab Twitter: https://twitter.com/GreatScottLab Instagram: https://www.instagram.com/great.scott.lab/ Support me for more videos: https://www.patreon.com/GreatScott?ty=h Websites/Videos which were shown during the video: https://www.youtube.com/@bitlunislab/videos https://www.youtube.com/@PhilsLab/videos https://www.altium.com/documentation/altium-designer/tutorial-complete-design-walkthrough Music: George Street Shuffle by Kevin MacLeod is licensed under a Creative Commons Attribution 4.0 license. https://creativecommons.org/licenses/by/4.0/ Source: http://incompetech.com/music/royalty-free/index.html?isrc=USUAN1300035 Artist: http://incompetech.com/ 0:00 Overview 0:45 How did 2022 go? 3:13 New Release Schedule? 5:29 House Project? 7:16 Your Questions 7:59 Is is still fun? 8:30 How I stay motivated 9:47 More Home Renovation videos? 10:20 No EV Charger? 10:46 Collaboration with other YouTubers? 11:41 Best Project this year? 12:24 Plans to Expand? 13:01 How to learn PCB Design 13:31 Final Words

suOimZ4gmQg | 18 Dec 2022
$2 for 1-8 Layer PCBs, free assembly- JLCPCB:https://jlcpcb.com/AAA Free EDA for 2.8 Million Engineers - EasyEDA: https://bit.ly/easyeda1 Try the world's most trusted PCB design software, Altium Designer with 365, for free and 25% off your purchase: https://www.altium.com/yt/greatscott! Previous video: https://youtu.be/7sGN0-YsiYw Old DIY Power Meter/Logger video: https://youtu.be/lrugreN2K4w Facebook: https://www.facebook.com/greatscottlab Twitter: https://twitter.com/GreatScottLab Instagram: https://www.instagram.com/great.scott.lab/ Support me for more videos: https://www.patreon.com/GreatScott?ty=h You can find more project information here: https://hackaday.io/project/187504-esp32-3-channel-power-logger Websites which were shown during the video: https://www.ti.com/lit/ds/symlink/ina3221.pdf?ts=1669059606513 https://cdn.sparkfun.com/datasheets/Dev/Arduino/Other/CH340DS1.PDF In this video we will be having a look at a project created by one of my viewers. He created a remake of my power meter/logger project that comes with tons of improvements. Those include 3 channel measuring, WiFi, RTC support, USB measuring and USB-C compatibility. So how good do I think it is from a scale from 1 to 10? And should you consider building it as well? Let's find out! Thanks to JLCPCB for sponsoring this video. Visit https://jlcpcb.com to get professional PCBs for low prices. 0:00 A Power Meter is Super Useful! 1:33 Intro 2:03 What Changed in the Remake? 6:01 Building the Project 7:40 Programming the Board.....Problems 8:38 Positive Aspects 9:58 Negative Aspects 10:47 Verdict
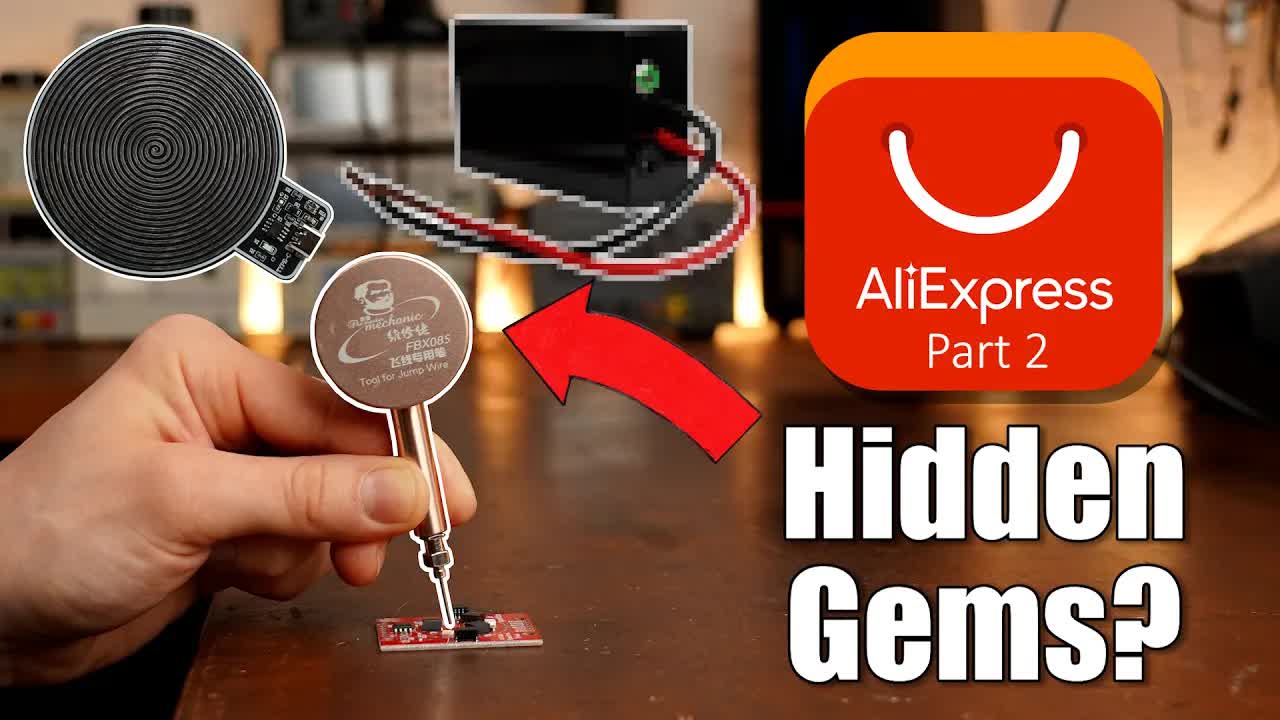
7sGN0-YsiYw | 11 Dec 2022
Get your Elektor Magazine here: https://www.elektormagazine.com/arduino-gift Coupon Code: ARDUINOGIFT Try the world's most trusted PCB design software, Altium Designer with 365, for free and 25% off your purchase: https://www.altium.com/yt/greatscott! Previous video: https://youtu.be/wsJONukJlLI Previous Aliexpress video: https://youtu.be/fUdlfc1nJcY Facebook: https://www.facebook.com/greatscottlab Twitter: https://twitter.com/GreatScottLab Instagram: https://www.instagram.com/great.scott.lab/ Support me for more videos: https://www.patreon.com/GreatScott?ty=h You can find the featured products here: (affiliate links) Schumann Generator: https://s.click.aliexpress.com/e/_DBjhgQP Ideal Diode: https://s.click.aliexpress.com/e/_DBXS4XZ Wind Generator: https://s.click.aliexpress.com/e/_DdJ5d7d Flying Pen: https://s.click.aliexpress.com/e/_DBK7ex1 Spot Welder: https://s.click.aliexpress.com/e/_DmLarwT DIY Makita Battery Pack: https://s.click.aliexpress.com/e/_DnPOAQn IP2368 Mini: https://s.click.aliexpress.com/e/_DBaBQcj In this video we will be having a closer look at 7 different products I got from Aliexpress. Aliexpress is famous for featuring the newest products/ICs when it comes to electronics but finding those can be a bit difficult. So I tried finding the hidden Gems not only electronics related but in general what I think could be useful. Let's get started! Thanks to Elektor for sponsoring this video! 0:00 AliExpress? 0:31 Intro 1:26 Schumann Generator 3:09 Ideal Diode 5:28 Wind Generator 6:42 Flying Pen 7:46 Spot Welder 9:28 Makita Battery Kit 10:23 IP2368 100W PowerBank 11:18 Verdict

wsJONukJlLI | 04 Dec 2022
Check out the Keysight Labs YouTube channel: https://www.youtube.com/keysightlabs Try the world's most trusted PCB design software, Altium Designer with 365, for free and 25% off your purchase: https://www.altium.com/yt/greatscott! Previous video: https://youtu.be/vKJWwBXRPuI Previous Electrical Wiring video: https://youtu.be/83Mdnc7FyVY Facebook: https://www.facebook.com/greatscottlab Twitter: https://twitter.com/GreatScottLab Instagram: https://www.instagram.com/great.scott.lab/ Support me for more videos: https://www.patreon.com/GreatScott?ty=h In this video I will show you how I did the electrical installation in my new garage. That means I will show you the basic stuff like mounting and wiring up switches, outlets, lamps, fuses,...... But I will also include some more advanced and super awesome stuff like a CEE socket, emergency stop switches and special cable ducts. So let me show you how German electricians do such work and maybe I can inspire you for your next electrical installation. Websites which were shown/used during the video: https://www.hornbach.de/shop/Arbeitsplatte-Buche-Natur-massiv-3000x900x40mm/5242258/artikel.html https://www.hornbach.de/shop/Konsta-Latte-Fichte-Tanne-28x48x3000-mm/3393337/artikel.html https://amzn.to/3VAwfGn https://www.elektro-wandelt.de/Installationsmaterial/Schutzrohr-Kabelkanaele/Bruestungskanaele/Hager-elektro/Steckdosen/ https://www.elektro-wandelt.de/Hager-GLS5500-Geraeteeinbaudose-1-fach-Energie-fuer-BR-C-Profi.html? Thanks to Keysight for sponsoring this video. 0:00 Electrical Installation for a Garage? 1:15 Intro 1:58 Building Workbenches 3:53 Plans for the Electronics 4:49 Speciality 1 "Wall Ducts" 5:56 Speciality 2 CEE Socket 6:23 Speciality 3 Emergency Stop Switches 8:08 Planning Complete 8:51 Practical Build 11:25 Testing & Verdict

vKJWwBXRPuI | 20 Nov 2022
Check out Keysight's RF Back to Basics Bootcamp: https://keysig.ht/XRnZU2 Free Altium Designer Trial: https://altium.com/yt/greatscott! Previous video (100W Power Bank video): https://youtu.be/_WI9Nwqvplo You can get the shown parts here: (affiliate links) Power Supply: https://amzn.to/3WGNE18 USB Tester: https://s.click.aliexpress.com/e/_DmgsbSP USB PD Trigger board: https://s.click.aliexpress.com/e/_DDbqr3p Constant Load: https://s.click.aliexpress.com/e/_Ddo3Rqn Cable A: https://amzn.to/3UgVAVi Cable B: https://amzn.to/3DNu0YH Cable C: https://amzn.to/3NQ3tik Cable D: https://amzn.to/3GayXxV Cable E: https://amzn.to/3zTBwAp Cable F: https://amzn.to/3hlpwRv Cable G: https://amzn.to/3WFtvIX Cable H: https://amzn.to/3zSs40d Cable I: https://s.click.aliexpress.com/e/_DdpVABH Cable J: https://www.aliexpress.com/item/1005004089914259.html?spm=a2g0o.order_list.0.0.2e511802HMp73j Cable K: https://s.click.aliexpress.com/e/_DdrDicP Cable L: https://s.click.aliexpress.com/e/_DdpVABH Cable M: https://s.click.aliexpress.com/e/_DBN77d9 Facebook: https://www.facebook.com/greatscottlab Twitter: https://twitter.com/GreatScottLab Instagram: https://www.instagram.com/great.scott.lab/ Support me for more videos: https://www.patreon.com/GreatScott?ty=h In this video we will be having a closer look at USB-C cables and find out why most of them are actually not that great. We will be focusing on 100W power transfer so very fast charging. I will show you how much power loss 13 different USB-C cables produce and why most of them do not meet the standard specs. Let's get started! Websites which were shown/used during the video: https://www.usb.org/usb-charger-pd https://www.mi.com/global/product/xiaomi-11t-pro-120w-xiaomi-hypercharge/ https://www.usb.org/document-library/usb-type-cr-cable-and-connector-specification-release-22 https://satechi.net/blogs/news/pd-3-1-protocol-everything-you-need-to-know Thanks to Keysight for sponsoring this video. 0:00 The Problem with USB-C Cables 1:49 Intro 2:26 60W/100W cables? 3:14 E-Marker Chip? 5:04 Test Setup 6:42 The Worst Performing Cable 7:43 Test Results 9:50 Verdict

_WI9Nwqvplo | 13 Nov 2022
Signup for the Onshape Free Plan here: https://Onshape.pro/GreatScott Free Altium Designer Trial: https://altium.com/yt/greatscott! Previous video: https://youtu.be/7f8SliNGeDM Previous Battery Pack videos: https://youtu.be/b2sBhDxmPmA https://youtu.be/hwhqn4BmC2I You can get the shown parts here: (affiliate links) Buy PowerBank: Amazon.com: https://amzn.to/3TL6q5N Amazon.de: https://amzn.to/3szl5Fi Aliexpress: https://s.click.aliexpress.com/e/_DBErL7V DIY PCB: https://s.click.aliexpress.com/e/_DdEwByf 100W USB-C Cable with Display: https://s.click.aliexpress.com/e/_Dds1Pon USB-C PD Trigger Board: https://s.click.aliexpress.com/e/_DmzNXwj Facebook: https://www.facebook.com/greatscottlab Twitter: https://twitter.com/GreatScottLab Instagram: https://www.instagram.com/great.scott.lab/ Support me for more videos: https://www.patreon.com/GreatScott?ty=h You can find more project information here: https://www.patreon.com/posts/diy-100w-power-74124475 In this episode of DIY or Buy we will be having a closer look at 100W Power Banks. Such Power Banks are great to have around to quickly charge up your big electronics like a laptop or tablet and they are also very useful when powering more current demanding electronics projects. That is why I properly tested a PCB from Aliexpress which allows us to create such a DIY Power Bank easily. And at the end we will see whether you should try such a DIY solution or rather stick to the Buy version. Let's get started! Websites which were shown/used during the video: https://datasheet.octopart.com/INR18650-MH1-LG-Electronics-datasheet-48665530.pdf http://file.yzimgs.com/398592/202213-225835877.pdf https://www.digitaltrends.com/computing/charging-via-usb-c/ Thanks to Onshape for sponsoring this video. 0:00 Why a 100W Power Bank? 1:31 PCB for DIY Solution? 2:04 Intro 3:03 Output Features of the PCB 4:08 Input Features of the PCB (Battery Pack) 6:25 Testing the PCB 8:46 Creating the Battery Pack 9:51 Completing the DIY Power Bank and Testing 10:31 Verdict

7f8SliNGeDM | 30 Oct 2022
Check out Keysight World Innovate here: https://keysig.ht/2rgsqL Free Altium Designer Trial: https://altium.com/yt/greatscott! Warning!: Modify your phone at your own risk. There is always a chance of destroying things. Previous video: https://youtu.be/nIB3kWqqAzE Mrwhosetheboss video: https://youtu.be/OfM0GqsIB6c Mains Voltage Inverter video: https://youtu.be/hl90yRy4vEI Facebook: https://www.facebook.com/greatscottlab Twitter: https://twitter.com/GreatScottLab Instagram: https://www.instagram.com/great.scott.lab/ Support me for more videos: https://www.patreon.com/GreatScott?ty=h In this video we will be having a closer look at the swollen battery problem of Samsung phones. Of course we could always replace such a battery but that is maybe only a short time solution. Instead I want to get rid of the battery and use my phone with just a power supply since I no longer need it for mobile usage. In such a case the phone can still be useful for various applications which I will show you in the video? So can we power a phone without its battery? Let's find out! Websites which were shown/used during the video: https://www.youtube.com/c/mrwhosetheboss https://www.sammobile.com/news/we-checked-over-100-old-samsung-phones-and-found-no-swollen-batteries/ https://www.ifixit.com/Guide/Samsung+Galaxy+S10e+Battery+Replacement/121285 https://twitter.com/search?q=samsung%20swollen%20battery&src=typed_query Thanks to Keysight for sponsoring this video. 0:00 Swelling Battery Problem? 1:14 The Plan to Save my Phone 1:57 Intro 2:34 Removing the Battery 4:55 Trying to Power the Phone 7:49 Final Power Solution 9:52 Verdict

nIB3kWqqAzE | 16 Oct 2022
$2 for 2-4 Layer PCBs, free ENIG for 6Layer PCBs:https://jlcpcb.com/AAA Get $54 New User Coupon &3D Coupon: https://bit.ly/3UlsFjE Free Altium Designer Trial: https://altium.com/yt/greatscott! Previous video: https://youtu.be/fUdlfc1nJcY HomeAssistant Video: https://youtu.be/IvI1RqYPO24 Facebook: https://www.facebook.com/greatscottlab Twitter: https://twitter.com/GreatScottLab Instagram: https://www.instagram.com/great.scott.lab/ Support me for more videos: https://www.patreon.com/GreatScott?ty=h More project information here: https://www.patreon.com/posts/73255776?pr=true Parts list: (affiliate links) ESP-12F: https://s.click.aliexpress.com/e/_DF1sGi3 HT7833: https://s.click.aliexpress.com/e/_DF5CyKT 5V Power Supply: https://s.click.aliexpress.com/e/_DcZa6Rd Mini Transformer: https://s.click.aliexpress.com/e/_Dl3T5xv Current Transformer: https://s.click.aliexpress.com/e/_DmdSnnh CS5460A Power Measurement IC: https://s.click.aliexpress.com/e/_DBafuRV 0805 Resistors: https://s.click.aliexpress.com/e/_DE6NmIF 0805 Capacitos: https://s.click.aliexpress.com/e/_DkG13Nd Relay: https://www.mouser.de/ProductDetail/655-T9GV1L14-5 Crystal: https://lcsc.com/product-detail/Crystals_Yangxing-Tech-X49SD4096MSD2SC-1_C2226.html Choke: https://lcsc.com/product-detail/Common-Mode-Filters_FH-Guangdong-Fenghua-Advanced-Tech-UU9-8Y-10mH_C75192.html Varistor: https://lcsc.com/product-detail/Varistors_Hongzhi-Elec-10D561K_C113236.html Input Capacitor: https://lcsc.com/product-detail/Suppression-Capacitors_CORETONG-MPX-104K275VAC-A-B4-10-5-11-7-5MM_C3249977.html Fuse: https://lcsc.com/product-detail/Fuse-Holders_XFCN-PTF-77_C717030.html MOSFET: Flyback Diode: https://lcsc.com/product-detail/Diodes-General-Purpose_MDD-Microdiode-Electronics-S3MB_C47524.html Tactile Switches: https://lcsc.com/product-detail/Tactile-Switches_XKB-Connectivity-TS-1101-C-W_C318938.html In this episode of DIY or Buy we will be having a closer look at Smart Plugs, Sockets, Outlets.....However you want to call them. I love using such Smart of Wireless outlets to completely disconnect my appliances from the grid and thus getting rid of the standby power. But commercial smart outlets do often fail when I use them. So in this video we will investigate this problem, find a solution and possibly build the BEST DIY Smart Outlet that exists. Let's get started! Websites which were shown/used during the video: https://esphome.io/components/sensor/cs5460a.html https://www.mouser.de/c/electromechanical/relays-contactors-solenoids/general-purpose-relays/?coil%20voltage=5%20VDC&contact%20current%20rating=20%20A https://datasheet.lcsc.com/szlcsc/1909111105_HI-LINK-HLK-PM24_C399250.pdf https://circuitjournal.com/esp8266-with-arduino-ide https://asset.conrad.com/media10/add/160267/c1/-/en/001425170DS01/datenblatt-1425170-afe-brd-ss-124lm-printrelais-24-vdc-15-a-1-schliesser-1-st.pdf https://ibex.tech/resources/geek-area/electronics/relays/relay-contact-materials https://www.cirrus.com/products/cs5460a/ https://statics.cirrus.com/pubs/proDatasheet/CS5460A_F6.pdf https://www.mouser.de/ProductDetail/655-T9GV1L14-5 https://www.mouser.de/datasheet/2/418/8/ENG_DS_T9G_1216_0321-1281449.pdf Thanks to JLCPCB for sponsoring this video. Visit https://jlcpcb.com to get professional PCBs for low prices. Thanks to Altium for sponsoring this video. 0:00 The Relay Sticking Problem! 1:42 Intro 2:06 Reason for the Relay Sticking? 3:53 Testing the Solution 5:09 DIY Smart Socket Features 6:01 Power Measurement 8:27 Circuit (PCB) for the DIY Solution 10:13 First Tests & Improvements 10:49 Final Version & Verdict
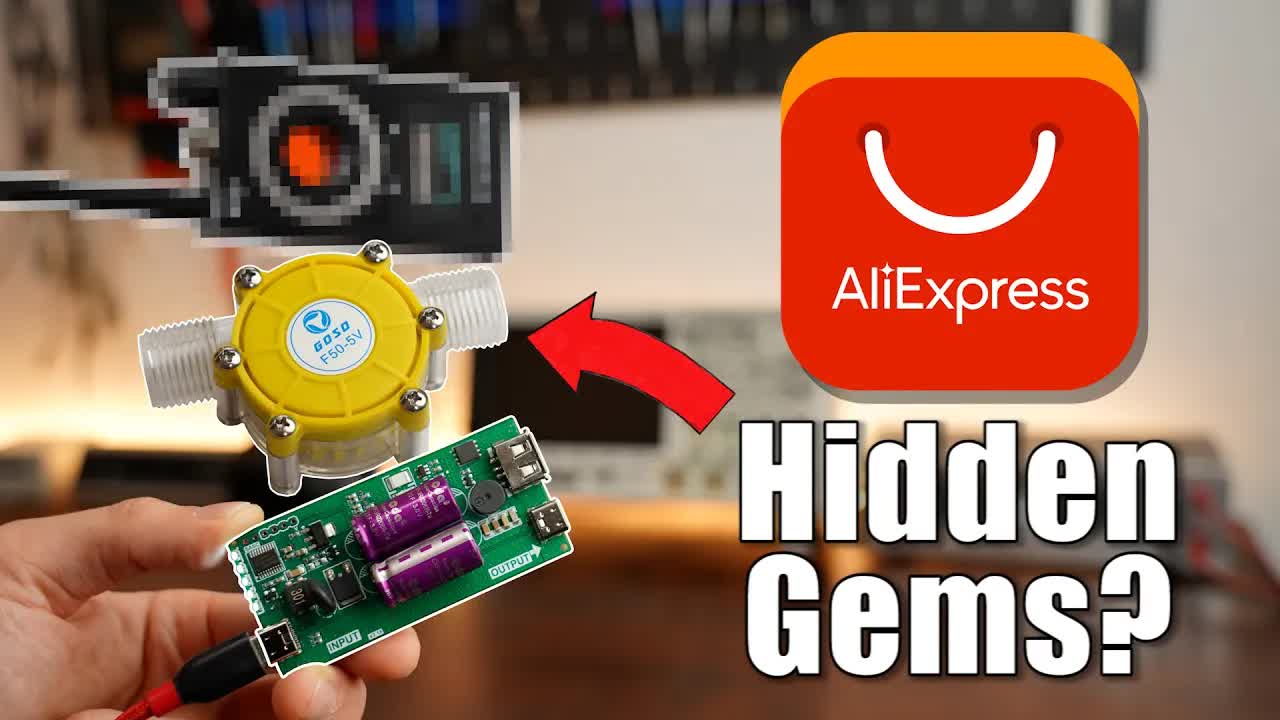
fUdlfc1nJcY | 02 Oct 2022
5PCBs for $2! 3D Printing from $1: https://jlcpcb.com/3d-printing?from=3DP Get $54 New User Coupon & 3D Coupon: https://bit.ly/3UlsFjE Free Altium Designer trial: https://altium.com/yt/greatscott! Previous video: https://youtu.be/DeSDjjicGWY Facebook: https://www.facebook.com/greatscottlab Twitter: https://twitter.com/GreatScottLab Instagram: https://www.instagram.com/great.scott.lab/ Support me for more videos: https://www.patreon.com/GreatScott?ty=h Altium Designer: https://altium.com/yt/greatscott! You can find the featured products here: (affiliate links) 5V SuperCapacitor Filter/Buffer: https://s.click.aliexpress.com/e/_DBnysVt Water Flow Generator: https://s.click.aliexpress.com/e/_DnPjmLd Drill powered Pump: https://s.click.aliexpress.com/e/_Dm4ZMxl Drill powered Jigsaw: https://s.click.aliexpress.com/e/_De4CEd1 Drill powered Chainsaw: https://s.click.aliexpress.com/e/_DlAsMHv 3A Lithium Battery Charger: https://s.click.aliexpress.com/e/_Dn4n90T Hand Crank Generator: https://s.click.aliexpress.com/e/_DmfhRrD RF Spy Detector: https://s.click.aliexpress.com/e/_DEsOZ4j In this video we will be having a closer look at 8 different products I got from Aliexpress. Aliexpress is famous for featuring the newest products/ICs when it comes to electronics but finding those can be a bit difficult. So I tried finding the hidden Gems not only electronics related but in general what I think could be useful. Let's get started! Thanks to JLCPCB for sponsoring this video. Visit https://jlcpcb.com to get professional PCBs for low prices. 0:00 What Aliexpress Treasures? 1:12 Intro 1:58 SuperCapacitor Cube 4:24 Water Flow Generator 5:48 Drill Powered Water Pump 6:44 Drill Powered Jigsaw 7:15 Drill Powered Chainsaw 7:44 Lithium Battery Charger (3A) 9:43 Hand Crank Generator 11:14 RF Spy Detector 12:05 Verdict

DeSDjjicGWY | 18 Sep 2022
Check out Keysight World Innovate here: https://keysig.ht/2rgsqL Previous video: https://youtu.be/SykfLBLP3xI Motor, ESC, Battery video: https://youtu.be/3dArEoLOvzI Joshua Bardwell Betaflight videos: https://youtu.be/LkBWRiEGKTI Facebook: https://www.facebook.com/greatscottlab Twitter: https://twitter.com/GreatScottLab Instagram: https://www.instagram.com/great.scott.lab/ Support me for more videos: https://www.patreon.com/GreatScott?ty=h Altium Designer: https://altium.com/yt/greatscott! All the project information here on Patreon: https://www.patreon.com/posts/drone-more-72061626 Printables model: https://www.printables.com/model/196607-6-fpv-drone Parts list (affiliate links): Motors (2306 2555KV): https://s.click.aliexpress.com/e/_Dl3tc4b Propellers: https://s.click.aliexpress.com/e/_Dnt5FRz Battery: https://s.click.aliexpress.com/e/_DezDXxd Receiver: https://s.click.aliexpress.com/e/_DFWPK0b Remote: https://s.click.aliexpress.com/e/_DBRGvlv Camera: https://s.click.aliexpress.com/e/_De5JRMr VTx: https://s.click.aliexpress.com/e/_DFnEooj Goggles: https://s.click.aliexpress.com/e/_DCnwd11 FC & ESC: https://s.click.aliexpress.com/e/_DeARB0n M3 Screws: https://s.click.aliexpress.com/e/_Dl9V28L & https://s.click.aliexpress.com/e/_Dn2naAP Zip Ties: https://s.click.aliexpress.com/e/_DBSKBHh Standoffs (M3 20mm): https://s.click.aliexpress.com/e/_Dmspaoj Velcro Strips (20x300mm): https://s.click.aliexpress.com/e/_Dku7zEF In this project I will show you how I built my own drone. This way you should get a basic understanding of what is important when designing your own and most importantly it should clear up the confusion about drone building. I personally think the drone market is flooded with tons of different hardware and software and there is not really a good guide that gives you a basic overview about everything. And that is what I am trying to do with this video. Let's get started! Websites which were shown/used in the video: https://n-factory.de/ https://www.fpv24.com/en/ https://betafpv.com/ https://betaflight.com/ https://github.com/BETAFPV/BETAFPV_Configurator/releases https://github.com/ExpressLRS/ExpressLRS-Configurator Thanks to Keysight for sponsoring this video. 0:00 Why a Drone Build? 1:47 Intro 2:24 What Components are mandatory? 4:21 What Components did I choose? 9:16 The Actual Drone Build 12:00 Software Settings (Betaflight) 13:12 Tests & Fails 15:13 Verdict

SykfLBLP3xI | 04 Sep 2022
Check out MEL Science here: https://melscience.com/sBJy/ Previous video: https://youtu.be/BNK92ep8DhY The "problematic" videos: https://youtu.be/se-RxeFEncY https://youtu.be/lLrBrZaBweo You can get a proper simple/cheap ESC here (affiliate links) https://s.click.aliexpress.com/e/_DCrnVBH https://amzn.to/3KdR6uu Facebook: https://www.facebook.com/greatscottlab Twitter: https://twitter.com/GreatScottLab Instagram: https://www.instagram.com/great.scott.lab/ Support me for more videos: https://www.patreon.com/GreatScott?ty=h Altium Designer: https://altium.com/yt/greatscott! In this video we will actually be looking at another video on YouTube. There the creator claimed that you can build a BLDC Motor driver with only 9 components. The catch is that ESCs (which are normally used for driving BLDC motors) consist of way more components and are usually quite complicated. So let's "test" the circuit and find out all the information the original creator kept quiet about. Let's get started! Thanks to MEL Science for sponsoring this video. 0:00 The "Bad" Video I found 1:53 Intro 2:51 What Information was Missing? 3:37 Building the Circuit 4:11 4 Wire Motor Problem 5:17 First Test (Small Motor) 6:45 Second Test (Bigger Motor) 7:41 Why does the Circuit Suck? 9:21 Verdict

BNK92ep8DhY | 21 Aug 2022
Check out the Prusa 3D Printer here: https://prusa.io/greatscottlab/mk3s Printables for the 3D Models: https://prusa.io/greatscottlab/printables Previous video: https://youtu.be/LyztbYNB0Eg Latch Circuit video: https://youtu.be/y1ROEogHF7A HomeAssistant video: https://youtu.be/IvI1RqYPO24 Project information on Instructables: https://www.instructables.com/Online-Water-Tracker-Reduce-Shower-Time/ Facebook: https://www.facebook.com/greatscottlab Twitter: https://twitter.com/GreatScottLab Instagram: https://www.instagram.com/great.scott.lab/ Support me for more videos: https://www.patreon.com/GreatScott?ty=h Altium Designer: https://altium.com/yt/greatscott! Parts list (affiliate links): Aliexpress: TP4056 Battery Charge & Protect: https://s.click.aliexpress.com/e/_Dd7XXD9 LiPo Battery: https://s.click.aliexpress.com/e/_DlZ9Ign Boost Converter: https://s.click.aliexpress.com/e/_DlhhkBd EPS8266: https://s.click.aliexpress.com/e/_DEQC023 P-Channel MOSFET: https://s.click.aliexpress.com/e/_DeTu9zV Water Flow Sensor: https://s.click.aliexpress.com/e/_DD7Vsvv Water Switch: https://s.click.aliexpress.com/e/_DnoC8VD LED: https://s.click.aliexpress.com/e/_Dmq3et1 Resistors: https://s.click.aliexpress.com/e/_DkVtJQX Amazon.com: TP4056 Battery Charge & Protect: https://amzn.to/3JRzrss LiPo Battery: https://amzn.to/3dsdJz1 Boost Converter: https://amzn.to/3SRI7TC EPS8266: https://amzn.to/3pgMzhl P-Channel MOSFET: - Water Flow Sensor: https://amzn.to/3AlO97L Water Switch: https://amzn.to/3PmHM8z LED: https://amzn.to/3QraeYa Resistors: https://amzn.to/3AlnkR6 The goal of this project was to lower my shower time since I am spending way too much water/money there. And what better way than to see how expensive each shower is? That is why I built an online water tracker that not only tells me how much waster I am using, but also what it costs. Let's get started! Websites which were shown/used in the video: https://datasheetspdf.com/pdf-file/1315641/Alpha&OmegaSemiconductors/AO4447A/1 https://github.com/kalkih/mini-graph-card/#grouping-by-date Thanks to Prusa Research for sponsoring this video. 0:00 My Plan to Reduce Shower Time 1:19 Intro 1:33 The Water Flow Sensor 2:45 Arduino Prototype (for the Sensor) 4:20 Powering the Electronics in the Shower? 5:54 Final Arduino Prototype (Liter/Cost/Battery) 6:32 Building the WiFi uC System 7:22 Water Resistant Enclosure 8:50 Final Assembly 9:18 Home Assistant Programming 10:14 Final Test & Verdict

LyztbYNB0Eg | 07 Aug 2022
Check out Keysight Jobs: https://bit.ly/KeysightJobsGS Warning!: This video is only for educational purposes. The WiFi Jammer might only be super low power/distance but do not build it on your own. Previous video: https://youtu.be/F0o1C7nEgw0 Facebook: https://www.facebook.com/greatscottlab Twitter: https://twitter.com/GreatScottLab Instagram: https://www.instagram.com/great.scott.lab/ Support me for more videos: https://www.patreon.com/GreatScott?ty=h Altium Designer: https://altium.com/yt/greatscott! You can get the shown VCOs here (affiliate links/only for educational purposes): https://s.click.aliexpress.com/e/_DDX26fz https://s.click.aliexpress.com/e/_DlyEzTD In this video I will show you how I tried to build a wireless video system for a drone but instead only ended up with a low power/range WiFi jammer. That means we will explore analog composite video, frequency modulation (FM), voltage controlled oscillators (VCOs) and much much more. Lots of experiments included ;-) Let's get started! Websites which were shown/used in the video: https://www.drohnen-forum.de/index.php/Attachment/10787-RTC6705-DST-001-pdf/ https://www.maximintegrated.com/en/products/comms/wireless-rf/MAX2753.html https://www.maximintegrated.com/en/design/technical-documents/tutorials/7/734.html Thanks to Keysight for sponsoring this video. 0:00 My Wireless Video Goal 1:08 Intro 1:38 How Analog Video works! 3:10 How Wireless Video works! (FM) 5:08 DIY LC Tank Transmitter 6:47 DIY 5.8GHz VCO Transmitter 8:23 WiFi Jammer 9:28 Verdict

F0o1C7nEgw0 | 24 Jul 2022
Altium Designer: https://altium.com/yt/greatscott! OctoPart: https://octopart.com/ Previous video: https://youtu.be/y1ROEogHF7A Arduino Alternative video series: https://youtube.com/playlist?list=PLAROrg3NQn7cVnrEFOht5qt5vHEn2bu9r Facebook: https://www.facebook.com/greatscottlab Twitter: https://twitter.com/GreatScottLab Instagram: https://www.instagram.com/great.scott.lab/ Support me for more videos: https://www.patreon.com/GreatScott?ty=h You can get the Raspberry Pi Pico (W) here: (affiliate links) Amazon.com: https://amzn.to/3P5HuTI Amazon.de: https://amzn.to/3bS9Pib In this video we will be having a closer look at the first microcontroller board from Raspberry Pi, the Raspberry Pi Pico. The board is 1.5 years old but back then I was convinced that it was overrated. But things changed and nowadays I think it is a good Arduino alternative. So let me show you how to use the board and what exactly happened that made me change my mind. Let's get started! Websites which were shown/used in the video: https://datasheets.raspberrypi.com/pico/pico-datasheet.pdf https://datasheets.raspberrypi.com/rp2040/rp2040-datasheet.pdf https://datasheets.raspberrypi.com/pico/Pico-R3-A4-Pinout.pdf https://www.raspberrypi.com/documentation/microcontrollers/raspberry-pi-pico.html https://www.raspberrypi.com/documentation/microcontrollers/micropython.html https://www.raspberrypi.com/documentation/microcontrollers/c_sdk.html https://github.com/earlephilhower/arduino-pico https://arduino-pico.readthedocs.io/en/latest/index.html https://github.com/khoih-prog/RPI_PICO_TimerInterrupt https://www.arduinolibraries.info/architectures/rp2040 https://www.instructables.com/Raspberry-Pi-Pico-200Khz-Digital-Oscilloscope/ https://www.instructables.com/Arbitrary-Wave-Generator-With-the-Raspberry-Pi-Pic/ http://www.breatharian.eu/hw/picovga/index_en.html https://forum.arduino.cc/t/libraries-updated-to-support-new-rp2040-based-boards-raspberry-pi-pico-etc/860353 Thanks to Altium for sponsoring this video. 0:00 Why I think the Pico was Overrated! 1:24 Intro 2:00 General Overview of the Pico 3:43 Good Parts of the Pico 6:55 One Bad Thing about the Pico 8:01 Truly Great Stuff about the Pico 9:35 Verdict
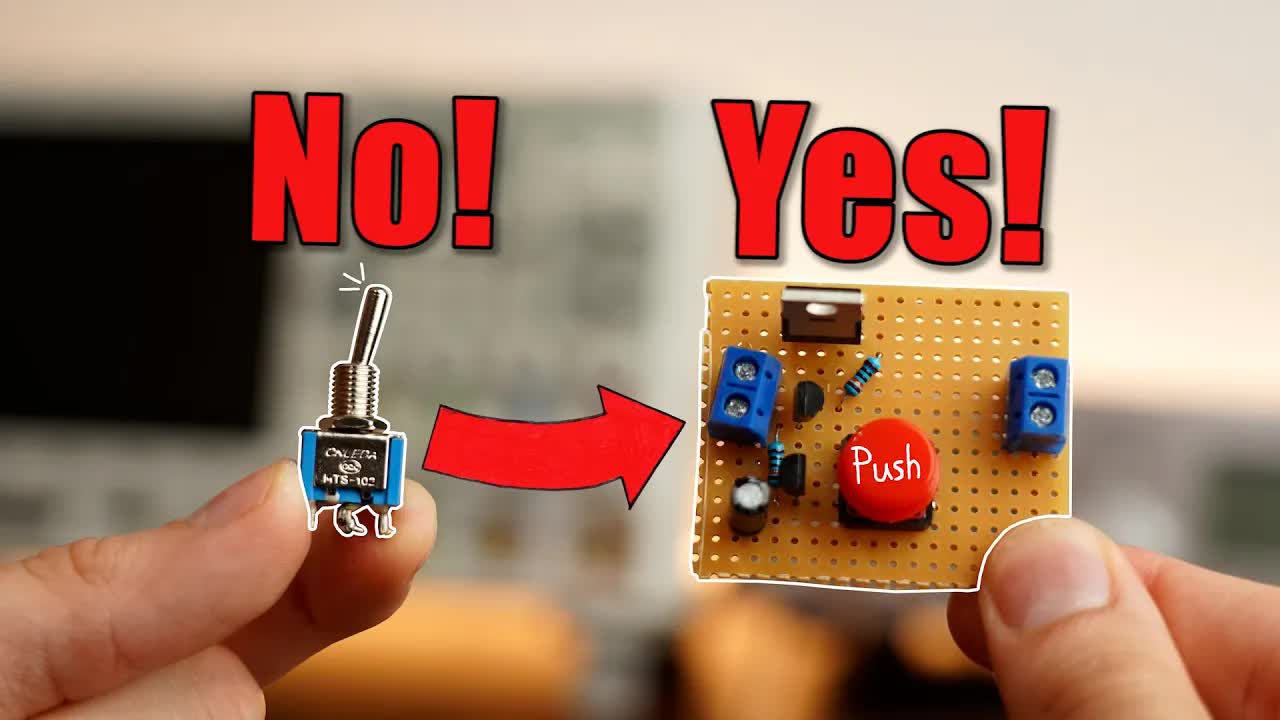
y1ROEogHF7A | 10 Jul 2022
The first 1,000 people to use the link will get a 1 month free trial of Skillshare: https://skl.sh/greatscott07221 Previous video: https://youtu.be/VApJ_oaZAk0 DIY Overcurrent Protection circuit video: https://youtu.be/7ctPSgaLxbc 555 Timer video: https://youtu.be/fLaexx-NMj8 Facebook: https://www.facebook.com/greatscottlab Twitter: https://twitter.com/GreatScottLab Instagram: https://www.instagram.com/great.scott.lab/ Support me for more videos: https://www.patreon.com/GreatScott?ty=h Altium Designer: https://altium.com/yt/greatscott! You can get the shown components here: (affiliate links): SR Latch IC (74LS279): https://s.click.aliexpress.com/e/_DCvoI1Z NOR Gate IC (74HC02): https://s.click.aliexpress.com/e/_DENPL71 BC547 NPN BJT: https://s.click.aliexpress.com/e/_Dey4ikR IRF5210 MOSFET: https://s.click.aliexpress.com/e/_DFNd8oJ Resistors: https://s.click.aliexpress.com/e/_Ddi4rk7 Capacitors: https://s.click.aliexpress.com/e/_DFCYSpD In this episode of electronics basics we will be having a closer look at latch circuits. As the name suggests, a latch circuit activates/deactivates a switching element through one Set/Reset voltage input pulse and keeps it in that state. Because of that latch circuit are everywhere. They are part of other circuits or come in the form of power switches or latching relays. Let's learn all about them and build one! Websites which were shown/used in the video: https://randomnerdtutorials.com/latching-power-switch-circuit-auto-power-off-circuit-esp32-esp8266-arduino/ http://www.mosaic-industries.com/embedded-systems/microcontroller-projects/electronic-circuits/push-button-switch-turn-on/latching-toggle-power-switch http://www.learningaboutelectronics.com/Articles/Latch-circuit-with-transistors.php https://www.ti.com/lit/ds/symlink/sn74ls279a.pdf?ts=1655808263577&ref_url=https%253A%252F%252Fwww.ti.com%252Fproduct%252FSN74LS279A https://www.youtube.com/watch?v=Foc9R0dC2iI https://en.wikibooks.org/wiki/Digital_Circuits/Latches#:~:text=Since%20the%20gated%20SR%20latch,inverse%20of%20the%20remaining%20input. https://www.mouser.de/ProductDetail/E-Switch/ST5DP104T2C1?qs=aP1CjGhiNiEOL7BFmWVZ8Q%3D%3D https://www.mouser.de/ProductDetail/TE-Connectivity-PB/1-1825137-6?qs=GQ3BsEl46pk8vicKht%252BRUg%3D%3D https://www.mouser.de/ProductDetail/Infineon-IR/IRF5210PBF?qs=9%252BKlkBgLFf3S3YiL4ijtLg%3D%3D https://www.google.com/search?q=latch+circuit&tbm=isch&ved=2ahUKEwiags2xhc34AhXuwwIHHevrAuwQ2-cCegQIABAA Thanks to Skillshare for sponsoring this video. 0:00 What/Why Latch circuit? 1:33 Intro 2:33 Logic Gate Latch 5:31 Latching Relay 6:22 Toggle On/Off Power Latch circuit 8:57 Set/Reset Latch circuit 10:01 Verdict

VApJ_oaZAk0 | 03 Jul 2022
Check out Keysights Automotive Cybersecurity videos: https://keysig.ht/1fPZoZ Previous video: https://youtu.be/XOcA7ijtlCY Photovoltaic Off-Grid System video: https://youtu.be/WU16AJwvNhE LiFeYPO4 Battery Pack video: https://youtu.be/ewkj875qUmk Facebook: https://www.facebook.com/greatscottlab Twitter: https://twitter.com/GreatScottLab Instagram: https://www.instagram.com/great.scott.lab/ Support me for more videos: https://www.patreon.com/GreatScott?ty=h Altium Designer: https://altium.com/yt/greatscott! You can get the shown battery tester + batteries here: (affiliate links) Aliexpress: Capacity Tester: https://s.click.aliexpress.com/e/_ACkbW5 Internal Resistance Tester: https://s.click.aliexpress.com/e/_AY6d1j 12V 100Ah LiFePO4 battery: https://s.click.aliexpress.com/e/_AoMrtF Amazon.com: Capacity Tester: https://amzn.to/39ArSIP Internal Resistance Tester: https://amzn.to/3QCmmq2 Amazon.de: Capacity Tester: https://amzn.to/3tORtot Internal Resistance Tester: https://amzn.to/3A5rKMz 12V 100Ah LiFePO4 battery: https://amzn.to/3HAwCe0 In this video I will be having a closer look at the battery of my solar off-grid garage in order to find out whether it is still working perfectly fine or needs to get replaced. The battery is a LiFeYPO4 type but during the video I will also include Li-Ion and LiPo batteries and show you exactly how you can test their capacity and internal resistance in order to determine if they are still good to go. These tests are of course also suitable for all other battery types which means you will be the "master" tester for all of them after finishing this video ;-) Let's get started! Websites which were shown/mentioned in the video: http://www.zketech.com/nd.jsp?id=14#_np=101_304 https://files.gwl.eu/inc/_doc/attach/StoItem/1580/ThunderSky-Winston-LIFEPO4-100Ah-TALL-Datasheet.pdf https://www.statista.com/statistics/1267541/germany-monthly-wholesale-electricity-price/ https://www.amperetime.com/collections/ampere-time-12v-lithium-lifepo4-battery-series/products/ampere-time-12v-100ah-lithium-lifepo4-battery https://www.nothnagel-marine.de/media/downloads/Lithium_Akkus/Manual%20WB-LYP100AHA%20Winston-Lithium-ion%20Batterie.pdf https://www.electronicdesign.com/technologies/test-measurement/article/21128843/keysight-technologies-measuring-dcir-of-lithiumion-cells https://batteryuniversity.com/article/bu-902-how-to-measure-internal-resistance https://lygte-info.dk/info/Internal%20impedance%20UK.html Thanks to Keysight for sponsoring this video. 0:00 Is my Big Battery Pack still good to use? 1:34 Intro 2:06 Capacity of a Battery Explained 3:44 How to measure the Capacity 7:04 Internal (DC) Resistance Explained 8:04 Measuring the Internal AC&DC Resistance 9:43 Boombox Li-Ion Battery Test 10:19 Verdict

XOcA7ijtlCY | 19 Jun 2022
PCB+Assembly from $2, Get JLCPCB Coupons:https://jlcpcb.com/AAA Get SMT Coupons via Contacting JLCPCB FB: https://www.facebook.com/jlcpcb/ Previous video: https://youtu.be/ZrkAWSemDC8 Facebook: https://www.facebook.com/greatscottlab Twitter: https://twitter.com/GreatScottLab Instagram: https://www.instagram.com/great.scott.lab/ Support me for more videos: https://www.patreon.com/GreatScott?ty=h Altium Designer: https://altium.com/yt/greatscott! You can get the shown SEPIC Converters here: (affiliate links) Aliexpress: https://s.click.aliexpress.com/e/_Asmzkh Amazon.com: https://amzn.to/3xGB4Vz Amazon.de: https://amzn.to/3NYNXzm In this video we will be having a closer look at the SEPIC voltage converter. You probably do not know it, but most small Buck Boost Converters are in fact SEPIC converters and for a good reason. I will show you how the SEPIC converter works, why it is "(S)EPIC", how you can modify it with a coupled inductor and how to make a DIY version. Let's get started! Websites which were shown/mentioned in the video: https://www.we-online.com/catalog/en/WE-MCRI https://www.onsemi.com/pub/collateral/and90136-d.pdf https://www.ti.com/lit/an/slyt309/slyt309.pdf https://datasheetspdf.com/pdf/1096363/FeelingTechnology/FP5139/1 https://datasheet.octopart.com/IPD088N04L-G-Infineon-datasheet-8434349.pdf https://www.ti.com/lit/an/slyt411/slyt411.pdf?ts=1654076900096&ref_url=https%253A%252F%252Fwww.google.com%252F https://www.all-electronics.de/wp-content/uploads/migrated/document/114418/502ag0207.pdf https://www.digikey.de/en/articles/comparing-coupled-and-uncoupled-inductor-sepic-voltage-converters https://www.ti.com/lit/ds/symlink/lm2577.pdf Thanks to JLCPCB for sponsoring this video. Visit https://jlcpcb.com to get professional PCBs for low prices. 0:00 SEPIC Converter? 1:54 Intro 2:29 How does it work? 5:20 Advantages of the SEPIC 6:05 Secret Coupled Inductor Hack? 9:21 Which SEPIC should you buy? 9:49 DIY SEPIC
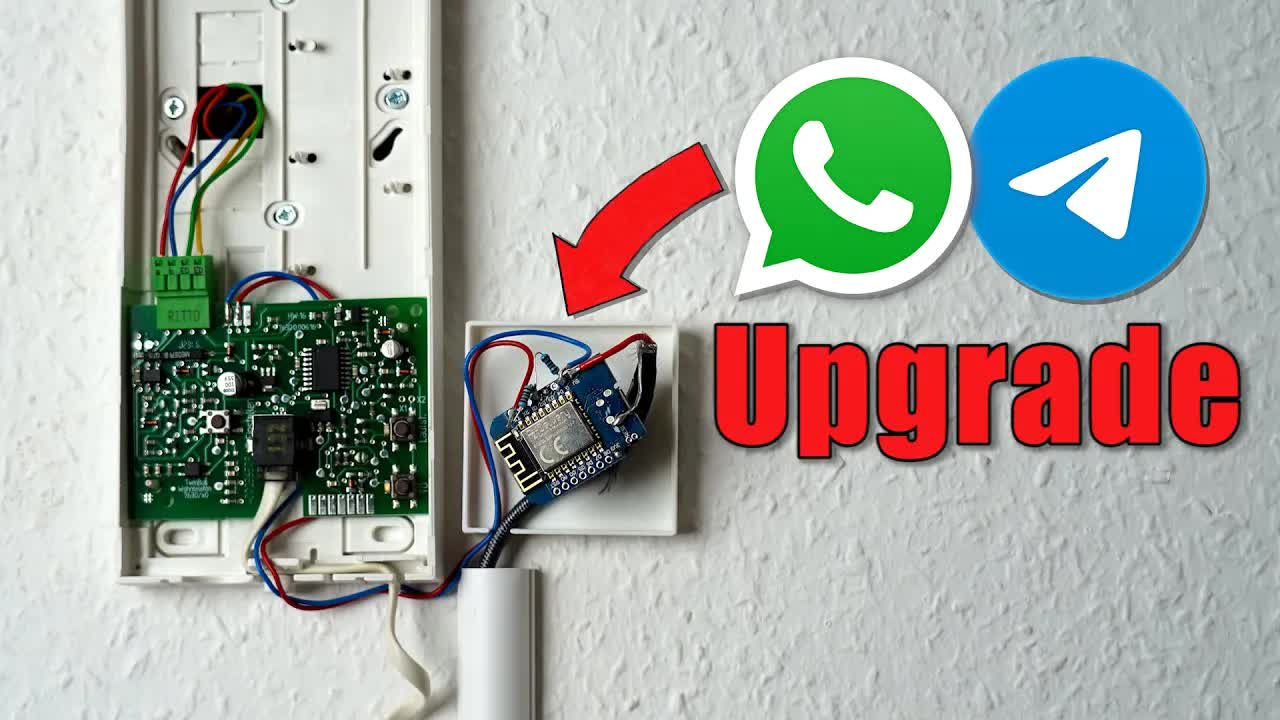
ZrkAWSemDC8 | 12 Jun 2022
Altium Designer: https://altium.com/yt/greatscott! Previous video: https://youtu.be/W_hIVtcx6CA Home Assistant video: https://youtu.be/IvI1RqYPO24 Facebook: https://www.facebook.com/greatscottlab Twitter: https://twitter.com/GreatScottLab Instagram: https://www.instagram.com/great.scott.lab/ Support me for more videos: https://www.patreon.com/GreatScott?ty=h More project information here: https://www.patreon.com/posts/67124049 You can get the parts for this project here (affiliate links): Aliexpress: ESP8266: https://s.click.aliexpress.com/e/_9RWw7d Resistors: https://s.click.aliexpress.com/e/_9yPdxh 5V Power Supply: https://s.click.aliexpress.com/e/_AmIdk7 Amazon.com: ESP8266: https://amzn.to/3N1RUmT Resistors: https://amzn.to/3lXYxdX 5V Power Supply: https://amzn.to/3lXupPX Amazon.de: ESP8266: https://amzn.to/3N4r3Xm Resistors: https://amzn.to/3M3NbzA 5V Power Supply: https://amzn.to/3a6kV28 In this project I will be solving a problem that I had for a while. Since I love listening to music I always miss the doorbell. That is a big problem for me because there is always a postman at the door trying to deliver the components for the next project. So in this video I will show you how to add an ESP8266 to an intercom so that it can send WhatsApp/Telegram notifications to a phone. This way I and maybe you will never miss the doorbell again ;-) Let's get started! Websites which were shown/used in the video: https://asset.conrad.com/media10/add/160267/c1/-/de/000469693ML01/04-Bedienung.pdf https://www.nicht-trivial.de/index.php/2018/02/14/ritto-zu-mqtt/ https://www.callmebot.com/blog/free-api-whatsapp-messages/ https://github.com/witnessmenow/push-notifications-arduino-esp8266 https://www.youtube.com/c/brianlough https://www.twilio.com/ https://giphy.com/gifs/free-real-estate-8VSaCyIdcnbuE Thanks to Altium for sponsoring this video. 0:00 My Doorbell Problem 1:30 Intro 2:09 Plan Overview 2:58 Intercom Investigation 4:46 uC WhatsApp Notifications 6:54 uC Telegram Notifications 7:36 Adding the uC to the Intercom 9:31 Verdict
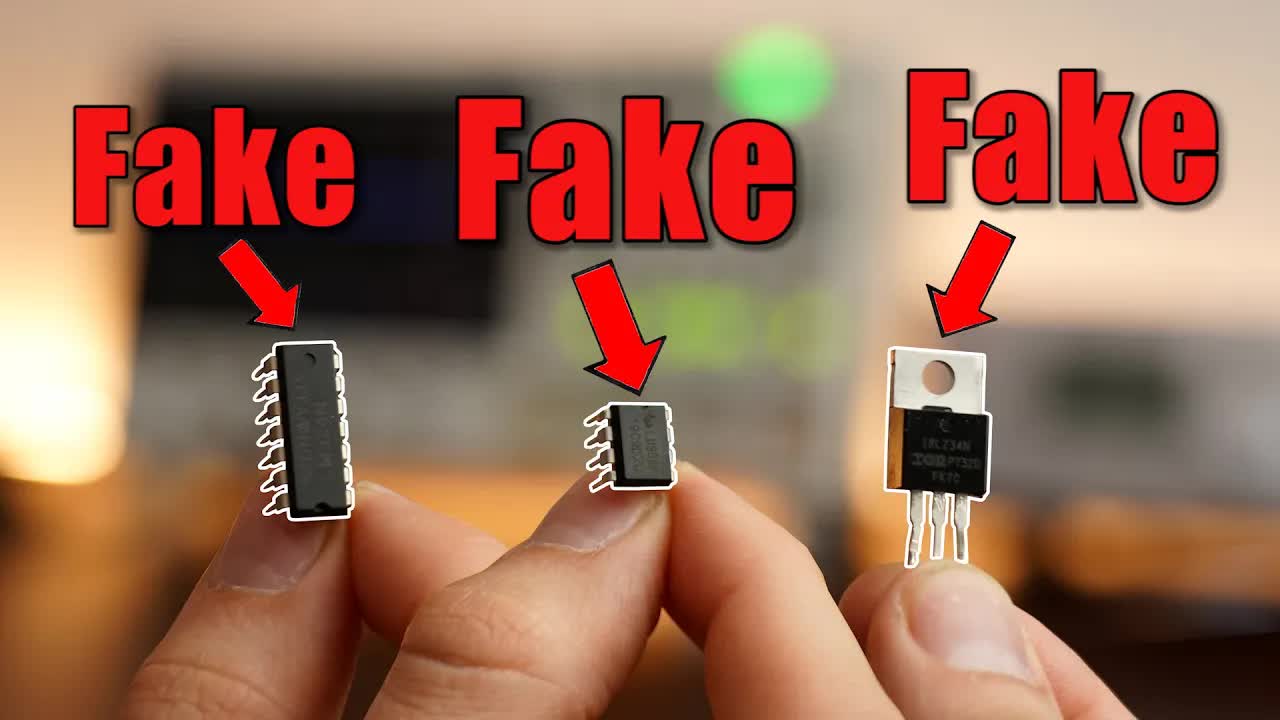
W_hIVtcx6CA | 05 Jun 2022
Keysight University Live: https://bit.ly/LFTL_GreatScott Previous video: https://youtu.be/KKK-gFkBHbE Facebook: https://www.facebook.com/greatscottlab Twitter: https://twitter.com/GreatScottLab Instagram: https://www.instagram.com/great.scott.lab/ Support me for more videos: https://www.patreon.com/GreatScott?ty=h Altium Designer: https://altium.com/yt/greatscott! Attention!: I accuse none of the shown component sellers that they sell fake components. The tests were simply not enough so there is a chance that the shown components were all original. You can get the shown transistor tester here ;-) (Affiliate links): Aliexpress: https://s.click.aliexpress.com/e/_AYQh7t Amazon.com: https://amzn.to/3yRjgrv Amazon.de: https://amzn.to/39KSoz7 In this video we will be having a closer look at electrical components because there is definitely a possibility that your components are fake/counterfeit. So I will show you why fake components exist, what their problems are and how you can spot them/test them. Let's get started! Websites/Pictures which were shown/used in the video: https://www.statista.com/chart/17410/counterfeit-and-pirated-products-by-category/ https://www.newport.com/n/semiconductor-manufacturing https://en.wikipedia.org/wiki/Die_(integrated_circuit)#/media/File:SN7400_1965.jpg https://en.wikipedia.org/wiki/Die_(integrated_circuit) https://www.ti.com/lit/ds/symlink/lm358b.pdf?ts=1652792868118&ref_url=https%253A%252F%252Fwww.google.com%252F https://www.infineon.com/dgdl/Infineon-IRLZ34N-DataSheet-v01_01-EN.pdf?fileId=5546d462533600a40153567206892720 https://www.infineon.com/dgdl/Infineon-IRF540N-DataSheet-v01_01-EN.pdf?fileId=5546d462533600a4015355e39f0d19a1 Thanks to Keysight for sponsoring this video. 0:00 Fake Components? 1:23 Intro 2:00 How Fake Components come to be 3:11 MOSFET Fake Testing 6:12 OpAmp Fake Testing 8:50 Verdict
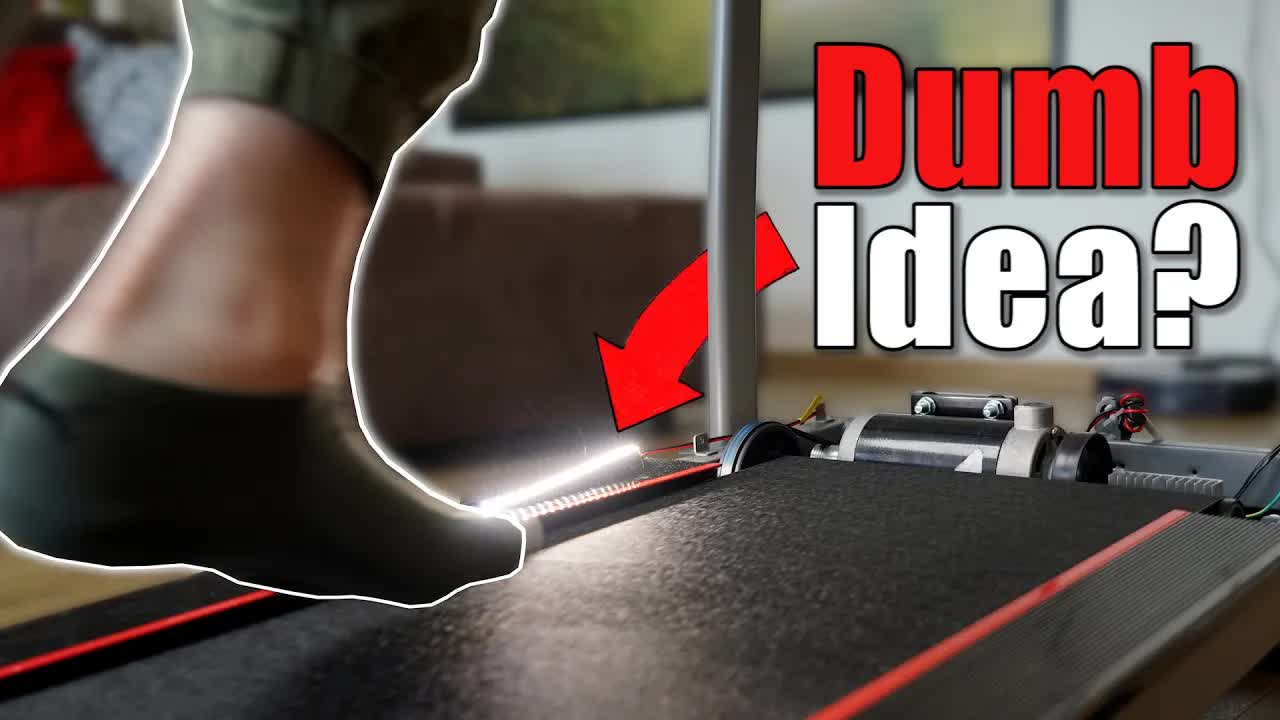
KKK-gFkBHbE | 22 May 2022
PCB+Assembly from $2, 3D Printing from $1:https://jlcpcb.com/AAA Get Coupons via Contacting JLCPCB FB: https://www.facebook.com/jlcpcb/ Previous video: https://youtu.be/S0j4xOuRzD4 Facebook: https://www.facebook.com/greatscottlab Twitter: https://twitter.com/GreatScottLab Instagram: https://www.instagram.com/great.scott.lab/ Support me for more videos: https://www.patreon.com/GreatScott?ty=h Altium Designer: https://altium.com/yt/greatscott! In this video I will try out an idea I had in my head for quite a while. Why not simply use a treadmill to generate electricity? I mean we power treadmills to make us run, so why not "run" as well but push the treadmill to produce electricity. That is exactly what I will be finding out in this video. Is such a modification possible? How much power can we produce? Would I recommend it? Let's find out! Websites which were shown/used in the video: https://cintascorrer.net/blog/motor/ https://datasheetspdf.com/pdf-file/1029570/JILINSINO/15F60C/1 Thanks to JLCPCB for sponsoring this video. Visit https://jlcpcb.com to get professional PCBs for low prices. 0:00 Treadmill Generator Idea! 1:07 Intro 1:45 Motor Inspection 3:21 Driver Electronics 5:27 Using the Motor as a Generator! 7:31 Charge your Phone? 9:06 Verdict
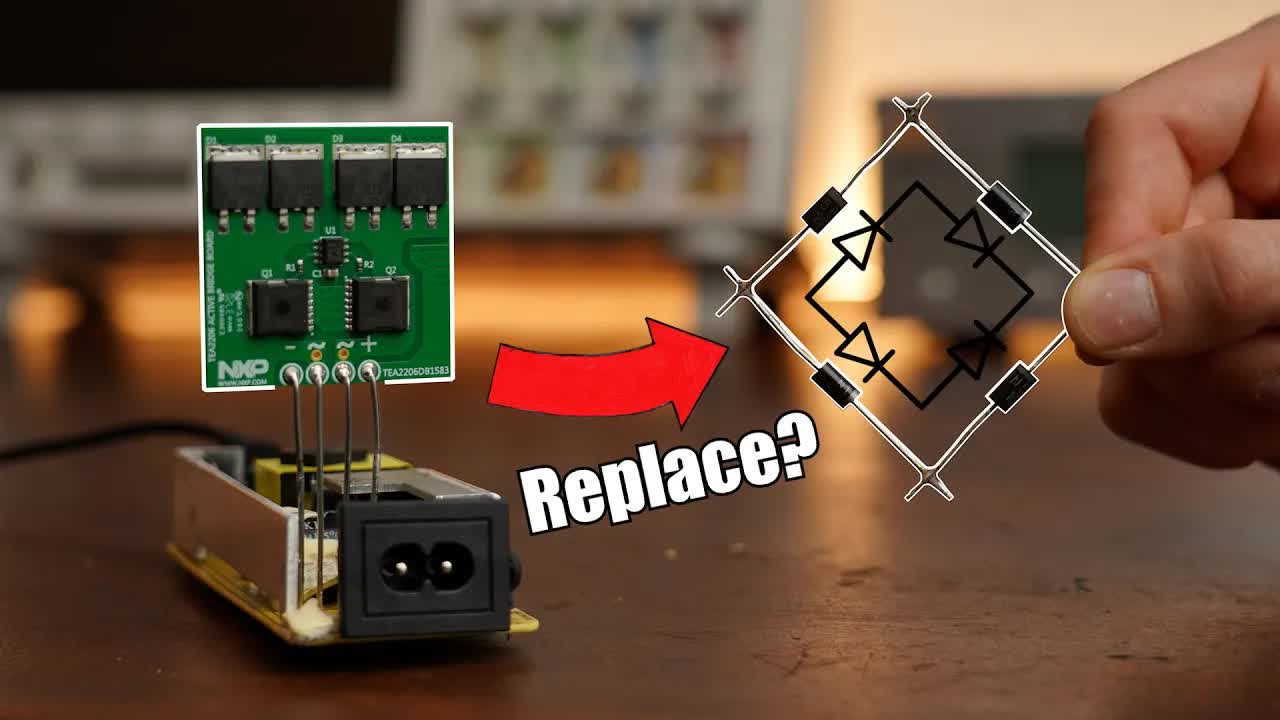
S0j4xOuRzD4 | 15 May 2022
Altium Designer: https://altium.com/yt/greatscott! Previous video: https://youtu.be/3dArEoLOvzI Diode & Full Bridge Rectifier video: https://youtu.be/46WSCihjoRI Facebook: https://www.facebook.com/greatscottlab Twitter: https://twitter.com/GreatScottLab Instagram: https://www.instagram.com/great.scott.lab/ Support me for more videos: https://www.patreon.com/GreatScott?ty=h In this video we will be having a closer look at active rectifiers. For decades we have been using full bridge rectifiers to convert our mains AC voltage into a DC voltage that we can then step down to power all of our electronics devices. But the problem is that a full bridge rectifier consists of 4 diodes that come with a noticeable voltage drop and thus power losses. Because of that an active rectifier uses MOSFETs instead of diodes in order to decrease power losses. Does that makes sense? Let's find out! Websites which were shown/mentioned in the video: https://www.nxp.com/docs/en/data-sheet/TEA2208T.pdf https://www.nxp.com/docs/en/data-sheet/TEA2206T.pdf https://www.mouser.de/ProductDetail/NXP-Semiconductors/TEA2206DB1583?qs=TuK3vfAjtkVC%252BjhSfiCAwg%3D%3D Thanks to Altium for sponsoring this video. 0:00 The Problem with Full Bridge Rectifiers (FBR) 1:27 Intro 2:09 How does an FBR work? 3:36 The Idea of the Active Rectifier 4:38 Active Rectifier Controller ICs 5:40 25V AC Comparison Test 6:45 DIY Active Rectifier 7:59 230V AC Power Supply Comparison Test 9:46 Verdict

3dArEoLOvzI | 08 May 2022
Keysight University Live Giveaway: https://bit.ly/LFTL_GreatScott Previous video: https://youtu.be/rXuWnwSYC5Y Load Cell video: https://youtu.be/lWFiKMSB_4M Facebook: https://www.facebook.com/greatscottlab Twitter: https://twitter.com/GreatScottLab Instagram: https://www.instagram.com/great.scott.lab/ Support me for more videos: https://www.patreon.com/GreatScott?ty=h Altium Designer: https://altium.com/yt/greatscott! More information about the DIY solution here: https://www.patreon.com/posts/65629255 Parts list for the DIY solution (affiliate links): Aliexpress: Load Cell 3kg & HX711: https://s.click.aliexpress.com/e/_Ams5ph Arduino: https://s.click.aliexpress.com/e/_9R3pBH Alu Profile: https://s.click.aliexpress.com/e/_A6pb3d Amazon.com: Load Cell 3kg & HX711: https://amzn.to/37IJdOV Arduino: https://amzn.to/3EMXarb Alu Profile: https://amzn.to/3EMy1No In this video I will finally get one step closer to building my own DIY drone. Because in this episode of DIY or Buy we will be having a look at drone motor test stands and obviously build a crude DIY one as well. With such a stand you can measure at what RPM/Power your motor creates what RPM with what thrust. This information is more or less crucial when making your own DIY drone. So let's get started! Websites which were shown/used in the video: https://www.tytorobotics.com/products/thrust-stand-series-1580 Thanks to Keysight for sponsoring this video. 0:00 What Drone Problem? 2:00 Intro 2:40 What do I need to measure? 4:34 Buy Option Test 5:53 Motor Test Results 7:48 DIY Option 9:57 Verdict

rXuWnwSYC5Y | 24 Apr 2022
Sign up to Morning Brew for free today: https://morningbrewdaily.com/greatscott Previous video: https://youtu.be/z5eB_2wjLTg Wireless Power videos: https://youtu.be/ExU32UyGX6w https://youtu.be/3E5PUnYlaTM https://youtu.be/15HmW1K8MZY https://youtu.be/S3mLHpzzcTU TheLockPickingLawyers shown video: https://youtu.be/0SEHUqkbIjU Facebook: https://www.facebook.com/greatscottlab Twitter: https://twitter.com/GreatScottLab Instagram: https://www.instagram.com/great.scott.lab/ Support me for more videos: https://www.patreon.com/GreatScott?ty=h Altium Designer: https://altium.com/yt/greatscott! In this video I will try to pick an RFID lock electrically. Will I succeed or fail? We will find out. Along the way we will learn tons about 125kHz RFID locking systems and how "secure" they are. Reading and writing to RFID tags will of course also be a part of that. So let's get started! Thanks to Morning Brew for sponsoring this video. 0:00 RFID Door Locking System Overview 1:17 Intro 2:12 How I built the Locking System 4:03 RFID Theory 5:54 Amazon RFID Writer/Reader 6:46 Amp Mod (Increase Reading Distance) 8:40 Coil Mod (Increase Reading Distance) 10:41 Verdict

z5eB_2wjLTg | 17 Apr 2022
Altium Designer: https://altium.com/yt/greatscott! Previous video: https://youtu.be/C8Xpjj47vgU Waveform Generator video: https://youtu.be/Y1KE8eAC9Bk Facebook: https://www.facebook.com/greatscottlab Twitter: https://twitter.com/GreatScottLab Instagram: https://www.instagram.com/great.scott.lab/ Support me for more videos: https://www.patreon.com/GreatScott?ty=h You can get the components mentioned in the video here (affiliate links): Charge Pump Power Supply: https://s.click.aliexpress.com/e/_Ad0Us9 Diodes: https://s.click.aliexpress.com/e/_AmtdPf Capacitors: https://s.click.aliexpress.com/e/_9gfJRJ In this electronics basics episode we will be having a look at negative DC voltages. Now you usually do not require them alone, but pretty much always with a positive voltage as well. In this case the power supply that can provide these two voltages is called a dual rail power supply. So in this video you will not only find out where you need such a dual rail voltage but also how to create one with 3 different techniques! Let's get started! Websites which were shown/mentioned in the video: https://tangentsoft.net/elec/vgrounds.html https://robu.in/what-is-dual-power-supply-circuit-construction-and-working/ https://www.electronicsweekly.com/market-sectors/power/ten-best-ways-split-voltage-rail-2015-02/ https://en.wikipedia.org/wiki/Charge_pump https://www.ti.com/lit/ds/symlink/rc4580.pdf?ts=1648798873856&ref_url=https%253A%252F%252Fwww.google.com%252F https://www.analog.com/media/en/technical-documentation/data-sheets/1990fb.pdf http://ww1.microchip.com/downloads/en/DeviceDoc/21456D.pdf https://datasheet.lcsc.com/lcsc/1809131515_Maxim-Integrated-MAX512CPD-_C80560.pdf https://www.ti.com/lit/ds/symlink/ne5532.pdf?ts=1648785673595&ref_url=https%253A%252F%252Fwww.digchip.com%252F Thanks to Altium for sponsoring this video. 0:00 Why Negative Voltages? 1:37 Intro 2:11 Charge Pump Design 5:44 Transformer Design 7:15 Simpler Rail Splitter Designs 9:26 Verdict

C8Xpjj47vgU | 10 Apr 2022
Keysight University Live Giveaway: https://bit.ly/LFTL_GreatScott Previous video: https://youtu.be/6w6x7eiorLw Wire Nut VS Wago video: https://youtu.be/zgjo36-jaFY Wire Connector/Ferrule video: https://youtu.be/KE3CjZ0BUFo Facebook: https://www.facebook.com/greatscottlab Twitter: https://twitter.com/GreatScottLab Instagram: https://www.instagram.com/great.scott.lab/ Support me for more videos: https://www.patreon.com/GreatScott?ty=h Altium Designer: https://altium.com/yt/greatscott! You can get Wago connectors here (affiliate links): Amazon.com: https://amzn.to/3DeEK1N Amazon.com: https://amzn.to/3DeEK1N You can get the shown Wire connectors here (affiliate links): Amazon.com: https://amzn.to/3tGMVAU https://amzn.to/3Nn6sOm https://amzn.to/3uspE4N https://amzn.to/3wFeKv7 Amazon.de: https://amzn.to/3No3NEo https://amzn.to/3qCe1qR https://amzn.to/3IKE0m2 https://amzn.to/3LflJil https://amzn.to/3Nlg0tp https://amzn.to/3Dg48V2 https://amzn.to/3LbFffI In this video we will be having a closer look at Wago Knock-Offs. That means I will be testing 7 different kinds of them in order to find out if one of them can be a Wago replacement. Tests include a resistance test, pull test, size comparison, price comparison and much more. Let's get started! Websites which were shown/used in the video: https://www.nelcoproducts.com/blog/understanding-ul-listing/ https://www.vde.com/tic-en/marks-and-zertificates/certification-marks-and-attestations https://www.enec.com/page.php?p=2 https://www.wago.com/global/installation-terminal-blocks-and-connectors/classic-splicing-connector/p/222-413 https://europa.eu/youreurope/business/product-requirements/labels-markings/ce-marking/index_en.htm Thanks to Keysight for sponsoring this video. 0:00 I was weak and bought Wago Knock-Offs! 1:08 Intro 1:49 Wago Knock-Off comparison list 3:54 Ease of use 5:04 Extra features 6:11 Size 6:36 Prize 7:26 Pull Test 8:08 Resistance Test 9:35 Certificates 10:19 Verdict

6w6x7eiorLw | 27 Mar 2022
Try PSIM for free: https://powersimtech.com/products/psim/psim-pricing-and-licensing/download-demo/ More information about PSIM: https://powersimtech.com/ Previous video: https://youtu.be/ktcuBLA3Www Facebook: https://www.facebook.com/greatscottlab Twitter: https://twitter.com/GreatScottLab Instagram: https://www.instagram.com/great.scott.lab/ Support me for more videos: https://www.patreon.com/GreatScott?ty=h Altium Designer: https://altium.com/yt/greatscott! More project information here: https://www.patreon.com/posts/63950907 Parts list (affiliate links): Resistors: https://s.click.aliexpress.com/e/_dTPpXjt https://amzn.to/3ijSqPe Ceramic Capacitors: https://s.click.aliexpress.com/e/_dU4FEsB https://amzn.to/3Ig8GLH IRL540 MOSFET: https://s.click.aliexpress.com/e/_A2Q9sP TL431 IC: https://s.click.aliexpress.com/e/_AekHjV https://amzn.to/3JlmfuP MCP602 OpAmp: https://s.click.aliexpress.com/e/_dTvJRGw https://amzn.to/3tiHGXS Supercapacitor: https://s.click.aliexpress.com/e/_Agm02X Perfboard: https://s.click.aliexpress.com/e/_dXx2Zv5 https://amzn.to/366Xxjq Trimmer: https://s.click.aliexpress.com/e/_AWiIan https://amzn.to/3JoAYVI You can get the Buy option here (affiliate links): https://amzn.to/3tivs1p https://amzn.to/3CPPUtL In this episode of DIY or Buy we will be having a look at a Fire TV Stick and its problem that you can not really power them with a TVs USB Port. There is a product out there that solves this problem but I think you can build such a circuit better, simpler and cheaper the DIY way. So let's find out how the buy option works and how can we can create a DIY solution with Supercapacitors! Let's get started! Thanks to Powersys for sponsoring this video. 0:00 The power problem of Fire TV Sticks 1:45 Intro 2:45 Fire TV Stick current measurement 3:30 Testing the Buy option 4:00 How does the Buy option work? 5:26 DIY Supercapacitor improvement 6:44 DIY Solution Test/Explain 9:36 DIY Solution Build & Verdict

ktcuBLA3Www | 20 Mar 2022
Altium Designer: https://altium.com/yt/greatscott! Previous video: https://youtu.be/n9QpmIBFfcQ Mark Robers Domino Robot video: https://youtu.be/8HEfIJlcFbs AI Robot video: https://youtu.be/EvK2ZQbMn8o Facebook: https://www.facebook.com/greatscottlab Twitter: https://twitter.com/GreatScottLab Instagram: https://www.instagram.com/great.scott.lab/ Support me for more videos: https://www.patreon.com/GreatScott?ty=h More project information here: https://www.patreon.com/posts/63551949 Parts list (affiliate links): Arduino Nano: https://s.click.aliexpress.com/e/_APAGPx LM298: https://s.click.aliexpress.com/e/_A7krD3 DC Motors: https://s.click.aliexpress.com/e/_ANbG8N USB Type C PD Trigger Board: https://s.click.aliexpress.com/e/_9w9JCZ RC Transmitter & Receiver: https://s.click.aliexpress.com/e/_ALrheN In this project we will be having a closer look at omniwheels. Such wheels can (like the name implies) move in any 2D direction without turning. That makes them ideal for saving energy and time and they can also very precisely move the robot to a specific spot. There are of course many more advantages and applications which is why I was eager to find out more about them. So in this video I basically built my own omniwheel robot to learn more about the topic while also determining whether it is worth it to build such a robot design. Websites which were shown/mentioned in the video: https://www.sparkfun.com/datasheets/Robotics/L298_H_Bridge.pdf Thanks to Altium for sponsoring this video. 0:00 What are Omniwheels? 1:35 Intro 2:10 DIY Omniwheel Build 4:30 Robot Build 8:02 First Robot Test (Spin around) 8:20 Omniwheel Moving Theory & Code 9:05 Final Tests & Improvements 10:03 Verdict

n9QpmIBFfcQ | 13 Mar 2022
Visit Keysight University: https://bit.ly/GreatScott_Keysight Previous video: https://youtu.be/QarizoUnRfk Facebook: https://www.facebook.com/greatscottlab Twitter: https://twitter.com/GreatScottLab Instagram: https://www.instagram.com/great.scott.lab/ Support me for more videos: https://www.patreon.com/GreatScott?ty=h Altium Designer: https://altium.com/yt/greatscott! You can get Liquid Metal/Thermal Paste here (affiliate links): Amazon.com: https://amzn.to/3LYh0TF https://amzn.to/3HhkVHv Amazon.de: https://amzn.to/353PlzN https://amzn.to/3sXAejs In this video we will be having a closer look at liquid metal. I first heard about this stuff when the new PlayStation 5 was presented. Basically a metal substance that features a way better thermal conductivity than the usual thermal paste. But does that mean that we should now all use liquid metal? In this video I will do a couple of tests in order to show you that this is not such a good idea ;-) Let's get started! Websites which were shown/used in the video: https://www.gamersnexus.net/guides/3064-intels-thermal-problem-pt1-liquid-metal-vs-thermal-paste-benchmarks-7900x https://github.com/nschloe/stressberry https://tutorial.cytron.io/2021/11/18/stressberry-test-on-raspberry-pi-4/ https://en.wikipedia.org/wiki/Transistor_count#/media/File:Moore's_Law_Transistor_Count_1970-2020.png Thanks to Keysight for sponsoring this video. 0:00 What is Liquid Metal? 1:19 Intro 1:58 "Unboxing" 2:34 Aluminium Problem 3:13 Application Examples 3:56 Raspberry Pi Thermal Paste Test 6:42 Raspberry Pi Liquid Metal Test 8:24 Transistor Heat Transfer Test 9:57 Verdict

QarizoUnRfk | 27 Feb 2022
PCB+Assembly from $2, Get JLCPCB SMT Coupon:https://jlcpcb.com/AAA Fans Activity: Top 8 comments with the most likes will get a $50 JLCPCB discount card. Comment winners' pls email [email protected] on 8 March for prize. Facebook: https://www.facebook.com/greatscottlab Twitter: https://twitter.com/GreatScottLab Instagram: https://www.instagram.com/great.scott.lab/ Support me for more videos: https://www.patreon.com/GreatScott?ty=h Altium Designer: https://altium.com/yt/greatscott! You can get the Buy option here (affiliate links): https://s.click.aliexpress.com/e/_A1wGk3 https://amzn.to/3GOuNIt https://amzn.to/3sG6jwc Parts list for the DIY version (incomplete, affiliate links): ATMEGA328P-AU: https://s.click.aliexpress.com/e/_ArWKdp OLED Display: https://s.click.aliexpress.com/e/_AkhcgB MOSFET: https://s.click.aliexpress.com/e/_A5U183 5V Regulator: https://s.click.aliexpress.com/e/_A3WLNN LMT85 Temp Sensor: https://s.click.aliexpress.com/e/_9uTxT1 More project information about the DIY option: https://www.solderreflowplate.co.uk/ https://github.com/AfterEarthLTD/Solder-Reflow-Plate In this episode of DIY or Buy we will be having a look at reflow soldering plates. I am familiar with hand soldering, hot air reflow soldering and oven reflow soldering and I was looking for a better technique that is easy to pull off and not as bulky as an oven. That is when I found out about reflow plates. So I bought myself one for testing and around the same time a viewer of mine reached out with a DIY solution. So in this video I will test both versions and ultimately tell you whether hot plate soldering is awesome and whether you should DIY one or simply buy one! Let's get started! Thanks to JLCPCB for sponsoring this video. Visit https://jlcpcb.com to get professional PCBs for low prices. 0:00 My Soldering techniques suck! 1:10 Hot Plate soldering? 1:53 Intro 2:36 Buy option test 4:35 DIY PCB version functional principle 5:21 DIY Schematic & Code 6:57 DIY Build 9:33 DIY option test 10:22 Verdict

tEgVHgHovBA | 23 Feb 2022
Du möchtest mehr über die Würth Elektronik Bauteile erfahren? Dann klicke hier: https://bit.ly/OnlineKatalog_DE Würth Elektronik-Produkte, die im Video zu sehen waren: - WL-SMDC Horticulture LEDs (150353xx74500): https://bit.ly/WE_horticulture_leds - Lighting Development Kit (150001): https://bit.ly/WE_Lighting_DevKit - MagI³C-LDHM LED Step Down High Current Module: https://bit.ly/MagI³C_LDHM_LED_Module Würth Elektronik REDEXPERT Kernverlust-Design-Software: https://bit.ly/REDEXPERT_Horti_Leds Landingpage REDEXPERT für weitere Informationen: https://bit.ly/REDEXPERT_LP Internetseiten welche im Video zu sehen waren (application notes): https://bit.ly/Let_It_Grow_LP Vorheriges Video: https://youtu.be/zgjo36-jaFY Facebook: https://www.facebook.com/greatscottlab Twitter: https://twitter.com/GreatScottLab Instagram: https://www.instagram.com/great.scott.lab/ Unterstütze mich für mehr videos : https://www.patreon.com/GreatScott?ty=h Altium Designer: https://altium.com/yt/greatscott! In diesen Projekt werden wir uns Horticulture LEDs aka Growing LEDs genauer anschauen. Dabei werde Ich erklären wie genau diese LEDs das Wachstum der Pflanzen beschleunigen können und danach werden wir uns ein praktisches Beispiel anschauen, in welchen Ich ein High Power LED Board mit passender Treiberschaltung baue. Am Ende werde Ich dann die Elektronik nutzen um ein Experiment durchzuführen, in welchen Ich Rucola 3 Wochen wachsen ließ mithilfe der LEDs und ohne diese. Let's get started! Danke an die Würth Elektronik eiSos Gruppe für die Unterstützung des Videos. 0:00 Vorstellung der Horticulture LEDs 0:56 Intro 1:09 Wie helfen die Horticulture LEDs den Pflanzen? 3:32 DIY LED Board 5:45 DIY LED Treiberschaltung 7:27 Fertigstellung des Experimentaufbaus 9:23 Experiment Durchführung & Auswertung 10:02 Fazit

4FryMPpJG6I | 20 Feb 2022
Do you want to know more about the Würth Elektronik components? Then click here: https://www.we-online.com/katalog/en Würth Elektronik products, which were used in the video: - WL-SMDC Horticulture LEDs (150353xx74500): https://bit.ly/WE_horticulture_leds_en - Lighting Development Kit (150001): https://bit.ly/WE_Lighting_Dev_Kit_en - MagI³C-LDHM LED Step Down High Current Module: https://bit.ly/MagI³C_LDHM_LED_Module_en Würth Elektronik REDEXPERT Software: https://bit.ly/REDEXPERT_Horti_Leds Landingpage REDEXPERT for more information: https://bit.ly/REDEXPERT_LP_en Websites which were shown in the video (application notes): https://bit.ly/Let_it_grow_LP_en Previous video: https://youtu.be/zgjo36-jaFY Facebook: https://www.facebook.com/greatscottlab Twitter: https://twitter.com/GreatScottLab Instagram: https://www.instagram.com/great.scott.lab/ Support me for more videos: https://www.patreon.com/GreatScott?ty=h Altium Designer: https://altium.com/yt/greatscott! In this project we will be having a look at horticulture LEDs aka growing LEDs. I will explain why they can improve the growth of plants and then show you a practical example in which I built a high power LED board long with a driver circuit for it. At the end I will then use all the electronics in order to conduct an experiment in which I let arugula grow for 3 weeks with and without the growing lights. Let' see the results! Thanks to the Würth Elektronik eiSos Group for supporting this video. 0:00 Horticulture LED introduction 0:57 Intro 1:10 How can Horticulture LEDs help plants? 3:38 DIY LED board 6:07 DIY LED Driver board 7:44 Final Experiment setup 9:41 Experiment execution & result 10:25 Verdict

zgjo36-jaFY | 13 Feb 2022
The first 1,000 people to use this link will get a 1 month free trial of Skillshare: https://skl.sh/greatscott02221 Previous video: https://youtu.be/MPnTSl4vpNs Facebook: https://www.facebook.com/greatscottlab Twitter: https://twitter.com/GreatScottLab Instagram: https://www.instagram.com/great.scott.lab/ Support me for more videos: https://www.patreon.com/GreatScott?ty=h Altium Designer: https://altium.com/yt/greatscott! You can get Wago Connectors here ;-) (Affiliate links): Amazon.com: https://amzn.to/3AMwSmW https://amzn.to/3rfRXTA Amazon.de: https://amzn.to/3IRjIYv In this video we will be having a closer look at wire nuts and wago connectors. Both are used for electrical house wiring and both come with their own advantages & disadvantages. I will present you their most important ones by doing a couple of different tests and at the end you will know what connector you will use in the future ;-) Let's get started! Websites which were shown/used in the video: https://en.wikipedia.org/wiki/Twist-on_wire_connector https://static.chipdip.ru/lib/848/DOC011848027.pdf Thanks to Skillshare for sponsoring this video. 0:00 Wire Nut VS Wago Overview 0:59 Intro 1:57 Comparison Criteria 2:58 Ease of use 5:27 Possible Problems 6:19 Fast to use? 6:54 Reusability 7:23 Size 7:44 Price 8:01 Pull Test 8:46 Resistance Test (Heat) 10:05 Flammable? 10:22 Verdict

MPnTSl4vpNs | 30 Jan 2022
Altium Designer: https://altium.com/yt/greatscott! Previous video: https://youtu.be/sr_sm6VR9uc Facebook: https://www.facebook.com/greatscottlab Twitter: https://twitter.com/GreatScottLab Instagram: https://www.instagram.com/great.scott.lab/ Support me for more videos: https://www.patreon.com/GreatScott?ty=h Parts list (affiliate links): Aliexpress: Makita Adapter: https://s.click.aliexpress.com/e/_AFuLEy Relay: https://s.click.aliexpress.com/e/_A1kdHa Heat Gun: https://s.click.aliexpress.com/e/_AUYP2U Plastic Welding Sticks: https://s.click.aliexpress.com/e/_9ASdCY Amazon.com: Makita Adapter: https://amzn.to/3rIajMb Relay: https://amzn.to/3tWFTZ9 Heat Gun: https://amzn.to/3554kJt Plastic Welding Sticks: https://amzn.to/3IxQTQC In this project we will be having a closer look at my vacuum. The problem is that its run time is roughly around 10 minutes and the worst part is that it takes 4 hours to charge up. So I will be showing you how I added an adapter to the vacuum which allows using Makita battery packs in order to power it. This way the battery run time becomes basically endlessly because I got 2 battery packs I can switch between. You can of course implement this Makita battery pack idea into other devices if you know what you are doing ;-) Let's get started! Websites which were shown/mentioned in the video: https://drive.google.com/file/d/1SvhWEEU4TqKJi6Ww7-WqfC7j_crP7Sd1/view Thanks to Altium for sponsoring this video. 0:00 My vacuum sucks! 1:01 Intro 1:38 Vacuum overview 2:23 Exploring the insides 4:44 Makita battery upgrade 6:37 First test & troubleshooting 7:54 Final assembly & showcase

sr_sm6VR9uc | 23 Jan 2022
One Stop PCBA, Get $24 SMT Coupon:https://jlcpcb.com/AAA Get my PCB design & Name Card Gerber: https://bit.ly/3tNjXji Previous video: https://youtu.be/XlON0Uj2Zk0 Box project video: https://youtu.be/0P4R91hsMf0 Facebook: https://www.facebook.com/greatscottlab Twitter: https://twitter.com/GreatScottLab Instagram: https://www.instagram.com/great.scott.lab/ Support me for more videos: https://www.patreon.com/GreatScott?ty=h Altium Designer: https://altium.com/yt/greatscott! More project information (code, schematic, pictures,....) on Instructables & EasyEDA: https://www.instructables.com/A-Box-That-Can-SAVE-YOUR-LIFEand-Get-You-Out-of-Aw/ https://oshwlab.com/GreatScott/smscallgpsthingy Parts list (affiliate links): Aliexpress: 1x Arduino Pro Mini: https://s.click.aliexpress.com/e/_APsmG8 1x A6 GSM Module: https://s.click.aliexpress.com/e/_98ih6y 1x NEO-6M GPS Module: https://s.click.aliexpress.com/e/_A5Pys4 2x Slide Switch: https://s.click.aliexpress.com/e/_99gyF2 1x Tactile Push Button: https://s.click.aliexpress.com/e/_A3GIVQ 1x TP4056: https://s.click.aliexpress.com/e/_dX8n0hp 1x LiPo Battery: https://s.click.aliexpress.com/e/_996Mx2 Amazon.com: 1x Arduino Pro Mini: https://amzn.to/3D0YFiM 1x A6 GSM Module: https://amzn.to/3D1bdXN 1x NEO-6M GPS Module: https://amzn.to/3D2hpyB 2x Slide Switch: https://amzn.to/3DZRpVO 1x Tactile Push Button: https://amzn.to/3FThzdn 1x TP4056: https://amzn.to/32FcNC6 1x LiPo Battery: https://amzn.to/3refAfN In this video I will show you how I turned a big and clunky electronics project into a rather small form factor that can easily be carried around. The project itself can call your phone and send an SMS with GPS information. The new credit card sized PCB version can do all of that while being way smaller. The reason is a 4 Layer PCB design which I will tell you all about during the video and how you can make your own. Let's get started! Useful websites which were shown/mentioned in the video: https://www.electrodragon.com/w/GSM_GPRS_A6_Module https://www.smart-prototyping.com/image/data/9_Modules/101756%20Wireless%20A6C/A6_A7_A6C_datasheet-EN.pdf https://www.makerfabs.com/wiki/images/9/90/Maduino_GPRS_A6_v1.5.pdf https://www.electroschematics.com/neo-6m-gps-module/ http://wiki.sunfounder.cc/index.php?title=Ublox_NEO-6M_GPS_Module Thanks to JLCPCB for sponsoring this video. Visit https://jlcpcb.com to get professional PCBs for low prices. 0:00 My old project is TOO BIG! 1:26 Intro 2:08 Component sourcing 3:16 Creating the schematic 4:25 4 Layer PCB design 6:48 Soldering the PCBs 7:55 First test & troubleshooting 9:08 Final Test & verdict

XlON0Uj2Zk0 | 16 Jan 2022
The first 1,000 people to use this link will get a 1 month free trial of Skillshare: https://skl.sh/greatscott01221 Previous video: https://youtu.be/Okqrbwf4tjA Facebook: https://www.facebook.com/greatscottlab Twitter: https://twitter.com/GreatScottLab Instagram: https://www.instagram.com/great.scott.lab/ Support me for more videos: https://www.patreon.com/GreatScott?ty=h Altium Designer: https://altium.com/yt/greatscott! Battery Comparison video: https://youtu.be/5B1sX7p5xXI In this video we will be having a closer look at a new type of supercapacitor. They are called Lithium-Ion Capacitor or LIC and they have some things in common with the well known Lithium-Ion batteries. But will they replace them? What advantages & disadvantages do they come with? When to use them? Let's find out. Websites which were shown/used in the video: https://www.mouser.de/new/taiyo-yuden/taiyo-yuden-lithium-ion-capacitors/ https://en.wikipedia.org/wiki/Lithium-ion_capacitor https://www.yuden.co.jp/include/english/solutions/lic/LIC_White_Paper_Final.pdf https://www.mouser.de/datasheet/2/396/taiyoyuden_capacitor03_e-1488112.pdf https://www.mouser.de/c/power/supercapacitors/?m=Taiyo%20Yuden&voltage%20rating%20dc=3.8%20VDC Thanks to Skillshare for sponsoring this video. 0:00 Big Advantage of Supercapacitors 1:43 Intro 2:47 Lithium Ion Capacitor Basics 5:08 Comparison Supercap, LIC, Batteries 6:09 Stress Testing LICs (Current Limit) 7:12 LICs Application 8:40 Final Verdict

Okqrbwf4tjA | 02 Jan 2022
Yes, I know. I am not directly looking into the camera at all times....I was using a teleprompter for the first time. Sorry about that. Previous video: https://youtu.be/LA8YXaDnqGA Facebook: https://www.facebook.com/greatscottlab Twitter: https://twitter.com/GreatScottLab Instagram: https://www.instagram.com/great.scott.lab/ Support me for more videos: https://www.patreon.com/GreatScott?ty=h Altium Designer: https://altium.com/yt/greatscott! Here is the link to the shown solder (affiliate link): https://amzn.to/3mmtKYS Websites/Videos which were shown during the video: https://support.google.com/youtube/answer/10059070?hl=en https://www.youtube.com/c/greatscottlab2/videos https://www.youtube.com/watch?v=S2xHZPH5Sng https://www.youtube.com/watch?v=8aRTyQwMWqY https://youtu.be/oX1e06KFhBU https://youtu.be/zvkfWfbQ4KA George Street Shuffle by Kevin MacLeod is licensed under a Creative Commons Attribution 4.0 license. https://creativecommons.org/licenses/by/4.0/ Source: http://incompetech.com/music/royalty-free/index.html?isrc=USUAN1300035 Artist: http://incompetech.com/ 0:00 Introduction 0:42 Renovation of my lab 1:14 2021 was weird as a YouTube creator 10:10 I bought a house 13:07 Q&A time
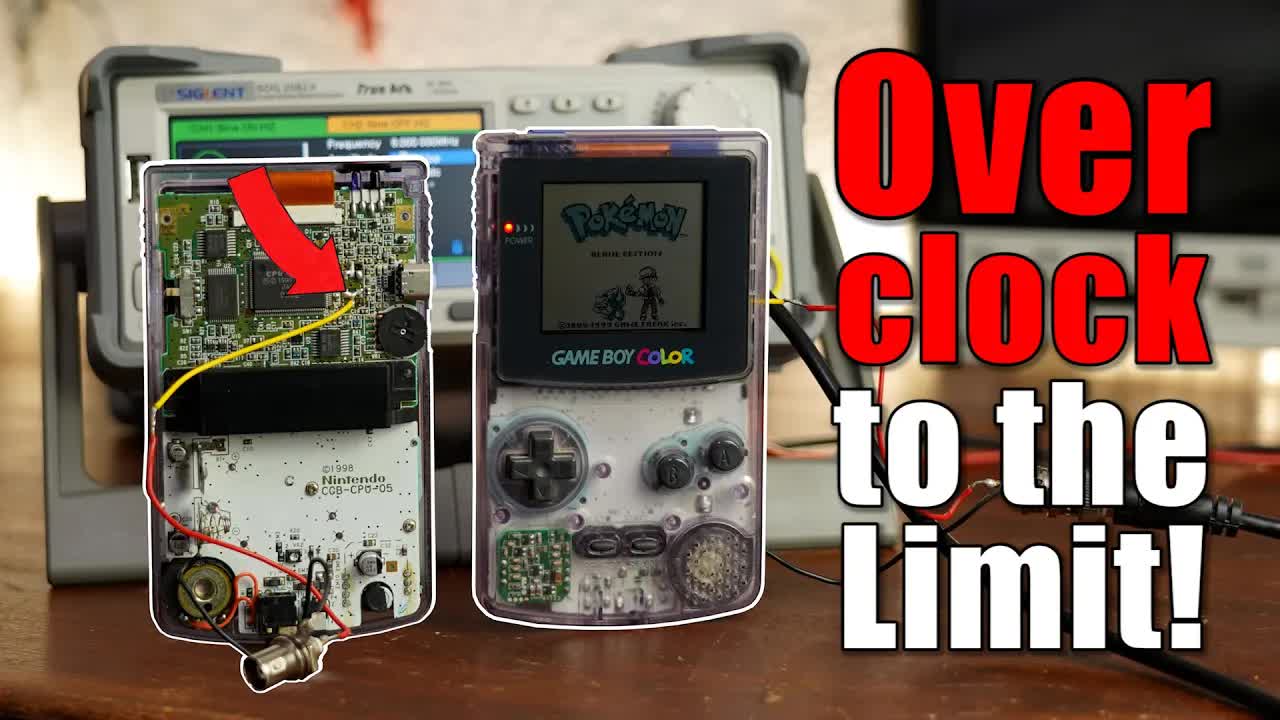
LA8YXaDnqGA | 19 Dec 2021
Altium Designer: https://altium.com/yt/greatscott! Previous video: https://youtu.be/S3mLHpzzcTU Facebook: https://www.facebook.com/greatscottlab Twitter: https://twitter.com/GreatScottLab Support me for more videos: https://www.patreon.com/GreatScott?ty=h You can get the shown Crystal Oscillator Kit here (affiliate links): https://amzn.to/3m18t6Y https://s.click.aliexpress.com/e/_AdkFkw Websites which were shown/used in the video: https://www.sysmaelettronica.it/media/pdf/SCO-061-1.pdf In this video we will be having a look at overclocking. At first I will explain in a very simple way what overclocking is and then I will use this technique in order to speed up my Arduino Microcontroller and GameBoy! Along the way we will learn about the advantages and disadvantages of overclocking. Let's get started! Thanks to Altium for sponsoring this video. 0:00 Overclocking can be useful for? 0:56 Intro 1:30 Overclocking Theory 3:32 Arduino Overclocking 7:37 GameBoy Overclocking

S3mLHpzzcTU | 12 Dec 2021
Elektor Member Offer: https://www.elektormagazine.com/greatscott-elektor-offer-green?utm_source=greatscott&utm_medium=link&utm_campaign=GS-member-12-21 Coupon Code: GreatScott25 LCR Meter: https://www.elektor.com/elektor-2-mhz-lcr-meter-kit?utm_source=greatscott&utm_medium=link&utm_campaign=GS-LCR-12-21 Previous video: https://youtu.be/0P4R91hsMf0 Previous Wireless Power video: https://youtu.be/15HmW1K8MZY Impedance video: https://youtu.be/W2VwAL7-8-o Facebook: https://www.facebook.com/greatscottlab Twitter: https://twitter.com/GreatScottLab Support me for more videos: https://www.patreon.com/GreatScott?ty=h Altium Designer: https://altium.com/yt/greatscott! In this video we will be having a closer look at my wireless power coils in order to optimize them. That means I will show you exactly how to measure the most important characteristics of any coil and how to turn these values into the coil quality which I should keep as big as possible for my wireless power transmission. Along the way we will learn about LCR meters, how coils act at higher frequencies and ultimately (maybe) create my best wireless power coil so far. Let's get started! Websites which were shown/used in the video: https://www.tek.com/document/application-note/capacitance-and-inductance-measurements-using-oscilloscope-and-function-ge https://www.hioki.com/global/learning/usage/lcr-meters_1.html https://www.electronics-notes.com/articles/test-methods/lcr-meter-bridge/primer-basics.php https://www.datatec.de/media/pdf/7c/4e/21/Keysight_Impedance-Measurement-Handbook-5950-3000.pdf https://meettechniek.info/passive/inductance.html Thanks to Elektor for sponsoring this video! Visit https://www.elektormagazine.com/ to read their magazines and buy electronic components 0:00 We need the Coil Quality! 1:22 Intro 2:08 High Frequency Inductor Problem 3:55 Real Coil Explained (LCR) 5:00 DIY Coil Measurements 7:33 DIY Coil Quality Analysis & New Test 8:21 New Litz Wire Coil 9:45 Final Test & Verdict
0P4R91hsMf0 | 05 Dec 2021
The first 1,000 people to use this link will get a 1 month free trial of Skillshare: https://skl.sh/greatscott12211 Previous video: https://youtu.be/uezoQ5fkixY Facebook: https://www.facebook.com/greatscottlab Twitter: https://twitter.com/GreatScottLab Support me for more videos: https://www.patreon.com/GreatScott?ty=h Altium Designer: https://altium.com/yt/greatscott! More project information (code, schematic, pictures,....) on Instructables: https://www.instructables.com/A-Box-That-Can-SAVE-YOUR-LIFEand-Get-You-Out-of-Aw/ Parts list (affiliate links): Aliexpress: 1x Arduino Pro Mini: https://s.click.aliexpress.com/e/_APsmG8 1x A6 GSM Module: https://s.click.aliexpress.com/e/_98ih6y 1x NEO-6M GPS Module: https://s.click.aliexpress.com/e/_A5Pys4 Resistors: https://s.click.aliexpress.com/e/_dTPpXjt LED: https://s.click.aliexpress.com/e/_dV63r7D 2x Slide Switch: https://s.click.aliexpress.com/e/_99gyF2 1x Tactile Push Button: https://s.click.aliexpress.com/e/_A3GIVQ 1x TP4056: https://s.click.aliexpress.com/e/_dX8n0hp 1x LiPo Battery: https://s.click.aliexpress.com/e/_996Mx2 Perfboard: https://s.click.aliexpress.com/e/_AAlVqy Amazon.com: 1x Arduino Pro Mini: https://amzn.to/3D0YFiM 1x A6 GSM Module: https://amzn.to/3D1bdXN 1x NEO-6M GPS Module: https://amzn.to/3D2hpyB Resistors: https://amzn.to/2ZuOC86 LED: https://amzn.to/3nZxIYQ 2x Slide Switch: https://amzn.to/3DZRpVO 1x Tactile Push Button: https://amzn.to/3FThzdn 1x TP4056: https://amzn.to/32FcNC6 1x LiPo Battery: https://amzn.to/3refAfN Perfboard: https://amzn.to/3174q1a In this project I will be showing you how to build a GPS/SMS/Call thingy. I got the idea from an Instagram product that can send an emergency SMS with GPS location to a phone. But the only problem was that the instagram product requires a smartphone to do this which I think is not ideal. So I came up with a box that can do all this work on its own without requiring a smartphone. And as a bonus; my box can also call you to get you out of awkward conversations ;-) Let's get started! Websites which were shown/used in the video: https://www.instagram.com/invisawear/ https://www.invisawear.com/collections/necklaces/products/silver-leather-choker https://www.invisawear.com/pages/faqs https://www.elecrow.com/download/A6%20module%20AT%20commands.pdf https://www.monolithicpower.com/en/mp1584.html https://lastminuteengineers.com/a6-gsm-gprs-module-arduino-tutorial/ https://lastminuteengineers.com/neo6m-gps-arduino-tutorial/ https://github.com/mikalhart/TinyGPSPlus Thanks to Skillshare for sponsoring this video. 0:00 Instagram product that I want to improve 1:32 Intro 2:30 Hardware overview 5:07 Building the test circuit 5:52 Using the GPS/GSM board 8:02 Final code & prototype test 8:52 Building the final "product"
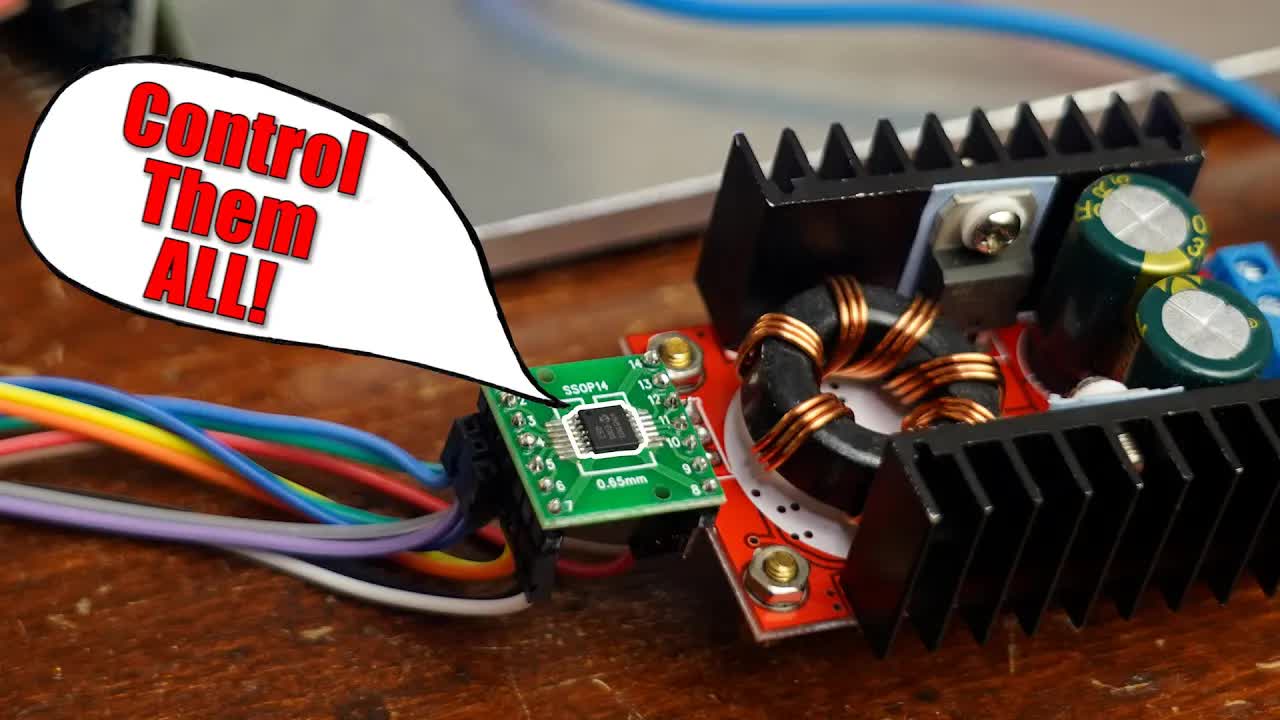
uezoQ5fkixY | 21 Nov 2021
Altium Designer: https://altium.com/yt/greatscott! Previous video: https://youtu.be/5B1sX7p5xXI Facebook: https://www.facebook.com/greatscottlab Twitter: https://twitter.com/GreatScottLab Support me for more videos: https://www.patreon.com/GreatScott?ty=h You can get the shown Digital Potentiometers here (affiliate links): Amazon.com: https://amzn.to/3CexuRe https://amzn.to/3wIa9qd Aliexpress: https://s.click.aliexpress.com/e/_AA6Giq https://s.click.aliexpress.com/e/_A1wEx0 https://s.click.aliexpress.com/e/_A0QwT0 Websites which were shown in the video: https://www.instructables.com/MCP41HVX1-Digital-Potentiometer-for-Arduino/ https://www.renesas.com/us/en/document/dst/x9c102-x9c103-x9c104-x9c503-datasheet https://datasheet.lcsc.com/lcsc/1806121747_Microchip-Tech-MCP41010T-I-SN_C136395.pdf https://datasheet.lcsc.com/lcsc/2004302105_Microchip-Tech-MCP4017T-104E-LT_C510890.pdf https://www.ti.com/lit/ds/symlink/ucc38c43.pdf?ts=1636367150250&ref_url=https%253A%252F%252Fwww.ti.com%252Fproduct%252FUCC38C43 https://cdn-reichelt.de/documents/datenblatt/A200/DS_MCP41HVX1.pdf In this episode of electronics basics we will be having a look at digital potentiometers. You can use them to control any circuit digitally by replacing their mechanical potentiometers with them. But there can be pitfalls when trying to simply replacing the potentiometer. That is why I will tell you all about digital potentiometers which includes how to control them, what kind of current and voltage they can handle and how to properly use them. Let's get started! Thanks to Altium for sponsoring this video. Music: 2011 Lookalike by Bartlebeats 0:00 Where Digital Potentiometers can be used! 1:39 Intro 2:14 X9C103 Overview 4:22 Digital Potentiometer Functional Principle 5:43 X9C103 Practical Test 6:42 Voltage Converter Digital Pot Problem 8:39 High Voltage Digital Pot solves the problem 9:49 Final Test & Verdict
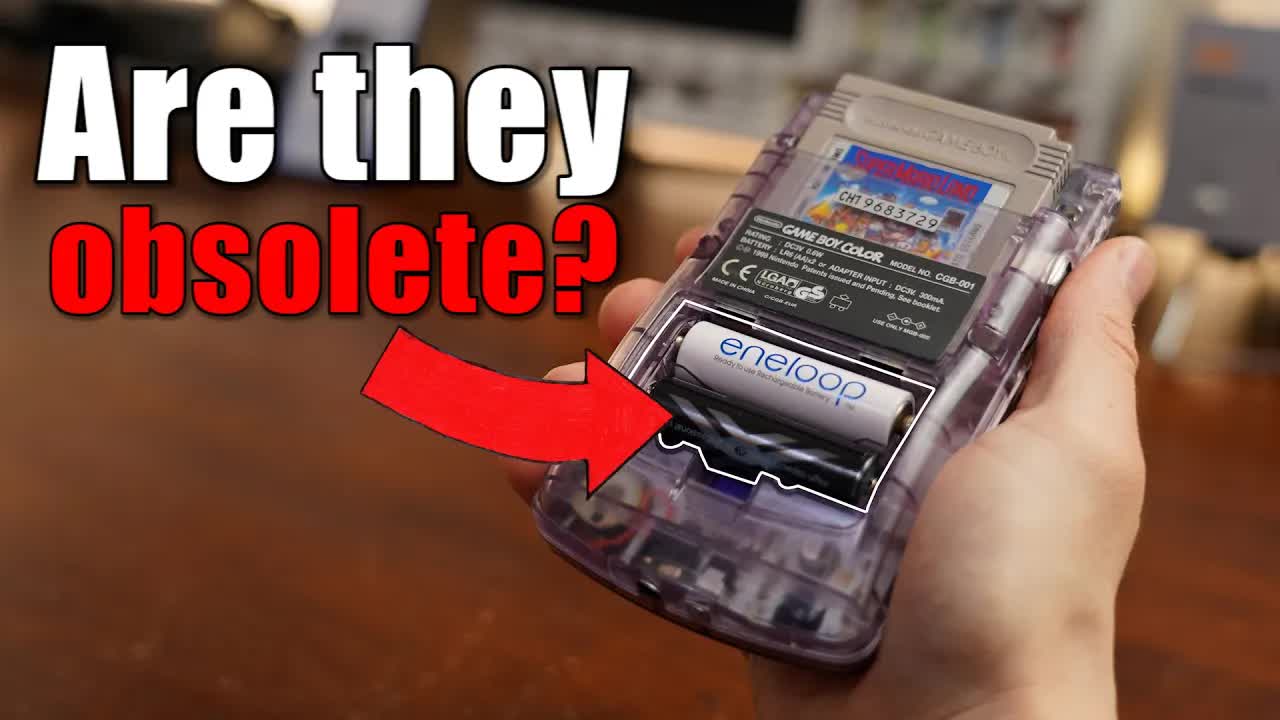
5B1sX7p5xXI | 07 Nov 2021
The first 1,000 people to use this link will get a 1 month free trial of Skillshare: https://skl.sh/greatscott11211 Previous video: https://youtu.be/W4i2FRZ8gXc Facebook: https://www.facebook.com/greatscottlab Twitter: https://twitter.com/GreatScottLab Support me for more videos: https://www.patreon.com/GreatScott?ty=h Altium Designer: https://altium.com/yt/greatscott! In this video we will be having a closer look at AA NiMH batteries and find out whether they are obsolete nowadays. That means I will compare them to Li-Ion and LiPo batteries in order to find out all their advantages/disadvantages. Topics will include safety, price, size, weight, proper charging and discharging. Let's find out! Useful websites which were shown during the video: https://eneloop101.com/wp-content/uploads/2017/02/HR-3UWXB.pdf https://www.mouser.com/datasheet/2/268/50002561A-1102171.pdf https://www.grepow.com/blog/do-nimh-batteries-explode/ https://www.instructables.com/circuits/howto/nimh/ https://www.analog.com/media/en/technical-documentation/data-sheets/4010fb.pdf https://www.electronics-notes.com/articles/electronic_components/battery-technology/nimh-nickel-metal-hydride-charging.php https://lygte-info.dk/info/batteryChargingNiMH%20UK.html Thanks to Skillshare for sponsoring this video. Music: 2011 Lookalike by Bartlebeats 0:00 NiMH batteries in my projects? 1:03 Intro 2:02 NiMH Voltages 3:39 NiMH Current Capabilities 4:51 NiMH Safety 5:28 NiMH, Li-Ion, LiPo Energy Density Comparison 6:20 NiMH Powering a Device 8:20 NiMH DIY Charging Circuit 10:49 Verdict

W4i2FRZ8gXc | 31 Oct 2021
PCBA from $0 (Free Setup, Free Stencil):https://jlcpcb.com/AAA Previous video: https://youtu.be/KE3CjZ0BUFo MOSFET Driver video: https://youtu.be/8swJ_Bnsgl4 Facebook: https://www.facebook.com/greatscottlab Twitter: https://twitter.com/GreatScottLab Altium Designer: https://altium.com/yt/greatscott! Support me for more videos: https://www.patreon.com/GreatScott?ty=h More project information (schematic, gerber files,....) on Patreon: https://www.patreon.com/posts/57544108 Parts list (affiliate links): IR2184 MOSFET driver: https://s.click.aliexpress.com/e/_AnpUcr https://amzn.to/3jcxfj5 SS34 Diode: https://s.click.aliexpress.com/e/_Ac5TCb https://amzn.to/3AR0G0e 1206 Capacitors: https://s.click.aliexpress.com/e/_ACG8WT https://amzn.to/3DX6sPT 1206 Resistors: https://s.click.aliexpress.com/e/_AmrL3v https://amzn.to/2XlJX7m IRFB3077 MOSFET: https://s.click.aliexpress.com/e/_AL7HWB https://amzn.to/3FUuBbr 100uH Inductor: https://s.click.aliexpress.com/e/_Aq42ab https://amzn.to/3vAjOi5 470uF Capacitor: https://s.click.aliexpress.com/e/_AFCjAJ https://amzn.to/3aOQHhm PCB Terminal: https://s.click.aliexpress.com/e/_A8H315 https://amzn.to/3BVXPV8 In this video I will be showing you how I created a synchronous buck converter. Such a synchronous design comes with one big advantage and that is a better efficiency. Datasheets claim an efficiency of 95% and above which I wanted to confirm by myself. That is why I will not only show you how a normal buck converter functions, but also how to transform it into a synchronous buck converter. Let's get started! Useful websites which were shown/mentioned in the video: https://www.we-online.com/web/en/index.php/show/media/07_electronic_components/news_1/blog/midcom_blog_photos/SMPSChart.pdf https://www.ti.com/seclit/ug/slyu036/slyu036.pdf https://www.maximintegrated.com/en/design/technical-documents/app-notes/6/6129.html https://techweb.rohm.com/knowledge/acdc/acdc_pwm/acdc_pwm04/3551 https://www.monolithicpower.com/en/the-difference-between-ccm-and-dcm-explained https://www.ieee.li/pdf/viewgraphs/topology_review_dc_dc_converters.pdf https://www.ti.com/lit/ds/symlink/lmq61460-q1.pdf?ts=1634034318661&ref_url=https%253A%252F%252Fwww.ti.com%252Fpower-management%252Fnon-isolated-dc-dc-switching-regulators%252Fstep-down-buck%252Fbuck-converter-integrated-switch%252Foverview.html%253Fgclid%253DEAIaIQobChMIv4Xm99PE8wIVAeztCh3vQAOeEAAYASAAEgIDtfD_BwE%2526gclsrc%253Daw.ds https://www.ti.com/lit/an/snva038b/snva038b.pdf https://fscdn.rohm.com/en/products/databook/datasheet/ic/power/switching_regulator/bd93291efj-e.pdf https://www.ti.com/lit/ds/symlink/lm61495.pdf?ts=1634225117018&ref_url=https%253A%252F%252Fwww.ti.com%252Fpower-management%252Fnon-isolated-dc-dc-switching-regulators%252Fstep-down-buck%252Fbuck-converter-integrated-switch%252Foverview.html Thanks to JLCPCB for sponsoring this video. Visit https://jlcpcb.com to get professional PCBs for low prices. Music: 2011 Lookalike by Bartlebeats 0:00 Why a "Synchronous" Voltage Converter? 1:15 Intro 1:54 Buck Converter Theory 4:09 DIY Buck Converter 5:25 Improving The Buck Converter (Synchronous Design Theory) 6:59 DIY Synchronous Buck Converter 8:16 DCM Problem with the Synchronous Design 9:40 Power/Efficiency Tests

KE3CjZ0BUFo | 24 Oct 2021
Thanks to Knipex for sponsoring this video! https://www.knipex.com/ You can get the shown tools/connectors here: (affiliate links) Cable Shoe Crimping Tool: https://amzn.to/3Fwx6Aw https://amzn.to/307yn0F Ferrule Crimping Tool: https://amzn.to/3Fx5viy https://amzn.to/2WYOKvr Wire Stripper: https://amzn.to/2YJnYYF https://amzn.to/3mzyVnE Wire Cutter: https://amzn.to/3Au220o https://amzn.to/3iNlvDD JST Connector Kit: https://amzn.to/3mIlEco https://amzn.to/3iPODdf Wago 221: https://amzn.to/3FAVkcP https://amzn.to/3amDtrZ Screw Terminal: https://amzn.to/3mItOBs https://amzn.to/3Bpls86 PCB Screw Terminal: https://amzn.to/2YDeCxy https://amzn.to/3Dt4hTS Previous video: https://youtu.be/iHkKTGYc6aA Facebook: https://www.facebook.com/greatscottlab Twitter: https://twitter.com/GreatScottLab Altium Designer: https://altium.com/yt/greatscott! Support me for more videos: https://www.patreon.com/GreatScott?ty=h In this video I will explain to you why it is so important to use the correct electrical connectors for your electrical wiring/projects. Along the way I will tell you all about Wago connectors, screw terminals, cable shoes and wire ferrules. At the end I will then conduct a big experiment in order to find out which connector is the best! Let's get started! Websites which were shown in the video: https://de.wikipedia.org/wiki/Aderendh%C3%BClse Music: 2011 Lookalike by Bartlebeats 0:00 Why good connectors are important! 1:18 Intro 1:37 The problem with stranded wire/contact resistance 4:11 Wire ferrule 4:46 Connector overview 5:02 Wago 221 terminal 5:16 Cable shoes 5:47 Solder/Crimp connection 6:15 Best connector experiment 7:57 Experiment results 9:30 Verdict
iHkKTGYc6aA | 10 Oct 2021
Altium Designer: https://altium.com/yt/greatscott! WARNING!: High voltage can be dangerous! Previous video: https://youtu.be/isutYMU2HHU Tesla coil video: https://youtu.be/LbTyEratSTI Music playing arc video: https://youtu.be/m-4sHRzexpQ Arc lighter video: https://youtu.be/lk_1lzMiUVc Induction heater video: https://youtu.be/_v5Hg2zfLjs Facebook: https://www.facebook.com/greatscottlab Twitter: https://twitter.com/GreatScottLab Support me for more videos: https://www.patreon.com/GreatScott?ty=h You can get the shown HV transformer here (affiliate links): Amazon.de: https://amzn.to/39RwxTb Amazon.com: https://amzn.to/2ZIp2fH Aliexpress: https://s.click.aliexpress.com/e/_AL8KzF Websites which were shown in the video: https://www.bka.de/DE/UnsereAufgaben/Aufgabenbereiche/Verwaltungsfunktionen/Waffenrecht/Elektroschocker/elektroschocker_node.html https://www.google.com/search?q=555+timer+hv+flyback&tbm In this video we will be having a closer look at the terrible HV generators that you can get from Amazon or elsewhere. I will tell you why you should not buy one and along the way show you an alternative, which is a HV transformer. With it you can do all kinds of experiments and create different arcs. Let's get started! Thanks to Altium for sponsoring this video. Music: 2011 Lookalike by Bartlebeats 0:00 Disliking the HV Generator 1:26 Intro 2:05 HV Transformer Basics 3:30 Commercial Driver circuit 6:39 DIY Flyback circuit 8:31 DIY ZVS circuit 10:15 Verdict

isutYMU2HHU | 03 Oct 2021
The first 1,000 people to use this link will get a 1 month free trial of Skillshare: https://skl.sh/greatscott10211 Previous video: https://youtu.be/j1V2I-otdzk Power Supply video: https://youtu.be/ycT-PItAzNk Zener Diode video: https://youtu.be/GtH8lAzQf2A Comparator video: https://youtu.be/woTiKij76cA Facebook: https://www.facebook.com/greatscottlab Twitter: https://twitter.com/GreatScottLab Support me for more videos: https://www.patreon.com/GreatScott?ty=h Altium Designer: https://altium.com/yt/greatscott! In this video we will be having a look at a very versatile component, the TL431 IC. I used it in the feedback loop of my DIY switched mode power supply and thus got interested in it. That is why I will show you how it works, how you can use it in lot of different circuits and also how it functions in feedback loops of for example voltage converters. Let's get started! Useful websites you can visit for more information: https://www.ti.com/lit/ds/symlink/tl431.pdf?ts=1631534081428&ref_url=https%253A%252F%252Fwww.google.com%252F https://www.bristolwatch.com/ccs/TL431A.htm http://www.runonielsen.dk/Feedback.pdf https://www.site.uottawa.ca/~rhabash/Practical-Feedback-Loop-Design-Buck.pdf https://www.onsemi.com/pub/Collateral/TND381-D.PDF http://u.dianyuan.com/bbs/u/70/1360651225251207.pdf https://www.ti.com/lit/an/slvaf37/slvaf37.pdf?ts=1631594690215&ref_url=https%253A%252F%252Fwww.google.com%252F https://www.apogeeweb.net/circuitry/tl431-simple-circuits.html Thanks to Skillshare for sponsoring this video. Music: 2011 Lookalike by Bartlebeats 0:00 TL431 is amazing! 1:25 Intro 2:28 Basics 3:19 TL431 as a Comparator 4:32 TL431 as a 2.5V Zener Diode 5:51 TL431 as an adjustable Zener Diode 6:30 Various other applications 7:20 SMPS Feedback Loop Theory 8:46 TL431 in DIY SMPS

j1V2I-otdzk | 26 Sep 2021
Visit Brilliant.org and get a 20% discount: https://Brilliant.org/GreatScott/ Previous video: https://youtu.be/15HmW1K8MZY Facebook: https://www.facebook.com/greatscottlab Twitter: https://twitter.com/GreatScottLab Support me for more videos: https://www.patreon.com/GreatScott?ty=h Altium Designer: https://altium.com/yt/greatscott! More project information (schematic, code, pictures,.....) on Instructables: https://www.instructables.com/Automatic-Volume-Adjuster-for-LOUD-MOVIE-MUSIC/ Parts list (affiliate links): LiPo Battery: https://s.click.aliexpress.com/e/_ASwccg https://amzn.to/3EcECjz Charge/Protect board: https://s.click.aliexpress.com/e/_d7ZzZsT https://amzn.to/3AagCuT Switch: https://s.click.aliexpress.com/e/_9AUg2y https://amzn.to/2Xb67ZD 3.3V regulator: https://s.click.aliexpress.com/e/_AAYr2o https://amzn.to/3kaAwQR Capacitors: https://s.click.aliexpress.com/e/_dU4FEsB https://amzn.to/3llj23v Resistors: https://s.click.aliexpress.com/e/_dTPpXjt https://amzn.to/3lmbRIy Electret Mic: https://s.click.aliexpress.com/e/_AP8fDA https://amzn.to/3zeyovE OpAmp: https://s.click.aliexpress.com/e/_dTvJRGw https://amzn.to/3AcMD5p Potentiometer: https://s.click.aliexpress.com/e/_A7tN0k https://amzn.to/3EqTevR Arduino Pro Mini: https://s.click.aliexpress.com/e/_AmcdA0 https://amzn.to/3C7vBq3 IR LED: https://s.click.aliexpress.com/e/_AMJj6s https://amzn.to/3nv06Sy Red LED: https://s.click.aliexpress.com/e/_dV63r7D https://amzn.to/3hyj07j In this project I will solve one of the biggest problems I have with modern movies. The problem is that the conversation volume is way too low in comparison to the music volume. That is why I combined an Arduino microcontroller with a microphone and an IR LED in order to create an automatic volume adjuster. It basically detects when loud movie music starts playing, lowers the volume and then brings the volume back up when the music is over. Let's get started! Websites which were shown in the video: https://ww1.microchip.com/downloads/en/DeviceDoc/MCP1700-Low-Quiescent-Current-LDO-20001826E.pdf http://www.advanced-monolithic.com/pdf/ds1117.pdf Thanks to Brilliant.org for sponsoring this video. Music: 2011 Lookalike by Bartlebeats 0:00 The problem with movie music 1:20 Intro 2:17 Volume control + sound measurement 3:06 Hardware design around uC 5:26 IR codes for volume 5:39 ADC settings for audio sampling 6:23 Algorithm for detecting loud movie music 8:21 Arduino code 9:10 Final test & verdict
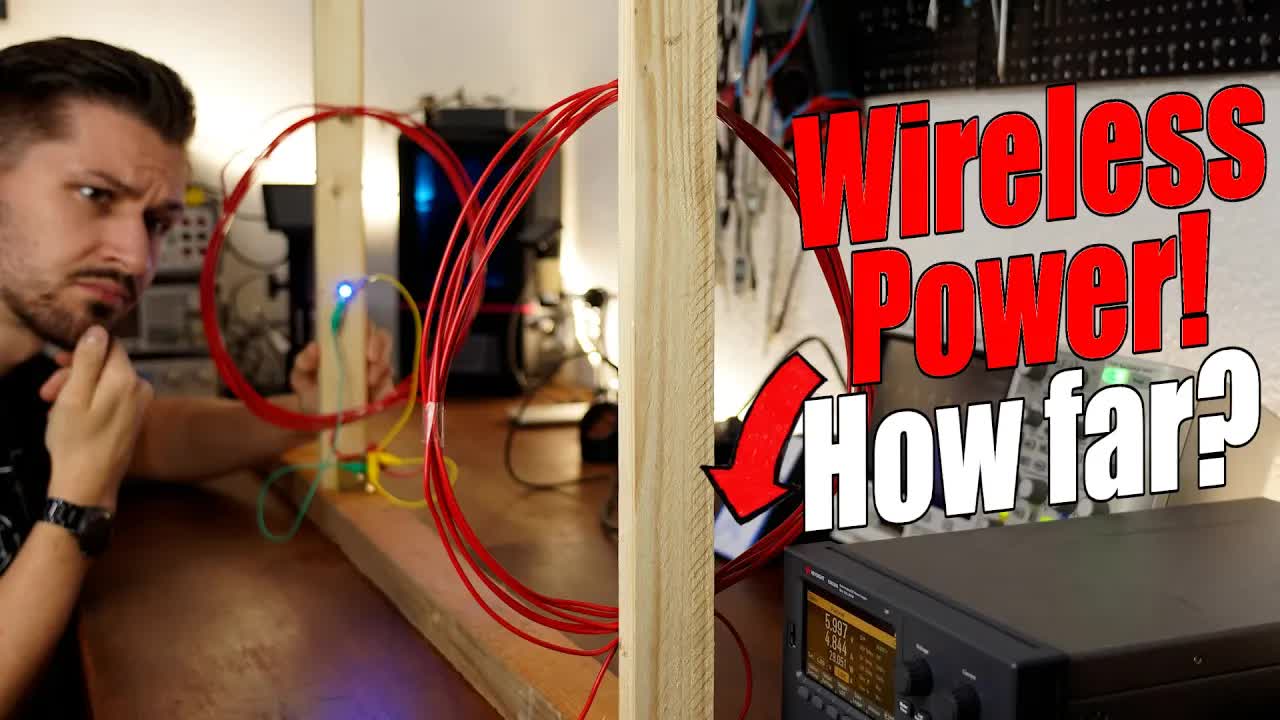
15HmW1K8MZY | 12 Sep 2021
Altium Designer: https://altium.com/yt/greatscott! WARNING!: Do not replicate the experiment showcased in the video! Previous video: https://youtu.be/ZswJoAvbuzY How Does Wireless Charging Work? video: https://youtu.be/ExU32UyGX6w DIY Wireless Energy Transfer System video: https://youtu.be/3E5PUnYlaTM Facebook: https://www.facebook.com/greatscottlab Twitter: https://twitter.com/GreatScottLab Support me for more videos: https://www.patreon.com/GreatScott?ty=h More project information (schematic, code,.....) on Patreon: https://www.patreon.com/posts/55620062 Parts list (affiliate links): Arduino Nano: https://s.click.aliexpress.com/e/_dULoNXh https://amzn.to/3zACpM1 5V regulator: https://s.click.aliexpress.com/e/_dXSrfiP https://amzn.to/2V3wDDt Capacitors: https://s.click.aliexpress.com/e/_d7dOwRz https://s.click.aliexpress.com/e/_dU4FEsB https://amzn.to/3kBoHC4 https://amzn.to/3gQj4Pz Resistors: https://s.click.aliexpress.com/e/_dTPpXjt https://amzn.to/2Y6MEtu OLED screen: https://s.click.aliexpress.com/e/_APw28Y https://amzn.to/3kKOMPg Potentiometer: https://s.click.aliexpress.com/e/_dX83GAF https://amzn.to/3mSJ1BF MUR460 Diode: https://s.click.aliexpress.com/e/_ArPcS4 https://amzn.to/3yzbIpE IR2184 MOSFET Driver: https://s.click.aliexpress.com/e/_9HCy28 https://amzn.to/3kMP7Bf IRF740 MOSFET: https://s.click.aliexpress.com/e/_9yefJK https://amzn.to/3BxqJdk Websites which were shown in the video: https://news.mit.edu/2007/wireless-0607 https://archive.eetindia.co.in/www.eetindia.co.in/ART_8800467843_1800008_NT_4ba623b8.HTM https://www.we-online.com/catalog/datasheet/760308100110.pdf In this video I will be once again having a look at wireless power transmission. But this time it is all about distance and power because I wanted to find out whether I could achieve the same results as MIT back in 2007. They transmitted 60W of power with an efficiency of 40% over 2m. During my experiment I will tell you lots about good coil designs and power electronics which are required to achieve such results. Let's get started! Thanks to Altium for sponsoring this video. Music: 2011 Lookalike by Bartlebeats 0:00 MIT's wireless power results 1:49 Intro 2:25 Building the power electronics (half-bridge) 4:18 Coil design (diameter, windings) 5:54 Frequency selection for the coil design 7:14 Test 1 (windings) 8:50 Test 2 (diameter) 9:15 Test 3 (HF litz wire) 9:49 Final Test & Verdict

ZswJoAvbuzY | 05 Sep 2021
The first 1,000 people to use this link will get a 1 month free trial of Skillshare: https://skl.sh/greatscott09211 Previous video: https://youtu.be/ycT-PItAzNk Previous hand-crank generator video: https://youtu.be/3fpsInXqo1E Facebook: https://www.facebook.com/greatscottlab Twitter: https://twitter.com/GreatScottLab Support me for more videos: https://www.patreon.com/GreatScott?ty=h Altium Designer: https://altium.com/yt/greatscott! More project information (schematic, pictures,.....) on Instructables: https://www.instructables.com/Hoverboard-Motor-Becomes-a-Hand-cranked-Generator/ Parts list (affiliate links): Hoverboard Motor: https://s.click.aliexpress.com/e/_9AKNcs https://amzn.to/3DrX6Mk Slip Ring: https://s.click.aliexpress.com/e/_AUXur0 https://amzn.to/3DG6tYS 1N5817 Diode: https://s.click.aliexpress.com/e/_Al2ccc https://amzn.to/38lu9U0 5F Supercapacitor: https://s.click.aliexpress.com/e/_ACW1QG https://amzn.to/3mJvPPA Resistor: https://s.click.aliexpress.com/e/_AksoBw https://amzn.to/3ktU1mt eFuse: https://www.digikey.de/number/en/texas-instruments/296/TPS259621/28832 Buck/Boost Converter: https://s.click.aliexpress.com/e/_A4njbO https://amzn.to/3BoruFN In this project I will show you how to turn a motor from an obsolete hoverboard into something quite useful. We will be building a hand-cranked generator with it that can charge up a powerbank in emergency situations. Along the way I will show you how such a motor works, how we can modify it and how we can turn its AC output voltage into smooth 5V DC for our powerbank. Let's get started! Thanks to Skillshare for sponsoring this video. Music: 2011 Lookalike by Bartlebeats 0:00 Hoverboard Motors are interesting! 1:25 Intro 2:24 Motor Modification 5:06 Generator Hand-Crank Test 5:42 Power Electronics for the Generator (AC -- 5V DC) 9:17 Final Test 10:55 Verdict
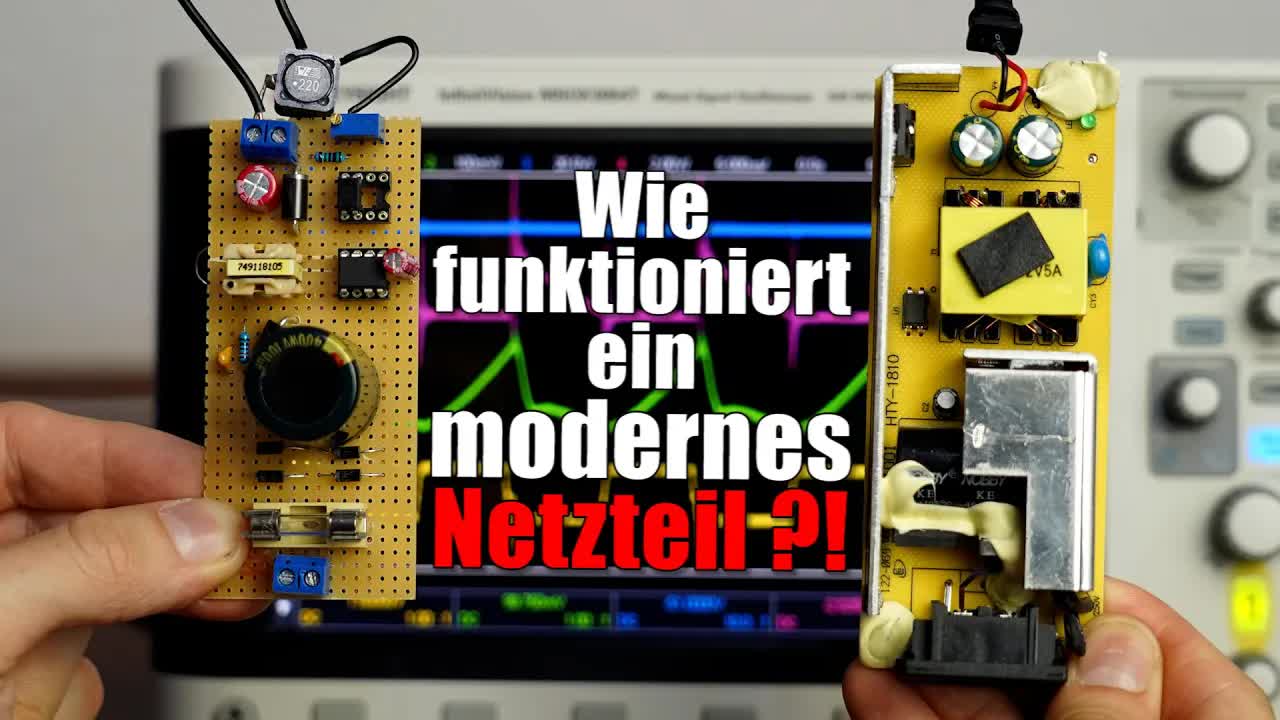
sZ8e7JsBHK8 | 01 Sep 2021
Du möchtest mehr über die Würth Elektronik Bauteile erfahren? Dann klicke hier: https://bit.ly/OnlineKatalog_DE Würth Elektronik-Produkte, die im Video zu sehen waren: - WE-FLEX + Flexibler Übertrager für getaktete Stromversorgungen (749197131): https://bit.ly/WE_FLEX_DE - WE-UOST Netzteilübertrager (760875112): https://bit.ly/WE_UOST_1_DE - WE-UOST Netzteilübertrager (760875532): https://bit.ly/WE_UOST_2_DE - WE-LLCR Resonanzwandler (760895731): https://bit.ly/WE_LLCR_DE - WE-UNIT Netzteilübertrager (749118105): https://bit.ly/WE_UNIT_DE Vorheriges Video: https://youtu.be/6SFJdovlBMQ Everything you need to know about Transformers! video: https://youtu.be/2cxcP5lY7K4 Facebook: https://www.facebook.com/greatscottlab Twitter: https://twitter.com/GreatScottLab Unterstütze mich für mehr videos : https://www.patreon.com/GreatScott?ty=h In diesen Video werden wir uns die Netzteile anschauen, welche du tagtäglich nutzt. Ich meine natürlich Schaltnetzteile, welche unsere 230V AC Netzspannung in zum Beispiel 5V oder 12V umwandeln. Ich werde nicht nur über das "Herz" solcher Schaltungen erzählen, den Flyback Trafos, sondern Ich werde auch zeigen wie diese in einer Flyback Schaltung genutzt werden. Am Ende zeige Ich auch ein DIY Versuch eines Netzspannung Netzteiles, welches (bitte) nicht nachgebaut werden sollte. Let's get started! Internetseiten welche im Video zu sehen waren: https://www.onsemi.com/pdf/datasheet/ncp1010-d.pdf Danke an die Würth Elektronik eiSos Gruppe für die Unterstützung des Videos. Music: 2011 Lookalike by Bartlebeats 0:00 Flyback Trafos in Schaltnetzteilen 1:14 Intro 1:31 Flyback Trafo Theorie 3:15 Flyback Konverter Schaltung erklärt 5:37 Praktische Flyback Schaltung 7:39 DIY 230V AC Schaltnetzteil

ycT-PItAzNk | 29 Aug 2021
Do you want to know more about the Würth Elektronik components? Then click here: https://bit.ly/Online_Catalog_EN Würth Elektronik products, which were used in the video: - WE-FLEX+ Flexible Transformer for DC/DC Converter (749197131): https://bit.ly/WE_FLEX_EN - WE-UOST Universal Offline Standard Transformers (760875112): https://bit.ly/WE_UOST_1_EN - WE-UOST Universal Offline Standard Transformers (760875532): https://bit.ly/WE_UOST_2_EN - WE-LLCR Resonant Converter (760895731): https://bit.ly/WE_LLCR_EN - WE-UNIT Off-Line Transformer (749118105): https://bit.ly/WE_UNIT_EN Previous video: https://youtu.be/6SFJdovlBMQ Everything you need to know about Transformers! video: https://youtu.be/2cxcP5lY7K4 Facebook: https://www.facebook.com/greatscottlab Twitter: https://twitter.com/GreatScottLab Support me for more videos: https://www.patreon.com/GreatScott?ty=h In this video we will be having a look at the kind of power supplies you use every day. I am talking about switched mode power supplies that convert our 230V AC mains voltage into for example 5V or 12V DC to power our electronics. I will not only tell you all about the heart of such a system, a flyback transformer, but I will also show you how it is used in a flyback circuit. At the end I will also show you a DIY attempt of such a mains power supply that you should (please) not replicate. Let's get started! Websites which were shown (used) during the video: https://www.onsemi.com/pdf/datasheet/ncp1010-d.pdf Thanks to the Würth Elektronik eiSos Group for supporting this video. Music: 2011 Lookalike by Bartlebeats 0:00 Flyback Transformers in Power Supplies 1:15 Intro 1:33 Flyback Transformer Theory 3:25 Flyback Converter Functional Principle 5:58 Practical Flyback Converter Circuit 8:13 DIY 230V AC Flyback Converter (SMPS)

6SFJdovlBMQ | 15 Aug 2021
Altium Designer: https://altium.com/yt/greatscott! Previous video: https://youtu.be/d58GzhXKKG8 Previous tube amp video: https://youtu.be/RoSIzgvEGtA Class A transistor amp video: https://youtu.be/7Pv-j_R3YP4 Facebook: https://www.facebook.com/greatscottlab Twitter: https://twitter.com/GreatScottLab Support me for more videos: https://www.patreon.com/GreatScott?ty=h More information about my DIY tube amp can be found here: https://www.patreon.com/posts/54695080 Websites which were shown in the video: https://www.thomann.de/gb/search_dir.html?sw=tube+amp&smcs=604f4b_1459 https://www.google.com/search?q=fender+champ+amp+schematic&sxsrf https://www.jj-electronic.com/images/stories/product/preamplifying_tubes/pdf/ecc83s.pdf https://www.jj-electronic.com/images/stories/product/power_tubes/pdf/6l6gc.pdf In this video I will not only show you how to build a proper vacuum tube amplifier, but I will also directly compare it to a transistor amp. You will hear the audio quality difference between them and I will also show you the difference between them by using an FFT and also by creating a Bode plot. Along the way you will learn all about tube amplifiers which come with a proper tube output stage as well as a transformer. Let's get started! Thanks to Altium for sponsoring this video. Music: 2011 Lookalike by Bartlebeats 0:00 I did injustice to tube amp lovers 1:15 Intro 1:54 Tube Theory (triode, pentode) 3:54 DIY Tube Amp schematic 5:51 Building the DIY Tube Amp 6:35 First Tube Amp audio test 7:45 Audio quality comparison 8:59 FFT & Bode plot comparison 9:34 Verdict

d58GzhXKKG8 | 08 Aug 2021
Visit Brilliant.org and get a 20% discount: https://Brilliant.org/GreatScott/ Previous video: https://youtu.be/_lDm0RV9IV8 Current Clamp video: https://youtu.be/ohQF79cMODw Power form video: https://youtu.be/cxXmWZDwNEs Facebook: https://www.facebook.com/greatscottlab Twitter: https://twitter.com/GreatScottLab Support me for more videos: https://www.patreon.com/GreatScott?ty=h Altium Designer: https://altium.com/yt/greatscott! You can get a decent (4 channel, low cost) scope here (affiliate links): https://s.click.aliexpress.com/e/_Aqd2VG You can get a differential probe here (affiliate links): https://s.click.aliexpress.com/e/_9IoEt4 Websites which were shown in the video: https://www.batronix.com/shop/oscilloscopes/DSO.html https://www.batronix.com/shop/oscilloscopes/Keysight-MSOX3054T.html https://www.batronix.com/shop/oscilloscopes/Keysight-DSOX1204G.html https://www.batronix.com/shop/oscilloscopes/Rigol-DS1052E.html In this electronics basics episode we will be having a look at the biggest mistake you can do when working with an oscilloscope. But I will not only show you how to do safe mains voltage measurements but also show you all the basics when it comes to oscilloscopes. That means I will show you how to choose one, how to do simple voltage and current measurements and finally how FFT works. I will explain passive probes, triggering, voltage & time division, measuring functions, the cursor function, AC & DC coupling and single mode capturing. Let's get started! Thanks to Brilliant.org for sponsoring this video. Music: 2011 Lookalike by Bartlebeats 0:00 The big mistake when using an oscilloscope 1:08 Intro 2:02 How to choose a scope? 4:44 Passive probes & scaling factor 5:55 Trigger 6:41 Voltage division 7:11 Time division 7:37 Measure function 7:47 Cursor function 8:19 AC & DC coupling 9:08 Single mode capturing 9:36 Current measurement 10:16 Safe mains voltage measurement 11:37 Differential probe 11:52 Math & FFT

_lDm0RV9IV8 | 01 Aug 2021
$2 for Aluminum Boards/1-4 Layer PCBs: https://jlcpcb.com/AAA Previous video: https://youtu.be/l6dtyaNc0to Facebook: https://www.facebook.com/greatscottlab Twitter: https://twitter.com/GreatScottLab Support me for more videos: https://www.patreon.com/GreatScott?ty=h Altium Designer: https://altium.com/yt/greatscott! More project information (3D Model) on Patreon: https://www.patreon.com/posts/53757049 Websites which were shown in the video: https://www.instructables.com/Infrared-Thermal-Imaging-Camera-With-MLX90640-and-/ https://www.youtube.com/user/stopperl16 https://stoppi-homemade-physics.de/ https://github.com/sparkfun/SparkFun_MLX90640_Arduino_Example https://github.com/MartyMacGyver/ESP32_Adafruit_ILI9341 https://github.com/adafruit/Adafruit_ILI9341 https://github.com/adafruit/Adafruit_MLX90640 https://www.adafruit.com/product/3538 https://www.sparkfun.com/products/14843 Parts list (affiliate links): ESP32: https://s.click.aliexpress.com/e/_9gPfmi MLX90640 Camera: https://s.click.aliexpress.com/e/_9wpVtY ILI9341 Screen: https://s.click.aliexpress.com/e/_9fMoeO LiPo Supercharger: https://www.sparkfun.com/products/18004 In this episode of DIY or Buy we will have a look at thermal imaging camera. At first I will show you why thermal imaging cameras can be very useful when it comes to working with electronics. Afterwards I will explain how such cameras work and what flaws they come with. At the end I will then build my own low budget DIY thermal imaging camera and compare it with the commercial one. Let's get started! Thanks to JLCPCB for sponsoring this video. Visit https://jlcpcb.com to get professional PCBs for low prices. Music: 2011 Lookalike by Bartlebeats 0:00 Why a thermal imaging camera is useful for electronics 1:56 Intro 2:43 How a thermal imaging camera functions 4:26 The emissivity coefficient problem 5:47 Testing the AMG8832 (64 pixel sensor) 6:57 Testing the MLX90640 (768 pixel sensor) 8:12 Making a DIY thermal imaging camera 9:51 Comparison & Verdict

l6dtyaNc0to | 18 Jul 2021
Pre-order out-stock & in-stock JLC parts for assembly: https://jlcpcb.com/AAA Previous video: https://youtu.be/fp5KvNOpnx0 Color Organ video: https://youtu.be/InrQvtUuS2w Facebook: https://www.facebook.com/greatscottlab Twitter: https://twitter.com/GreatScottLab Support me for more videos: https://www.patreon.com/GreatScott?ty=h More project information (schematic, code,....) on Instructables: https://www.instructables.com/Making-Ferrofluid-Dance-to-the-Music/ Parts list (affiliate links): Ferrofluid: https://s.click.aliexpress.com/e/_ANf6K4 Arduino Nano: https://s.click.aliexpress.com/e/_dULoNXh Audio Jack: https://s.click.aliexpress.com/e/_d6P8Gwx MSGEQ7: https://s.click.aliexpress.com/e/_AMsSco Resistors: https://s.click.aliexpress.com/e/_dTPpXjt Capacitors: https://s.click.aliexpress.com/e/_dU4FEsB APA102 LED Strip: https://s.click.aliexpress.com/e/_Ag0jtq IRLZ34N MOSFET: https://s.click.aliexpress.com/e/_A7iKBm 1N4003 Diode: https://s.click.aliexpress.com/e/_A85ToU Copper wire: https://s.click.aliexpress.com/e/_9QN9yM PCB Terminal: https://s.click.aliexpress.com/e/_dYbstfZ Websites which were shown in the video: https://www.sparkfun.com/datasheets/Components/General/MSGEQ7.pdf https://cdn-shop.adafruit.com/datasheets/APA102.pdf https://github.com/NicoHood/MSGEQ7 https://github.com/FastLED/FastLED In this video I will show you how I took a boring flask filled with ferrofluid and turned it into a music reactive goo. For that I will be using an Arduino and an MSGEQ7 IC which determines the strength of the frequency bands in our music. This way the Arduino will know how much bass, middle and high frequencies there are and thus not only turn on LEDs according to the beat but also electromagnets which will move our ferrofluid. Let's get started! Thanks to JLCPCB for sponsoring this video. Visit https://jlcpcb.com to get professional PCBs for low prices. Music: 2011 Lookalike by Bartlebeats 0:00 Project overview 1:00 Intro 1:45 Using commercial electromagnets? 4:16 Creating DIY electromagnets 6:05 Enclosure design 6:46 Electronics hardware 8:25 Electronics code 9:21 Assembly & Final test
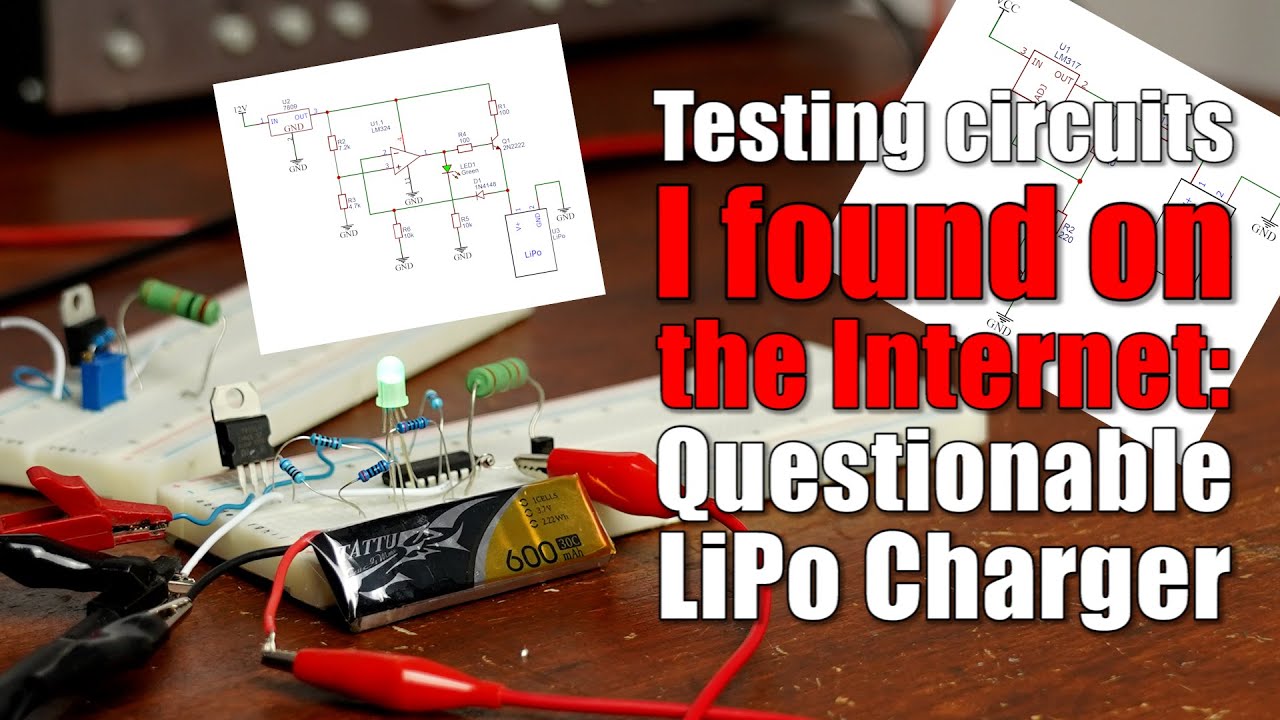
fp5KvNOpnx0 | 11 Jul 2021
Altium Designer: https://altium.com/yt/greatscott! Previous video: https://youtu.be/ohQF79cMODw AC VS DC video: https://youtu.be/trmxzUVT2eE How dangerous are LiPo Batteries video: https://youtu.be/osfgkFyq7lA Facebook: https://www.facebook.com/greatscottlab Twitter: https://twitter.com/GreatScottLab Support me for more videos: https://www.patreon.com/GreatScott?ty=h You can get some decent LiPo chargers here (affiliate links): https://www.elektor.com/diy-lipo-supercharger-kit-by-greatscott https://s.click.aliexpress.com/e/_AM68Dj https://s.click.aliexpress.com/e/_A8nfZn Websites which were shown in the video: https://cdn-shop.adafruit.com/datasheets/503562+1200mah.pdf https://sites.google.com/site/donutscience/various-projects/the-easiest-diy-lithium-polymer-battery-charger/the-easiest-diy-lithium-polymer-battery-charger---the-schematic https://www.circuitstoday.com/lipo-battery-charger-circuit http://www.tp4056.com/d/tp4056.pdf https://www.ti.com/lit/ds/symlink/bq24091.pdf?ts=1625045712665&ref_url=https%253A%252F%252Fwww.ti.com%252Fproduct%252FBQ24091 https://www.ti.com/lit/ds/symlink/lm317.pdf In this episode of testing circuits I found on the internet I will be having a look at LiPo battery charger schematics. I will build up 2 very simple circuits which claim to charge a LiPo battery and test whether they can truly do that. One circuit is based around an LM317 adjustable regulator while the other one is based around an Op-Amp. I will show you the flaws of those simple design and while I am at it also show you my own super simple, very inefficient but safe LiPo charger. Let's get started! Thanks to Altium for sponsoring this video. Music: 2011 Lookalike by Bartlebeats 0:00 LiPo Battery charging in general 1:45 Intro 2:25 How to properly charge a LiPo battery 3:56 Testing circuit 1 (LM317) 7:58 Testing circuit 2 (OpAmp) 10:20 Making my own LiPo charger (CC/CV) 11:49 Verdict

ohQF79cMODw | 04 Jul 2021
Visit Brilliant.org and get a 20% discount: https://Brilliant.org/GreatScott/ Previous video: https://youtu.be/GHdIGt7bbyU Facebook: https://www.facebook.com/greatscottlab Twitter: https://twitter.com/GreatScottLab Support me for more videos: https://www.patreon.com/GreatScott?ty=h You can find more information about my DIY solution here: https://www.patreon.com/posts/52795400 The website shown with the nice 3D printed current clamp: https://matthewtran.dev/2019/08/diy-dc-current-clamp/ You can get the commercial AC/DC current clamp here (affiliate links): https://s.click.aliexpress.com/e/_AVZjBj DIY solution parts list (affiliate links): LM7805: https://s.click.aliexpress.com/e/_dXSrfiP Resistors: https://s.click.aliexpress.com/e/_dTPpXjt Capacitors: https://s.click.aliexpress.com/e/_d7dOwRz https://s.click.aliexpress.com/e/_dU4FEsB S49E Hall Effect Sensor: https://s.click.aliexpress.com/e/_98ld1L 200k Trimmers: https://s.click.aliexpress.com/e/_AVTh3R TL082 OpAmp: https://s.click.aliexpress.com/e/_9iaLp7 BNC connector: https://s.click.aliexpress.com/e/_AYumOt PCB Terminal: https://s.click.aliexpress.com/e/_dYbstfZ Perfboard: https://s.click.aliexpress.com/e/_dXx2Zv5 In this episode of DIY or Buy we will be having a closer look at my broken AC/DC current clamp which can be also called a current probe. The job of such a current clamp is simple, visualizing the current waveform on an oscilloscope. So in this video I will explain how such a current clamp functions and how we can make a DIY alternative in order to find out whether it makes sense to DIY such a tool or whether we should stick to the commercial solution instead. Let's get started! Thanks to Brilliant.org for sponsoring this video. Music: 2011 Lookalike by Bartlebeats 0:00 Why current clamps are awesome 2:04 Intro 3:00 Why not use a current shunt? 3:55 How does an AC current clamp work? 5:17 Measuring a DC current with a current clamp 6:41 Building a DIY AC/DC current clamp 7:26 Building a circuit for the current clamp 9:07 Testing my DIY solution 10:30 Verdict

GHdIGt7bbyU | 20 Jun 2021
Visit Thangs.com to download my Pulley model: https://bit.ly/3xl3dyj Previous video: https://youtu.be/khXwzBW2sHI Previous Bike Generator video: https://youtu.be/tp_VI6ujKHE Tesla Coil video: https://youtu.be/LbTyEratSTI Facebook: https://www.facebook.com/greatscottlab Twitter: https://twitter.com/GreatScottLab Support me for more videos: https://www.patreon.com/GreatScott?ty=h In this video we will be once again having a look at my bike generator and upgrade it with the help of the feedback from my viewers. That means I will add a belt tensioner to the system, try out a different kind of alternator as well as a washing machine motor. And in the end I will be able to produce a decent amount of power on my own. 200W to be specific! Let's get started! Thanks to Thangs.com for sponsoring this video. Visit https://bit.ly/3wtd59h to find over 2.4 million models Music: 2011 Lookalike by Bartlebeats 0:00 Bike Generator Upgrade overview 0:55 Intro 1:48 Improvement 1: Gear 3:07 Improvement 2: Belt Tensioner 5:54 Improvement 3: One Wire Alternator 7:57 Improvement 4: Washing Machine Motor 10:03 Verdict
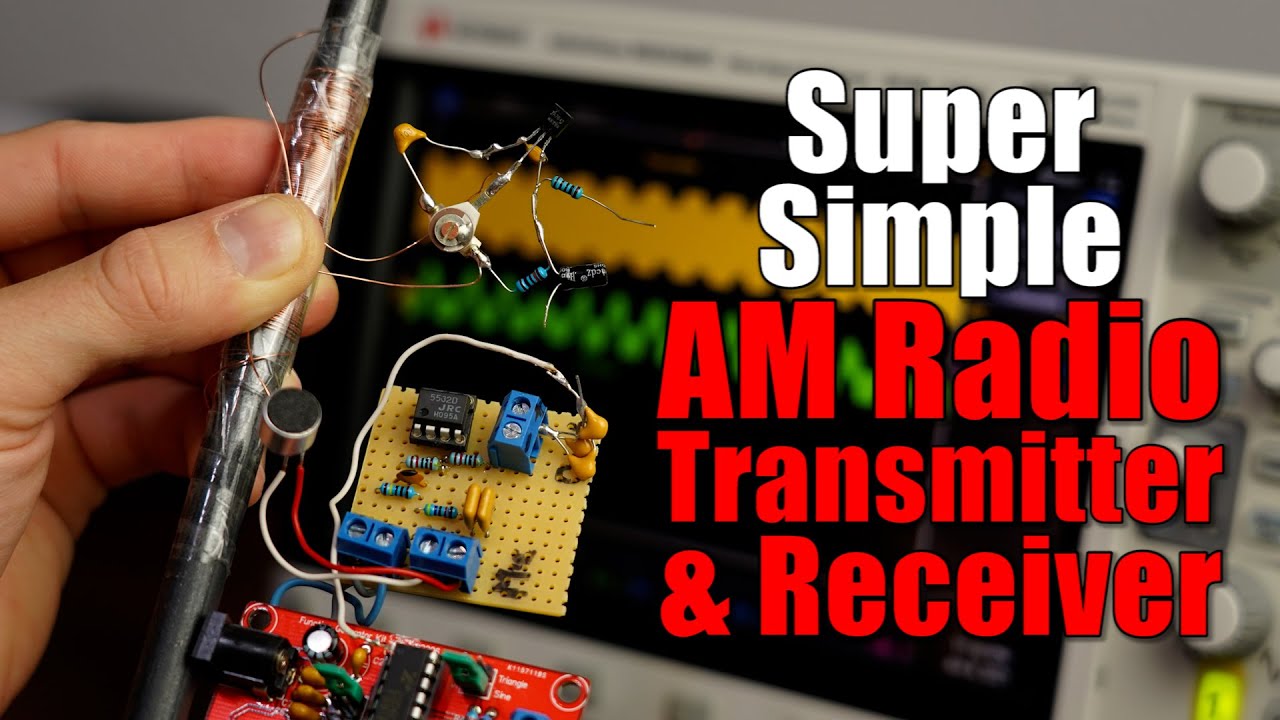
khXwzBW2sHI | 13 Jun 2021
Check out http://KiwiCo.com/GreatScott for 50% off your first month of ANY crate! WARNING: Always check your local law if you want to transmit something with AM! Sending on certain frequencies and thus blocking other licensed transmitters can be illegal. So if you want to try it then make sure that the transmission power is super low. In my example the transmitter was only capable of sending over a distance of around 2-3m. Previous video: https://youtu.be/tLKsvHSADdw Walkie-Talkie nRF24 video: https://youtu.be/SZYwvvh6m-s Walkie-Talkie RF Modules: https://youtu.be/PKowvbnIxso 555 Timer video: https://youtu.be/fLaexx-NMj8 Voice-over Microphone video: https://youtu.be/ts-JqEVzvDo Oscillator video: https://youtu.be/eYVOdlK15Og Facebook: https://www.facebook.com/greatscottlab Twitter: https://twitter.com/GreatScottLab Support me for more videos: https://www.patreon.com/GreatScott?ty=h More project information (pictures,.....) on Instructables: https://www.instructables.com/Simple-AM-Radio-Transmitter-Receiver/ Parts list: (affiliate links) 555 Timer: https://s.click.aliexpress.com/e/_dTrUY9D Resistors: https://s.click.aliexpress.com/e/_dTPpXjt Capacitors: https://s.click.aliexpress.com/e/_dU4FEsB NE5532 OpAmp: https://s.click.aliexpress.com/e/_9JNpe3 Electret Mic: https://s.click.aliexpress.com/e/_AAJ0er Perfboard: https://s.click.aliexpress.com/e/_AZXOgT PCB Terminal: https://s.click.aliexpress.com/e/_dYbstfZ XR2206 Function Generator: https://s.click.aliexpress.com/e/_Abhz51 TA7642 IC: https://s.click.aliexpress.com/e/_Adpjwb 100pF variable capacitor: https://s.click.aliexpress.com/e/_An8vVt Enamelled copper wire: https://s.click.aliexpress.com/e/_9i1Heb In this project we will keep it simple when it comes to wireless audio communication. Instead of trying to use an nRF24 or RF modules, we will go back to the old days in which they used AM radios. I will show you how such amplitude modulation works and along the way show you how to build a super simple AM transmitter and receiver. Let's get started! Thanks to KiWiCo for sponsoring this video. Music: 2011 Lookalike by Bartlebeats 0:00 "Complicated" Wireless Audio 0:45 Simple AM Radio Solution 1:59 Intro 2:09 Theory AM 3:19 Transmitter AM 555 Timer (sounds terrible) 6:08 Transmitter AM XR2206 IC (sounds decent) 7:25 Receiver AM TA7642 9:53 KiWiCo Sponsor
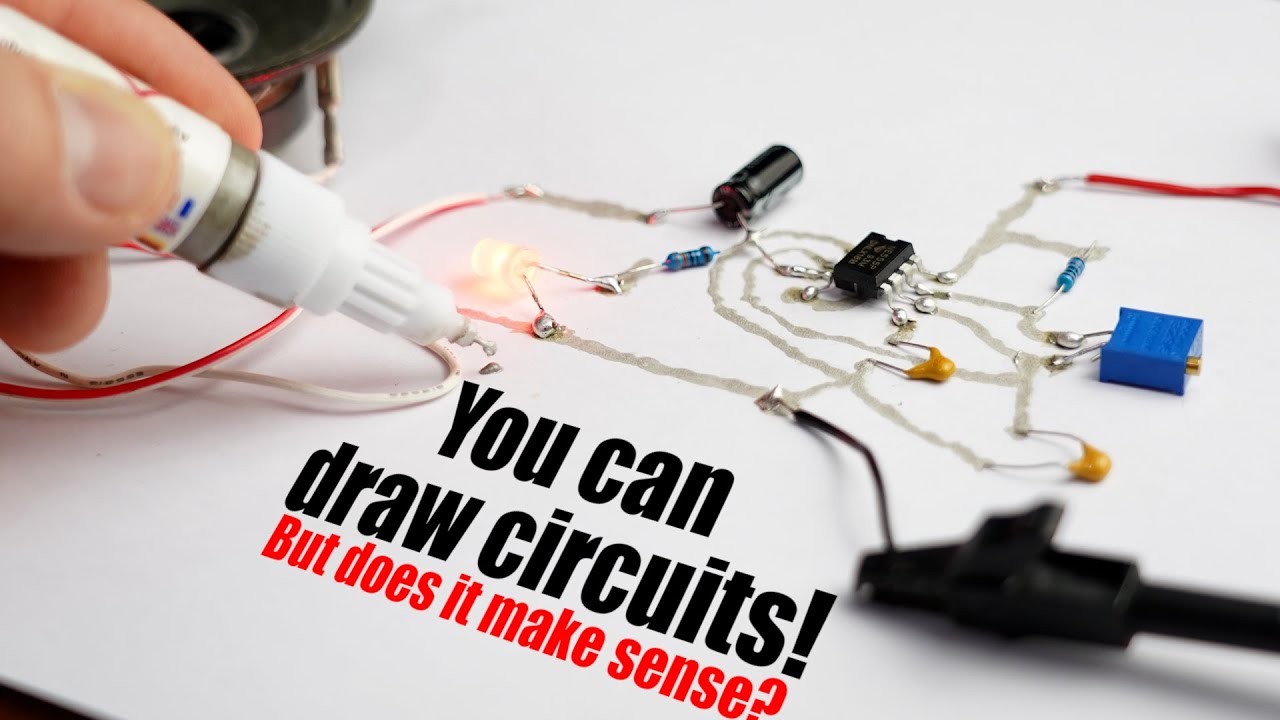
tLKsvHSADdw | 06 Jun 2021
Design & Order on EasyEDA, PCB+SMT $10 Off: https://easyeda.com/editor Get coupon & Join JLC&EDA Group: https://jlcpcb.com/EDA Previous video: https://youtu.be/l8Fza6VVF5o Make your own LED Sign VU Meter video: https://youtu.be/Jyrpx9rEGMI Conductive 3D Printing Filament video: https://youtu.be/Fm8IR-lBfRQ PCB printer video: https://youtu.be/8u4izLA-SCo Facebook: https://www.facebook.com/greatscottlab Twitter: https://twitter.com/GreatScottLab Support me for more videos: https://www.patreon.com/GreatScott?ty=h You can get conductive ink pens here (affiliate links): https://s.click.aliexpress.com/e/_A82PGl https://s.click.aliexpress.com/e/_AUleKH In this video I will be having a closer look at conductive ink pens and find out whether they are useful when it comes to creating electronics circuits. I will test 2 different types by doing an experiment targeting the resistance, current capability and frequency response. At the end we will know for certain in which way such conductive ink pens can be used. Thanks to JLCPCB for sponsoring this video. Visit https://jlcpcb.com to get professional PCBs for low prices. Music: 2011 Lookalike by Bartlebeats 0:00 Conductive Ink Pens? 1:39 Intro 2:25 Initial test 3:38 Focus on the silver pen 4:30 Resistance test 5:42 Max Current test 6:54 Frequency test 8:42 Verdict

l8Fza6VVF5o | 23 May 2021
Design & Order on EasyEDA, PCB+SMT $10 Off: https://easyeda.com/editor Get coupon & Join JLC&EDA Group: https://jlcpcb.com/EDA Previous video: https://youtu.be/hl90yRy4vEI Make your own "Powerwall" video: https://youtu.be/ewkj875qUmk Creating an Overpowered Battery Pack video: https://youtu.be/TsY9ov784-g BMS (Battery Management System) video: https://youtu.be/rT-1gvkFj60 Facebook: https://www.facebook.com/greatscottlab Twitter: https://twitter.com/GreatScottLab Support me for more videos: https://www.patreon.com/GreatScott?ty=h More project information (pictures,.....) on Instructables: https://www.instructables.com/DIY-Portable-Power-Station/ You can get a commercial power station here: (affiliate links) https://amzn.to/3f79rLR https://s.click.aliexpress.com/e/_9yrewf Parts list for the DIY version: (partly affiliate links) 1x LiFePo4 Battery Pack: https://s.click.aliexpress.com/e/_9yEcDV 1x Smart BMS: https://shop.gwl.eu/Battery-Management/BMS123-Smart-Gen3-Complete-Set-4-cells-with-Bluetooth-4-0.html 1x Smart Relay: https://shop.gwl.eu/Battery-Management/BMS123-Smart-Dual-Latching-Relay.html 3x Push Button: https://s.click.aliexpress.com/e/_ATwXO3 1x Inverter: https://s.click.aliexpress.com/e/_ALUiuL 1x USB Output Adapter: https://s.click.aliexpress.com/e/_9J7vxz 1x 100A Fuse: https://shop.gwl.eu/LiFePO4-accessories/DC-Fuse-MEGA-100A-M8.html 1x Lab Bench Power Supply: https://s.click.aliexpress.com/e/_Aa11Tz 1x DC Jack: https://s.click.aliexpress.com/e/_AMNLQL Wire 8 AWG : https://s.click.aliexpress.com/e/_ADLeKr Ring Connectors: https://s.click.aliexpress.com/e/_AkxAWn 24V Power Supply: https://s.click.aliexpress.com/e/_AkIfa7 Wood,....., everything else: Home Improvement Store In this episode of DIY or Buy we will be having a closer look at portable power stations. Those are great for all kinds of outdoor camping or if your garage is not connected to the electrical grid,.....like mine. In the video I will show you how a commercial power station works and how we can create a DIY version which is actually a bit cheaper and can output way more power. Let's get started! Thanks to JLCPCB for sponsoring this video. Visit https://jlcpcb.com to get professional PCBs for low prices. Music: 2011 Lookalike by Bartlebeats 0:00 Portable power stations are awesome! 1:36 Intro 2:23 Testing a commercial power station 3:53 How does the commercial version work? 5:47 DIY version components 7:22 DIY version wiring 9:21 DIY version first test 9:43 DIY version enclosure build 12:10 Verdict
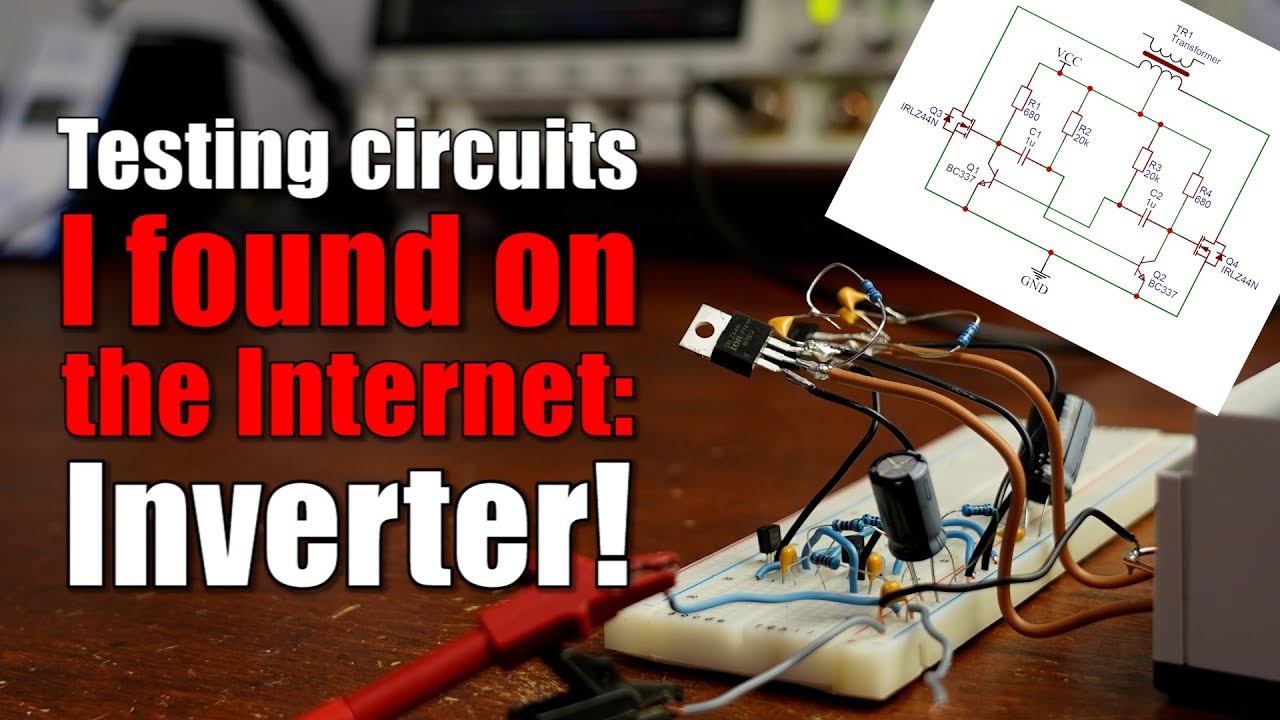
hl90yRy4vEI | 16 May 2021
Visit Brilliant.org and get a 20% discount: https://Brilliant.org/GreatScott/ Previous video: https://youtu.be/tp_VI6ujKHE Facebook: https://www.facebook.com/greatscottlab Twitter: https://twitter.com/GreatScottLab Support me for more videos: https://www.patreon.com/GreatScott?ty=h Websites which were shown during the video: http://www.learningaboutelectronics.com/Articles/Power-inverter-circuit.php In this episode of "Testing circuits I found on the Internet", I will be having a look at a popular inverter schematic I found on google images. The design uses an astable multivibrator in order to pull current alternately through a transformer and thus create a high AC voltage on its output side. A lot of DIY inverters use this functional principle. That is why I will build up the schematic, properly test the circuit and show you what problems it comes with that you can more or less easily fix. Let's get started! Thanks to Brilliant.org for sponsoring this video. Music: 2011 Lookalike by Bartlebeats 0:00 The schematic I found on the internet 1:06 Intro 2:09 Building up the circuit 3:13 Initial test 4:23 How the circuit works 7:32 Problem 1: Feedback 8:45 Problem 2: Overvoltage at the MOSFETs 9:20 Problem 3: Overvoltage at the Transformer 10:11 Other problems (lots of them) 10:42 Verdict

tp_VI6ujKHE | 09 May 2021
$2 for 1-4 Layer PCBs, Get SMT Coupons: https://jlcpcb.com/AAA Previous video: https://youtu.be/iN6j1AbUbYo Turning an Induction Motor into a Generator video: https://youtu.be/05qJM-zZ4ng Facebook: https://www.facebook.com/greatscottlab Twitter: https://twitter.com/GreatScottLab Support me for more videos: https://www.patreon.com/GreatScott?ty=h In this video I will be using a car alternator in combination with an old bicycle in order to create my own electrical energy. Along the way I will show you how a car alternator works and how we can use it with a bike. That includes electrical and mechanical modifications in order to reach the best output performance of the alternator. At the end I will then show you how much power I was able to create and whether I could power my home with it. Let's get started! Thanks to JLCPCB for sponsoring this video. Visit https://jlcpcb.com to get professional PCBs for low prices. Music: 2011 Lookalike by Bartlebeats 0:00 Project overview 1:39 Intro 2:12 Initial tests 3:39 Bike modifications 5:17 Creating a wood construction for the bike 6:10 The problem with the exciter coil 7:43 First proper tests with the bike 8:30 Alternator regulator modification 9:13 Final test & verdict
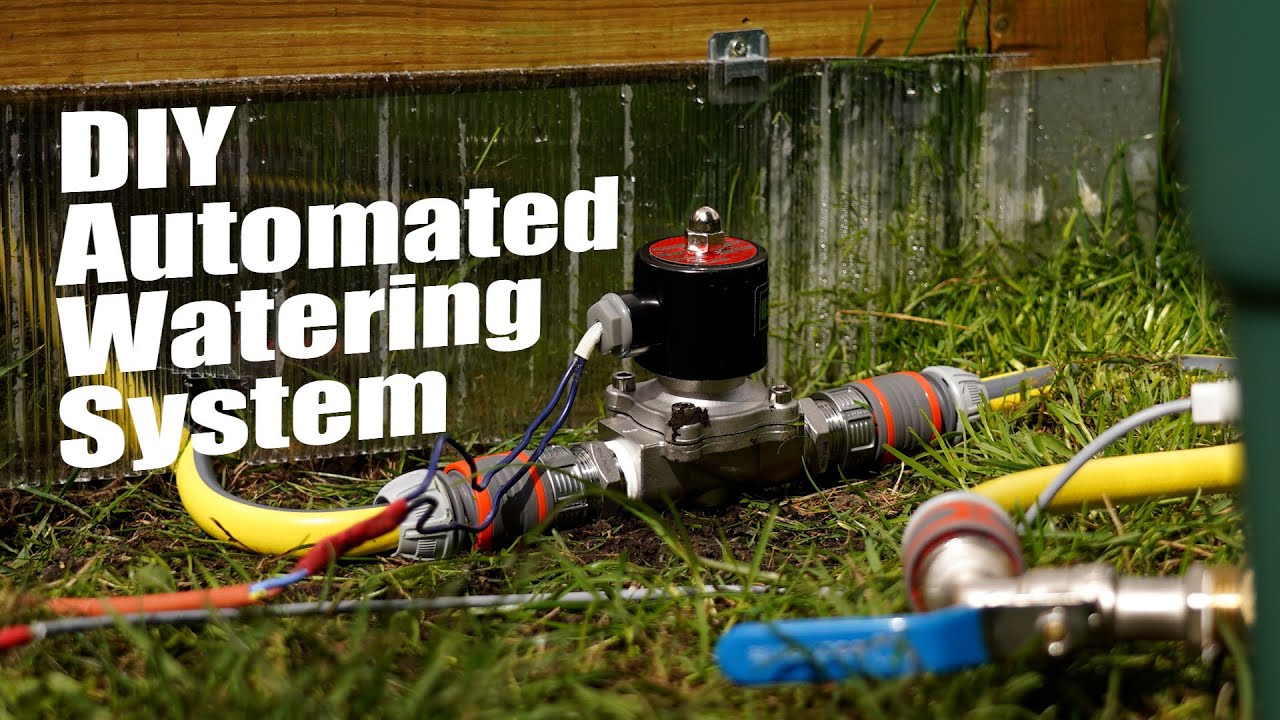
iN6j1AbUbYo | 25 Apr 2021
$2 for 1-4 Layer PCBs, Get SMT Coupons: https://jlcpcb.com/AAA Previous video: https://youtu.be/JOhQ3nsR7xo Greenhouse DIY or Buy video: https://youtu.be/pOsgXDpUQdM Greenhouse Automation Part 1 video: https://youtu.be/2YJHcGQnpAk Greenhouse Automation Part 2 video: https://youtu.be/gsMqwNi4wT4 Facebook: https://www.facebook.com/greatscottlab Twitter: https://twitter.com/GreatScottLab Support me for more videos: https://www.patreon.com/GreatScott?ty=h More project information (pictures, code, schematic,....) on Instructables: https://www.instructables.com/DIY-Automated-Watering-System/ Parts list (affiliate links): 1x Solenoid Valve: https://s.click.aliexpress.com/e/_AC4bnX 1x Tap: https://s.click.aliexpress.com/e/_9gn3BR 2x Adapter: https://s.click.aliexpress.com/e/_Ae2UJT 3x Garden Hose Adapter: https://s.click.aliexpress.com/e/_A4P9O5 https://s.click.aliexpress.com/e/_AKfGxj 1x Sealing Tape: https://s.click.aliexpress.com/e/_9iJtKN 1x Water Level Sensor: https://s.click.aliexpress.com/e/_ACAOE1 1x Relay Board: https://s.click.aliexpress.com/e/_AkiYvr 1x Water Barrel 1x LoRa Radio Node: http://s.click.aliexpress.com/e/_dYpwqA6 1x LM7805 Voltage Regulator: http://s.click.aliexpress.com/e/_dS0705s 1x Solar Panel: http://s.click.aliexpress.com/e/_dSNkyma 1x Solar Charge Controller: http://s.click.aliexpress.com/e/_dZ5u0f4 1x 12V Battery: http://s.click.aliexpress.com/e/_dT3yvjs 1x Wood chest 1x BME280 Sensor: http://s.click.aliexpress.com/e/_dSZ4I4W In this project I will be showing you how to create an automated watering system. My system is made for my greenhouse, but you can use the general principle for pretty much everything and everywhere. The system uses LoRa for remote communication, so that I can water my plants even when I am on vacation. But there is also a push button to water the plants manually. The mains ingredients for my system are a big water barrel, a solenoid valve, a water level sensor and a long garden hose ;-) Let's get started! Thanks to JLCPCB for sponsoring this video. Visit https://jlcpcb.com to get professional PCBs for low prices. Music: 2011 Lookalike by Bartlebeats 0:00 DIY Greenhouse improvements 0:41 Project overview 1:34 Intro 2:06 What happened to the old electronics? 3:00 Electronics in the new greenhouse 4:40 Watering System mechanical side 6:36 Watering System electronics side 7:49 Arduino Code & Test 8:34 Practical build 10:18 Final test & verdict
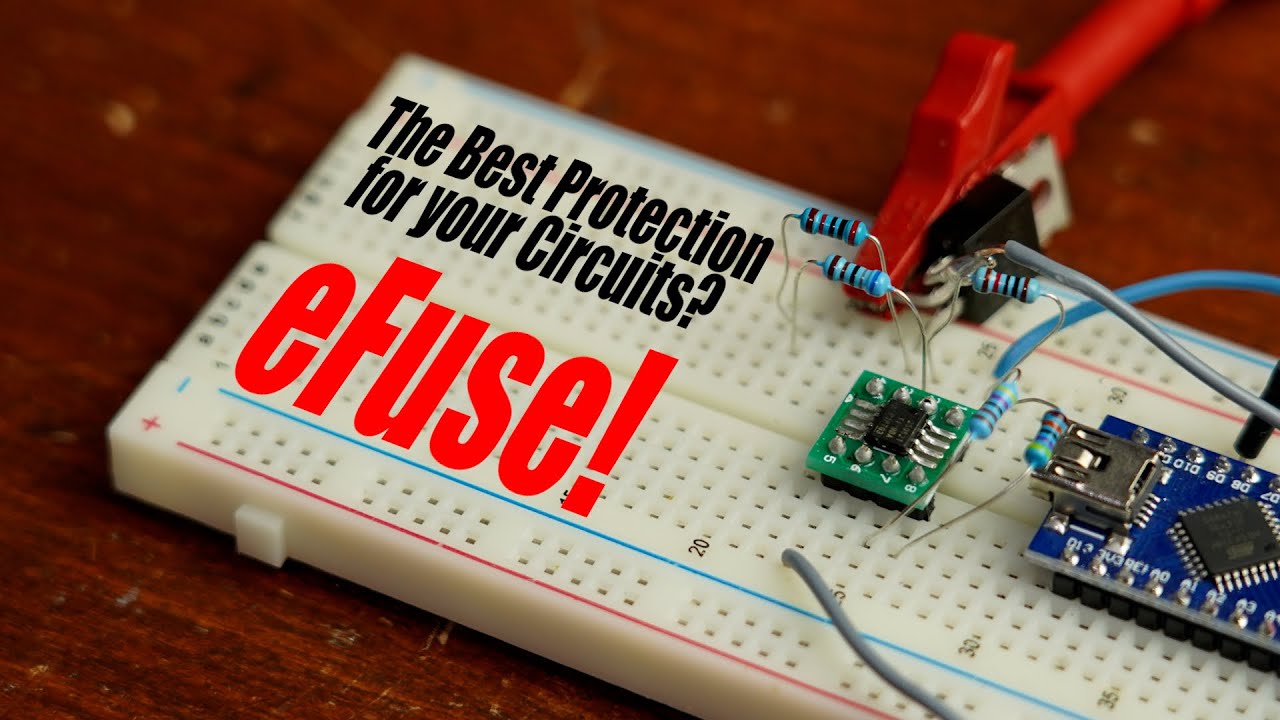
JOhQ3nsR7xo | 18 Apr 2021
$2 for 1-4 Layer PCBs, Get SMT Coupons: https://jlcpcb.com/AAA Previous video: https://youtu.be/pOsgXDpUQdM LiPo Supercharger video: https://youtu.be/6LxRnf6sQNQ Short Circuit (Overcurrent) Protection video: https://youtu.be/7ctPSgaLxbc Reverse Voltage Protection Circuit video: https://youtu.be/7Tk5ghH_U2s Facebook: https://www.facebook.com/greatscottlab Twitter: https://twitter.com/GreatScottLab Support me for more videos: https://www.patreon.com/GreatScott?ty=h You can get an eFuse here: (affiliate link) https://s.click.aliexpress.com/e/_APh7dh In this electronics basics episode we will have a closer look at eFuse ICs. They offer a ton of protection features for a very small price tag. That is why I will show you how I used such an eFuse in my LiPo Supercharger project and how you can use it for pretty much every electronics project. The included protection features are the following: undervoltage, overvoltage, reverse voltage, overcurrent and short circuit current. Let's get started! Thanks to JLCPCB for sponsoring this video. Visit https://jlcpcb.com to get professional PCBs for low prices. Music: 2011 Lookalike by Bartlebeats 0:00 The ideal way to power electronics 1:00 Why you need an eFuse! 2:19 Intro 2:51 How to select an eFuse IC? 5:10 How to wire it up? 6:01 Set the undervoltage limit 7:11 Set the overvoltage limit 8:23 Set the current limit 9:36 Verdict 10:12 Adding a reverse voltage protection

pOsgXDpUQdM | 11 Apr 2021
$2 for 1-4 Layer PCBs, Get SMT Coupons: https://jlcpcb.com/AAA Previous video: https://youtu.be/eh0YXLkzAKg Automating a Greenhouse with LoRa! (Part 1): https://youtu.be/2YJHcGQnpAk Automating a Greenhouse with LoRa! (Part 2): https://youtu.be/gsMqwNi4wT4 LED Bar video: https://youtu.be/_NEK5YwKGKk Facebook: https://www.facebook.com/greatscottlab Twitter: https://twitter.com/GreatScottLab Support me for more videos: https://www.patreon.com/GreatScott?ty=h In this episode of DIY or Buy I will show you how I built a really sturdy DIY greenhouse over the course of 5 days. I had to build a new one because my old commercial one got destroyed during a storm. That is why I used the opportunity to create a DIY greenhouse by myself in order to find out whether it makes sense to DIY such a project or whether we should stick to the commercial solution instead. Let's get started! Thanks to JLCPCB for sponsoring this video. Visit https://jlcpcb.com to get professional PCBs for low prices. Music: 2011 Lookalike by Bartlebeats 0:00 Story of my old greenhouse (got destroyed) 1:38 Intro 2:11 Material/Tool list 3:38 Day 1 (main foundation) 6:30 Day 2 (roof) 7:47 Day 3 (door/support battens) 9:55 Day 4 (twin wall sheets around greenhouse & on the roof) 11:21 Day 5 (twin wall sheets on the roof) 12:33 Verdict

eh0YXLkzAKg | 28 Mar 2021
$2 for 1-4 Layer PCBs, Get SMT Coupons: https://jlcpcb.com/AAA Previous video: https://youtu.be/oTUZQDpQcU4 MOSFET Driver Part 2 video: https://youtu.be/B7Eqrf2M-Iw Everything you need to know about Transformers! video: https://youtu.be/2cxcP5lY7K4 Solid State Relay video: https://youtu.be/2UtL2uAYCUA Facebook: https://www.facebook.com/greatscottlab Twitter: https://twitter.com/GreatScottLab Support me for more videos: https://www.patreon.com/GreatScott?ty=h More project information (schematic, code,.....) on Instructables: https://www.instructables.com/How-to-Make-an-AC-Softstarter/ Parts list (affiliate links): 1x Arduino Nano: https://s.click.aliexpress.com/e/_dULoNXh 1x Push Button: https://s.click.aliexpress.com/e/_Aeay0k 1x Red & Green 5mm LED: https://s.click.aliexpress.com/e/_dV63r7D Resistors: https://s.click.aliexpress.com/e/_dTPpXjt 1x 4N25 Optocoupler: https://s.click.aliexpress.com/e/_AERtjq 1x MOC3052 Optocoupler: https://s.click.aliexpress.com/e/_AeCdJW 1x BTB26 Triac: https://s.click.aliexpress.com/e/_AfaGfw 1x 5V Power Supply: https://s.click.aliexpress.com/e/_A4fEFi 1x FBR: https://s.click.aliexpress.com/e/_AUMFys In this project video I will show you why my new autotransformer keeps tripping my circuit breaker and how I built an AC softstarter in order to "softly" start the transformer so that it does not trip my circuit breaker. Along the way we will find out how exactly this problem gets created and how you can fix it easily. BTW, such softstarters are also useful for motors ;-) Let's get started! Thanks to JLCPCB for sponsoring this video. Visit https://jlcpcb.com to get professional PCBs for low prices. Music: 2011 Lookalike by Bartlebeats Killing Time, Kevin MacLeod (incompetech.com) 0:00 Showing off the autotransformer 1:04 The problem with the transformer 1:40 Intro 2:13 Functional Principle of an autotransformer 4:27 Finding the problem 5:52 The reason for the problem 7:10 DIY Solution 1 (Simple) 8:15 DIY Solution 2 (Softstarter) 10:33 Final Test & Assembly

oTUZQDpQcU4 | 21 Mar 2021
You can enter the Keysight University Live 2021event here: http://bit.ly/GS_KULive The full overview is here: http://bit.ly/KU_Overview http://bit.ly/KULive_Calendar Join the livestream here: https://www.youtube.com/watch?v=dKYAFzoGgmw Keysight Labs YouTube Channel: https://www.youtube.com/user/KeysightOscilloscope Previous video: https://youtu.be/EvK2ZQbMn8o USB Type-C is awesome video: https://youtu.be/OwAZqJ4wpJg Electronic Basics #23: Transistor (MOSFET) as a Switch video: https://youtu.be/o4_NeqlJgOs MOSFET Driver Part 1 (Driver, Bootstrapping) video: https://youtu.be/8swJ_Bnsgl4 MOSFET Driver Part 2 (Potential-free) video: https://youtu.be/B7Eqrf2M-Iw Facebook: https://www.facebook.com/greatscottlab Twitter: https://twitter.com/GreatScottLab Support me for more videos: https://www.patreon.com/GreatScott?ty=h In this video we will be having a closer look at GaN FETs in order to find out whether they will improve power electronics products in the future. For that I got myself a commercial GaN power adapter which I will compare with a more traditional power adapter concerning their efficiency. Afterwards I will measure the resistance and switching speed of a proper GaN FET and finally use it in a buck converter circuit to demonstrate the difference to a normal MOSFET. Let's get started! Websites which were shown (used) during the video: https://www.infineon.com/dgdl/Infineon-IPP60R199CP-DS-v02_03-en.pdf?fileId=db3a304412b407950112b42d8b484897 https://www.transphormusa.com/en/document/650v-cascode-gan-fet-tph3206psb/ https://www.transphormusa.com/en/document/recommended-external-circuitry-transphorm-gan-fets/ https://epc-co.com/epc/CEOInsights/FastJustGotFasterBlog/December2013.aspx https://www.ti.com/power-management/gallium-nitride/overview.html https://www.infineon.com/dgdl/Infineon-GalliumNitride_CoolGaN_emode_HEMTs-ProductSelectionGuide-v01_01-EN.pdf?fileId=5546d46266f85d6301670c286baf30a6 https://www.powerelectronics.com/technologies/gan-transistors/article/21863347/gan-basics-faqs Thanks to the Keysight University Live for sponsoring this video. Music: 2011 Lookalike by Bartlebeats 0:00 Introduction to GaN FETs (Power Adapters) 1:58 Intro 2:50 Testing the efficiency of a GaN Power Adapter and a traditional one 5:43 Selecting a proper GaN FET 6:08 Resistance Test (GaN FET VS MOSFET) 7:00 Switching Test (GaN FET VS MOSFET) 9:46 Buck Converter Test (GaN FET VS MOSFET) 10:42 Conclusion

EvK2ZQbMn8o | 14 Mar 2021
Check out the free webinar 'Meet the Engineers': https://elektor.clickmeeting.com/529471334/register Offer: 20% Discount on Elektor Magazine Print -- Code: Great20P Offer: 50% Discount on Elektor Magazine Digital -- Code: Great50D Both 20% Off on the printed issue as also 50% on the digital can be found here: https://www.elektormagazine.com/greatscott-elektor-sparkfun For quick delivery in the North America via SparkFun: https://www.sparkfun.com/products/15769 For quick delivery in EU & ROW via Elektor: https://www.elektor.com/sparkfun-jetbot-ai-kit-v2-1?utm_source=YT&utm_medium=Link&utm_campaign=GSjetbot Previous video: https://youtu.be/B7Eqrf2M-Iw Pyboard (MicroPython) Beginner's Guide video: https://youtu.be/CyrgzzxQPzk Facebook: https://www.facebook.com/greatscottlab Twitter: https://twitter.com/GreatScottLab Support me for more videos: https://www.patreon.com/GreatScott?ty=h Websites which were shown/used during the video: https://pytorch.org/ https://en.wikipedia.org/wiki/Artificial_intelligence https://www.analyticssteps.com/blogs/how-tesla-making-use-artificial-intelligence-its-operations https://qengineering.eu/deep-learning-with-raspberry-pi-and-alternatives.html https://jetbot.org/master/index.html https://www.sparkfun.com/products/16417 https://www.sparkfun.com/products/15769 https://github.com/NVIDIA-AI-IOT/jetbot https://developer.nvidia.com/embedded/jetson-nano-dl-inference-benchmarks In this video we will have a closer look at the concept of AI aka artificial intelligence and deep learning. As a practical example I will be building a small robot that comes with an NVIDIA SBC, a camera and two motors with wheels to drive around. I will show you how to use the SBC and its AI features in order to create an algorithm that avoids obstacles while the robot is driving around autonomously. Of course there is much more to learn when it comes to AI and deep learning. So let's get started! Thanks to Elektor and SparkFun for sponsoring this video! Visit https://www.elektormagazine.com/ to read their magazines and buy electronic components. Or visit https://www.sparkfun.com/ to get DIY electronics kits. Music: 2011 Lookalike by Bartlebeats Killing Time, Kevin MacLeod (incompetech.com) 0:00 This is why AI is WICKED! 1:54 Intro 2:44 Finding suitable hardware for AI tasks 4:06 Building the AI robot 6:06 Connecting the AI robot to the internet 6:44 Presenting the AI robots programming interface 7:26 First practical test 8:22 AI practical test 9:46 Conclusion
_5M5Nub-c8o | 07 Mar 2021
You can enter the Keysight University Live 2021event here: http://bit.ly/GS_KULive The full overview is here: http://bit.ly/KU_Overview http://bit.ly/KULive_Calendar Join the livestream here: https://www.youtube.com/watch?v=dKYAFzoGgmw Keysight Labs YouTube Channel: https://www.youtube.com/user/KeysightOscilloscope Support me for more videos: https://www.patreon.com/GreatScott Facebook: https://www.facebook.com/greatscottlab Twitter: https://twitter.com/GreatScottLab 0:00 The video is only 2 minutes long. You do not need timestamps ;-) 1:41 The end

hg2XYW9CHrE | 03 Mar 2021
Du möchtest mehr über die Würth Elektronik Bauteile erfahren? Dann klicke hier: https://bit.ly/WE_OnlineKatalog_DE Würth Elektronik Gate-Drive-Übertrager - Übersicht:http://bit.ly/Gate_Drive_Übertrager - WE-GDT Gate-Drive-Übertrager: http://bit.ly/WE_GDT-de - WE-GDTI Gate-Drive-Übertrager: http://bit.ly/WE_GDTI_de - WE-AGDT WE-AGDT Auxiliary Gate Drive Transformer: http://bit.ly/WE_AGDT_de Vorheriges Video: https://youtu.be/kEvv-G_-jY0 DIY Tesla Coil Videoreihe: https://youtu.be/-CY3aCDc3RY MOSFET Ansteuerung Teil 1 Video: https://youtu.be/pdTRzBHOC5w Everything you need to know about Transformers Video: https://youtu.be/2cxcP5lY7K4 Facebook: https://www.facebook.com/greatscottlab Twitter: https://twitter.com/GreatScottLab Unterstütze mich für mehr videos : https://www.patreon.com/GreatScott?ty=h In diesen Video werden die MOSFET Ansteuerung Videoreihe zu Ende bringen. Dafür werden wir uns einen Gate-Drive Übertrager genauer anschauen. Als praktisches Beispiel werde Ich einen Teslaspulen Treiber verwenden, welcher Gate-Drive Übertrager nutzt um seine MOSFETs anzusteuern. Wir werden herausfinden wie diese Transformatoren funktionieren, wie man sie in einer Schaltung nutzt, wie man eine DIY Variante baut und wir werden herausfinden warum das Nutzen von kommerziellen Übertragern oft sinnvoller ist. Let's get started! Internetseiten welche im Video zu sehen waren: Websites which were shown (used) during the video: https://www.ebay.de/itm/230V-Teslaspule-mit-Toroid-Bausatz-Halfbridge-SSTC-kit-Solid-State-Tesla-Coil/323525869072?ssPageName=STRK%3AMEBIDX%3AIT&_trksid=p2057872.m2749.l2649 http://ferroxcube.home.pl/news/gate%20drive%20trafo.pdf http://www.richieburnett.co.uk/temp/gdt/gdt2.html https://www.we-online.de/katalog/datasheet/760301301.pdf Danke an die Würth Elektronik eiSos Gruppe für die Unterstützung des Videos. Music: 2011 Lookalike by Bartlebeats 0:00 Vorstellen meines neuen Teslaspulen Kit 1:25 Warum performt die neue Teslaspule besser? 2:35 Intro 2:58 Überblick über was ein Gate-Drive Übertrager macht 4:21 Wie funktioniert der praktische Transformator? 5:54 Spannungsverläufe auf den Oszi 6:25 Zusätzliche Komponenten für den Trafo 7:12 Bau eines DIY Gate-Drive Übertrager 7:37 Testen der DIY Variante 8:32 Das Problem beim Entwerfen einer DIY Variante 9:35 Aussuchen eines kommerziellen Gate-Drive Übertragers 10:21 Testen der kommerziellen Lösung 10:45 Zusammenfassung & Abschließende Frage

B7Eqrf2M-Iw | 28 Feb 2021
Do you want to know more about the Würth Elektronik components? Then click here: http://bit.ly/we_onlinecatalog_EN and visit the page http://bit.ly/Gate_Drive_Transformers to get an overview of gate drive transformers. Würth Elektronik products, which were used in the video: - WE-GDT Gate-Drive-Transformer: http://bit.ly/WE_GDT_en - WE-GDTI Gate-Drive-Transformer: http://bit.ly/WE_GDTI_en - WE-AGDT Auxiliary Gate Drive Transformer: http://bit.ly/WE_AGDT_en Previous video: https://youtu.be/kEvv-G_-jY0 DIY Tesla Coil video series: https://youtu.be/-CY3aCDc3RY MOSFET Driver Part 1 video: https://youtu.be/8swJ_Bnsgl4 Everything you need to know about Transformers video: https://youtu.be/2cxcP5lY7K4 Facebook: https://www.facebook.com/greatscottlab Twitter: https://twitter.com/GreatScottLab Support me for more videos: https://www.patreon.com/GreatScott?ty=h In this video I will conclude the MOSFET Driver video series by having a closer look at Gate-Drive Transformers. As a practical example I will be using a Tesla Coil driver circuit that uses a Gate-Drive Transformer to control its MOSFETs. We will be finding out how the transformer works, how to use it in a circuit, how to create a DIY version and why using a commercial solution often makes more sense. Let's get started! Websites which were shown (used) during the video: https://www.ebay.de/itm/230V-Teslaspule-mit-Toroid-Bausatz-Halfbridge-SSTC-kit-Solid-State-Tesla-Coil/323525869072?ssPageName=STRK%3AMEBIDX%3AIT&_trksid=p2057872.m2749.l2649 http://ferroxcube.home.pl/news/gate%20drive%20trafo.pdf http://www.richieburnett.co.uk/temp/gdt/gdt2.html https://www.we-online.de/katalog/datasheet/760301301.pdf Thanks to the Würth Elektronik eiSos Group for supporting this video. Music: 2011 Lookalike by Bartlebeats 0:00 Presenting my new Tesla Coil 1:30 Why does it perform better than my old one? 2:42 Intro 3:03 Overview of what a Gate-Drive Transformer does 4:36 How does the practical Transformer work? 6:13 Having a look at the Waveforms 6:48 Complementary components for the Transformer 7:36 Creating a DIY Gate-Drive Transformer 8:03 Testing the DIY version 9:03 The problem with designing a DIY version 10:16 Getting a commercial Gate-Drive Transformer 11:05 Testing the commercial solution 11:30 Verdict

kEvv-G_-jY0 | 21 Feb 2021
How JLCPCB Keep $2 PCB Prototype & Build PCB best: https://jlcpcb.com/aboutUs JLCPCB Story & Full-scale Factories: https://www.youtube.com/watch?v=y1TRiahMrD4 Previous video: https://youtu.be/7Pv-j_R3YP4 Everything about LEDs and current limiting resistors video: https://youtu.be/Qlayua3yjuE Facebook: https://www.facebook.com/greatscottlab Twitter: https://twitter.com/GreatScottLab Support me for more videos: https://www.patreon.com/GreatScott?ty=h In this episode of Fix It! I will be having a look at a self-dimming LED downlight that quit working after only 1.5 years of usage. I will not only find the simple mistake that makes the light useable again but I will also explore the lights circuit secrets. I will show you exactly how it works and I will also directly compare it to the same lamp type which was produced a couple of years later and show you how the new light does everything better. Let's get started! Thanks to JLCPCB for sponsoring this video. Visit https://jlcpcb.com to get professional PCBs for low prices. Music: 2011 Lookalike by Bartlebeats Killing Time, Kevin MacLeod (incompetech.com) 0:00 Showing the faulty LED downlight 1:49 Intro 2:29 Removing the light 3:08 Testing the light and finding the culprit 5:08 Disassembling the old light 5:40 Finding out how the old light works 7:49 Comparing the new light with the old one 10:03 Conclusion
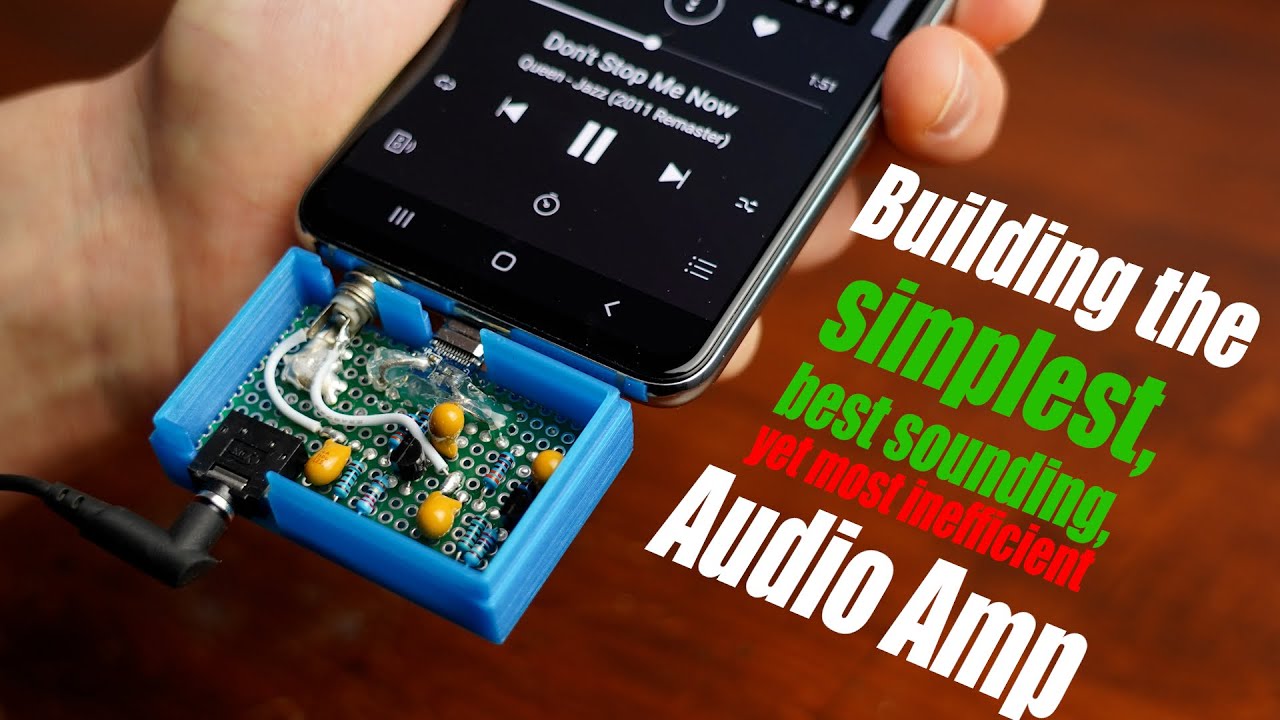
7Pv-j_R3YP4 | 14 Feb 2021
$2 for 4-Layer PCBs: https://jlcpcb.com Previous video: https://youtu.be/8u4izLA-SCo Transistor (BJT) as a Switch video: https://youtu.be/WRm2oUw4owE Low Budget Bluetooth Music System video: https://youtu.be/oGTXczCV30A Facebook: https://www.facebook.com/greatscottlab Twitter: https://twitter.com/GreatScottLab Support me for more videos: https://www.patreon.com/GreatScott?ty=h More project information (schematic,.....) on Instructables: https://www.instructables.com/Building-the-Simplest-Best-Sounding-Yet-Most-Ineff/ Parts list (affiliate links): 2x BC337 NPN BJT: https://s.click.aliexpress.com/e/_9I1F1z 2x 100Ω, 2x 22Ω, 2x 3.3kΩ, 2x 1kΩ Resistor: https://s.click.aliexpress.com/e/_dTPpXjt 4x 10µF Capacitor: https://s.click.aliexpress.com/e/_d7dOwRz 1x USB Type-C breakout board: https://s.click.aliexpress.com/e/_AonKUJ 1x Audio jack: https://s.click.aliexpress.com/e/_9IfcXd 1x Audio plug: https://s.click.aliexpress.com/e/_ABC7UL 1x Perfboard: https://s.click.aliexpress.com/e/_A5V4B5 Useful sites which were partly shown in the video: https://www.electronics-lab.com/article/class-a-amplifiers/ https://learnabout-electronics.org/Amplifiers/amplifiers21.php https://learnabout-electronics.org/Amplifiers/amplifiers20.php https://www.tutorialspoint.com/amplifiers/class_a_power_amplifiers.htm https://www.electronics-tutorials.ws/amplifier/amplifier-classes.html https://www.electronics-tutorials.ws/amplifier/amp_5.html In this project I will be showing you how to create a class A audio amp. The great thing about such amps is that they only require a few components and sound awesome. On the other hand though, their efficiency is not that great. But since I will be creating this amp for a smartphone with a USB Type-C port for powering the amp, it should be just fine. So let me show you how to calculate a design for such an amp and how to build it! Let's get started! Thanks to JLCPCB for sponsoring this video. Visit https://jlcpcb.com to get professional PCBs for low prices. Music: 2011 Lookalike by Bartlebeats 0:00 Why I want to build a class A audio amp 1:02 Intro 1:39 General circuit design 3:03 Closer look at the Base Input side 4:24 Comparison of class A, B & AB amplifiers 5:30 Closer look at the Collector Output side 6:23 Selecting the complementary components 8:34 Extra Information about class A amps 9:05 Modifying a USB Type-C board to get 5V 9:53 Practical build & End

8u4izLA-SCo | 31 Jan 2021
Voltera V-One PCB Printer on Elektor.com: http://bit.ly/Voltera-more-information Elektor Member Offer: (60% Discount on Digital Membership): http://bit.ly/Elektor-offer-for-GreatScott-Followers Code = GreatScott60 Previous video: https://youtu.be/s6SAjQYhssk From Idea to Schematic to PCB - How to do it easily!: https://youtu.be/35YuILUlfGs Homemade PCB Etching (through hole parts) - Part 1: https://youtu.be/YJgX9Na4rWw Homemade PCB Etching (through hole parts) - Part 2: https://youtu.be/6uInan-TjiA How NOT to Mill a PCB (except for SMD): https://youtu.be/_ak0IJUMBFg DIY Trailing Edge Dimmer: https://youtu.be/BhQWOv10Oag Facebook: https://www.facebook.com/greatscottlab Twitter: https://twitter.com/GreatScottLab Support me for more videos: https://www.patreon.com/GreatScott?ty=h In this video I will be testing out the Voltera V-One PCB printer and create a homemade PCB version of one of my older PCB projects in order to find out whether such a PCB printer is a good replacement for proper PCB manufacturers. Along the way we will discover all the advantages and disadvantages such a printer comes with. Let's get started! Thanks to Elektor for sponsoring this video! Visit https://www.elektormagazine.com/ to read their magazines and buy electronic components. Music: 2011 Lookalike by Bartlebeats Killing Time, Kevin MacLeod (incompetech.com) 0:00 Introduction (Why PCBs are important!) 1:17 Introducing the PCB printer 1:55 Intro 2:42 Unpacking the PCB printer 3:19 Installing the software 3:52 Deciding on an example PCB project 4:21 Drill process 5:48 Printing the top layer 7:35 Printing the bottom layer 8:04 Adding the rivets 8:25 Soldering the components 8:51 Homemade PCB of one of my older projects 10:51 Verdict of the PCB printer
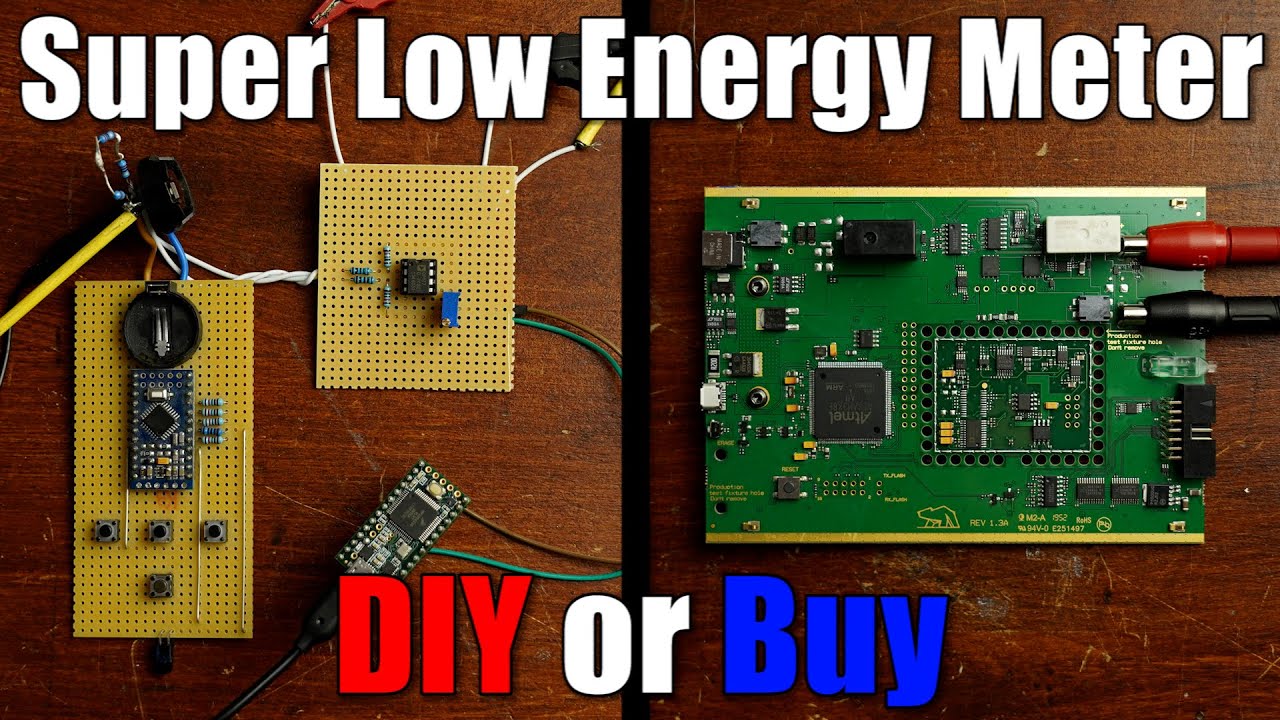
s6SAjQYhssk | 24 Jan 2021
You can buy the Otii Arc here: https://www.qoitech.com/buy/ Thanks to QOITECH for sponsoring this video. Previous video: https://youtu.be/83Mdnc7FyVY HACKED!: Speaker System gets an IR Remote video: https://youtu.be/XUY0-doBx1U Make your own Power Meter/Logger video: https://youtu.be/lrugreN2K4w Electronic Basics #27: ADC (Analog to Digital Converter) video: https://youtu.be/EnfjYwe2A0w Facebook: https://www.facebook.com/greatscottlab Twitter: https://twitter.com/GreatScottLab Support me for more videos: https://www.patreon.com/GreatScott?ty=h In this episode of DIY or Buy we will be having a closer look at the Otii Arc product. It is a tool that can basically measure µA/nA and therefore calculate the used energy of a low power device. Since such a tool is super handy to have around, I will also try to create my own crude low energy meter in this video. Let's find out whether a Teensy microcontroller and an Op-Amp circuit is capable of measuring µA/nA! Let's get started! Websites which were shown/used in the video: https://hackaday.com/2017/12/22/coin-cells-the-mythical-milliamp-hour/ https://www.pjrc.com/store/teensy32.html https://forum.pjrc.com/threads/25532-ADC-library-update-now-with-support-for-Teensy-3-1 https://github.com/GadgetReboot/Processing/tree/master/Simple_Scope https://www.analog.com/media/en/technical-documentation/data-sheets/OP177.pdf https://www.analog.com/media/en/technical-documentation/data-sheets/AD7192.pdf https://ww1.microchip.com/downloads/en/DeviceDoc/Atmel-11057-32-bit-Cortex-M3-Microcontroller-SAM3X-SAM3A_Datasheet.pdf Music: 2011 Lookalike by Bartlebeats 0:00 Introduction (Why I need to measure µA/nA) 1:45 Presenting the Buy option (Otii Arc) 2:53 Intro 3:12 Testing the Otii Arc 7:01 Coming up with a DIY solution 8:44 Building the DIY circuit 11:12 Conclusion
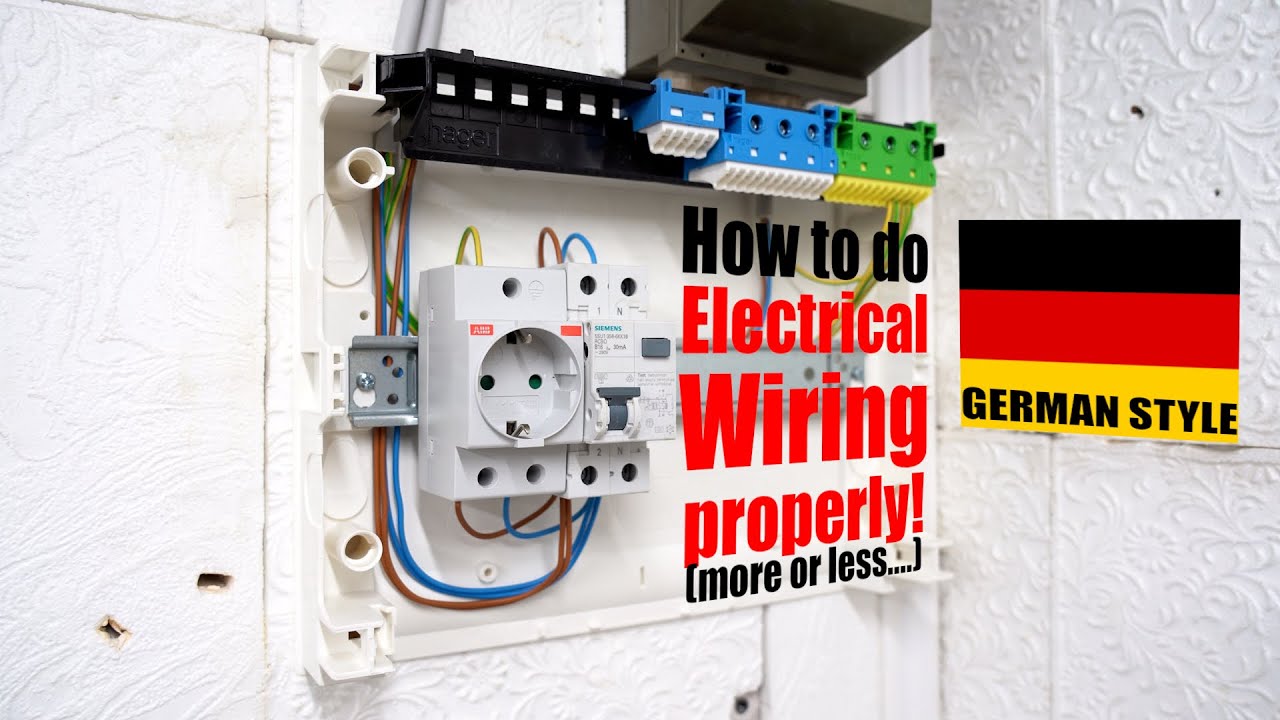
83Mdnc7FyVY | 17 Jan 2021
A Better 2021 for All JLC & GreatScott! friends: https://jlcpcb.com Previous video: https://youtu.be/qspHm1RKsPc How circuit breakers can save your life! video: https://youtu.be/DWsVvdd8QJ4 Facebook: https://www.facebook.com/greatscottlab Twitter: https://twitter.com/GreatScottLab Support me for more videos: https://www.patreon.com/GreatScott?ty=h You can get a proper Jokari and Wire stripper here (affiliate links): https://amzn.to/38vB4tq https://amzn.to/34DHDt0 In this video me and my friend will show you how to do electrical wiring properly. That means we will remove the complete electrical system of his garage and install a new one. We will be talking about/showing you how to mount and wire up a new distribution box, install circuit breakers, mount electrical components like outlets, switches and lamps, install conduits, lay cable and finally how to connect all the components to one another. Let's get started! Websites which were shown in the video: https://de.wikipedia.org/wiki/Liste_der_Schaltzeichen_(Elektrik/Elektronik) Thanks to JLCPCB for sponsoring this video. Visit https://jlcpcb.com to get professional PCBs for low prices. Music: 2011 Lookalike by Bartlebeats Killing Time, Kevin MacLeod (incompetech.com) 0:00 Introduction 1:16 Intro 1:47 Drawing an Installation plan 2:42 Explaining the Flow sheet 4:20 Ordering the components 5:12 Practical Build 11:01 Final Test & End

0tmcD3MbTQQ | 03 Jan 2021
Support me for more videos: https://www.patreon.com/GreatScott Previous video: https://youtu.be/qspHm1RKsPc Facebook: https://www.facebook.com/greatscottlab Twitter: https://twitter.com/GreatScottLab 0:00 Introduction 2:21 Number 3 video of 2020 voted by viewers 5:50 Number 2 video of 2020 voted by viewers 8:40 Number 1 video of 2020 voted by viewers 11:42 Number 3 video of 2020 voted by me ;-) 14:46 Number 2 video of 2020 voted by me ;-) 16:48 Number 1 video of 2020 voted by me ;-) 20:05 Q&A Time! 55:53 Announcement & End Random/Unscripted Q&A #7: https://youtu.be/l7jJPi-Xk8o Top 3 GreatScott! videos of 2019 || Random/Unscripted Q&A #6: https://youtu.be/xus3zQ3cX2U Random/Unscripted Q&A #5: https://youtu.be/57t2i7XfL1Y Random/Unscripted Q&A #4: https://youtu.be/trrjQ4cN2Bc Random/Unscripted Q&A #3: https://youtu.be/j99I1EveKd4 Random/Unscripted Q&A #2: https://youtu.be/8nOXWfS1hQo Random/Unscripted Q&A: https://youtu.be/x2MEJfY45UY
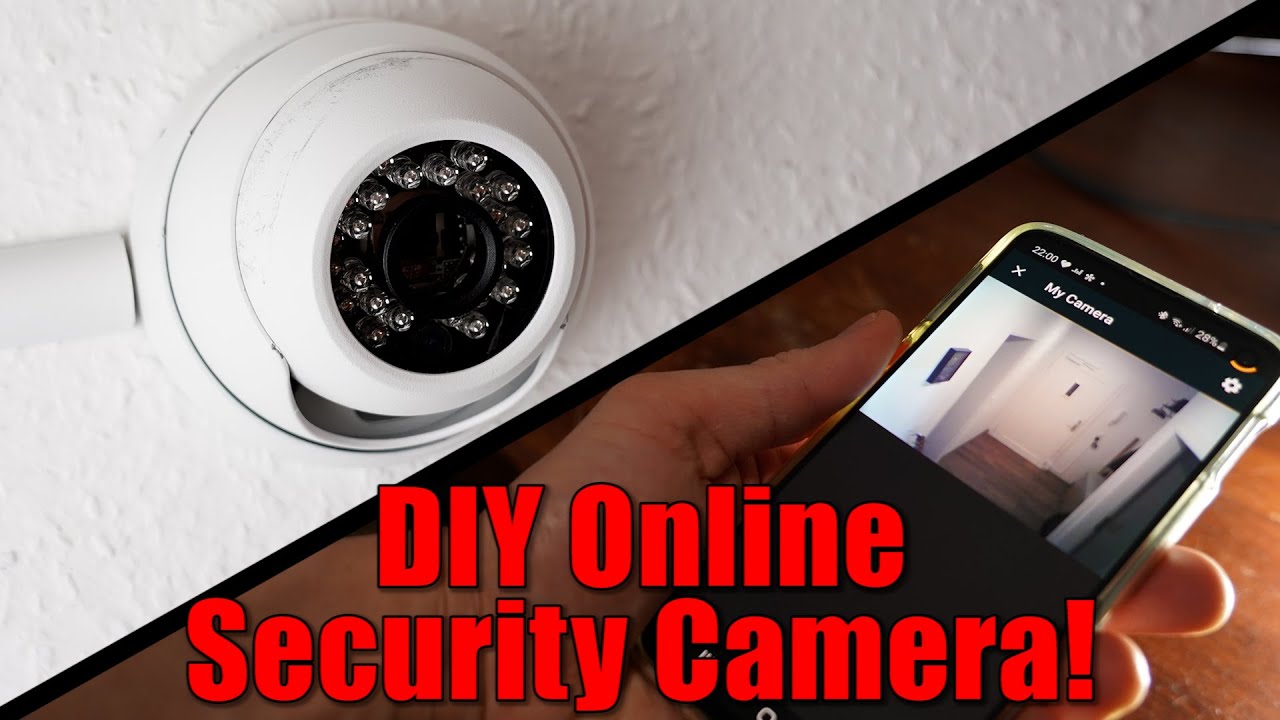
qspHm1RKsPc | 20 Dec 2020
Altium Designer: https://altium.com/yt/greatscott! Previous video: https://youtu.be/8swJ_Bnsgl4 DIY Home Automation Intruder Alarm System video: https://youtu.be/IvI1RqYPO24 Facebook: https://www.facebook.com/greatscottlab Twitter: https://twitter.com/GreatScottLab Support me for more videos: https://www.patreon.com/GreatScott?ty=h More project information (schematic, code,....) on Instructables: https://www.instructables.com/DIY-Online-Security-Camera/ Parts list (affiliate links): ESP32-CAM: https://s.click.aliexpress.com/e/_A6nOO9 Security Camera: https://s.click.aliexpress.com/e/_9RZXCz 200, 10k Resistor: https://s.click.aliexpress.com/e/_9fYthX IRL2905 MOSFET: https://s.click.aliexpress.com/e/_9HTFsN Boost Converter: https://s.click.aliexpress.com/e/_9gDvAh Useful sites which were shown in the video: https://www.uctronics.com/download/cam_module/OV2640DS.pdf https://github.com/easytarget/esp32-cam-webserver https://esphome.io/components/esp32_camera.html https://www.home-assistant.io/integrations/camera/ https://www.home-assistant.io/docs/configuration/basic/ In this project I will show you how to combine an ESP32-CAM with an ordinary security camera housing in order to create an online security camera. That means I will show you how to use the ESP32-CAM board in order to take pictures and then I will show you how to integrate it into home assistant. There we can then create an automation in order to take pictures when an intruder triggers an alarm. At the end I will then show you how to put all of the components inside a security camera housing. Let's get started! Thanks to Altium for sponsoring this video. Music: 2011 Lookalike by Bartlebeats
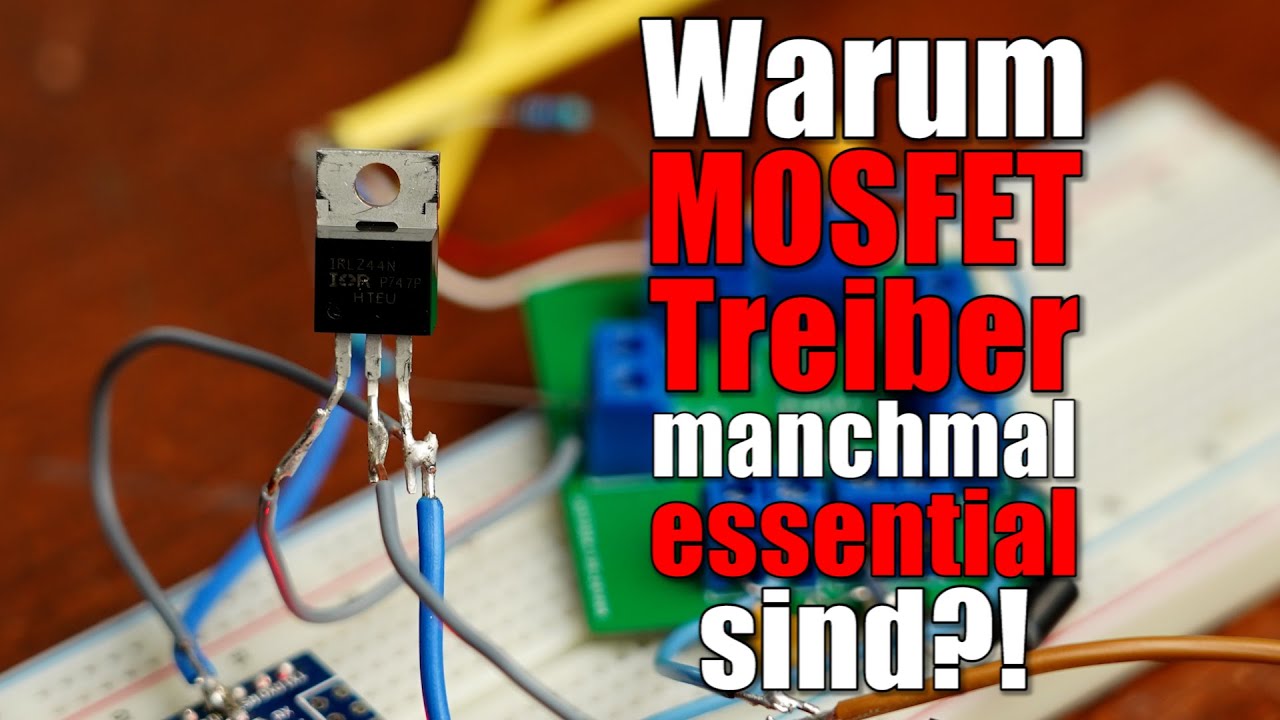
pdTRzBHOC5w | 16 Dec 2020
Du möchtest mehr über die Würth Elektronik Bauteile erfahren? Dann klicke hier: https://bit.ly/WE_OnlineKatalog_DE Vorheriges Video: https://youtu.be/6LxRnf6sQNQ Electronic Basics #23: Transistor (MOSFET) as a Switch: https://youtu.be/o4_NeqlJgOs Facebook: https://www.facebook.com/greatscottlab Twitter: https://twitter.com/GreatScottLab Unterstütze mich für mehr videos : https://www.patreon.com/GreatScott?ty=h In diesen Video werden wir uns genauer anschauen wie man MOSFETs ansteuert. Ich werde verschieden Beispiele zeigen wie man einen MOSFET ein und aus schaltet mithilfe eines Mikrocontrollers. Wir werden herausfinden warum und wie viel Gate Strom fließt und Ich werde die Frage beantworten warum die Gate Kapazität uns "zwingt" einen MOSFET Treiber zu nutzen. Während des Videos wirst du auch über Bootstrapping erfahren und warum man auch manchmal einen Gate-Drive Übertrager benötigt. Let's get started! Internetseiten welche im Video zu sehen waren: https://www.infineon.com/dgdl/irlz44npbf.pdf?fileId=5546d462533600a40153567217c32725 https://www.ti.com/lit/ds/symlink/lmg1210.pdf?ts=1606397671181&ref_url=https%253A%252F%252Fwww.google.fr%252F https://www.ti.com/lit/an/slyt664/slyt664.pdf?ts=1606278986834&ref_url=https%253A%252F%252Fwww.google.com%252F#:~:text=MOSFET%20switching%20losses%20are%20a,as%20shown%20by%20Equation%204.&text=Switch%2DMOSFET%20gate%20losses%20can,and%20turn%2Doff%20gate%20losses. https://www.ti.com/lit/ml/slua618a/slua618a.pdf?ts=1606281136402&ref_url=https%253A%252F%252Fwww.google.com%252F https://www.wikiwand.com/de/Gate-Treiber Danke an die Würth Elektronik eiSos Gruppe für die Unterstützung des Videos. Music: 2011 Lookalike by Bartlebeats Killing Time, Kevin MacLeod (incompetech.com)

8swJ_Bnsgl4 | 13 Dec 2020
Do you want to know more about the Würth Elektronik components? Then click here: http://bit.ly/we_onlinecatalog_EN Previous video: https://youtu.be/6LxRnf6sQNQ Electronic Basics #23: Transistor (MOSFET) as a Switch: https://youtu.be/o4_NeqlJgOs Facebook: https://www.facebook.com/greatscottlab Twitter: https://twitter.com/GreatScottLab Support me for more videos: https://www.patreon.com/GreatScott?ty=h In this video we will be having a closer look on how to drive MOSFETs. That means I will show you different examples on how to turn on/off a MOSFET with a microcontroller. We will investigate why and how much gate current is flowing and how the gate capacitance pretty much forces us to use a MOSFET driver at some point. Along the way you will also learn about what bootstrapping is and when to use it and you will hear a tiny bit about a gate-drive transformer. Let's get started! Websites which were shown during the video: https://www.infineon.com/dgdl/irlz44npbf.pdf?fileId=5546d462533600a40153567217c32725 https://www.ti.com/lit/ds/symlink/lmg1210.pdf?ts=1606397671181&ref_url=https%253A%252F%252Fwww.google.fr%252F https://www.ti.com/lit/an/slyt664/slyt664.pdf?ts=1606278986834&ref_url=https%253A%252F%252Fwww.google.com%252F#:~:text=MOSFET%20switching%20losses%20are%20a,as%20shown%20by%20Equation%204.&text=Switch%2DMOSFET%20gate%20losses%20can,and%20turn%2Doff%20gate%20losses. https://www.ti.com/lit/ml/slua618a/slua618a.pdf?ts=1606281136402&ref_url=https%253A%252F%252Fwww.google.com%252F https://www.wikiwand.com/de/Gate-Treiber Thanks to the Würth Elektronik eiSos Group for supporting this video. Music: 2011 Lookalike by Bartlebeats Killing Time, Kevin MacLeod (incompetech.com)

6LxRnf6sQNQ | 06 Dec 2020
Get your DIY LiPo Supercharger here (shipped world-wide): https://www.elektor.com/greatscott-diy-lipo-supercharger-kit (FYI, I do get a commission for every sold kit) My last article in Elektor’s print-magazine: https://www.elektormagazine.com/magazine/elektor-151/58764 Check out Elektor’s YouTube channel: https://www.youtube.com/user/ElektorIM Previous video: https://youtu.be/CyrgzzxQPzk DIY LiPo Charge/Protect/5V Boost Circuit video: https://youtu.be/Fj0XuYiE7HU How to Solder properly video: https://youtu.be/VxMV6wGS3NY Facebook: https://www.facebook.com/greatscottlab Twitter: https://twitter.com/GreatScottLab Support me for more videos: https://www.patreon.com/GreatScott?ty=h Websites (datasheets) which were shown in the video: https://datasheet.lcsc.com/szlcsc/1811151452_XySemi-XB8089D_C79928.pdf https://datasheet.lcsc.com/szlcsc/1810010224_Texas-Instruments-BQ24092DGQR_C133237.pdf https://www.ti.com/lit/ds/symlink/tps2596.pdf?ts=1605531654874&ref_url=https%253A%252F%252Fwww.ti.com%252Fproduct%252FTPS2596%253FkeyMatch%253DTPS2596-30%2526tisearch%253DSearch-EN-everything%2526usecase%253DGPN https://datasheet.lcsc.com/szlcsc/1810010731_Texas-Instruments-TPS61085DGKR_C113659.pdf In this video I will present you my DIY LiPo Supercharger circuit, co-produced with @Elektor! If you connect a LiPo battery to it, then the circuit can charge it up with 1A of current through a USB Type-C port, it protects the battery from overcharge, over-discharge and a short circuit and it can even boost the battery voltage up to 5V or 12V with an output current of 1.5A and 0.75A respectively. This circuit is basically an improved version of my old Charge/Protect/5V Boost circuit. But this time you can even buy it as a kit! Let's get started! Music: 2011 Lookalike by Bartlebeats
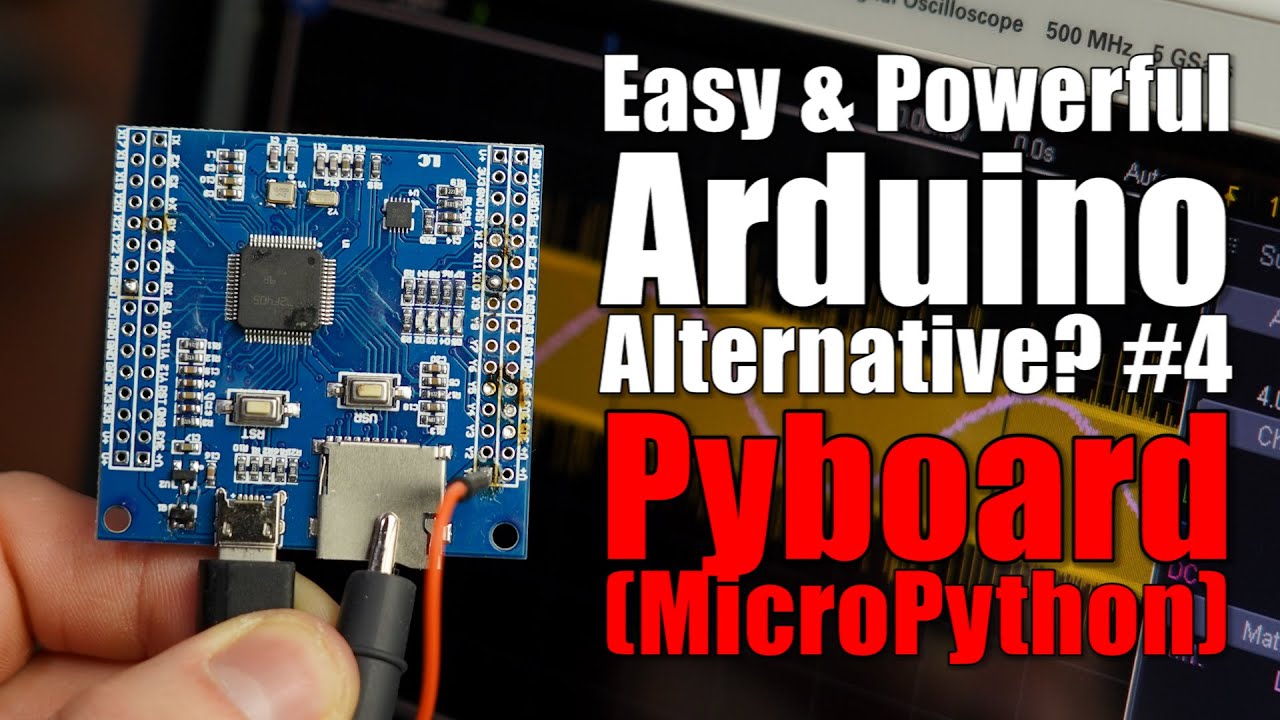
CyrgzzxQPzk | 29 Nov 2020
$2 for 4-Layer PCBs: https://jlcpcb.com Previous video: https://youtu.be/PSzkaSy5lHY Arduino Alternative #1 STM32 video: https://youtu.be/EaZuKRSvwdo Arduino Alternative #2 MSP432 video: https://youtu.be/NQIiiRwILv4 Arduino Alternative #3 Teensy video: https://youtu.be/5yjdPbCac9g Raspberry Pi Arduino video: https://youtu.be/tQEmtbaO2GY Facebook: https://www.facebook.com/greatscottlab Twitter: https://twitter.com/GreatScottLab Support me for more videos: https://www.patreon.com/GreatScott?ty=h You can get the used Pyboard here (affiliate link): https://s.click.aliexpress.com/e/_AC19Cw The eBay store I was talking about (affiliate links): https://rover.ebay.com/rover/1/711-53200-19255-0/1?mpre=https%3A%2F%2Fwww.ebay.com%2Fstr%2Fgcsupermarkethkcoltd&campid=5337582279&toolid=10001&customid= You can download my created code for the video here: https://www.patreon.com/posts/43960549 Websites which were shown in the video: http://www.chinalctech.com/cpzx/STM32_Study_Board/338.html https://www.st.com/en/microcontrollers-microprocessors/stm32f405rg.html https://micropython.org/download/pybv1/ http://docs.micropython.org/en/latest/ http://wiki.micropython.org/Home https://awesome-micropython.com/ https://www.putty.org/ In this video we will be having a closer look at the Pyboard in order to find out whether it is a good Arduino alternative. Along the way we will discover all of the features the board comes with and learn quite a bit of MicroPython programming. Let's get started! Thanks to JLCPCB for sponsoring this video. Visit https://jlcpcb.com to get professional PCBs for low prices. Music: 2011 Lookalike by Bartlebeats

PSzkaSy5lHY | 22 Nov 2020
Have fun and win via JLCPCB E-exhibition: https://jlcpcb.com/E-exhibition $2 for 4-Layer PCBs: https://jlcpcb.com Previous video: https://youtu.be/RoSIzgvEGtA Home Assistant video: https://youtu.be/IvI1RqYPO24 Power video: https://youtu.be/cxXmWZDwNEs Facebook: https://www.facebook.com/greatscottlab Twitter: https://twitter.com/GreatScottLab Support me for more videos: https://www.patreon.com/GreatScott?ty=h More project information (pictures, schematics,....) on Patreon: https://www.patreon.com/posts/esp32-power-43701117 Parts list: (affiliate links) ESP32: https://s.click.aliexpress.com/e/_AfKZrJ Current Transformer: https://s.click.aliexpress.com/e/_A661E9 Voltage Transformer: https://s.click.aliexpress.com/e/_Adyvfr Resistor Kit: https://s.click.aliexpress.com/e/_dTPpXjt Capacitor Kit: https://s.click.aliexpress.com/e/_d7dOwRz Websites which were shown in the video: https://learn.openenergymonitor.org/electricity-monitoring/ac-power-theory/introduction https://github.com/Savjee/EmonLib-esp32 https://esphome.io/index.html https://esphome.io/components/sensor/custom.html In this project I will show you how to build an ESP32 AC power meter that can be used with your home assistant setup. That means I will firstly explain how to actually measure and calculate real and apparent power along with the power factor and then I will show you how to use the ESP32 in combination with some complementary components in order to create the power meter. Let's get started! Thanks to JLCPCB for sponsoring this video. Visit https://jlcpcb.com to get professional PCBs for low prices. Music: 2011 Lookalike by Bartlebeats
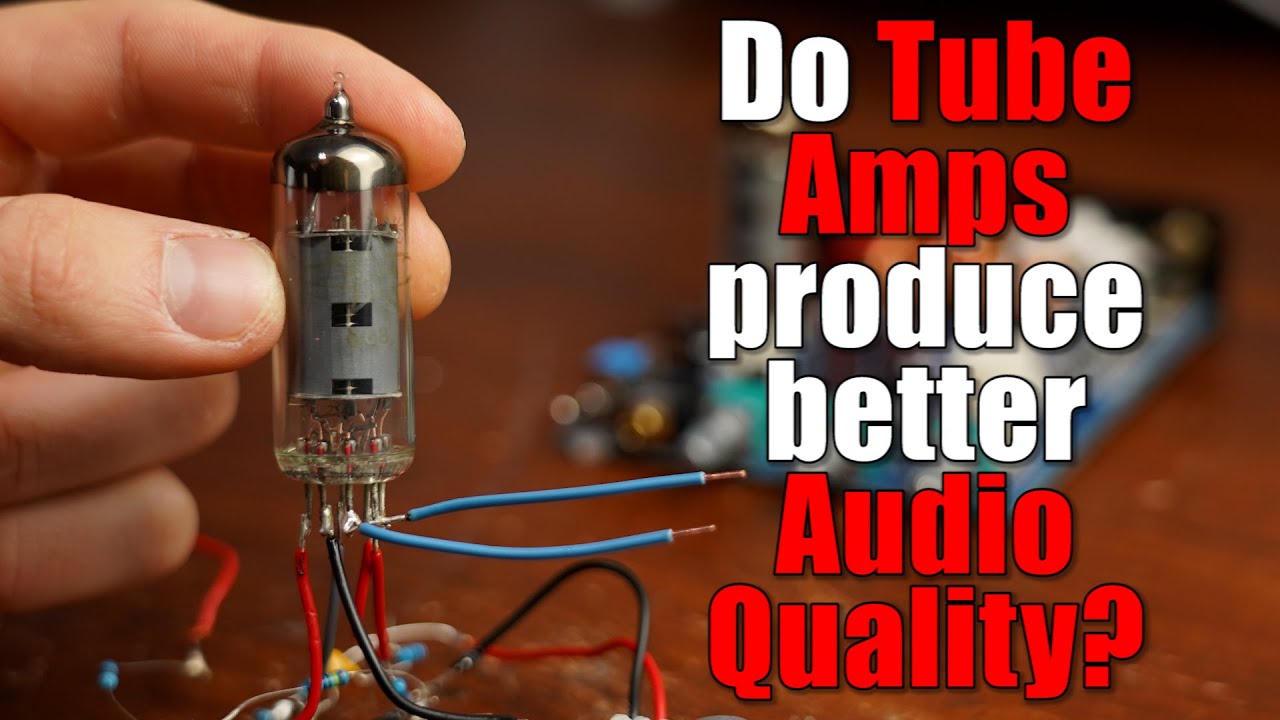
RoSIzgvEGtA | 08 Nov 2020
Altium Designer: https://altium.com/yt/greatscott! Previous video: https://youtu.be/qQHcZgMC-Iw DIY Class D Audio Amplifier video: https://youtu.be/3dQjIeYoIdM Low Budget Bluetooth Music System video: https://youtu.be/oGTXczCV30A Transistor (BJT) as a Switch video: https://youtu.be/WRm2oUw4owE OpAmp (Operational Amplifier) video: https://youtu.be/kqCV-HGJc6A Facebook: https://www.facebook.com/greatscottlab Twitter: https://twitter.com/GreatScottLab Support me for more videos: https://www.patreon.com/GreatScott?ty=h In this video I will be having a closer look at a commercial vacuum tube amplifier aka a tube amp. I will show you how such vacuum tubes works and how to create a simple class A amplifier with them. At the end I will then show you why some people still like using them even 100 years after their invention, even though they offer lots of disadvantages. Thanks to Altium for sponsoring this video. Music: 2011 Lookalike by Bartlebeats Killing Time, Kevin MacLeod (incompetech.com)
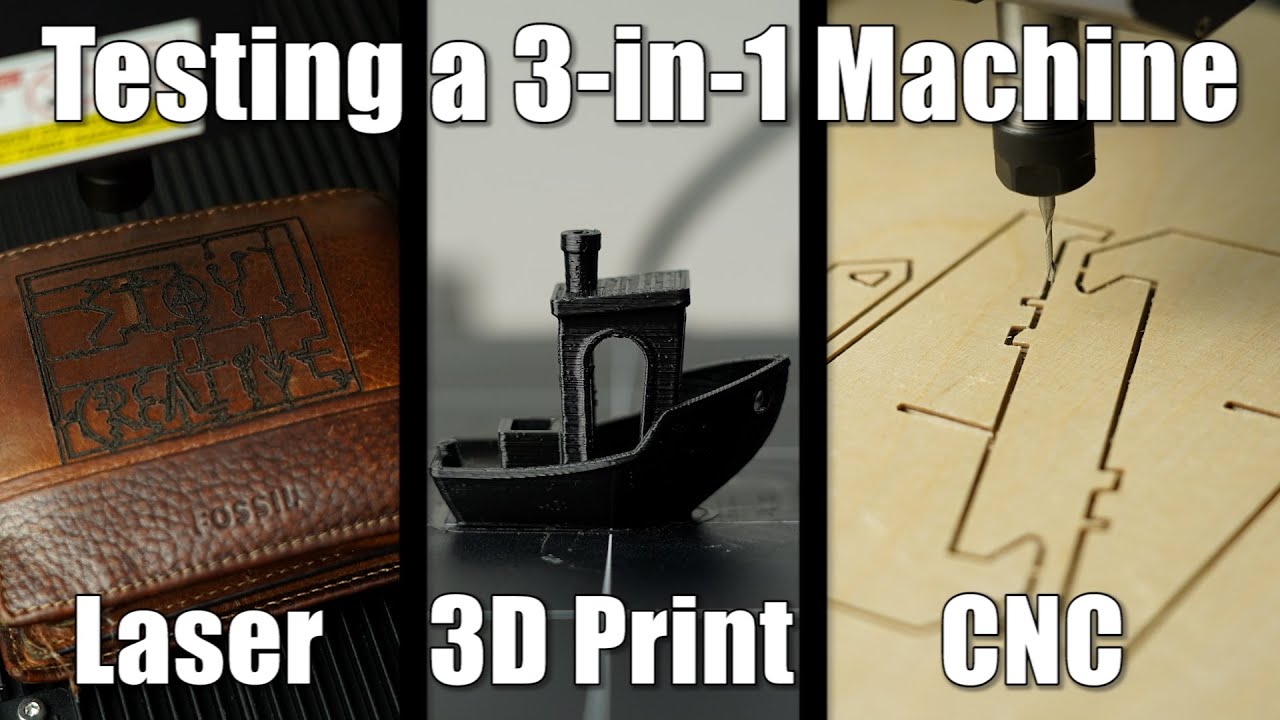
BSWcrzghlCs | 01 Nov 2020
$2 for 2Layer, 5pcs & $5 for 4Layer, 5pcs: https://jlcpcb.com Previous video: https://youtu.be/qQHcZgMC-Iw X-Carve DIY CNC Machine Review: https://youtu.be/vyuzImO9nQs Facebook: https://www.facebook.com/greatscottlab Twitter: https://twitter.com/GreatScottLab Support me for more videos: https://www.patreon.com/GreatScott?ty=h Used Thingiverse models: https://www.thingiverse.com/thing:943563 https://www.thingiverse.com/thing:1940114 https://www.thingiverse.com/thing:763622 In this video I will be having a look at the Snapmaker 2.0, a 3-in-1 machine that can do laser engraving, 3D printing and CNC cutting. I will show you how easy it is to assemble, I will try out all of its functions and tell you how well they work and in the end I will tell you my opinion whether I think it is worth its price tag. Let's get started! Thanks to JLCPCB for sponsoring this video. Visit https://jlcpcb.com to get professional PCBs for low prices. Thanks to Snapmaker for providing the tested machine free of charge. https://snapmaker.com/ Music: 2011 Lookalike by Bartlebeats
qQHcZgMC-Iw | 25 Oct 2020
$2 for 2Layer, 5pcs & $5 for 4Layer, 5pcs: https://jlcpcb.com Previous video: https://youtu.be/TsY9ov784-g Schmitt Trigger video: https://youtu.be/woTiKij76cA Facebook: https://www.facebook.com/greatscottlab Twitter: https://twitter.com/GreatScottLab Support me for more videos: https://www.patreon.com/GreatScott?ty=h You can download the schematics for all of the circuits here: https://www.patreon.com/posts/42624837 You can get the Buy version here (affiliate links): https://s.click.aliexpress.com/e/_eshkl0 In this episode of DIY or Buy we will be having a closer look at a cable tracker. It is a tool that is used to locate wires in you wall. This is helpful to drill holes in your wall or to locate a fault in your wiring. I will show you how the sender and receiver functions and afterwards I will create a super crude, but functional DIY version in order to find out whether we should Buy the product or create our own DIY version. Let's get started! Thanks to JLCPCB for sponsoring this video Visit https://jlcpcb.com to get professional PCBs for low prices. Music: 2011 Lookalike by Bartlebeats
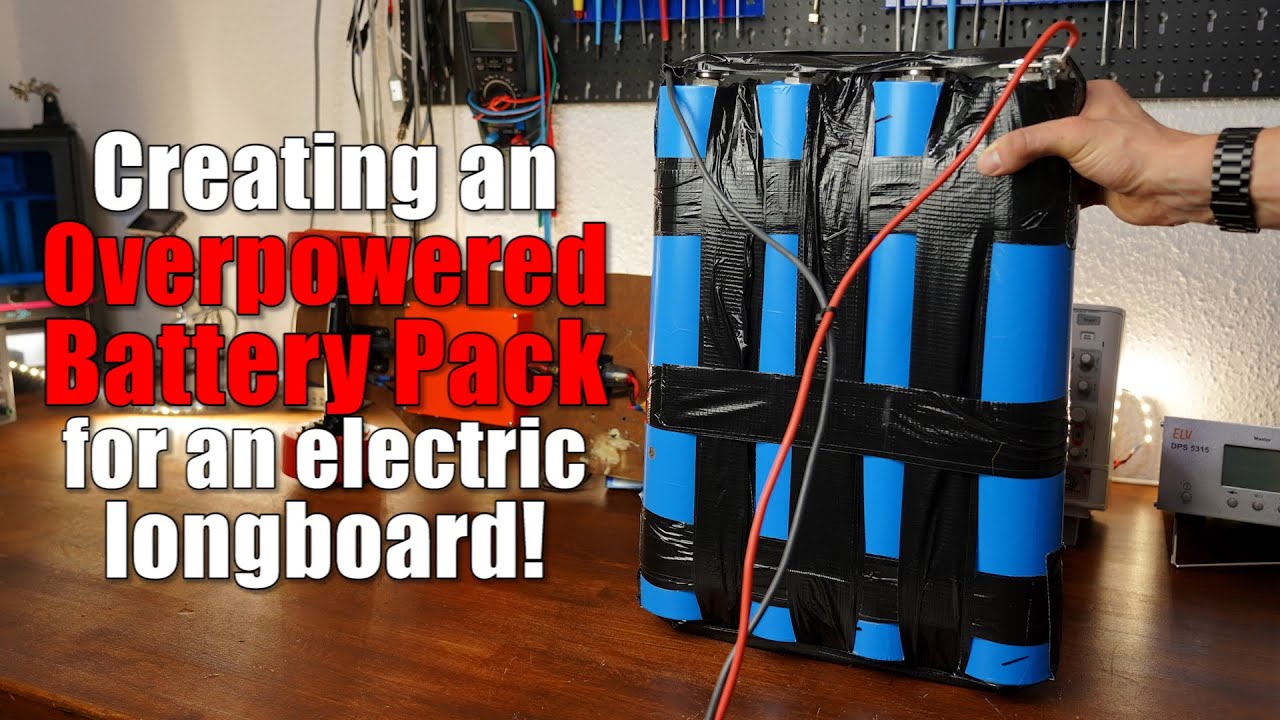
TsY9ov784-g | 11 Oct 2020
Altium Designer: https://altium.com/yt/greatscott! Previous video: https://youtu.be/K9HTMol7hds Make your own Simple yet Powerful Electric Motorized Longboard: https://youtu.be/XworvxoQleY Make your own "Powerwall" (Big LiFePO4 Battery Pack!): https://youtu.be/ewkj875qUmk GWL Power video: https://youtu.be/Qzt9RZ0FQyM Facebook: https://www.facebook.com/greatscottlab Twitter: https://twitter.com/GreatScottLab Support me for more videos: https://www.patreon.com/GreatScott?ty=h In this video I will try to create off-road tires as well as an overpowered battery pack for my electric longboard. For the tires I will be using TPU filament and 3D printing to create them and for the battery pack I will be using LiFePo4 100Ah cells. Let's find out whether both ideas will work out. Let's get started! Thanks to Altium for sponsoring this video. Music: 2011 Lookalike by Bartlebeats
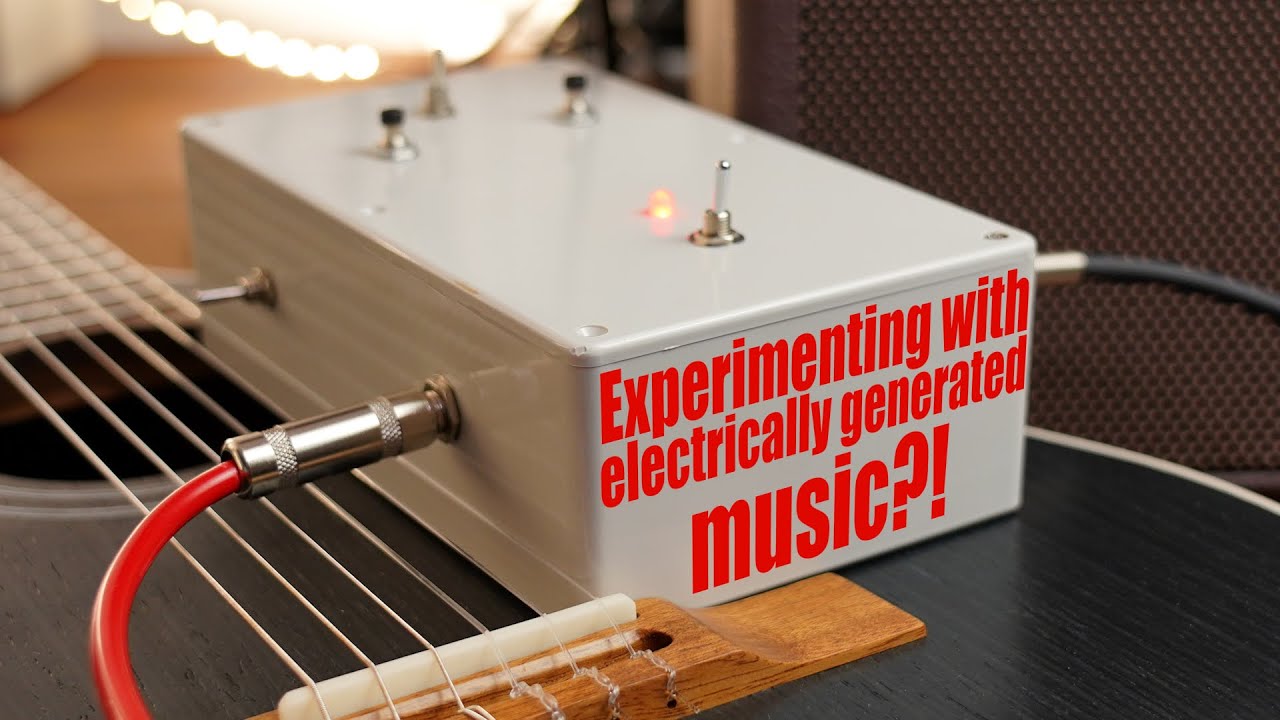
K9HTMol7hds | 04 Oct 2020
The first 1000 people to use this link will get a free trial of Skillshare Premium Membership: https://skl.sh/greatscott10201 Previous video: https://youtu.be/IvI1RqYPO24 Twitter: https://twitter.com/GreatScottLab Support me for more videos: https://www.patreon.com/GreatScott?ty=h More project information about my version of the Arduino Uno pedalShield: https://www.patreon.com/posts/42037993 Useful websites shown in the video: https://www.allaboutcircuits.com/projects/diy-synth-series-vco/ https://www.vguitarforums.com/smf/index.php?topic=23002.0 https://www.parasitstudio.se/original-effects.html https://www.parasitstudio.se/1985guitarsynth.html https://www.diystompboxes.com/smfforum/index.php?topic=117603.0 https://www.sparkfun.com/datasheets/Kits/XR2206_104_020808.pdf https://create.arduino.cc/projecthub/electrosmash/arduino-uno-guitar-pedal-b2ba96?ref=tag&ref_id=guitar&offset=0 https://www.electrosmash.com/pedalshield https://www.electrosmash.com/forum/pedalshield-uno/114-how-to-start-programming-pedalshield-uno?lang=en https://shop.electrosmash.com/product-category/arduino/pedalshield-uno/ In this video I will be showing you how I experimented with a couple of different oscillators in order to create electrically generated music with my guitar. I will talk about a function generator, a summing amplifier, voltage controlled oscillators and a 555 timer circuit before I will build the open source Arduino pedalShield project in order to create some proper guitar effects. Let's get started! This video was sponsored by Skillshare. Music: 2011 Lookalike by Bartlebeats

IvI1RqYPO24 | 27 Sep 2020
$2 for 2Layer, 5pcs & $5 for 4Layer, 5pcs: https://jlcpcb.com Previous video: https://youtu.be/6QZMt4yyylU Essential Tools that you will need for creating electronics projects!: https://youtu.be/7-djg27lJyQ How to do Simple Home Automation with Amazon Alexa: https://youtu.be/ZyetXihGrM0 Facebook: https://www.facebook.com/greatscottlab Twitter: https://twitter.com/GreatScottLab Support me for more videos: https://www.patreon.com/GreatScott?ty=h More project information (schematic, code,....) on Instructables: https://www.instructables.com/id/DIY-Home-Automation-Intruder-Alarm-System/ Parts list (affiliate links): Raspberry Pi: https://s.click.aliexpress.com/e/_dXdmDP1 Raspberry Pi enclosure: https://s.click.aliexpress.com/e/_d7TFBjv 5V Power Supply DIN Rail: https://s.click.aliexpress.com/e/_dTYbcVv ESP8266: https://s.click.aliexpress.com/e/_dUZoa6b Reed Switch: https://s.click.aliexpress.com/e/_dZgobcb Toggle Switch: https://s.click.aliexpress.com/e/_dVkXaPH 5V Power Supply: https://s.click.aliexpress.com/e/_d8eicmb Micro USB Cable: https://s.click.aliexpress.com/e/_dZJjzrZ Useful sites: https://www.home-assistant.io/getting-started/ https://esphome.io/guides/getting_started_hassio.html https://esphome.io/index.html https://www.home-assistant.io/integrations/binary_sensor https://esphome.io/components/switch/gpio.html https://community.home-assistant.io/t/i-can-t-send-notification-to-pushover/86639/6 https://esphome.io/components/sensor/bme280.html In this project I will be showing you how to use the Home Assistant software in order to create an intruder alarm system for your home. The system will basically detect if the door gets opened without permission and then it will send out a notification to your smartphone. Along the way I will show you how to use a Raspberry Pi and ESP8266 in order to properly utilize the Home Assistant software. Let's get started! Thanks to JLCPCB for sponsoring this video Visit https://jlcpcb.com to get professional PCBs for low prices. Music: 2011 Lookalike by Bartlebeats

6QZMt4yyylU | 13 Sep 2020
$2 for 2Layer, 5pcs & $5 for 4Layer, 5pcs: https://jlcpcb.com Previous video: https://youtu.be/05qJM-zZ4ng uC Timer video: https://youtu.be/IdL0_ZJ7V2s Facebook: https://www.facebook.com/greatscottlab Twitter: https://twitter.com/GreatScottLab Support me for more videos: https://www.patreon.com/GreatScott?ty=h More project information (schematic, code,....) on Instructables: soon Parts list (affiliate links): 1x Arduino Pro Mini: https://s.click.aliexpress.com/e/_dTWuuYz 1x IR Distance Sensor: https://s.click.aliexpress.com/e/_dXlui7F 1x 128x64 OLED: https://s.click.aliexpress.com/e/_dXOYM8H 1x TP4056 Charge Protect Board: https://s.click.aliexpress.com/e/_d697XPJ 1x LiPo Battery: https://s.click.aliexpress.com/e/_dUE2A0V 1x Toggle Switch: https://s.click.aliexpress.com/e/_dZ19w21 In this episode of DIY or Buy we will be having a closer look at a commercial tachometer (RPM Meter) and test it in order to find out that it is pretty much unusable. Afterwards I will show you how a 3€ IR distance sensor works and how we can use it to build a proper DIY tachometer that functions properly. Let's get started! Thanks to JLCPCB for sponsoring this video Visit https://jlcpcb.com to get professional PCBs for low prices. Music: 2011 Lookalike by Bartlebeats Killing Time, Kevin MacLeod (incompetech.com)

05qJM-zZ4ng | 06 Sep 2020
$2 for 2Layer, 5pcs & $5 for 4Layer, 5pcs: https://jlcpcb.com Previous video: https://youtu.be/XUW21vWBdIw Hand-cranked Generator video: https://youtu.be/3fpsInXqo1E Induction Motor video: https://youtu.be/EzJsKWW-cDU BLDC Motor rewind video: https://youtu.be/KZ4cylB114E Facebook: https://www.facebook.com/greatscottlab Twitter: https://twitter.com/GreatScottLab Support me for more videos: https://www.patreon.com/GreatScott?ty=h In this episode of HACKED! we will be having a look at an asynchronous induction motor and find out whether we can use it as a generator. While doing so we will learn about what makes a generator special and how we can convert an induction motor into one. Let's get started! Thanks to JLCPCB for sponsoring this video Visit https://jlcpcb.com to get professional PCBs for low prices. Music: 2011 Lookalike by Bartlebeats
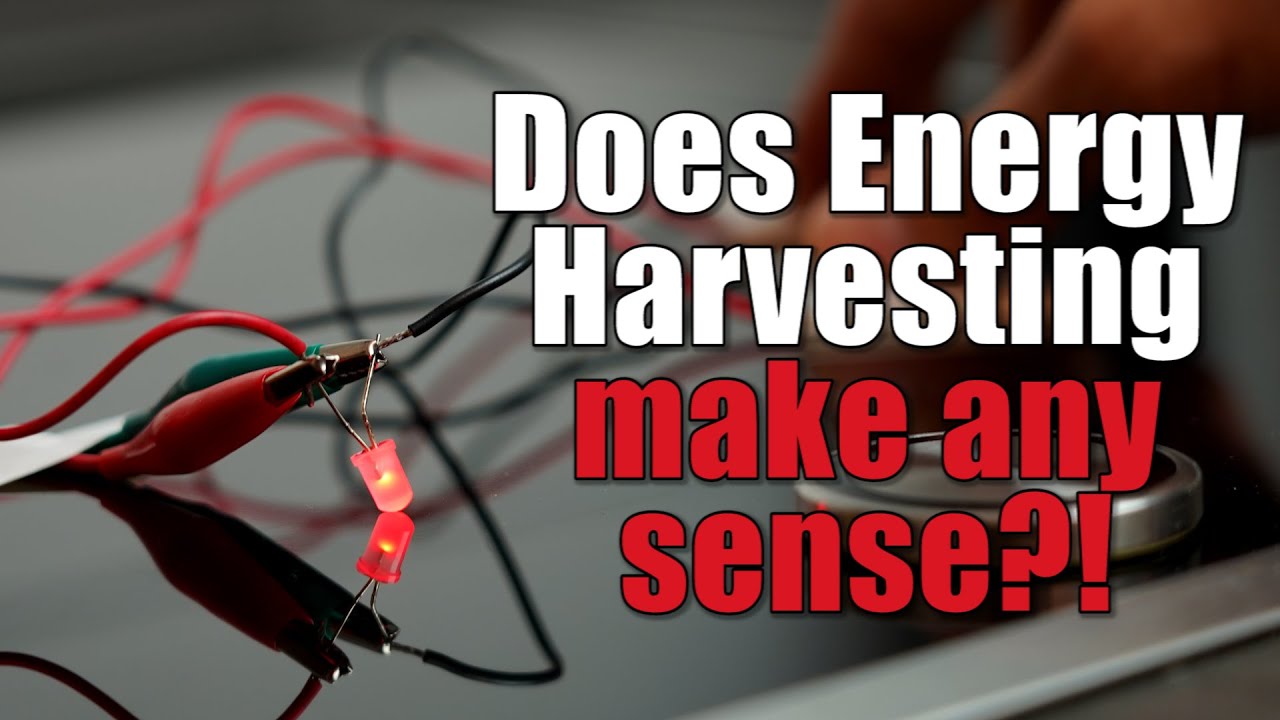
XUW21vWBdIw | 30 Aug 2020
$2 for 2Layer, 5pcs & $5 for 4Layer, 5pcs: https://jlcpcb.com Previous video: https://youtu.be/gsMqwNi4wT4 Free Energy BS video: https://youtu.be/g4tO0kBOzqk Photovoltaic Off-Grid System video: https://youtu.be/WU16AJwvNhE 100W Solar panel video: https://youtu.be/6_3gK83bePQ Thermoelectric Generator video: https://youtu.be/fOacM-syXGI Facebook: https://www.facebook.com/greatscottlab Twitter: https://twitter.com/GreatScottLab Support me for more videos: https://www.patreon.com/GreatScott?ty=h Useful links to websites partly shown in the video: https://upload.wikimedia.org/wikipedia/commons/thumb/c/c7/United_States_Frequency_Allocations_Chart_2016_-_The_Radio_Spectrum.pdf/page1-6300px-United_States_Frequency_Allocations_Chart_2016_-_The_Radio_Spectrum.pdf.jpg https://www.bristol.ac.uk/engineering/research/em/power-electronics/zero-standby-power/ https://bristol.ac.uk/media-library/sites/engineering/research/eem-group/zero-standby/UB20M_Datasheet_Rev.1.5.pdf https://docs.wixstatic.com/ugd/62cf01_b5f8295f735a481a9b00a934a1efb510.pdf?index=true https://www.allaboutcircuits.com/technical-articles/how-why-of-energy-harvesting-for-low-power-applications/ In this video I will be having a look at the subject of energy harvesting. I will explain where and when energy harvesting is being used and how we can create such energy harvesting systems by ourselves. Those system will partly work with sun light, mechanical vibrations, heat and radio frequencies. Let's get started! Thanks to JLCPCB for sponsoring this video Visit https://jlcpcb.com to get professional PCBs for low prices. Music: 2011 Lookalike by Bartlebeats Killing Time, Kevin MacLeod (incompetech.com)

l7jJPi-Xk8o | 23 Aug 2020
Siglent Review Campaign: https://www.siglenteu.com/news-article/win-siglent-x-scope-or-x-generator-just-for-giving-us-a-review/ The book I was talking about (affiliate link): https://amzn.to/2XOqIQO Support me for more videos: https://www.patreon.com/GreatScott Previous video: https://youtu.be/GX0yYjTV1FE Facebook: https://www.facebook.com/greatscottlab Twitter: https://twitter.com/GreatScottLab Random/Unscripted Q&A #6: https://youtu.be/xus3zQ3cX2U Random/Unscripted Q&A #5: https://youtu.be/57t2i7XfL1Y Random/Unscripted Q&A #4: https://youtu.be/trrjQ4cN2Bc Random/Unscripted Q&A #3: https://youtu.be/j99I1EveKd4 Random/Unscripted Q&A #2: https://youtu.be/8nOXWfS1hQo Random/Unscripted Q&A: https://youtu.be/x2MEJfY45UY

gsMqwNi4wT4 | 16 Aug 2020
$2 for 2Layer, 5pcs & $5 for 4Layer, 5pcs: https://jlcpcb.com Previous video: https://youtu.be/EzJsKWW-cDU Part 1: https://youtu.be/2YJHcGQnpAk Facebook: https://www.facebook.com/greatscottlab Twitter: https://twitter.com/GreatScottLab Support me for more videos: https://www.patreon.com/GreatScott?ty=h More project information (schematic, code,......) on Instructables: https://www.instructables.com/id/Automating-a-Greenhouse-With-LoRa-Part-2-Motorized/ Parts list (affiliate links): 1x LoRa Radio Node: http://s.click.aliexpress.com/e/_dYpwqA6 1x LM7805 Voltage Regulator: http://s.click.aliexpress.com/e/_dS0705s 1x LG02 LoRa Gateway: http://s.click.aliexpress.com/e/_d8jEIAK 1x L293D Motor Driver IC: https://s.click.aliexpress.com/e/_dWFVvdc 1x 12V 100RPM DC Motor: https://s.click.aliexpress.com/e/_dYY7aWa In this project I will be showing you how I created a motorized window opener for my greenhouse. That means I will show you what motor I used, how I designed the actual mechanical system, how I drive the motor and finally how I used an Arduino LoRa board in order to control the motor from anywhere in the world. Let's get started! Thanks to JLCPCB for sponsoring this video Visit https://jlcpcb.com to get professional PCBs for low prices. Music: 2011 Lookalike by Bartlebeats

EzJsKWW-cDU | 09 Aug 2020
$2 for 2Layer, 5pcs & $5 for 4Layer, 5pcs: https://jlcpcb.com Previous video: https://youtu.be/sGe90rG4aQ4 Electronic Basics #18: DC & Brushless DC Motor + ESC: https://youtu.be/UteZJ_7C4Mg Electronic Basics #24: Stepper Motors and how to use them https://youtu.be/bkqoKWP4Oy4 Facebook: https://www.facebook.com/greatscottlab Twitter: https://twitter.com/GreatScottLab Support me for more videos: https://www.patreon.com/GreatScott?ty=h Useful websites about Asynchronous Motors: https://www.jinsa.com.mx/FichaTecnica/EATON/MSC.DS.MMAX.ver968en.pdf https://www.hs-weingarten.de/c/document_library/get_file?uuid=4c4f7ac2-a125-48ce-88f4-45f520f50dc0&groupId=22009 http://home.teleos-web.de/vsteinkamp/antriebe/asynchronmotor/asynchronmotor.htm http://www.servotechnik.de/fachwissen/motoren/f_beitr_00_311.htm https://www.js-technik.de/en In this video we will be having a closer look at an old induction motor or asynchronous motor that I got lying around. In order to see whether it still works, I will show you exactly how to power such a motor and how it creates its rotational movement. Along the way you will also learn why such motor types are still the most widely used ones in the world and I will also partly compare them to DC, BLDC and stepper motors. Let's get started! Thanks to JLCPCB for sponsoring this video Visit https://jlcpcb.com to get professional PCBs for low prices. Music: 2011 Lookalike by Bartlebeats Killing Time, Kevin MacLeod (incompetech.com)

sGe90rG4aQ4 | 02 Aug 2020
The first 1000 people who click the link will get 2 free months of Skillshare Premium: https://skl.sh/greatscott2 Previous video: https://youtu.be/7-djg27lJyQ Make your own Photovoltaic Off-Grid System: https://youtu.be/WU16AJwvNhE 100W Solar panel || DIY or Buy: https://youtu.be/6_3gK83bePQ Electronic Basics #29: Solar Panel & Charge Controller: https://youtu.be/sU-hSFFwSmo Facebook: https://www.facebook.com/greatscottlab Twitter: https://twitter.com/GreatScottLab Support me for more videos: https://www.patreon.com/GreatScott?ty=h More project information (pictures, .stl file,......) on Instructables: https://www.instructables.com/id/DIY-5V-USB-Portable-Solar-Power-Charger/ Parts list (affiliate links): Solar Cell: https://s.click.aliexpress.com/e/_dUOfklv Tapping Wire: https://s.click.aliexpress.com/e/_d6VRGYP Flux Pen: https://s.click.aliexpress.com/e/_dX8env9 Solder: https://s.click.aliexpress.com/e/_d6H6ixH Buck/Boost Converter: https://s.click.aliexpress.com/e/_dXWqLTh Epoxy Resin: https://s.click.aliexpress.com/e/_dSrlysP In this episode of DIY or Buy I will have a closer look at a commercial 5V USB portable solar power charger. After measuring its output power and pretty much "short reviewing" the product, I will try to make my own DIY version that should cost around the same while outputting more power! Let's get started! This video was sponsored by Skillshare. Music: 2011 Lookalike by Bartlebeats

7-djg27lJyQ | 19 Jul 2020
$2 for 2Layer, 5pcs & $5 for 4Layer, 5pcs: https://jlcpcb.com Previous video: https://youtu.be/qNLvoSQCx60 Essential Electronics Components video: https://yo...
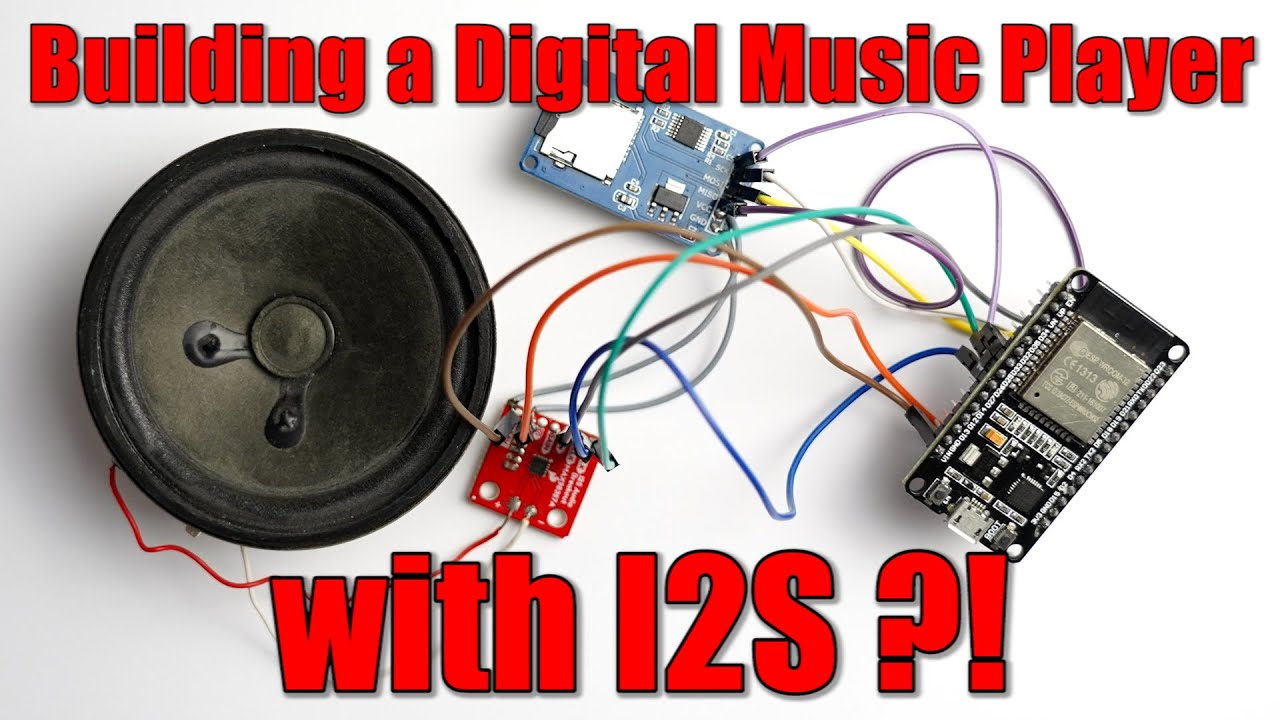
qNLvoSQCx60 | 12 Jul 2020
$2 for 2Layer, 5pcs & $5 for 4Layer, 5pcs: https://jlcpcb.com Previous video: https://youtu.be/yEbbhTw0kno Bitlunis I2S ESP32 video: https://youtu.be/6PGrsZm...

yEbbhTw0kno | 05 Jul 2020
$2 for 2Layer, 5pcs & $5 for 4Layer, 5pcs: https://jlcpcb.com Previous video: https://youtu.be/2YJHcGQnpAk Here is why USB Type-C is awesome video: https://youtu.be/OwAZqJ4wpJg USB Type-C Power Delivery Trigger Board video: https://youtu.be/DQLrZA5RMjQ Facebook: https://www.facebook.com/greatscottlab Twitter: https://twitter.com/GreatScottLab Support me for more videos: https://www.patreon.com/GreatScott?ty=h More project information (wiring diagram, pictures,....) on Instructables: https://www.instructables.com/id/Building-a-USB-Type-C-PD-Powerbank-the-Super-Simpl Parts list (affiliate links): 1x IP5328P Powerbank PCB: http://s.click.aliexpress.com/e/_d8hmFU2 6x NCR18650B Li-Ion Cell: http://s.click.aliexpress.com/e/_BfiUCF06 Nickel Strips: http://s.click.aliexpress.com/e/_dZKZoW6 Wire: http://s.click.aliexpress.com/e/_dU4v51y In this small project I will show you how to create a DIY USB Type-C PD powerbank the super simple way. To do that I will firstly test a powerbank PCB based around the IP5328P IC I got from Aliexpress. The measurements will show us how suitable the PCB is for creating a DIY powerbank. Afterwards I will then show you how I created a Li-Ion battery pack and a custom 3D printed enclosure before I will put all the components together to form the powerbank. Let's get started! Thanks to JLCPCB for sponsoring this video Visit https://jlcpcb.com to get professional PCBs for low prices Music: 2011 Lookalike by Bartlebeats Killing Time, Kevin MacLeod (incompetech.com)

2YJHcGQnpAk | 21 Jun 2020
$2 for 2Layer, 5pcs & $5 for 4Layer, 5pcs: https://jlcpcb.com Previous video: https://youtu.be/DQLrZA5RMjQ Transmitting an Alarm Signal with LoRa video: https://youtu.be/ItZwa1AdrpU Facebook: https://www.facebook.com/greatscottlab Twitter: https://twitter.com/GreatScottLab Support me for more videos: https://www.patreon.com/GreatScott?ty=h More project information (schematic, code,......) on Instructables: https://www.instructables.com/id/Automating-a-Greenhouse-With-LoRa-Part-1-Sensors-T Parts list (affiliate links): 1x Solar Panel: http://s.click.aliexpress.com/e/_dSNkyma 1x Solar Charge Controller: http://s.click.aliexpress.com/e/_dZ5u0f4 1x 12V Battery: http://s.click.aliexpress.com/e/_dT3yvjs 1x Wood chest Silicone Wire 1x LoRa Radio Node: http://s.click.aliexpress.com/e/_dYpwqA6 1x BME280 Sensor: http://s.click.aliexpress.com/e/_dSZ4I4W 2x Soil Moisture Sensor: http://s.click.aliexpress.com/e/_dZqKMNo 1x LM7805 Voltage Regulator: http://s.click.aliexpress.com/e/_dS0705s 1x LG02 LoRa Gateway: http://s.click.aliexpress.com/e/_d8jEIAK Websites which were shown during the video: https://github.com/IOT-MCU/LoRa-Radio-Node-v1.0 https://www.dragino.com/downloads/downloads/LoRa_Gateway/LG02-OLG02/LG02_LoRa_Gateway_User_Manual_v1.6.1.pdf https://github.com/dragino/arduino-lmic https://github.com/sparkfun/SparkFun_BME280_Arduino_Library In this project I will be showing you how I automated a greenhouse. That means I will show you how I built the greenhouse and how I wired up the power and automation electronics. Also I will be showing you how to program an Arduino board that uses LoRa in order to transmit the measured temperature, humidity and soil moisture inside the greenhouse to a LoRa gateway which then uploads it all to the internet. That means you can check on your greenhouse from everywhere in the world. Let's get started! Thanks to JLCPCB for sponsoring this video Visit https://jlcpcb.com to get professional PCBs for low prices Music: 2011 Lookalike by Bartlebeats
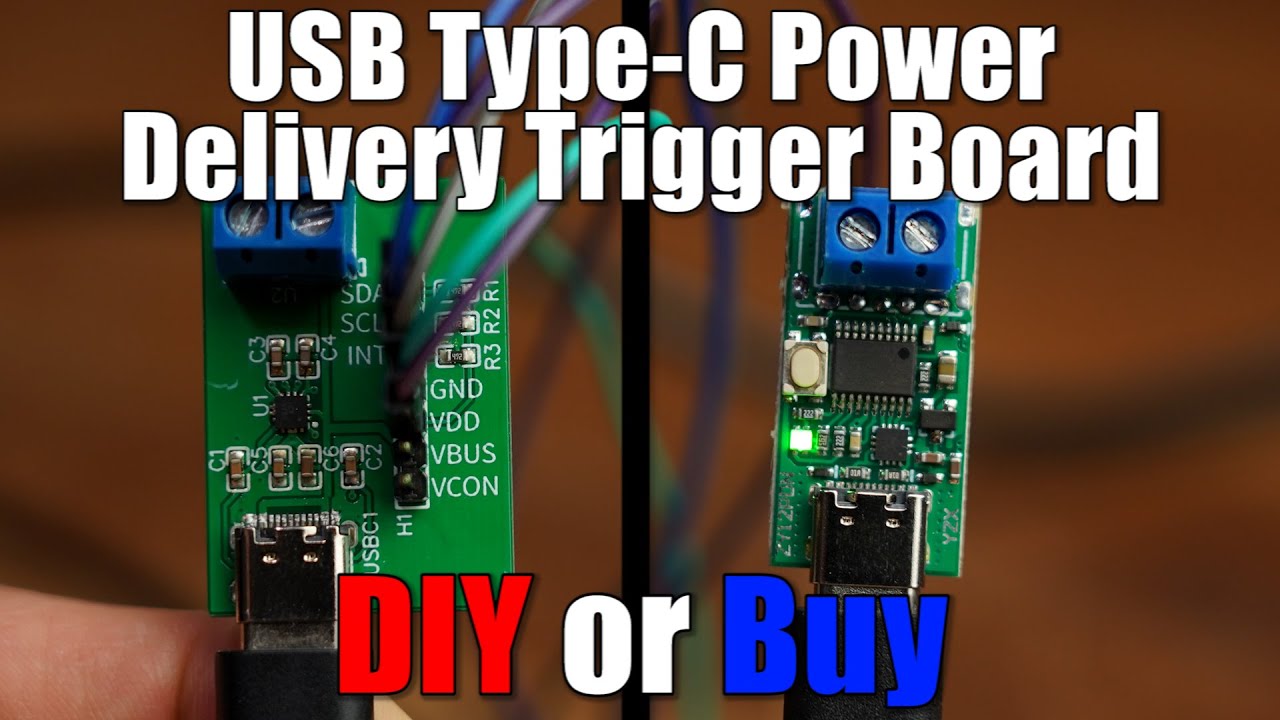
DQLrZA5RMjQ | 14 Jun 2020
Click "Like" to get coupon: https://jlcpcb.com/Workshop-PCB-Project-Competiton $2/5pcs 2Layer & $5/5pcs 4Layer PCBs: https://jlcpcb.com Previous video (Reflow Soldering video): https://youtu.be/ARWmGVCOw3w Here is why USB Type-C is awesome video: https://youtu.be/OwAZqJ4wpJg Facebook: https://www.facebook.com/greatscottlab Twitter: https://twitter.com/GreatScottLab Support me for more videos: https://www.patreon.com/GreatScott?ty=h More project information (schematic, code, gerber files,....) on Instructables: https://www.instructables.com/id/DIY-USB-Type-C-Power-Delivery-Trigger-Board Websites which where shown during the video: https://www.tindie.com/products/reclaimerlabs/usb-c-power-delivery-phy-breakout-board/ https://www.tindie.com/products/reclaimerlabs/usb-c-explorer/ https://www.reclaimerlabs.com/ https://hackaday.io/project/13476-usb-type-c-power-delivery-breakout https://github.com/ReclaimerLabs/USB-PD-Breakout https://www.onsemi.com/pub/Collateral/FUSB302-D.PDF https://www.usb.org/ In this episode of DIY or Buy we will have a closer look at a USB Type-C Power Delivery Trigger board. Such boards are used to output 5V, 9V, 12V, 15V or even 20V from a Power Delivery compatible power source. So I will be showing you how such a commercial board works and I will try to create my own DIY version of it in order to see whether it makes sense to DIY such a board or whether we should stick to the commercial solution instead. Let's get started! Thanks to JLCPCB for sponsoring this video Visit https://jlcpcb.com to get professional PCBs for low prices Music: 2011 Lookalike by Bartlebeats Killing Time, Kevin MacLeod (incompetech.com)

DYrucIWig24 | 07 Jun 2020
The first 1000 people who click the link will get 2 free months of Skillshare Premium: https://skl.sh/greatscott Previous video: https://youtu.be/ARWmGVCOw3w How to Solder properly video: https://youtu.be/VxMV6wGS3NY Facebook: https://www.facebook.com/greatscottlab Twitter: https://twitter.com/GreatScottLab Support me for more videos: https://www.patreon.com/GreatScott?ty=h You can get the shown reflow oven and hot air station here (affiliate links): Reflow oven: http://s.click.aliexpress.com/e/_dZLDUuT Hot air station: http://s.click.aliexpress.com/e/_dUSCaV9 In this video we will find out how to do reflow soldering. We need to use this technique when we are dealing with supery tiny ICs which is the case for my new project. So I will be trying out 3 different reflow soldering methods: hot air, sand and a reflow oven. At the end we will find out which method worked out and I will tell you which one was my favourite. Let's get started! Thanks to Skillshare for sponsoring this video. Music: 2011 Lookalike by Bartlebeats

wttMGvWUdLY | 27 May 2020
Du möchtest mehr über die Würth Elektronik Bauteile erfahren? Dann klicke hier: https://bit.ly/WE_OnlineKatalog_DE Würth Elektronik-Produkte, die im Video verwendet wurden: - Infrarot LEDs: https://bit.ly/WL_SITW_SMT_de - LED Step Down High Current Modul: https://bit.ly/MAGIC_LDHM_de Ein weiteres Produkt, was für das Projekt hilfreich ist: https://bit.ly/EvaluationBoard_LED_Treiber_de Klick hier, um deine gewünschten kostenlosen Muster zu bestellen: https://bit.ly/FreeSamples_de Vorheriges Video: https://youtu.be/ItZwa1AdrpU Facebook: https://www.facebook.com/greatscottlab Twitter: https://twitter.com/GreatScottLab Unterstütze mich für mehr videos : https://www.patreon.com/GreatScott?ty=h Mehr Projekt Informationen (Schematic, 3D Modelle, Bilder,....) gibt es auf Instructables: https://www.instructables.com/id/How-to-Make-Your-Own-Night-Vision-Device In diesen Projekt zeige Ich dir wie du dein eigenes Nachtsichtgerät bauen kannst. Es besteht hauptsächlich aus einer Sicherheitskamera, einen kleinen Bildschirm und einer selbst konzipierten Platine, welche mit IR LEDs und einen LED Treiber bestückt ist. Nachdem das Gerät mittels USB Type-C PD Powerbank mit Strom versorgt wird, kann man es nutzen um in Dunkeln zu sehen. Let's get started! Danke an die Würth Elektronik eiSos Gruppe für die Unterstützung des Videos. Musik: 2011 Lookalike by Bartlebeats Killing Time, Kevin MacLeod (incompetech.com)

ARWmGVCOw3w | 24 May 2020
Do you want to know more about the Würth Elektronik components? Then click here: http://bit.ly/we_onlinecatalog_EN Würth Elektronik products, which were used in the video: - Infrared LEDs: https://bit.ly/WL_SITW_SMT_en - LED Step Down High Current Module: https://bit.ly/MAGIC_LDHM_en A further Würth Elektronik product which you can use for the project : https://bit.ly/EvaluationBoard_LED_Driver_en Order your free samples here: https://bit.ly/FreeSamples_en Previous video: https://youtu.be/ItZwa1AdrpU Facebook: https://www.facebook.com/greatscottlab Twitter: https://twitter.com/GreatScottLab Support me for more videos: https://www.patreon.com/GreatScott?ty=h More project information (schematic, PCB files, pictures,....) on Instructables: https://www.instructables.com/id/How-to-Make-Your-Own-Night-Vision-Device In this project I will show you how to create a night vision device. It mainly consists of a security camera, a small screen and a custom PCB which features IR LEDs and an LED driver. After powering the device with a USB Type-C PD powerbank, you can basically use it to see in the dark. Let's get started! Thanks to the Würth Elektronik eiSos Group for supporting this video. Music: 2011 Lookalike by Bartlebeats Killing Time, Kevin MacLeod (incompetech.com)
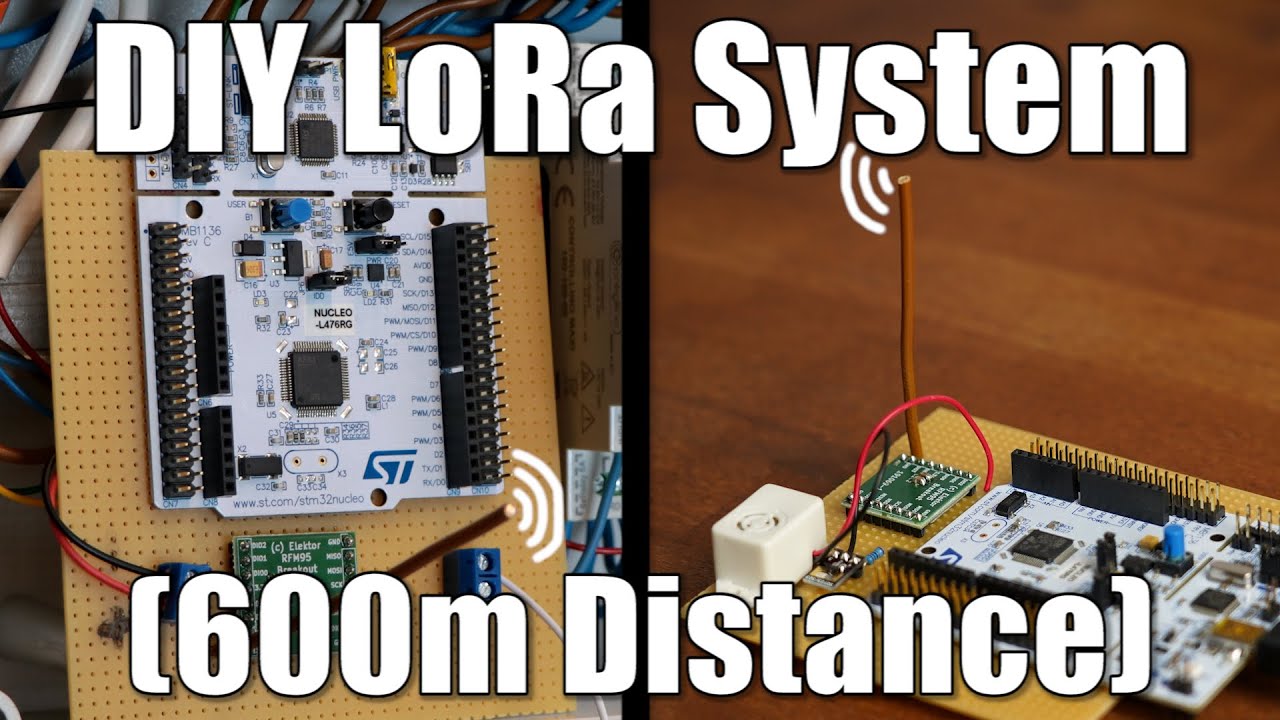
ItZwa1AdrpU | 17 May 2020
Elektor offer: https://www.elektormagazine.com/widgets/elektor-offer-for-greatscott-subscribers Coupon Codes: Elektor GREEN – 1 Year - : greatscott50 Elektor TRIAL (Gold) – 4 Months - : greatscott50t Elektor Book Store (50% off 2 books) - : greatscott50 ( https://www.elektor.com/books?manufacturer=Elektor ) Previous video: https://youtu.be/u4md32GMX28 DIY Light Barrier Alarm System video: https://youtu.be/0fDPBtbsUgc Facebook: https://www.facebook.com/greatscottlab Twitter: https://twitter.com/GreatScottLab Support me for more videos: https://www.patreon.com/GreatScott?ty=h More project information (schematic, pictures, code.....) on instructables: https://www.instructables.com/id/DIY-LoRa-System Parts list (affiliate links): RFM95 Break-out Board – Bare PCB: https://www.elektor.com/rfm95-break-out-board-bare-pcb-191069-1 RFM95 Ultra LoRa Transceiver Module (868/915 MHz): https://www.elektor.com/rfm95-ultra-lora-transceiver-module-868-915-mhz STM32 Nucleo L476RG Board: https://www.elektor.com/stm32-nucleo-l476rg-board Dragino LG02 Dual Channels LoRa IoT Gateway: https://www.elektor.com/dragino-lg02-dual-channels-lora-iot-gateway 5V Buzzer: https://s.click.aliexpress.com/e/_Bf6g8HUZ MOSFET: https://s.click.aliexpress.com/e/_d8ocEHJ PCB Terminal: https://s.click.aliexpress.com/e/_dX5BMK1 10 ohm Resistor: https://s.click.aliexpress.com/e/_dTPpXjt In this project I will show you how to build a small LoRa transmitter and receiver with the help of STM32 development boards and RFM95 LoRa modules. This LoRa System can basically transmit an alarm signal from my garage to my apartment wirelessly through the air. The transmitter and receiver feature a distance of around 600m to one another. Let's get started! Thanks to Elektor for sponsoring this video! Visit https://www.elektormagazine.com/ to read their magazines and buy electronic components. Music: 2011 Lookalike by Bartlebeats

u4md32GMX28 | 10 May 2020
PCB+SMT assembly, from $2: https://jlcpcb.com/?ref=greatscott Previous video: https://youtu.be/ViYAr-M4i0s Facebook: https://www.facebook.com/greatscottlab Twitter: https://twitter.com/GreatScottLab Support me for more videos: https://www.patreon.com/GreatScott?ty=h In this video I will present you my list of the essential electronics components that you should have laying around in order to create projects! Let's get started! Component list (affiliate links): Storage Box: https://s.click.aliexpress.com/e/_dWs7Vz0 Resistor Kit E24 1/4W: https://s.click.aliexpress.com/e/_dXa0N8e 10k Resistor: https://s.click.aliexpress.com/e/_d6zUnmi 1 Resistor Shunt: https://s.click.aliexpress.com/e/_d83DRLU 1206 Resistor Book Kit: https://s.click.aliexpress.com/e/_dSVr8XC Electrolytic Capacitor Kit: https://s.click.aliexpress.com/e/_d8JQ9qw Ceramic Capacitor Kit: https://s.click.aliexpress.com/e/_d8zvcwI 1206 SMD Capacitor Kit: https://s.click.aliexpress.com/e/_d6mZq2A Power Inductor Kit: https://s.click.aliexpress.com/e/_d8I90cw LM7805: https://s.click.aliexpress.com/e/_d77sKk6 LM7812: https://s.click.aliexpress.com/e/_d8FlUQO Boost Converter MT3608: https://s.click.aliexpress.com/e/_dYMoZGQ Buck Converter LM2596: https://s.click.aliexpress.com/e/_dSX756a MCP602: https://s.click.aliexpress.com/e/_d8kK7WE LM358 OpAmp: https://s.click.aliexpress.com/e/_Bf7ch0pc IRLZ44N: https://s.click.aliexpress.com/e/_d6onA8S IRF5305: https://s.click.aliexpress.com/e/_dTNnSv0 TC4420: https://s.click.aliexpress.com/e/_dSjxsMw TC4428: https://s.click.aliexpress.com/e/_Bf8K8eeA IR2113: https://s.click.aliexpress.com/e/_dY0yaqQ BC547: https://s.click.aliexpress.com/e/_dShX0cK BC557: https://s.click.aliexpress.com/e/_d8clevk Diode Kit : https://s.click.aliexpress.com/e/_BffCIw9k NE555: https://s.click.aliexpress.com/e/_dZqfnby TLC555: https://s.click.aliexpress.com/e/_dShEFYO HCF4013BE: https://s.click.aliexpress.com/e/_dU8ZZUK 74HC14: https://s.click.aliexpress.com/e/_dSyi89G Arduino Nano: https://s.click.aliexpress.com/e/_dUGdUIO LED 5mm Set: https://s.click.aliexpress.com/e/_dWLhMeQ Fuse Kit: https://s.click.aliexpress.com/e/_dUaBruq Fuse Holder: https://s.click.aliexpress.com/e/_dUbc1x8 Potentiometer: https://s.click.aliexpress.com/e/_d8Zkn9u Trimmer: https://s.click.aliexpress.com/e/_d7b84Lu Toggle Switch: https://s.click.aliexpress.com/e/_dTzxEeA Tactile Push Button: https://s.click.aliexpress.com/e/_dYMRQSW Screw Terminal: https://s.click.aliexpress.com/e/_dSuKufo IC Sockets: https://s.click.aliexpress.com/e/_d8G2Ndu Male Female Header: https://s.click.aliexpress.com/e/_dX0nuXs Breadboard: https://s.click.aliexpress.com/e/_dVGFIWO Jumper Wires: https://s.click.aliexpress.com/e/_dSLeMly Alligator Clip Wires: https://s.click.aliexpress.com/e/_BfjCyLKw Videos about components: Resistor: https://youtu.be/7w5I-KbJ1Sg Capacitor: https://youtu.be/otQGdPLyF3w https://youtu.be/2v8zBj7_sxg Inductor: https://youtu.be/kdrP9WbJIb8 https://youtu.be/XCnI6ZOYKes https://youtu.be/hYOtx_2hYTU OpAmp: https://youtu.be/kqCV-HGJc6A MOSFET: https://youtu.be/o4_NeqlJgOs BJT: https://youtu.be/WRm2oUw4owE Diode: https://youtu.be/46WSCihjoRI https://youtu.be/GtH8lAzQf2A 555 Timer: https://youtu.be/fLaexx-NMj8 D-type Flip Flop: https://youtu.be/Degt4HUzWXY Schmitt Trigger: https://youtu.be/woTiKij76cA Thanks to JLCPCB for sponsoring this video Visit https://jlcpcb.com to get professional PCBs for low prices Music: 2011 Lookalike by Bartlebeats Killing Time, Kevin MacLeod (incompetech.com)
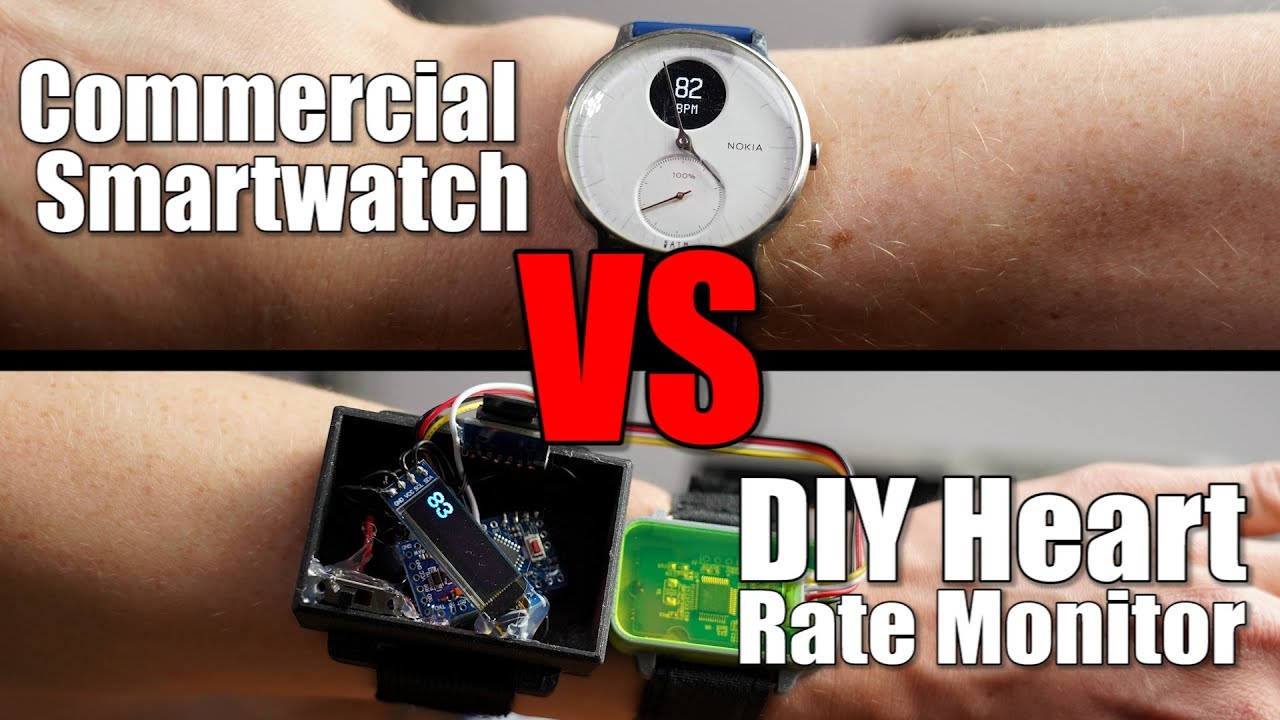
ViYAr-M4i0s | 26 Apr 2020
Choose DHL for Fast Ship PCBs on JLCPCB: https://jlcpcb.com/?ref=greatscott Previous video: https://youtu.be/PKowvbnIxso Facebook: https://www.facebook.com/greatscottlab Twitter: https://twitter.com/GreatScottLab Support me for more videos: https://www.patreon.com/GreatScott?ty=h My smartwatch (affiliate link): https://amzn.to/3aw1JGo More project information (schematic, pictures, code.....) on instructables: https://www.instructables.com/id/DIY-Heart-Rate-Monitor-logger Parts list (incomplete, see Instructables for more, affiliate links): Aliexpress: 1x LiPo Battery: https://s.click.aliexpress.com/e/_d6jtyKS 1x Slide Switch: https://s.click.aliexpress.com/e/_dYGop3Y 1x MCP1700 3.3V Regulator: https://s.click.aliexpress.com/e/_d8ldQ90 1x Grove Heart Rate Sensor: - 1x OLED Display: https://s.click.aliexpress.com/e/_BffOD3gi 1x Arduino Pro Mini: https://s.click.aliexpress.com/e/_d62ALdV 1x Micro SD Card Board: https://s.click.aliexpress.com/e/_dVMMRTg In this video I will show you how a commercial smartwatch measures and monitors your heart rate and afterwards I will show you how to create a DIY circuit that can basically do the same with the addition that it can also store the heart rate data on a micro SD card. At the end I will then compare both heart rate monitors in order to find out whether my smartwatch still works fine. Let's get started! Thanks to JLCPCB for sponsoring this video Visit https://jlcpcb.com to get professional PCBs for low prices Music: 2011 Lookalike by Bartlebeats

PKowvbnIxso | 19 Apr 2020
PCB+SMT assembly, from $2: https://jlcpcb.com/?ref=greatscott Previous video: https://youtu.be/ViYAr-M4i0s Previous Walkie-Talkie video: https://youtu.be/SZYwvvh6m-s Andreas Spiess video: https://youtu.be/YJ25eQRbhaQ Class D Audio Amplifier video: https://youtu.be/3dQjIeYoIdM Facebook: https://www.facebook.com/greatscottlab Twitter: https://twitter.com/GreatScottLab Support me for more videos: https://www.patreon.com/GreatScott?ty=h More project information (schematic, pictures, code.....) on instructables: https://www.instructables.com/id/DIY-Walkie-Talkie-With-Generic-433MHz-RF-Modules Parts list (incomplete, see Instructables for more, affiliate links): Aliexpress: 2x 433MHz Transmitter: https://s.click.aliexpress.com/e/_dZWpOdO 2x 433MHz Receiver: https://s.click.aliexpress.com/e/_dYg2WFi 2x TLC555 IC: https://s.click.aliexpress.com/e/_dTrUY9D 2x MCP602 IC: https://s.click.aliexpress.com/e/_dTvJRGw 2x TC4428 IC: https://s.click.aliexpress.com/e/_dUoZWG8 1x Mic: https://s.click.aliexpress.com/e/_dSPsdVK 1x 250k Trimmer: https://s.click.aliexpress.com/e/_dTFyPv5 Resistors: https://s.click.aliexpress.com/e/_dTPpXjt Capacitors: https://s.click.aliexpress.com/e/_dU4FEsB https://s.click.aliexpress.com/e/_d7dOwRz 2x Micro USB Breakout PCB: https://s.click.aliexpress.com/e/_dWadkSj 2x 1500uH Inductor: https://s.click.aliexpress.com/e/_d7357MY 2x Speaker: https://s.click.aliexpress.com/e/_d7xD9DK In this project I will show you how to use generic 433MHz RF modules from Ebay in order to create a functional Walkie-Talkie. That means we will compare different RF Modules, learn a bit about a class d amplifier and finally build the Walkie-Talkie. It can be powered by a normal powerbank for around 130 hours and features a range of around 15m. Let's get started! Thanks to JLCPCB for sponsoring this video Visit https://jlcpcb.com to get professional PCBs for low prices Music: 2011 Lookalike by Bartlebeats

PRL_Wp-FpGQ | 12 Apr 2020
Fast, Quality PCB, starts 5PCBs from $2: https://jlcpcb.com/?ref=greatscott Previous video: https://youtu.be/ZNunxg7o8l0 USB Type C video: https://youtu.be/OwAZqJ4wpJg Facebook: https://www.facebook.com/greatscottlab Twitter: https://twitter.com/GreatScottLab Support me for more videos: https://www.patreon.com/GreatScott?ty=h More project information (schematic, pictures,.....) on instructables: https://www.instructables.com/id/Make-Your-Own-Portable-Retro-Game-Consolewhich-Is- Parts list (incomplete, see Instructables for more, affiliate links): Aliexpress: 1x LattePanda SBC: https://s.click.aliexpress.com/e/_d9lgiFG 1x 7" LCD with Touchscreen: https://s.click.aliexpress.com/e/_dUGLunk 1x USB Type C PD PCB: https://s.click.aliexpress.com/e/_d6uiyLk 1x Speaker: https://s.click.aliexpress.com/e/_dSx1OTy 1x 3.5mm Audio Jack: https://s.click.aliexpress.com/e/_dT0hSNg 17x 9.5mm Tactile Push Button: https://s.click.aliexpress.com/e/_dW4kpAm 3x Micro USB Cable: https://s.click.aliexpress.com/e/_dSRxw7y 1x Flat HDMI Cable: https://s.click.aliexpress.com/e/_d9e6pOA Ebay: 1x LattePanda SBC: http://rover.ebay.com/rover/1/711-53200-19255-0/1?ff3=4&pub=5575101368&toolid=10001&campid=5337582279&customid=&mpre=https%3A%2F%2Fwww.ebay.com%2Fitm%2FLattePanda-2G-32GB-EMMC-Win10-Development-Board-without-Win10-product-key%2F183002401511%3Fepid%3D769579549%26hash%3Ditem2a9bcb0ae7%3Ag%3Ab8EAAOSwQN5aUKs- 1x 7" LCD with Touchscreen: http://rover.ebay.com/rover/1/711-53200-19255-0/1?ff3=4&pub=5575101368&toolid=10001&campid=5337582279&customid=&mpre=https%3A%2F%2Fwww.ebay.com%2Fitm%2FWaveshare-1024x600-7inch-HDMI-LCD-H-Raspberry-Pi-Capacitive-Touch-Screen-IPS%2F253607386986%3Fepid%3D10019051239 1x USB Type C PD PCB: http://rover.ebay.com/rover/1/711-53200-19255-0/1?ff3=4&pub=5575101368&toolid=10001&campid=5337582279&customid=&mpre=https%3A%2F%2Fwww.ebay.com%2Fitm%2F100W-9V-12V-15V-20V-Type-C-USB-C-PD-2-0-3-0-to-DC-USB-QC-Trigger-Poll-Detector%2F312705399960%3Fhash%3Ditem48ceb1bc98%3Am%3AmOwS4TZqe_1ETOI9YKGpafA%26var%3D611423355586 1x Speaker: http://rover.ebay.com/rover/1/711-53200-19255-0/1?ff3=4&pub=5575101368&toolid=10001&campid=5337582279&customid=&mpre=https%3A%2F%2Fwww.ebay.com%2Fitm%2FOriginal-Nintendo-Game-Boy-DMG-01-New-Replacement-Speaker%2F193383003222%3Fhash%3Ditem2d06867456%3Ag%3A4E8AAOSwVfVebcBC 1x 3.5mm Audio Jack: http://rover.ebay.com/rover/1/711-53200-19255-0/1?ff3=4&pub=5575101368&toolid=10001&campid=5337582279&customid=&mpre=https%3A%2F%2Fwww.ebay.com%2Fitm%2F5Pcs-3-5mm-Female-5pin-Stereo-Headset-Interior-PCB-Mount-Audio-Jack-SocketP-lo%2F124114141166%3Fhash%3Ditem1ce5c77fee%3Ag%3A39cAAOSwPI1axJIk 17x 9.5mm Tactile Push Button: http://rover.ebay.com/rover/1/711-53200-19255-0/1?ff3=4&pub=5575101368&toolid=10001&campid=5337582279&customid=&mpre=https%3A%2F%2Fwww.ebay.com%2Fitm%2F4-Pin-SMD-Momentary-Tact-Tactile-Push-Button-Switch-6x6x4-1mm-to-6x6x25mm%2F183254849538%3Fhash%3Ditem2aaad71802%3Am%3AmM-cEXnbytvr_wzHrTPrpbA 3x Micro USB Cable: http://rover.ebay.com/rover/1/711-53200-19255-0/1?ff3=4&pub=5575101368&toolid=10001&campid=5337582279&customid=&mpre=https%3A%2F%2Fwww.ebay.com%2Fitm%2F2-PACK-OEM-Samsung-Galaxy-S6-S7-Edge-Note-5-Fast-Charger-Micro-USB-Cable-Cord%2F153562700928%3Fhash%3Ditem23c10cdc80%3Am%3Amn7UF2BiFmmagF3Q6VbeVpQ 1x Flat HDMI Cable: http://rover.ebay.com/rover/1/711-53200-19255-0/1?ff3=4&pub=5575101368&toolid=10001&campid=5337582279&customid=&mpre=https%3A%2F%2Fwww.ebay.com%2Fitm%2FFPV-Micro-Mini-HDMI-Angled-Adapter-FPC-Flat-Cable-Pitch-20pin-Plug-Connector%2F254196468814%3Fhash%3Ditem3b2f4a4c4e%3Am%3Amyf7dRmKsf18EmSVtN0evIA In this project I will show you how to create a portable retro game console that can also be used as a Windows 10 tablet. It will consist of a 7" HDMI LCD with touchscreen, a LattePanda SBC, a USB Type C PD power PCB and a few more complementary components. When running a game, a common 72Wh powerbank can power the console for about 8 hours. Let's get started! Thanks to JLCPCB for sponsoring this video Visit https://jlcpcb.com to get professional PCBs for low prices Music: 2011 Lookalike by Bartlebeats Killing Time, Kevin MacLeod (incompetech.com)
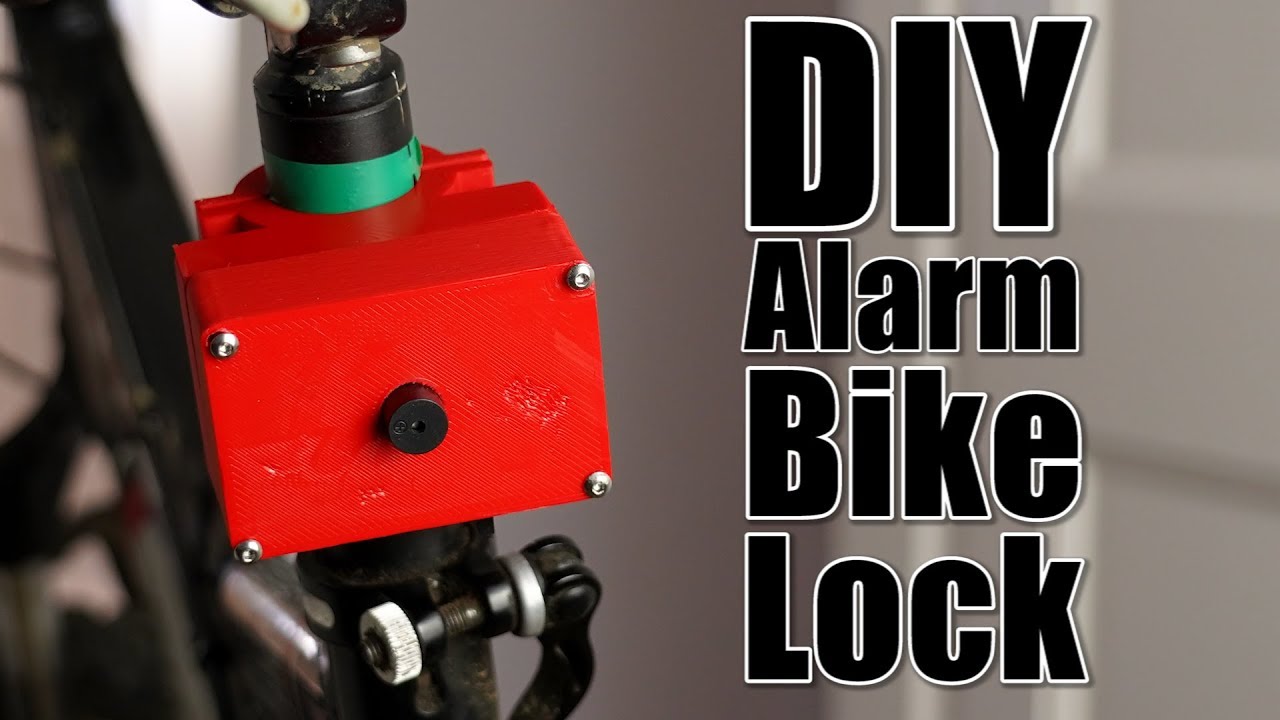
IcR1OjJwo90 | 29 Mar 2020
Top 20 Order SMT on https://jlcpcb.com use coupon code: JLCScott Previous video: https://youtu.be/ZNunxg7o8l0 DIY Light Barrier Alarm System with an industrial grade PLC (Controllino): https://youtu.be/0fDPBtbsUgc Make your own GPS SMS Security Tracking System: https://youtu.be/CeStrH-5Llo Facebook: https://www.facebook.com/greatscottlab Twitter: https://twitter.com/GreatScottLab Support me for more videos: https://www.patreon.com/GreatScott?ty=h More project information (schematic, pictures,.....) on instructables: https://www.instructables.com/id/DIY-Alarm-Bike-Lock-Shock-Activated/ Parts list (incomplete, see Instructables for more, affiliate links): Aliexpress: 1x LiPo Battery: https://s.click.aliexpress.com/e/_d6jtyKS 1x TP4056 board: https://s.click.aliexpress.com/e/_dX8n0hp 1x Slide Switch: https://s.click.aliexpress.com/e/_dYGop3Y 1x LP2950 3.3V Regulator: https://s.click.aliexpress.com/e/_dSRyW5u 2x 20k, 2x 680k, 1x 68k, 1x 1M Resistor: https://s.click.aliexpress.com/e/_dTPpXjt 2x 1uF, 1x 100uF Capacitor: https://s.click.aliexpress.com/e/_d7dOwRz 3x 100nF Capacitor: https://s.click.aliexpress.com/e/_dU4FEsB 1x MCP602 OpAmp: https://s.click.aliexpress.com/e/_d8ZNgSi 1x 200k Trimmer: https://s.click.aliexpress.com/e/_dTFyPv5 1x CD4013 Flip Flop: https://s.click.aliexpress.com/e/_dYQhWVo 1x IRLML6344 MOSFET: https://s.click.aliexpress.com/e/_dZdyF94 1x 3.3V Buzzer: https://s.click.aliexpress.com/e/_d6hTbaq In this project I will be showing you how to create a simple shock activated alarm bike lock. Like the name implies, it does create an alarm sound when your bike is being moved around with permission. Along the way we will learn a bit about piezoelectric discs, amplifiers and a simple logic circuit. Let's get started! Thanks to JLCPCB for sponsoring this video Visit https://jlcpcb.com to get professional PCBs for low prices Music: 2011 Lookalike by Bartlebeats
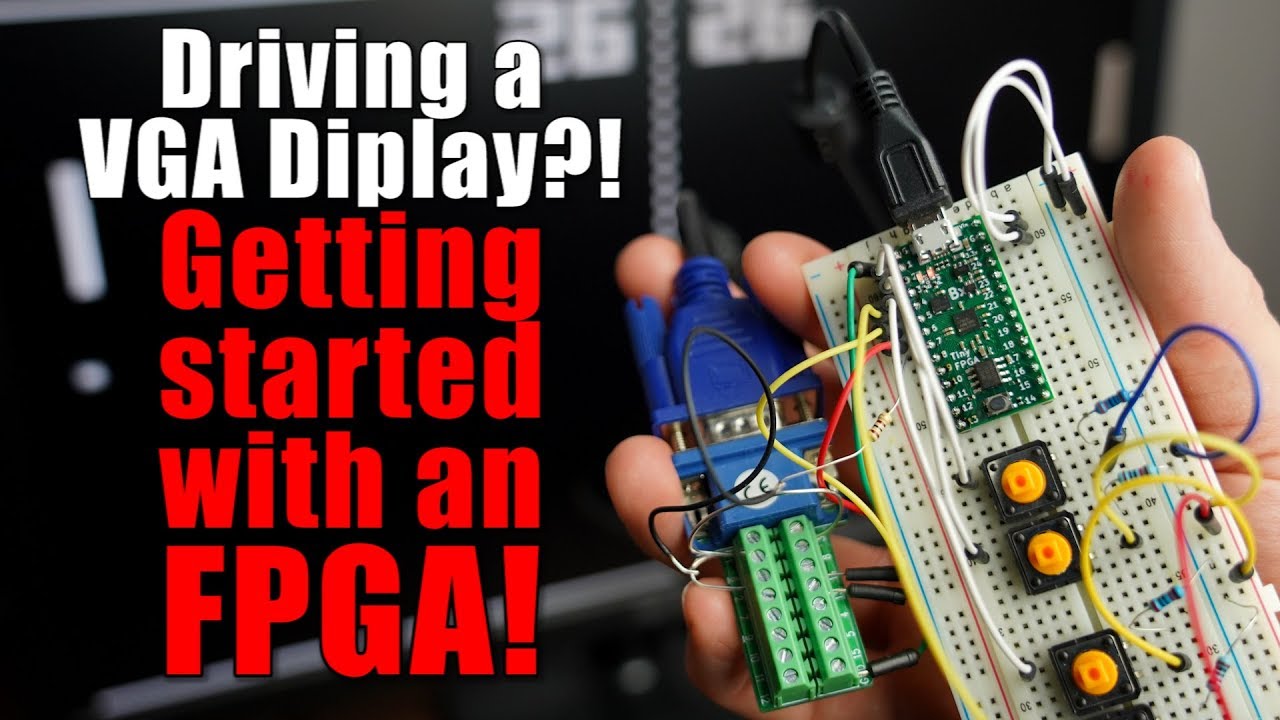
ZNunxg7o8l0 | 22 Mar 2020
Fast PCB Prototype for $2 Again : https://jlcpcb.com/?ref=greatscott Previous video: https://youtu.be/VuxR0ZMId5U bitluni's lab video: https://youtu.be/qJ68fRff5_k Arduino VS Common IC: https://youtu.be/lzXMImK_wyM Facebook: https://www.facebook.com/greatscottlab Twitter: https://twitter.com/GreatScottLab Support me for more videos: https://www.patreon.com/GreatScott?ty=h Useful website for FPGA learning: https://tinyfpga.com/bx/guide.html https://github.com/tinyfpga/TinyFPGA-BX https://www.crowdsupply.com/tinyfpga/tinyfpga-bx https://icestudio.io/ https://github.com/juanmard/screen-pong https://www.nandland.com/articles/fpga-101-fpgas-for-beginners.html https://www.fpga4fun.com/Opto.html https://www.fpga4student.com/p/fpga-projects.html https://www.digikey.com/en/blog/fpgas-101-a-beginners-guide In this video I will be having a closer look at FPGAs and I will do some simple beginners examples with the TinyFPGA BX board. That means we will find out what makes an FPGA so special and also how to program it easily. At the end I will then show you how the required VGA signals looks like and how the TinyFPGA can create them. Let's get started! Thanks to JLCPCB for sponsoring this video Visit https://jlcpcb.com to get professional PCBs for low prices Music: 2011 Lookalike by Bartlebeats Killing Time, Kevin MacLeod (incompetech.com)

VuxR0ZMId5U | 15 Mar 2020
Fast Again & $2 for 5 PCBs: https://jlcpcb.com/?ref=greatscott Previous video (Wind Turbine DIY or Buy): https://youtu.be/938dTRrwrYc Facebook: https://www.facebook.com/greatscottlab Twitter: https://twitter.com/GreatScottLab Support me for more videos: https://www.patreon.com/GreatScott?ty=h In this small project I will show you how I used the Fusion 360 software and my 3D printer in order to create 2 gear trains for a commercial wind turbine. The gear trains will allow me to spin the wind turbine fast enough in order to output a bit of power so that it can charge USB devices. Along the way we will learn a bit about different gear systems and how to use Fusion 360. Let's get started! Thanks to JLCPCB for sponsoring this video Visit https://jlcpcb.com to get professional PCBs for low prices Music: 2011 Lookalike by Bartlebeats
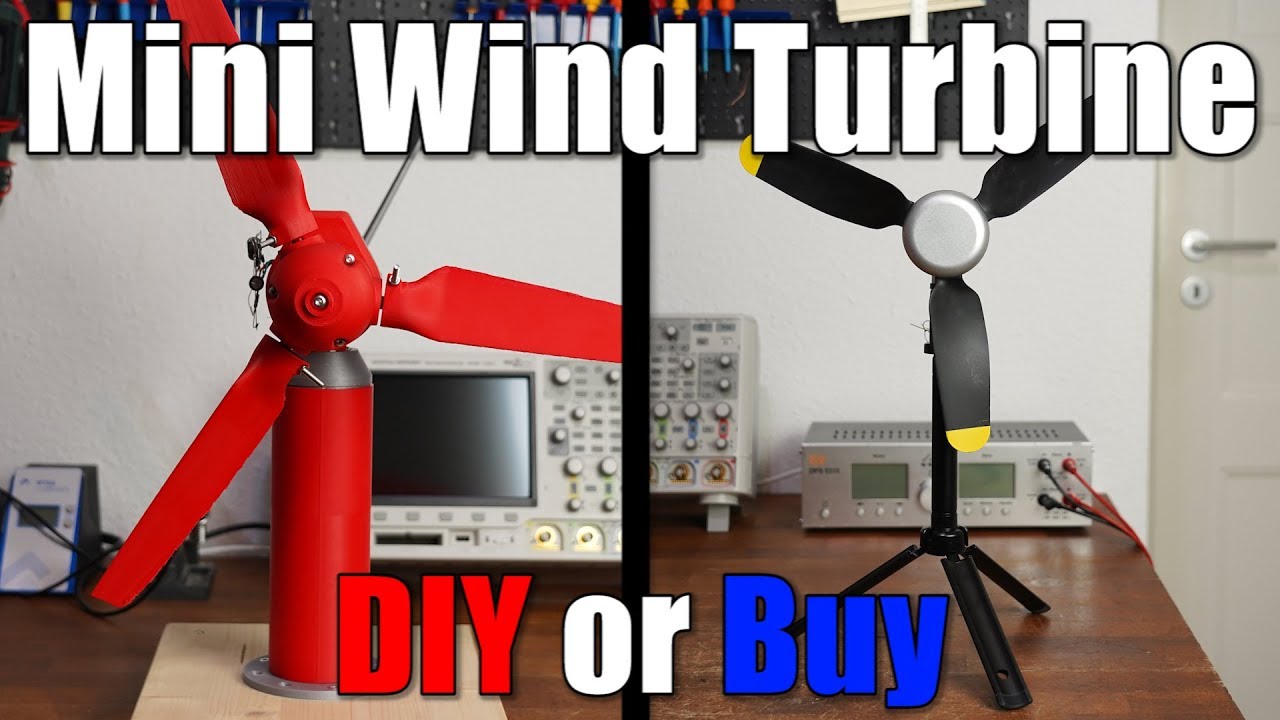
938dTRrwrYc | 01 Mar 2020
Stay strong & Keep $2 PCBs: https://jlcpcb.com/?ref=greatscott Previous video: https://youtu.be/hYOtx_2hYTU Power Meter video: https://youtu.be/lrugreN2K4w Facebook: https://www.facebook.com/greatscottlab Twitter: https://twitter.com/GreatScottLab Support me for more videos: https://www.patreon.com/GreatScott?ty=h Websites which were shown/used in the video: https://www.thingiverse.com/thing:2060281 https://www.thingiverse.com/thing:2851306 https://www.amazon.de/Energy-Infinite-Windm%C3%BChle-Ladeger%C3%A4t-Elektroger%C3%A4te-schwarz/dp/B075RF17NV https://www.knivesandtools.com/en/pt/-texenergy-infinite-air-wind-turbine-ia-001-wind-generator.htm In this episode of DIY or Buy we will have a closer look at a commercial wind turbine. I will show you how it works and how much power it can output. Afterwards I will then 3D print a mini wind turbine I found on thingiverse and test it as well in order to figure out whether it makes sense to DIY such a wind turbine or whether we should stick to the commercial solution instead. Let's get started! Thanks to JLCPCB for sponsoring this video Visit https://jlcpcb.com to get professional PCBs for low prices Music: 2011 Lookalike by Bartlebeats

hYOtx_2hYTU | 23 Feb 2020
Do you want to know more about the Würth Elektronik components? Then click here: http://bit.ly/we_onlinecatalog_EN All products used in this video can be find in the Learning Kit TI-PMLK: http://bit.ly/LearningKit_TI_EN All Würth Elektronik Single Coil Power Inductors: http://bit.ly/WE_inductors_EN REDEXPERT tool: http://bit.ly/redexpert_YT Useful application notes: http://bit.ly/AppNotes_EN Subscribe to Würth Elektronik on YouTube: http://bit.ly/WE_youtube Useful videos on the topic: Rated current of an inductor: http://bit.ly/YT_askLorandt_inductor1 Saturation current of an inductor: http://bit.ly/YT_askLorandt_inductor2 Temperature influence of the saturation current for an inductor: http://bit.ly/YT_askLorandt_inductor3 Selecting the proper Inductor with REDEXPERT: http://bit.ly/YT_askLorandt_inductor4 Facebook: https://www.facebook.com/greatscottlab Twitter: https://twitter.com/GreatScottLab Support me for more videos: https://www.patreon.com/GreatScott?ty=h In this video we will not only find out how a buck converter works and how to calculate its inductance, but we will also learn about different coil types. That means I will show you how the size, core material and temperature can influence a coil and what you need to be aware of when choosing a coil for your converter. Let's get started! Thanks to the Würth Elektronik eiSos Group for supporting this video. Music: 2011 Lookalike by Bartlebeats

Rf-kBZ_wVS4 | 23 Feb 2020
Du möchtest mehr über die Würth Elektronik Bauteile erfahren? Dann klicke hier: http://bit.ly/WE_onlinekatalog_DE Die im Video gezeigten Produkte findest du hier: http://bit.ly/LearningKit_TI_DE Speicherdrosseln: http://bit.ly/WE_inductors_DE REDEXPERT tool: http://bit.ly/redexpert_YT Nützliche AppNotes: http://bit.ly/AppNotes_DE Würth Elektronik auf YouTube abonnieren: http://bit.ly/WE_youtube Nützliche Videos zum Thema: Nennstrom einer Induktivität: http://bit.ly/YT_askLorandt_inductor1_DE Sättigungsstrom einer Induktivität: http://bit.ly/YT_askLorandt_inductor2_DE Temperatureinfluss auf das Sättigungsverhalten einer Induktivität: http://bit.ly/YT_askLorandt_inductor3_DE Auswahl einer Speicherinduktivität mit REDEXPERT: http://bit.ly/YT_askLorandt_inductor4_DE Facebook: https://www.facebook.com/greatscottlab Twitter: https://twitter.com/GreatScottLab Unterstütze mich für mehr videos : https://www.patreon.com/GreatScott?ty=h In diesen Video werden wir nicht nur herausfinden wie ein Buck Konverter funktioniert und wie man dessen benötigte Induktivität berechnet, sondern wir werden uns auch genauer mit verschiedenen Spulentypen beschäftigen. Das heißt Ich zeige euch wie Größe, Kernmaterial oder gar die Temperatur eine Spule beeinflussen und auf was man bei der Auswahl einer Spule für einen Konverter achten muss. Let's get started! Danke an die Würth Elektronik eiSos Gruppe für die Unterstützung des Videos. Musik: 2011 Lookalike by Bartlebeats
86YFQBqtsto | 19 Feb 2020
You can enter the Wave 2020 event here: http://bit.ly/GScott2020 The full overview is here: https://blogs.keysight.com/blogs/tech.entry.html/2020/01/21/keysight_wave_2020o-cM58.html?_ga=2.30215350.823904201.1582014651-361599654.1580664431 Join the livestream here: https://www.youtube.com/watch?v=TXV2AFiKXfU Keysight Labs YouTube Channel: https://www.youtube.com/user/KeysightOscilloscope Support me for more videos: https://www.patreon.com/GreatScott Facebook: https://www.facebook.com/greatscottlab Twitter: https://twitter.com/GreatScottLab

sehUXYZGsAg | 16 Feb 2020
$2 for 5 PCBs & 2 minutes Ordering: https://jlcpcb.com/?ref=greatscott Previous video: https://youtu.be/GBv80BgfTBc Electric Bike Conversion video: https://youtu.be/ALU8j7BTXnI Electric Motorized Longboard video: https://youtu.be/XworvxoQleY Nixie Clock video: https://youtu.be/ObgmVNV1Kfg Facebook: https://www.facebook.com/greatscottlab Twitter: https://twitter.com/GreatScottLab Support me for more videos: https://www.patreon.com/GreatScott?ty=h You can find the wiring diagrams and more information here: https://www.patreon.com/posts/33712206 Websites which were shown/used in the video: https://www.maginon.com https://voltaplex.com/bak-vw-18650-battery-h18650cc In this video I will be having a closer look at the cheapest street-legal E-Scooter I could find on the Internet. It is called the eScooter Street One from Aldi and I will not only tell you my personal opinion about it but I will also upgrade some of its electrical features. That means I will try to increase its speed, range, charge up time and also change the fact that the lights require their own little batteries. Let's get started! Thanks to JLCPCB for sponsoring this video Visit https://jlcpcb.com to get professional PCBs for low prices Music: 2011 Lookalike by Bartlebeats Killing Time, Kevin MacLeod (incompetech.com)
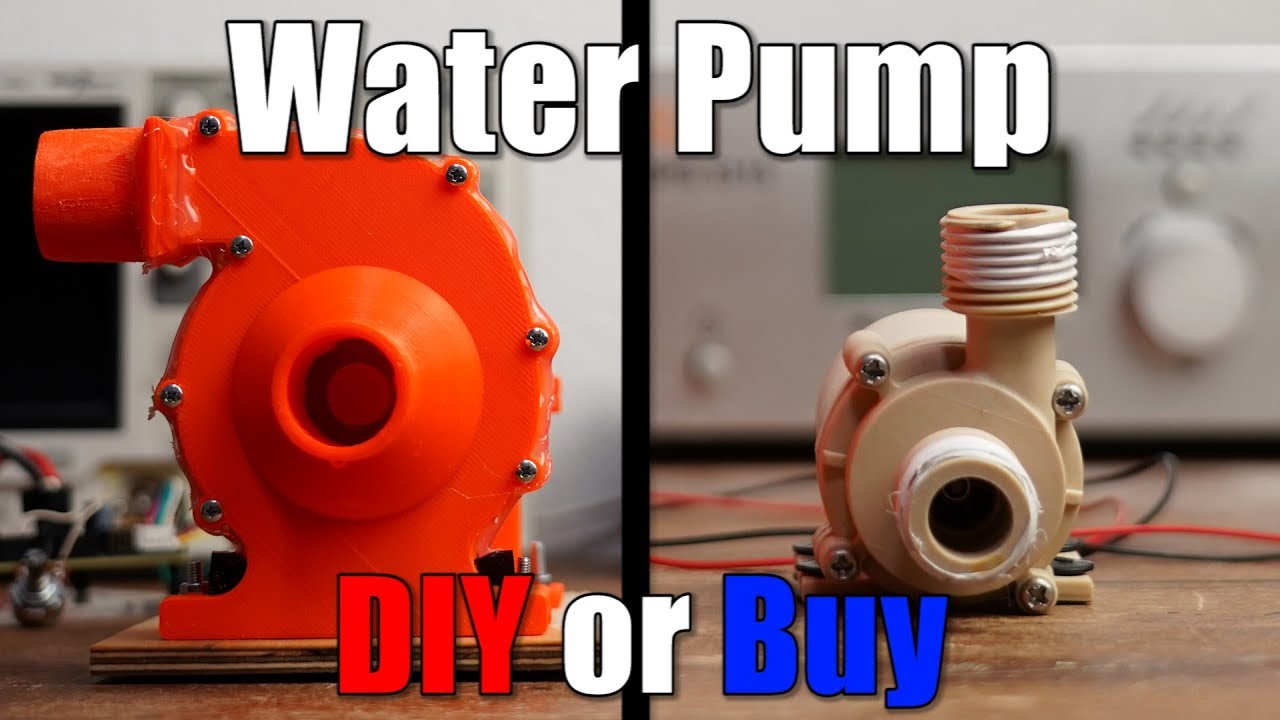
GBv80BgfTBc | 02 Feb 2020
Trinamic Website: https://www.trinamic.com/ Join Trinamics ROCINANTE newsletter: https://blog.trinamic.com/rocinante/ Previous video: https://youtu.be/n_b_0BWP0mI Facebook: https://www.facebook.com/greatscottlab Twitter: https://twitter.com/GreatScottLab Support me for more videos: https://www.patreon.com/GreatScott?ty=h Websites which were shown/used in the video: https://www.thingiverse.com/thing:1651315 https://www.thingiverse.com/thing:3113040 In this episode of DIY or Buy we will have a closer look at a small commercial 12V DC Water Pump. We will find out how it works and why it is called a centrifugal pump. Afterwards I will then 3D print a bigger water pump in order to find out whether it makes sense to DIY such a pump with a 3D printer or whether we should stick to the commercial solution instead. Let's get started! Thanks to Trinamic Motion Control for sponsoring this video and sending an early version of their DOCK5 board, which features the ROCINANTE chip with integrated RISC-V processor. Visit https://www.trinamic.com/ to get awesome motor control ICs. Music: 2011 Lookalike by Bartlebeats
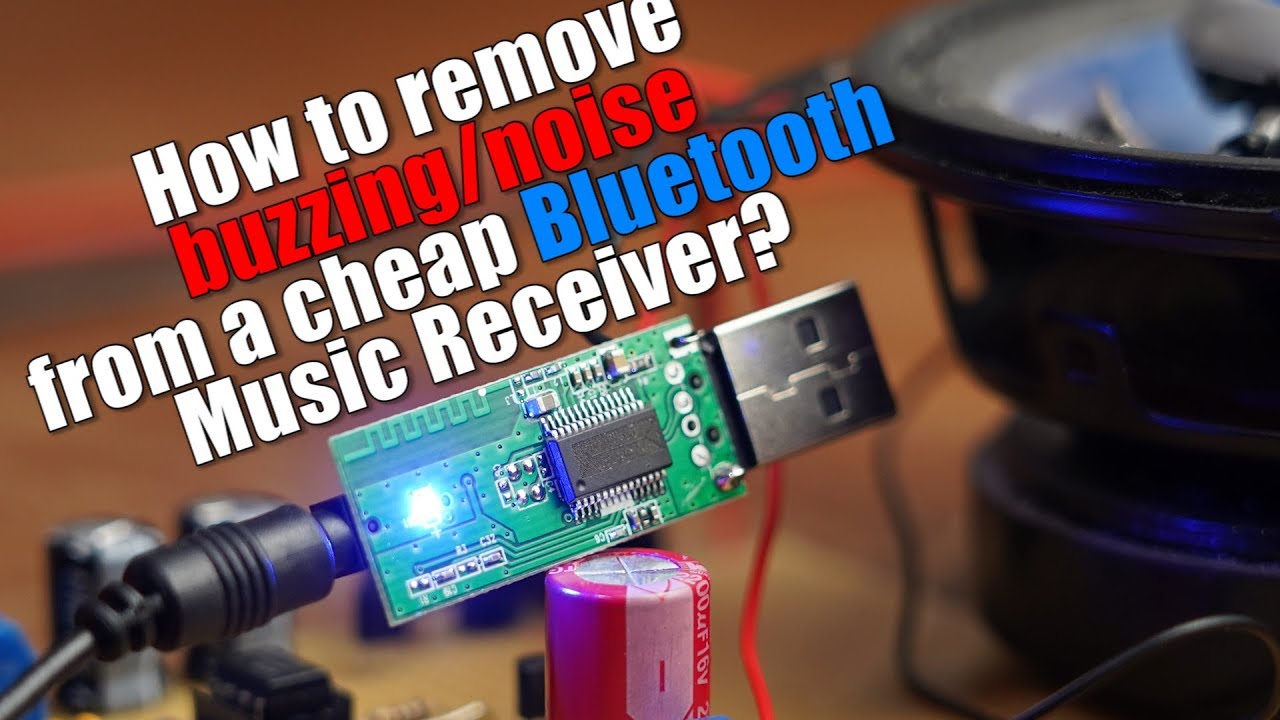
n_b_0BWP0mI | 26 Jan 2020
$2 for 5 PCBs & 2 minutes Ordering: https://jlcpcb.com/?ref=greatscott Previous video: https://youtu.be/zOMA2eH2d6Q Make your own Low Budget Bluetooth Music System video: https://youtu.be/oGTXczCV30A Facebook: https://www.facebook.com/greatscottlab Twitter: https://twitter.com/GreatScottLab Support me for more videos: https://www.patreon.com/GreatScott?ty=h In this video I will be having a look at the buzzing/noise problem that cheap bluetooth music receiver can create. I faced this problem in a previous video of mine but used an easy fix to get around it. But this time we will find out why a buzzing problem can occur and how we can fix it. Let's get started! Thanks to JLCPCB for sponsoring this video Visit https://jlcpcb.com to get professional PCBs for low prices Music: 2011 Lookalike by Bartlebeats (incompetech.com)
zOMA2eH2d6Q | 19 Jan 2020
Get your 75% off Gold Elektor subscription here: https://www.elektormagazine.com/news/greatscott-elektor-gold?utm_source=YT&utm_medium=link&utm_campaign=GS2020YT Coupon Code: greatscott20yt Previous video: https://youtu.be/xus3zQ3cX2U LIDAR video (previous Elektor video): https://youtu.be/_--8K1BW_O4 Facebook: https://www.facebook.com/greatscottlab Twitter: https://twitter.com/GreatScottLab Support me for more videos: https://www.patreon.com/GreatScott?ty=h Websites which were shown during the video: https://www.elektor.com/ https://www.elektor.com/openmv-h7-camera https://openmv.io/ http://docs.openmv.io/openmvcam/tutorial/index.html https://www.trinamic.com/fileadmin/assets/Products/ICs_Documents/TMC2130_datasheet.pdf https://www.thingiverse.com/ In this video we will have a closer look at the OpenMV-H7 Camera. That means we will learn a bit about Python programming before I will show you how to use the camera in order to track a face, eyes, objects or colours. At the end I will then combine the camera with 3D Printing and a stepper motor in order to create a system that tracks my PSVR headset. Let's get started! Thanks to Elektor for sponsoring this video! Visit https://www.elektormagazine.com/ to read their magazines and buy electronic components. Music: 2011 Lookalike by Bartlebeats

xus3zQ3cX2U | 05 Jan 2020
Support me for more videos: https://www.patreon.com/GreatScott Previous video: https://youtu.be/GX0yYjTV1FE Facebook: https://www.facebook.com/greatscottlab Twitter: https://twitter.com/GreatScottLab Random/Unscripted Q&A #5: https://youtu.be/57t2i7XfL1Y Random/Unscripted Q&A #4: https://youtu.be/trrjQ4cN2Bc Random/Unscripted Q&A #3: https://youtu.be/j99I1EveKd4 Random/Unscripted Q&A #2: https://youtu.be/8nOXWfS1hQo Random/Unscripted Q&A: https://youtu.be/x2MEJfY45UY
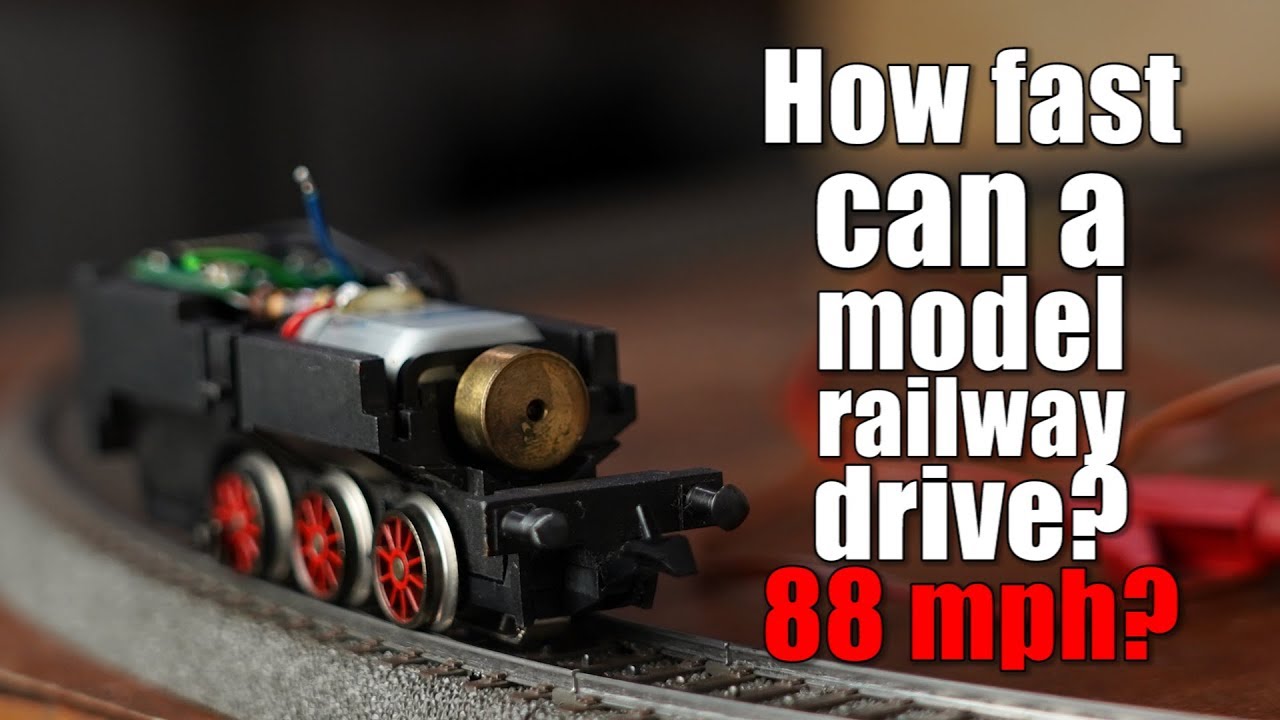
GX0yYjTV1FE | 22 Dec 2019
I wish all my viewers HAPPY HOLIDAYS! Stay creative and I will see you next time! Previous video: https://youtu.be/ObgmVNV1Kfg Facebook: https://www.facebook.com/greatscottlab Twitter: https://twitter.com/GreatScottLab Support me for more videos: https://www.patreon.com/GreatScott?ty=h In this small christmas special video I will be having a look at a common electric model railway and find a way to increase its speed. Afterwards I will calculate the maximum speed theoretically and also measure it practically. Let's get started! Music: 2011 Lookalike by Bartlebeats Killing Time, Kevin MacLeod (incompetech.com)

ObgmVNV1Kfg | 15 Dec 2019
$2 for PCB Prototypes & Free SMT Assembly: https://jlcpcb.com Previous video: https://youtu.be/PL0TPdrhMuI Facebook: https://www.facebook.com/greatscottlab Twitter: https://twitter.com/GreatScottLab Support me for more videos: https://www.patreon.com/GreatScott?ty=h More project information (schematic, pictures,.....) on Instructables: https://www.instructables.com/id/Make-Your-Own-Retro-Nixie-Clock-With-an-RTC/ Parts list (incomplete, see Instructables for more, affiliate links): Amazon.com: 4x IN-14 Nixie tube: https://amzn.to/2P2kNUr 4x K155ID1 Nixie tube driver: https://amzn.to/35hvV5i 1x LM7805 5V regulator: https://amzn.to/2E35vZo 1x Arduino Pro Mini: https://amzn.to/2E24LDC 1x DS1307 RTC: https://amzn.to/2YtNvAI SMD Capacitors (1206 10uF, 100nF): https://amzn.to/2RzisSw Male+Female Header: https://amzn.to/2YxJE5N 4x 10kΩ Resistor: https://amzn.to/2YB2BEr 1x 170V DC Supply: https://amzn.to/2P7Xclr 1x DC Input Jack: https://amzn.to/354Yt2b Websites which were shown in the video: https://tubehobby.com/store.php?cat=2 https://tubehobby.com/show_det.php?det=13 https://tubehobby.com/datasheets/in14.pdf https://tubehobby.com/datasheets/k155id1.pdf In this project I will show you how to create a retro nixie clock. That means I will show you how you can control nixie tubes with a high voltage DC power supply and then I will combine 4 nixie tubes with an Arduino, a Real Time Clock (RTC) and a custom 3D printed enclosure in order to create the nixie clock. Let's get started! Thanks to JLCPCB for sponsoring this video Visit https://jlcpcb.com to get professional PCBs for low prices Music: 2011 Lookalike by Bartlebeats Killing Time, Kevin MacLeod (incompetech.com)
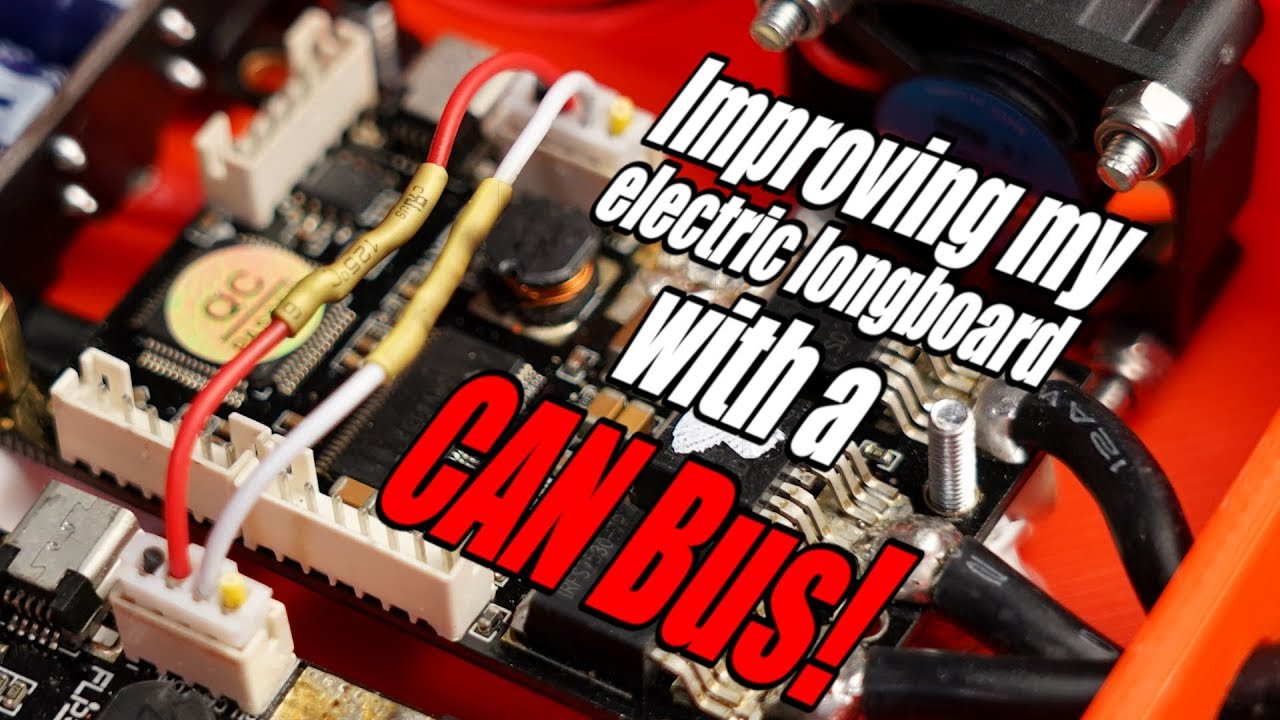
PL0TPdrhMuI | 08 Dec 2019
$2 for PCB Prototypes & Free SMT Assembly: https://jlcpcb.com Previous video: https://youtu.be/fOacM-syXGI Electric longboard video: https://youtu.be/XworvxoQleY RS-485 video: https://youtu.be/yFQS_TQ4948 Facebook: https://www.facebook.com/greatscottlab Twitter: https://twitter.com/GreatScottLab Support me for more videos: https://www.patreon.com/GreatScott?ty=h Useful websites which were shown/used during the video: https://www.ti.com/lit/an/sloa101b/sloa101b.pdf http://esd.cs.ucr.edu/webres/can20.pdf https://www.nxp.com/docs/en/reference-manual/BCANPSV2.pdf https://www.allaboutcircuits.com/technical-articles/introduction-to-can-controller-area-network/ https://en.wikipedia.org/wiki/CAN_bus In this video I will show you how I improved my electric longboard with a CAN Bus. During that process I will explain to you what a CAN Bus is, where it is being used and what advantages it offers in comparison to other bus systems. Let's get started! Thanks to JLCPCB for sponsoring this video Visit https://jlcpcb.com to get professional PCBs for low prices Music: 2011 Lookalike by Bartlebeats

fOacM-syXGI | 01 Dec 2019
$2 for 5 PCBs (born for easier prototype): https://jlcpcb.com Previous video: https://youtu.be/OwAZqJ4wpJg DIY Cooler video: https://youtu.be/1Kp_yWY2tdU TechBuilder DIY Candle Powered USB Charger: https://youtu.be/PAMzAGge8bM Facebook: https://www.facebook.com/greatscottlab Twitter: https://twitter.com/GreatScottLab Support me for more videos: https://www.patreon.com/GreatScott?ty=h In this video we will have a closer look at a fake thermoelectric generator and find out exactly why it can not charge up a smartphone like advertised. While doing so, you will learn quite a bit about Peltier modules. Afterwards I will then show you how to create a real thermoelectric generator that can charge up a smartphone through the power of tea lights and ice water. Let's get started! Thanks to JLCPCB for sponsoring this video Visit https://jlcpcb.com to get professional PCBs for low prices Music: 2011 Lookalike by Bartlebeats (incompetech.com)

OwAZqJ4wpJg | 17 Nov 2019
$2 PCB Prototype & SMT Coupons $8 + $7: https://jlcpcb.com Previous video: https://youtu.be/zvkfWfbQ4KA RS-485 video: https://youtu.be/yFQS_TQ4948 Facebook: https://www.facebook.com/greatscottlab Twitter: https://twitter.com/GreatScottLab Support me for more videos: https://www.patreon.com/GreatScott?ty=h Components which were used in the video (affiliate links): Amazon.com: PD Powerbank: https://amzn.to/2CpeEdM PD Charger: https://amzn.to/36XG0pA USB Type-C USB Tester: https://amzn.to/2PXyVPI USB Type -C PD Sink PCB: https://amzn.to/34MergZ Ebay: USB Type-C USB Tester: http://rover.ebay.com/rover/1/711-53200-19255-0/1?ff3=4&pub=5575101368&toolid=10001&campid=5337582279&customid=&mpre=https%3A%2F%2Fwww.ebay.com%2Fitm%2FUSB-Type-C-Tester-Wireless-Bluetooth-DC-Digital-Voltmeter-Current-Voltage-Detect%2F113724479658%3F USB Type -C PD Sink PCB: http://rover.ebay.com/rover/1/711-53200-19255-0/1?ff3=4&pub=5575101368&toolid=10001&campid=5337582279&customid=&mpre=https%3A%2F%2Fwww.ebay.com%2Fitm%2FType-C-USB-C-PD2-0-3-0-to-DC-USB-Fast-Charge-Trigger-Poll-Detector-Charging%2F333247140116%3F Useful websites mentioned in the video: https://www.usb.org/documents In this video I will tell you all about USB Type-C and why it is AWESOME! That means I will show you the development of USB connectors over time and finally explain how USB Type-C performs in regard to speed, power delivery and alternate usage like for example outputting an HDMI signal. Let's get started! Thanks to JLCPCB for sponsoring this video Visit https://jlcpcb.com to get professional PCBs for low prices Music: 2011 Lookalike by Bartlebeats Killing Time, Kevin MacLeod (incompetech.com)

jl-jyDRBPOc | 10 Nov 2019
Du möchtest mehr über die Würth Elektronik EMV Bauteile erfahren? Dann klicke hier: http://bit.ly/EMCFilterKit_DE und bestelle dein Design Kit. Die im Video gezeigten Produkte findest du hier: Stromkompensierte Netzdrosseln: http://bit.ly/CommonModeChokes_DE Kondensatoren: http://bit.ly/caps_Katalog_DE Würth Elektronik „Theoretische Grundlagen für Gleich- und Gegentaktstörungen“: http://bit.ly/askLorandt_CommonMode_DE Nützliche Application Notes: http://bit.ly/caps_Appnote_DE Bestelle hier das Fachbuch „Trilogie der induktiven Bauelemente“: http://bit.ly/Fachbuch_induktiveBauelemente_DE Vorheriges Video: http://bit.ly/WEcaps_DE Würth Elektronik auf YouTube abonnieren: http://bit.ly/WE_YT_GS Facebook: https://www.facebook.com/greatscottlab Twitter: https://twitter.com/GreatScottLab Unterstütze mich für mehr videos : https://www.patreon.com/GreatScott?ty=h In diesen Video werden wir das Mysterium des surrenden Lautsprechers lösen. Die Ursache für die Störgeräusche ist natürlich ein EMV Problem, also ein Problem der elektromagnetischen Verträglichkeit. Daher werde Ich die Gründe von EMV Problemen erläutern, Diese messen und eine technische Lösung für das bestehende Problem finden. Dabei wird es nicht nur um Netzfilter gehen, sondern Ich werde auch einen groben Überblick über andere Gebieter der EMV vermitteln. Let's get started! Danke an die Würth Elektronik eiSos Gruppe für die Unterstützung des Videos. Music: 2011 Lookalike by Bartlebeats

zvkfWfbQ4KA | 10 Nov 2019
You want to know more about the Würth Elektronik EMC components? Then click here: http://bit.ly/EMCFilterKit_EN and order your design kit. You can find the products shown in the video below: Common Mode Chokes: http://bit.ly/CommonModeChokes_EN Capacitors: http://bit.ly/caps_Catalogue_EN Würth Elektronik “Theoretical Basics for Common Mode and Differential Mode”: http://bit.ly/askLorandt_CommonMode_EN Useful application notes: http://bit.ly/caps_Appnote_EN Specialist book “Trilogy of Magnetics”: http://bit.ly/Book_TrilogyOfMagnetics_EN Previous video: http://bit.ly/WEcaps_EN Subscribe to Würth Elektronik on YouTube: http://bit.ly/WE_YT_GS Facebook: https://www.facebook.com/greatscottlab Twitter: https://twitter.com/GreatScottLab Support me for more videos: https://www.patreon.com/GreatScott?ty=h In this video we will solve the mystery of the buzzing speaker. The reason for the noises are of course EMC problems, aka electromagnetic compatibility problems. That is why I will explain the reasons for EMC problems, how to measure them and how to fix them as well. While doing so, I will not only talk about mains filter but also about other areas of the EMC. Let's get started! Thanks to the Würth Elektronik eiSos Gruppe for supporting this video. Music: 2011 Lookalike by Bartlebeats Killing Time, Kevin MacLeod (incompetech.com)
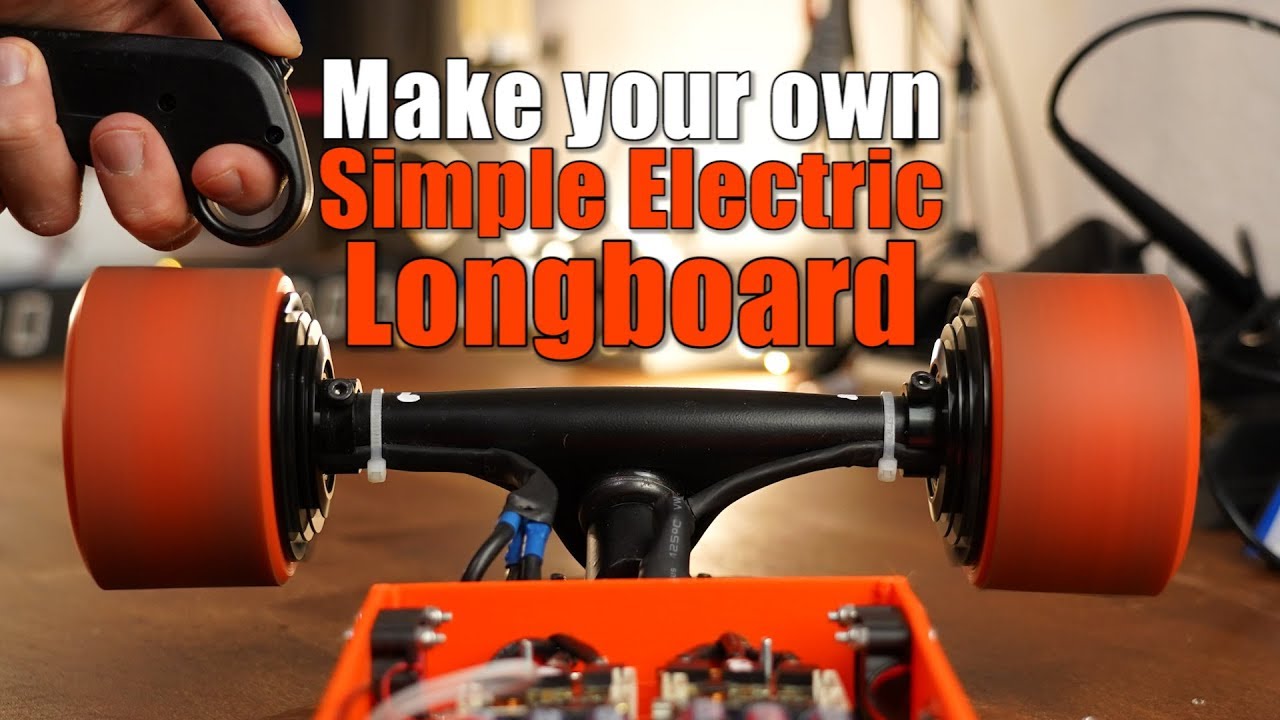
XworvxoQleY | 03 Nov 2019
$2 PCB Prototype & SMT Coupons $8 + $7: https://jlcpcb.com Previous video: https://youtu.be/yFQS_TQ4948 Previous Electric Longboard videos: https://www.youtube.com/playlist?list=PLAROrg3NQn7f8UvrzOU8rM67z1RcFHMJ9 BLDC Motor Basics video: https://youtu.be/UteZJ_7C4Mg Make your own ESC video: https://youtu.be/W9IHEqlGG1s Make your own sensored ESC video: https://youtu.be/YV-ee8wA5lI EBike Battery Pack video: https://youtu.be/b2sBhDxmPmA VESC Website: https://vesc-project.com/vesc_tool Facebook: https://www.facebook.com/greatscottlab Twitter: https://twitter.com/GreatScottLab Support me for more videos: https://www.patreon.com/GreatScott?ty=h More project information (schematic, pictures,.....) on Instructables: https://www.instructables.com/id/Make-Your-Own-Simple-Yet-Powerful-Electric-Motoriz/ Parts list (incomplete, see Instructables for more, affiliate links): Amazon.com: 1x Electric Skateboard Hub Motor Kit: https://amzn.to/34kTUjp 2x FSESC: https://amzn.to/2C3S1LP 1x Electric Skateboard Remote Controller: https://amzn.to/325YBMf 1x 6S LiPo Battery Pack: https://amzn.to/2ppZbHK 1x 12V Buck Converter: https://amzn.to/2pzGJwe 2x 30mm Fan: https://amzn.to/34lrUft 1x 80A Fuse: https://amzn.to/2oDG0cP In this project video I will be showing you how I combined easy to get components in order to create a powerful electric motorized longboard. The main components I will be talking about are BLDC hub motors, the FSESC (aka VESC), a 2.4GHz remote controller and finally a custom made Li-Ion battery pack. This project might not be the cheapest, but the end result will be very awesome and thus worth it! Let's get started! Thanks to JLCPCB for sponsoring this video Visit https://jlcpcb.com to get professional PCBs for low prices Music: 2011 Lookalike by Bartlebeats Killing Time, Kevin MacLeod (incompetech.com)

yFQS_TQ4948 | 20 Oct 2019
Visit https://flipdots.com/en/products-services/small-7-segment-displays/ to get your own mechanical 7-segment displays! (https://flip-digits.com/) Previous video: https://youtu.be/Y4-eDcaF4q4 Multiplexing video: https://youtu.be/uQMUPhyoXoE SPI video: https://youtu.be/fvOAbDMzoks I2C video: https://youtu.be/_fgWQ3TIhyE Facebook: https://www.facebook.com/greatscottlab Twitter: https://twitter.com/GreatScottLab Support me for more videos: https://www.patreon.com/GreatScott?ty=h Useful websites which were shown/used during the video: https://www.ti.com/lit/an/slla272c/slla272c.pdf http://www.circuitbasics.com/basics-uart-communication/ https://github.com/witnessmenow/arduino-youtube-api In this video I will be having a closer look at commercial mechanical 7-segment displays and find out how they work. Afterwards I will be creating a YouTube subscriber counter with them and an ESP8266 by not only finding out how the control PCB for the display works, but also by learning about the RS-485 and UART interface. Let's get started! Thanks to Alfazeta (https://flipdots.com) for sponsoring this video! Music: 2011 Lookalike by Bartlebeats

Y4-eDcaF4q4 | 13 Oct 2019
$5 discount for the first 30 to order on JLCPCB with code “JLCScott" https://jlcpcb.com/?ref=greatscott Previous video: https://youtu.be/9BeTMMI8wRc Ultrasonic Mist Maker videos: https://youtu.be/aKhPj7uFD0Y https://youtu.be/OOZi3QnnDCo Facebook: https://www.facebook.com/greatscottlab Twitter: https://twitter.com/GreatScottLab Support me for more videos: https://www.patreon.com/GreatScott?ty=h In this Halloween episode I will ditch the idea of an ultrasonic mist maker and instead focus on more common fog/smoke machines. I will show you how they use "fog juice" in order to create smoke and at the end I will come up with my own crude mini fog/smoke machine design that did actually work. Let's get started! Thanks to JLCPCB for sponsoring this video Visit https://jlcpcb.com to get professional PCBs for low prices Music: 2011 Lookalike by Bartlebeats Killing Time, Kevin MacLeod (incompetech.com)

9BeTMMI8wRc | 06 Oct 2019
$5 discount for the first 30 to order on JLCPCB with code “JLCScott" https://jlcpcb.com/?ref=greatscott Previous video: https://youtu.be/ewkj875qUmk Transformer Basics video: https://youtu.be/2cxcP5lY7K4 3D printing a motor video: https://youtu.be/AdNVg1MWc8c Facebook: https://www.facebook.com/greatscottlab Twitter: https://twitter.com/GreatScottLab Support me for more videos: https://www.patreon.com/GreatScott?ty=h Useful websites which were shown in the video: https://www.sauter-shop.de/trafobleche/ei-bleche/index.html http://www.roehrenkramladen.de/Trafowickelmaschine/Twm3.html https://www.emt-net.de/elektrobleche/Allgemeine-Informationen-zu-Elektroblechen.pdf https://www.robkalmeijer.nl/techniek/electronica/radiotechniek/hambladen/cq-dl/1987/page293/index.html http://www.jogis-roehrenbude.de/Transformator.htm In this video I will be showing you how to calculate and build a basic mains transformer with electrical steel sheets. Along the way you will learn about the number of turns and the thickness of the primary and secondary winding and also how the size of the transformer influences those values. Once the testing of the "normal" transformer is done, I will then continue by 3D printing one with ferromagnetic filament in order to find out whether it can be an alternative material. Let's get started! Thanks to JLCPCB for sponsoring this video Visit https://jlcpcb.com to get professional PCBs for low prices Music: 2011 Lookalike by Bartlebeats Killing Time, Kevin MacLeod (incompetech.com)

ewkj875qUmk | 22 Sep 2019
$5 discount for the first 50 to order on JLCPCB with the code “JLCScott" https://jlcpcb.com/?ref= greatscott Previous video: https://youtu.be/2cxcP5lY7K4 Photovoltaic Off-Grid System video: https://youtu.be/WU16AJwvNhE Li-Ion Battery Pack video: https://youtu.be/hwhqn4BmC2I EBike Battery Pack video: https://youtu.be/b2sBhDxmPmA Facebook: https://www.facebook.com/greatscottlab Twitter: https://twitter.com/GreatScottLab Support me for more videos: https://www.patreon.com/GreatScott?ty=h Here is where I got my components (for the "Powerwall") from: https://www.energusps.com/shop/product/tiny-bms-s516-30a-16 https://www.ev-power.eu/Winston-40Ah-200Ah/WB-LYP100AHA-LiFeYPO4-3-2V-100Ah-TALL.html?cur=1 https://www.voelkner.de/products/38995/Rittal-AE-1038.500-Schaltschrank-380-x-600-x-210-Stahlblech-Lichtgrau-RAL-7035-1St..html Useful websites which were shown during the video: https://www.tesla.com/powerwall https://en.wikipedia.org/wiki/Tesla_Powerwall In this project I will be creating my own DIY "Powerwall" which is basically just a container filled with batteries and a BMS. Along the way we will learn quite a bit about LiFePO4 cells and about the budget friendly, yet powerful Tiny BMS. At the end you should be able to create your own big and safe battery pack that can be for example used with a solar off grid system. Let's get started! Thanks to JLCPCB for sponsoring this video. Visit https://jlcpcb.com to get professional PCBs for low prices. Music: 2011 Lookalike by Bartlebeats

2cxcP5lY7K4 | 15 Sep 2019
JLCPCB Prototype for $2 (Any color): https://jlcpcb.com Previous video: https://youtu.be/Y1KE8eAC9Bk Complex Impedance video: https://youtu.be/W2VwAL7-8-o Wireless Energy video: https://youtu.be/ExU32UyGX6w Facebook: https://www.facebook.com/greatscottlab Twitter: https://twitter.com/GreatScottLab Support me for more videos: https://www.patreon.com/GreatScott?ty=h Useful websites about Transformer: https://de.wikipedia.org/wiki/Koerzitivfeldst%C3%A4rke#/media/Datei:B-H_loop.png https://www.robkalmeijer.nl/techniek/electronica/radiotechniek/hambladen/cq-dl/1987/page293/index.html https://www.electronics-tutorials.ws/de/transformatoren/transformator-aufbau.html http://www.christiani.de/pdf/94444_probe.pdf https://de.wikibooks.org/wiki/Physikalische_Grundlagen_von_Transformatoren http://www.joretronik.de/Web_NT_Buch/Kap1/Kapitel1.html In this video I will be conducting a couple tests with a transformer in order to not only explain how it works, but also how to design one by yourself. We will be talking about mains voltage transformer and SMPS transformers and we will find out (for example) how the size and frequency of the voltage alters the design of the transformer. At the end I will then answer the question whether it is easy to create a transformer on your own. Let's get started! Thanks to JLCPCB for sponsoring this video Visit https://jlcpcb.com to get professional PCBs for low prices Music: 2011 Lookalike by Bartlebeats Killing Time, Kevin MacLeod (incompetech.com)
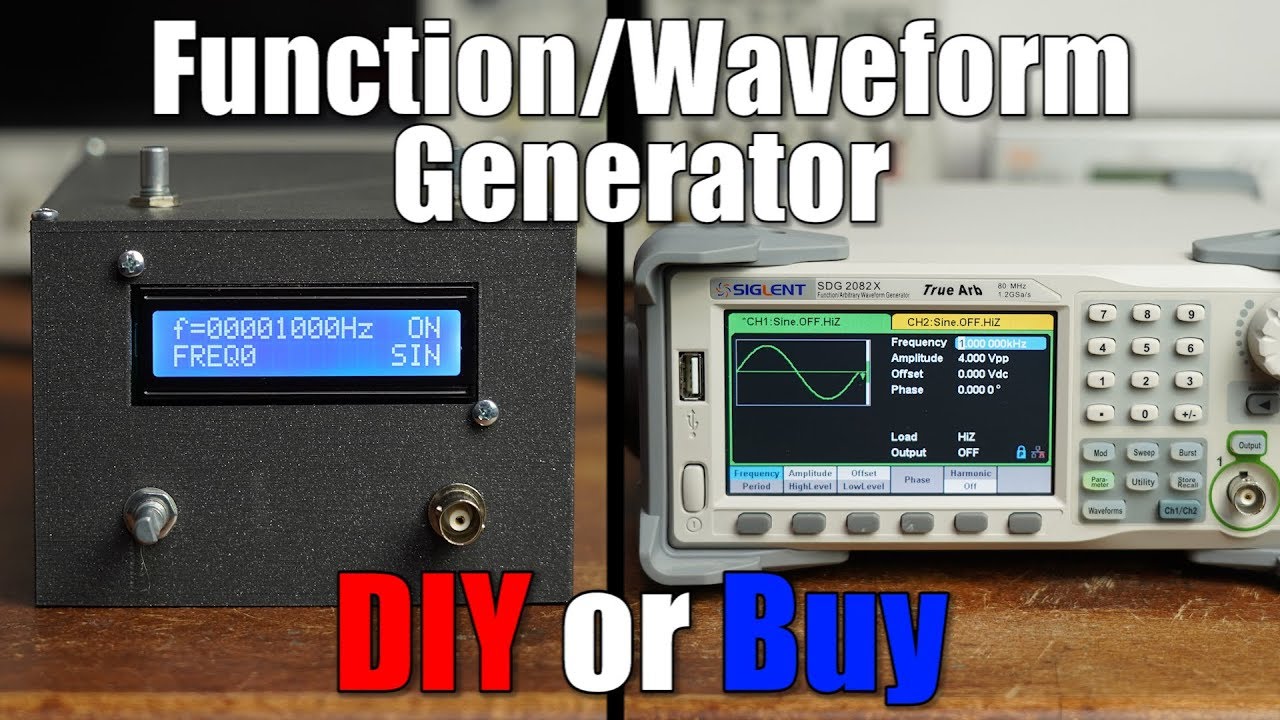
Y1KE8eAC9Bk | 08 Sep 2019
JLCPCB $2 for 5 PCBs (Any Color) : https://jlcpcb.com Previous video: https://youtu.be/_--8K1BW_O4 Facebook: https://www.facebook.com/greatscottlab Twitter: https://twitter.com/GreatScottLab Support me for more videos: https://www.patreon.com/GreatScott?ty=h Check out Cezar Chirilas article on All About Circuits: https://www.allaboutcircuits.com/projects/how-to-DIY-waveform-generator-analog-devices-ad9833-ATmega328p/ You can get the commercial function generators here (affiliate links): Siglent SDG 2082X: http://rover.ebay.com/rover/1/711-53200-19255-0/1?icep_ff3=2&pub=5575101368&toolid=10001&campid=5337582279&customid=&icep_item=233265100453&ipn=psmain&icep_vectorid=229466&kwid=902099&mtid=824&kw=lg AE20125: http://rover.ebay.com/rover/1/711-53200-19255-0/1?icep_ff3=2&pub=5575101368&toolid=10001&campid=5337582279&customid=&icep_item=260883293519&ipn=psmain&icep_vectorid=229466&kwid=902099&mtid=824&kw=lg XR-2206: http://rover.ebay.com/rover/1/711-53200-19255-0/1?icep_ff3=2&pub=5575101368&toolid=10001&campid=5337582279&customid=&icep_item=401185073102&ipn=psmain&icep_vectorid=229466&kwid=902099&mtid=824&kw=lg More project information (schematic, pictures,.....) on Instructables: https://www.instructables.com/id/DIY-FunctionWaveform-Generator/ Parts list (incomplete, see Instructables for more, affiliate links): Amazon.com: 1x 12V center tapped transformer: https://amzn.to/315KMhk 1x IEC socket: https://amzn.to/2HVm9wb 1x B40C2300 full bridge rectifier: https://amzn.to/300y2ad 1x LM7812 12V regulator: https://amzn.to/2ZJrCkR 1x LM7912 -12V regulator: https://amzn.to/31h0vtO 1x LM7805 5V regulator: https://amzn.to/2ZHiaOE 1x Capacitor kit: https://amzn.to/2ZQJZTW 1x Arduino Nano: https://amzn.to/2ZM32j6 1x Rotary Encoder: https://amzn.to/2HWJvlg 1x AD9833 DDS IC: https://amzn.to/34vh1IX 1x I2C LCD: https://amzn.to/2LDaa7L 1x TL071 OpAmp: https://amzn.to/316IUF1 1x BNC connector: https://amzn.to/2UDQK6I 1x 10k, 50k Potentiometer: https://amzn.to/2HSJu1G In this episode of DIY or Buy we will have a short look at commercial function/waveform generators in order to determine what features are important for a DIY version. Afterwards I will then show you how to create a simple function generator, the analog and digital way. At the end I will then present you a DIY DDS function generator design which can (kind of) hold up to the commercial versions. Let's get started! Thanks to JLCPCB for sponsoring this video Visit https://jlcpcb.com to get professional PCBs for low prices Music: 2011 Lookalike by Bartlebeats

57t2i7XfL1Y | 01 Sep 2019
You can get merchandise here: https://teespring.com/stores/great-scott Support me for more videos: https://www.patreon.com/GreatScott Previous video: https://youtu.be/_--8K1BW_O4 Facebook: https://www.facebook.com/greatscottlab Twitter: https://twitter.com/GreatScottLab Random/Unscripted Q&A #4: https://youtu.be/trrjQ4cN2Bc Random/Unscripted Q&A #3: https://youtu.be/j99I1EveKd4 Random/Unscripted Q&A #2: https://youtu.be/8nOXWfS1hQo Random/Unscripted Q&A: https://youtu.be/x2MEJfY45UY

_--8K1BW_O4 | 18 Aug 2019
Get your free Elektor subscription here: https://www.elektormagazine.com/news/greatscott-and-elektor Coupon code: GreatScott19! The LIDAR sensor that was used in the video: https://www.elektor.com/ydlidar-x4-lidar-360-degree-laser-range-scanner Previous video: https://youtu.be/SVLGHB2IxxU Facebook: https://www.facebook.com/greatscottlab Twitter: https://twitter.com/GreatScottLab Support me for more videos: https://www.patreon.com/GreatScott?ty=h In this video we will have a closer look at a commercial LIDAR sensor for hobbyists. We will find out how the sensor manages to measure the distance to objects placed all around it and how we can use this data with a computer and an Arduino. At the end I will then create a small robot which uses the LIDAR system to "crudely" navigate through a room. Let's get started! Thanks to Elektor for sponsoring this video! Visit https://www.elektormagazine.com/ to read their magazines and buy electronic components. Music: 2011 Lookalike by Bartlebeats Killing Time, Kevin MacLeod (incompetech.com)

SVLGHB2IxxU | 11 Aug 2019
PCB Manufacturer - $2 PCBs - JLCPCB: https://jlcpcb.com Previous video: https://youtu.be/1wzUqVFyQ7o Make your own Photovoltaic Off-Grid System: https://youtu.be/WU16AJwvNhE Facebook: https://www.facebook.com/greatscottlab Twitter: https://twitter.com/GreatScottLab Support me for more videos: https://www.patreon.com/GreatScott?ty=h More project information (schematic, pictures,.....) on Instructables: https://www.instructables.com/id/How-to-Make-a-Softstarter/ Parts list (incomplete, see Instructables for more, affiliate links): Amazon.com: 1x 12V Relay: https://amzn.to/31a5hsS 1x Power Resistor: https://amzn.to/2ZqZkHv 1x 1N4002 Diode: https://amzn.to/2YJ2eKw 1x IRFZ44N MOSFET: https://amzn.to/2YukiZP 1x 10µF Capacitor: https://amzn.to/2YH2ntX 2x 100k Resistor: https://amzn.to/2ZwpyrZ Ebay: 1x 12V Relay: http://rover.ebay.com/rover/1/711-53200-19255-0/1?icep_ff3=2&pub=5575101368&toolid=10001&campid=5337582279&customid=&icep_item=263393369331&ipn=psmain&icep_vectorid=229466&kwid=902099&mtid=824&kw=lg 1x Power Resistor: http://rover.ebay.com/rover/1/711-53200-19255-0/1?icep_ff3=2&pub=5575101368&toolid=10001&campid=5337582279&customid=&icep_item=292651817361&ipn=psmain&icep_vectorid=229466&kwid=902099&mtid=824&kw=lg 1x 1N4002 Diode: http://rover.ebay.com/rover/1/711-53200-19255-0/1?icep_ff3=2&pub=5575101368&toolid=10001&campid=5337582279&customid=&icep_item=112545063515&ipn=psmain&icep_vectorid=229466&kwid=902099&mtid=824&kw=lg 1x IRFZ44N MOSFET: http://rover.ebay.com/rover/1/711-53200-19255-0/1?icep_ff3=2&pub=5575101368&toolid=10001&campid=5337582279&customid=&icep_item=280842347588&ipn=psmain&icep_vectorid=229466&kwid=902099&mtid=824&kw=lg 1x 10µF Capacitor: http://rover.ebay.com/rover/1/711-53200-19255-0/1?icep_ff3=2&pub=5575101368&toolid=10001&campid=5337582279&customid=&icep_item=392203315804&ipn=psmain&icep_vectorid=229466&kwid=902099&mtid=824&kw=lg 2x 100k Resistor: http://rover.ebay.com/rover/1/711-53200-19255-0/1?icep_ff3=2&pub=5575101368&toolid=10001&campid=5337582279&customid=&icep_item=252838503547&ipn=psmain&icep_vectorid=229466&kwid=902099&mtid=824&kw=lg In this small project we will be having a closer look at appliances that require a softstarter in order to properly work with a limited output current system. The shown appliances in this project include an inverter, a boost converter, a power supply and a motor. We will find out why a big inrush current requires a softstarter and how we can build a simple circuit that can do this job. Let's get started! Thanks to JLCPCB for sponsoring this video Visit https://jlcpcb.com to get professional PCBs for low prices Music: 2011 Lookalike by Bartlebeats

1wzUqVFyQ7o | 04 Aug 2019
Reliable PCB Partner - $2 PCBs - JLCPCB: https://jlcpcb.com Previous video: https://youtu.be/SZYwvvh6m-s How to create a Bookshelf Speaker Boombox: https://youtu.be/vOPBkfTKzkc Electronic Basics #37: What is Impedance? (AC Resistance?): https://youtu.be/W2VwAL7-8-o Facebook: https://www.facebook.com/greatscottlab Twitter: https://twitter.com/GreatScottLab Support me for more videos: https://www.patreon.com/GreatScott?ty=h Websites which were shown during the video: https://kimmosaunisto.net/Software/Software.html In this video we will have a closer look at audio crossovers. That means I will demonstrate why they need to "split" the frequencies of your music signal and what components are capable of accomplishing this job. This way we will learn quite a lot about passive filter in order to answer the question whether it makes sense to replace an existing audio crossover or creating a DIY one. Let's get started! Thanks to JLCPCB for sponsoring this video Visit https://jlcpcb.com to get professional PCBs for low prices Music: 2011 Lookalike by Bartlebeats Killing Time, Kevin MacLeod (incompetech.com)
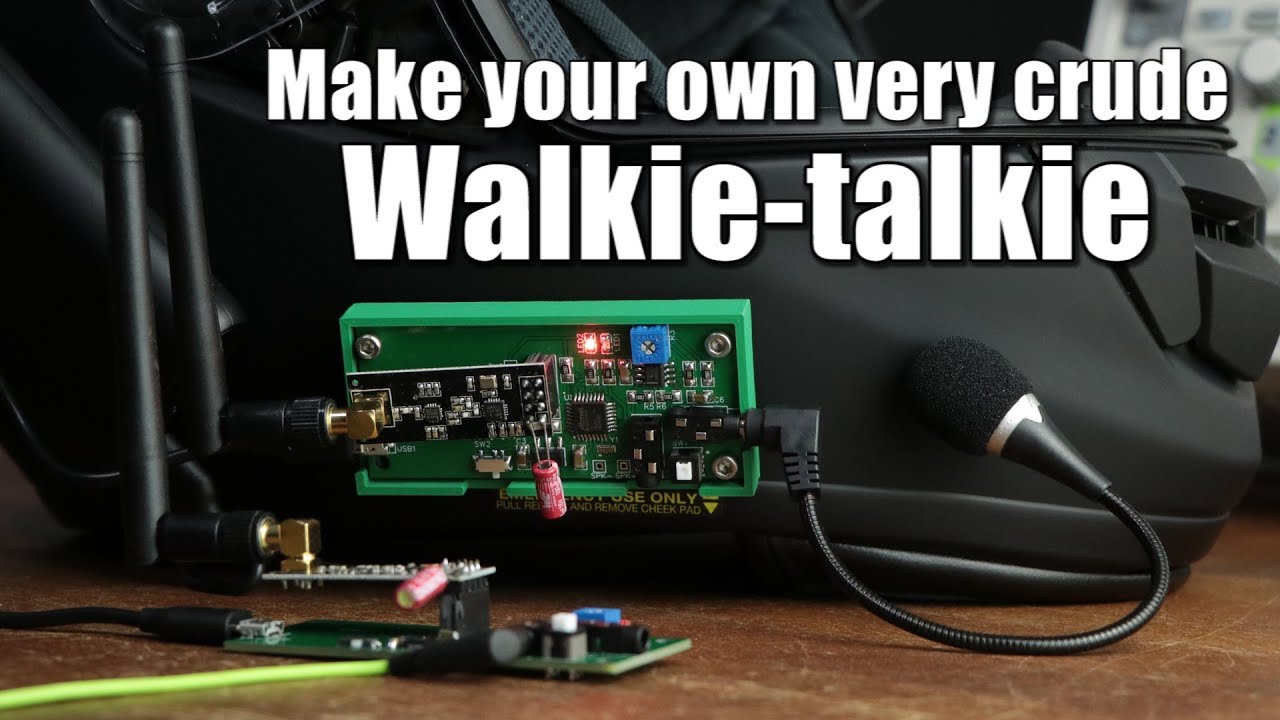
SZYwvvh6m-s | 21 Jul 2019
JLCPCB SMD assembly coming soon: https://jlcpcb.com Here is how to fix my Walkie-talkie: https://youtu.be/YJ25eQRbhaQ Previous video: https://youtu.be/0fDPBtbsUgc HACKED!: TV Remote becomes an RF Remote: https://youtu.be/Nd_Kc7BXa54 Support me for more videos: https://www.patreon.com/GreatScott Facebook: https://www.facebook.com/greatscottlab Twitter: https://twitter.com/GreatScottLab You can find the schematic & PCB design on EasyEDA: https://bit.ly/2xX307A https://bit.ly/30J6GX6 Or you can download it here: https://www.patreon.com/posts/28513352 Websites which were shown in the video: https://tmrh20.github.io/RF24Audio/ https://github.com/nRF24/RF24Audio http://www.ti.com/product/CC8520 https://en.wikipedia.org/wiki/Sampling_(signal_processing) In this project I will be showing you how I tried to create a Walkie-talkie with the Arduino development board and the nRF24. Along the way I will present you the functional principle of a Walkie-talkie and at the end create a kind of working prototype. Thanks to JLCPCB for sponsoring this video Visit https://jlcpcb.com to get professional PCBs for low prices Music: 2011 Lookalike by Bartlebeats
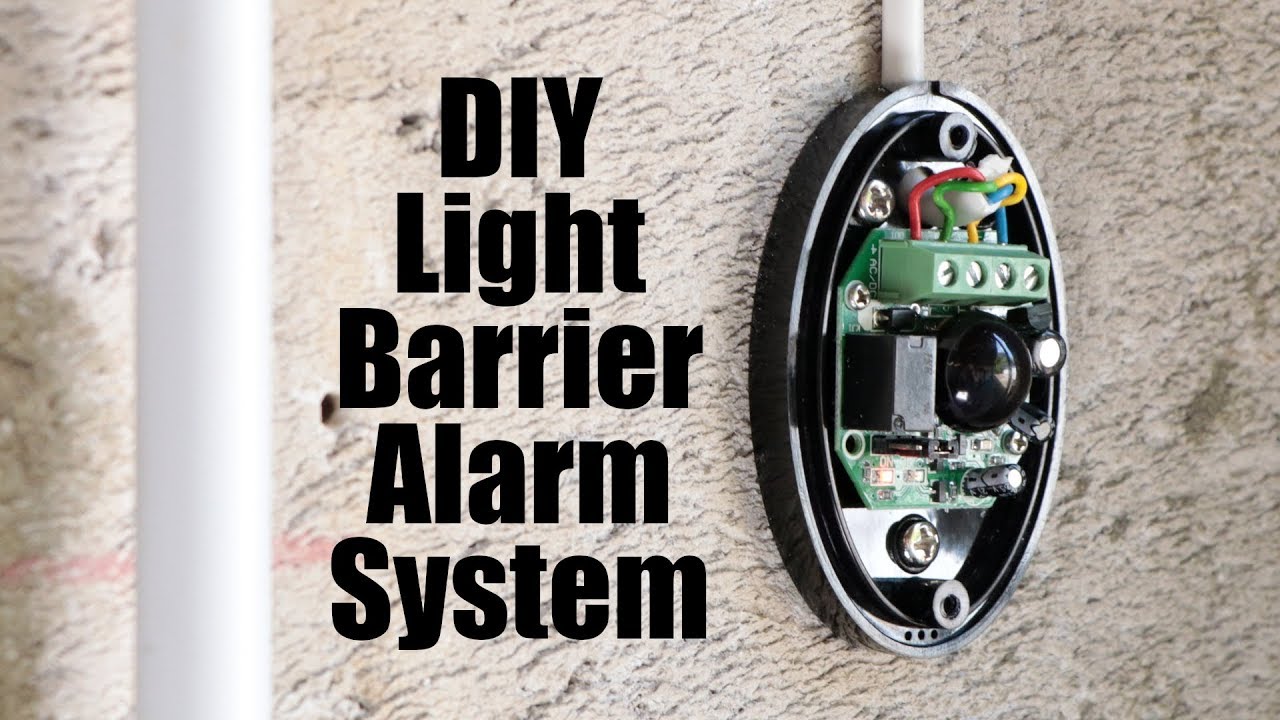
0fDPBtbsUgc | 14 Jul 2019
Controllino website: https://www.controllino.biz/ Previous video: https://youtu.be/dYnplx_DVHs Make your own Photovoltaic Off-Grid System: https://youtu.be/WU16AJwvNhE Make your own LED Stroboscope: https://youtu.be/XuZuNwRnBFQ 555 Timer Basics video: https://youtu.be/fLaexx-NMj8 555 Timer Police Siren Oscillator: https://www.electronicshub.org/police-siren-circuit-using-ne555-timer/ Support me for more videos: https://www.patreon.com/GreatScott Facebook: https://www.facebook.com/greatscottlab Twitter: https://twitter.com/GreatScottLab More project information (schematic, plans, pictures, code,.....) on Instructables: https://www.instructables.com/id/DIY-Light-Barrier-Alarm-System-With-an-Industrial-/ Parts list (incomplete, see Instructables for more, affiliate links): Amazon.com: 1x Reed switch: https://amzn.to/2lcgZU0 1x IR Light Barrier: https://amzn.to/2l8Ducv 1x 200W Boost Converter: https://amzn.to/2lfBlMj 1x 100W Siren: https://amzn.to/2l4h4ZX 2x 555 Timer: https://amzn.to/2ldaIYj 1x Resistor Kit: https://amzn.to/2ldapg7 1x Capacitor Kit: https://amzn.to/2ldaSyT Ebay: 1x Reed switch: http://rover.ebay.com/rover/1/711-53200-19255-0/1?icep_ff3=2&pub=5575101368&toolid=10001&campid=5337582279&customid=&icep_item=264392978851&ipn=psmain&icep_vectorid=229466&kwid=902099&mtid=824&kw=lg 1x IR Light Barrier: - 1x 200W Boost Converter: http://rover.ebay.com/rover/1/711-53200-19255-0/1?icep_ff3=2&pub=5575101368&toolid=10001&campid=5337582279&customid=&icep_item=173806722040&ipn=psmain&icep_vectorid=229466&kwid=902099&mtid=824&kw=lg 1x 100W Siren: http://rover.ebay.com/rover/1/711-53200-19255-0/1?icep_ff3=2&pub=5575101368&toolid=10001&campid=5337582279&customid=&icep_item=283493981436&ipn=psmain&icep_vectorid=229466&kwid=902099&mtid=824&kw=lg 2x 555 Timer: http://rover.ebay.com/rover/1/711-53200-19255-0/1?icep_ff3=2&pub=5575101368&toolid=10001&campid=5337582279&customid=&icep_item=263845762757&ipn=psmain&icep_vectorid=229466&kwid=902099&mtid=824&kw=lg 1x Resistor Kit: http://rover.ebay.com/rover/1/711-53200-19255-0/1?icep_ff3=2&pub=5575101368&toolid=10001&campid=5337582279&customid=&icep_item=362091089797&ipn=psmain&icep_vectorid=229466&kwid=902099&mtid=824&kw=lg 1x Capacitor Kit: http://rover.ebay.com/rover/1/711-53200-19255-0/1?icep_ff3=2&pub=5575101368&toolid=10001&campid=5337582279&customid=&icep_item=352574456836&ipn=psmain&icep_vectorid=229466&kwid=902099&mtid=824&kw=lg In this project I will be showing you how I combined a PLC (the Controllino) with a light barrier, a siren, a reed switch and a stroboscope light in order to create a truly robust working alarm/security system that will scare off intruders easily. Let's get started! Thanks to Controllino for sponsoring this video! Visit https://www.controllino.biz/ to get your own industrial grade PLC. Music: 2011 Lookalike by Bartlebeats

dYnplx_DVHs | 07 Jul 2019
JLCPCB - $2 PCBs for Engineers & Makers: https://jlcpcb.com Previous video: https://youtu.be/HCoHc3_4aCE Wireless Charging video: https://youtu.be/ExU32UyGX6w DIY Wireless Energy Transfer System video: https://youtu.be/3E5PUnYlaTM Hackaday article: https://hackaday.com/2014/08/19/a-mipi-dsi-display-shieldhdmi-adapter/ Support me for more videos: https://www.patreon.com/GreatScott Facebook: https://www.facebook.com/greatscottlab Twitter: https://twitter.com/GreatScottLab In this video I will take apart my old Samsung Galaxy S6 in order to find out which components I can salvage for future electronics projects. I will also answer the popular question whether you can reuse the screen and camera modules. Let's get started! Thanks to JLCPCB for sponsoring this video Visit https://jlcpcb.com to get professional PCBs for low prices Music: 2011 Lookalike by Bartlebeats Killing Time, Kevin MacLeod (incompetech.com)

HCoHc3_4aCE | 23 Jun 2019
$2 for Prototype & Best PCB Partner: https://jlcpcb.com/ Previous video: https://youtu.be/u5LYctj6Y9o Portable LED Panel video: https://youtu.be/r9GMUYa_DvY Support me for more videos: https://www.patreon.com/GreatScott Facebook: https://www.facebook.com/greatscottlab Twitter: https://twitter.com/GreatScottLab More project information (schematic, plans, pictures,.....) on Instructables: https://www.instructables.com/id/Make-Your-Own-Overhead-Camera-Rig-With-LED-Illumin/ Parts list (incomplete, see Instructables for more, affiliate links): Amazon.com: 5630 warm/pure white LED strip: https://amzn.to/2Y3SQxH 2x TLC555: https://amzn.to/2Fr5Ciq 1x TC4427 MOSFET Driver IC: https://amzn.to/2WWmvMG 2x IRLZ44N MOSFET: https://amzn.to/2Y7BX4Y 3x PCB Terminal: http://amzn.to/2mTnJmn 1x DC Jack: http://amzn.to/2lsV7TQ 4x 47µF Capacitor: http://amzn.to/2lsRMUK 2x 100nF, 2x 1nF Capacitor: http://amzn.to/2lsRMUK 4x 1N4148 Diode: http://amzn.to/2lsKbFS 2x 50kΩ Potentiometer: http://amzn.to/2mH1MtJ 2x 10Ω, 2x470Ω Resistor: http://amzn.to/2lsGIqt Ebay: 5630 warm/pure white LED strip: http://rover.ebay.com/rover/1/711-53200-19255-0/1?icep_ff3=2&pub=5575101368&toolid=10001&campid=5337582279&customid=&icep_item=172613845023&ipn=psmain&icep_vectorid=229466&kwid=902099&mtid=824&kw=lg In this project I will be showing you how to create a simple overhead camera rig. The rig can not only hold the camera right above the object you want to film, but it also features a monitor to observe the footage and LED illumination to perfectly light your scene. The main materials are PVC pipes and wood and thus this rig is pretty easy to replicate. Let's get started! Thanks to JLCPCB for sponsoring this video Visit https://jlcpcb.com to get professional PCBs for low prices Music: 2011 Lookalike by Bartlebeats

u5LYctj6Y9o | 16 Jun 2019
$2 PCB Prototype & 24 Hours Lead Time: https://jlcpcb.com/ Previous video: https://youtu.be/BhQWOv10Oag Support me for more videos: https://www.patreon.com/GreatScott Facebook: https://www.facebook.com/greatscottlab Twitter: https://twitter.com/GreatScottLab In this HACKED! episode we will have a closer look at the electric generator of an old Simson moped. I will tell you a bit about how such an electric generator creates energy and afterwards modify the Simson one. This way we will convert the 6V electrical system of the moped into a 12V one. Let's get started! Thanks to JLCPCB for sponsoring this video Visit https://jlcpcb.com to get professional PCBs for low prices Music: 2011 Lookalike by Bartlebeats Killing Time, Kevin MacLeod (incompetech.com)

BhQWOv10Oag | 09 Jun 2019
$2 PCB Prototype & 24 Hours Lead Time: https://jlcpcb.com/ Previous video: https://youtu.be/UqZ8Um5MZEA AC Light Dimmer DIY or Buy video: https://youtu.be/hGFRQcVmLNg Support me for more videos: https://www.patreon.com/GreatScott Facebook: https://www.facebook.com/greatscottlab Twitter: https://twitter.com/GreatScottLab EasyEDA project links: https://bit.ly/2WHUibn https://bit.ly/2WMFM2b More project information (schematic, code,.....) on Instructables: https://www.instructables.com/id/DIY-Trailing-Edge-Dimmer/ Parts list (incomplete, see Instructables for more, affiliate links): Amazon.com: 1 x ATtiny85: https://amzn.to/2VOFw36 1x HI-Link 12V Power Supply: https://amzn.to/3181Nb8 1x 1206 Resistor kit: https://amzn.to/2W7J6ET 1x 1206 Capacitor kit: https://amzn.to/2WfBrUX Ebay: 1 x ATtiny85: http://rover.ebay.com/rover/1/711-53200-19255-0/1?icep_ff3=2&pub=5575101368&toolid=10001&campid=5337582279&customid=&icep_item=401597431899&ipn=psmain&icep_vectorid=229466&kwid=902099&mtid=824&kw=lg 1x HI-Link 12V Power Supply: http://rover.ebay.com/rover/1/711-53200-19255-0/1?icep_ff3=2&pub=5575101368&toolid=10001&campid=5337606358&customid=&icep_item=272277083863&ipn=psmain&icep_vectorid=229466&kwid=902099&mtid=824&kw=lg 1x 1206 Resistor kit: http://rover.ebay.com/rover/1/711-53200-19255-0/1?icep_ff3=2&pub=5575101368&toolid=10001&campid=5337582279&customid=&icep_item=162634161350&ipn=psmain&icep_vectorid=229466&kwid=902099&mtid=824&kw=lg 1x 1206 Capacitor kit: http://rover.ebay.com/rover/1/711-53200-19255-0/1?icep_ff3=2&pub=5575101368&toolid=10001&campid=5337582279&customid=&icep_item=162634161350&ipn=psmain&icep_vectorid=229466&kwid=902099&mtid=824&kw=lg In this video we will have a closer look at the electrical challenges AC LED light bulbs offer when it comes to dimming them. That means I will tell you a bit about how they are built and we will also determine the differences between leading edge and trailing edge dimmers. At the end I will then show you how to create a DIY trailing edge dimmer that you can even build at home for cheap. Let's get started! Thanks to JLCPCB for sponsoring this video Visit https://jlcpcb.com to get professional PCBs for low prices Music: 2011 Lookalike by Bartlebeats

UqZ8Um5MZEA | 26 May 2019
Support me for more videos: https://www.patreon.com/GreatScott Previous video: https://youtu.be/hGFRQcVmLNg OctoPrint Tutorial video: https://youtu.be/Ijm2q8J4biM Facebook: https://www.facebook.com/greatscottlab Twitter: https://twitter.com/GreatScottLab You can get most of the components shown in this video here: (affiliate links) Amazon.com: Raspberry Pi: https://amzn.to/2vTefNo Raspberry Pi Camera: https://amzn.to/2E3fGxv Micro Switch: https://amzn.to/2HcvX58 2.5mm audio cable: https://amzn.to/2DY4FNB Ebay: Raspberry Pi: http://rover.ebay.com/rover/1/711-53200-19255-0/1?icep_ff3=2&pub=5575101368&toolid=10001&campid=5337582279&customid=&icep_item=232708265037&ipn=psmain&icep_vectorid=229466&kwid=902099&mtid=824&kw=lg Raspberry Pi Camera: http://rover.ebay.com/rover/1/711-53200-19255-0/1?icep_ff3=2&pub=5575101368&toolid=10001&campid=5337582279&customid=&icep_item=192494298739&ipn=psmain&icep_vectorid=229466&kwid=902099&mtid=824&kw=lg Micro Switch: http://rover.ebay.com/rover/1/711-53200-19255-0/1?icep_ff3=2&pub=5575101368&toolid=10001&campid=5337582279&customid=&icep_item=191674188194&ipn=psmain&icep_vectorid=229466&kwid=902099&mtid=824&kw=lg 2.5mm audio cable: http://rover.ebay.com/rover/1/711-53200-19255-0/1?icep_ff3=2&pub=5575101368&toolid=10001&campid=5337582279&customid=&icep_item=391961067471&ipn=psmain&icep_vectorid=229466&kwid=902099&mtid=824&kw=lg Amazon.de: Raspberry Pi: https://amzn.to/2LBNvfc Raspberry Pi Camera: https://amzn.to/2HfGcEE Micro Switch: https://amzn.to/2WBjKMA 2.5mm audio cable: https://amzn.to/2HepWUi In this video I will be showing you how to use a Raspberry Pi in combination with a DSLR camera to create stunning to look at timelapses of your 3D prints. That means you will learn a bit about OctoPrint, Octolapse and how to use such software to create timelapses. Let's get started! Websites which were shown during the video: https://blog.prusaprinters.org/how-to-create-beautiful-3d-print-timelapse-videos/ https://github.com/FormerLurker/Octolapse https://octoprint.org/ https://github.com/FormerLurker/Octolapse/wiki/Usage https://www.thingiverse.com/thing:274111 https://community.octoprint.org/t/how-can-i-change-mjpg-streamer-parameters-on-octopi/203 https://community.octoprint.org/t/available-mjpg-streamer-configuration-options/1106 https://www.thingiverse.com/thing:1388237 Music: 2011 Lookalike by Bartlebeats Killing Time, Kevin MacLeod (incompetech.com)

hGFRQcVmLNg | 19 May 2019
$2 for prototype & 24 hour build: https://jlcpcb.com Previous video: https://youtu.be/LGH1DIKmzBM Support me for more videos: https://www.patreon.com/GreatScott Facebook: https://www.facebook.com/greatscottlab Twitter: https://twitter.com/GreatScottLab EasyEDA project link: https://bit.ly/2Htp7Ze More project information (schematic, code,.....) on Instructables: https://www.instructables.com/id/DIY-AC-Light-Dimmer/ Capacitive Dropper Circuit video: https://youtu.be/-n22cqZkxNQ Triac video: https://youtu.be/4N1uLth1o9o Arduino 101 video: https://youtu.be/BtLwoNJ6klE Arduino 102 video: https://youtu.be/YT3birSKLLU Arduino 103 video: https://youtu.be/EVm0qVJ56II Arduino Timer video: https://youtu.be/IdL0_ZJ7V2s Parts list (incomplete, see Instructables for more, affiliate links): Amazon.com: 1 x ATtiny85: https://amzn.to/2VOFw36 1x MOC3052: https://amzn.to/2LSSWX4 1x HI-Link 5V Power Supply: https://amzn.to/2w8NvbY 1x 1206 Resistor kit: https://amzn.to/2W7J6ET 1x 1206 Capacitor kit: https://amzn.to/2WfBrUX Ebay: 1 x ATtiny85: http://rover.ebay.com/rover/1/711-53200-19255-0/1?icep_ff3=2&pub=5575101368&toolid=10001&campid=5337582279&customid=&icep_item=401597431899&ipn=psmain&icep_vectorid=229466&kwid=902099&mtid=824&kw=lg 1x MOC3052: http://rover.ebay.com/rover/1/711-53200-19255-0/1?icep_ff3=2&pub=5575101368&toolid=10001&campid=5337582279&customid=&icep_item=371917280926&ipn=psmain&icep_vectorid=229466&kwid=902099&mtid=824&kw=lg 1x HI-Link 5V Power Supply: http://rover.ebay.com/rover/1/711-53200-19255-0/1?icep_ff3=2&pub=5575101368&toolid=10001&campid=5337582279&customid=&icep_item=254192647575&ipn=psmain&icep_vectorid=229466&kwid=902099&mtid=824&kw=lg 1x 1206 Resistor kit: http://rover.ebay.com/rover/1/711-53200-19255-0/1?icep_ff3=2&pub=5575101368&toolid=10001&campid=5337582279&customid=&icep_item=162634161350&ipn=psmain&icep_vectorid=229466&kwid=902099&mtid=824&kw=lg 1x 1206 Capacitor kit: http://rover.ebay.com/rover/1/711-53200-19255-0/1?icep_ff3=2&pub=5575101368&toolid=10001&campid=5337582279&customid=&icep_item=162634161350&ipn=psmain&icep_vectorid=229466&kwid=902099&mtid=824&kw=lg In this episode of DIY or Buy we will have a closer look at a generic AC light dimmer and find out how it functions. Afterwards I will present you a more modern, digital, DIY design of such an AC light dimmer and build it in order to find out whether DIYing such a circuit truly makes sense. Let's get started! Thanks to JLCPCB for sponsoring this video Visit https://jlcpcb.com to get professional PCBs for low prices Music: 2011 Lookalike by Bartlebeats Killing Time, Kevin MacLeod (incompetech.com)
LGH1DIKmzBM | 12 May 2019
JLCPCB PCBs for $2 (any color): https://jlcpcb.com How to get PCB coupons: https://bit.ly/2GMCH9w Support me for more videos: https://www.patreon.com/GreatScott Previous video: https://youtu.be/5yjdPbCac9g Facebook: https://www.facebook.com/greatscottlab Twitter: https://twitter.com/GreatScottLab More project information (pictures, wiring scheme, ....) on Instructables: https://www.instructables.com/id/Building-a-Unique-Coffee-Table-With-an-Old-Barrel-/ Parts list (incomplete, see Instructables for more, affiliate links): Amazon.com: 1x 12V 9Ah Battery: https://amzn.to/2DGIETq Wago Terminal: https://amzn.to/2DDtKNS IEC Connector: https://amzn.to/2GS17hP 12V Power Switch: https://amzn.to/2IS8QP6 RGBW LED Strip + Controller: https://amzn.to/2VwnIc7 Battery Charger: https://amzn.to/2VBiH1V Ebay: 1x 12V 9Ah Battery: http://rover.ebay.com/rover/1/711-53200-19255-0/1?icep_ff3=2&pub=5575101368&toolid=10001&campid=5337582279&customid=&icep_item=122444075699&ipn=psmain&icep_vectorid=229466&kwid=902099&mtid=824&kw=lg Wago Terminal: http://rover.ebay.com/rover/1/711-53200-19255-0/1?icep_ff3=2&pub=5575101368&toolid=10001&campid=5337582279&customid=&icep_item=253063317158&ipn=psmain&icep_vectorid=229466&kwid=902099&mtid=824&kw=lg IEC Connector: http://rover.ebay.com/rover/1/711-53200-19255-0/1?icep_ff3=2&pub=5575101368&toolid=10001&campid=5337582279&customid=&icep_item=162042338178&ipn=psmain&icep_vectorid=229466&kwid=902099&mtid=824&kw=lg 12V Power Switch: http://rover.ebay.com/rover/1/711-53200-19255-0/1?icep_ff3=2&pub=5575101368&toolid=10001&campid=5337582279&customid=&icep_item=201414875998&ipn=psmain&icep_vectorid=229466&kwid=902099&mtid=824&kw=lg RGBW LED Strip + Controller: http://rover.ebay.com/rover/1/711-53200-19255-0/1?icep_ff3=2&pub=5575101368&toolid=10001&campid=5337582279&customid=&icep_item=323223489827&ipn=psmain&icep_vectorid=229466&kwid=902099&mtid=824&kw=lg Battery Charger: http://rover.ebay.com/rover/1/711-53200-19255-0/1?icep_ff3=2&pub=5575101368&toolid=10001&campid=5337582279&customid=&icep_item=162981943079&ipn=psmain&icep_vectorid=229466&kwid=902099&mtid=824&kw=lg In this project I will be showing you how to create a truly unique coffee table from an old barrel, wood from a euro pallet and LED lights. The work process takes around 20 hours for 2 person and requires quite a lot of steps. Let's get started! Thanks to JLCPCB for sponsoring this video Visit https://jlcpcb.com to get professional PCBs for low prices Music: 2011 Lookalike by Bartlebeats Killing Time, Kevin MacLeod (incompetech.com)

5yjdPbCac9g | 28 Apr 2019
JLCPCB Prototype for $2 (Any color): https://jlcpcb.com How to get PCB coupons: https://bit.ly/2GMCH9w Support me for more videos: https://www.patreon.com/GreatScott Previous video: https://youtu.be/2v8zBj7_sxg Facebook: https://www.facebook.com/greatscottlab Twitter: https://twitter.com/GreatScottLab You can get the Teensy LC Development Board here: (affiliate links): Amazon.com: https://amzn.to/2Ven7eO Amazon.de: https://amzn.to/2vk0EON Ebay: http://rover.ebay.com/rover/1/711-53200-19255-0/1?icep_ff3=2&pub=5575101368&toolid=10001&campid=5337582279&customid=&icep_item=112927294938&ipn=psmain&icep_vectorid=229466&kwid=902099&mtid=824&kw=lg You can find more information about the board and how to use it here: https://www.nxp.com/docs/en/data-sheet/KL26P64M48SF5.pdf https://www.pjrc.com/teensy/teensyLC.html https://forum.pjrc.com/forum.php https://www.pjrc.com/teensy/td_pulse.html https://www.pjrc.com/teensy/teensyduino.html In this video we will have a closer look at the Teensy microcontroller development board, especially the Teensy LC. That means I will show you how to program the board and how to use most of its functions. At the end I will then determine whether it is an easy to use, but powerful Arduino alternative. Let's get started! Thanks to JLCPCB for sponsoring this video Visit https://jlcpcb.com to get professional PCBs for low prices Music: 2011 Lookalike by Bartlebeats

9Wc6F9WqEyQ | 21 Apr 2019
Du möchtest mehr über die Würth Elektronik Kondensatoren erfahren? Dann klicke hier: http://bit.ly/caps_Katalog_DE und bestelle deine gewünschten Produkte als kostenlose Musterlieferung. Würth Elektronik Webinar „Was es bei der Kondensatorauswahl zu beachten gilt“: http://bit.ly/caps_Webinar_DE Nützliche Application Notes: http://bit.ly/caps_Appnote_DE Fachbuch „ABC der Kondensatoren“: http://bit.ly/caps_Fachbuch_DE Vorheriges Video: https://youtu.be/VrcmvmM7h3Y Facebook: https://www.facebook.com/greatscottlab Twitter: https://twitter.com/GreatScottLab Unterstütze mich für mehr videos : https://www.patreon.com/GreatScott?ty=h In diesen Video werden wir einen genaueren Blick auf ein Decoupling Problem einer LED Schaltung werfen. Das bedeutet, Ich werde erklären wie ein Decoupling Kondensator meine Schaltung vor der Zerstörung durch schädliche Oszillationen bewahren kann. Dabei werde Ich auch über 3 populäre Kondensatortypen, den Folien-, Keramik- und Elektrolytkondensator sprechen und erklären welcher von ihnen für welche Anwendung geeignet ist. Let's get started! Danke an die Würth Elektronik eiSos Gruppe für die Unterstützung (Sponsor) des Videos. Music: 2011 Lookalike by Bartlebeats Killing Time, Kevin MacLeod (incompetech.com)

2v8zBj7_sxg | 21 Apr 2019
You want to know more about the Würth Elektronik capacitors? Then click here: http://bit.ly/caps_Catalogue_EN and order your free samples. Würth Elektronik Webinar “How to select the proper capacitor for your design”: http://bit.ly/caps_Webinar_EN Useful application notes: http://bit.ly/caps_Appnote_EN Specialist book “ABC of capacitors”: http://bit.ly/caps_Specialistbook_EN Previous video: https://youtu.be/VrcmvmM7h3Y Facebook: https://www.facebook.com/greatscottlab Twitter: https://twitter.com/GreatScottLab Support me for more videos: https://www.patreon.com/GreatScott?ty=h In this video we will have a closer look at a decoupling problem of one of my recent LED circuits. That means I will explain how a decoupling capacitor can save my circuit from harmful oscillations. Along the way I will talk about three popular capacitor types, the film capacitor, the ceramic capacitor and the electrolytic capacitor and explain which one is best suited for which application and why. Let's get started! Thanks to the Würth Elektronik eiSos Gruppe for sponsoring this video. Music: 2011 Lookalike by Bartlebeats Killing Time, Kevin MacLeod (incompetech.com)
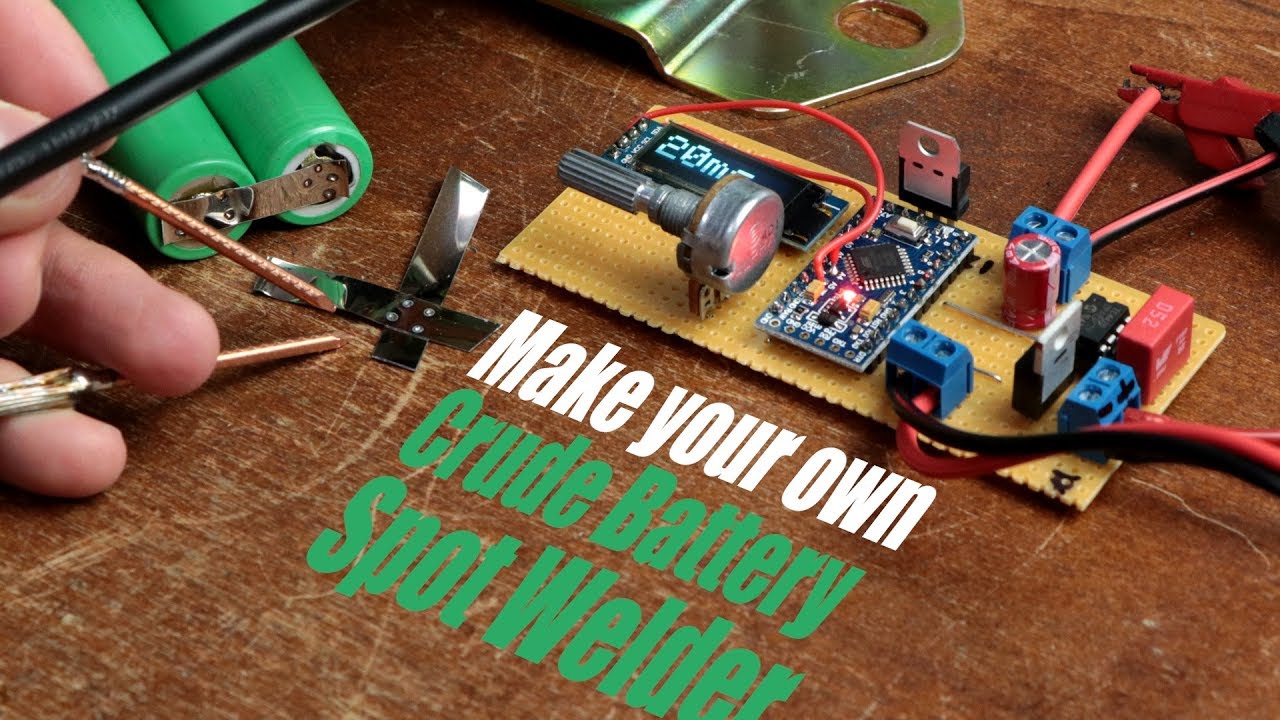
VrcmvmM7h3Y | 14 Apr 2019
JLCPCB Prototype for $2(Any Color): https://jlcpcb.com Previous video: https://youtu.be/-n22cqZkxNQ Battery Spot Welder (CD Welder): https://youtu.be/5TVNdMqVZpk Facebook: https://www.facebook.com/greatscottlab Twitter: https://twitter.com/GreatScottLab Support me for more videos: https://www.patreon.com/GreatScott?ty=h More project information (schematic, code, pictures, ....) on Instructables: https://www.instructables.com/id/Make-Your-Own-Crude-Battery-Spot-Welder-With-a-Car/ Parts list (incomplete, see Instructables for more, affiliate links): Amazon.com: 1x Arduino Pro Mini: https://amzn.to/2KyhofI 1x TC4420 MOSFET Driver: https://amzn.to/2Dd30mW 1x IRLZ34N MOSFET: https://amzn.to/2GkEzpM 1x Power Relay: https://amzn.to/2D6wEdN 1x Foot Switch: https://amzn.to/2D6wUJN 1x OLED: https://amzn.to/2IfMcQv 2x Car Battery Terminal Adapter: https://amzn.to/2X7Lg47 1x Fuse Holder + 200A Fuse: https://amzn.to/2Xc8iqF 2x Copper Nail: https://amzn.to/2DnN8hV Ebay: 1x Arduino Pro Mini: http://rover.ebay.com/rover/1/711-53200-19255-0/1?icep_ff3=2&pub=5575101368&toolid=10001&campid=5337582279&customid=&icep_item=382557228840&ipn=psmain&icep_vectorid=229466&kwid=902099&mtid=824&kw=lg 1x TC4420 MOSFET Driver: http://rover.ebay.com/rover/1/711-53200-19255-0/1?icep_ff3=2&pub=5575101368&toolid=10001&campid=5337582279&customid=&icep_item=261092836070&ipn=psmain&icep_vectorid=229466&kwid=902099&mtid=824&kw=lg 1x IRLZ34N MOSFET: http://rover.ebay.com/rover/1/711-53200-19255-0/1?icep_ff3=2&pub=5575101368&toolid=10001&campid=5337582279&customid=&icep_item=192340044427&ipn=psmain&icep_vectorid=229466&kwid=902099&mtid=824&kw=lg 1x Power Relay: http://rover.ebay.com/rover/1/711-53200-19255-0/1?icep_ff3=2&pub=5575101368&toolid=10001&campid=5337582279&customid=&icep_item=173234336725&ipn=psmain&icep_vectorid=229466&kwid=902099&mtid=824&kw=lg 1x Foot Switch: http://rover.ebay.com/rover/1/711-53200-19255-0/1?icep_ff3=2&pub=5575101368&toolid=10001&campid=5337582279&customid=&icep_item=152150884119&ipn=psmain&icep_vectorid=229466&kwid=902099&mtid=824&kw=lg 1x OLED: http://rover.ebay.com/rover/1/711-53200-19255-0/1?icep_ff3=2&pub=5575101368&toolid=10001&campid=5337582279&customid=&icep_item=401234789687&ipn=psmain&icep_vectorid=229466&kwid=902099&mtid=824&kw=lg 2x Car Battery Terminal Adapter: http://rover.ebay.com/rover/1/711-53200-19255-0/1?icep_ff3=2&pub=5575101368&toolid=10001&campid=5337582279&customid=&icep_item=113693697070&ipn=psmain&icep_vectorid=229466&kwid=902099&mtid=824&kw=lg 1x Fuse Holder + 200A Fuse: http://rover.ebay.com/rover/1/711-53200-19255-0/1?icep_ff3=2&pub=5575101368&toolid=10001&campid=5337582279&customid=&icep_item=273494982727&ipn=psmain&icep_vectorid=229466&kwid=902099&mtid=824&kw=lg 2x Copper Nail: http://rover.ebay.com/rover/1/711-53200-19255-0/1?icep_ff3=2&pub=5575101368&toolid=10001&campid=5337582279&customid=&icep_item=143193088442&ipn=psmain&icep_vectorid=229466&kwid=902099&mtid=824&kw=lg In this project I will be showing you how to create a crude but functional battery spot welder. Its mains power source is a car battery and all of its components combined cost around 90€ which makes this setup pretty low cost. So sit back and learn how to build your own with an Arduino and a few complementary components. Let's get started! Websites which were shown during the video: https://www.keenlab.de/index.php/product-category/kspot-welder-kit/ https://malectrics.eu/ https://www.instructables.com/id/DIY-Arduino-Battery-Spot-Welder/ Thanks to JLCPCB for sponsoring this video Visit https://jlcpcb.com to get professional PCBs for low prices Music: 2011 Lookalike by Bartlebeats Killing Time, Kevin MacLeod (incompetech.com)
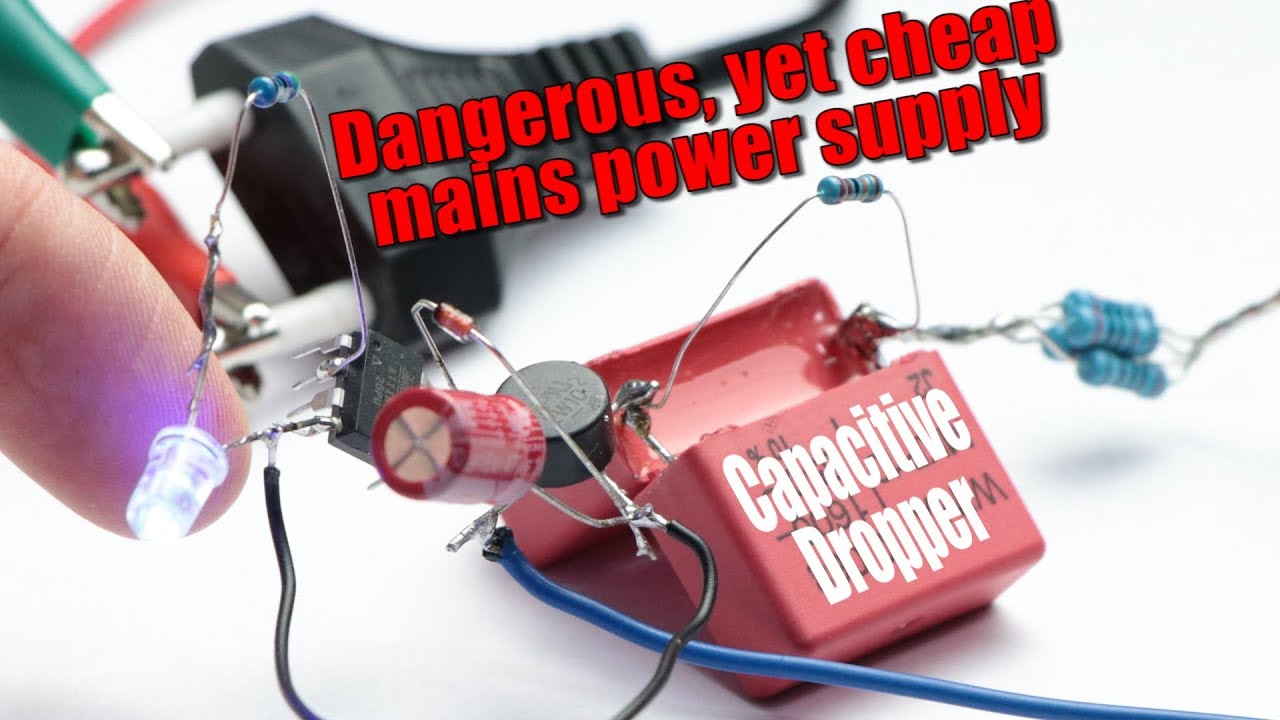
-n22cqZkxNQ | 31 Mar 2019
$2 for 10 PCBs (any colour): https://jlcpcb.com Previous video: https://youtu.be/rT-1gvkFj60 Impedance video: https://youtu.be/W2VwAL7-8-o Reactive power video: https://youtu.be/cxXmWZDwNEs Facebook: https://www.facebook.com/greatscottlab Twitter: https://twitter.com/GreatScottLab Support me for more videos: https://www.patreon.com/GreatScott?ty=h In this video I will be showing you how a capacitive dropper circuit works and how you can build your own. The circuit is basically a transformerless mains power supply that can for example turn your 230V AC to 5V DC. It only requires a few components and thus is very cheap to build. But on the other hand, it does not feature a galvanic isolation which makes it quite dangerous. So sit back and enjoy the video to learn all about the circuit! Let's get started! Thanks to JLCPCB for sponsoring this video Visit https://jlcpcb.com to get professional PCBs for low prices Music: 2011 Lookalike by Bartlebeats
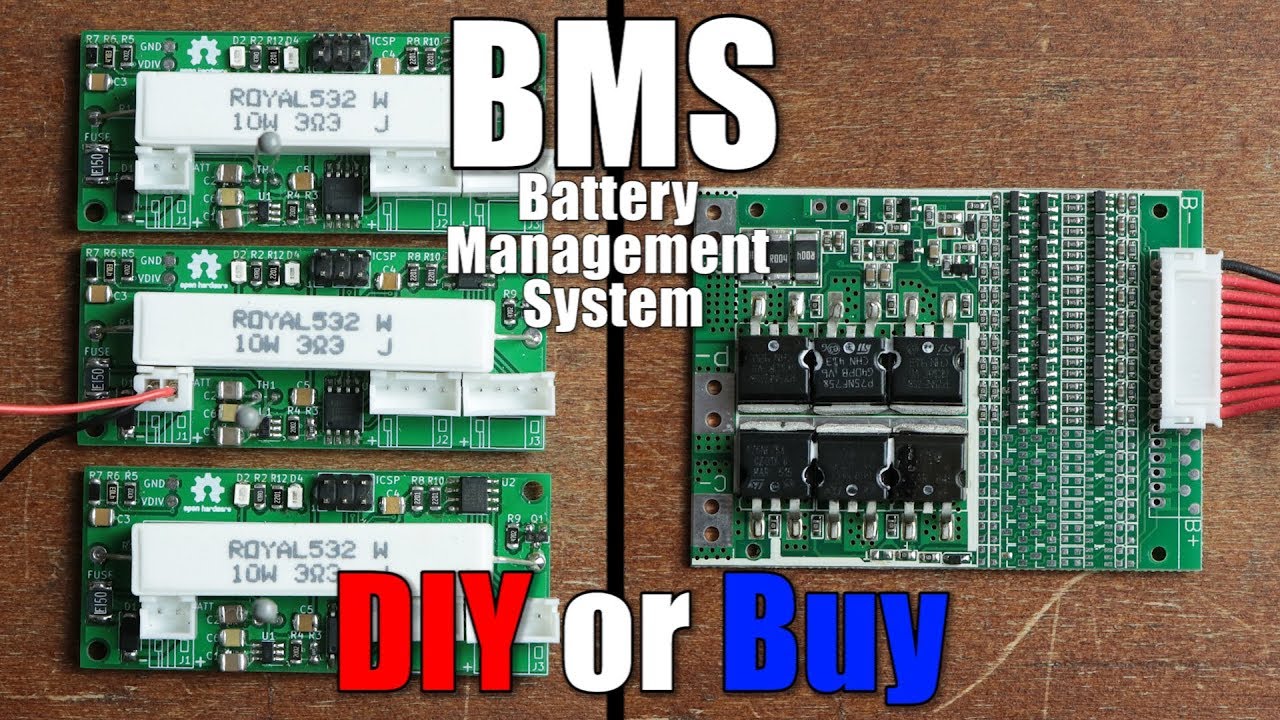
rT-1gvkFj60 | 24 Mar 2019
$2 for 10 PCBs (No fee on any color): https://jlcpcb.com Previous video: https://youtu.be/pMc_H-REIJk EBike Battery Pack video: https://youtu.be/b2sBhDxmPmA Facebook: https://www.facebook.com/greatscottlab Twitter: https://twitter.com/GreatScottLab Support me for more videos: https://www.patreon.com/GreatScott?ty=h Websites which were shown during the video: https://www.youtube.com/channel/UCZm-Gp9v5KH98bQwkAxyF3w https://www.youtube.com/channel/UCm5sG3-BXQZfVy3st2T_XKg https://github.com/stuartpittaway/diyBMS https://github.com/chickey/diyBMS http://hmsemi.com/downfile/DW01A.PDF https://datasheet.lcsc.com/szlcsc/HYCON-Tech-HY2213-BB3A_C113632.pdf In this episode of DIY or Buy we will be having a closer look at BMS or battery management systems. That means I will show you how a commercial BMS is built and how it functions. Afterwards I will then have a look at a DIY BMS project from Stuart Pittaway, build it and test it in order to find out whether you should stick to the commercial BMS or use a DIY one instead. Let's get started! Thanks to JLCPCB for sponsoring this video Visit https://jlcpcb.com to get professional PCBs for low prices Music: 2011 Lookalike by Bartlebeats Killing Time, Kevin MacLeod (incompetech.com)

pMc_H-REIJk | 17 Mar 2019
$2 for 10 PCBs with any color: https://jlcpcb.com/quote Previous video: https://youtu.be/mzPb9QLJu8k Make your own Modern LED Ceiling Lamp: https://youtu.be/O_o3akWh2DE Electronic Basics #32: Relays & Optocouplers: https://youtu.be/2BdevOmN-Zk Solid State Relay || DIY or Buy: https://youtu.be/2UtL2uAYCUA Facebook: https://www.facebook.com/greatscottlab Twitter: https://twitter.com/GreatScottLab Support me for more videos: https://www.patreon.com/GreatScott?ty=h More project information on Instructables: https://www.instructables.com/id/Repurposing-an-LED-RF-Remote-to-Control-anything/ Parts list (incomplete, see Instructables for more, affiliate links): Amazon.com: 1x Arduino Nano: https://amzn.to/2Fgn0H5 1x SSR: https://amzn.to/2W2x4sH 1x 433MHz receiver: https://amzn.to/2CmUZeM 1x PCB Terminal: https://amzn.to/2VXvdW2 1x 5V Power Supply: https://amzn.to/2TEiQl3 Ebay: 1x Arduino Nano: http://rover.ebay.com/rover/1/711-53200-19255-0/1?icep_ff3=2&pub=5575101368&toolid=10001&campid=5337582279&customid=&icep_item=381374550571&ipn=psmain&icep_vectorid=229466&kwid=902099&mtid=824&kw=lg 1x SSR: http://rover.ebay.com/rover/1/711-53200-19255-0/1?icep_ff3=2&pub=5575101368&toolid=10001&campid=5337582279&customid=&icep_item=253066802045&ipn=psmain&icep_vectorid=229466&kwid=902099&mtid=824&kw=lg 1x 433MHz receiver: http://rover.ebay.com/rover/1/711-53200-19255-0/1?icep_ff3=2&pub=5575101368&toolid=10001&campid=5337582279&customid=&icep_item=401186085838&ipn=psmain&icep_vectorid=229466&kwid=902099&mtid=824&kw=lg 1x PCB Terminal: http://rover.ebay.com/rover/1/711-53200-19255-0/1?icep_ff3=2&pub=5575101368&toolid=10001&campid=5337582279&customid=&icep_item=192346900934&ipn=psmain&icep_vectorid=229466&kwid=902099&mtid=824&kw=lg 1x 5V Power Supply: http://rover.ebay.com/rover/1/711-53200-19255-0/1?icep_ff3=2&pub=5575101368&toolid=10001&campid=5337582279&customid=&icep_item=163015315527&ipn=psmain&icep_vectorid=229466&kwid=902099&mtid=824&kw=lg In this project I will show you how to repurpose an LED RF remote in order to control pretty much anything you want with it. That means we will have a closer look at the transmission process of the RF remote, read in the sent data with an Arduino µC and use it to control a solid state relay. This way I switch on/off LED lamps, but you can use this technique for other appliances. Websites which were shown during the video: https://github.com/sui77/rc-switch https://github.com/sui77/rc-switch/wiki/KnowHow_LineCoding Thanks to JLCPCB for sponsoring this video Visit https://jlcpcb.com to get professional PCBs for low prices Music: 2011 Lookalike by Bartlebeats
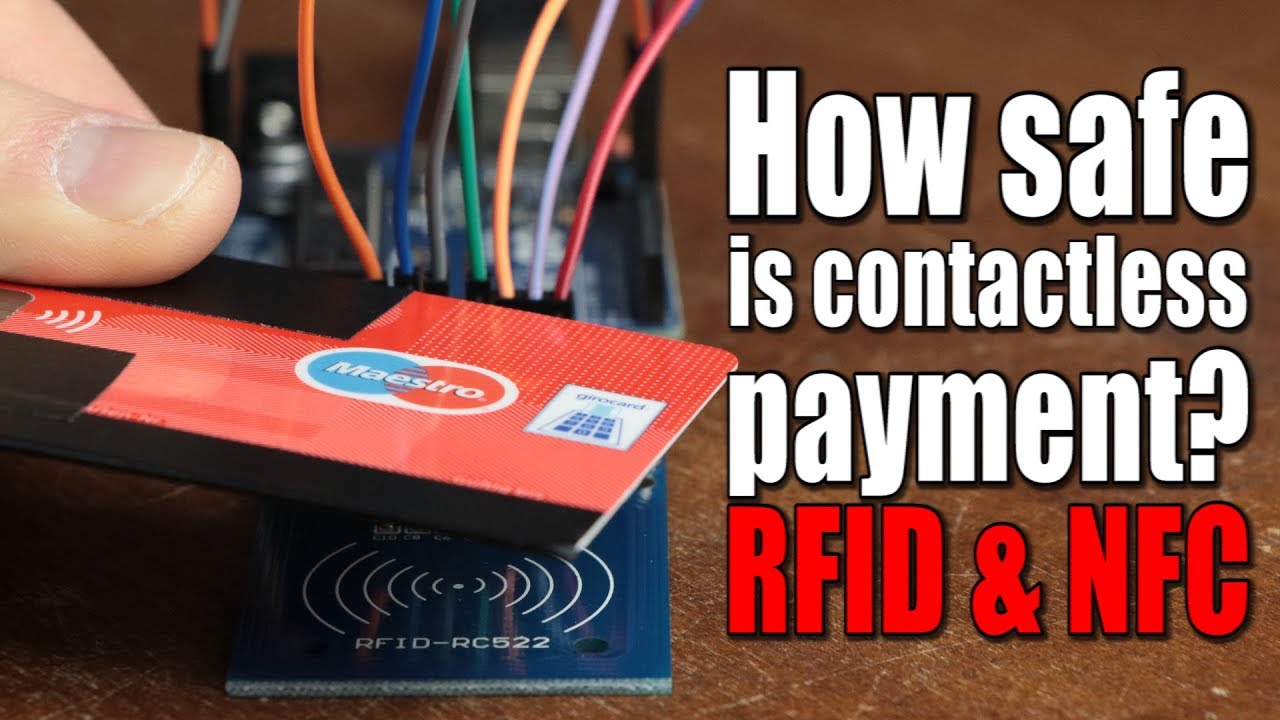
mzPb9QLJu8k | 03 Mar 2019
$2 for 10PCBs (24 Hour Fast Build): https://jlcpcb.com Previous video: https://youtu.be/O_o3akWh2DE How Does Wireless Charging Work? video: https://youtu.be/ExU32UyGX6w DIY Wireless Energy Transfer System video: https://youtu.be/3E5PUnYlaTM Facebook: https://www.facebook.com/greatscottlab Twitter: https://twitter.com/GreatScottLab Support me for more videos: https://www.patreon.com/GreatScott?ty=h You can get the components shown in the video here: (affiliate links) Amazon.com: RC522: https://amzn.to/2Uj1MgE PN532: https://amzn.to/2XBSbU2 RDM6300: https://amzn.to/2EHvExN RFID Blocking Card Holder: https://amzn.to/2tNIEf0 Ebay: RC522: http://rover.ebay.com/rover/1/711-53200-19255-0/1?icep_ff3=2&pub=5575101368&toolid=10001&campid=5337582279&customid=&icep_item=311563538690&ipn=psmain&icep_vectorid=229466&kwid=902099&mtid=824&kw=lg PN532: http://rover.ebay.com/rover/1/711-53200-19255-0/1?icep_ff3=2&pub=5575101368&toolid=10001&campid=5337582279&customid=&icep_item=141976858790&ipn=psmain&icep_vectorid=229466&kwid=902099&mtid=824&kw=lg RDM6300: http://rover.ebay.com/rover/1/711-53200-19255-0/1?icep_ff3=2&pub=5575101368&toolid=10001&campid=5337582279&customid=&icep_item=322041346304&ipn=psmain&icep_vectorid=229466&kwid=902099&mtid=824&kw=lg RFID Blocking Card Holder: http://rover.ebay.com/rover/1/711-53200-19255-0/1?icep_ff3=2&pub=5575101368&toolid=10001&campid=5337582279&customid=&icep_item=273368382986&ipn=psmain&icep_vectorid=229466&kwid=902099&mtid=824&kw=lg In this video I will be showing you how RFID and NFC works. Along the way we will have a look at a few RFID readers, how to use them for Arduino projects and in the end determine whether contactless payment is truly safe. Let's get started! Websites which were shown/used during the video: https://github.com/elechouse/PN532 https://www.boecker-systemelektronik.de/epages/63381271.sf/de_DE/?ObjectPath=/Shops/63381271/Categories/Tutorials https://www.nxp.com/docs/en/data-sheet/MFRC522.pdf http://ww1.microchip.com/downloads/en/appnotes/00680b.pdf https://www.nxp.com/docs/en/nxp/data-sheets/PN532_C1.pdf https://www.nxp.com/docs/en/data-sheet/MFRC522.pdf http://www.mouser.com/catalog/specsheets/Seeed_113020002.pdf Thanks to JLCPCB for sponsoring this video Visit https://jlcpcb.com to get professional PCBs for low prices Music: 2011 Lookalike by Bartlebeats Killing Time, Kevin MacLeod (incompetech.com)
O_o3akWh2DE | 24 Feb 2019
$2 for 10PCBs (24 Hour Fast Build): https://jlcpcb.com Previous video: https://youtu.be/wyKStRyez5Y Facebook: https://www.facebook.com/greatscottlab Twitter: https://twitter.com/GreatScottLab Support me for more videos: https://www.patreon.com/GreatScott?ty=h More project information on Instructables: https://www.instructables.com/id/Make-Your-Own-Modern-LED-Ceiling-Lamp/ Parts list (incomplete, see Instructables for more, affiliate links): Amazon.com: 1x RGBW LED Strip WIFI Kit: https://amzn.to/2EuaCCN https://amzn.to/2U6A7zg 9x GU10 LED Spots: https://amzn.to/2E8g1xW 9x GU10 Mounting Bracket: https://amzn.to/2tDeqeS 9x GU10 Socket: https://amzn.to/2H0ckgX Wago Connector: https://amzn.to/2XooANM Ebay: 1x RGBW LED Strip WIFI Kit: http://rover.ebay.com/rover/1/711-53200-19255-0/1?icep_ff3=2&pub=5575101368&toolid=10001&campid=5337582279&customid=&icep_item=283307090307&ipn=psmain&icep_vectorid=229466&kwid=902099&mtid=824&kw=lg 9x GU10 LED Spots: http://rover.ebay.com/rover/1/711-53200-19255-0/1?icep_ff3=2&pub=5575101368&toolid=10001&campid=5337582279&customid=&icep_item=272504064900&ipn=psmain&icep_vectorid=229466&kwid=902099&mtid=824&kw=lg 9x GU10 Mounting Bracket: http://rover.ebay.com/rover/1/711-53200-19255-0/1?icep_ff3=2&pub=5575101368&toolid=10001&campid=5337582279&customid=&icep_item=263404951085&ipn=psmain&icep_vectorid=229466&kwid=902099&mtid=824&kw=lg 9x GU10 Socket: http://rover.ebay.com/rover/1/711-53200-19255-0/1?icep_ff3=2&pub=5575101368&toolid=10001&campid=5337582279&customid=&icep_item=202355989824&ipn=psmain&icep_vectorid=229466&kwid=902099&mtid=824&kw=lg Wago Connector: http://rover.ebay.com/rover/1/711-53200-19255-0/1?icep_ff3=2&pub=5575101368&toolid=10001&campid=5337582279&customid=&icep_item=253063317158&ipn=psmain&icep_vectorid=229466&kwid=902099&mtid=824&kw=lg In this project I will be showing you how to create a modern LED Ceiling Lamp. It utilizes GU10 LED spots for the bottom and an RGBW LED strip for the top to create a mood light. Along the way I will show you all the important steps regarding the mechanical and electrical work. Let's get started! Websites which were shown during the video: https://www.bauhaus.info/gipskartonplatten/verotec-leichtbauplatte-veroboard-rapid/p/22912011 Thanks to JLCPCB for sponsoring this video Visit https://jlcpcb.com to get professional PCBs for low prices Music: 2011 Lookalike by Bartlebeats Killing Time, Kevin MacLeod (incompetech.com)

wyKStRyez5Y | 17 Feb 2019
$2 for 10PCBs (24 Hour Fast Build): https://jlcpcb.com Previous video: https://youtu.be/Degt4HUzWXY Facebook: https://www.facebook.com/greatscottlab Twitter: https://twitter.com/GreatScottLab Support me for more videos: https://www.patreon.com/GreatScott?ty=h More project information (wiring schematic, pictures, ....) on Instructables: https://www.instructables.com/id/Make-Your-Own-Launchpad/ You can buy the commercial launchpad here: (affiliate links) Amazon.com: https://amzn.to/2tnwKbz Amazon.de: https://amzn.to/2DFB4b0 Parts list (incomplete, see Instructables for more, affiliate links): Amazon.com: WS2812 LEDs: https://amzn.to/2DL40yc 1x Arduino Nano: https://amzn.to/2N7143m 36x Tactile Switch: https://amzn.to/2GJ0SWQ 36x 1N4002 Diode: https://amzn.to/2TSg3k6 2x Perfboard: https://amzn.to/2N9REnw Ebay: WS2812 LEDs: http://rover.ebay.com/rover/1/711-53200-19255-0/1?icep_ff3=2&pub=5575101368&toolid=10001&campid=5337582279&customid=&icep_item=292785807220&ipn=psmain&icep_vectorid=229466&kwid=902099&mtid=824&kw=lg 1x Arduino Nano: http://rover.ebay.com/rover/1/711-53200-19255-0/1?icep_ff3=2&pub=5575101368&toolid=10001&campid=5337582279&customid=&icep_item=381374550571&ipn=psmain&icep_vectorid=229466&kwid=902099&mtid=824&kw=lg 36x Tactile Switch: http://rover.ebay.com/rover/1/711-53200-19255-0/1?icep_ff3=2&pub=5575101368&toolid=10001&campid=5337582279&customid=&icep_item=273628460268&ipn=psmain&icep_vectorid=229466&kwid=902099&mtid=824&kw=lg 36x 1N4002 Diode: http://rover.ebay.com/rover/1/711-53200-19255-0/1?icep_ff3=2&pub=5575101368&toolid=10001&campid=5337582279&customid=&icep_item=401361485516&ipn=psmain&icep_vectorid=229466&kwid=902099&mtid=824&kw=lg 2x Perfboard: http://rover.ebay.com/rover/1/711-53200-19255-0/1?icep_ff3=2&pub=5575101368&toolid=10001&campid=5337582279&customid=&icep_item=232946401067&ipn=psmain&icep_vectorid=229466&kwid=902099&mtid=824&kw=lg In this episode of DIY or Buy I will be showing you how I created my own launchpad. That means I will show you how I combined a design idea with 3D Prints, WS2812 LEDs, tactile switches and an Arduino to create a proper MIDI instrument. While building I will also tell you a bit about a keyboard matrix and in the end determine what advantages the DIY Launchpad offers. Let's get started! Websites which were shown during the video: https://www.dribin.org/dave/keyboard/one_html/ https://www.midi.org/specifications-old/item/table-2-expanded-messages-list-status-bytes http://projectgus.github.io/hairless-midiserial/ https://playground.arduino.cc/code/keypad https://github.com/FastLED/FastLED https://www.tobias-erichsen.de/software/loopmidi.html https://www.image-line.com/flstudio/ Thanks to JLCPCB for sponsoring this video Visit https://jlcpcb.com to get professional PCBs for low prices Music: 2011 Lookalike by Bartlebeats Killing Time, Kevin MacLeod (incompetech.com)
PffSWOdLK2g | 06 Feb 2019
You can enter the Wave 2019 event here: http://bit.ly/GreatScottWave2019 The full overview is here: http://bit.ly/Wave2019blog Keysight Labs YouTube Channel: https://www.youtube.com/user/KeysightOscilloscope Support me for more videos: https://www.patreon.com/GreatScott Facebook: https://www.facebook.com/greatscottlab Twitter: https://twitter.com/GreatScottLab

Degt4HUzWXY | 03 Feb 2019
$2 for 10 PCBs & 24 Hour Quick Turn: https://jlcpcb.com Previous video: https://youtu.be/NQIiiRwILv4 Multiplex video: https://youtu.be/uQMUPhyoXoE Schmitt Trigger video: https://youtu.be/woTiKij76cA Arduino Timer video: https://youtu.be/IdL0_ZJ7V2s Facebook: https://www.facebook.com/greatscottlab Twitter: https://twitter.com/GreatScottLab Support me for more videos: https://www.patreon.com/GreatScott?ty=h You can download my created Arduino codes here: https://www.patreon.com/posts/24415217 In this video I will have a closer look at a custom made LED Matrix that a viewer sent me. I will show you how I reverse engineered the circuit and give you some basic information on how to control the utilized shift registers in order to display letters on the matrix. This step will also include some µC programming! Let's get started! Thanks to JLCPCB for sponsoring this video Visit https://jlcpcb.com to get professional PCBs for low prices Music: 2011 Lookalike by Bartlebeats Killing Time, Kevin MacLeod (incompetech.com)

NQIiiRwILv4 | 27 Jan 2019
Learn more about the TI Robotics System Learning Kit (TI-RSLK): http://ow.ly/n8SW30nqfWZ Previous video: https://youtu.be/trrjQ4cN2Bc STM32 Beginner's Guide: https://youtu.be/EaZuKRSvwdo Facebook: https://www.facebook.com/greatscottlab Twitter: https://twitter.com/GreatScottLab Support me for more videos: https://www.patreon.com/GreatScott?ty=h You can find more information about the MSP432 launchpad and how to use it here: http://www.ti.com/lit/ds/symlink/msp432p401r.pdf http://www.ti.com/lit/ug/slau356h/slau356h.pdf http://www.ti.com/lit/ug/slau597f/slau597f.pdf http://www.ti.com/tool/msp-exp432p401r http://software-dl.ti.com/simplelink/esd/simplelink_msp432_sdk/2.40.00.10/docs/simplelink_mcu_sdk/Quick_Start_Guide.html https://dev.ti.com/# http://energia.nu/ https://energia.nu/pinmaps/msp-exp432p401r/ In this video we will have a look at the TI-RSLK Kit and the MSP432 launchpad development board. Along the way I will show you how to easily program the MSP432 with an Arduino like IDE and Code Composer Studio and what advantages/disadvantages it offers in comparison to the traditional Arduino. Let's get started! Thanks to Texas Instruments for sponsoring this video: http://www.ti.com/tools-software/launchpads/launchpads.html Music: 2011 Lookalike by Bartlebeats

ZQjazsiyr8s | 20 Jan 2019
$2 for PCB Prototype & 24 Hour Quick Turn: https://jlcpcb.com Previous video: https://youtu.be/trrjQ4cN2Bc EBike Battery Pack video: https://youtu.be/b2sBhDxmPmA Facebook: https://www.facebook.com/greatscottlab Twitter: https://twitter.com/GreatScottLab Support me for more videos: https://www.patreon.com/GreatScott?ty=h More project information (wiring schematic, pictures, ....) on Instructables: https://www.instructables.com/id/DIY-Laptop-PowerBank/ Parts list (incomplete, see Instructables for more, affiliate links): Amazon.com: 16x INR18650-25R Li-Ion Cell: https://amzn.to/2W0rSXb 1x BMS: https://amzn.to/2SYHaJL 1x LiPo Voltage Tester: https://amzn.to/2RUYIJG 1x Current/Voltage Monitor: https://amzn.to/2U1SOnk 1x Boost Converter: https://amzn.to/2W15v3G 1x Buck Converter: https://amzn.to/2FHYSO6 2x DC Jack: https://amzn.to/2MkFjga 2x DC Jack Connector: https://amzn.to/2U0Y7TY 3x SPDT Switch: https://amzn.to/2S133ee Ebay: 16x INR18650-25R Li-Ion Cell: http://rover.ebay.com/rover/1/711-53200-19255-0/1?icep_ff3=2&pub=5575101368&toolid=10001&campid=5337582279&customid=&icep_item=362532112993&ipn=psmain&icep_vectorid=229466&kwid=902099&mtid=824&kw=lg 1x BMS: http://rover.ebay.com/rover/1/711-53200-19255-0/1?icep_ff3=2&pub=5575101368&toolid=10001&campid=5337582279&customid=&icep_item=153247639816&ipn=psmain&icep_vectorid=229466&kwid=902099&mtid=824&kw=lg 1x LiPo Voltage Tester: http://rover.ebay.com/rover/1/711-53200-19255-0/1?icep_ff3=2&pub=5575101368&toolid=10001&campid=5337582279&customid=&icep_item=142650372421&ipn=psmain&icep_vectorid=229466&kwid=902099&mtid=824&kw=lg 1x Current/Voltage Monitor: http://rover.ebay.com/rover/1/711-53200-19255-0/1?icep_ff3=2&pub=5575101368&toolid=10001&campid=5337582279&customid=&icep_item=173018633475&ipn=psmain&icep_vectorid=229466&kwid=902099&mtid=824&kw=lg 1x Boost Converter: - 1x Buck Converter: http://rover.ebay.com/rover/1/711-53200-19255-0/1?icep_ff3=2&pub=5575101368&toolid=10001&campid=5337582279&customid=&icep_item=311164183684&ipn=psmain&icep_vectorid=229466&kwid=902099&mtid=824&kw=lg 2x DC Jack: http://rover.ebay.com/rover/1/711-53200-19255-0/1?icep_ff3=2&pub=5575101368&toolid=10001&campid=5337582279&customid=&icep_item=182603218327&ipn=psmain&icep_vectorid=229466&kwid=902099&mtid=824&kw=lg 2x DC Jack Connector: http://rover.ebay.com/rover/1/711-53200-19255-0/1?icep_ff3=2&pub=5575101368&toolid=10001&campid=5337582279&customid=&icep_item=253107974183&ipn=psmain&icep_vectorid=229466&kwid=902099&mtid=824&kw=lg 3x SPDT Switch: http://rover.ebay.com/rover/1/711-53200-19255-0/1?icep_ff3=2&pub=5575101368&toolid=10001&campid=5337582279&customid=&icep_item=201414875998&ipn=psmain&icep_vectorid=229466&kwid=902099&mtid=824&kw=lg In this project I will show you how to create a Laptop PowerBank. It mainly consists of a Li-Ion battery pack and one buck and boost converter. This way the PowerBank can get charged up through the Laptop power supply and aftewards charge up the Laptop directly to give it an additional run time of 3 hours. Let's get started! Websites which were shown during the video: http://www.ti.com/lit/ds/slusak9/slusak9.pdf https://www.ti.com/lit/ds/symlink/tps51211.pdf https://drive.google.com/file/d/0B5ce5vDCG1uyZFlNa1hHdmFyYWs/view Thanks to JLCPCB for sponsoring this video Visit https://jlcpcb.com to get professional PCBs for low prices Music: 2011 Lookalike by Bartlebeats Killing Time, Kevin MacLeod (incompetech.com)
trrjQ4cN2Bc | 06 Jan 2019
Support me for more videos: https://www.patreon.com/GreatScott Siglent SDM3055 Multimeter: https://www.siglenteu.com/digital-multimeters/sdm3055-5-%C2%BD-digits-dual-display-digital-multimeters/ Previous video: https://youtu.be/UF62cxKa6tA Facebook: https://www.facebook.com/greatscottlab Twitter: https://twitter.com/GreatScottLab Random/Unscripted Q&A #3: https://youtu.be/j99I1EveKd4 Random/Unscripted Q&A #2: https://youtu.be/8nOXWfS1hQo
UF62cxKa6tA | 30 Dec 2018
$2 for 10PCBs (Not only for New Member): https://jlcpcb.com DC & Brushless DC Motor + ESC video: https://youtu.be/UteZJ_7C4Mg Make your own ESC video: https://youtu.be/W9IHEqlGG1s Timer video: https://youtu.be/IdL0_ZJ7V2s Facebook: https://www.facebook.com/greatscottlab Twitter: https://twitter.com/GreatScottLab Support me for more videos: https://www.patreon.com/GreatScott?ty=h More project information on Instructables: https://www.instructables.com/id/Make-Your-Own-ESCServo-Tester/ Parts list (incomplete, see Instructables for more, affiliate links): Amazon.com: 1x Arduino Pro Mini: https://amzn.to/2VgVfnz 1x FTDI breakout board: https://amzn.to/2VfoY08 1x I2C 16x2 LCD: https://amzn.to/2s2u1nn 1x Locking Push Button: https://amzn.to/2RlZ8sl 4x Tactile Switches: https://amzn.to/2LGL07w 1x 10k Potentiometer: https://amzn.to/2VjnOk7 1x PCB Terminal: https://amzn.to/2SwstOc Ebay: 1x Arduino Pro Mini: http://rover.ebay.com/rover/1/711-53200-19255-0/1?icep_ff3=2&pub=5575101368&toolid=10001&campid=5337582279&customid=&icep_item=252713861320&ipn=psmain&icep_vectorid=229466&kwid=902099&mtid=824&kw=lg 1x FTDI breakout board: http://rover.ebay.com/rover/1/711-53200-19255-0/1?icep_ff3=2&pub=5575101368&toolid=10001&campid=5337582279&customid=&icep_item=122971088622&ipn=psmain&icep_vectorid=229466&kwid=902099&mtid=824&kw=lg 1x I2C 16x2 LCD: http://rover.ebay.com/rover/1/711-53200-19255-0/1?icep_ff3=2&pub=5575101368&toolid=10001&campid=5337582279&customid=&icep_item=162452854154&ipn=psmain&icep_vectorid=229466&kwid=902099&mtid=824&kw=lg 1x Locking Push Button: http://rover.ebay.com/rover/1/711-53200-19255-0/1?icep_ff3=2&pub=5575101368&toolid=10001&campid=5337582279&customid=&icep_item=273547084077&ipn=psmain&icep_vectorid=229466&kwid=902099&mtid=824&kw=lg 4x Tactile Switches: http://rover.ebay.com/rover/1/711-53200-19255-0/1?icep_ff3=2&pub=5575101368&toolid=10001&campid=5337582279&customid=&icep_item=202542187869&ipn=psmain&icep_vectorid=229466&kwid=902099&mtid=824&kw=lg 1x 10k Potentiometer: http://rover.ebay.com/rover/1/711-53200-19255-0/1?icep_ff3=2&pub=5575101368&toolid=10001&campid=5337582279&customid=&icep_item=322774231676&ipn=psmain&icep_vectorid=229466&kwid=902099&mtid=824&kw=lg 1x PCB Terminal: http://rover.ebay.com/rover/1/711-53200-19255-0/1?icep_ff3=2&pub=5575101368&toolid=10001&campid=5337582279&customid=&icep_item=232727640967&ipn=psmain&icep_vectorid=229466&kwid=902099&mtid=824&kw=lg In this small project I will show you how to build a custom ESC/Servo Tester. Along the way I will show you how to setup the timer of the ATmega328P in order to create the required control signal. At the end I will then add tactile switches, a potentiometer and an LCD to adjust the control signal easily. Let's get started! Thanks to JLCPCB for sponsoring this video Visit https://jlcpcb.com to get professional PCBs for low prices Music: 2011 Lookalike by Bartlebeats Ecstatic Wave, Jens Kiilstofte https://machinimasound.com/music

kAmnU5Y96MA | 23 Dec 2018
$2 for 10PCBs (Not only for new customers): https://jlcpcb.com/e Previous video: https://youtu.be/AdNVg1MWc8c TFT LCD video: https://youtu.be/SIo_Gv7K7Fo SPI video: https://youtu.be/fvOAbDMzoks Facebook: https://www.facebook.com/greatscottlab Twitter: https://twitter.com/GreatScottLab Support me for more videos: https://www.patreon.com/GreatScott?ty=h In this video I will show you how commercial E-Paper displays work and how we can control them easily with an Arduino development board. Along the way we will discover their advantages and disadvantages and compare them to traditional TFT LCDs. Let's get started! You can buy E-Paper modules here: https://www.aliexpress.com/item/Waveshare-640x384-7-5inch-E-Ink-display-HAT-for-Raspberry-Pi-2B-3B-Zero-Zero-W/32833170391.html https://www.aliexpress.com/item/400x300-4-2inch-E-Ink-display-module-SPI-Without-backlight-Compatible-with-variuous-board-Ultra-low/32827172081.html?spm=2114.10010108.1000023.1.37e85f02VKvPjN Websites which were shown during the video: https://www.waveshare.com/w/upload/6/6a/4.2inch-e-paper-specification.pdf https://www.waveshare.com/wiki/4.2inch_e-Paper_Module https://www.waveshare.com/product/modules/oleds-lcds/e-paper/4.2inch-e-paper-module.htm https://www.waveshare.com/product/modules/oleds-lcds/e-paper/7.5inch-e-paper-hat.htm Thanks to JLCPCB for sponsoring this video Visit https://jlcpcb.com to get professional PCBs for low prices Music: 2011 Lookalike by Bartlebeats

AdNVg1MWc8c | 16 Dec 2018
$2 for 10PCBs (Not only for new customers): https://jlcpcb.com/e Previous video: https://youtu.be/kEttqWJrdww How to rewind a BLDC Motor: https://youtu.be/KZ4cylB114E Christoph Laimer videos: https://youtu.be/WEEDJiC8Jqc https://youtu.be/YsSm65DAcCg Facebook: https://www.facebook.com/greatscottlab Twitter: https://twitter.com/GreatScottLab Support me for more videos: https://www.patreon.com/GreatScott?ty=h Websites which were shown during the video: https://youtu.be/WEEDJiC8Jqc https://youtu.be/YsSm65DAcCg https://www.proto-pasta.com/pages/magnetic-iron-pla http://www.openscad.org/ https://www.thingiverse.com/thing:59997 In this project I will have a look at the proto pasta magnetic iron filament and see whether it is possible to create a BLDC Motor with it. Along the way we will learn a bit about BLDC Motors, 3D Printing and finally how to not test motors properly. Let's get started! Thanks to JLCPCB for sponsoring this video Visit https://jlcpcb.com to get professional PCBs for low prices Music: 2011 Lookalike by Bartlebeats Killing Time, Kevin MacLeod (incompetech.com)

kEttqWJrdww | 09 Dec 2018
$2 for 10 PCBs & 24 Hour Production: https://jlcpcb.com/e Previous video: https://youtu.be/cxXmWZDwNEs Solar Panel Basics video: https://youtu.be/sU-hSFFwSmo LiPo Charge, Protect, Boost project: https://youtu.be/Fj0XuYiE7HU Facebook: https://www.facebook.com/greatscottlab Twitter: https://twitter.com/GreatScottLab Support me for more videos: https://www.patreon.com/GreatScott?ty=h You can get the buy option here: http://rover.ebay.com/rover/1/711-53200-19255-0/1?icep_ff3=2&pub=5575101368&toolid=10001&campid=5337606358&customid=&icep_item=292699173707&ipn=psmain&icep_vectorid=229466&kwid=902099&mtid=824&kw=lg EasyEDA project files: https://easyeda.com/GreatScott/SolarLiPoChargeProtectBoost More project information on Instructables: https://www.instructables.com/id/DIY-Solar-Battery-Charger-LiPoLi-Ion/ Websites which were shown during the video: http://www.consonance-elec.com/index-E.html In this episode of DIY or Buy I will have a look at a commercial solar battery charger. That means I will conduct a few tests with it and afterwards create my own DIY version that improves the functionality of such a solar battery charger. And after finishing testing the DIY boad, I will conclude whether DIY or Buy is the winner. Let's get started! Thanks to JLCPCB for sponsoring this video Visit https://jlcpcb.com to get professional PCBs for low prices Music: 2011 Lookalike by Bartlebeats Killing Time, Kevin MacLeod (incompetech.com)
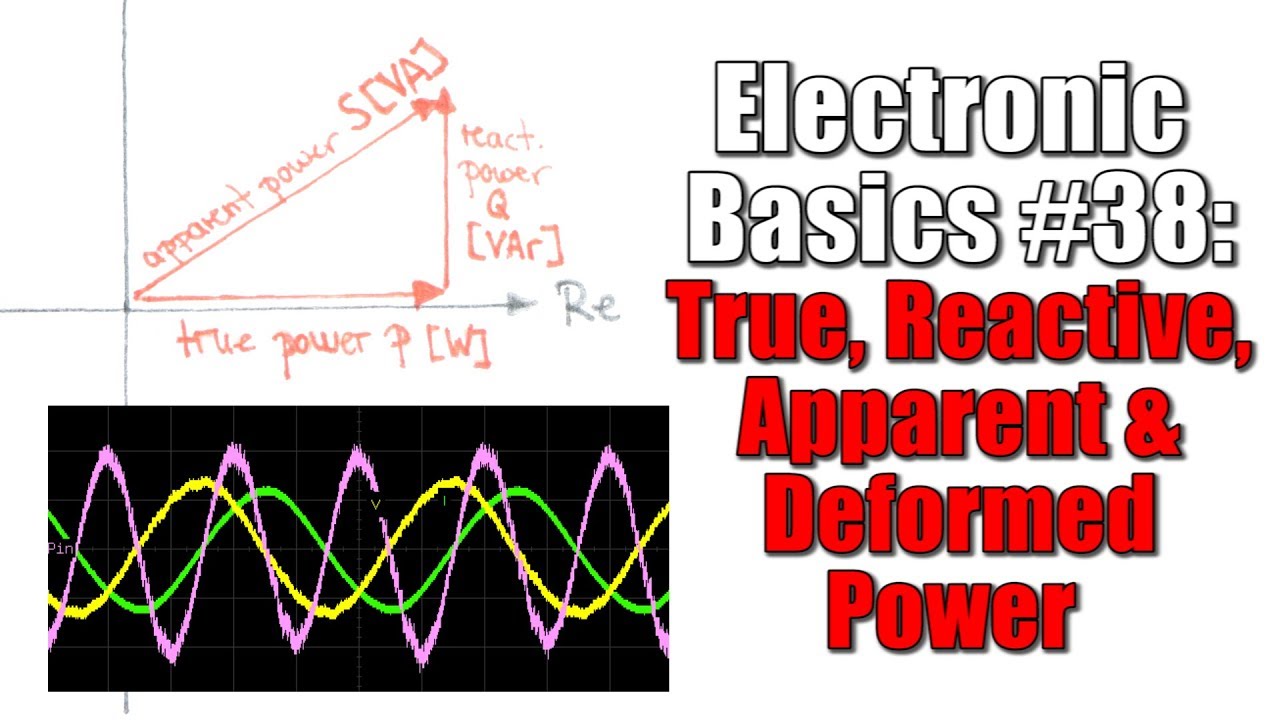
cxXmWZDwNEs | 02 Dec 2018
Previous video: https://youtu.be/3fpsInXqo1E Impedance video: https://youtu.be/W2VwAL7-8-o Facebook: https://www.facebook.com/greatscottlab Twitter: https://twitter.com/GreatScottLab Support me for more videos: https://www.patreon.com/GreatScott?ty=h In this electronic basics episode I will tell you all about the different kinds of power that exist. That includes true, reactive, apparent and deformed power. Along the way, I will demonstrate how reactive power gets produced and ways to counteract it. At the end you should understand that all kinds of reactive power are a problem for our power grid. Music: 2011 Lookalike by Bartlebeats Killing Time, Kevin MacLeod (incompetech.com)
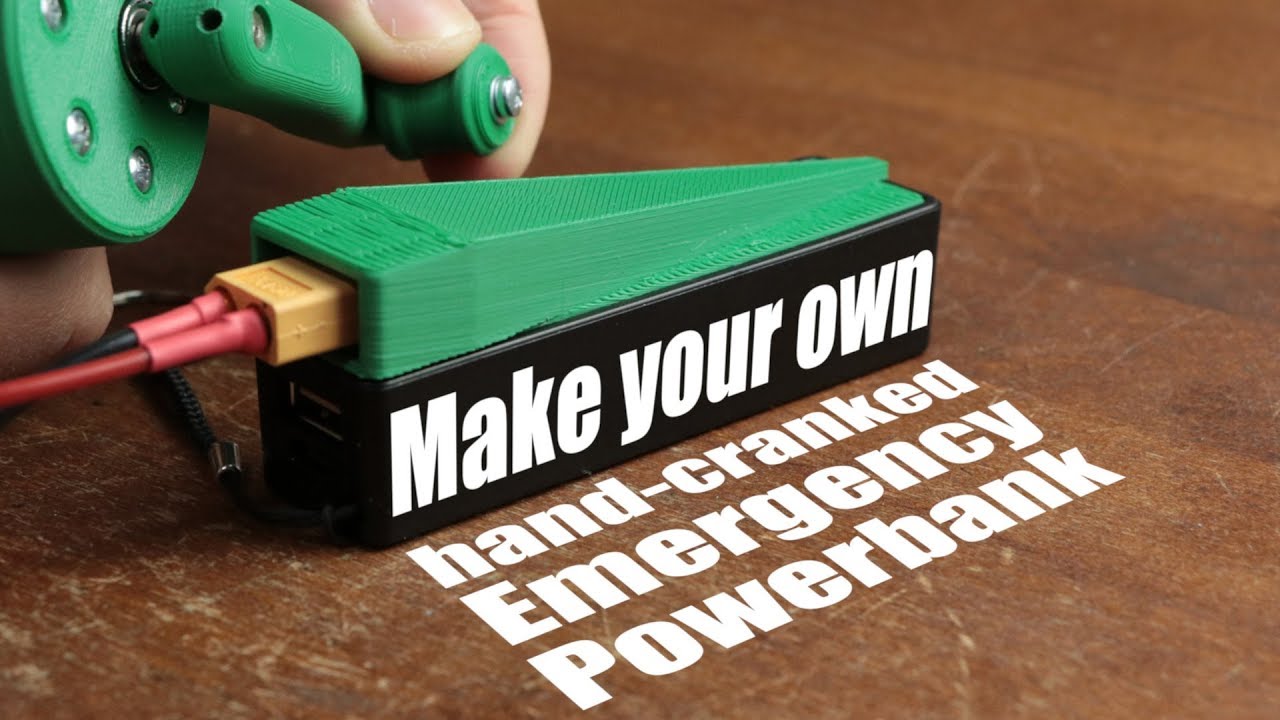
3fpsInXqo1E | 25 Nov 2018
$2 for 10PCBs & Free 24H Expedited (5pcs): https://jlcpcb.com Previous video: https://youtu.be/Dn2PFebi2ww Motor rewind video: https://youtu.be/KZ4cylB114E Facebook: https://www.facebook.com/greatscottlab Twitter: https://twitter.com/GreatScottLab Support me for more videos: https://www.patreon.com/GreatScott?ty=h More project information (.stl files, parts list, pictures,.....) on Instructables: https://www.instructables.com/id/Make-Your-Own-Hand-cranked-Emergency-Powerbank/ Parts list (incomplete, see Instructables for more, affiliate links): Amazon.com: 1x Powerbank: - 2x XT60 Connector: https://amzn.to/2DHgecI 1x 1N4002 Diode: https://amzn.to/2PMJZjL 1x 470uF 35V Capacitor: https://amzn.to/2P0765c 1x 12V DC Motor (200RPM): https://amzn.to/2OZ8XXV Ebay: 1x Powerbank: http://rover.ebay.com/rover/1/711-53200-19255-0/1?icep_ff3=2&pub=5575101368&toolid=10001&campid=5337582279&customid=&icep_item=253801859319&ipn=psmain&icep_vectorid=229466&kwid=902099&mtid=824&kw=lg 2x XT60 Connector: http://rover.ebay.com/rover/1/711-53200-19255-0/1?icep_ff3=2&pub=5575101368&toolid=10001&campid=5337582279&customid=&icep_item=122827868480&ipn=psmain&icep_vectorid=229466&kwid=902099&mtid=824&kw=lg 1x 1N4002 Diode: http://rover.ebay.com/rover/1/711-53200-19255-0/1?icep_ff3=2&pub=5575101368&toolid=10001&campid=5337582279&customid=&icep_item=283175287842&ipn=psmain&icep_vectorid=229466&kwid=902099&mtid=824&kw=lg 1x 470uF 35V Capacitor: http://rover.ebay.com/rover/1/711-53200-19255-0/1?icep_ff3=2&pub=5575101368&toolid=10001&campid=5337582279&customid=&icep_item=260824182372&ipn=psmain&icep_vectorid=229466&kwid=902099&mtid=824&kw=lg 1x 12V DC Motor (200RPM): http://rover.ebay.com/rover/1/711-53200-19255-0/1?icep_ff3=2&pub=5575101368&toolid=10001&campid=5337582279&customid=&icep_item=123007977255&ipn=psmain&icep_vectorid=229466&kwid=902099&mtid=824&kw=lg In this project I will show you how to create a hand-cranked generator along with a modified powerbank. This way you can charge up your powerbank in an emergency situation without the need of a socket. Along the way I will also tell you why BLDC motors are terrible hand-cranked generators. Let's get started! Thanks to JLCPCB for sponsoring this video Visit https://jlcpcb.com to get professional PCBs for low prices Music: 2011 Lookalike by Bartlebeats

Dn2PFebi2ww | 18 Nov 2018
Fast Prototype Option ($2 for 10 PCBs): https://jlcpcb.com Previous video: https://youtu.be/78WgdXpAVxw Square Wave Inverter video: https://youtu.be/zASxHFxf6oY Arduino Timer video: https://youtu.be/IdL0_ZJ7V2s Facebook: https://www.facebook.com/greatscottlab Twitter: https://twitter.com/GreatScottLab Support me for more videos: https://www.patreon.com/GreatScott?ty=h Websites which were mentioned/shown in the video: https://github.com/Terbytes/Arduino-Atmel-sPWM http://www.egmicro.com/download/EG8010_SPWM_V2_2.pdf http://www.egmicro.com/download/EGP1000W_manual_20110509.pdf http://www.egmicro.com/download/EGS001_datasheet_v1_2.pdf In this video I will tell you the basics about SPWM and show you how we can use it to create a pure sine wave. Afterwards we will have a closer look at the EGS002 which is a cheap SPWM driver board from China. I will create a DIY pure sine wave inverter with it and show you why it is not really a decent alternative to commercial inverters. Thanks to JLCPCB for sponsoring this video Visit https://jlcpcb.com to get professional PCBs for low prices Music: 2011 Lookalike by Bartlebeats

78WgdXpAVxw | 11 Nov 2018
Fast & Cheapest PCB Service: https://jlcpcb.com Previous video: https://youtu.be/KZ4cylB114E Water & Electronics video: https://youtu.be/pGLUsQozT94 Facebook: https://www.facebook.com/greatscottlab Twitter: https://twitter.com/GreatScottLab Support me for more videos: https://www.patreon.com/GreatScott?ty=h Websites which were mentioned/shown in the video: http://pim.meguin.de/pidoc/P002001/8757-MeguinTransformatorenoelJ10-18.0-en.pdf http://www.internetprodukte.de/meguin/8757 In this video I will show you why oil and electronics can sometimes represent a useful combination. Along the way I will perform a couple of experiments with the oil in order to determine its resistance as well as its cooling capacity. Let's get started! Thanks to JLCPCB for sponsoring this video Visit https://jlcpcb.com to get professional PCBs for low prices Music: 2011 Lookalike by Bartlebeats Killing Time, Kevin MacLeod (incompetech.com)
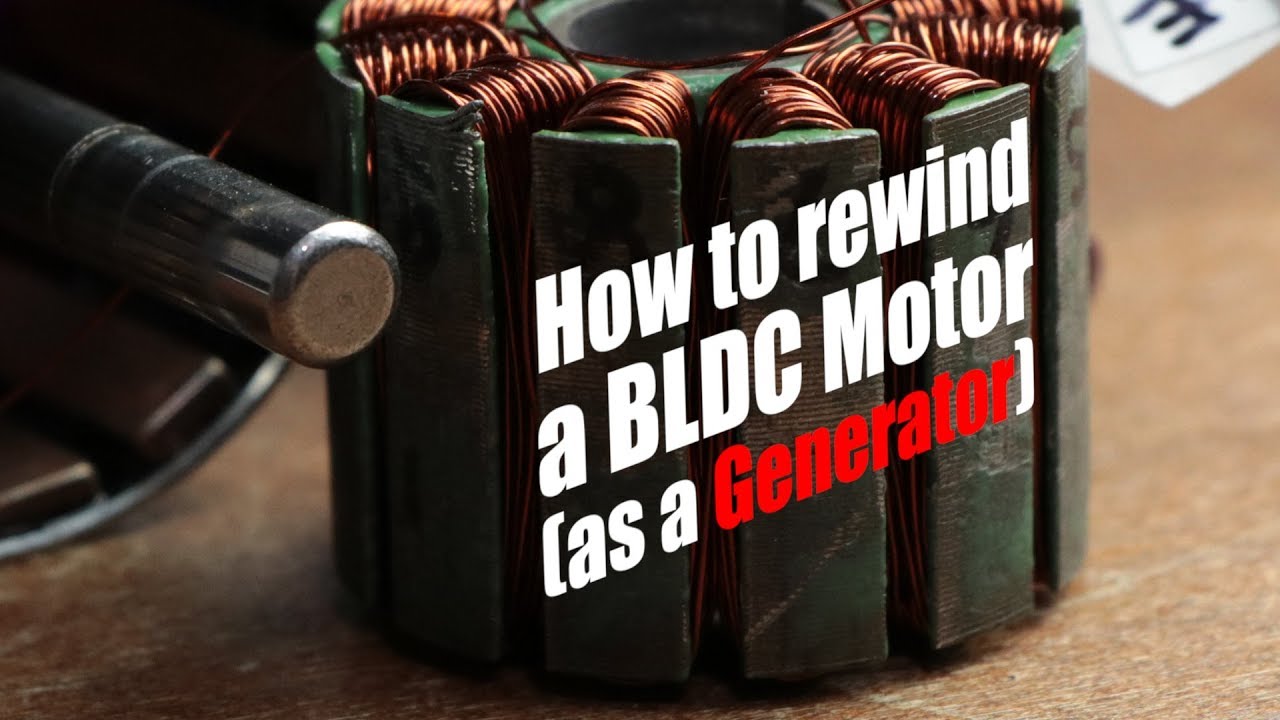
KZ4cylB114E | 04 Nov 2018
$2 for 10 PCBs & $6 for stencil: https://jlcpcb.com Previous video: https://youtu.be/OOZi3QnnDCo Motor type Generator video: https://youtu.be/cJ_vDA7xsGs Facebook: https://www.facebook.com/greatscottlab Twitter: https://twitter.com/GreatScottLab Support me for more videos: https://www.patreon.com/GreatScott?ty=h Websites which were mentioned/shown in the video: https://www.e-modelisme.com/komodo-kit-moteur-brushless-item-kh257dn50-p-574.html?language=en https://drive.google.com/file/d/0B6UdtMHx3ZujUDA0YXN3b0lJRzQ/view https://www.instructables.com/id/Make-Your-Own-Miniature-Electric-Hub-Motor/ In this video I will show you how you can disassemble a BLDC Motor and in which manner you have to rewind its copper wires (motor phases) in order to lower the kV rating of the Motor. This way the motor features a lower maximum RPM and thus can be easier utilized as a generator. Along the way you will also learn a bit about the delta and star wiring of such a motor and their advantages. Thanks to JLCPCB for sponsoring this video Visit https://jlcpcb.com to get professional PCBs for low prices Music: 2011 Lookalike by Bartlebeats Ecstatic Wave, Jens Kiilstofte https://machinimasound.com/music

OOZi3QnnDCo | 28 Oct 2018
$2 for 10 PCBs & $6 for stencil: https://jlcpcb.com Previous video: https://youtu.be/W2VwAL7-8-o Ultrasonic Mist Maker DIY or Buy: https://youtu.be/aKhPj7uFD0Y Facebook: https://www.facebook.com/greatscottlab Twitter: https://twitter.com/GreatScottLab Support me for more videos: https://www.patreon.com/GreatScott?ty=h More project information (schematic, parts list, pictures,.....) on Instructables: https://www.instructables.com/id/Make-Your-Own-Super-Simple-Ultrasonic-Mist-Maker/ You can get the ultrasonic mist maker circuit featured in the video here (affiliate links): Ebay: http://rover.ebay.com/rover/1/711-53200-19255-0/1?icep_ff3=2&pub=5575101368&toolid=10001&campid=5337582279&customid=&icep_item=311855277557&ipn=psmain&icep_vectorid=229466&kwid=902099&mtid=824&kw=lg Amazon.com: https://amzn.to/2SpA3u1 Parts list (incomplete, see Instructables for more, affiliate links): Amazon.com: 1x NE555: https://amzn.to/2SomFXi 1x IRLZ44N: https://amzn.to/2EPIQ65 1x 113kHz Piezoelectric Disc: https://amzn.to/2yBdaLQ 1x 5kΩTrimmer: https://amzn.to/2EOJxwi 1x 10Ω Resistor: https://amzn.to/2qfdKKL 1x 220µH Inductor: https://amzn.to/2qgZoJL 2x 100nF, 1x 10nF Capacitor: https://amzn.to/2Sl1NjA Ebay: 1x NE555: http://rover.ebay.com/rover/1/711-53200-19255-0/1?icep_ff3=2&pub=5575101368&toolid=10001&campid=5337582279&customid=&icep_item=381374644111&ipn=psmain&icep_vectorid=229466&kwid=902099&mtid=824&kw=lg 1x IRLZ44N: http://rover.ebay.com/rover/1/711-53200-19255-0/1?icep_ff3=2&pub=5575101368&toolid=10001&campid=5337582279&customid=&icep_item=261074291323&ipn=psmain&icep_vectorid=229466&kwid=902099&mtid=824&kw=lg 1x 113kHz Piezoelectric Disc: http://rover.ebay.com/rover/1/711-53200-19255-0/1?icep_ff3=2&pub=5575101368&toolid=10001&campid=5337582279&customid=&icep_item=332140756939&ipn=psmain&icep_vectorid=229466&kwid=902099&mtid=824&kw=lg 1x 5kΩTrimmer: http://rover.ebay.com/rover/1/711-53200-19255-0/1?icep_ff3=2&pub=5575101368&toolid=10001&campid=5337582279&customid=&icep_item=202371078005&ipn=psmain&icep_vectorid=229466&kwid=902099&mtid=824&kw=lg 1x 10Ω Resistor: http://rover.ebay.com/rover/1/711-53200-19255-0/1?icep_ff3=2&pub=5575101368&toolid=10001&campid=5337582279&customid=&icep_item=251790713275&ipn=psmain&icep_vectorid=229466&kwid=902099&mtid=824&kw=lg 1x 220µH Inductor: http://rover.ebay.com/rover/1/711-53200-19255-0/1?icep_ff3=2&pub=5575101368&toolid=10001&campid=5337582279&customid=&icep_item=400985273603&ipn=psmain&icep_vectorid=229466&kwid=902099&mtid=824&kw=lg 2x 100nF, 1x 10nF Capacitor: http://rover.ebay.com/rover/1/711-53200-19255-0/1?icep_ff3=2&pub=5575101368&toolid=10001&campid=5337582279&customid=&icep_item=221372015123&ipn=psmain&icep_vectorid=229466&kwid=902099&mtid=824&kw=lg In this project I will be showing you how to create a simple driver circuit for a 113kHz ultrasonic piezoelectric disc. The circuit basically consists of a 555 timer circuit, a MOSFET and a couple of complementary components. Along the way I will also show you how the commercial product works. Let's get started! Thanks to JLCPCB for sponsoring this video Visit https://jlcpcb.com to get professional PCBs for low prices Music: 2011 Lookalike by Bartlebeats

W2VwAL7-8-o | 21 Oct 2018
Just $2 for 10 quality PCBs: http://jlcpcb.com Previous video: https://youtu.be/XuZuNwRnBFQ Inductor basics video: https://youtu.be/kdrP9WbJIb8 Capacitor basics video: https://youtu.be/otQGdPLyF3w Resistor basics video: https://youtu.be/7w5I-KbJ1Sg Facebook: https://www.facebook.com/greatscottlab Twitter: https://twitter.com/GreatScottLab Support me for more videos: https://www.patreon.com/GreatScott?ty=h In this episode of Electronic Basics I will tell you all about the concept of Impedance. That means I will demonstrate how capacitors and inductors act as "resistors" with an AC voltage and thus change the magnitude and phase of the current flow. Afterwards I will show you a simple impedance calculation with a resistor and capacitor in series. And at the end you will understand that the Impedance is an important concept when it comes to AC circuits with R,L,C components. Thanks to JLCPCB for sponsoring this video Visit https://jlcpcb.com to get professional PCBs for low prices Music: 2011 Lookalike by Bartlebeats

XuZuNwRnBFQ | 14 Oct 2018
JLCPCB - $2 for 10 PCBs: https://jlcpcb.com Previous video: https://youtu.be/daS2CE-zFNo 555 Timer video: https://youtu.be/fLaexx-NMj8 Arduino Timer video: https://youtu.be/IdL0_ZJ7V2s Facebook: https://www.facebook.com/greatscottlab Twitter: https://twitter.com/GreatScottLab Support me for more videos: https://www.patreon.com/GreatScott?ty=h More project information (schematic, parts list, code, pictures,.....) on Instructables: https://www.instructables.com/id/Make-Your-Own-LED-Stroboscope/ Parts list (incomplete, see Instructables for more, affiliate links): Amazon.com: 1x TLC555: https://amzn.to/2CfibN7 1x TC4420: https://amzn.to/2CGUf69 1x IRLZ44N MOSFET: https://amzn.to/2yfLGLS 1x 100W High Power LED: https://amzn.to/2CajcWF 1x 7815 Voltage Regulator: https://amzn.to/2ISY9cx 1x 50k Potentiometer: https://amzn.to/2pQSCdC 1x 25k Potentiometer: https://amzn.to/2PxGIAy 2x 1N4148 Diodes: https://amzn.to/2ybVKp9 2x 4.7uF, 1x 100uF Capacitor: https://amzn.to/2pSwjUS 1x 0.1uF, 1x 470nF Capacitor: https://amzn.to/2PwRaZe Ebay: 1x TLC555: http://rover.ebay.com/rover/1/711-53200-19255-0/1?icep_ff3=2&pub=5575101368&toolid=10001&campid=5337582279&customid=&icep_item=170881262435&ipn=psmain&icep_vectorid=229466&kwid=902099&mtid=824&kw=lg 1x TC4420: http://rover.ebay.com/rover/1/711-53200-19255-0/1?icep_ff3=2&pub=5575101368&toolid=10001&campid=5337582279&customid=&icep_item=261092836070&ipn=psmain&icep_vectorid=229466&kwid=902099&mtid=824&kw=lg 1x IRLZ44N MOSFET: http://rover.ebay.com/rover/1/711-53200-19255-0/1?icep_ff3=2&pub=5575101368&toolid=10001&campid=5337582279&customid=&icep_item=261074291323&ipn=psmain&icep_vectorid=229466&kwid=902099&mtid=824&kw=lg 1x 100W High Power LED: http://rover.ebay.com/rover/1/711-53200-19255-0/1?icep_ff3=2&pub=5575101368&toolid=10001&campid=5337582279&customid=&icep_item=202040668603&ipn=psmain&icep_vectorid=229466&kwid=902099&mtid=824&kw=lg 1x 7815 Voltage Regulator: http://rover.ebay.com/rover/1/711-53200-19255-0/1?icep_ff3=2&pub=5575101368&toolid=10001&campid=5337582279&customid=&icep_item=280951245486&ipn=psmain&icep_vectorid=229466&kwid=902099&mtid=824&kw=lg 1x 50k Potentiometer: http://rover.ebay.com/rover/1/711-53200-19255-0/1?icep_ff3=2&pub=5575101368&toolid=10001&campid=5337582279&customid=&icep_item=122861048818&ipn=psmain&icep_vectorid=229466&kwid=902099&mtid=824&kw=lg 1x 25k Potentiometer: http://rover.ebay.com/rover/1/711-53200-19255-0/1?icep_ff3=2&pub=5575101368&toolid=10001&campid=5337582279&customid=&icep_item=301657236589&ipn=psmain&icep_vectorid=229466&kwid=902099&mtid=824&kw=lg 2x 1N4148 Diodes: http://rover.ebay.com/rover/1/711-53200-19255-0/1?icep_ff3=2&pub=5575101368&toolid=10001&campid=5337582279&customid=&icep_item=201415000130&ipn=psmain&icep_vectorid=229466&kwid=902099&mtid=824&kw=lg 2x 4.7uF, 1x 100uF Capacitor: http://rover.ebay.com/rover/1/711-53200-19255-0/1?icep_ff3=2&pub=5575101368&toolid=10001&campid=5337582279&customid=&icep_item=252355714446&ipn=psmain&icep_vectorid=229466&kwid=902099&mtid=824&kw=lg 1x 0.1uF, 1x 470nF Capacitor: http://rover.ebay.com/rover/1/711-53200-19255-0/1?icep_ff3=2&pub=5575101368&toolid=10001&campid=5337582279&customid=&icep_item=191381494567&ipn=psmain&icep_vectorid=229466&kwid=902099&mtid=824&kw=lg In this project I will show you how the stroboscopic effect works and how we can use it to determine the RPM of a motor. Also I will be showing you how to create a simple LED stroboscope at home by utilizing an Arduino or a 555 Timer circuit. Let's get started! Thanks to JLCPCB for sponsoring this video Visit https://jlcpcb.com to get professional PCBs for low prices Music: 2011 Lookalike by Bartlebeats Killing Time, Kevin MacLeod (incompetech.com)
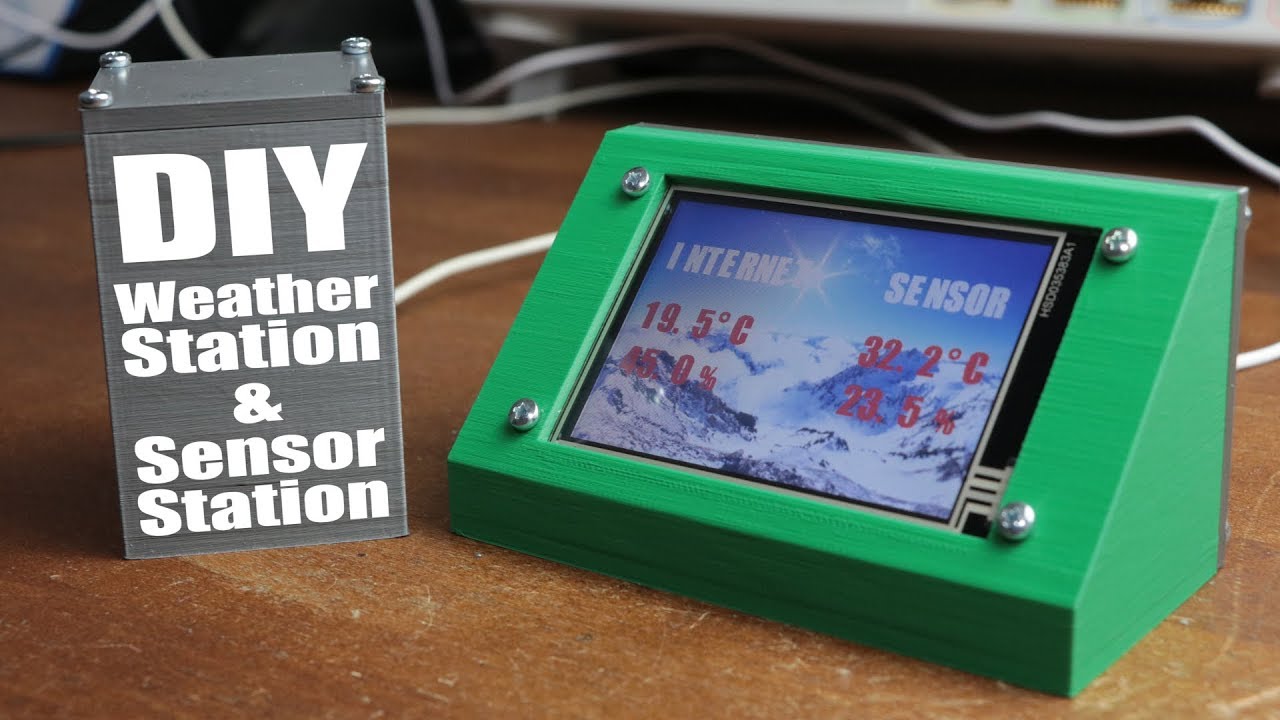
daS2CE-zFNo | 07 Oct 2018
Previous video: https://youtu.be/Nhy6g9wGHow Facebook: https://www.facebook.com/greatscottlab Twitter: https://twitter.com/GreatScottLab Support me for more videos: https://www.patreon.com/GreatScott?ty=h The background pictures were made by Tom Wendlandt and you can download them for free on Instructables More project information (schematic, parts list, code, pictures,.....) on Instructables: https://www.instructables.com/id/DIY-Weather-Station-WiFi-Sensor-Station/ Parts list (incomplete, see Instructables for more, affiliate links): Amazon.com: 3x Wemos D1 Minis: https://amzn.to/2E3AzuR 2x 1N4148 Diodes: https://amzn.to/2BZMgjy 2x Micro USB Breakout Boards: https://amzn.to/2QyrOdE 1x Nextion LCD: https://amzn.to/2IJqvWg 1x BME280 Sensor: https://amzn.to/2Qv19hJ Ebay: 3x Wemos D1 Minis: http://rover.ebay.com/rover/1/711-53200-19255-0/1?icep_ff3=2&pub=5575101368&toolid=10001&campid=5337582279&customid=&icep_item=183166459914&ipn=psmain&icep_vectorid=229466&kwid=902099&mtid=824&kw=lg 2x 1N4148 Diodes: http://rover.ebay.com/rover/1/711-53200-19255-0/1?icep_ff3=2&pub=5575101368&toolid=10001&campid=5337582279&customid=&icep_item=201415000130&ipn=psmain&icep_vectorid=229466&kwid=902099&mtid=824&kw=lg 2x Micro USB Breakout Boards: http://rover.ebay.com/rover/1/711-53200-19255-0/1?icep_ff3=2&pub=5575101368&toolid=10001&campid=5337582279&customid=&icep_item=292318719339&ipn=psmain&icep_vectorid=229466&kwid=902099&mtid=824&kw=lg 1x Nextion LCD: http://rover.ebay.com/rover/1/711-53200-19255-0/1?icep_ff3=2&pub=5575101368&toolid=10001&campid=5337582279&customid=&icep_item=152947277092&ipn=psmain&icep_vectorid=229466&kwid=902099&mtid=824&kw=lg 1x BME280 Sensor: http://rover.ebay.com/rover/1/711-53200-19255-0/1?icep_ff3=2&pub=5575101368&toolid=10001&campid=5337582279&customid=&icep_item=281916017609&ipn=psmain&icep_vectorid=229466&kwid=902099&mtid=824&kw=lg In this project I will show you how to create a weather station along with a WiFi sensor station. The sensor station measures local temperature and humidity data and sends it, through WiFi, to the weather station. The weather station then displays the data on its LCD screen. It also grabs the current temperature and humidity data in your city from the Internet and displays it as well on the LCD screen. Let's get started! Websites which were shown/used in the video (useful): https://educ8s.tv/esp8266-weather-display/ https://www.itead.cc/wiki/Nextion_Editor_Quick_Start_Guide#Flash_Project_firmware_from_SD_card https://www.instructables.com/id/Arduino-Weather-Station-With-a-Nextion-Display/ https://www.instructables.com/id/WiFi-Communication-Between-Two-ESP8266-Based-MCU-T/ https://www.instructables.com/id/Solar-Powered-WiFi-Weather-Station/ https://github.com/esp8266/Arduino https://github.com/sparkfun/SparkFun_BME280_Arduino_Library Music: 2011 Lookalike by Bartlebeats
Nhy6g9wGHow | 30 Sep 2018
Trinamic Website: https://www.trinamic.com/ How to set up the TMC4671 FOC Servo Controller video: https://youtu.be/g2BHEdvW9bU Previous video: https://youtu.be/zASxHFxf6oY Sensorless ESC video: https://youtu.be/W9IHEqlGG1s Sensored ESC video: https://youtu.be/YV-ee8wA5lI Facebook: https://www.facebook.com/greatscottlab Twitter: https://twitter.com/GreatScottLab Support me for more videos: https://www.patreon.com/GreatScott?ty=h In this video I will show you how Field Oriented Control (FOC) works and what advantages it offers in comparison to traditional ESCs. Along the way I will also present the TMC-4671 IC from Trinamics which features hardware that offers the FOC functionality for motors. Websites which were shown/used in the video (useful): https://www.db-thueringen.de/servlets/MCRFileNodeServlet/dbt_derivate_00013770/ilm1-2007000172.pdf https://www.roboteq.com/index.php/applications/100-how-to/359-field-oriented-control-foc-made-ultra-simple https://www.maccon.de/fileadmin/redaktion/downloads/Produkte/Antriebselektronik/Copley_drives/Field-Oriented-Control.pdf https://www.trinamic.com/fileadmin/assets/Products/ICs_Documents/TMC4671_datasheet_v1.03.pdf Thanks to Trinamic Motion Control for sponsoring this video Visit https://www.trinamic.com/ to get awesome motor control ICs Music: 2011 Lookalike by Bartlebeats
zASxHFxf6oY | 23 Sep 2018
Fast Prototype Option ($2 for 10 PCBs): https://jlcpcb.com Previous video: https://youtu.be/7Tk5ghH_U2s Afrotechmods video: https://youtu.be/5QaKiXRa-n0 Facebook: https://www.facebook.com/greatscottlab Twitter: https://twitter.com/GreatScottLab Support me for more videos: https://www.patreon.com/GreatScott?ty=h You can get more information (schematic, code,....) about my inverter circuit here: https://www.patreon.com/posts/21571279 In this video I will show you how to create a decent low voltage inverter circuit which outputs a modified square wave. Along the way though, I will also connect this low voltage signal to a transformer in order to bring it up to mains voltage levels. This way I will be showing you how unsafe and dangerous such a DIY mains voltage inverter circuit can be. Let's get started! Thanks to JLCPCB for sponsoring this video Visit https://jlcpcb.com to get professional PCBs for low prices Music: 2011 Lookalike by Bartlebeats Killing Time, Kevin MacLeod (incompetech.com)

7Tk5ghH_U2s | 16 Sep 2018
$2 for PCB Prototype (100% tested): https://jlcpcb.com Previous video: https://youtu.be/kJXRyWQgOY4 ElectroBOOM video: https://youtu.be/At0advb9_fA Facebook: https://www.facebook.com/greatscottlab Twitter: https://twitter.com/GreatScottLab Support me for more videos: https://www.patreon.com/GreatScott?ty=h Websites which were shown in the video (useful): http://blog.deconinck.info/post/2017/12/22/18650-Battery-charger-reverse-polarity-protection https://www.infineon.com/dgdl/Reverse-Batery-Protection-Rev2.pdf?fileId=db3a304412b407950112b41887722615 In this video I will show you how I repaired my lab bench power supply which got damaged through a battery which I connected the wrong way around. Along the way I will show you different reverse voltage protection techniques and show you their advantages and disadvantages. This way you will hopefully never damage your lab bench power supply like I did. Thanks to JLCPCB for sponsoring this video Visit https://jlcpcb.com to get professional PCBs for low prices Music: 2011 Lookalike by Bartlebeats

kJXRyWQgOY4 | 09 Sep 2018
Previous video: https://youtu.be/fvOAbDMzoks Li-Ion video: https://youtu.be/bNNWbm681AI Li-Po video: https://youtu.be/osfgkFyq7lA Facebook: https://www.facebook.com/greatscottlab Twitter: https://twitter.com/GreatScottLab Support me for more videos: https://www.patreon.com/GreatScott?ty=h ProLogium Website: http://www.prologium.com/ In this video we will have a closer look at solid state lithium batteries, in particular LCBs (lithium ceramic batteries). We will determine their volumetric and gravimetric energy density and compare them to Li-Ion and Li-Po batteries. At the end we will conduct a couple of mechanical and electrical stress tests in order to demonstrate the big strength of this battery type, its safety. Music: 2011 Lookalike by Bartlebeats Killing Time, Kevin MacLeod (incompetech.com)
fvOAbDMzoks | 02 Sep 2018
$2 for 10 PCBs (10cm*10cm): https://jlcpcb.com Previous video: https://youtu.be/VwCHtwskzLA Electronic Basics #19: I2C and how to use it: https://youtu.be/_fgWQ3TIhyE Facebook: https://www.facebook.com/greatscottlab Twitter: https://twitter.com/GreatScottLab Support me for more videos: https://www.patreon.com/GreatScott?ty=h Websites which were shown in the video: https://www.maximintegrated.com/en/products/digital/real-time-clocks/DS3234.html https://datasheets.maximintegrated.com/en/ds/DS3234.pdf https://arduino.stackexchange.com/questions/16348/how-do-you-use-spi-on-an-arduino https://github.com/sparkfun/DeadOn_RTC/blob/v1.1/Libraries/DeadOn_RTC/examples/set_and_read_time/set_and_read_time.ino https://learn.sparkfun.com/tutorials/deadon-rtc-breakout-hookup-guide/using-the-sparkfun-ds3234-arduino-library In this Electronic Basics episode I will present you the most important facts about the communication protocol SPI and how we can use it with an Arduino and an RTC IC. Thanks to JLCPCB for sponsoring this video Visit https://jlcpcb.com to get professional PCBs for low prices Music: 2011 Lookalike by Bartlebeats Ecstatic Wave, Jens Kiilstofte https://machinimasound.com/music
VwCHtwskzLA | 26 Aug 2018
Special $2 for 10 PCBs(100*100mm): https://jlcpcb.com Previous video: https://youtu.be/SIo_Gv7K7Fo Constant Current Load video: https://youtu.be/8uBcywBUTkw Cocktail Machine video: https://youtu.be/Z7GkGeZrb2Y Motorized Camera Slider video: https://youtu.be/XtpOl8FpkB8 Facebook: https://www.facebook.com/greatscottlab Twitter: https://twitter.com/GreatScottLab Support me for more videos: https://www.patreon.com/GreatScott?ty=h More project information (schematic, parts list, pictures,.....) on Instructables: https://www.instructables.com/id/DIY-Adjustable-Constant-Load-Current-Power/ Parts list (incomplete, see Instructables for more, affiliate links): Amazon.com: 1x Arduino Nano: https://amzn.to/2PzA0ue 1x 16x2 I2C LCD: https://amzn.to/2o9Ms7N 1x Rotary Encoder: https://amzn.to/2wdvDNH 1x TC4420 MOSFET Driver: https://amzn.to/2PCV8Qf 1x IRFZ44N MOSFET: https://amzn.to/2P7NJYp 1x ACS712 Current Sensor: https://amzn.to/2BLBxL5 1x Fuse Holder: https://amzn.to/2BSGtxw 1x 20A Fuse: https://amzn.to/2MRbeax 2x Binding Post: https://amzn.to/2MN8Q4L In this project I will show you how I combined an Arduino Nano, a current sensor, an LCD, a rotary encoder and a couple of other complementary components in order to create an adjustable constant load. It features a constant current and power mode and can handle a maximum of 30V and 20A if your heatsink design can handle it. Let's get started! Thanks to JLCPCB for sponsoring this video Visit https://jlcpcb.com to get professional PCBs for low prices Music: 2011 Lookalike by Bartlebeats Killing Time, Kevin MacLeod (incompetech.com)
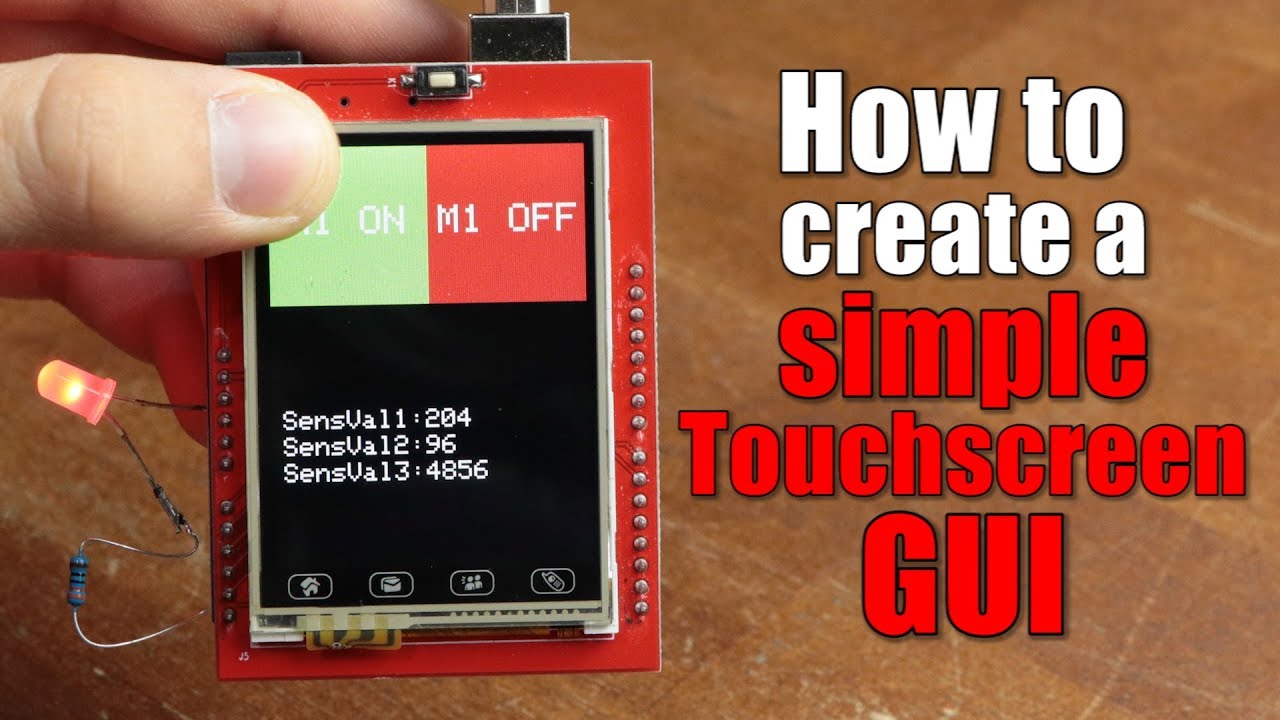
SIo_Gv7K7Fo | 19 Aug 2018
Only $2 for 10pcs PCBs (10cm*10cm): https://jlcpcb.com Previous video: https://youtu.be/m-4sHRzexpQ Multiplexing video: https://youtu.be/uQMUPhyoXoE Facebook: https://www.facebook.com/greatscottlab Twitter: https://twitter.com/GreatScottLab Support me for more videos: https://www.patreon.com/GreatScott?ty=h You can download my example code here: https://www.patreon.com/posts/20817428 You can get an 8-Bit Parallel TFT LCD here: (affiliate links) Amazon.com: https://amzn.to/2vLx3yD Ebay: http://rover.ebay.com/rover/1/711-53200-19255-0/1?icep_ff3=2&pub=5575101368&toolid=10001&campid=5337582279&customid=&icep_item=192163706724&ipn=psmain&icep_vectorid=229466&kwid=902099&mtid=824&kw=lg Amazon.de: https://amzn.to/2BkQnb8 Websites which were shown in the video: https://cdn-shop.adafruit.com/datasheets/ILI9341.pdf https://github.com/adafruit/TFTLCD-Library https://github.com/adafruit/Adafruit_TouchScreen https://www.nxp.com/wcm_documents/techzones/microcontrollers-techzone/Presentations/graphics.lcd.technologies.pdf https://www.sparkfun.com/datasheets/LCD/HOW%20DOES%20IT%20WORK.pdf In this video I will show you how TFT LCDs and resistive touchscreens work and how we can utilize an Arduino in order to control them. At the end I will then show you how to create a simple GUI for an Arduino project which has a touchscreen as an input. Thanks to JLCPCB for sponsoring this video Visit https://jlcpcb.com to get professional PCBs for low prices Music: 2011 Lookalike by Bartlebeats

m-4sHRzexpQ | 12 Aug 2018
Prototype PCB for $2 (100*100mm): https://www.jlcpcb.com Previous video: https://youtu.be/cJ_vDA7xsGs Transformer as a Speaker video: https://youtu.be/cz3DEP2LC_w Facebook: https://www.facebook.com/greatscottlab Twitter: https://twitter.com/GreatScottLab Support me for more videos: https://www.patreon.com/GreatScott?ty=h You can find the schematic for the circuit here: https://www.patreon.com/posts/20710056 Websites which were shown in the video: http://www.ti.com/lit/ds/symlink/tl494.pdf http://www.hrdiemen.com/reparation/flyback/scheme/7474 In this project I will show you how to create a plasma arc that can playback music. Along the way we will learn a bit about ignition coils, flyback transformers and the TL494 PWM IC. Let's get started! Thanks to JLCPCB for sponsoring this video Visit https://jlcpcb.com to get professional PCBs for low prices Music: 2011 Lookalike by Bartlebeats Killing Time, Kevin MacLeod (incompetech.com)

cJ_vDA7xsGs | 05 Aug 2018
Best Prototype Choice ($2 for 10 PCBs): https://jlcpcb.com Previous video: https://youtu.be/j99I1EveKd4 DC & BLDC Motor video: https://youtu.be/UteZJ_7C4Mg Stepper Motor video: https://youtu.be/bkqoKWP4Oy4 VESC video: https://youtu.be/SPoMvuRxwFw Facebook: https://www.facebook.com/greatscottlab Twitter: https://twitter.com/GreatScottLab Support me for more videos: https://www.patreon.com/GreatScott?ty=h Websites which were shown in the video: https://odriverobotics.com/#odrive https://www.thingiverse.com/thing:1101036 In this video I will conduct a small experiment in order to show you whether the DC, BLDC or Stepper Motor is best suited as a generator. Along the way we will learn a bit about the theory of those motors and realize why a gearbox can be an important part of a generator setup. Let's get started! Thanks to JLCPCB for sponsoring this video Visit https://jlcpcb.com to get professional PCBs for low prices Music: 2011 Lookalike by Bartlebeats Ecstatic Wave, Jens Kiilstofte https://machinimasound.com/music

j99I1EveKd4 | 29 Jul 2018
Support me for more videos: https://www.patreon.com/GreatScott Previous video: https://youtu.be/6_3gK83bePQ Facebook: https://www.facebook.com/greatscottlab Twitter: https://twitter.com/GreatScottLab Programming an Attiny+Homemade Arduino Shield: https://youtu.be/9LjfkjwMqXI Random/Unscripted Q&A #2: https://youtu.be/8nOXWfS1hQo

6_3gK83bePQ | 22 Jul 2018
Best price in 2-layer prototype & volume PCBs: https://jlcpcb.com Previous video: https://youtu.be/vOPBkfTKzkc Facebook: https://www.facebook.com/greatscottlab Twitter: https://twitter.com/GreatScottLab Support me for more videos: https://www.patreon.com/GreatScott?ty=h You can get a commercial 100W solar panel here (affiliate link): http://rover.ebay.com/rover/1/711-53200-19255-0/1?icep_ff3=2&pub=5575101368&toolid=10001&campid=5337606358&customid=&icep_item=391726701593&ipn=psmain&icep_vectorid=229466&kwid=902099&mtid=824&kw=lg You can get individual solar cells here (affiliate link): http://rover.ebay.com/rover/1/711-53200-19255-0/1?icep_ff3=2&pub=5575101368&toolid=10001&campid=5337606358&customid=&icep_item=222571000661&ipn=psmain&icep_vectorid=229466&kwid=902099&mtid=824&kw=lg In this episode of DIY or Buy I will show you how I created a 100W solar panel by myself. Along the way you will learn how to wire up solar cells and how they are usually wired up in a commercial solar panel. At the end we will then evaluate whether the DIY version is cheaper to produce. Thanks to JLCPCB for sponsoring this video Visit https://jlcpcb.com to get professional PCBs for low prices Music: 2011 Lookalike by Bartlebeats Killing Time, Kevin MacLeod (incompetech.com)

vOPBkfTKzkc | 15 Jul 2018
Trusted PCB Supplier ($2 for 10pcs 10*10cm): https://jlcpcb.com Previous video (LED Battery Level Indicator): https://youtu.be/rZq2v7two1s EBike Battery Pack video: https://youtu.be/b2sBhDxmPmA Facebook: https://www.facebook.com/greatscottlab Twitter: https://twitter.com/GreatScottLab Support me for more videos: https://www.patreon.com/GreatScott?ty=h More project information (schematic, parts list, pictures,.....) on Instructables: https://www.instructables.com/id/How-to-Create-a-Bookshelf-Speaker-Boombox/ Parts list (incomplete, see Instructables for more, affiliate links): Amazon.com: 16x INR18650-25R Li-Ion Battery: https://amzn.to/2uBZzl0 Nickel Strips: https://amzn.to/2NUbtzs 1x BMS: https://amzn.to/2uu7tMU 1x TPA3100D2 Amp: https://amzn.to/2JlLNbu 1x USB Charger: https://amzn.to/2miI3hP 1x Audio Crossover: https://amzn.to/2LiT9OJ 2x Switch: https://amzn.to/2uA44w2 1x XT60 Connector: https://amzn.to/2zEuiU7 Ebay: 16x INR18650-25R Li-Ion Battery: http://rover.ebay.com/rover/1/711-53200-19255-0/1?icep_ff3=2&pub=5575101368&toolid=10001&campid=5337606358&customid=&icep_item=263668497036&ipn=psmain&icep_vectorid=229466&kwid=902099&mtid=824&kw=lg Nickel Strips: http://rover.ebay.com/rover/1/711-53200-19255-0/1?icep_ff3=2&pub=5575101368&toolid=10001&campid=5337606358&customid=&icep_item=112529585368&ipn=psmain&icep_vectorid=229466&kwid=902099&mtid=824&kw=lg 1x BMS: http://rover.ebay.com/rover/1/711-53200-19255-0/1?icep_ff3=2&pub=5575101368&toolid=10001&campid=5337606358&customid=&icep_item=401306837148&ipn=psmain&icep_vectorid=229466&kwid=902099&mtid=824&kw=lg 1x TPA3100D2 Amp: http://rover.ebay.com/rover/1/711-53200-19255-0/1?icep_ff3=2&pub=5575101368&toolid=10001&campid=5337606358&customid=&icep_item=263725139295&ipn=psmain&icep_vectorid=229466&kwid=902099&mtid=824&kw=lg 1x USB Charger: http://rover.ebay.com/rover/1/711-53200-19255-0/1?icep_ff3=2&pub=5575101368&toolid=10001&campid=5337606358&customid=&icep_item=232791262748&ipn=psmain&icep_vectorid=229466&kwid=902099&mtid=824&kw=lg 1x Audio Crossover: http://rover.ebay.com/rover/1/711-53200-19255-0/1?icep_ff3=2&pub=5575101368&toolid=10001&campid=5337606358&customid=&icep_item=180988917287&ipn=psmain&icep_vectorid=229466&kwid=902099&mtid=824&kw=lg 2x Switch: http://rover.ebay.com/rover/1/711-53200-19255-0/1?icep_ff3=2&pub=5575101368&toolid=10001&campid=5337606358&customid=&icep_item=181931855436&ipn=psmain&icep_vectorid=229466&kwid=902099&mtid=824&kw=lg 1x XT60 Connector: http://rover.ebay.com/rover/1/711-53200-19255-0/1?icep_ff3=2&pub=5575101368&toolid=10001&campid=5337606358&customid=&icep_item=122827868480&ipn=psmain&icep_vectorid=229466&kwid=902099&mtid=824&kw=lg In this project I will show you how I turned an old bookshelf speaker into an awesome portable boombox. It features a battery run-time of 100h, a battery level indicator, USB charging ports and a 20W amp. Those features make it perfect for all outdoor trips. Let's get started! Thanks to JLCPCB for sponsoring this video Visit https://jlcpcb.com to get professional PCBs for low prices Music: 2011 Lookalike by Bartlebeats Ecstatic Wave, Jens Kiilstofte https://machinimasound.com/music

rZq2v7two1s | 08 Jul 2018
Rapid prototypes ($2 for 10 PCBs 10*10cm): https://jlcpcb.com Previous video: https://youtu.be/_6QIutZfsFs Facebook: https://www.facebook.com/greatscottlab Twitter: https://twitter.com/GreatScottLab Support me for more videos: https://www.patreon.com/GreatScott?ty=h More project information (schematic, parts list, pictures,.....) on Instructables: https://www.instructables.com/id/Make-Your-Own-LED-Battery-Level-Indicator/ Parts list (incomplete, see Instructables for more, affiliate links): Amazon.com: 2x LM324: https://amzn.to/2IZA0zb 6x 10k Trimmer: https://amzn.to/2Nzt8fJ 6x 2k Resistor: https://amzn.to/2m1GG6M 6x 5mm LED: https://amzn.to/2KW3kbT 1x Boost Converter: https://amzn.to/2NzYhPV Ebay: 2x LM324: http://rover.ebay.com/rover/1/711-53200-19255-0/1?icep_ff3=2&pub=5575101368&toolid=10001&campid=5337606358&customid=&icep_item=381374818352&ipn=psmain&icep_vectorid=229466&kwid=902099&mtid=824&kw=lg 6x 10k Trimmer: http://rover.ebay.com/rover/1/711-53200-19255-0/1?icep_ff3=2&pub=5575101368&toolid=10001&campid=5337606358&customid=&icep_item=182551169452&ipn=psmain&icep_vectorid=229466&kwid=902099&mtid=824&kw=lg 6x 2k Resistor: http://rover.ebay.com/rover/1/711-53200-19255-0/1?icep_ff3=2&pub=5575101368&toolid=10001&campid=5337606358&customid=&icep_item=252838503547&ipn=psmain&icep_vectorid=229466&kwid=902099&mtid=824&kw=lg 6x 5mm LED: http://rover.ebay.com/rover/1/711-53200-19255-0/1?icep_ff3=2&pub=5575101368&toolid=10001&campid=5337606358&customid=&icep_item=172618155078&ipn=psmain&icep_vectorid=229466&kwid=902099&mtid=824&kw=lg 1x Boost Converter: http://rover.ebay.com/rover/1/711-53200-19255-0/1?icep_ff3=2&pub=5575101368&toolid=10001&campid=5337606358&customid=&icep_item=112619032791&ipn=psmain&icep_vectorid=229466&kwid=902099&mtid=824&kw=lg In this video I will show you how we can use the classic LM3914 IC to create an LED Battery Level Indicator. Along the way I will show you how the IC works and explain why it is not the most precise circuit for a Li-Ion battery pack. And at the end I will show you how I created my own, more precise Battery Level Indicator circuit with a couple of simple components. Websites mentioned in the video: https://www.powerstream.com/p/INR18650-25R-datasheet.pdf https://www.akkuteile.de/ http://lygte-info.dk/review/batteries2012/Sony%20US18650VTC6%203000mAh%20(Green)%20UK.html https://www.akkuteile.de/lithium-ionen-akkus/18650/sony-konion-us18650vtc6-3120mah-3-6v-3-7v-flat-top-max-30a/a-100680/ Thanks to JLCPCB for sponsoring this video Visit https://jlcpcb.com to get professional PCBs for low prices Music: 2011 Lookalike by Bartlebeats Killing Time, Kevin MacLeod (incompetech.com)
_6QIutZfsFs | 01 Jul 2018
Easy Quote & Order Online ($2 for 10 boards): https://jlcpcb.com Previous video: https://youtu.be/SPoMvuRxwFw Photovoltaic Off-Grid System: https://youtu.be/WU16AJwvNhE Power Meter/Logger: https://youtu.be/lrugreN2K4w Facebook: https://www.facebook.com/greatscottlab Twitter: https://twitter.com/GreatScottLab Support me for more videos: https://www.patreon.com/GreatScott?ty=h Mini Pan Tilt from Thingiverse: https://www.thingiverse.com/thing:708819 More project information (code, schematic, parts list,.....) on Instructables: https://www.instructables.com/id/DIY-Miniature-Solar-Tracker/ Parts list (incomplete, see Instructables for more, affiliate links): Amazon.com: 1x Arduino Nano: https://amzn.to/2MCkpI2 2x SG90 Servo: https://amzn.to/2lJDT24 4x Photoresistor: https://amzn.to/2tHYY1a 4x 1kohm Resistor: https://amzn.to/2KjGBds Ebay: 1x Arduino Nano: http://rover.ebay.com/rover/1/711-53200-19255-0/1?icep_ff3=2&pub=5575101368&toolid=10001&campid=5337582279&customid=&icep_item=201539955347&ipn=psmain&icep_vectorid=229466&kwid=902099&mtid=824&kw=lg 2x SG90 Servo: http://rover.ebay.com/rover/1/711-53200-19255-0/1?icep_ff3=2&pub=5575101368&toolid=10001&campid=5337582279&customid=&icep_item=253673114521&ipn=psmain&icep_vectorid=229466&kwid=902099&mtid=824&kw=lg 4x Photoresistor: http://rover.ebay.com/rover/1/711-53200-19255-0/1?icep_ff3=2&pub=5575101368&toolid=10001&campid=5337582279&customid=&icep_item=401051315285&ipn=psmain&icep_vectorid=229466&kwid=902099&mtid=824&kw=lg 4x 1kohm Resistor: http://rover.ebay.com/rover/1/711-53200-19255-0/1?icep_ff3=2&pub=5575101368&toolid=10001&campid=5337582279&customid=&icep_item=371759674335&ipn=psmain&icep_vectorid=229466&kwid=902099&mtid=824&kw=lg In this project I will show you how to create a solar tracker which like the name implies can follow the movement of the sun throughout the day. And at the end I will show you the energy harvest difference between a solar tracker mounted solar panel and a flat mounted solar panel. Thanks to JLCPCB for sponsoring this video Visit https://jlcpcb.com to get professional PCBs for low prices Music: 2011 Lookalike by Bartlebeats Ecstatic Wave, Jens Kiilstofte https://machinimasound.com/music

SPoMvuRxwFw | 24 Jun 2018
Prototype quality PCB ($2) & Stencil ($7) : https://jlcpcb.com Previous video: https://youtu.be/liZMwInWuTM Make your own ESC: https://youtu.be/W9IHEqlGG1s Make your own Sensored ESC: https://youtu.be/YV-ee8wA5lI Facebook: https://www.facebook.com/greatscottlab Twitter: https://twitter.com/GreatScottLab You can get a VESC here: (affiliate link): http://rover.ebay.com/rover/1/711-53200-19255-0/1?icep_ff3=2&pub=5575101368&toolid=10001&campid=5337582279&customid=&icep_item=302546260454&ipn=psmain&icep_vectorid=229466&kwid=902099&mtid=824&kw=lg http://www.trampaboards.com/vesc-6-complete--vedder-electronic-speed-controller-trampa-exclusive-p-24166.html Useful websites which were shown in the video: http://vedder.se/2015/01/vesc-open-source-esc/ https://vesc-project.com/ http://www.electric-skateboard.builders/t/vesc-boot-loader-installation-tutorial/32103 In this episode of DIY or Buy we will have a closer look at the VESC which is probably the best open source ESC. Along the way we will have a look at its amazing features and try to build our own in order to find out whether DIYing the circuit is cheaper. Thanks to JLCPCB for sponsoring this video Visit https://jlcpcb.com to get professional PCBs for low prices Music: 2011 Lookalike by Bartlebeats Killing Time, Kevin MacLeod (incompetech.com)

liZMwInWuTM | 17 Jun 2018
Prototype quality PCB ($2) & Stencil ($7) : https://jlcpcb.com Previous video: https://youtu.be/35YuILUlfGs Facebook: https://www.facebook.com/greatscottlab Twitter: https://twitter.com/GreatScottLab More project information (code, parts list,.....) on Instructables: https://www.instructables.com/id/Make-Your-Own-1D-Pong-Game/ Parts list (incomplete, see Instructables for more, affiliate links): Amazon.com: 1x Arduino Nano: https://amzn.to/2JS2Rqs 2x Wago Terminal: https://amzn.to/2LThnic 1x 5m WS2812B LED Strip: https://amzn.to/2tgp0aT 2x Buzzer Button: https://amzn.to/2lds1oQ 1x 5V 3A Power Supply: https://amzn.to/2lfvQtP 1x DC Jack: https://amzn.to/2JO53DG Ebay: 1x Arduino Nano: http://rover.ebay.com/rover/1/711-53200-19255-0/1?icep_ff3=2&pub=5575101368&toolid=10001&campid=5337606358&customid=&icep_item=201539955347&ipn=psmain&icep_vectorid=229466&kwid=902099&mtid=824&kw=lg 2x Wago Terminal: http://rover.ebay.com/rover/1/711-53200-19255-0/1?icep_ff3=2&pub=5575101368&toolid=10001&campid=5337606358&customid=&icep_item=222820365661&ipn=psmain&icep_vectorid=229466&kwid=902099&mtid=824&kw=lg 1x 5m WS2812B LED Strip: http://rover.ebay.com/rover/1/711-53200-19255-0/1?icep_ff3=2&pub=5575101368&toolid=10001&campid=5337606358&customid=&icep_item=322058431958&ipn=psmain&icep_vectorid=229466&kwid=902099&mtid=824&kw=lg 2x Buzzer Button: http://rover.ebay.com/rover/1/711-53200-19255-0/1?icep_ff3=2&pub=5575101368&toolid=10001&campid=5337606358&customid=&icep_item=382078902011&ipn=psmain&icep_vectorid=229466&kwid=902099&mtid=824&kw=lg 1x 5V 3A Power Supply: http://rover.ebay.com/rover/1/711-53200-19255-0/1?icep_ff3=2&pub=5575101368&toolid=10001&campid=5337606358&customid=&icep_item=322286626497&ipn=psmain&icep_vectorid=229466&kwid=902099&mtid=824&kw=lg 1x DC Jack: http://rover.ebay.com/rover/1/711-53200-19255-0/1?icep_ff3=2&pub=5575101368&toolid=10001&campid=5337606358&customid=&icep_item=253307155276&ipn=psmain&icep_vectorid=229466&kwid=902099&mtid=824&kw=lg For this project I will show you how I combined an MDF board with buzzer buttons, LEDs and an Arduino Nano in order to create a 1D Pong Game that is really fun to play. Along the way I will show you how to create the electronics circuit and how difficult it actually is to program such a 1D Pong Game from scratch. Thanks to JLCPCB for sponsoring this video Visit https://jlcpcb.com to get professional PCBs for low prices Music: 2011 Lookalike by Bartlebeats Killing Time, Kevin MacLeod (incompetech.com)

35YuILUlfGs | 10 Jun 2018
Where to order 10 PCBs for $2: https://jlcpcb.com Circuit project files: https://easyeda.com/GreatScott/LongboardFernbedienung-28d260c134334a9f8e23a8d22675be00 Previous video: https://youtu.be/dVYJfl3tOQk Facebook: https://www.facebook.com/greatscottlab Twitter: https://twitter.com/GreatScottLab How to solder properly video: https://youtu.be/VxMV6wGS3NY Websites which were shown during the video: https://easyeda.com/ https://lcsc.com/ https://jlcpcb.com/ https://arduino-info.wikispaces.com/Nrf24L01-2.4GHz-HowTo In this tutorial I will show you what steps are necessary to turn your idea for an electronics circuit into a schematic and then into a PCB. Along the way I will show you that it is actually quite simple nowadays to order PCBs from a professional manufacturing house. Thanks to JLCPCB for sponsoring this video Visit https://jlcpcb.com to get professional PCBs for low prices Music: 2011 Lookalike by Bartlebeats Killing Time, Kevin MacLeod (incompetech.com)

dVYJfl3tOQk | 03 Jun 2018
Previous video: https://youtu.be/ALU8j7BTXnI Moai SLA 3D Printer video: https://youtu.be/UTRUMETt9qY Facebook: https://www.facebook.com/greatscottlab Twitter: https://twitter.com/GreatScottLab Support me for more videos: https://www.patreon.com/GreatScott?ty=h Thanks to Anycubic for providing the review unit. http://www.anycubic3d.com/ You can get the Anycubic Photon here: (affiliate links) Amazon.com: https://amzn.to/2JrhWm2 Amazon.de: https://amzn.to/2LR44j8 Ebay: http://rover.ebay.com/rover/1/711-53200-19255-0/1?icep_ff3=2&pub=5575101368&toolid=10001&campid=5337582279&customid=&icep_item=292400403385&ipn=psmain&icep_vectorid=229466&kwid=902099&mtid=824&kw=lg .stl files that were used during the video: https://www.thingiverse.com/thing:2755765 https://www.thingiverse.com/thing:2765929 https://www.thingiverse.com/thing:763622 In this review/comparison video we will have a closer look at the Anycubic Photon DLP 3D Printer. I will show you what you get when you buy one and how easy it is to use. Along the way I will compare the machine to the Moai SLA 3D Printer and see whether the quality of the Photon can hold up. At the end I will then conclude whether the Photon is a good alternative for the Moai. Music: 2011 Lookalike by Bartlebeats Ecstatic Wave, Jens Kiilstofte https://machinimasound.com/music

ALU8j7BTXnI | 27 May 2018
Trusted PCB Supplier ($2 for 10pcs 10*10cm): https://jlcpcb.com Previous video: https://youtu.be/STwYJr3AHRU Part 1: https://youtu.be/YV-ee8wA5lI Part 2: https://youtu.be/b2sBhDxmPmA Facebook: https://www.facebook.com/greatscottlab Twitter: https://twitter.com/GreatScottLab You can get the .stl files for my 3D printed enclosure here: https://www.patreon.com/posts/19039219 You can order an Electric Bike Conversion kit here: (affiliate links) Amazon.com: https://amzn.to/2HpHUFw Ebay: http://rover.ebay.com/rover/1/711-53200-19255-0/1?icep_ff3=2&pub=5575101368&toolid=10001&campid=5337582279&customid=&icep_item=312086116556&ipn=psmain&icep_vectorid=229466&kwid=902099&mtid=824&kw=lg In this final chapter of the Electric Bike Conversion project I will be showing you how I created an enclosure for my DIY battery pack and how I mounted all the components onto my bike. At the end I will then go for a test ride in order to present my verdict about such conversion kits. Thanks to JLCPCB for sponsoring this video Visit https://jlcpcb.com to get professional PCBs for low prices Music: In the Hall of the Mountain King, Kevin MacLeod 2011 Lookalike by Bartlebeats Killing Time, Kevin MacLeod (incompetech.com)
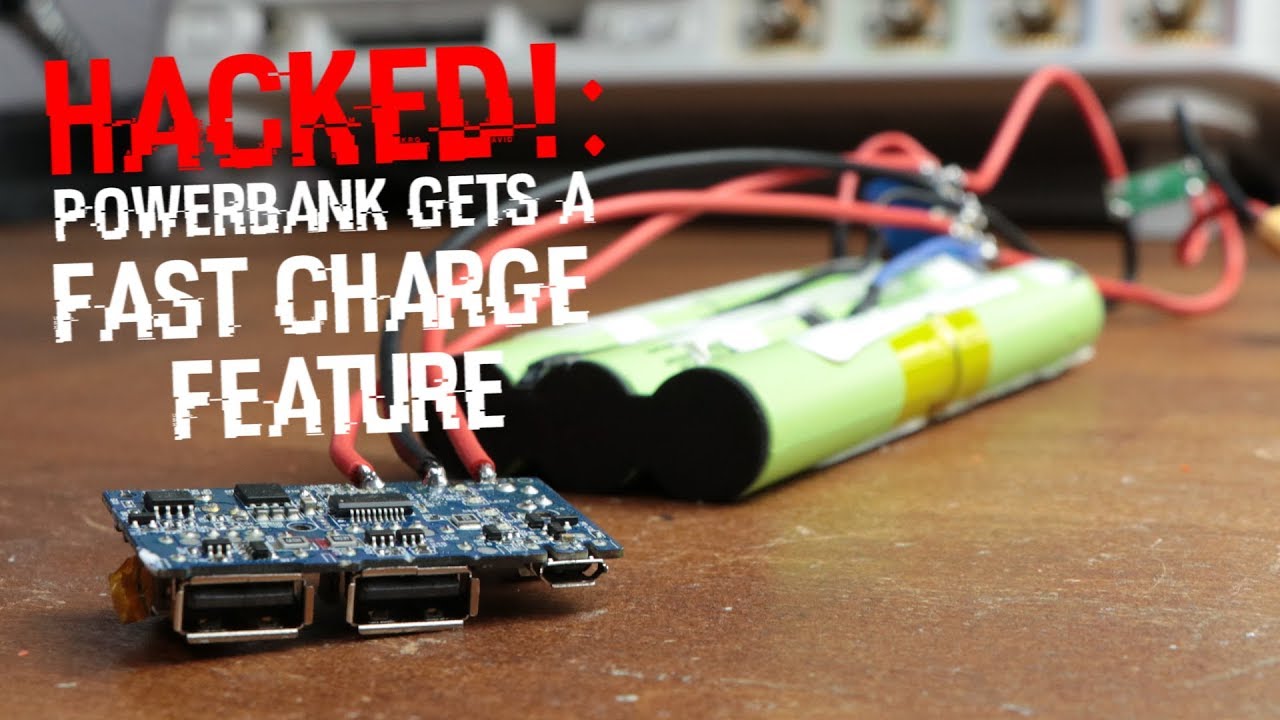
STwYJr3AHRU | 20 May 2018
Best & fast PCB supplier ($2 for 10 boards): https://jlcpcb.com Previous video: https://youtu.be/5R_QCurh_iM Facebook: https://www.facebook.com/greatscottlab Twitter: https://twitter.com/GreatScottLab More project information (pictures, parts list,.....) on Instructables: https://www.instructables.com/id/Adding-a-Fast-Charge-Feature-to-a-Powerbank/ Parts list (incomplete, see Instructables for more, affiliate links): Amazon.com: 1x Powerbank: https://amzn.to/2ItW7Tc 1x 4PDT Switch: https://amzn.to/2IwaYbz 1x 2S Protection Circuit: https://amzn.to/2LdCtIU 1x XT60 Connector: https://amzn.to/2IxcPgn Ebay: 1x 4PDT Switch: http://rover.ebay.com/rover/1/711-53200-19255-0/1?icep_ff3=2&pub=5575101368&toolid=10001&campid=5337582279&customid=&icep_item=182286104999&ipn=psmain&icep_vectorid=229466&kwid=902099&mtid=824&kw=lg 1x 2S Protection Circuit: http://rover.ebay.com/rover/1/711-53200-19255-0/1?icep_ff3=2&pub=5575101368&toolid=10001&campid=5337582279&customid=&icep_item=282779274488&ipn=psmain&icep_vectorid=229466&kwid=902099&mtid=824&kw=lg 1x XT60 Connector: http://rover.ebay.com/rover/1/711-53200-19255-0/1?icep_ff3=2&pub=5575101368&toolid=10001&campid=5337582279&customid=&icep_item=122827868480&ipn=psmain&icep_vectorid=229466&kwid=902099&mtid=824&kw=lg In this episode of HACKED! I will show you how I modified a common powerbank in order to cut down its ridiculously long charging time. Along the way I will talk about the powerbank circuit and why the battery pack of my powerbank is a bit special. Thanks to JLCPCB for sponsoring this video Visit https://jlcpcb.com to get professional PCBs for low prices Music: 2011 Lookalike by Bartlebeats Ecstatic Wave, Jens Kiilstofte https://machinimasound.com/music

5R_QCurh_iM | 13 May 2018
Best & fast PCB supplier ($2 for 10 boards): https://jlcpcb.com Previous video: https://youtu.be/tQEmtbaO2GY Boost Converter video: https://youtu.be/QnUhjnbZ0T8 Facebook: https://www.facebook.com/greatscottlab Twitter: https://twitter.com/GreatScottLab Useful websites for boost converters that were partly shown in the video: https://www.maximintegrated.com/en/app-notes/index.mvp/id/2031 https://www.olimex.com/Products/Breadboarding/BB-PWR-3608/resources/MT3608.pdf http://www.ti.com/ww/en/simple_switcher/index.html In this video we will have a look at the classic boost converter circuit and find a way to create a proper feedback based boost converter without a µC. Along the way I will show you how commercial boost converter keep their output voltage stable and how we can rebuild their circuit so achieve the same. Thanks to JLCPCB for sponsoring this video Visit https://jlcpcb.com to get professional PCBs for low prices Music: 2011 Lookalike by Bartlebeats Killing Time, Kevin MacLeod (incompetech.com)

tQEmtbaO2GY | 06 May 2018
Best PCB prototyping ($2 for 10 boards): https://jlcpcb.com Previous video: https://youtu.be/b2sBhDxmPmA Arduino Basics 101: https://youtu.be/BtLwoNJ6klE Arduino Basics 102: https://youtu.be/YT3birSKLLU Arduino Basics 103: https://youtu.be/EVm0qVJ56II Facebook: https://www.facebook.com/greatscottlab Twitter: https://twitter.com/GreatScottLab You can get a Raspberry Pi here: (affiliate links) Amazon.com: https://amzn.to/2wnG17I Ebay: http://rover.ebay.com/rover/1/711-53200-19255-0/1?icep_ff3=2&pub=5575101368&toolid=10001&campid=5337582279&customid=&icep_item=261698200759&ipn=psmain&icep_vectorid=229466&kwid=902099&mtid=824&kw=lg Amazon.de: https://amzn.to/2FLI1WR Useful websites that were partly shown in the video: http://wiringpi.com/ https://learn.sparkfun.com/tutorials/raspberry-gpio https://pypi.org/ https://pinout.xyz/ https://github.com/MichMich/MagicMirror https://www.hackster.io/shiva-s-r/mapping-of-unknown-environment-9b82cd https://learn.adafruit.com/raspberry-pi-analog-to-digital-converters/ads1015-slash-ads1115 In this video I will show you how to use the C and Python programming language in order to control the GPIOs of a Raspberry Pi. Along the way I will demonstrate for what projects the Raspberry Pi can be used and when you should rather use an Arduino instead. Thanks to JLCPCB for sponsoring this video Visit https://jlcpcb.com to get professional PCBs for low prices Music: 2011 Lookalike by Bartlebeats Ecstatic Wave, Jens Kiilstofte https://machinimasound.com/music
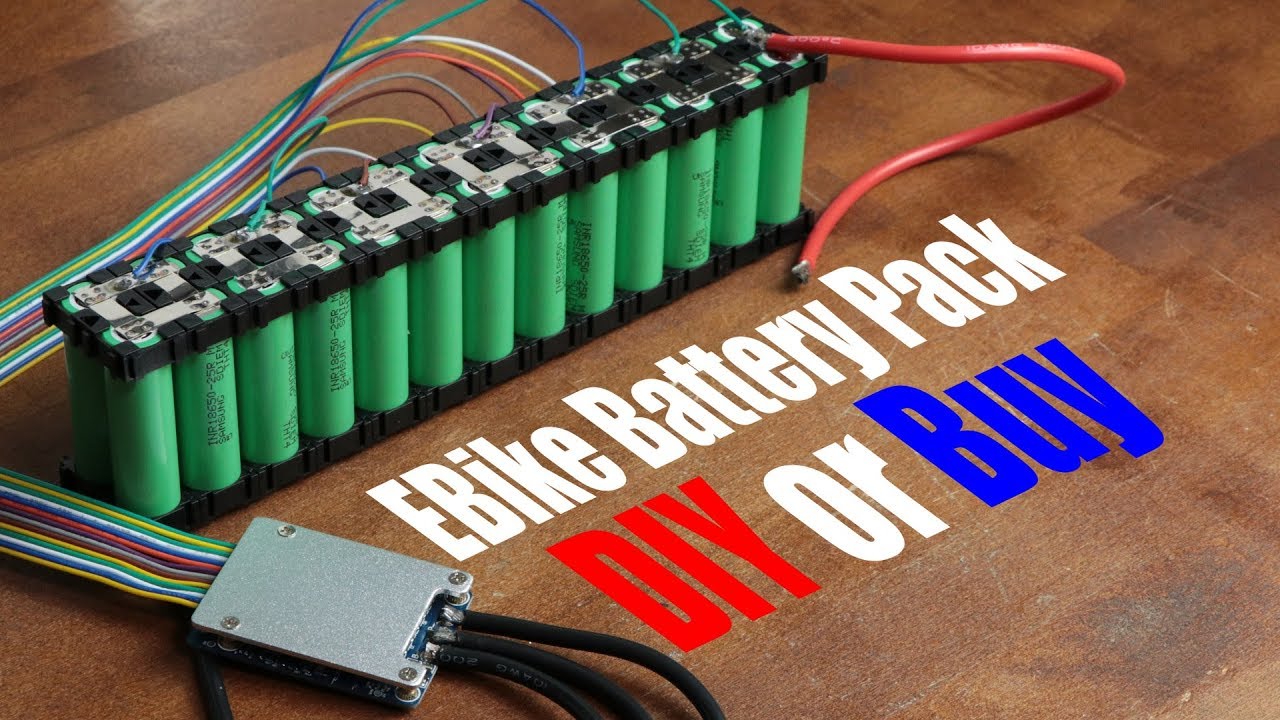
b2sBhDxmPmA | 29 Apr 2018
Best PCB prototyping house ($2 for 10 boards): https://jlcpcb.com Previous video: https://youtu.be/DWsVvdd8QJ4 Electric Bike Conversion (Part 1): https://youtu.be/YV-ee8wA5lI Battery Type Comparison: https://youtu.be/LqgP16JQ24I Make your own Li-Ion Battery Pack: https://youtu.be/hwhqn4BmC2I Battery Spot Welder (CD Welder): https://youtu.be/5TVNdMqVZpk Facebook: https://www.facebook.com/greatscottlab Twitter: https://twitter.com/GreatScottLab More project information (pictures, parts list,.....) on Instructables: https://www.instructables.com/id/DIY-EBike-Battery-Pack/ The spot welder that I used in the video: https://www.keenlab.de/index.php/portfolio-item/kweld/ https://www.keenlab.de/index.php/product-category/kspot-welder-kit/ I got my 18650 cells from Akkuteile.de: https://www.akkuteile.de/samsung-inr18650-25r-2500mah-3-7v/a-100657/ Parts list (incomplete, see Instructables for more, affiliate links): Amazon.com: 26x INR18650-25R: https://amzn.to/2r7GiGW 13x Spacer: https://amzn.to/2HB4Eiy 7mm x 0.3mm nickel ribbon: https://amzn.to/2r9v8AP 13s 20A BMS: https://amzn.to/2JCNYYu 10 AWG Wire: https://amzn.to/2Fs08kr Ebay: 26x INR18650-25R: http://rover.ebay.com/rover/1/711-53200-19255-0/1?icep_ff3=2&pub=5575101368&toolid=10001&campid=5337582279&customid=&icep_item=282784768261&ipn=psmain&icep_vectorid=229466&kwid=902099&mtid=824&kw=lg 13x Spacer: http://rover.ebay.com/rover/1/711-53200-19255-0/1?icep_ff3=2&pub=5575101368&toolid=10001&campid=5337582279&customid=&icep_item=311659219371&ipn=psmain&icep_vectorid=229466&kwid=902099&mtid=824&kw=lg 7mm x 0.3mm nickel ribbon: http://rover.ebay.com/rover/1/711-53200-19255-0/1?icep_ff3=2&pub=5575101368&toolid=10001&campid=5337582279&customid=&icep_item=263177771984&ipn=psmain&icep_vectorid=229466&kwid=902099&mtid=824&kw=lg 13s 20A BMS: http://rover.ebay.com/rover/1/711-53200-19255-0/1?icep_ff3=2&pub=5575101368&toolid=10001&campid=5337582279&customid=&icep_item=362070141286&ipn=psmain&icep_vectorid=229466&kwid=902099&mtid=824&kw=lg 10 AWG Wire: http://rover.ebay.com/rover/1/711-53200-19255-0/1?icep_ff3=2&pub=5575101368&toolid=10001&campid=5337582279&customid=&icep_item=332180455387&ipn=psmain&icep_vectorid=229466&kwid=902099&mtid=824&kw=lg In this episode of DIY or Buy I will show you how to create a proper EBike battery pack. The main components for the build are Li-Ion cells, nickel strips and a BMS. At the end of the project I will then conclude whether DIYing your own battery pack is cheaper than buying a premade one. Thanks to JLCPCB for sponsoring this video Visit https://jlcpcb.com to get professional PCBs for low prices Music: In the Hall of the Mountain King, Kevin MacLeod 2011 Lookalike by Bartlebeats Killing Time, Kevin MacLeod (incompetech.com)

sHAnGoz7if8 | 25 Apr 2018
GreatScott! Merchandise Shop: https://teespring.com/stores/great-scott Siglent SDG2082X product page: https://www.siglenteu.com/waveform-generators/sdg2000x-series-functionarbitrary-waveform-generators/ Support me for more videos: https://www.patreon.com/GreatScott Facebook: https://www.facebook.com/greatscottlab Twitter: https://twitter.com/GreatScottLab

DWsVvdd8QJ4 | 22 Apr 2018
$2 for 10 PCBs & $20 off on first shipping: https://jlcpcb.com Previous video: https://youtu.be/YV-ee8wA5lI AC VS DC Pain Test video: https://youtu.be/trmxzUVT2eE Facebook: https://www.facebook.com/greatscottlab Twitter: https://twitter.com/GreatScottLab You can buy MCBs and RCCBs here: (affiliate links) Amazon.com: https://amzn.to/2JeheEQ https://amzn.to/2qSmypZ Amazon.de: https://amzn.to/2HlMuRZ https://amzn.to/2HigHp4 In this video I will show you what kind of circuit breakers are common in a German distribution box and how they work. Along the way we will learn about the electric network and find out why MCB protect the wiring, while RCCB can protect human from electric shocks. Thanks to JLCPCB for sponsoring this video Visit https://jlcpcb.com to get professional PCBs for low prices Music: 2011 Lookalike by Bartlebeats Ecstatic Wave, Jens Kiilstofte https://machinimasound.com/music

YV-ee8wA5lI | 15 Apr 2018
Best price in 2-layer prototype & volume PCBs: https://jlcpcb.com Previous video: https://youtu.be/nP6YuwNVoPU Make your own ESC videos: https://youtu.be/W9IHEqlGG1s https://youtu.be/NXkLydhRvS0 Arduino Basics videos: https://youtu.be/BtLwoNJ6klE https://youtu.be/YT3birSKLLU https://youtu.be/EVm0qVJ56II Facebook: https://www.facebook.com/greatscottlab Twitter: https://twitter.com/GreatScottLab More project information (schematic, code, pictures,...) on Instructables: https://www.instructables.com/id/Make-Your-Own-Sensored-ESC You can get a e-bike conversion kit here: (affiliate links) Amazon.com: https://amzn.to/2HpHUFw Ebay: http://rover.ebay.com/rover/1/711-53200-19255-0/1?icep_ff3=2&pub=5575101368&toolid=10001&campid=5337582279&customid=&icep_item=312086116556&ipn=psmain&icep_vectorid=229466&kwid=902099&mtid=824&kw=lg Parts list (incomplete, see Instructables for more, affiliate links): Amazon.com: 1x Arduino Nano: https://amzn.to/2H1cCRV 1x 10k Potentiometer: https://amzn.to/2JKY7mZ 1x 74HC14 Hex Inverter Schmitt Trigger: https://amzn.to/2HCejq8 3x TC4427 MOSFET Driver: https://amzn.to/2JMSZin 3x IRF5305 P-Channel MOSFET: https://amzn.to/2H0zjFA 3x IRFZ44N N-Channel MOSFET: https://amzn.to/2JMzPsO 6x MUR460 Diode: https://amzn.to/2HF3FPr 1x LM7805 5V Regulator: https://amzn.to/2vcRUNx 1x LM7815 15V Regulator: https://amzn.to/2JJMDA4 Ebay: 1x Arduino Nano: http://rover.ebay.com/rover/1/711-53200-19255-0/1?icep_ff3=2&pub=5575101368&toolid=10001&campid=5337582279&customid=&icep_item=201539955347&ipn=psmain&icep_vectorid=229466&kwid=902099&mtid=824&kw=lg 1x 10k Potentiometer: http://rover.ebay.com/rover/1/711-53200-19255-0/1?icep_ff3=2&pub=5575101368&toolid=10001&campid=5337582279&customid=&icep_item=172129655099&ipn=psmain&icep_vectorid=229466&kwid=902099&mtid=824&kw=lg 1x 74HC14 Hex Inverter Schmitt Trigger: http://rover.ebay.com/rover/1/711-53200-19255-0/1?icep_ff3=2&pub=5575101368&toolid=10001&campid=5337582279&customid=&icep_item=221953495963&ipn=psmain&icep_vectorid=229466&kwid=902099&mtid=824&kw=lg 3x TC4427 MOSFET Driver: http://rover.ebay.com/rover/1/711-53200-19255-0/1?icep_ff3=2&pub=5575101368&toolid=10001&campid=5337582279&customid=&icep_item=391807060145&ipn=psmain&icep_vectorid=229466&kwid=902099&mtid=824&kw=lg 3x IRF5305 P-Channel MOSFET: http://rover.ebay.com/rover/1/711-53200-19255-0/1?icep_ff3=2&pub=5575101368&toolid=10001&campid=5337582279&customid=&icep_item=282025643423&ipn=psmain&icep_vectorid=229466&kwid=902099&mtid=824&kw=lg 3x IRFZ44N N-Channel MOSFET: http://rover.ebay.com/rover/1/711-53200-19255-0/1?icep_ff3=2&pub=5575101368&toolid=10001&campid=5337582279&customid=&icep_item=172129149130&ipn=psmain&icep_vectorid=229466&kwid=902099&mtid=824&kw=lg 6x MUR460 Diode: http://rover.ebay.com/rover/1/711-53200-19255-0/1?icep_ff3=2&pub=5575101368&toolid=10001&campid=5337582279&customid=&icep_item=401112827140&ipn=psmain&icep_vectorid=229466&kwid=902099&mtid=824&kw=lg 1x LM7805 5V Regulator: http://rover.ebay.com/rover/1/711-53200-19255-0/1?icep_ff3=2&pub=5575101368&toolid=10001&campid=5337582279&customid=&icep_item=132475473284&ipn=psmain&icep_vectorid=229466&kwid=902099&mtid=824&kw=lg 1x LM7815 15V Regulator: http://rover.ebay.com/rover/1/711-53200-19255-0/1?icep_ff3=2&pub=5575101368&toolid=10001&campid=5337582279&customid=&icep_item=192109575355&ipn=psmain&icep_vectorid=229466&kwid=902099&mtid=824&kw=lg In this video I will show you how a sensored BLDC Motor from an electric bike works and how we can create our own sensored ESC in order to let it rotate. Thanks to JLCPCB for sponsoring this video Visit https://jlcpcb.com to get professional PCBs for low prices Music: 2011 Lookalike by Bartlebeats Killing Time, Kevin MacLeod (incompetech.com)
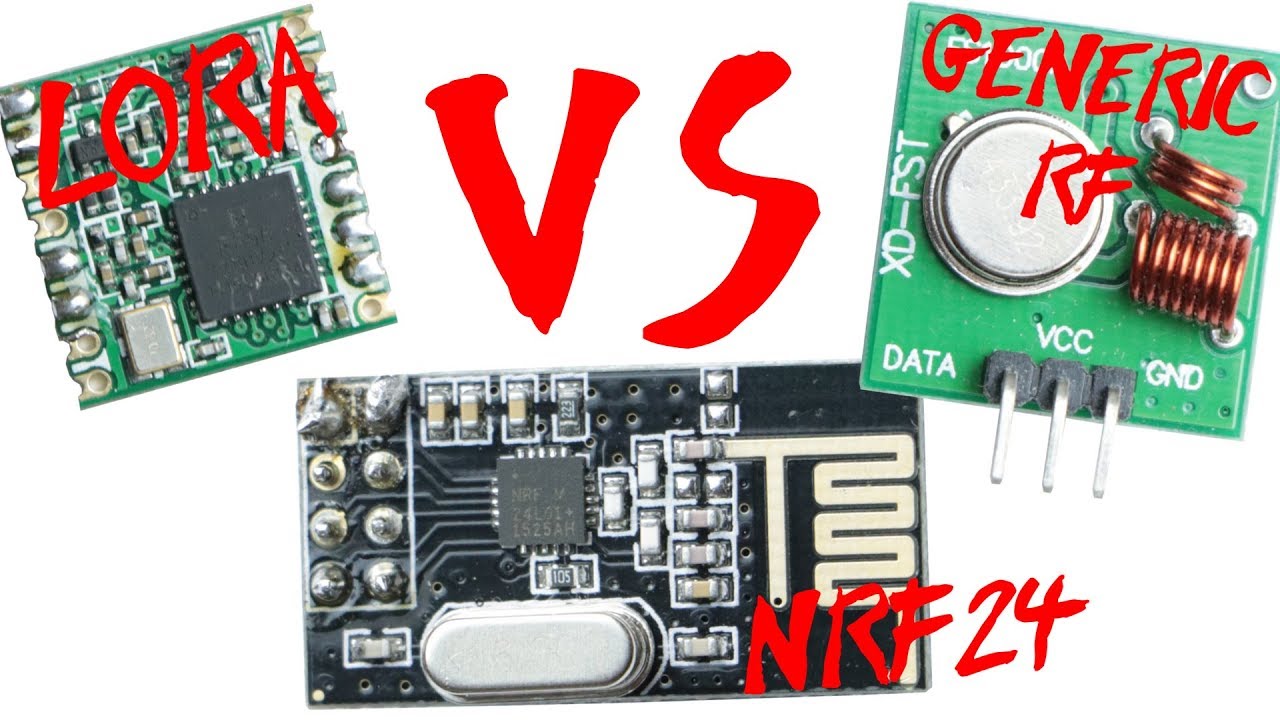
nP6YuwNVoPU | 08 Apr 2018
Price Cut on PCBs, from $71/m² to $58/m² now: https://jlcpcb.com Previous video: https://youtu.be/5TVNdMqVZpk Facebook: https://www.facebook.com/greatscottlab Twitter: https://twitter.com/GreatScottLab You can get the wireless communication boards here: (affiliate link) Amazon.com: LoRa Board: https://amzn.to/2Jse3dA nRF24: https://amzn.to/2Hmjla4 Generic RF Module: https://amzn.to/2EtxQ93 Ebay: LoRa Board: http://rover.ebay.com/rover/1/711-53200-19255-0/1?icep_ff3=2&pub=5575101368&toolid=10001&campid=5337582279&customid=&icep_item=231784606792&ipn=psmain&icep_vectorid=229466&kwid=902099&mtid=824&kw=lg nRF24: http://rover.ebay.com/rover/1/711-53200-19255-0/1?icep_ff3=2&pub=5575101368&toolid=10001&campid=5337582279&customid=&icep_item=401088440858&ipn=psmain&icep_vectorid=229466&kwid=902099&mtid=824&kw=lg Generic RF Module: http://rover.ebay.com/rover/1/711-53200-19255-0/1?icep_ff3=2&pub=5575101368&toolid=10001&campid=5337582279&customid=&icep_item=291922530716&ipn=psmain&icep_vectorid=229466&kwid=902099&mtid=824&kw=lg Useful websites which were mentioned in the video: https://github.com/sandeepmistry/arduino-LoRa http://www.hoperf.com/upload/rf/RFM95_96_97_98W.pdf https://arduino-info.wikispaces.com/Nrf24L01-2.4GHz-HowTo https://www.sparkfun.com/datasheets/Components/SMD/nRF24L01Pluss_Preliminary_Product_Specification_v1_0.pdf http://www.airspayce.com/mikem/arduino/VirtualWire/ In this VS episode we will have a closer look at LoRa boards and compare them to the nRF24 and a generic RF board. The comparison will include a range and power test and will also show you how easy it is to use a LoRa board with the Arduino. Thanks to JLCPCB for sponsoring this video Visit https://jlcpcb.com to get professional PCBs for low prices Music: 2011 Lookalike by Bartlebeats Ecstatic Wave, Jens Kiilstofte https://machinimasound.com/music

5TVNdMqVZpk | 01 Apr 2018
Where to order 10 PCBs for $2: https://jlcpcb.com Circuit project files: https://easyeda.com/editor#id=0a72be604cf74193a29e8896090b63ae Previous video: https://youtu.be/1i-6cz4KHXE Facebook: https://www.facebook.com/greatscottlab Twitter: https://twitter.com/GreatScottLab Make your own Li-Ion Battery Pack: https://youtu.be/hwhqn4BmC2I HACKED!: Microwave Transformer becomes a High Current Transformer: https://youtu.be/fQXBNkaB1tU Functional CD Welder project: https://www.instructables.com/id/Capacitive-Discharge-CD-Welder-for-battery-tabs/ You can find more information about my failed project here: https://www.patreon.com/posts/17902005 In this not planned episode of DIY or Buy we will have a look at my failed CD welder project. During the video I will show you how I designed the project and demonstrate how around 90% of it works. At the end though, I will tell you why this project failed and thus show you that buying can save you a lot of nerves. Thanks to JLCPCB for sponsoring this video Visit https://jlcpcb.com to get professional PCBs for low prices Music: 2011 Lookalike by Bartlebeats Killing Time, Kevin MacLeod (incompetech.com)

1i-6cz4KHXE | 25 Mar 2018
$2 for 10 PCBs & Free Shipping on First Order: https://jlcpcb.com Support me for more videos: https://www.patreon.com/GreatScott Previous video: https://youtu.be/USa3HFLnrlk Facebook: https://www.facebook.com/greatscottlab Twitter: https://twitter.com/GreatScottLab Make your own Remote Bluetooth Firework Igniter: https://youtu.be/ScZfuQxoI_s Electronic Basics #4: Arduino+Bluetooth+Android=Awesome: https://youtu.be/x3KAXjnP06o Code used in this video can be downloaded here: https://www.patreon.com/posts/17759054 You can get the HC-05 and HM-10 board here: (affiliate link) Amazon.com: HC-05: https://amzn.to/2pDWMWI HM-10: https://amzn.to/2G4arRd Amazon.de: HC-05: https://amzn.to/2I1qWtz HM-10: https://amzn.to/2G9VzN9 Ebay: HC-05: http://rover.ebay.com/rover/1/711-53200-19255-0/1?icep_ff3=2&pub=5575101368&toolid=10001&campid=5337582279&customid=&icep_item=232412681033&ipn=psmain&icep_vectorid=229466&kwid=902099&mtid=824&kw=lg HM-10: http://rover.ebay.com/rover/1/711-53200-19255-0/1?icep_ff3=2&pub=5575101368&toolid=10001&campid=5337582279&customid=&icep_item=253082851414&ipn=psmain&icep_vectorid=229466&kwid=902099&mtid=824&kw=lg Useful websites which were mentioned in the video: https://github.com/yostane/arduino-at-09/blob/master/hm-10-datasheet.pdf http://www.electronicaestudio.com/docs/istd016A.pdf https://cdn.makezine.com/uploads/2014/03/hc_hc-05-user-instructions-bluetooth.pdf http://www.martyncurrey.com/bluetooth-modules/ https://blog.yavilevich.com/2017/03/mlt-bt05-ble-module-a-clone-of-a-clone/ In this VS episode we will have a closer look at the most common Bluetooth boards for the Arduino. Along the way I will present you how easy it is to implement such a board in a Bluetooth project and whether it makes sense to use Bluetooth 4.0 (BLE) or whether we should stick to Bluetooth 2.0. Thanks to JLCPCB for sponsoring this video Visit https://jlcpcb.com to get professional PCBs for low prices Music: 2011 Lookalike by Bartlebeats Ecstatic Wave, Jens Kiilstofte https://machinimasound.com/music
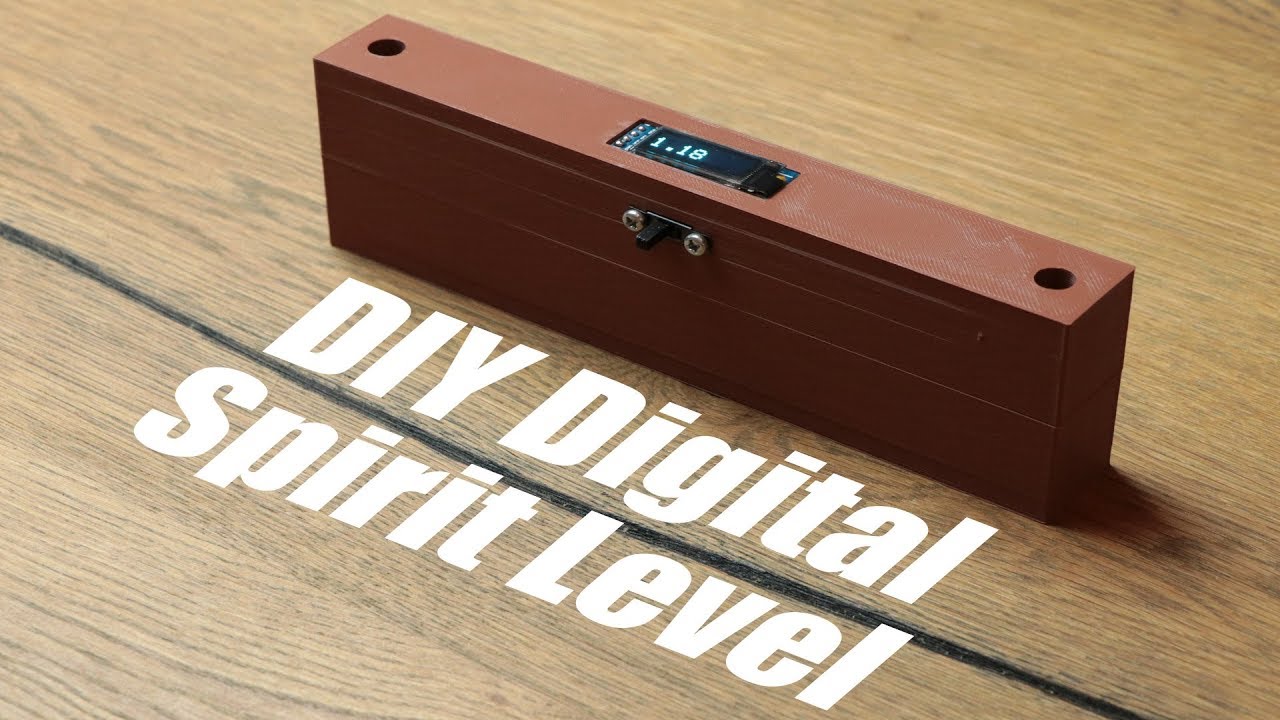
USa3HFLnrlk | 18 Mar 2018
$2 for 10 PCBs & Free Shipping on First Order: https://jlcpcb.com Support me for more videos: https://www.patreon.com/GreatScott Previous video: https://youtu.be/woTiKij76cA DIY LiPo Charge/Protect/5V Boost Circuit video: https://youtu.be/Fj0XuYiE7HU Afrotechmods accelerometer video: https://youtu.be/i2U49usFo10 Facebook: https://www.facebook.com/greatscottlab Twitter: https://twitter.com/GreatScottLab More project information (code, schematic, ....) on Instructables: https://www.instructables.com/id/DIY-Digital-Spirit-Level/ Parts list (incomplete, see Instructables for more, affiliate links): Amazon.com: 1x Arduino Nano: http://amzn.to/2FJZ8xk 1x MPU9250: http://amzn.to/2DBxz3h 1x Slide Switch: http://amzn.to/2FRMBE5 1x 128x32 SSD1306 OLED Display: http://amzn.to/2FKof2O 1x LiPo Battery: http://amzn.to/2FPnP7r Ebay: 1x Arduino Nano: http://rover.ebay.com/rover/1/711-53200-19255-0/1?icep_ff3=2&pub=5575101368&toolid=10001&campid=5337582279&customid=&icep_item=201539955347&ipn=psmain&icep_vectorid=229466&kwid=902099&mtid=824&kw=lg 1x MPU9250: http://rover.ebay.com/rover/1/711-53200-19255-0/1?icep_ff3=2&pub=5575101368&toolid=10001&campid=5337582279&customid=&icep_item=221545416146&ipn=psmain&icep_vectorid=229466&kwid=902099&mtid=824&kw=lg 1x Slide Switch: http://rover.ebay.com/rover/1/711-53200-19255-0/1?icep_ff3=2&pub=5575101368&toolid=10001&campid=5337582279&customid=&icep_item=122088040967&ipn=psmain&icep_vectorid=229466&kwid=902099&mtid=824&kw=lg 1x 128x32 SSD1306 OLED Display: http://rover.ebay.com/rover/1/711-53200-19255-0/1?icep_ff3=2&pub=5575101368&toolid=10001&campid=5337582279&customid=&icep_item=182371257748&ipn=psmain&icep_vectorid=229466&kwid=902099&mtid=824&kw=lg 1x LiPo Battery: http://rover.ebay.com/rover/1/711-53200-19255-0/1?icep_ff3=2&pub=5575101368&toolid=10001&campid=5337582279&customid=&icep_item=272076544700&ipn=psmain&icep_vectorid=229466&kwid=902099&mtid=824&kw=lg Websites shown during the video: https://www.lucidar.me/en/inertial-measurement-unit/mpu-9250-and-arduino-9-axis-imu/ https://www.invensense.com/wp-content/uploads/2015/02/PS-MPU-9250A-01-v1.1.pdf https://cdn.sparkfun.com/assets/learn_tutorials/5/5/0/MPU-9250-Register-Map.pdf In this small project we will have a closer look at accelerometer ICs and find out how we can use them with an Arduino. Afterwards we will combine such an IC with a couple of complementary components and a 3D printed enclosure in order to create a digital spirit level. Thanks to JLCPCB for sponsoring this video Visit https://jlcpcb.com to get professional PCBs for low prices Music: 2011 Lookalike by Bartlebeats Killing Time, Kevin MacLeod (incompetech.com)

woTiKij76cA | 11 Mar 2018
$2 for 10 PCBs & Free Shipping on First Order: https://jlcpcb.com Support me for more videos: https://www.patreon.com/GreatScott Previous video: https://youtu.be/mWR9Q_pTagw OpAmp video: https://youtu.be/kqCV-HGJc6A Facebook: https://www.facebook.com/greatscottlab Twitter: https://twitter.com/GreatScottLab Useful links for Schmitt Trigger information: http://hyperphysics.phy-astr.gsu.edu/hbase/Electronic/schmitt.html#c2 http://electronics-course.com/schmitt-trigger-oscillator https://www.mikrocontroller.net/articles/Schmitt-Trigger https://www.roman-koller.ch/zf/Elo1.pdf In this Electronic Basics video I will tell you all the important basic information about Schmitt Triggers and why they are sometimes very important components. Along the way I will also show you some practical examples where it makes sense to use a Schmitt Trigger. Thanks to JLCPCB for sponsoring this video Visit https://jlcpcb.com to get professional PCBs for low prices Music: 2011 Lookalike by Bartlebeats Ecstatic Wave, Jens Kiilstofte https://machinimasound.com/music
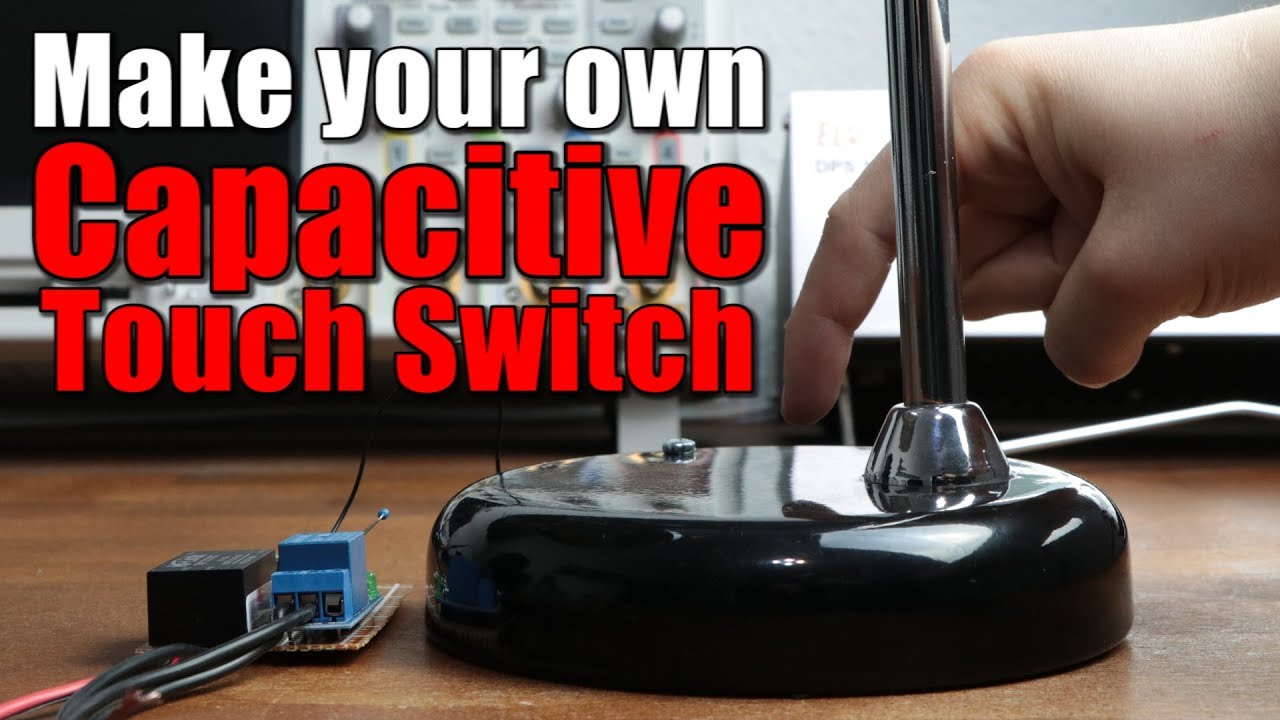
mWR9Q_pTagw | 04 Mar 2018
$2 for 10 PCBs with 100% Top Quality: https://jlcpcb.com Support me for more videos: https://www.patreon.com/GreatScott Previous video: https://youtu.be/ZyetXihGrM0 Facebook: https://www.facebook.com/greatscottlab Twitter: https://twitter.com/GreatScottLab You can find more project information (code, schematic,...) here: https://www.patreon.com/posts/17351927 In this small project I will show you how capacitive touch sensors work and how we can create one on our own. At the end we will have a functional Arduino touch sensor that we can utilize to switch all kinds of things. Thanks to JLCPCB for sponsoring this video Visit https://jlcpcb.com to get professional PCBs for low prices Music: 2011 Lookalike by Bartlebeats Killing Time, Kevin MacLeod (incompetech.com)
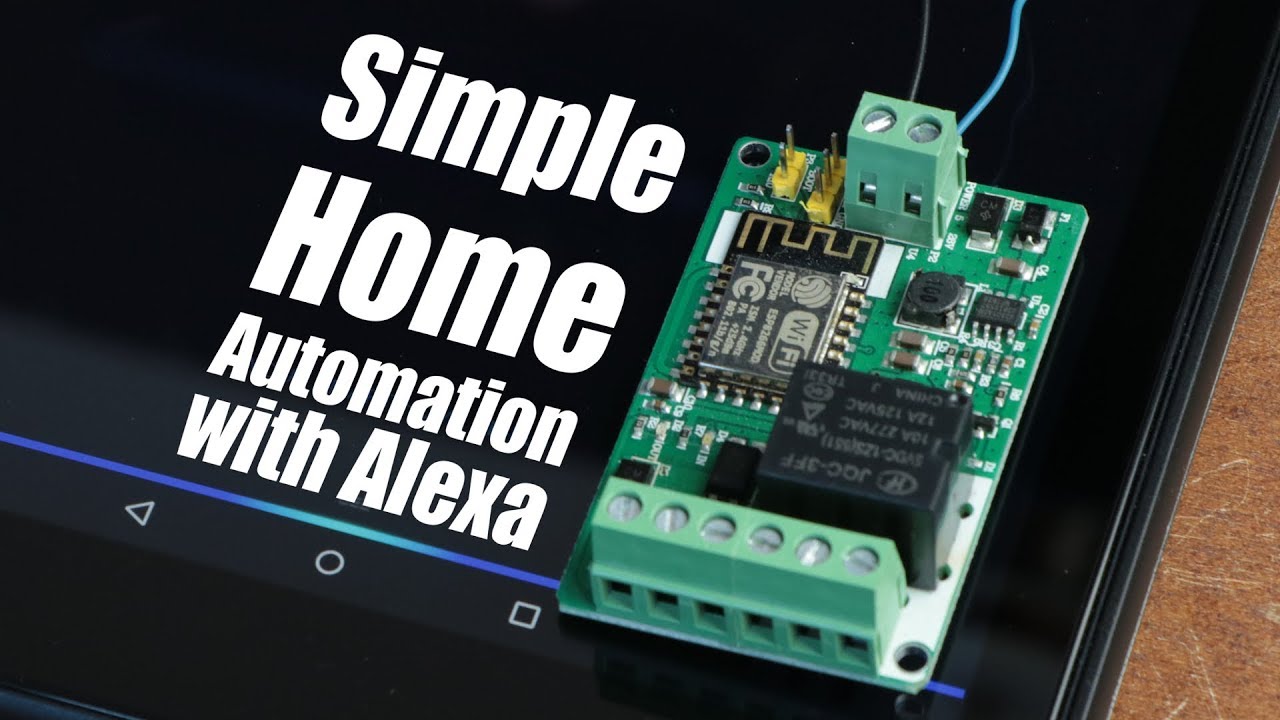
ZyetXihGrM0 | 25 Feb 2018
Upload Gerber files for review & order $2 PCBs: https://jlcpcb.com/quote Support me for more videos: https://www.patreon.com/GreatScott Previous video: https://youtu.be/AMiXme4bMUk Facebook: https://www.facebook.com/greatscottlab Twitter: https://twitter.com/GreatScottLab You can get the ESP8266 Relay Board here: (affiliate link) Amazon.com: http://amzn.to/2EU1S6F Amazon.de: http://amzn.to/2sU2cRq Ebay: http://rover.ebay.com/rover/1/711-53200-19255-0/1?icep_ff3=2&pub=5575101368&toolid=10001&campid=5337582279&customid=&icep_item=201604528261&ipn=psmain&icep_vectorid=229466&kwid=902099&mtid=824&kw=lg Useful websites which were mentioned in the video: https://ucexperiment.wordpress.com/2016/12/18/yunshan-esp8266-250v-15a-acdc-network-wifi-relay-module/ https://bitbucket.org/xoseperez/fauxmoesp https://github.com/kakopappa/sinric https://sinric.com/ In this video I will show you how we can easily control the output of a µC with Amazon Alexa. Along the way I will show you what software to use and which hardware is suitable to switch mains voltage. And at the end I will present you a practical example of home automation by controlling the lights in a corridor. Thanks to JLCPCB for sponsoring this video Visit https://jlcpcb.com to get professional PCBs for low prices Music: 2011 Lookalike by Bartlebeats Ecstatic Wave, Jens Kiilstofte https://machinimasound.com/music

T_3KIG2e9jM | 21 Feb 2018
You can enter the Wave 2018 event here: http://wave.keysight.com Keysight Labs YouTube Channel: https://www.youtube.com/user/KeysightOscilloscope Livestream for the Wave 2018 event: https://www.youtube.com/watch?v=BMkkBT0oMo8 Support me for more videos: https://www.patreon.com/GreatScott Facebook: https://www.facebook.com/greatscottlab Twitter: https://twitter.com/GreatScottLab Viewers from UN sanctioned countries (North Korea, Iran,...) can not enter the giveaway from GreatScott!. Sorry.
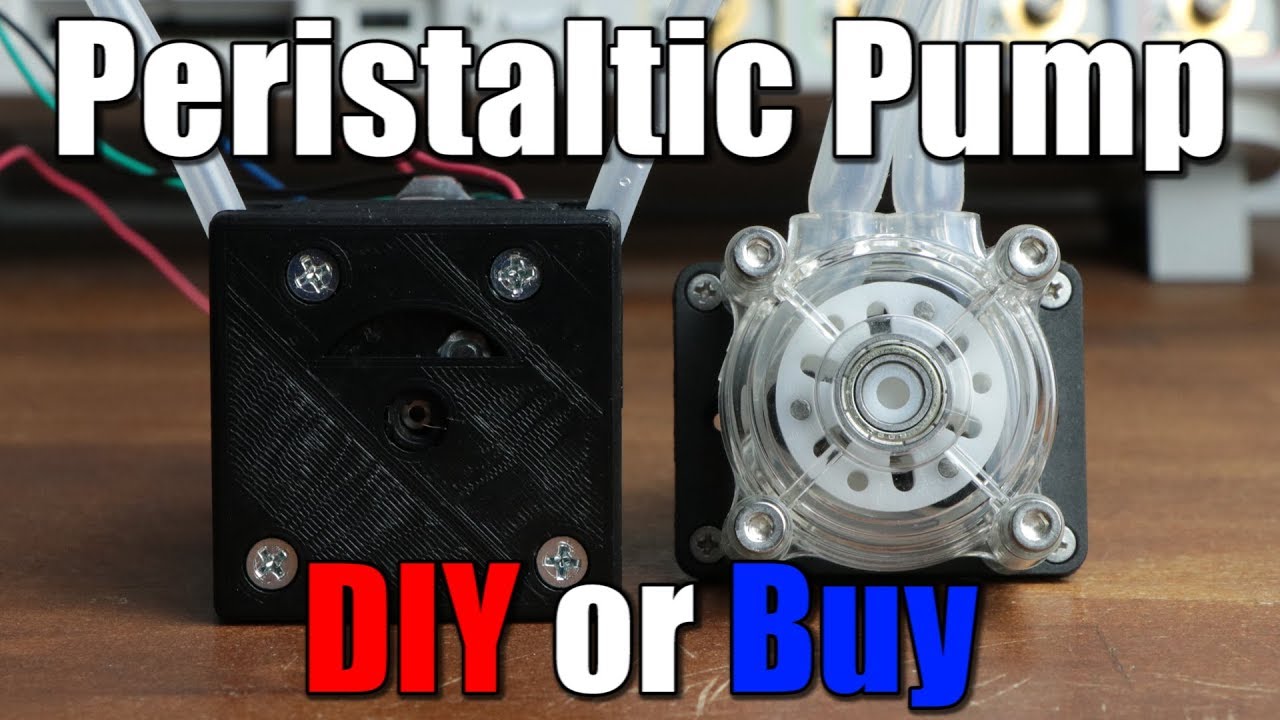
AMiXme4bMUk | 18 Feb 2018
Upload Gerber files for review & order $2 PCBs: https://jlcpcb.com/quote Support me for more videos: https://www.patreon.com/GreatScott Previous video: https://youtu.be/a6elq83OVWQ Facebook: https://www.facebook.com/greatscottlab Twitter: https://twitter.com/GreatScottLab Thingiverse Model from Ralf: https://www.thingiverse.com/thing:254956 More project information (schematic, code,....) on Instructables: https://www.instructables.com/id/DIY-Peristaltic-Pump/ You can get the Buy option shown in the video here: (affiliate link) http://rover.ebay.com/rover/1/711-53200-19255-0/1?icep_ff3=2&pub=5575101368&toolid=10001&campid=5337582279&customid=&icep_item=142271941950&ipn=psmain&icep_vectorid=229466&kwid=902099&mtid=824&kw=lg Parts list (incomplete, see Instructables for more, affiliate links): Amazon.com: 1x Arduino Nano: http://amzn.to/2CrLhFn 1x NEMA17 Stepper Motor: http://amzn.to/2CwhwDu 1x DRV8825 Stepper Motor Driver: http://amzn.to/2CtuWjB 1x 10kΩ Potentiometer: http://amzn.to/2C9j2zw 1x 100µF Capacitor: http://amzn.to/2Curk0x Ebay: 1x Arduino Nano: http://rover.ebay.com/rover/1/711-53200-19255-0/1?icep_ff3=2&pub=5575101368&toolid=10001&campid=5337582279&customid=&icep_item=201601613488&ipn=psmain&icep_vectorid=229466&kwid=902099&mtid=824&kw=lg 1x NEMA17 Stepper Motor: http://rover.ebay.com/rover/1/711-53200-19255-0/1?icep_ff3=2&pub=5575101368&toolid=10001&campid=5337582279&customid=&icep_item=192252132344&ipn=psmain&icep_vectorid=229466&kwid=902099&mtid=824&kw=lg 1x DRV8825 Stepper Motor Driver: http://rover.ebay.com/rover/1/711-53200-19255-0/1?icep_ff3=2&pub=5575101368&toolid=10001&campid=5337582279&customid=&icep_item=321512494157&ipn=psmain&icep_vectorid=229466&kwid=902099&mtid=824&kw=lg 1x 10kΩ Potentiometer: http://rover.ebay.com/rover/1/711-53200-19255-0/1?icep_ff3=2&pub=5575101368&toolid=10001&campid=5337582279&customid=&icep_item=172618234349&ipn=psmain&icep_vectorid=229466&kwid=902099&mtid=824&kw=lg 1x 100µF Capacitor: http://rover.ebay.com/rover/1/711-53200-19255-0/1?icep_ff3=2&pub=5575101368&toolid=10001&campid=5337582279&customid=&icep_item=263472281711&ipn=psmain&icep_vectorid=229466&kwid=902099&mtid=824&kw=lg In this episode of DIY or Buy we will have a look at peristaltic pumps and find out whether it makes sense to DIY our own version of it or whether we should just stick with the commercial buy option instead. Along the way we will create a stepper motor driver circuit and a suitable 3D print for our DIY version. Thanks to JLCPCB for sponsoring this video Visit https://jlcpcb.com to get professional PCBs for low prices Music: 2011 Lookalike by Bartlebeats Killing Time, Kevin MacLeod (incompetech.com)

a6elq83OVWQ | 11 Feb 2018
Support me for more videos: https://www.patreon.com/GreatScott Previous video: https://youtu.be/7Hn4UFi9wvs Facebook: https://www.facebook.com/greatscottlab Twitter: https://twitter.com/GreatScottLab You can get a Original Prusa i3 MK3 3D Printer here: https://shop.prusa3d.com/en/17-3d-printers Thanks to Prusa Research for providing the tested unit. Thingiverse models in this video: https://www.thingiverse.com/thing:763622 https://www.thingiverse.com/thing:2234489 https://www.thingiverse.com/thing:2633724 https://www.thingiverse.com/thing:2627593 https://www.thingiverse.com/thing:2297367 https://www.thingiverse.com/thing:193647 https://www.thingiverse.com/thing:952885 https://www.thingiverse.com/thing:814007 https://www.thingiverse.com/thing:1460364 In this video we will have a look at the Original Prusa i3 MK3 3D Printer and find out whether it is a worthy successor to the MK2. Along the way I will show you my experiences I had with the machine and its new features. And at the end I will tell you whether I think it is worth the money. Music: 2011 Lookalike by Bartlebeats Ecstatic Wave, Jens Kiilstofte https://machinimasound.com/music

7Hn4UFi9wvs | 04 Feb 2018
Only $2 for 10pcs PCBs (10cm*10cm): https://jlcpcb.com Support me for more videos: https://www.patreon.com/GreatScott Previous video: https://youtu.be/1pKJ-KcHZ8g Facebook: https://www.facebook.com/greatscottlab Twitter: https://twitter.com/GreatScottLab Voice-over Microphone || DIY or Buy: https://youtu.be/ts-JqEVzvDo More project information (code, schematic,...) on Instructables: https://www.instructables.com/id/Make-Your-Own-Spy-Bug-Arduino-Voice-Recorder/ Parts list (incomplete, see Instructables for more, affiliate links): Amazon.com: 1x Arduino Pro Mini: http://amzn.to/2Eh0YnW 1x LiPo Battery: http://amzn.to/2E30BcU 1x TP4056 LiPo Charge/Protection Board: http://amzn.to/2s77dWo 1x Micro SD Card Adapter: http://amzn.to/2GMEY2G 1x Electret Mic + MAX9814 Amp: http://amzn.to/2GLB5uJ 1x Tactile Switch: http://amzn.to/2Eh15Qo 1x 5mm Red LED: http://amzn.to/2GNotDt 1x 2kΩ Resistor: http://amzn.to/2GNouY3 Ebay: 1x Arduino Pro Mini: http://rover.ebay.com/rover/1/711-53200-19255-0/1?icep_ff3=2&pub=5575101368&toolid=10001&campid=5337582279&customid=&icep_item=191679508570&ipn=psmain&icep_vectorid=229466&kwid=902099&mtid=824&kw=lg 1x LiPo Battery: http://rover.ebay.com/rover/1/711-53200-19255-0/1?icep_ff3=2&pub=5575101368&toolid=10001&campid=5337582279&customid=&icep_item=181298737034&ipn=psmain&icep_vectorid=229466&kwid=902099&mtid=824&kw=lg 1x TP4056 LiPo Charge/Protection Board: http://rover.ebay.com/rover/1/711-53200-19255-0/1?icep_ff3=2&pub=5575101368&toolid=10001&campid=5337582279&customid=&icep_item=172892361639&ipn=psmain&icep_vectorid=229466&kwid=902099&mtid=824&kw=lg 1x Micro SD Card Adapter: http://rover.ebay.com/rover/1/711-53200-19255-0/1?icep_ff3=2&pub=5575101368&toolid=10001&campid=5337582279&customid=&icep_item=112219107442&ipn=psmain&icep_vectorid=229466&kwid=902099&mtid=824&kw=lg 1x Electret Mic + MAX9814 Amp: http://rover.ebay.com/rover/1/711-53200-19255-0/1?icep_ff3=2&pub=5575101368&toolid=10001&campid=5337582279&customid=&icep_item=172379251850&ipn=psmain&icep_vectorid=229466&kwid=902099&mtid=824&kw=lg 1x Tactile Switch: http://rover.ebay.com/rover/1/711-53200-19255-0/1?icep_ff3=2&pub=5575101368&toolid=10001&campid=5337582279&customid=&icep_item=192232129149&ipn=psmain&icep_vectorid=229466&kwid=902099&mtid=824&kw=lg 1x 5mm Red LED: http://rover.ebay.com/rover/1/711-53200-19255-0/1?icep_ff3=2&pub=5575101368&toolid=10001&campid=5337582279&customid=&icep_item=121977427183&ipn=psmain&icep_vectorid=229466&kwid=902099&mtid=824&kw=lg 1x 2kΩ Resistor: http://rover.ebay.com/rover/1/711-53200-19255-0/1?icep_ff3=2&pub=5575101368&toolid=10001&campid=5337582279&customid=&icep_item=132265230690&ipn=psmain&icep_vectorid=229466&kwid=902099&mtid=824&kw=lg Thanks to JLCPCB for sponsoring this video Visit https://jlcpcb.com to get professional PCBs for low prices In this project we will combine an Arduino Pro Mini with a couple of complementary components in order to create a voice recorder which could be abused as a spy bug. It has a run time of around 9 hours, is small and super easy to use. The recording quality might not be the best, but it should be suitable for many purposes. Music: 2011 Lookalike by Bartlebeats Killing Time, Kevin MacLeod (incompetech.com)

1pKJ-KcHZ8g | 28 Jan 2018
Only $2 for 10pcs PCBs (10cm*10cm): https://jlcpcb.com Support me for more videos: https://www.patreon.com/GreatScott Previous video: https://youtu.be/EaZuKRSvwdo Facebook: https://www.facebook.com/greatscottlab Twitter: https://twitter.com/GreatScottLab How does Magnetic Levitation work? || Crude Levitator circuit: https://youtu.be/BgIjlvlwwzY You can get the schematic and the code of the circuit here: https://www.patreon.com/posts/16653255 You can get the spreadsheet for the Arduino PID calculation here: https://www.dropbox.com/s/yrdreafcn8vwh0j/PID%20tuning%20Arduino.xlsx?dl=0 Thanks to JLCPCB for sponsoring this video Visit https://jlcpcb.com to get professional PCBs for low prices Parts list: (affiliate links): Ebay: SS495A Hall effect sensor: http://rover.ebay.com/rover/1/711-53200-19255-0/1?icep_ff3=2&pub=5575101368&toolid=10001&campid=5337606358&customid=&icep_item=252022864137&ipn=psmain&icep_vectorid=229466&kwid=902099&mtid=824&kw=lg Electromagnet: http://rover.ebay.com/rover/1/711-53200-19255-0/1?icep_ff3=2&pub=5575101368&toolid=10001&campid=5337582279&customid=&icep_item=202117586516&ipn=psmain&icep_vectorid=229466&kwid=902099&mtid=824&kw=lg IRLZ44N MOSFET: http://rover.ebay.com/rover/1/711-53200-19255-0/1?icep_ff3=2&pub=5575101368&toolid=10001&campid=5337606358&customid=&icep_item=171532905847&ipn=psmain&icep_vectorid=229466&kwid=902099&mtid=824&kw=lg TC4420 MOSFET Driver: http://rover.ebay.com/rover/1/711-53200-19255-0/1?icep_ff3=2&pub=5575101368&toolid=10001&campid=5337606358&customid=&icep_item=182170720290&ipn=psmain&icep_vectorid=229466&kwid=902099&mtid=824&kw=lg PCB Terminals: http://rover.ebay.com/rover/1/711-53200-19255-0/1?icep_ff3=2&pub=5575101368&toolid=10001&campid=5337606358&customid=&icep_item=182525842695&ipn=psmain&icep_vectorid=229466&kwid=902099&mtid=824&kw=lg UF4007 Diode: http://rover.ebay.com/rover/1/711-53200-19255-0/1?icep_ff3=2&pub=5575101368&toolid=10001&campid=5337606358&customid=&icep_item=221995587488&ipn=psmain&icep_vectorid=229466&kwid=902099&mtid=824&kw=lg Arduino Nano: http://rover.ebay.com/rover/1/711-53200-19255-0/1?icep_ff3=2&pub=5575101368&toolid=10001&campid=5337582279&customid=&icep_item=201539955347&ipn=psmain&icep_vectorid=229466&kwid=902099&mtid=824&kw=lg Amazon.com: SS495A Hall effect sensor: http://amzn.to/2D7RLOT Electromagnet: http://amzn.to/2DGl3Aq IRLZ44N MOSFET: http://amzn.to/2DeiMiW TC4420 MOSFET Driver: http://amzn.to/2DtPomy PCB Terminals: http://amzn.to/2Dc1Edn UF4007 Diode: http://amzn.to/2D7zVLH Arduino Nano: http://amzn.to/2Ehgw8J In this Electronic Basics episode we will have a look at a crude levitator circuit and its control system. We will find out how two-position controller work and why it often makes sense to use the more complicated PID controller instead. At the end you will know the basics about those regulation technology systems and the levitator circuit will function as well. Music: 2011 Lookalike by Bartlebeats Ecstatic Wave, Jens Kiilstofte https://machinimasound.com/music

EaZuKRSvwdo | 21 Jan 2018
Upload Gerber files for review & order $2 PCBs: https://jlcpcb.com/quote Support me for more videos: https://www.patreon.com/GreatScott Previous video: https://youtu.be/BgIjlvlwwzY Facebook: https://www.facebook.com/greatscottlab Twitter: https://twitter.com/GreatScottLab Arduino videos mentioned in the video: https://youtu.be/BtLwoNJ6klE https://youtu.be/YT3birSKLLU https://youtu.be/EVm0qVJ56II https://youtu.be/IdL0_ZJ7V2s You can get the STM32 Development Board here: (affiliate links): Ebay: http://rover.ebay.com/rover/1/711-53200-19255-0/1?icep_ff3=2&pub=5575101368&toolid=10001&campid=5337582279&customid=&icep_item=311156408508&ipn=psmain&icep_vectorid=229466&kwid=902099&mtid=824&kw=lg Amazon.com: http://amzn.to/2Dzgfjk Amazon.de: http://amzn.to/2G0DWzq USB to Seriell Converter: Ebay: http://rover.ebay.com/rover/1/711-53200-19255-0/1?icep_ff3=2&pub=5575101368&toolid=10001&campid=5337582279&customid=&icep_item=381374421597&ipn=psmain&icep_vectorid=229466&kwid=902099&mtid=824&kw=lg Amazon.com: http://amzn.to/2EZkIJr Amazon.de: http://amzn.to/2Dte0in You can find more information about the board and how to use it here: http://www.st.com/en/microcontrollers/stm32f103c8.html http://wiki.stm32duino.com/index.php?title=Blue_Pill http://wiki.stm32duino.com/index.php?title=Boards_Manager_package http://grauonline.de/wordpress/?page_id=1004 http://www.stm32duino.com/ http://docs.leaflabs.com/static.leaflabs.com/pub/leaflabs/maple-docs/latest/index-2.html https://github.com/rogerclarkmelbourne/Arduino_STM32/wiki/Libraries Thanks to JLCPCB for sponsoring this video Visit https://jlcpcb.com to get professional PCBs for low prices In this video we will have a look at the Blue Pill development board that is based around an STM32 32-bit ARM uC. Along the way I will show you how to easily program it with the Arduino IDE and what advantages/disadvantages it offers in comparison to the traditional Arduino. Music: 2011 Lookalike by Bartlebeats Killing Time, Kevin MacLeod (incompetech.com)
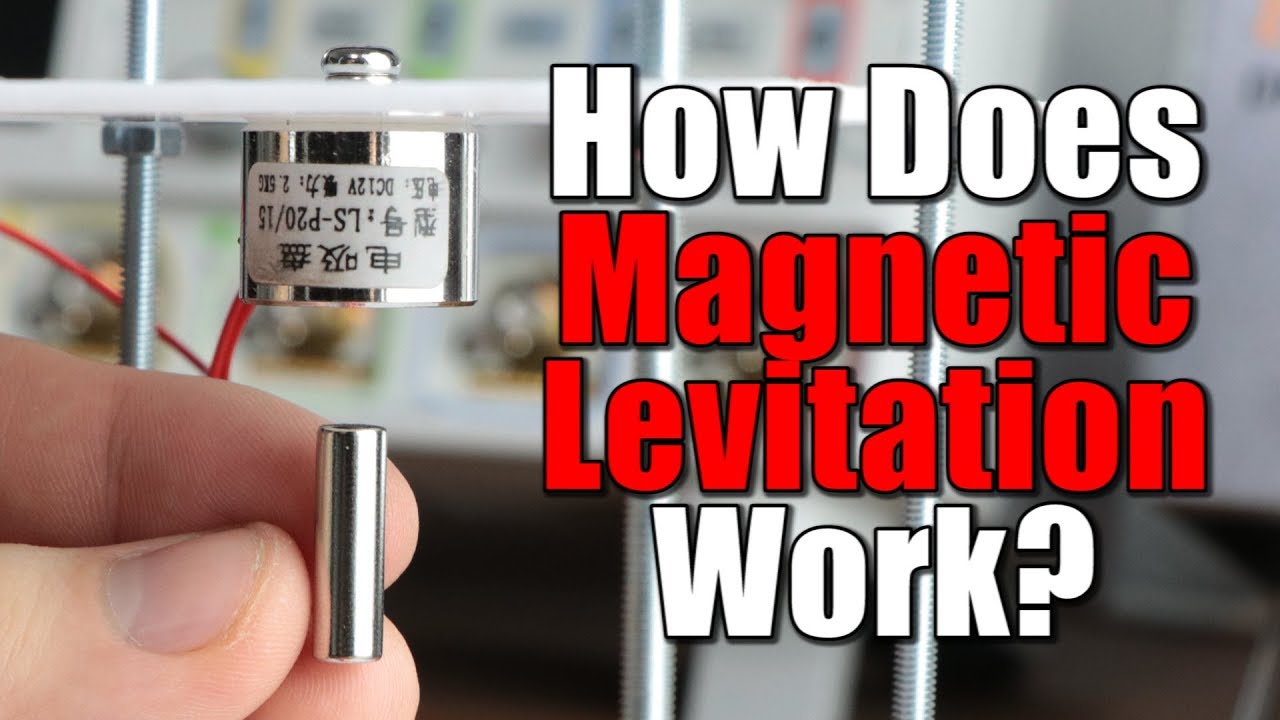
BgIjlvlwwzY | 14 Jan 2018
$2 PCBs & Shipping Discount(up to $20) on First Order: https://jlcpcb.com Support me for more videos: https://www.patreon.com/GreatScott Previous video: https://youtu.be/8nOXWfS1hQo Facebook: https://www.facebook.com/greatscottlab Twitter: https://twitter.com/GreatScottLab You can get the schematic and more information about the circuit here: https://www.patreon.com/posts/16383340 Thanks to JLCPCB for sponsoring this video Visit https://jlcpcb.com to get professional PCBs for low prices Parts list: (affiliate links): Ebay: SS495A Hall effect sensor: http://rover.ebay.com/rover/1/711-53200-19255-0/1?icep_ff3=2&pub=5575101368&toolid=10001&campid=5337606358&customid=&icep_item=252022864137&ipn=psmain&icep_vectorid=229466&kwid=902099&mtid=824&kw=lg Electromagnet: http://rover.ebay.com/rover/1/711-53200-19255-0/1?icep_ff3=2&pub=5575101368&toolid=10001&campid=5337606358&customid=&icep_item=182304262206&ipn=psmain&icep_vectorid=229466&kwid=902099&mtid=824&kw=lg IRLZ44N MOSFET: http://rover.ebay.com/rover/1/711-53200-19255-0/1?icep_ff3=2&pub=5575101368&toolid=10001&campid=5337606358&customid=&icep_item=171532905847&ipn=psmain&icep_vectorid=229466&kwid=902099&mtid=824&kw=lg TC4420 MOSFET Driver: http://rover.ebay.com/rover/1/711-53200-19255-0/1?icep_ff3=2&pub=5575101368&toolid=10001&campid=5337606358&customid=&icep_item=182170720290&ipn=psmain&icep_vectorid=229466&kwid=902099&mtid=824&kw=lg PCB Terminals: http://rover.ebay.com/rover/1/711-53200-19255-0/1?icep_ff3=2&pub=5575101368&toolid=10001&campid=5337606358&customid=&icep_item=182525842695&ipn=psmain&icep_vectorid=229466&kwid=902099&mtid=824&kw=lg UF4007 Diode: http://rover.ebay.com/rover/1/711-53200-19255-0/1?icep_ff3=2&pub=5575101368&toolid=10001&campid=5337606358&customid=&icep_item=221995587488&ipn=psmain&icep_vectorid=229466&kwid=902099&mtid=824&kw=lg Amazon.com: SS495A Hall effect sensor: http://amzn.to/2D7RLOT Electromagnet: http://amzn.to/2Dcv4s1 IRLZ44N MOSFET: http://amzn.to/2DeiMiW TC4420 MOSFET Driver: http://amzn.to/2DtPomy PCB Terminals: http://amzn.to/2Dc1Edn UF4007 Diode: http://amzn.to/2D7zVLH In this video we will have a closer look at the subject of magnetic levitation. At first we will talk about the theory on how to achieve the suspension of a magnet in midair and then we will create a crude levitator circuit that did not work very well but still showcased how the main principle works. Music: 2011 Lookalike by Bartlebeats Ecstatic Wave, Jens Kiilstofte https://machinimasound.com/music

8nOXWfS1hQo | 07 Jan 2018
Support me for more videos: https://www.patreon.com/GreatScott Previous video: https://youtu.be/tjCJ3MlFt7g Facebook: https://www.facebook.com/greatscottlab Twitter: https://twitter.com/GreatScottLab G&C Supermarket: http://goo.gl/1ZGWGU This Q&A #2 video is completely random and unscripted. I will go through 19 questions from Patreon, 6 from Facebook and 6 from Twitter.

tjCJ3MlFt7g | 30 Dec 2017
$2 for 10 PCBs (48 hours quick turn): https://jlcpcb.com Support me for more videos: https://www.patreon.com/GreatScott Previous video: https://youtu.be/h8ycmroFQSs Make your own ESC (Part 1): https://youtu.be/W9IHEqlGG1s Make your own ESC (Part 2): https://youtu.be/NXkLydhRvS0 Facebook: https://www.facebook.com/greatscottlab Twitter: https://twitter.com/GreatScottLab You can get the schematic + code shown in the video here: https://www.patreon.com/posts/16126253 Thanks to JLCPCB for sponsoring this video Visit https://jlcpcb.com to get professional PCBs for low prices In this episode of HACKED! we will have a closer look at the BLDC Motor of a hard drive. We will find out how it works and how we can use its construction to determine whether it spins clockwise or anticlockwise. At the end we will connect the Motor to an Arduino in order to use it as a rotary encoder. Music: 2011 Lookalike by Bartlebeats Killing Time, Kevin MacLeod (incompetech.com)
h8ycmroFQSs | 23 Dec 2017
JLCPCB for $2 PCB prototype (2-day build time): https://jlcpcb.com Support me for more videos: https://www.patreon.com/GreatScott Previous video: https://youtu.be/KajdWOlCt0s Water & Electronics video: https://youtu.be/pGLUsQozT94 Facebook: https://www.facebook.com/greatscottlab Twitter: https://twitter.com/GreatScottLab Thanks to JLCPCB for sponsoring this video Visit https://jlcpcb.com to get professional PCBs for low prices You can get Potting Compound here: (affiliate links) Amazon.de: http://amzn.to/2kL1ejJ Amazon.com: http://amzn.to/2zkL2Kt Ebay.de: http://rover.ebay.com/rover/1/707-53477-19255-0/1?icep_ff3=2&pub=5575101368&toolid=10001&campid=5337582279&customid=&icep_item=322611079202&ipn=psmain&icep_vectorid=229487&kwid=902099&mtid=824&kw=lg Ebay.com: http://rover.ebay.com/rover/1/711-53200-19255-0/1?icep_ff3=2&pub=5575101368&toolid=10001&campid=5337582279&customid=&icep_item=332477547141&ipn=psmain&icep_vectorid=229466&kwid=902099&mtid=824&kw=lg In this video we will find out how well nail polish, silicone and potting compound can waterproof electronics and how well they can handle heat transfer. Along the way I will show you how to apply those coating materials and what is important to remember when utilizing them. Music: 2011 Lookalike by Bartlebeats Ecstatic Wave, Jens Kiilstofte https://machinimasound.com/music

KajdWOlCt0s | 17 Dec 2017
$2 for 10 PCB's & A chance of Free shipping: https://jlcpcb.com Support me for more videos: https://www.patreon.com/GreatScott Previous video: https://youtu.be/Z7GkGeZrb2Y Facebook: https://www.facebook.com/greatscottlab Twitter: https://twitter.com/GreatScottLab Thanks to JLCPCB for sponsoring this video Visit https://jlcpcb.com to get professional PCBs for low prices You can get the microscopes shown in the video here: (affiliate links) Amazon.com: http://amzn.to/2BmHN80 http://amzn.to/2CNn9yf http://amzn.to/2kEpuUb Ebay: http://rover.ebay.com/rover/1/711-53200-19255-0/1?icep_ff3=2&pub=5575101368&toolid=10001&campid=5337582279&customid=&icep_item=401423108838&ipn=psmain&icep_vectorid=229466&kwid=902099&mtid=824&kw=lg http://rover.ebay.com/rover/1/711-53200-19255-0/1?icep_ff3=2&pub=5575101368&toolid=10001&campid=5337582279&customid=&icep_item=292028947587&ipn=psmain&icep_vectorid=229466&kwid=902099&mtid=824&kw=lg http://rover.ebay.com/rover/1/711-53200-19255-0/1?icep_ff3=2&pub=5575101368&toolid=10001&campid=5337582279&customid=&icep_item=112204909116&ipn=psmain&icep_vectorid=229466&kwid=902099&mtid=824&kw=lg Amazon.de: http://amzn.to/2AHHofq http://amzn.to/2CMf50T http://amzn.to/2kD83Dl In this VS episode we will compare three different microscopes for SMD soldering and find out whether it is necessary to spend a lot of money to get decent magnification or whether the cheapie microscope does the job just fine. Music: 2011 Lookalike by Bartlebeats Killing Time, Kevin MacLeod (incompetech.com)

Z7GkGeZrb2Y | 10 Dec 2017
Enjoy $2 PCBs and Free Shipping on First Order: https://jlcpcb.com Support me for more videos: https://www.patreon.com/GreatScott Previous video: https://youtu.be/lWFiKMSB_4M Facebook: https://www.facebook.com/greatscottlab Twitter: https://twitter.com/GreatScottLab More project information (schematic, code, parts list,...) on Instructables: https://www.instructables.com/id/Make-Your-Own-Crude-Cocktail-Machine/ Thanks to JLCPCB for sponsoring this video Visit https://jlcpcb.com to get professional PCBs for low prices In this project I will show you how I combined an Arduino Nano, an LCD, a rotary encoder, three peristaltic pumps with motor drivers, a load cell and a couple pieces of wood to create a crude, but functional Cocktail Machine. Along the way I will demonstrate how peristaltic pumps work and in which way they can work with the other components in order to pump a precise amount of liquid. Videos about components of the Cocktail Machine: Load Cell: https://youtu.be/lWFiKMSB_4M Rotary Encoder/LCD: https://youtu.be/XtpOl8FpkB8 or https://youtu.be/UtYbd89kVgY Parts list: (incomplete, see Instructables for more, affiliate links): Amazon.com: 1x Arduino Nano: http://amzn.to/2iMDj2k 1x I2C LCD: http://amzn.to/2BR2nwD 1x Rotary Encoder: http://amzn.to/2iLT7SF 1x Load Cell (1kg) + HX711 ADC IC: http://amzn.to/2AIadcu 2x L298N Breakout Board: http://amzn.to/2iL0IRx 3x Peristaltic Pump: http://amzn.to/2AU2Qkr 1x DC Jack: http://amzn.to/2ATAvuv 1x 15V 5A Power Supply: http://amzn.to/2iKENtL Ebay: 1x Arduino Nano: http://rover.ebay.com/rover/1/711-53200-19255-0/1?icep_ff3=2&pub=5575101368&toolid=10001&campid=5337582279&customid=&icep_item=201601613488&ipn=psmain&icep_vectorid=229466&kwid=902099&mtid=824&kw=lg 1x I2C LCD: http://rover.ebay.com/rover/1/711-53200-19255-0/1?icep_ff3=2&pub=5575101368&toolid=10001&campid=5337582279&customid=&icep_item=252513792517&ipn=psmain&icep_vectorid=229466&kwid=902099&mtid=824&kw=lg 1x Rotary Encoder: http://rover.ebay.com/rover/1/711-53200-19255-0/1?icep_ff3=2&pub=5575101368&toolid=10001&campid=5337582279&customid=&icep_item=171906808593&ipn=psmain&icep_vectorid=229466&kwid=902099&mtid=824&kw=lg 1x Load Cell (1kg) + HX711 ADC IC: http://rover.ebay.com/rover/1/711-53200-19255-0/1?icep_ff3=2&pub=5575101368&toolid=10001&campid=5337582279&customid=&icep_item=282067197427&ipn=psmain&icep_vectorid=229466&kwid=902099&mtid=824&kw=lg 2x L298N Breakout Board: http://rover.ebay.com/rover/1/711-53200-19255-0/1?icep_ff3=2&pub=5575101368&toolid=10001&campid=5337582279&customid=&icep_item=252675793125&ipn=psmain&icep_vectorid=229466&kwid=902099&mtid=824&kw=lg 3x Peristaltic Pump: http://rover.ebay.com/rover/1/711-53200-19255-0/1?icep_ff3=2&pub=5575101368&toolid=10001&campid=5337582279&customid=&icep_item=142271941950&ipn=psmain&icep_vectorid=229466&kwid=902099&mtid=824&kw=lg 1x DC Jack: http://rover.ebay.com/rover/1/711-53200-19255-0/1?icep_ff3=2&pub=5575101368&toolid=10001&campid=5337582279&customid=&icep_item=171778451435&ipn=psmain&icep_vectorid=229466&kwid=902099&mtid=824&kw=lg 1x 15V 5A Power Supply: http://rover.ebay.com/rover/1/711-53200-19255-0/1?icep_ff3=2&pub=5575101368&toolid=10001&campid=5337582279&customid=&icep_item=401349317089&ipn=psmain&icep_vectorid=229466&kwid=902099&mtid=824&kw=lg Music: 2011 Lookalike by Bartlebeats Killing Time, Kevin MacLeod (incompetech.com)
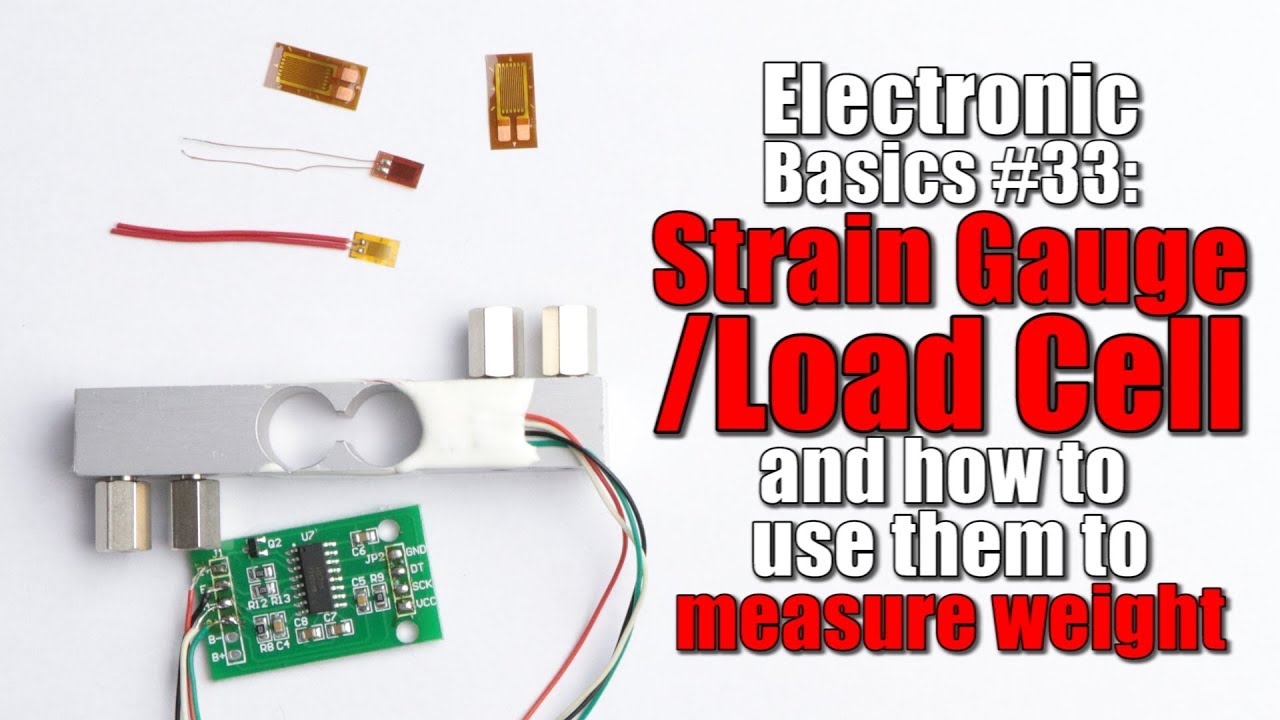
lWFiKMSB_4M | 03 Dec 2017
Support me for more videos: https://www.patreon.com/GreatScott Previous video: https://youtu.be/pGLUsQozT94 Facebook: https://www.facebook.com/greatscottlab Twitter: https://twitter.com/GreatScottLab You can get Strain Gauges, Load Cells and the HX711 IC here (affiliate links): Amazon.com: Strain Gauge: http://amzn.to/2iazaVl Load Cell: http://amzn.to/2kiSnIN HX711: http://amzn.to/2ia9ybb Ebay: Strain Gauge: http://rover.ebay.com/rover/1/711-53200-19255-0/1?icep_ff3=2&pub=5575101368&toolid=10001&campid=5337582279&customid=&icep_item=142533264958&ipn=psmain&icep_vectorid=229466&kwid=902099&mtid=824&kw=lg Load Cell: http://rover.ebay.com/rover/1/711-53200-19255-0/1?icep_ff3=2&pub=5575101368&toolid=10001&campid=5337582279&customid=&icep_item=172442136742&ipn=psmain&icep_vectorid=229466&kwid=902099&mtid=824&kw=lg HX711: http://rover.ebay.com/rover/1/711-53200-19255-0/1?icep_ff3=2&pub=5575101368&toolid=10001&campid=5337582279&customid=&icep_item=182696799101&ipn=psmain&icep_vectorid=229466&kwid=902099&mtid=824&kw=lg Amazon.de: Strain Gauge: http://amzn.to/2BGbEIg Load Cell: http://amzn.to/2npyuks HX711: http://amzn.to/2khmhxh In this episode of electronic basics we will have a closer look at strain gauges and load cells and find out how we can use them to measure weight. Along the way we will talk about the wheatstone bridge, suitable amplifier circuits and how we can use a µC to output the measured values of our weight measuring system. Music: 2011 Lookalike by Bartlebeats Killing Time, Kevin MacLeod (incompetech.com)

pGLUsQozT94 | 26 Nov 2017
Support me for more videos: https://www.patreon.com/GreatScott Previous video: https://youtu.be/2UtL2uAYCUA Facebook: https://www.facebook.com/greatscottlab Twitter: https://twitter.com/GreatScottLab In this video I will show you how water and electricity/electronic circuits correlate by conducting a couple of experiments. Along the way we will bust a couple of preconceptions and find out whether we can use electronics underwater. Music: 2011 Lookalike by Bartlebeats Ecstatic Wave, Jens Kiilstofte https://machinimasound.com/music You want to support my videos? You can browse and buy tools&materials from my Amazon Store. This way I get a small commission: Amazon.de: http://astore.amazon.de/great043-21 Amazon.com:http://astore.amazon.com/gre09a-20 Amazon.co.uk: http://astore.amazon.co.uk/gre0b-21 Or you feel super generous and want to use this Amazon link as your Amazon home page. And do not worry, your purchases are all anonym and the prices are all the same: Amazon.de:http://www.amazon.de/?_encoding=UTF8&camp=1638&creative=19454&linkCode=ur2&site-redirect=de&tag=great043-21&linkId=ORZEQZEOVJAFURCZ Amazon.com:http://www.amazon.com/?_encoding=UTF8&camp=1789&creative=390957&linkCode=ur2&tag=gre09a-20&linkId=I5NDCEAVCD2OWM4S

2UtL2uAYCUA | 19 Nov 2017
Support me for more videos: https://www.patreon.com/GreatScott Previous video: https://youtu.be/_FytVf5hH88 Facebook: https://www.facebook.com/greatscottlab Twitter: https://twitter.com/GreatScottLab Relay video: https://youtu.be/2BdevOmN-Zk Triac video: https://youtu.be/4N1uLth1o9o More project information (schematic, parts list,...) on Instructables: https://www.instructables.com/id/Make-Your-Own-Solid-State-Relay You can get the commercial Solid State Relay here (Affiliate link): Amazon.com: http://amzn.to/2zgYSTh Ebay: http://rover.ebay.com/rover/1/711-53200-19255-0/1?icep_ff3=2&pub=5575101368&toolid=10001&campid=5337582279&customid=&icep_item=201542544279&ipn=psmain&icep_vectorid=229466&kwid=902099&mtid=824&kw=lg Amazon.de: http://amzn.to/2hLR9F9 Parts list (incomplete, see Instructables for more): Amazon.com: 1x MOC3020 Optocoupler: http://amzn.to/2zUgwcv 1x BT138 Triac: http://amzn.to/2AYozVH 1x 330Ω, 3x 1kΩ Resistor: http://amzn.to/2hLOI5t 2x PCB Terminal: http://amzn.to/2B0LkbP 1x Heatsink: http://amzn.to/2AZjmNz Ebay: 1x MOC3020 Optocoupler: http://rover.ebay.com/rover/1/711-53200-19255-0/1?icep_ff3=2&pub=5575101368&toolid=10001&campid=5337582279&customid=&icep_item=191674503980&ipn=psmain&icep_vectorid=229466&kwid=902099&mtid=824&kw=lg 1x BT138 Triac: http://rover.ebay.com/rover/1/711-53200-19255-0/1?icep_ff3=2&pub=5575101368&toolid=10001&campid=5337582279&customid=&icep_item=201594409101&ipn=psmain&icep_vectorid=229466&kwid=902099&mtid=824&kw=lg 1x 330Ω, 3x 1kΩ Resistor: http://rover.ebay.com/rover/1/711-53200-19255-0/1?icep_ff3=2&pub=5575101368&toolid=10001&campid=5337582279&customid=&icep_item=282351620096&ipn=psmain&icep_vectorid=229466&kwid=902099&mtid=824&kw=lg 2x PCB Terminal: http://rover.ebay.com/rover/1/711-53200-19255-0/1?icep_ff3=2&pub=5575101368&toolid=10001&campid=5337582279&customid=&icep_item=182525842695&ipn=psmain&icep_vectorid=229466&kwid=902099&mtid=824&kw=lg 1x Heatsink: http://rover.ebay.com/rover/1/711-53200-19255-0/1?icep_ff3=2&pub=5575101368&toolid=10001&campid=5337582279&customid=&icep_item=112376034841&ipn=psmain&icep_vectorid=229466&kwid=902099&mtid=824&kw=lg In this episode of DIY or Buy we will have a look at solid state relays, find out how they work and when to use them and find out in the end whether it would make sense to create our own DIY solid state relay or whether we should buy the commercial product instead. Music: 2011 Lookalike by Bartlebeats Killing Time, Kevin MacLeod (incompetech.com) You want to support my videos? You can browse and buy tools&materials from my Amazon Store. This way I get a small commission: Amazon.de: http://astore.amazon.de/great043-21 Amazon.com:http://astore.amazon.com/gre09a-20 Amazon.co.uk: http://astore.amazon.co.uk/gre0b-21 Or you feel super generous and want to use this Amazon link as your Amazon home page. And do not worry, your purchases are all anonym and the prices are all the same: Amazon.de:http://www.amazon.de/?_encoding=UTF8&camp=1638&creative=19454&linkCode=ur2&site-redirect=de&tag=great043-21&linkId=ORZEQZEOVJAFURCZ Amazon.com:http://www.amazon.com/?_encoding=UTF8&camp=1789&creative=390957&linkCode=ur2&tag=gre09a-20&linkId=I5NDCEAVCD2OWM4S
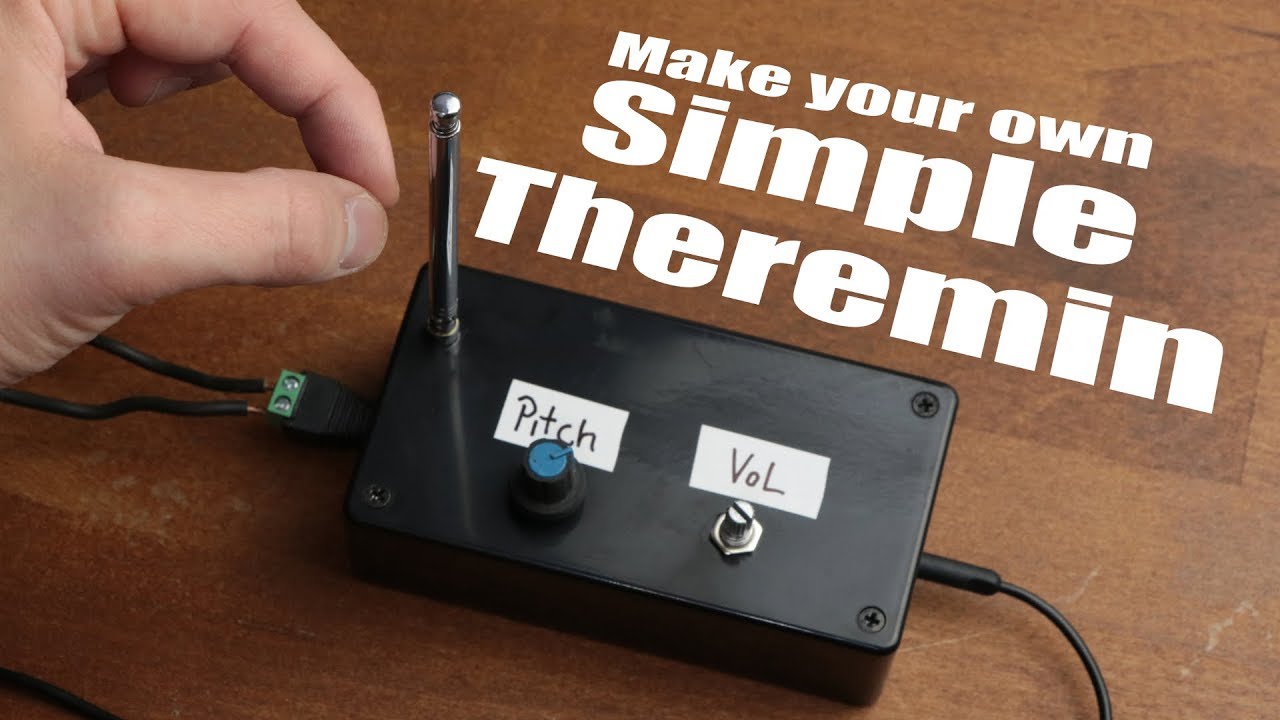
_FytVf5hH88 | 12 Nov 2017
Support me for more videos: https://www.patreon.com/GreatScott Previous video: https://youtu.be/ts-JqEVzvDo Facebook: https://www.facebook.com/greatscottlab Twitter: https://twitter.com/GreatScottLab More project information (schematic, pictures,....) on Instructables: https://www.instructables.com/id/Make-Your-Own-Simple-Theremin/ Theremin website shown in the video: http://www.strangeapparatus.com/Theremin.html Parts list (affiliate links, incomplete, see Instructables for more): Ebay: 1x CD4093 NAND IC: http://rover.ebay.com/rover/1/711-53200-19255-0/1?icep_ff3=2&pub=5575101368&toolid=10001&campid=5337582279&customid=&icep_item=181847219712&ipn=psmain&icep_vectorid=229466&kwid=902099&mtid=824&kw=lg 1x MCP602 OpAmp: http://rover.ebay.com/rover/1/711-53200-19255-0/1?icep_ff3=2&pub=5575101368&toolid=10001&campid=5337582279&customid=&icep_item=181846803759&ipn=psmain&icep_vectorid=229466&kwid=902099&mtid=824&kw=lg 2x 100pF, 1x 1nF Capacitor: http://rover.ebay.com/rover/1/711-53200-19255-0/1?icep_ff3=2&pub=5575101368&toolid=10001&campid=5337582279&customid=&icep_item=221372015123&ipn=psmain&icep_vectorid=229466&kwid=902099&mtid=824&kw=lg 1x 4.7µF Capacitor: http://rover.ebay.com/rover/1/711-53200-19255-0/1?icep_ff3=2&pub=5575101368&toolid=10001&campid=5337582279&customid=&icep_item=201956633680&ipn=psmain&icep_vectorid=229466&kwid=902099&mtid=824&kw=lg 6x 10k, 1x 5.1k, 1x6.8k Resistor: 2x 10k Potentiometer: http://rover.ebay.com/rover/1/711-53200-19255-0/1?icep_ff3=2&pub=5575101368&toolid=10001&campid=5337582279&customid=&icep_item=172618234352&ipn=psmain&icep_vectorid=229466&kwid=902099&mtid=824&kw=lg 1x Antenna: http://rover.ebay.com/rover/1/711-53200-19255-0/1?icep_ff3=2&pub=5575101368&toolid=10001&campid=5337582279&customid=&icep_item=172000947496&ipn=psmain&icep_vectorid=229466&kwid=902099&mtid=824&kw=lg 1x Power Jack: http://rover.ebay.com/rover/1/711-53200-19255-0/1?icep_ff3=2&pub=5575101368&toolid=10001&campid=5337582279&customid=&icep_item=171778451435&ipn=psmain&icep_vectorid=229466&kwid=902099&mtid=824&kw=lg 1x Audio Jack: http://rover.ebay.com/rover/1/711-53200-19255-0/1?icep_ff3=2&pub=5575101368&toolid=10001&campid=5337582279&customid=&icep_item=122059624238&ipn=psmain&icep_vectorid=229466&kwid=902099&mtid=824&kw=lg 1x Housing: http://rover.ebay.com/rover/1/711-53200-19255-0/1?icep_ff3=2&pub=5575101368&toolid=10001&campid=5337582279&customid=&icep_item=381073243337&ipn=psmain&icep_vectorid=229466&kwid=902099&mtid=824&kw=lg Amazon.com: 1x CD4093 NAND IC: http://amzn.to/2ADFlcq 1x MCP602 OpAmp: http://amzn.to/2yvJ8aE 2x 100pF, 1x 1nF Capacitor: http://amzn.to/2yxIgSz 1x 4.7µF Capacitor: http://amzn.to/2AEY7jN 6x 10k, 1x 5.1k, 1x6.8k Resistor: http://amzn.to/2ywZ3VO 2x 10k Potentiometer: http://amzn.to/2i7rHXy 1x Antenna: http://amzn.to/2yvJkXq 1x Power Jack: http://amzn.to/2ytRnUn 1x Audio Jack: http://amzn.to/2ACKbqx 1x Housing: http://amzn.to/2ABhev8 In this project I will show you how the electronic instrument Theremin works and how we can create a simple version of it with the help of 2 ICs and only a few complementary components. Along the way we will talk about oscillator types, body capacitance and much more. So let's get started! Music: 2011 Lookalike by Bartlebeats Ecstatic Wave, Jens Kiilstofte https://machinimasound.com/music You want to support my videos? You can browse and buy tools&materials from my Amazon Store. This way I get a small commission: Amazon.de: http://astore.amazon.de/great043-21 Amazon.com:http://astore.amazon.com/gre09a-20 Amazon.co.uk: http://astore.amazon.co.uk/gre0b-21 Or you feel super generous and want to use this Amazon link as your Amazon home page. And do not worry, your purchases are all anonym and the prices are all the same: Amazon.de:http://www.amazon.de/?_encoding=UTF8&camp=1638&creative=19454&linkCode=ur2&site-redirect=de&tag=great043-21&linkId=ORZEQZEOVJAFURCZ Amazon.com:http://www.amazon.com/?_encoding=UTF8&camp=1789&creative=390957&linkCode=ur2&tag=gre09a-20&linkId=I5NDCEAVCD2OWM4S

ts-JqEVzvDo | 05 Nov 2017
Thanks to AudioBlocks for sponsoring this video Click here to start your 7 day trial: http://audioblocks.com/greatscottlab_1117 Support me for more videos: https://www.patreon.com/GreatScott Previous video: https://youtu.be/2BdevOmN-Zk Facebook: https://www.facebook.com/greatscottlab Twitter: https://twitter.com/GreatScottLab In this episode of DIY or Buy we will have a look at two different microphone types in order to find out whether it makes sense to DIY our own micorphone for voice-overs or whether we should just stick with commercial products. Music: 2011 Lookalike by Bartlebeats Killing Time, Kevin MacLeod (incompetech.com) You want to support my videos? You can browse and buy tools&materials from my Amazon Store. This way I get a small commission: Amazon.de: http://astore.amazon.de/great043-21 Amazon.com:http://astore.amazon.com/gre09a-20 Amazon.co.uk: http://astore.amazon.co.uk/gre0b-21 Or you feel super generous and want to use this Amazon link as your Amazon home page. And do not worry, your purchases are all anonym and the prices are all the same: Amazon.de:http://www.amazon.de/?_encoding=UTF8&camp=1638&creative=19454&linkCode=ur2&site-redirect=de&tag=great043-21&linkId=ORZEQZEOVJAFURCZ Amazon.com:http://www.amazon.com/?_encoding=UTF8&camp=1789&creative=390957&linkCode=ur2&tag=gre09a-20&linkId=I5NDCEAVCD2OWM4S
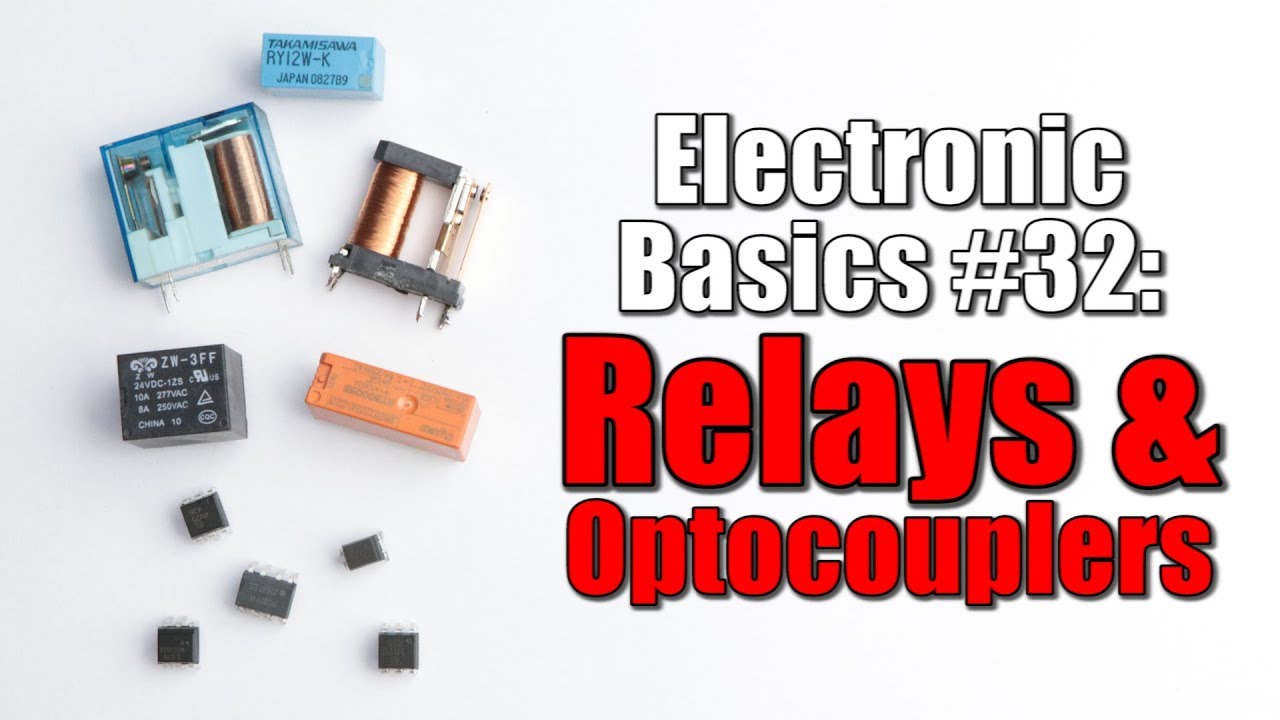
2BdevOmN-Zk | 29 Oct 2017
Support me for more videos: https://www.patreon.com/GreatScott Previous video: https://youtu.be/aKhPj7uFD0Y Facebook: https://www.facebook.com/greatscottlab Twitter: https://twitter.com/GreatScottLab In this episode of Electronic Basics I will show you how a Relay and Optocoupler works and when it makes sense to use them. Along the way you will see a couple of practical examples and find out how to control these two components properly. Music: 2011 Lookalike by Bartlebeats Ecstatic Wave, Jens Kiilstofte https://machinimasound.com/music You want to support my videos? You can browse and buy tools&materials from my Amazon Store. This way I get a small commission: Amazon.de: http://astore.amazon.de/great043-21 Amazon.com:http://astore.amazon.com/gre09a-20 Amazon.co.uk: http://astore.amazon.co.uk/gre0b-21 Or you feel super generous and want to use this Amazon link as your Amazon home page. And do not worry, your purchases are all anonym and the prices are all the same: Amazon.de:http://www.amazon.de/?_encoding=UTF8&camp=1638&creative=19454&linkCode=ur2&site-redirect=de&tag=great043-21&linkId=ORZEQZEOVJAFURCZ Amazon.com:http://www.amazon.com/?_encoding=UTF8&camp=1789&creative=390957&linkCode=ur2&tag=gre09a-20&linkId=I5NDCEAVCD2OWM4S

aKhPj7uFD0Y | 22 Oct 2017
You can get an Ultrasonic Mist Maker here (Affiliate Links): Amazon.com: http://amzn.to/2zua0aL Amazon.de: http://amzn.to/2yIztAm Ebay: http://rover.ebay.com/rover/1/711-53200-19255-0/1?icep_ff3=2&pub=5575101368&toolid=10001&campid=5337582279&customid=&icep_item=390914877251&ipn=psmain&icep_vectorid=229466&kwid=902099&mtid=824&kw=lg Support me for more videos: https://www.patreon.com/GreatScott Previous video: https://youtu.be/_ak0IJUMBFg Wireless Energy Transfer System: https://youtu.be/3E5PUnYlaTM Facebook: https://www.facebook.com/greatscottlab Twitter: https://twitter.com/GreatScottLab In this episode of DIY or Buy we will have a look at an ultrasonic mist maker and find out whether it makes sense to create a driver circuit for the ultrasonic piezoelectric disc. Or if we should rather just buy the commercial product instead. Music: 2011 Lookalike by Bartlebeats Killing Time, Kevin MacLeod (incompetech.com) You want to support my videos? You can browse and buy tools&materials from my Amazon Store. This way I get a small commission: Amazon.de: http://astore.amazon.de/great043-21 Amazon.com:http://astore.amazon.com/gre09a-20 Amazon.co.uk: http://astore.amazon.co.uk/gre0b-21 Or you feel super generous and want to use this Amazon link as your Amazon home page. And do not worry, your purchases are all anonym and the prices are all the same: Amazon.de:http://www.amazon.de/?_encoding=UTF8&camp=1638&creative=19454&linkCode=ur2&site-redirect=de&tag=great043-21&linkId=ORZEQZEOVJAFURCZ Amazon.com:http://www.amazon.com/?_encoding=UTF8&camp=1789&creative=390957&linkCode=ur2&tag=gre09a-20&linkId=I5NDCEAVCD2OWM4S
_ak0IJUMBFg | 15 Oct 2017
Support me for more videos: https://www.patreon.com/GreatScott Previous video: https://youtu.be/DkJ1f5UIuak Facebook: https://www.facebook.com/greatscottlab Twitter: https://twitter.com/GreatScottLab Tutorials mentioned in the video: https://www.inventables.com/projects/pcb-milling-on-x-carve https://www.inventables.com/projects/how-to-mill-a-through-hole-pcb https://www.inventables.com/projects/easy-pcbs-on-the-x-carve Etching video: https://youtu.be/YJgX9Na4rWw Design/Order PCB video: https://youtu.be/Fj0XuYiE7HU X-Carve Review video: https://youtu.be/vyuzImO9nQs In this video I will show you how to create a milled PCB for your electronics projects. Along the way I will demonstrate why creating milled PCBs for THT components is not that useful. On the other hand though, I will also demonstrate that creating milled PCBs for SMD components can be very useful. Let's get started! Music: 2011 Lookalike by Bartlebeats Killing Time, Kevin MacLeod (incompetech.com) You want to support my videos? You can browse and buy tools&materials from my Amazon Store. This way I get a small commission: Amazon.de: http://astore.amazon.de/great043-21 Amazon.com:http://astore.amazon.com/gre09a-20 Amazon.co.uk: http://astore.amazon.co.uk/gre0b-21 Or you feel super generous and want to use this Amazon link as your Amazon home page. And do not worry, your purchases are all anonym and the prices are all the same: Amazon.de:http://www.amazon.de/?_encoding=UTF8&camp=1638&creative=19454&linkCode=ur2&site-redirect=de&tag=great043-21&linkId=ORZEQZEOVJAFURCZ Amazon.com:http://www.amazon.com/?_encoding=UTF8&camp=1789&creative=390957&linkCode=ur2&tag=gre09a-20&linkId=I5NDCEAVCD2OWM4S

DkJ1f5UIuak | 08 Oct 2017
Support me for more videos: https://www.patreon.com/GreatScott Previous video: https://youtu.be/ZAqNKaX3LQ0 Facebook: https://www.facebook.com/greatscottlab Twitter: https://twitter.com/GreatScottLab More project information (schematic, code, parts list,...) on Instructables: https://www.instructables.com/id/DIY-WiFi-RGB-LED-Lamp/ Parts list: (incomplete, see Instructables for more) Amazon.com: 1x 10W RGB LED: http://amzn.to/2xr0xoo 1x Heatsink: http://amzn.to/2kArEHF 3x 10µH Inductor: http://amzn.to/2fTqMbR 3x 1N4007 Diode: http://amzn.to/2kwASEB 1x LM7805 Voltage Regulator: http://amzn.to/2xpPJXt 1x 12V 1A Power Supply: http://amzn.to/2xpH4Ey 2x 470µF Capacitor: http://amzn.to/2xpBime 3x 220nF Capacitor: http://amzn.to/2y39a5p 1x ESP8266 (NodeMCU): http://amzn.to/2xqQRp1 3x MCP602 OpAmp: http://amzn.to/2g2brZY 4x TC4420 MOSFET Driver: http://amzn.to/2fTr4zt 4x IRLZ44N MOSFET: http://amzn.to/2xrmYtG 4x 10Ω, 3x 5.1kΩ, 3x 1Ω, 3x 1kΩ, 3x 10kΩ Resistor: http://amzn.to/2xrdny5 Ebay: 1x 10W RGB LED: http://rover.ebay.com/rover/1/711-53200-19255-0/1?icep_ff3=2&pub=5575101368&toolid=10001&campid=5337582279&customid=&icep_item=322465496760&ipn=psmain&icep_vectorid=229466&kwid=902099&mtid=824&kw=lg 1x Heatsink: http://rover.ebay.com/rover/1/711-53200-19255-0/1?icep_ff3=2&pub=5575101368&toolid=10001&campid=5337582279&customid=&icep_item=112376034841&ipn=psmain&icep_vectorid=229466&kwid=902099&mtid=824&kw=lg 3x 10µH Inductor: http://rover.ebay.com/rover/1/711-53200-19255-0/1?icep_ff3=2&pub=5575101368&toolid=10001&campid=5337582279&customid=&icep_item=292199399065&ipn=psmain&icep_vectorid=229466&kwid=902099&mtid=824&kw=lg 3x 1N4007 Diode: http://rover.ebay.com/rover/1/711-53200-19255-0/1?icep_ff3=2&pub=5575101368&toolid=10001&campid=5337582279&customid=&icep_item=181847130209&ipn=psmain&icep_vectorid=229466&kwid=902099&mtid=824&kw=lg 1x LM7805 Voltage Regulator: http://rover.ebay.com/rover/1/711-53200-19255-0/1?icep_ff3=2&pub=5575101368&toolid=10001&campid=5337582279&customid=&icep_item=130747603683&ipn=psmain&icep_vectorid=229466&kwid=902099&mtid=824&kw=lg 1x 12V 1A Power Supply: http://rover.ebay.com/rover/1/711-53200-19255-0/1?icep_ff3=2&pub=5575101368&toolid=10001&campid=5337582279&customid=&icep_item=131301178127&ipn=psmain&icep_vectorid=229466&kwid=902099&mtid=824&kw=lg 2x 470µF Capacitor: http://rover.ebay.com/rover/1/711-53200-19255-0/1?icep_ff3=2&pub=5575101368&toolid=10001&campid=5337582279&customid=&icep_item=172045442898&ipn=psmain&icep_vectorid=229466&kwid=902099&mtid=824&kw=lg 3x 220nF Capacitor: http://rover.ebay.com/rover/1/711-53200-19255-0/1?icep_ff3=2&pub=5575101368&toolid=10001&campid=5337582279&customid=&icep_item=222432332394&ipn=psmain&icep_vectorid=229466&kwid=902099&mtid=824&kw=lg 1x ESP8266 (NodeMCU): http://rover.ebay.com/rover/1/711-53200-19255-0/1?icep_ff3=2&pub=5575101368&toolid=10001&campid=5337582279&customid=&icep_item=201542946669&ipn=psmain&icep_vectorid=229466&kwid=902099&mtid=824&kw=lg 3x MCP602 OpAmp: http://rover.ebay.com/rover/1/711-53200-19255-0/1?icep_ff3=2&pub=5575101368&toolid=10001&campid=5337582279&customid=&icep_item=301750976695&ipn=psmain&icep_vectorid=229466&kwid=902099&mtid=824&kw=lg 4x TC4420 MOSFET Driver: http://rover.ebay.com/rover/1/711-53200-19255-0/1?icep_ff3=2&pub=5575101368&toolid=10001&campid=5337582279&customid=&icep_item=253084888098&ipn=psmain&icep_vectorid=229466&kwid=902099&mtid=824&kw=lg 4x IRLZ44N MOSFET: http://rover.ebay.com/rover/1/711-53200-19255-0/1?icep_ff3=2&pub=5575101368&toolid=10001&campid=5337582279&customid=&icep_item=171532905847&ipn=psmain&icep_vectorid=229466&kwid=902099&mtid=824&kw=lg 4x 10Ω, 3x 5.1kΩ, 3x 1Ω, 3x 1kΩ, 3x 10kΩ Resistor: http://rover.ebay.com/rover/1/711-53200-19255-0/1?icep_ff3=2&pub=5575101368&toolid=10001&campid=5337582279&customid=&icep_item=261374861457&ipn=psmain&icep_vectorid=229466&kwid=902099&mtid=824&kw=lg In this video I will show you how I created a three channel constant current source and successfully combined it with an ESP8266µC and a 10W RGB High Power LED in order to create a WiFi controlled Lamp. Along the way I will also demonstrate how easy it is to use the App "Blynk" to control your ESP8266 through WiFi. Music: 2011 Lookalike by Bartlebeats Killing Time, Kevin MacLeod (incompetech.com) You want to support my videos? You can browse and buy tools&materials from my Amazon Store. This way I get a small commission: Amazon.de: http://astore.amazon.de/great043-21 Amazon.com:http://astore.amazon.com/gre09a-20 Amazon.co.uk: http://astore.amazon.co.uk/gre0b-21 Or you feel super generous and want to use this Amazon link as your Amazon home page. And do not worry, your purchases are all anonym and the prices are all the same: Amazon.de:http://www.amazon.de/?_encoding=UTF8&camp=1638&creative=19454&linkCode=ur2&site-redirect=de&tag=great043-21&linkId=ORZEQZEOVJAFURCZ Amazon.com:http://www.amazon.com/?_encoding=UTF8&camp=1789&creative=390957&linkCode=ur2&tag=gre09a-20&linkId=I5NDCEAVCD2OWM4S

ZAqNKaX3LQ0 | 01 Oct 2017
Support me for more videos: https://www.patreon.com/GreatScott Previous video: https://youtu.be/8uoo5pAeWZI Facebook: https://www.facebook.com/greatscottlab Twitter: https://twitter.com/GreatScottLab LED Matrix project video: https://youtu.be/D_QBlFIQk-o More project information on Instructables: https://www.instructables.com/id/How-to-Add-WiFi-Control-to-Any-Project-ESP32-Begin/ You can get the ESP32 here: Amazon.com: http://amzn.to/2xPC3DJ Amazon.de: http://amzn.to/2fGZBEw Ebay: http://rover.ebay.com/rover/1/711-53200-19255-0/1?icep_ff3=2&pub=5575101368&toolid=10001&campid=5337606358&customid=&icep_item=352009863808&ipn=psmain&icep_vectorid=229466&kwid=902099&mtid=824&kw=lg In this video I will show you how easy/difficult it is to use an ESP32 with the Arduino IDE in order to add WiFi control to any electronics project. Along the way I will show you how to use the ESP32 to create a simple WiFi server and how to create a fitting control app for your smartphone. Music: 2011 Lookalike by Bartlebeats Killing Time, Kevin MacLeod (incompetech.com) You want to support my videos? You can browse and buy tools&materials from my Amazon Store. This way I get a small commission: Amazon.de: http://astore.amazon.de/great043-21 Amazon.com:http://astore.amazon.com/gre09a-20 Amazon.co.uk: http://astore.amazon.co.uk/gre0b-21 Or you feel super generous and want to use this Amazon link as your Amazon home page. And do not worry, your purchases are all anonym and the prices are all the same: Amazon.de:http://www.amazon.de/?_encoding=UTF8&camp=1638&creative=19454&linkCode=ur2&site-redirect=de&tag=great043-21&linkId=ORZEQZEOVJAFURCZ Amazon.com:http://www.amazon.com/?_encoding=UTF8&camp=1789&creative=390957&linkCode=ur2&tag=gre09a-20&linkId=I5NDCEAVCD2OWM4S

azsAasA8E3o | 24 Sep 2017
Support me for more videos: https://www.patreon.com/GreatScott Previous video: https://youtu.be/8uoo5pAeWZI Facebook: https://www.facebook.com/greatscottlab Twitter: https://twitter.com/GreatScottLab You can get a Delta Go 3D Printer here: http://deltaprintr.com/shop/3d-printers/delta-go/ Use the coupon code "greatscott" to save $100! Thanks to Deltaprintr (http://deltaprintr.com/) for providing the tested unit. Thingiverse models in this video: https://www.thingiverse.com/thing:2047554 https://www.thingiverse.com/thing:1460364 https://www.thingiverse.com/thing:2297367 In this video we will have a look at the Delta Go - Desktop 3D Printer. In comparison to other 3D Printers, this one offers a smaller size, is lighter and also features LED notification lights. But is such a "toned down" version of a Delta 3D Printer really worth the money? Let's find out! Music: 2011 Lookalike by Bartlebeats Killing Time, Kevin MacLeod (incompetech.com) You want to support my videos? You can browse and buy tools&materials from my Amazon Store. This way I get a small commission: Amazon.de: http://astore.amazon.de/great043-21 Amazon.com:http://astore.amazon.com/gre09a-20 Amazon.co.uk: http://astore.amazon.co.uk/gre0b-21 Or you feel super generous and want to use this Amazon link as your Amazon home page. And do not worry, your purchases are all anonym and the prices are all the same: Amazon.de:http://www.amazon.de/?_encoding=UTF8&camp=1638&creative=19454&linkCode=ur2&site-redirect=de&tag=great043-21&linkId=ORZEQZEOVJAFURCZ Amazon.com:http://www.amazon.com/?_encoding=UTF8&camp=1789&creative=390957&linkCode=ur2&tag=gre09a-20&linkId=I5NDCEAVCD2OWM4S
8uoo5pAeWZI | 17 Sep 2017
Support me for more videos: https://www.patreon.com/GreatScott Previous video: https://youtu.be/Fj0XuYiE7HU DIY Buck/Boost Converter: https://youtu.be/ZiD_X-uo_TQ Facebook: https://www.facebook.com/greatscottlab Twitter: https://twitter.com/GreatScottLab More project information (schematic, pictures,....) on Instructables: https://www.instructables.com/id/Adding-a-Current-Limit-Feature-to-a-BuckBoost-Conv/ Parts list (incomplete, see Instructables for more): Amazon.com: 1x Buck/Boost Converter: http://amzn.to/2yh7zIW 1x LF33 Voltage Regulator: http://amzn.to/2xqkjim 1x 10nF Capacitor: http://amzn.to/2xJjZfG 1x 10µF Capacitor: http://amzn.to/2wyLbIQ 1x 0.1Ω Current shunt: http://amzn.to/2fsKACV 2x 3.3kΩ, 2x 100kΩ Resistor: http://amzn.to/2jCWbUL 1x MCP602 OpAmp: http://amzn.to/2yirlUy 1x 10kΩ Trimmer: http://amzn.to/2wyvJwu 1x UF4007 Diode: http://amzn.to/2fsKJpX 1x Voltage/Current Meter: http://amzn.to/2xddOiH Ebay: 1x Buck/Boost Converter: http://rover.ebay.com/rover/1/711-53200-19255-0/1?icep_ff3=2&pub=5575101368&toolid=10001&campid=5337582279&customid=&icep_item=263026689519&ipn=psmain&icep_vectorid=229466&kwid=902099&mtid=824&kw=lg 1x LF33 Voltage Regulator: http://rover.ebay.com/rover/1/711-53200-19255-0/1?icep_ff3=2&pub=5575101368&toolid=10001&campid=5337582279&customid=&icep_item=311572996786&ipn=psmain&icep_vectorid=229466&kwid=902099&mtid=824&kw=lg 1x 10nF Capacitor: http://rover.ebay.com/rover/1/711-53200-19255-0/1?icep_ff3=2&pub=5575101368&toolid=10001&campid=5337582279&customid=&icep_item=181982214939&ipn=psmain&icep_vectorid=229466&kwid=902099&mtid=824&kw=lg 1x 10µF Capacitor: http://rover.ebay.com/rover/1/711-53200-19255-0/1?icep_ff3=2&pub=5575101368&toolid=10001&campid=5337582279&customid=&icep_item=401206644592&ipn=psmain&icep_vectorid=229466&kwid=902099&mtid=824&kw=lg 1x 0.1Ω Current shunt: http://rover.ebay.com/rover/1/711-53200-19255-0/1?icep_ff3=2&pub=5575101368&toolid=10001&campid=5337582279&customid=&icep_item=182383981237&ipn=psmain&icep_vectorid=229466&kwid=902099&mtid=824&kw=lg 2x 3.3kΩ, 2x 100kΩ Resistor: http://rover.ebay.com/rover/1/711-53200-19255-0/1?icep_ff3=2&pub=5575101368&toolid=10001&campid=5337582279&customid=&icep_item=401036186511&ipn=psmain&icep_vectorid=229466&kwid=902099&mtid=824&kw=lg 1x MCP602 OpAmp: http://rover.ebay.com/rover/1/711-53200-19255-0/1?icep_ff3=2&pub=5575101368&toolid=10001&campid=5337582279&customid=&icep_item=181846803759&ipn=psmain&icep_vectorid=229466&kwid=902099&mtid=824&kw=lg 1x 10kΩ Trimmer: http://rover.ebay.com/rover/1/711-53200-19255-0/1?icep_ff3=2&pub=5575101368&toolid=10001&campid=5337582279&customid=&icep_item=182551169452&ipn=psmain&icep_vectorid=229466&kwid=902099&mtid=824&kw=lg 1x UF4007 Diode: http://rover.ebay.com/rover/1/711-53200-19255-0/1?icep_ff3=2&pub=5575101368&toolid=10001&campid=5337582279&customid=&icep_item=291549913009&ipn=psmain&icep_vectorid=229466&kwid=902099&mtid=824&kw=lg 1x Voltage/Current Meter: http://rover.ebay.com/rover/1/711-53200-19255-0/1?icep_ff3=2&pub=5575101368&toolid=10001&campid=5337582279&customid=&icep_item=282652383468&ipn=psmain&icep_vectorid=229466&kwid=902099&mtid=824&kw=lg Music: 2011 Lookalike by Bartlebeats Ecstatic Wave, Jens Kiilstofte https://machinimasound.com/music In this episode of HACKED! I will have a closer look at a common buck/boost converter and create a small, additional circuit that adds a current limit feature to it. With it, the buck/boost converter can be used just like a variable lab bench power supply. You want to support my videos? You can browse and buy tools&materials from my Amazon Store. This way I get a small commission: Amazon.de: http://astore.amazon.de/great043-21 Amazon.com:http://astore.amazon.com/gre09a-20 Amazon.co.uk: http://astore.amazon.co.uk/gre0b-21 Or you feel super generous and want to use this Amazon link as your Amazon home page. And do not worry, your purchases are all anonym and the prices are all the same: Amazon.de:http://www.amazon.de/?_encoding=UTF8&camp=1638&creative=19454&linkCode=ur2&site-redirect=de&tag=great043-21&linkId=ORZEQZEOVJAFURCZ Amazon.com:http://www.amazon.com/?_encoding=UTF8&camp=1789&creative=390957&linkCode=ur2&tag=gre09a-20&linkId=I5NDCEAVCD2OWM4S

Fj0XuYiE7HU | 10 Sep 2017
Where to order 10 PCBs for $2: https://jlcpcb.com Save cost on Components: https://lcsc.com Thanks to JLCPCB for sponsoring this video Support me for more videos: https://www.patreon.com/GreatScott How to Solder properly: https://youtu.be/VxMV6wGS3NY TP5410 Test: https://youtu.be/aND0j2Y2IkM Facebook: https://www.facebook.com/greatscottlab Twitter: https://twitter.com/GreatScottLab EasyEDA project files: https://easyeda.com/GreatScott/LiPoChargeProtectBoost_copy-3d9f4c3ddc7347d7861776340b9b90b7 More project information (Gerber Files, Parts list!,....) on Instructables: https://www.instructables.com/id/DIY-LiPo-ChargeProtect5V-Boost-Circuit/ In this video I will show you how I combined a couple of ICs in order to create a charge/protect/5V boost circuit for a single cell LiPo battery. Along the way I will show you how I designed the PCB, how I ordered it and what kind of problems occured while soldering the components and testing the circuit. Music: 2011 Lookalike by Bartlebeats Killing Time, Kevin MacLeod (incompetech.com) You want to support my videos? You can browse and buy tools&materials from my Amazon Store. This way I get a small commission: Amazon.de: http://astore.amazon.de/great043-21 Amazon.com:http://astore.amazon.com/gre09a-20 Amazon.co.uk: http://astore.amazon.co.uk/gre0b-21 Or you feel super generous and want to use this Amazon link as your Amazon home page. And do not worry, your purchases are all anonym and the prices are all the same: Amazon.de:http://www.amazon.de/?_encoding=UTF8&camp=1638&creative=19454&linkCode=ur2&site-redirect=de&tag=great043-21&linkId=ORZEQZEOVJAFURCZ Amazon.com:http://www.amazon.com/?_encoding=UTF8&camp=1789&creative=390957&linkCode=ur2&tag=gre09a-20&linkId=I5NDCEAVCD2OWM4S
VxMV6wGS3NY | 03 Sep 2017
Support me for more videos: https://www.patreon.com/GreatScott Previous video: https://youtu.be/69G522AeRq8 Facebook: https://www.facebook.com/greatscottlab Twitter: https://twitter.com/GreatScottLab Tools/Materials that I recommend (Affiliate Links): Amazon.com: Soldering Station: http://amzn.to/2vW8YlI Solder (0.5mm): http://amzn.to/2ezm5GT Solder Wick: http://amzn.to/2xHtGrK Tweezers: http://amzn.to/2xGL3sP Microscope: http://amzn.to/2wygoh1 Flux Pen: http://amzn.to/2ezu9Yo Hot Air Station: http://amzn.to/2vVSD0F Solder Paste: http://amzn.to/2wyohDc Amazon.de: Soldering Station: http://amzn.to/2ezB5Vk Solder (0.5mm): http://amzn.to/2euGKs4 Solder Wick: http://amzn.to/2vVO6eJ Tweezers: http://amzn.to/2x2xKpB Microscope: http://amzn.to/2ev9XTQ Flux Pen: http://amzn.to/2eRsaeN Hot Air Station: http://amzn.to/2ev7BnM Solder Paste: http://amzn.to/2wyeCwi Ebay: Soldering Station: http://rover.ebay.com/rover/1/711-53200-19255-0/1?icep_ff3=2&pub=5575101368&toolid=10001&campid=5337582279&customid=&icep_item=232228178227&ipn=psmain&icep_vectorid=229466&kwid=902099&mtid=824&kw=lg Solder (0.5mm): http://rover.ebay.com/rover/1/711-53200-19255-0/1?icep_ff3=2&pub=5575101368&toolid=10001&campid=5337582279&customid=&icep_item=310809071679&ipn=psmain&icep_vectorid=229466&kwid=902099&mtid=824&kw=lg Solder Wick: http://rover.ebay.com/rover/1/711-53200-19255-0/1?icep_ff3=2&pub=5575101368&toolid=10001&campid=5337582279&customid=&icep_item=171827508880&ipn=psmain&icep_vectorid=229466&kwid=902099&mtid=824&kw=lg Tweezers: http://rover.ebay.com/rover/1/711-53200-19255-0/1?icep_ff3=2&pub=5575101368&toolid=10001&campid=5337582279&customid=&icep_item=252601869448&ipn=psmain&icep_vectorid=229466&kwid=902099&mtid=824&kw=lg Microscope: http://rover.ebay.com/rover/1/711-53200-19255-0/1?icep_ff3=2&pub=5575101368&toolid=10001&campid=5337582279&customid=&icep_item=192284083946&ipn=psmain&icep_vectorid=229466&kwid=902099&mtid=824&kw=lg Flux Pen: http://rover.ebay.com/rover/1/711-53200-19255-0/1?icep_ff3=2&pub=5575101368&toolid=10001&campid=5337582279&customid=&icep_item=172740796011&ipn=psmain&icep_vectorid=229466&kwid=902099&mtid=824&kw=lg Hot Air Station: http://rover.ebay.com/rover/1/711-53200-19255-0/1?icep_ff3=2&pub=5575101368&toolid=10001&campid=5337582279&customid=&icep_item=322301372916&ipn=psmain&icep_vectorid=229466&kwid=902099&mtid=824&kw=lg Solder Paste: http://rover.ebay.com/rover/1/711-53200-19255-0/1?icep_ff3=2&pub=5575101368&toolid=10001&campid=5337582279&customid=&icep_item=142328779024&ipn=psmain&icep_vectorid=229466&kwid=902099&mtid=824&kw=lg In this video I will show you my technique when it comes to THT and SMD soldering tasks.I show you with some practical examples how easy it is to solder and what kind of tools and materials are necessary to do the job. Music: 2011 Lookalike by Bartlebeats Killing Time, Kevin MacLeod (incompetech.com) You want to support my videos? You can browse and buy tools&materials from my Amazon Store. This way I get a small commission: Amazon.de: http://astore.amazon.de/great043-21 Amazon.com:http://astore.amazon.com/gre09a-20 Amazon.co.uk: http://astore.amazon.co.uk/gre0b-21 Or you feel super generous and want to use this Amazon link as your Amazon home page. And do not worry, your purchases are all anonym and the prices are all the same: Amazon.de:http://www.amazon.de/?_encoding=UTF8&camp=1638&creative=19454&linkCode=ur2&site-redirect=de&tag=great043-21&linkId=ORZEQZEOVJAFURCZ Amazon.com:http://www.amazon.com/?_encoding=UTF8&camp=1789&creative=390957&linkCode=ur2&tag=gre09a-20&linkId=I5NDCEAVCD2OWM4S

69G522AeRq8 | 27 Aug 2017
Support me for more videos: https://www.patreon.com/GreatScott Previous video: https://youtu.be/GtH8lAzQf2A Facebook: https://www.facebook.com/greatscottlab Twitter: https://twitter.com/GreatScottLab More project information (schematic, code,....) on Instructables: https://www.instructables.com/id/Make-Your-Own-POV-LED-Globe/ Parts list (incomplete, see Instructables for more information): Amazon.com: 1x Arduino Nano: http://amzn.to/2izrhfo 1m x APA102 LED Strip (144 LED/m): http://amzn.to/2xnzCpE 1x U18 Hall effect sensor: http://amzn.to/2xnLYyh 1x LiPo Battery: http://amzn.to/2iC5XWG 1x TP4056 Protect/Charge circuit: http://amzn.to/2wAqD76 1x Boost Converter: http://amzn.to/2wfuUKC 1x Ball Bearing: http://amzn.to/2xnOjsY 1x 12V 3000RPM DC Motor: http://amzn.to/2wzkmIO 1x 8mm/5mm Adapter:http://amzn.to/2xDs0yT Ebay: 1x Arduino Nano: http://rover.ebay.com/rover/1/711-53200-19255-0/1?icep_ff3=2&pub=5575101368&toolid=10001&campid=5337582279&customid=&icep_item=311525513163&ipn=psmain&icep_vectorid=229466&kwid=902099&mtid=824&kw=lg 1m x APA102 LED Strip (144 LED/m): http://rover.ebay.com/rover/1/711-53200-19255-0/1?icep_ff3=2&pub=5575101368&toolid=10001&campid=5337582279&customid=&icep_item=152637114619&ipn=psmain&icep_vectorid=229466&kwid=902099&mtid=824&kw=lg 1x U18 Hall effect sensor: http://rover.ebay.com/rover/1/711-53200-19255-0/1?icep_ff3=2&pub=5575101368&toolid=10001&campid=5337582279&customid=&icep_item=252049518321&ipn=psmain&icep_vectorid=229466&kwid=902099&mtid=824&kw=lg 1x LiPo Battery: http://rover.ebay.com/rover/1/711-53200-19255-0/1?icep_ff3=2&pub=5575101368&toolid=10001&campid=5337582279&customid=&icep_item=111860443571&ipn=psmain&icep_vectorid=229466&kwid=902099&mtid=824&kw=lg 1x TP4056 Protect/Charge circuit: http://rover.ebay.com/rover/1/711-53200-19255-0/1?icep_ff3=2&pub=5575101368&toolid=10001&campid=5337582279&customid=&icep_item=132234194420&ipn=psmain&icep_vectorid=229466&kwid=902099&mtid=824&kw=lg 1x Boost Converter: http://rover.ebay.com/rover/1/711-53200-19255-0/1?icep_ff3=2&pub=5575101368&toolid=10001&campid=5337582279&customid=&icep_item=201206848274&ipn=psmain&icep_vectorid=229466&kwid=902099&mtid=824&kw=lg 1x Ball Bearing: http://rover.ebay.com/rover/1/711-53200-19255-0/1?icep_ff3=2&pub=5575101368&toolid=10001&campid=5337582279&customid=&icep_item=311742819077&ipn=psmain&icep_vectorid=229466&kwid=902099&mtid=824&kw=lg 1x 12V 3000RPM DC Motor: http://rover.ebay.com/rover/1/711-53200-19255-0/1?icep_ff3=2&pub=5575101368&toolid=10001&campid=5337582279&customid=&icep_item=311070288733&ipn=psmain&icep_vectorid=229466&kwid=902099&mtid=824&kw=lg 1x 8mm/5mm Adapter: http://rover.ebay.com/rover/1/711-53200-19255-0/1?icep_ff3=2&pub=5575101368&toolid=10001&campid=5337582279&customid=&icep_item=151854424476&ipn=psmain&icep_vectorid=229466&kwid=902099&mtid=824&kw=lg In this project I will show you how I combined a couple steel pieces with an Arduino, an APA102 LED Strip and a Hall effect sensor in order to create a POV (persistence of vision) RGB LED Globe. WIth it you can create all kinds of spherical pictures or even letters which is a definite eyecatcher. Music: 2011 Lookalike by Bartlebeats Killing Time, Kevin MacLeod (incompetech.com) You want to support my videos? You can browse and buy tools&materials from my Amazon Store. This way I get a small commission: Amazon.de: http://astore.amazon.de/great043-21 Amazon.com:http://astore.amazon.com/gre09a-20 Amazon.co.uk: http://astore.amazon.co.uk/gre0b-21 Or you feel super generous and want to use this Amazon link as your Amazon home page. And do not worry, your purchases are all anonym and the prices are all the same: Amazon.de:http://www.amazon.de/?_encoding=UTF8&camp=1638&creative=19454&linkCode=ur2&site-redirect=de&tag=great043-21&linkId=ORZEQZEOVJAFURCZ Amazon.com:http://www.amazon.com/?_encoding=UTF8&camp=1789&creative=390957&linkCode=ur2&tag=gre09a-20&linkId=I5NDCEAVCD2OWM4S

GtH8lAzQf2A | 20 Aug 2017
Support me for more videos: https://www.patreon.com/GreatScott Previous video: https://youtu.be/NXkLydhRvS0 Electronic Basics #9: Diodes & Bridge Rectifiers: https://youtu.be/46WSCihjoRI Facebook: https://www.facebook.com/greatscottlab Twitter: https://twitter.com/GreatScottLab In this episode of Electronic Basics I will show what makes schottky and zener diodes so special and when it makes sense to utilize them in a circuit: Music: 2011 Lookalike by Bartlebeats Killing Time, Kevin MacLeod (incompetech.com) You want to support my videos? You can browse and buy tools&materials from my Amazon Store. This way I get a small commission: Amazon.de: http://astore.amazon.de/great043-21 Amazon.com:http://astore.amazon.com/gre09a-20 Amazon.co.uk: http://astore.amazon.co.uk/gre0b-21 Or you feel super generous and want to use this Amazon link as your Amazon home page. And do not worry, your purchases are all anonym and the prices are all the same: Amazon.de:http://www.amazon.de/?_encoding=UTF8&camp=1638&creative=19454&linkCode=ur2&site-redirect=de&tag=great043-21&linkId=ORZEQZEOVJAFURCZ Amazon.com:http://www.amazon.com/?_encoding=UTF8&camp=1789&creative=390957&linkCode=ur2&tag=gre09a-20&linkId=I5NDCEAVCD2OWM4S
NXkLydhRvS0 | 13 Aug 2017
Support me for more videos: https://www.patreon.com/GreatScott Part 1: https://youtu.be/W9IHEqlGG1s Facebook: https://www.facebook.com/greatscottlab Twitter: https://twitter.com/GreatScottLab More project information (schematic, code,....) on Instructables: https://www.instructables.com/id/Make-Your-Own-ESC/ Parts list: Amazon.com: 1x Arduino Nano: http://amzn.to/2fCdkMl 2x LM393 Comparator: http://amzn.to/2wUuM25 1x L6234 IC: http://amzn.to/2wG6WHY 4x 470nF, 1x 100nF, 1x 10nF, 1x 220nF Capacitor: http://amzn.to/2uA0eWA 2x 1µF Capacitor: http://amzn.to/2vRNvi1 4x 1kΩ, 3x 10kΩ Resistor: http://amzn.to/2wG9Cpk 5x 1Ω Resistor: http://amzn.to/2fCjiNi 2x 10kΩ Potentiometer: http://amzn.to/2vRZZGf 2x 1N4148 Diode: http://amzn.to/2vyFPhT Ebay: 1x Arduino Nano: http://rover.ebay.com/rover/1/711-53200-19255-0/1?icep_ff3=2&pub=5575101368&toolid=10001&campid=5337582279&customid=&icep_item=162002876661&ipn=psmain&icep_vectorid=229466&kwid=902099&mtid=824&kw=lg 2x LM393 Comparator: http://rover.ebay.com/rover/1/711-53200-19255-0/1?icep_ff3=2&pub=5575101368&toolid=10001&campid=5337582279&customid=&icep_item=291549103310&ipn=psmain&icep_vectorid=229466&kwid=902099&mtid=824&kw=lg 1x L6234 IC: http://rover.ebay.com/rover/1/711-53200-19255-0/1?icep_ff3=2&pub=5575101368&toolid=10001&campid=5337582279&customid=&icep_item=221471524653&ipn=psmain&icep_vectorid=229466&kwid=902099&mtid=824&kw=lg 4x 470nF, 1x 100nF, 1x 10nF, 1x 220nF Capacitor: http://rover.ebay.com/rover/1/711-53200-19255-0/1?icep_ff3=2&pub=5575101368&toolid=10001&campid=5337582279&customid=&icep_item=221372015123&ipn=psmain&icep_vectorid=229466&kwid=902099&mtid=824&kw=lg 2x 1µF Capacitor: http://rover.ebay.com/rover/1/711-53200-19255-0/1?icep_ff3=2&pub=5575101368&toolid=10001&campid=5337582279&customid=&icep_item=252358753188&ipn=psmain&icep_vectorid=229466&kwid=902099&mtid=824&kw=lg 4x 1kΩ, 3x 10kΩ Resistor: http://rover.ebay.com/rover/1/711-53200-19255-0/1?icep_ff3=2&pub=5575101368&toolid=10001&campid=5337582279&customid=&icep_item=401036186511&ipn=psmain&icep_vectorid=229466&kwid=902099&mtid=824&kw=lg 5x 1Ω Resistor: http://rover.ebay.com/rover/1/711-53200-19255-0/1?icep_ff3=2&pub=5575101368&toolid=10001&campid=5337582279&customid=&icep_item=181766275671&ipn=psmain&icep_vectorid=229466&kwid=902099&mtid=824&kw=lg 2x 10kΩ Potentiometer: http://rover.ebay.com/rover/1/711-53200-19255-0/1?icep_ff3=2&pub=5575101368&toolid=10001&campid=5337582279&customid=&icep_item=182551169452&ipn=psmain&icep_vectorid=229466&kwid=902099&mtid=824&kw=lg 2x 1N4148 Diode: http://rover.ebay.com/rover/1/711-53200-19255-0/1?icep_ff3=2&pub=5575101368&toolid=10001&campid=5337582279&customid=&icep_item=172618181113&ipn=psmain&icep_vectorid=229466&kwid=902099&mtid=824&kw=lg In this two part video series I will firstly demonstrate how a common ESC works and afterwards create a circuit consisting of an Arduino Nano, an L6234 motor driver IC and a couple of complementary components in order to make a DIY ESC. Music: In the Hall of the Mountain King, Kevin MacLeod Killing Time, Kevin MacLeod (incompetech.com) You want to support my videos? You can browse and buy tools&materials from my Amazon Store. This way I get a small commission: Amazon.de: http://astore.amazon.de/great043-21 Amazon.com:http://astore.amazon.com/gre09a-20 Amazon.co.uk: http://astore.amazon.co.uk/gre0b-21 Or you feel super generous and want to use this Amazon link as your Amazon home page. And do not worry, your purchases are all anonym and the prices are all the same: Amazon.de:http://www.amazon.de/?_encoding=UTF8&camp=1638&creative=19454&linkCode=ur2&site-redirect=de&tag=great043-21&linkId=ORZEQZEOVJAFURCZ Amazon.com:http://www.amazon.com/?_encoding=UTF8&camp=1789&creative=390957&linkCode=ur2&tag=gre09a-20&linkId=I5NDCEAVCD2OWM4S

W9IHEqlGG1s | 06 Aug 2017
Support me for more videos: https://www.patreon.com/GreatScott Previous video: https://youtu.be/7ctPSgaLxbc Facebook: https://www.facebook.com/greatscottlab Twitter: https://twitter.com/GreatScottLab More project information (schematic, code,....) on Instructables: https://www.instructables.com/id/Make-Your-Own-ESC/ Parts list: Amazon.com: 1x Arduino Nano: http://amzn.to/2fCdkMl 2x LM393 Comparator: http://amzn.to/2wUuM25 1x L6234 IC: http://amzn.to/2wG6WHY 4x 470nF, 1x 100nF, 1x 10nF, 1x 220nF Capacitor: http://amzn.to/2uA0eWA 2x 1µF Capacitor: http://amzn.to/2vRNvi1 4x 1kΩ, 3x 10kΩ Resistor: http://amzn.to/2wG9Cpk 5x 1Ω Resistor: http://amzn.to/2fCjiNi 2x 10kΩ Potentiometer: http://amzn.to/2vRZZGf 2x 1N4148 Diode: http://amzn.to/2vyFPhT Ebay: 1x Arduino Nano: http://rover.ebay.com/rover/1/711-53200-19255-0/1?icep_ff3=2&pub=5575101368&toolid=10001&campid=5337582279&customid=&icep_item=162002876661&ipn=psmain&icep_vectorid=229466&kwid=902099&mtid=824&kw=lg 2x LM393 Comparator: http://rover.ebay.com/rover/1/711-53200-19255-0/1?icep_ff3=2&pub=5575101368&toolid=10001&campid=5337582279&customid=&icep_item=291549103310&ipn=psmain&icep_vectorid=229466&kwid=902099&mtid=824&kw=lg 1x L6234 IC: http://rover.ebay.com/rover/1/711-53200-19255-0/1?icep_ff3=2&pub=5575101368&toolid=10001&campid=5337582279&customid=&icep_item=221471524653&ipn=psmain&icep_vectorid=229466&kwid=902099&mtid=824&kw=lg 4x 470nF, 1x 100nF, 1x 10nF, 1x 220nF Capacitor: http://rover.ebay.com/rover/1/711-53200-19255-0/1?icep_ff3=2&pub=5575101368&toolid=10001&campid=5337582279&customid=&icep_item=221372015123&ipn=psmain&icep_vectorid=229466&kwid=902099&mtid=824&kw=lg 2x 1µF Capacitor: http://rover.ebay.com/rover/1/711-53200-19255-0/1?icep_ff3=2&pub=5575101368&toolid=10001&campid=5337582279&customid=&icep_item=252358753188&ipn=psmain&icep_vectorid=229466&kwid=902099&mtid=824&kw=lg 4x 1kΩ, 3x 10kΩ Resistor: http://rover.ebay.com/rover/1/711-53200-19255-0/1?icep_ff3=2&pub=5575101368&toolid=10001&campid=5337582279&customid=&icep_item=401036186511&ipn=psmain&icep_vectorid=229466&kwid=902099&mtid=824&kw=lg 5x 1Ω Resistor: http://rover.ebay.com/rover/1/711-53200-19255-0/1?icep_ff3=2&pub=5575101368&toolid=10001&campid=5337582279&customid=&icep_item=181766275671&ipn=psmain&icep_vectorid=229466&kwid=902099&mtid=824&kw=lg 2x 10kΩ Potentiometer: http://rover.ebay.com/rover/1/711-53200-19255-0/1?icep_ff3=2&pub=5575101368&toolid=10001&campid=5337582279&customid=&icep_item=182551169452&ipn=psmain&icep_vectorid=229466&kwid=902099&mtid=824&kw=lg 2x 1N4148 Diode: http://rover.ebay.com/rover/1/711-53200-19255-0/1?icep_ff3=2&pub=5575101368&toolid=10001&campid=5337582279&customid=&icep_item=172618181113&ipn=psmain&icep_vectorid=229466&kwid=902099&mtid=824&kw=lg In this two part video series I will firstly demonstrate how a common ESC works and afterwards create a circuit consisting of an Arduino Nano, an L6234 motor driver IC and a couple of complementary components in order to make a DIY ESC. Music: 2011 Lookalike by Bartlebeats Ecstatic Wave, Jens Kiilstofte https://machinimasound.com/music You want to support my videos? You can browse and buy tools&materials from my Amazon Store. This way I get a small commission: Amazon.de: http://astore.amazon.de/great043-21 Amazon.com:http://astore.amazon.com/gre09a-20 Amazon.co.uk: http://astore.amazon.co.uk/gre0b-21 Or you feel super generous and want to use this Amazon link as your Amazon home page. And do not worry, your purchases are all anonym and the prices are all the same: Amazon.de:http://www.amazon.de/?_encoding=UTF8&camp=1638&creative=19454&linkCode=ur2&site-redirect=de&tag=great043-21&linkId=ORZEQZEOVJAFURCZ Amazon.com:http://www.amazon.com/?_encoding=UTF8&camp=1789&creative=390957&linkCode=ur2&tag=gre09a-20&linkId=I5NDCEAVCD2OWM4S
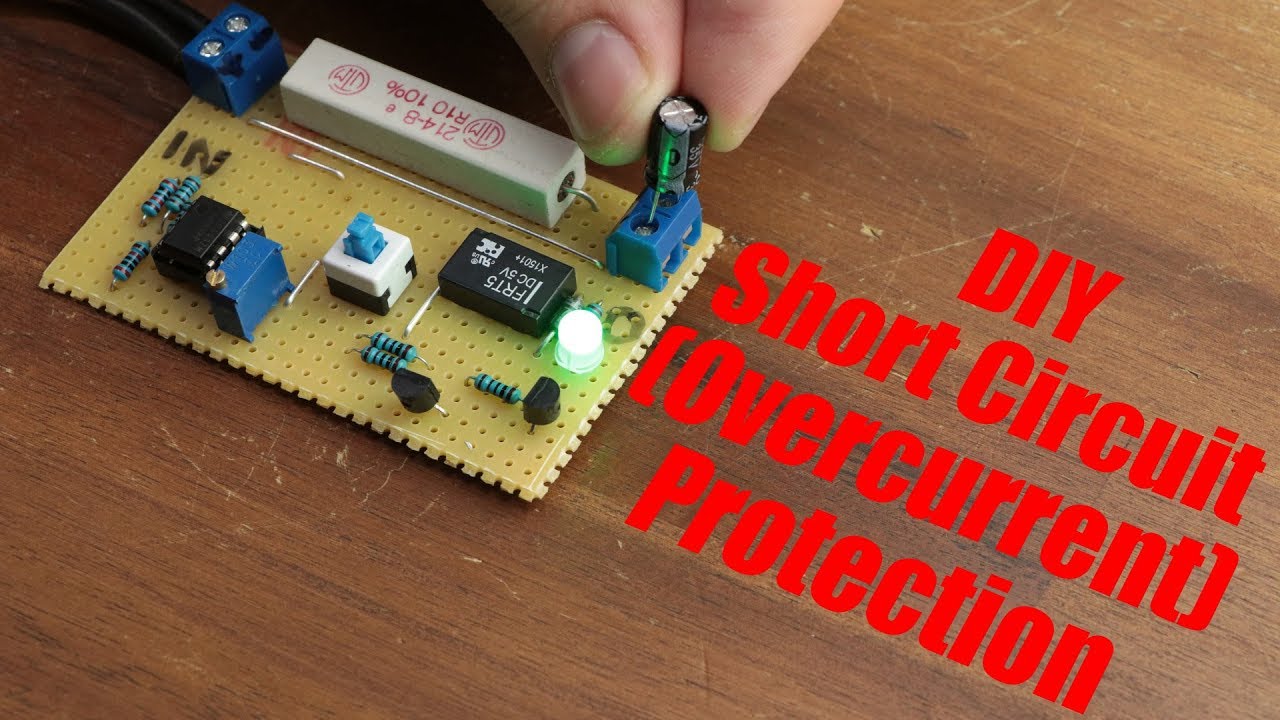
7ctPSgaLxbc | 30 Jul 2017
Support me for more videos: https://www.patreon.com/GreatScott Previous video: https://youtu.be/aND0j2Y2IkM Facebook: https://www.facebook.com/greatscottlab Twitter: https://twitter.com/GreatScottLab More project information (schematic, pictures, ....) on Instructables: https://www.instructables.com/id/DIY-Short-Circuit-Overcurrent-Protection/ Parts list (incomplete, see Instructables for more information): Amazon.com: 1x Relay (12V one with 2 changeover contacts): http://amzn.to/2v8vHyT 2x PCB Terminal: http://amzn.to/2uKP6VG 1x LM358 OpAmp: http://amzn.to/2v8RfLx 2x BC547 NPN Transistor: http://amzn.to/2u9yW4y 1x 5mm green LED: http://amzn.to/2hdv4OQ 1x 1N4007 Diode: http://amzn.to/2hdAAAU 1x Tactile Switch (NC): http://amzn.to/2uNZBpm 6x 1kΩ, 2x 20kΩ Resistor: http://amzn.to/2eYvgAA 1x 10kΩ Trimmer: http://amzn.to/2eYBArS 1x 0.1Ω Resistor: http://amzn.to/2eYRsdK Ebay: 1x Relay (12V one with 2 changeover contacts): http://rover.ebay.com/rover/1/711-53200-19255-0/1?icep_ff3=2&pub=5575101368&toolid=10001&campid=5337582279&customid=&icep_item=182591166464&ipn=psmain&icep_vectorid=229466&kwid=902099&mtid=824&kw=lg 2x PCB Terminal: http://rover.ebay.com/rover/1/711-53200-19255-0/1?icep_ff3=2&pub=5575101368&toolid=10001&campid=5337582279&customid=&icep_item=171758278263&ipn=psmain&icep_vectorid=229466&kwid=902099&mtid=824&kw=lg 1x LM358 OpAmp: http://rover.ebay.com/rover/1/711-53200-19255-0/1?icep_ff3=2&pub=5575101368&toolid=10001&campid=5337582279&customid=&icep_item=130750396561&ipn=psmain&icep_vectorid=229466&kwid=902099&mtid=824&kw=lg 2x BC547 NPN Transistor: http://rover.ebay.com/rover/1/711-53200-19255-0/1?icep_ff3=2&pub=5575101368&toolid=10001&campid=5337582279&customid=&icep_item=182523085678&ipn=psmain&icep_vectorid=229466&kwid=902099&mtid=824&kw=lg 1x 5mm green LED: http://rover.ebay.com/rover/1/711-53200-19255-0/1?icep_ff3=2&pub=5575101368&toolid=10001&campid=5337582279&customid=&icep_item=181723557701&ipn=psmain&icep_vectorid=229466&kwid=902099&mtid=824&kw=lg 1x 1N4007 Diode: http://rover.ebay.com/rover/1/711-53200-19255-0/1?icep_ff3=2&pub=5575101368&toolid=10001&campid=5337582279&customid=&icep_item=201415026157&ipn=psmain&icep_vectorid=229466&kwid=902099&mtid=824&kw=lg 1x Tactile Switch (NC): http://rover.ebay.com/rover/1/711-53200-19255-0/1?icep_ff3=2&pub=5575101368&toolid=10001&campid=5337582279&customid=&icep_item=182506452262&ipn=psmain&icep_vectorid=229466&kwid=902099&mtid=824&kw=lg 6x 1kΩ, 2x 20kΩ Resistor: http://rover.ebay.com/rover/1/711-53200-19255-0/1?icep_ff3=2&pub=5575101368&toolid=10001&campid=5337582279&customid=&icep_item=401036186511&ipn=psmain&icep_vectorid=229466&kwid=902099&mtid=824&kw=lg 1x 10kΩ Trimmer: http://rover.ebay.com/rover/1/711-53200-19255-0/1?icep_ff3=2&pub=5575101368&toolid=10001&campid=5337582279&customid=&icep_item=182551169452&ipn=psmain&icep_vectorid=229466&kwid=902099&mtid=824&kw=lg 1x 0.1Ω Resistor: http://rover.ebay.com/rover/1/711-53200-19255-0/1?icep_ff3=2&pub=5575101368&toolid=10001&campid=5337582279&customid=&icep_item=182383981237&ipn=psmain&icep_vectorid=229466&kwid=902099&mtid=824&kw=lg Music: 2011 Lookalike by Bartlebeats Killing Time, Kevin MacLeod (incompetech.com) In this project I will show you how to create a simple circuit that can interrupt the current flow to a load when the adjusted current limit is reached. That means the circuit can act as an overcurrent or short circuit protection. You want to support my videos? You can browse and buy tools&materials from my Amazon Store. This way I get a small commission: Amazon.de: http://astore.amazon.de/great043-21 Amazon.com:http://astore.amazon.com/gre09a-20 Amazon.co.uk: http://astore.amazon.co.uk/gre0b-21 Or you feel super generous and want to use this Amazon link as your Amazon home page. And do not worry, your purchases are all anonym and the prices are all the same: Amazon.de:http://www.amazon.de/?_encoding=UTF8&camp=1638&creative=19454&linkCode=ur2&site-redirect=de&tag=great043-21&linkId=ORZEQZEOVJAFURCZ Amazon.com:http://www.amazon.com/?_encoding=UTF8&camp=1789&creative=390957&linkCode=ur2&tag=gre09a-20&linkId=I5NDCEAVCD2OWM4S
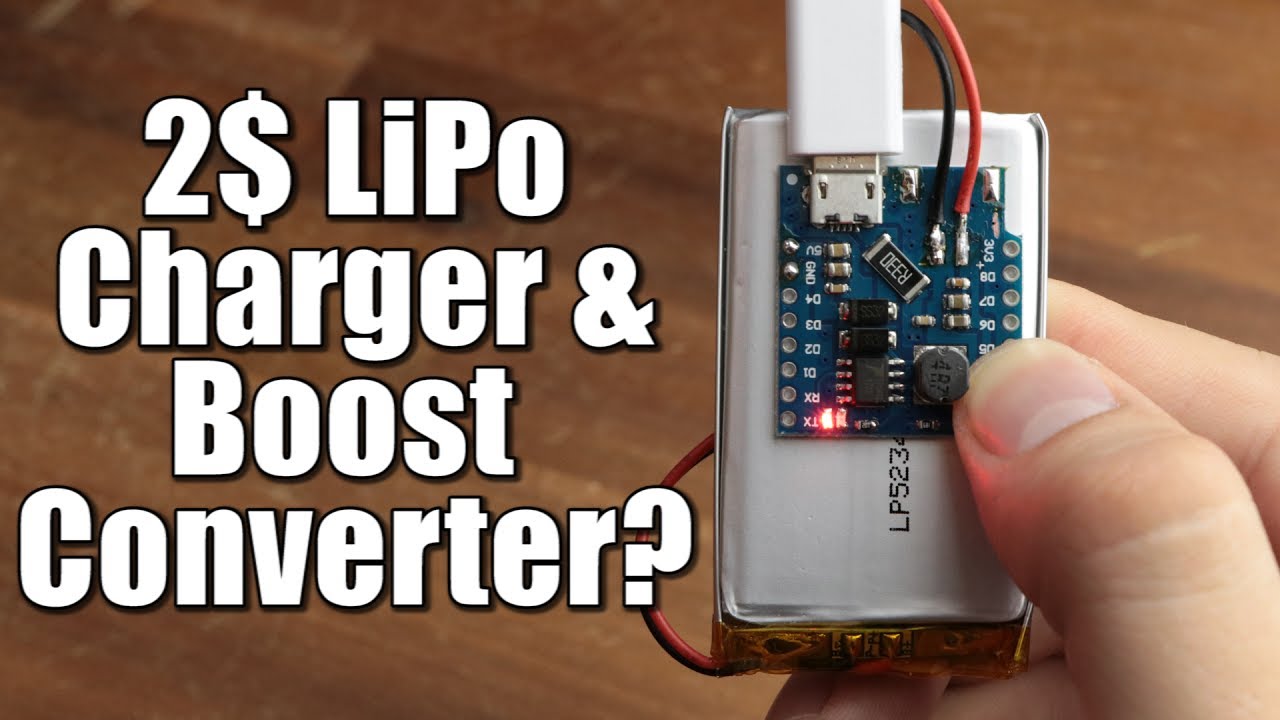
aND0j2Y2IkM | 23 Jul 2017
You can get the TP5410 board here: Ebay: http://rover.ebay.com/rover/1/711-53200-19255-0/1?icep_ff3=2&pub=5575101368&toolid=10001&campid=5337582279&customid=&icep_item=191990401129&ipn=psmain&icep_vectorid=229466&kwid=902099&mtid=824&kw=lg Amazon.com: http://amzn.to/2eFA6CC Amazon.de: http://amzn.to/2uMC6PT Support me for more videos: https://www.patreon.com/GreatScott Previous video: https://youtu.be/IdL0_ZJ7V2s Facebook: https://www.facebook.com/greatscottlab Twitter: https://twitter.com/GreatScottLab In this video I will have a look at the wemos d1 battery shield that "supposedly" can charge up a LiPo battery and boost its output voltage up to 5V. I will determine all the important features the board offers (like overdischarge or short circuit protection) and also test the efficiency of the boost converter. Music: 2011 Lookalike by Bartlebeats You want to support my videos? You can browse and buy tools&materials from my Amazon Store. This way I get a small commission: Amazon.de: http://astore.amazon.de/great043-21 Amazon.com:http://astore.amazon.com/gre09a-20 Amazon.co.uk: http://astore.amazon.co.uk/gre0b-21 Or you feel super generous and want to use this Amazon link as your Amazon home page. And do not worry, your purchases are all anonym and the prices are all the same: Amazon.de:http://www.amazon.de/?_encoding=UTF8&camp=1638&creative=19454&linkCode=ur2&site-redirect=de&tag=great043-21&linkId=ORZEQZEOVJAFURCZ Amazon.com:http://www.amazon.com/?_encoding=UTF8&camp=1789&creative=390957&linkCode=ur2&tag=gre09a-20&linkId=I5NDCEAVCD2OWM4S

IdL0_ZJ7V2s | 16 Jul 2017
Support me for more videos: https://www.patreon.com/GreatScott Previous video: https://youtu.be/oeNAhP-GIjo Facebook: https://www.facebook.com/greatscottlab Twitter: https://twitter.com/GreatScottLab In this episode of Electronic Basics I will show you how to use the timer of a microcontroller (Arduino Uno -- ATmega328P) to not only create precisely timed events but also generate a PWM signal with variable duty cycle and frequency up to 8MHz. Music: 2011 Lookalike by Bartlebeats Killing Time, Kevin MacLeod (incompetech.com) You want to support my videos? You can browse and buy tools&materials from my Amazon Store. This way I get a small commission: Amazon.de: http://astore.amazon.de/great043-21 Amazon.com:http://astore.amazon.com/gre09a-20 Amazon.co.uk: http://astore.amazon.co.uk/gre0b-21 Or you feel super generous and want to use this Amazon link as your Amazon home page. And do not worry, your purchases are all anonym and the prices are all the same: Amazon.de:http://www.amazon.de/?_encoding=UTF8&camp=1638&creative=19454&linkCode=ur2&site-redirect=de&tag=great043-21&linkId=ORZEQZEOVJAFURCZ Amazon.com:http://www.amazon.com/?_encoding=UTF8&camp=1789&creative=390957&linkCode=ur2&tag=gre09a-20&linkId=I5NDCEAVCD2OWM4S
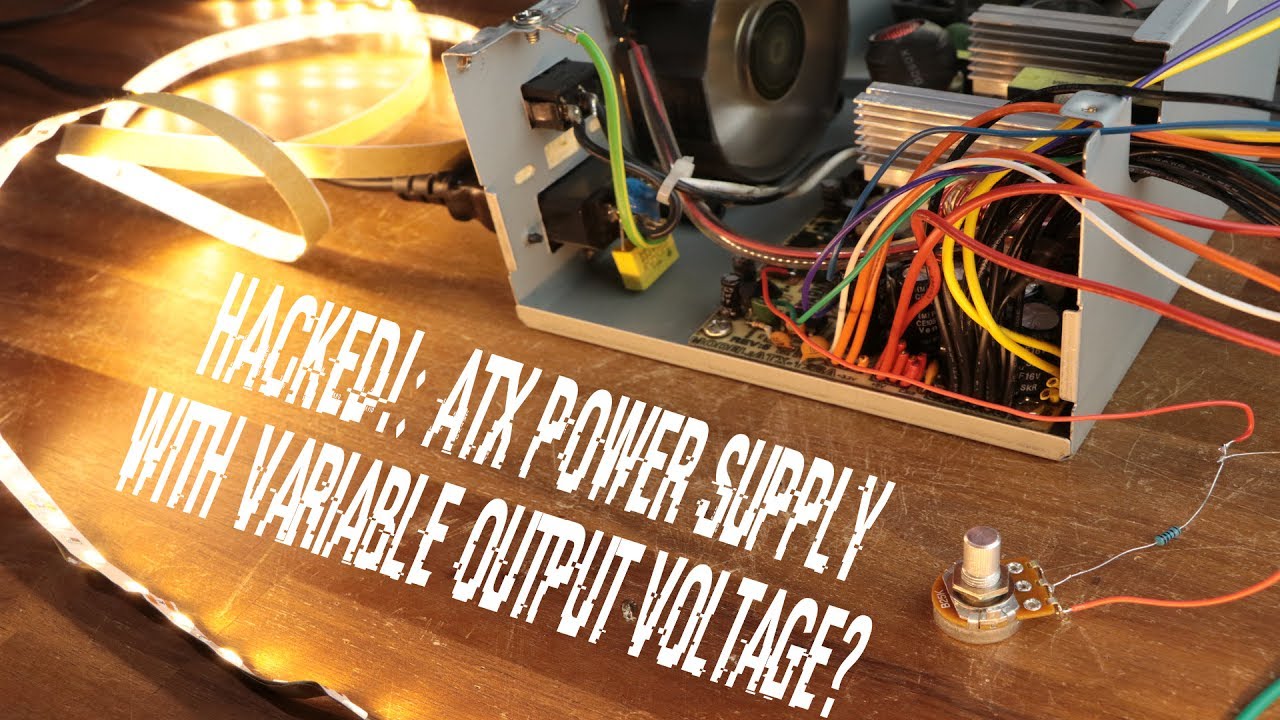
oeNAhP-GIjo | 09 Jul 2017
Support me for more videos: https://www.patreon.com/GreatScott DIY Lab Bench Power Supply video: https://youtu.be/QoGnOoTICGY Previous video: https://youtu.be/x2MEJfY45UY Facebook: https://www.facebook.com/greatscottlab Twitter: https://twitter.com/GreatScottLab You can get beginner lab bench power supplies here: Amazon.com: http://amzn.to/2tWd28S Amazon.de: http://amzn.to/2uXROEk Ebay (USA): http://rover.ebay.com/rover/1/711-53200-19255-0/1?icep_ff3=2&pub=5575101368&toolid=10001&campid=5337582279&customid=&icep_item=282534773203&ipn=psmain&icep_vectorid=229466&kwid=902099&mtid=824&kw=lg Ebay (Germany): http://rover.ebay.com/rover/1/711-53200-19255-0/1?icep_ff3=2&pub=5575101368&toolid=10001&campid=5337582279&customid=&icep_item=272707845563&ipn=psmain&icep_vectorid=229466&kwid=902099&mtid=824&kw=lg In this episode of HACKED! we will have a closer look at the circuit of an ATX PC power supply aka a switched mode power supply (SMPS) and find out whether it is possible to modify so that it outputs a variable voltage. Music: 2011 Lookalike by Bartlebeats Killing Time, Kevin MacLeod (incompetech.com) You want to support my videos? You can browse and buy tools&materials from my Amazon Store. This way I get a small commission: Amazon.de: http://astore.amazon.de/great043-21 Amazon.com:http://astore.amazon.com/gre09a-20 Amazon.co.uk: http://astore.amazon.co.uk/gre0b-21 Or you feel super generous and want to use this Amazon link as your Amazon home page. And do not worry, your purchases are all anonym and the prices are all the same: Amazon.de:http://www.amazon.de/?_encoding=UTF8&camp=1638&creative=19454&linkCode=ur2&site-redirect=de&tag=great043-21&linkId=ORZEQZEOVJAFURCZ Amazon.com:http://www.amazon.com/?_encoding=UTF8&camp=1789&creative=390957&linkCode=ur2&tag=gre09a-20&linkId=I5NDCEAVCD2OWM4S

x2MEJfY45UY | 05 Jul 2017
Support me for more videos: https://www.patreon.com/GreatScott Previous video: https://youtu.be/C0VZTqwE4Ls Facebook: https://www.facebook.com/greatscottlab Twitter: https://twitter.com/GreatScottLab This Q&A video is completely random and unscripted. I will go through around 20-30 questions from Patreon, Facebook and Twitter. You want to support my videos? You can browse and buy tools&materials from my Amazon Store. This way I get a small commission: Amazon.de: http://astore.amazon.de/great043-21 Amazon.com:http://astore.amazon.com/gre09a-20 Amazon.co.uk: http://astore.amazon.co.uk/gre0b-21 Or you feel super generous and want to use this Amazon link as your Amazon home page. And do not worry, your purchases are all anonym and the prices are all the same: Amazon.de:http://www.amazon.de/?_encoding=UTF8&camp=1638&creative=19454&linkCode=ur2&site-redirect=de&tag=great043-21&linkId=ORZEQZEOVJAFURCZ Amazon.com:http://www.amazon.com/?_encoding=UTF8&camp=1789&creative=390957&linkCode=ur2&tag=gre09a-20&linkId=I5NDCEAVCD2OWM4S
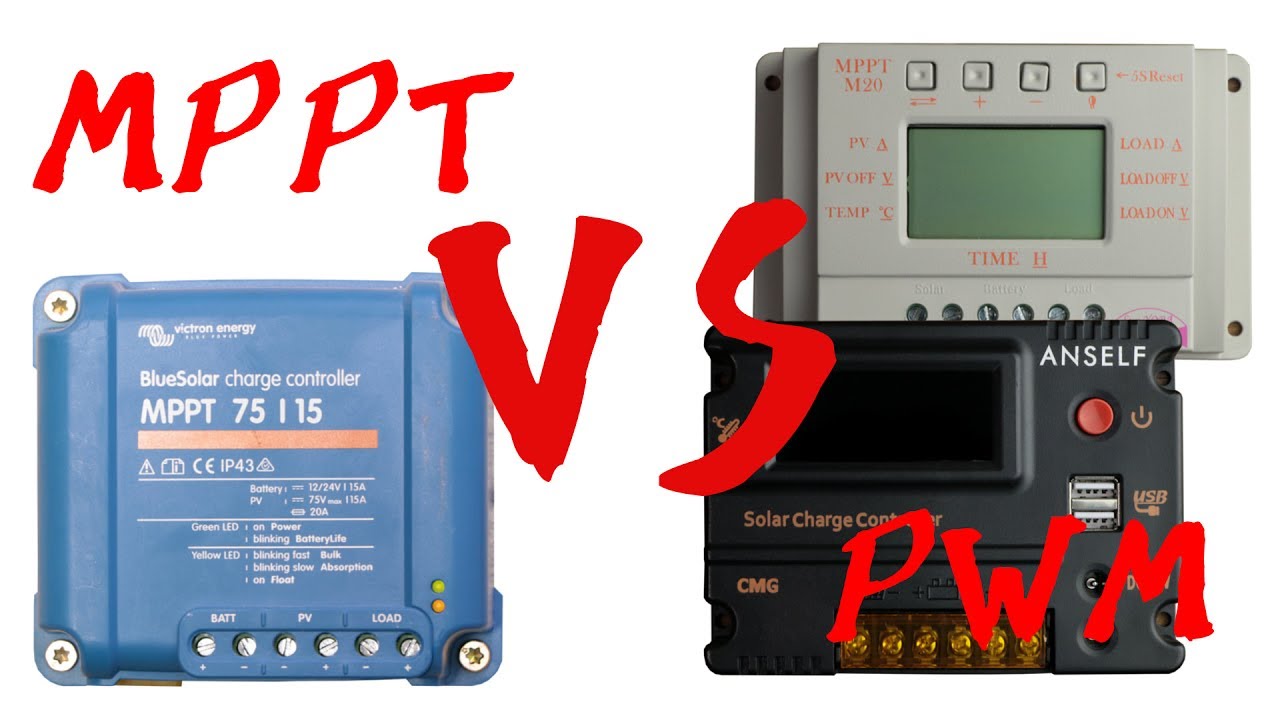
C0VZTqwE4Ls | 23 Jun 2017
Support me for more videos: https://www.patreon.com/GreatScott Previous video: https://youtu.be/WU16AJwvNhE Facebook: https://www.facebook.com/greatscottlab Twitter: https://twitter.com/GreatScottLab You can get the controllers shown in the video here: MPPT: Ebay: http://rover.ebay.com/rover/1/711-53200-19255-0/1?icep_ff3=2&pub=5575101368&toolid=10001&campid=5337582279&customid=&icep_item=172648478278&ipn=psmain&icep_vectorid=229466&kwid=902099&mtid=824&kw=lg Amazon.com: http://amzn.to/2t1TdNc Amazon.de: http://amzn.to/2sYscJS PWM: Ebay: http://rover.ebay.com/rover/1/711-53200-19255-0/1?icep_ff3=2&pub=5575101368&toolid=10001&campid=5337582279&customid=&icep_item=182478251420&ipn=psmain&icep_vectorid=229466&kwid=902099&mtid=824&kw=lg Amazon.com: http://amzn.to/2sy9oAt http://amzn.to/2rK0m0d Amazon.de: http://amzn.to/2s331Sj http://amzn.to/2sYIqCw In this VS episode I will compare an expensive MPPT solar charge controller with two cheap PWM solar charge controller from China. I will mostly talk about how much power they can draw from the solar panel and when it makes sense to use a cheap PWM controller and when an expensive MPPT controller. Music: 2011 Lookalike by Bartlebeats Killing Time, Kevin MacLeod (incompetech.com) You want to support my videos? You can browse and buy tools&materials from my Amazon Store. This way I get a small commission: Amazon.de: http://astore.amazon.de/great043-21 Amazon.com:http://astore.amazon.com/gre09a-20 Amazon.co.uk: http://astore.amazon.co.uk/gre0b-21 Or you feel super generous and want to use this Amazon link as your Amazon home page. And do not worry, your purchases are all anonym and the prices are all the same: Amazon.de:http://www.amazon.de/?_encoding=UTF8&camp=1638&creative=19454&linkCode=ur2&site-redirect=de&tag=great043-21&linkId=ORZEQZEOVJAFURCZ Amazon.com:http://www.amazon.com/?_encoding=UTF8&camp=1789&creative=390957&linkCode=ur2&tag=gre09a-20&linkId=I5NDCEAVCD2OWM4S

WU16AJwvNhE | 18 Jun 2017
Support me for more videos: https://www.patreon.com/GreatScott Previous video: https://youtu.be/sU-hSFFwSmo Facebook: https://www.facebook.com/greatscottlab Twitter: https://twitter.com/GreatScottLab More project information on Instructables: https://www.instructables.com/id/Make-Your-Own-Photovoltaic-Off-Grid-System Parts list (incomplete, see Instructables for more information): Amazon.com: 100W Solar Panel: http://amzn.to/2sH5bMa Solar wire + MC4 connectors: http://amzn.to/2rKdC4a Solar Charge Controller: http://amzn.to/2sM8qBu 12V 100Ah Battery: http://amzn.to/2sGRQmT Battery terminals: http://amzn.to/2sHedbM Inverter: http://amzn.to/2sM6pW7 Reed switch: http://amzn.to/2sMqQC3 LED strip: http://amzn.to/2rtg8wo Amazon.de: 100W Solar Panel: http://amzn.to/2rK1YXd Solar wire + MC4 connectors: http://amzn.to/2soYg7p Solar Charge Controller: http://amzn.to/2soVeA5 12V 100Ah Battery: http://amzn.to/2tBrTS3 Battery terminals: http://amzn.to/2sozvbp Inverter: http://amzn.to/2tBqQSo Reed switch: http://amzn.to/2tBxdVL LED strip: http://amzn.to/2soZy2d In this project I will show you how I combined a 100W solar panel, a 12V 100Ah battery, a solar charge controller, an inverter and many complementary components to reconstruct the electrical wiring inside my garage and create a photovoltaic off-grid system. Music: 2011 Lookalike by Bartlebeats Ecstatic Wave, Jens Kiilstofte https://machinimasound.com/music You want to support my videos? You can browse and buy tools&materials from my Amazon Store. This way I get a small commission: Amazon.de: http://astore.amazon.de/great043-21 Amazon.com:http://astore.amazon.com/gre09a-20 Amazon.co.uk: http://astore.amazon.co.uk/gre0b-21 Or you feel super generous and want to use this Amazon link as your Amazon home page. And do not worry, your purchases are all anonym and the prices are all the same: Amazon.de:http://www.amazon.de/?_encoding=UTF8&camp=1638&creative=19454&linkCode=ur2&site-redirect=de&tag=great043-21&linkId=ORZEQZEOVJAFURCZ Amazon.com:http://www.amazon.com/?_encoding=UTF8&camp=1789&creative=390957&linkCode=ur2&tag=gre09a-20&linkId=I5NDCEAVCD2OWM4S
sU-hSFFwSmo | 11 Jun 2017
Support me for more videos: https://www.patreon.com/GreatScott Previous video: https://youtu.be/3dQjIeYoIdM DIY Power Logger: https://youtu.be/lrugreN2K4w Facebook: https://www.facebook.com/greatscottlab Twitter: https://twitter.com/GreatScottLab In this episode of Electronic Basics I will show you how solar panels are wired up, why bypass and blocking diodes are necessary when working with them and how we can get the most power out of them. At the end I will also show you how MPPT and PWM charge controller can use a solar panel to charge up a battery. Music: 2011 Lookalike by Bartlebeats Killing Time, Kevin MacLeod (incompetech.com) You want to support my videos? You can browse and buy tools&materials from my Amazon Store. This way I get a small commission: Amazon.de: http://astore.amazon.de/great043-21 Amazon.com:http://astore.amazon.com/gre09a-20 Amazon.co.uk: http://astore.amazon.co.uk/gre0b-21 Or you feel super generous and want to use this Amazon link as your Amazon home page. And do not worry, your purchases are all anonym and the prices are all the same: Amazon.de:http://www.amazon.de/?_encoding=UTF8&camp=1638&creative=19454&linkCode=ur2&site-redirect=de&tag=great043-21&linkId=ORZEQZEOVJAFURCZ Amazon.com:http://www.amazon.com/?_encoding=UTF8&camp=1789&creative=390957&linkCode=ur2&tag=gre09a-20&linkId=I5NDCEAVCD2OWM4S
3dQjIeYoIdM | 04 Jun 2017
Amplifier circuit file on EasyEDA: https://easyeda.com/GreatScott/ClassDAudioAmp-8577705d8e0442faacfe601503588491 Support me for more videos: https://www.patreon.com/GreatScott Previous video: https://youtu.be/X0ihx9_1iFY Class AB Audio Amp video: https://youtu.be/oGTXczCV30A Facebook: https://www.facebook.com/greatscottlab Twitter: https://twitter.com/GreatScottLab More project information (schematic pictures,....) on Instructables: https://www.instructables.com/id/DIY-Class-D-Audio-Amplifier Thanks to EasyEDA for sponsoring this video. Free circuit design tool with 200,000 users: https://easyeda.com $2 for10pcs 2-layer 10x10cm PCB prototype here: https://easyeda.com/order Wide selection in-stock components: https://lcsc.com Parts list (Incomplete, see Instructables for Ebay and Amazon.de): Amazon.com: 1x 3.5mm Audio Jack: http://amzn.to/2qNwlMT 1x 10kΩ Potentiometer: http://amzn.to/2qNnpXy 1x LM393 Comparator: http://amzn.to/2ssBn2f 1x TLC555 Timer: http://amzn.to/2rGgUZX 1x 74HC04 Inverter: http://amzn.to/2qPW8YA 1x IR2113 MOSFET Driver: http://amzn.to/2rG7qxK 2x IRLZ44N MOSFET: http://amzn.to/2rFR3Bk 1x 7805 Voltage Regulator: http://amzn.to/2rGe1bL 1x 7812 Voltage Regulator: http://amzn.to/2qNx5S0 2x PCB Terminal: http://amzn.to/2qPZniW 3x 47µF, 1x 22µF Capacitor: http://amzn.to/2ssBJWD 7x 220nF Capacitor: http://amzn.to/2ssm3Tz 3x UF4007 Diode: http://amzn.to/2rFQd7S 2x 10kΩ, 2x 10Ω, 1x 2kΩ Resistor: http://amzn.to/2qPPnWG 2x 33µH Inductor: - In this project I will show you why a class AB amplifier is pretty inefficient and how a class D amplifier on the other hand improves this efficiency. At the end I will show you how we can apply the theory of operation of a class D amp to a couple of common components in order to create our own DIY class D audio amp. Music: 2011 Lookalike by Bartlebeats Killing Time, Kevin MacLeod (incompetech.com) You want to support my videos? You can browse and buy tools&materials from my Amazon Store. This way I get a small commission: Amazon.de: http://astore.amazon.de/great043-21 Amazon.com:http://astore.amazon.com/gre09a-20 Amazon.co.uk: http://astore.amazon.co.uk/gre0b-21 Or you feel super generous and want to use this Amazon link as your Amazon home page. And do not worry, your purchases are all anonym and the prices are all the same: Amazon.de:http://www.amazon.de/?_encoding=UTF8&camp=1638&creative=19454&linkCode=ur2&site-redirect=de&tag=great043-21&linkId=ORZEQZEOVJAFURCZ Amazon.com:http://www.amazon.com/?_encoding=UTF8&camp=1789&creative=390957&linkCode=ur2&tag=gre09a-20&linkId=I5NDCEAVCD2OWM4S

X0ihx9_1iFY | 28 May 2017
Previous video: https://youtu.be/-CY3aCDc3RY Low price Delta 3D Printer video: https://youtu.be/VjOGB6U_amY Facebook: https://www.facebook.com/greatscottlab Twitter: https://twitter.com/GreatScottLab Support me for more videos: https://www.patreon.com/GreatScott?ty=h You can get a TEVO Little Monster 3D Printer here: https://www.goo.gl/mh9n5f You can also join their Facebook group: https://www.goo.gl/nMlOjp Thanks to (goo.gl/qKumY3) for providing the tested unit free of charge. Utilized example prints from Thingiverse: https://www.thingiverse.com/thing:763622 https://www.thingiverse.com/thing:18672 https://www.thingiverse.com/thing:952885 https://www.thingiverse.com/thing:814007 In this video I will have a look at the TEVO Little Monster 3D Printer and find out whether its large build volume, direct extruder and overall quality justifies its 800$ price tag. Music: 2011 Lookalike by Bartlebeats You want to support my videos? You can browse and buy tools&materials from my Amazon Store. This way I get a small commission: Amazon.de: http://astore.amazon.de/great043-21 Amazon.com:http://astore.amazon.com/gre09a-20 Amazon.co.uk: http://astore.amazon.co.uk/gre0b-21 Or you feel super generous and want to use this Amazon link as your Amazon home page. And do not worry, your purchases are all anonym and the prices are all the same: Amazon.de:http://www.amazon.de/?_encoding=UTF8&camp=1638&creative=19454&linkCode=ur2&site-redirect=de&tag=great043-21&linkId=ORZEQZEOVJAFURCZ Amazon.com:http://www.amazon.com/?_encoding=UTF8&camp=1789&creative=390957&linkCode=ur2&tag=gre09a-20&linkId=I5NDCEAVCD2OWM4S

-CY3aCDc3RY | 21 May 2017
Support me for more videos: https://www.patreon.com/GreatScott Part 1: https://youtu.be/LbTyEratSTI Part 2: https://youtu.be/ChlG3TF38qI Previous video: https://youtu.be/g4tO0kBOzqk Facebook: https://www.facebook.com/greatscottlab Twitter: https://twitter.com/GreatScottLab More project information (schematic, code,....) on Instructables: https://www.instructables.com/id/Make-Your-Own-Tesla-Coil/ Parts list (incomplete, see Instructables for more information): Amazon.com: 4x IGBT: http://amzn.to/2qe13lo 1x Arduino Nano: http://amzn.to/2pnWCAE 1x 555 Timer IC: http://amzn.to/2pTzYTE 1x Schmitt trigger: http://amzn.to/2p9QcZK 2x IR2184 IGBT driver: http://amzn.to/2q6sbPR 12x UF4007 Diode: http://amzn.to/2r68eNa 1x 7805 Voltage Regulator: http://amzn.to/2qI1qUX 1x 7812 Voltage Regulator: http://amzn.to/2r5JCnE 1x SD Card Module: http://amzn.to/2qI3PPi Ebay: 4x IGBT: http://rover.ebay.com/rover/1/711-53200-19255-0/1?icep_ff3=2&pub=5575101368&toolid=10001&campid=5337582279&customid=&icep_item=391338347819&ipn=psmain&icep_vectorid=229466&kwid=902099&mtid=824&kw=lg 1x Arduino Nano: http://rover.ebay.com/rover/1/711-53200-19255-0/1?icep_ff3=2&pub=5575101368&toolid=10001&campid=5337582279&customid=&icep_item=162002876661&ipn=psmain&icep_vectorid=229466&kwid=902099&mtid=824&kw=lg 1x 555 Timer IC: http://rover.ebay.com/rover/1/711-53200-19255-0/1?icep_ff3=2&pub=5575101368&toolid=10001&campid=5337582279&customid=&icep_item=170881262435&ipn=psmain&icep_vectorid=229466&kwid=902099&mtid=824&kw=lg 1x Schmitt trigger: http://rover.ebay.com/rover/1/711-53200-19255-0/1?icep_ff3=2&pub=5575101368&toolid=10001&campid=5337582279&customid=&icep_item=201812729219&ipn=psmain&icep_vectorid=229466&kwid=902099&mtid=824&kw=lg 2x IR2184 IGBT driver: http://rover.ebay.com/rover/1/711-53200-19255-0/1?icep_ff3=2&pub=5575101368&toolid=10001&campid=5337582279&customid=&icep_item=121107957879&ipn=psmain&icep_vectorid=229466&kwid=902099&mtid=824&kw=lg 12x UF4007 Diode: http://rover.ebay.com/rover/1/711-53200-19255-0/1?icep_ff3=2&pub=5575101368&toolid=10001&campid=5337582279&customid=&icep_item=181846953488&ipn=psmain&icep_vectorid=229466&kwid=902099&mtid=824&kw=lg 1x 7805 Voltage Regulator: http://rover.ebay.com/rover/1/711-53200-19255-0/1?icep_ff3=2&pub=5575101368&toolid=10001&campid=5337582279&customid=&icep_item=301723629766&ipn=psmain&icep_vectorid=229466&kwid=902099&mtid=824&kw=lg 1x 7812 Voltage Regulator: http://rover.ebay.com/rover/1/711-53200-19255-0/1?icep_ff3=2&pub=5575101368&toolid=10001&campid=5337582279&customid=&icep_item=130753038469&ipn=psmain&icep_vectorid=229466&kwid=902099&mtid=824&kw=lg 1x SD Card Module: http://rover.ebay.com/rover/1/711-53200-19255-0/1?icep_ff3=2&pub=5575101368&toolid=10001&campid=5337582279&customid=&icep_item=381374955597&ipn=psmain&icep_vectorid=229466&kwid=902099&mtid=824&kw=lg In this three part video series I will show you how a common slayer exciter tesla coil kit works and how you can create your own improved version of a tesla coil that is commonly referred to as a SSTC. In this third part of the series I will show you how to play music with your tesla coil, how I improved the IGBT driver circuit so that it wastes less power, how to include a feedback circuit that keeps the oscillation frequency at the resonance frequency and how you can upgrade your SSTC to a DRSSTC. Music: In the Hall of the Mountain King, Kevin MacLeod Killing Time, Kevin MacLeod (incompetech.com) Latin Industries, Kevin MacLeod (incompetech.com) You want to support my videos? You can browse and buy tools&materials from my Amazon Store. This way I get a small commission: Amazon.de: http://astore.amazon.de/great043-21 Amazon.com:http://astore.amazon.com/gre09a-20 Amazon.co.uk: http://astore.amazon.co.uk/gre0b-21 Or you feel super generous and want to use this Amazon link as your Amazon home page. And do not worry, your purchases are all anonym and the prices are all the same: Amazon.de:http://www.amazon.de/?_encoding=UTF8&camp=1638&creative=19454&linkCode=ur2&site-redirect=de&tag=great043-21&linkId=ORZEQZEOVJAFURCZ Amazon.com:http://www.amazon.com/?_encoding=UTF8&camp=1789&creative=390957&linkCode=ur2&tag=gre09a-20&linkId=I5NDCEAVCD2OWM4S
g4tO0kBOzqk | 14 May 2017
Support me for more videos: https://www.patreon.com/GreatScott Previous video: https://youtu.be/ChlG3TF38qI Facebook: https://www.facebook.com/greatscottlab Twitter: https://twitter.com/GreatScottLab In this video I will present you how the infamous magnet PC fan and the Bedini motor supposedly create free energy and explain in detail why that is definitely not possible. Music: 2011 Lookalike by Bartlebeats You want to support my videos? You can browse and buy tools&materials from my Amazon Store. This way I get a small commission: Amazon.de: http://astore.amazon.de/great043-21 Amazon.com:http://astore.amazon.com/gre09a-20 Amazon.co.uk: http://astore.amazon.co.uk/gre0b-21 Or you feel super generous and want to use this Amazon link as your Amazon home page. And do not worry, your purchases are all anonym and the prices are all the same: Amazon.de:http://www.amazon.de/?_encoding=UTF8&camp=1638&creative=19454&linkCode=ur2&site-redirect=de&tag=great043-21&linkId=ORZEQZEOVJAFURCZ Amazon.com:http://www.amazon.com/?_encoding=UTF8&camp=1789&creative=390957&linkCode=ur2&tag=gre09a-20&linkId=I5NDCEAVCD2OWM4S
ChlG3TF38qI | 07 May 2017
Part 1: https://youtu.be/LbTyEratSTI Support me for more videos: https://www.patreon.com/GreatScott Previous video: https://youtu.be/RxRJW09A_XA Facebook: https://www.facebook.com/greatscottlab Twitter: https://twitter.com/GreatScottLab More project information (schematic, code,....) on Instructables: https://www.instructables.com/id/Make-Your-Own-Tesla-Coil/ Parts list (incomplete, see Instructables for more information): Amazon.com: 4x IGBT: http://amzn.to/2qe13lo 1x Arduino Nano: http://amzn.to/2pnWCAE 1x 555 Timer IC: http://amzn.to/2pTzYTE 1x Schmitt trigger: http://amzn.to/2p9QcZK 2x IR2184 IGBT driver: http://amzn.to/2q6sbPR 12x UF4007 Diode: http://amzn.to/2r68eNa 1x 7805 Voltage Regulator: http://amzn.to/2qI1qUX 1x 7812 Voltage Regulator: http://amzn.to/2r5JCnE 1x SD Card Module: http://amzn.to/2qI3PPi Ebay: 4x IGBT: http://rover.ebay.com/rover/1/711-53200-19255-0/1?icep_ff3=2&pub=5575101368&toolid=10001&campid=5337582279&customid=&icep_item=391338347819&ipn=psmain&icep_vectorid=229466&kwid=902099&mtid=824&kw=lg 1x Arduino Nano: http://rover.ebay.com/rover/1/711-53200-19255-0/1?icep_ff3=2&pub=5575101368&toolid=10001&campid=5337582279&customid=&icep_item=162002876661&ipn=psmain&icep_vectorid=229466&kwid=902099&mtid=824&kw=lg 1x 555 Timer IC: http://rover.ebay.com/rover/1/711-53200-19255-0/1?icep_ff3=2&pub=5575101368&toolid=10001&campid=5337582279&customid=&icep_item=170881262435&ipn=psmain&icep_vectorid=229466&kwid=902099&mtid=824&kw=lg 1x Schmitt trigger: http://rover.ebay.com/rover/1/711-53200-19255-0/1?icep_ff3=2&pub=5575101368&toolid=10001&campid=5337582279&customid=&icep_item=201812729219&ipn=psmain&icep_vectorid=229466&kwid=902099&mtid=824&kw=lg 2x IR2184 IGBT driver: http://rover.ebay.com/rover/1/711-53200-19255-0/1?icep_ff3=2&pub=5575101368&toolid=10001&campid=5337582279&customid=&icep_item=121107957879&ipn=psmain&icep_vectorid=229466&kwid=902099&mtid=824&kw=lg 12x UF4007 Diode: http://rover.ebay.com/rover/1/711-53200-19255-0/1?icep_ff3=2&pub=5575101368&toolid=10001&campid=5337582279&customid=&icep_item=181846953488&ipn=psmain&icep_vectorid=229466&kwid=902099&mtid=824&kw=lg 1x 7805 Voltage Regulator: http://rover.ebay.com/rover/1/711-53200-19255-0/1?icep_ff3=2&pub=5575101368&toolid=10001&campid=5337582279&customid=&icep_item=301723629766&ipn=psmain&icep_vectorid=229466&kwid=902099&mtid=824&kw=lg 1x 7812 Voltage Regulator: http://rover.ebay.com/rover/1/711-53200-19255-0/1?icep_ff3=2&pub=5575101368&toolid=10001&campid=5337582279&customid=&icep_item=130753038469&ipn=psmain&icep_vectorid=229466&kwid=902099&mtid=824&kw=lg 1x SD Card Module: http://rover.ebay.com/rover/1/711-53200-19255-0/1?icep_ff3=2&pub=5575101368&toolid=10001&campid=5337582279&customid=&icep_item=381374955597&ipn=psmain&icep_vectorid=229466&kwid=902099&mtid=824&kw=lg In this three part video series I will show you how a common slayer exciter tesla coil kit works and how you can create your own improved version of a tesla coil that is commonly referred to as a SSTC. In this second part of the series I will show you how to create a top load for the SSTC as well as an appropriate IGBT full bridge driver. In the end I will talk about the function of the interrupter in the circuit. Music: In the Hall of the Mountain King, Kevin MacLeod Killing Time, Kevin MacLeod (incompetech.com) You want to support my videos? You can browse and buy tools&materials from my Amazon Store. This way I get a small commission: Amazon.de: http://astore.amazon.de/great043-21 Amazon.com:http://astore.amazon.com/gre09a-20 Amazon.co.uk: http://astore.amazon.co.uk/gre0b-21 Or you feel super generous and want to use this Amazon link as your Amazon home page. And do not worry, your purchases are all anonym and the prices are all the same: Amazon.de:http://www.amazon.de/?_encoding=UTF8&camp=1638&creative=19454&linkCode=ur2&site-redirect=de&tag=great043-21&linkId=ORZEQZEOVJAFURCZ Amazon.com:http://www.amazon.com/?_encoding=UTF8&camp=1789&creative=390957&linkCode=ur2&tag=gre09a-20&linkId=I5NDCEAVCD2OWM4S

RxRJW09A_XA | 30 Apr 2017
Support me for more videos: https://www.patreon.com/GreatScott Previous video: https://youtu.be/LbTyEratSTI MOSFET Basics video: https://youtu.be/o4_NeqlJgOs BJT Basics video: https://youtu.be/WRm2oUw4owE Sources for the SSTC schematics: http://www.instructables.com/id/Solid-State-Tesla-Coil/ http://stevehv.4hv.org/SSTC5.htm https://www.stevehv.4hv.org/SSTC2.htm http://www.loneoceans.com/labs/sstc2/ http://danyk.cz/sstc4_en.html In this episode of Electronic Basics I will tell you how you can use an IGBT instead of a MOSFET to switch your load on and off and when it actually makes sense to use them instead of MOSFETs. Music: 2011 Lookalike by Bartlebeats Killing Time, Kevin MacLeod (incompetech.com) You want to support my videos? You can browse and buy tools&materials from my Amazon Store. This way I get a small commission: Amazon.de: http://astore.amazon.de/great043-21 Amazon.com:http://astore.amazon.com/gre09a-20 Amazon.co.uk: http://astore.amazon.co.uk/gre0b-21 Or you feel super generous and want to use this Amazon link as your Amazon home page. And do not worry, your purchases are all anonym and the prices are all the same: Amazon.de:http://www.amazon.de/?_encoding=UTF8&camp=1638&creative=19454&linkCode=ur2&site-redirect=de&tag=great043-21&linkId=ORZEQZEOVJAFURCZ Amazon.com:http://www.amazon.com/?_encoding=UTF8&camp=1789&creative=390957&linkCode=ur2&tag=gre09a-20&linkId=I5NDCEAVCD2OWM4S

LbTyEratSTI | 23 Apr 2017
Support me for more videos: https://www.patreon.com/GreatScott Previous video: https://youtu.be/EVm0qVJ56II DIY Wireless Energy Transfer System: https://youtu.be/3E5PUnYlaTM Facebook: https://www.facebook.com/greatscottlab Twitter: https://twitter.com/GreatScottLab More project information (schematic, code,....) on Instructables: https://www.instructables.com/id/Make-Your-Own-Tesla-Coil/ Parts list (incomplete, see Instructables for more information): DIY Tesla Coil Kit: http://rover.ebay.com/rover/1/711-53200-19255-0/1?icep_ff3=2&pub=5575101368&toolid=10001&campid=5337606358&customid=&icep_item=291960329255&ipn=psmain&icep_vectorid=229466&kwid=902099&mtid=824&kw=lg Amazon.com: 1x 10kΩ Resistor: http://amzn.to/2pSEoI7 1x BD535 NPN BJT: http://amzn.to/2oVDImM 1x Blue LED: http://amzn.to/2p5Vh1N Enameled copper wire (0.15mm): http://amzn.to/2oBrRqK Ebay.com: 1x 10kΩ Resistor: http://rover.ebay.com/rover/1/711-53200-19255-0/1?icep_ff3=2&pub=5575101368&toolid=10001&campid=5337606358&customid=&icep_item=302067921835&ipn=psmain&icep_vectorid=229466&kwid=902099&mtid=824&kw=lg 1x BD535 NPN BJT: http://rover.ebay.com/rover/1/711-53200-19255-0/1?icep_ff3=2&pub=5575101368&toolid=10001&campid=5337606358&customid=&icep_item=360645258926&ipn=psmain&icep_vectorid=229466&kwid=902099&mtid=824&kw=lg 1x Blue LED: http://rover.ebay.com/rover/1/711-53200-19255-0/1?icep_ff3=2&pub=5575101368&toolid=10001&campid=5337606358&customid=&icep_item=201607683457&ipn=psmain&icep_vectorid=229466&kwid=902099&mtid=824&kw=lg Enameled copper wire (0.15mm): http://rover.ebay.com/rover/1/711-53200-19255-0/1?icep_ff3=2&pub=5575101368&toolid=10001&campid=5337606358&customid=&icep_item=261086009588&ipn=psmain&icep_vectorid=229466&kwid=902099&mtid=824&kw=lg Home Improvement Store: PVC pipe, wood screws, spar, plywood, wire, spray varnish Magnet Wire: Ebay: http://rover.ebay.com/rover/1/711-53200-19255-0/1?icep_ff3=2&pub=5575101368&toolid=10001&campid=5337582279&customid=&icep_item=371091463474&ipn=psmain&icep_vectorid=229466&kwid=902099&mtid=824&kw=lg Amazon.com: http://amzn.to/2rqyCRF Amazon.de: http://amzn.to/2rEYQgf In this three part video series I will show you how a common slayer exciter tesla coil kit works and how you can create your own improved version of a tesla coil that is commonly referred to as a SSTC. Music: 2011 Lookalike by Bartlebeats Ecstatic Wave, Jens Kiilstofte https://machinimasound.com/music You want to support my videos? You can browse and buy tools&materials from my Amazon Store. This way I get a small commission: Amazon.de: http://astore.amazon.de/great043-21 Amazon.com:http://astore.amazon.com/gre09a-20 Amazon.co.uk: http://astore.amazon.co.uk/gre0b-21 Or you feel super generous and want to use this Amazon link as your Amazon home page. And do not worry, your purchases are all anonym and the prices are all the same: Amazon.de:http://www.amazon.de/?_encoding=UTF8&camp=1638&creative=19454&linkCode=ur2&site-redirect=de&tag=great043-21&linkId=ORZEQZEOVJAFURCZ Amazon.com:http://www.amazon.com/?_encoding=UTF8&camp=1789&creative=390957&linkCode=ur2&tag=gre09a-20&linkId=I5NDCEAVCD2OWM4S
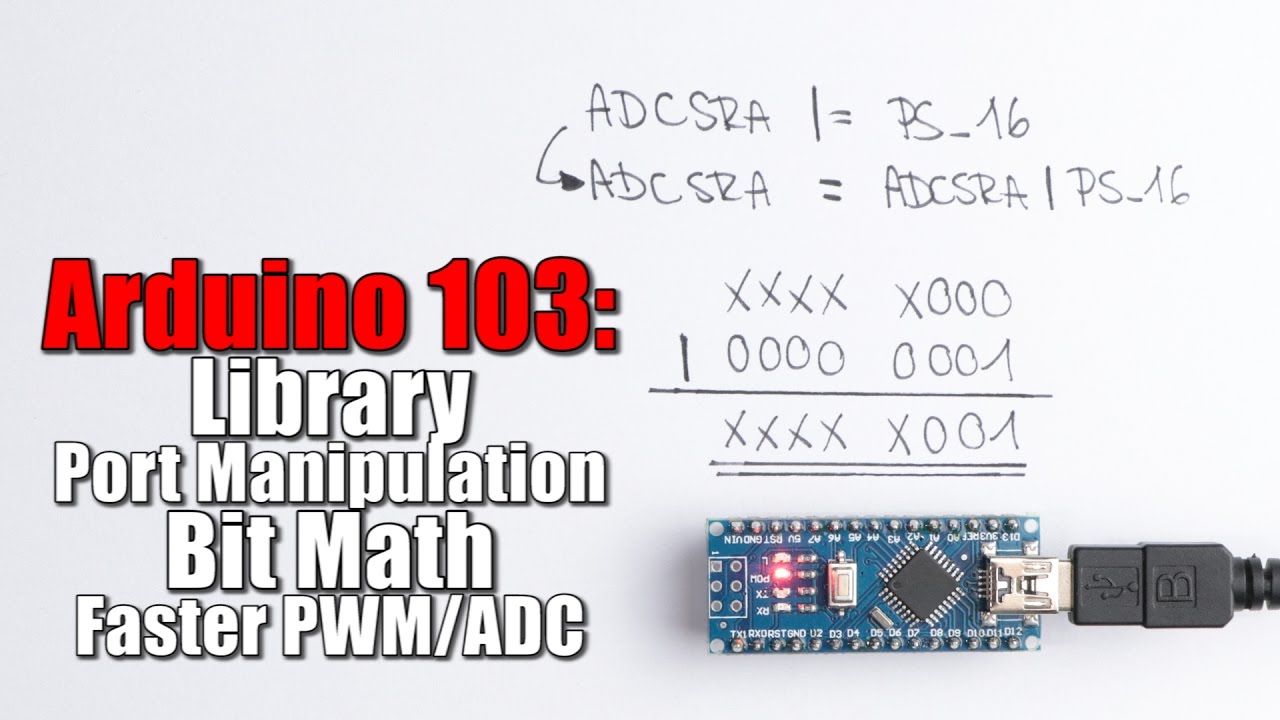
EVm0qVJ56II | 16 Apr 2017
Support me for more videos: https://www.patreon.com/GreatScott Previous video: https://youtu.be/UvH49nzpJts Arduino Basics 101: https://youtu.be/BtLwoNJ6klE Arduino Basics 102: https://youtu.be/YT3birSKLLU Facebook: https://www.facebook.com/greatscottlab Twitter: https://twitter.com/GreatScottLab You can get Arduino boards here: Ebay: Arduino Uno: http://rover.ebay.com/rover/1/711-53200-19255-0/1?icep_ff3=2&pub=5575101368&toolid=10001&campid=5337582279&customid=&icep_item=281638689314&ipn=psmain&icep_vectorid=229466&kwid=902099&mtid=824&kw=lg Arduino Nano: http://rover.ebay.com/rover/1/711-53200-19255-0/1?icep_ff3=2&pub=5575101368&toolid=10001&campid=5337582279&customid=&icep_item=162002876661&ipn=psmain&icep_vectorid=229466&kwid=902099&mtid=824&kw=lg Arduino Pro Mini: http://rover.ebay.com/rover/1/711-53200-19255-0/1?icep_ff3=2&pub=5575101368&toolid=10001&campid=5337582279&customid=&icep_item=331809989705&ipn=psmain&icep_vectorid=229466&kwid=902099&mtid=824&kw=lg FTDI board: http://rover.ebay.com/rover/1/711-53200-19255-0/1?icep_ff3=2&pub=5575101368&toolid=10001&campid=5337582279&customid=&icep_item=381374421597&ipn=psmain&icep_vectorid=229466&kwid=902099&mtid=824&kw=lg Amazon.com: Arduino Uno: http://amzn.to/2lw4DEt Arduino Nano: http://amzn.to/2kBp43B Arduino Pro Mini: http://amzn.to/2kVVFxc FTDI board: http://amzn.to/2mbPm8V Amazon.de: Arduino Uno: http://amzn.to/2ljDLFL Arduino Nano: http://amzn.to/2ljnq3J Arduino Pro Mini: http://amzn.to/2kMv0ly FTDI board: http://amzn.to/2ljvuRY In this third and final epsiode of the Arduino Basics video series I will talk about how to use libraries, how you can use port manipulation to turn a pin on/off faster and how you can modify the registers of the Arduino µC with Bit Math in order to increase the frequency of the PWM Signal or the sampling rate of the ADC. Music: In the Hall of the Mountain King, Kevin MacLeod Killing Time, Kevin MacLeod (incompetech.com) You want to support my videos? You can browse and buy tools&materials from my Amazon Store. This way I get a small commission: Amazon.de: http://astore.amazon.de/great043-21 Amazon.com:http://astore.amazon.com/gre09a-20 Amazon.co.uk: http://astore.amazon.co.uk/gre0b-21 Or you feel super generous and want to use this Amazon link as your Amazon home page. And do not worry, your purchases are all anonym and the prices are all the same: Amazon.de:http://www.amazon.de/?_encoding=UTF8&camp=1638&creative=19454&linkCode=ur2&site-redirect=de&tag=great043-21&linkId=ORZEQZEOVJAFURCZ Amazon.com:http://www.amazon.com/?_encoding=UTF8&camp=1789&creative=390957&linkCode=ur2&tag=gre09a-20&linkId=I5NDCEAVCD2OWM4S

UvH49nzpJts | 09 Apr 2017
Edit schematic and convert it into PCB here: https://easyeda.com/editor#id=d1ba6e9ca5a6436797b615fee961d032 Support me for more videos: https://www.patreon.com/GreatScott Previous video: https://youtu.be/UTRUMETt9qY Facebook: https://www.facebook.com/greatscottlab Twitter: https://twitter.com/GreatScottLab More project information (code, pictures,....) on Instructables: https://www.instructables.com/id/DIY-Arduino-Soldering-Station/ Thanks to EasyEDA for sponsoring this video. Check out their free circuit design tool here: https://easyeda.com Great cheap PCB Fab House here: https://easyeda.com/order Parts list (Incomplete, see Instructables for more): Amazon.com: 1x Toroidal Transformer: - 2x 2W10 Full Bridge Rectifier: http://amzn.to/2oOZEB3 1x BTB26 Triac: http://amzn.to/2nXQv5f 1x MOC3020 Optocoupler: http://amzn.to/2oSyn0i 1x 4N25 Optocoupler: http://amzn.to/2oSIySu 1x Arduino Pro Mini: http://amzn.to/2nXvY0K 1x SPI OLED LCD: http://amzn.to/2oVBQbx 1x MAX6675: http://amzn.to/2nueIUu 2x 1000µF Capacitor: http://amzn.to/2omfjXL 3x 100Ω, 1x 330Ω, 1x 2kΩ Resistor: http://amzn.to/2odSJOJ 1x 50kΩ Potentiometer: http://amzn.to/2oml73s Ebay: 1x Toroidal Transformer: http://rover.ebay.com/rover/1/711-53200-19255-0/1?icep_ff3=2&pub=5575101368&toolid=10001&campid=5337582279&customid=&icep_item=371664438597&ipn=psmain&icep_vectorid=229466&kwid=902099&mtid=824&kw=lg 2x 2W10 Full Bridge Rectifier: http://rover.ebay.com/rover/1/711-53200-19255-0/1?icep_ff3=2&pub=5575101368&toolid=10001&campid=5337582279&customid=&icep_item=180649597909&ipn=psmain&icep_vectorid=229466&kwid=902099&mtid=824&kw=lg 1x BTB26 Triac: http://rover.ebay.com/rover/1/711-53200-19255-0/1?icep_ff3=2&pub=5575101368&toolid=10001&campid=5337582279&customid=&icep_item=201632762545&ipn=psmain&icep_vectorid=229466&kwid=902099&mtid=824&kw=lg 1x MOC3020 Optocoupler: http://rover.ebay.com/rover/1/711-53200-19255-0/1?icep_ff3=2&pub=5575101368&toolid=10001&campid=5337582279&customid=&icep_item=401082672184&ipn=psmain&icep_vectorid=229466&kwid=902099&mtid=824&kw=lg 1x 4N25 Optocoupler: http://rover.ebay.com/rover/1/711-53200-19255-0/1?icep_ff3=2&pub=5575101368&toolid=10001&campid=5337582279&customid=&icep_item=400985457838&ipn=psmain&icep_vectorid=229466&kwid=902099&mtid=824&kw=lg 1x Arduino Pro Mini: http://rover.ebay.com/rover/1/711-53200-19255-0/1?icep_ff3=2&pub=5575101368&toolid=10001&campid=5337582279&customid=&icep_item=191679508570&ipn=psmain&icep_vectorid=229466&kwid=902099&mtid=824&kw=lg 1x SPI OLED LCD: http://rover.ebay.com/rover/1/711-53200-19255-0/1?icep_ff3=2&pub=5575101368&toolid=10001&campid=5337582279&customid=&icep_item=201146880872&ipn=psmain&icep_vectorid=229466&kwid=902099&mtid=824&kw=lg 1x MAX6675: http://rover.ebay.com/rover/1/711-53200-19255-0/1?icep_ff3=2&pub=5575101368&toolid=10001&campid=5337582279&customid=&icep_item=400798924042&ipn=psmain&icep_vectorid=229466&kwid=902099&mtid=824&kw=lg 2x 1000µF Capacitor: http://rover.ebay.com/rover/1/711-53200-19255-0/1?icep_ff3=2&pub=5575101368&toolid=10001&campid=5337582279&customid=&icep_item=231271286516&ipn=psmain&icep_vectorid=229466&kwid=902099&mtid=824&kw=lg 3x 100Ω, 1x 330Ω, 1x 2kΩ Resistor: http://rover.ebay.com/rover/1/711-53200-19255-0/1?icep_ff3=2&pub=5575101368&toolid=10001&campid=5337582279&customid=&icep_item=131504016234&ipn=psmain&icep_vectorid=229466&kwid=902099&mtid=824&kw=lg 1x 50kΩ Potentiometer: http://rover.ebay.com/rover/1/711-53200-19255-0/1?icep_ff3=2&pub=5575101368&toolid=10001&campid=5337582279&customid=&icep_item=381374716268&ipn=psmain&icep_vectorid=229466&kwid=902099&mtid=824&kw=lg In this project I will show you how to create an Arduino based soldering station for a standard JBC soldering iron. During the build I will talk about thermocouples, AC power control and zero point detection. Let's get started! Music: 2011 Lookalike by Bartlebeats Ecstatic Wave, Jens Kiilstofte https://machinimasound.com/music You want to support my videos? You can browse and buy tools&materials from my Amazon Store. This way I get a small commission: Amazon.de: http://astore.amazon.de/great043-21 Amazon.com:http://astore.amazon.com/gre09a-20 Amazon.co.uk: http://astore.amazon.co.uk/gre0b-21 Or you feel super generous and want to use this Amazon link as your Amazon home page. And do not worry, your purchases are all anonym and the prices are all the same: Amazon.de:http://www.amazon.de/?_encoding=UTF8&camp=1638&creative=19454&linkCode=ur2&site-redirect=de&tag=great043-21&linkId=ORZEQZEOVJAFURCZ Amazon.com:http://www.amazon.com/?_encoding=UTF8&camp=1789&creative=390957&linkCode=ur2&tag=gre09a-20&linkId=I5NDCEAVCD2OWM4S
UTRUMETt9qY | 02 Apr 2017
Moai SLA 3D Printer Kickstarter: https://www.kickstarter.com/projects/1554809440/moai-affordable-high-resolution-laser-sla-3d-print Thanks to Peopoly for providing the review unit. Support me for more videos: https://www.patreon.com/GreatScott Previous video: https://youtu.be/aScAZReGQc0 Facebook: https://www.facebook.com/greatscottlab Twitter: https://twitter.com/GreatScottLab In this video I will take a closer look at the Moai SLA 3D Printer kit and tell you how easy it is to build, how well it prints and what kind of problems occured while testing the machine. Music: 2011 Lookalike by Bartlebeats Killing Time, Kevin MacLeod (incompetech.com) You want to support my videos? You can browse and buy tools&materials from my Amazon Store. This way I get a small commission: Amazon.de: http://astore.amazon.de/great043-21 Amazon.com:http://astore.amazon.com/gre09a-20 Amazon.co.uk: http://astore.amazon.co.uk/gre0b-21 Or you feel super generous and want to use this Amazon link as your Amazon home page. And do not worry, your purchases are all anonym and the prices are all the same: Amazon.de:http://www.amazon.de/?_encoding=UTF8&camp=1638&creative=19454&linkCode=ur2&site-redirect=de&tag=great043-21&linkId=ORZEQZEOVJAFURCZ Amazon.com:http://www.amazon.com/?_encoding=UTF8&camp=1789&creative=390957&linkCode=ur2&tag=gre09a-20&linkId=I5NDCEAVCD2OWM4S
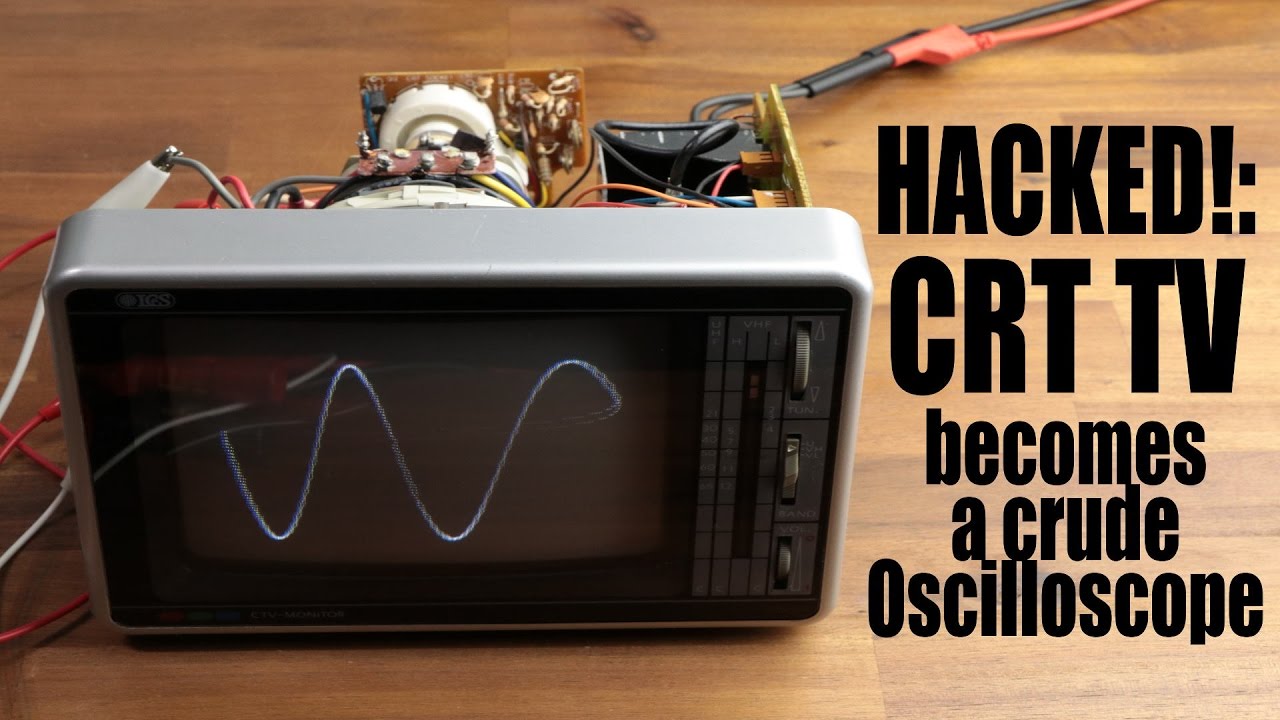
aScAZReGQc0 | 26 Mar 2017
Support me for more videos: https://www.patreon.com/GreatScott Previous video: https://youtu.be/CeStrH-5Llo Facebook: https://www.facebook.com/greatscottlab Twitter: https://twitter.com/GreatScottLab Transistor Tester used in the video: Amazon.de: http://amzn.to/2n6PM1l Amazon.com: http://amzn.to/2n5n2ox Ebay: http://rover.ebay.com/rover/1/711-53200-19255-0/1?icep_ff3=2&pub=5575101368&toolid=10001&campid=5337582279&customid=&icep_item=262807180342&ipn=psmain&icep_vectorid=229466&kwid=902099&mtid=824&kw=lg In this episode of HACKED! I will show you how I converted an old CRT TV into a crude Oscilloscope. During this process I will talk about how a CRT TV actually works and how we can utilize the deflection coils of it in order to create our own picture on the screen. Music: 2011 Lookalike by Bartlebeats Ecstatic Wave, Jens Kiilstofte https://machinimasound.com/music You want to support my videos? You can browse and buy tools&materials from my Amazon Store. This way I get a small commission: Amazon.de: http://astore.amazon.de/great043-21 Amazon.com:http://astore.amazon.com/gre09a-20 Amazon.co.uk: http://astore.amazon.co.uk/gre0b-21 Or you feel super generous and want to use this Amazon link as your Amazon home page. And do not worry, your purchases are all anonym and the prices are all the same:
CeStrH-5Llo | 19 Mar 2017
Support me for more videos: https://www.patreon.com/GreatScott Previous video: https://youtu.be/YT3birSKLLU Facebook: https://www.facebook.com/greatscottlab Twitter: https://twitter.com/GreatScottLab Convert Coordinates: http://www.earthpoint.us/Convert.aspx More project information (code, schematic, parts list,.....) on Instructables: https://www.instructables.com/id/Make-Your-Own-GPS-SMS-Security-Tracking-System/ Parts list (incomplete, see Instructables for complete list): Amazon.com: 1x SIM5320 3G Module (USA): http://amzn.to/2no6PPC 1x Arduino Pro Mini: http://amzn.to/2nav5Ee 1x MCP602 OpAmp: http://amzn.to/2nAgqDF 2x 20kΩ, 2x 680kΩ, 1x 10kΩ, 1x 470Ω Resistor: http://amzn.to/2nAmMmw 1x 50kΩ Trimmer: http://amzn.to/2mhfW54 1x IRLZ44N MOSFET: http://amzn.to/2mgYSvU 1x LM2940CT 5.0 Voltage Regulator: http://amzn.to/2no9Tv8 1x 220nF, 1x 22µF Capacitor: http://amzn.to/2nAmo7t 1x Piezoelectric Transducer: http://amzn.to/2nAouUP 1x Key Switch: http://amzn.to/2mFnZnm Ebay: 1x SIM5320 3G Module (Europe): http://rover.ebay.com/rover/1/711-53200-19255-0/1?icep_ff3=2&pub=5575101368&toolid=10001&campid=5337582279&customid=&icep_item=271932371410&ipn=psmain&icep_vectorid=229466&kwid=902099&mtid=824&kw=lg 1x SIM5320 3G Module (USA): http://rover.ebay.com/rover/1/711-53200-19255-0/1?icep_ff3=2&pub=5575101368&toolid=10001&campid=5337582279&customid=&icep_item=262553286280&ipn=psmain&icep_vectorid=229466&kwid=902099&mtid=824&kw=lg 1x Arduino Pro Mini: http://rover.ebay.com/rover/1/711-53200-19255-0/1?icep_ff3=2&pub=5575101368&toolid=10001&campid=5337582279&customid=&icep_item=191679508570&ipn=psmain&icep_vectorid=229466&kwid=902099&mtid=824&kw=lg 1x MCP602 OpAmp: http://rover.ebay.com/rover/1/711-53200-19255-0/1?icep_ff3=2&pub=5575101368&toolid=10001&campid=5337582279&customid=&icep_item=181846803759&ipn=psmain&icep_vectorid=229466&kwid=902099&mtid=824&kw=lg 2x 20kΩ, 2x 680kΩ, 1x 10kΩ, 1x 470Ω Resistor: http://rover.ebay.com/rover/1/711-53200-19255-0/1?icep_ff3=2&pub=5575101368&toolid=10001&campid=5337582279&customid=&icep_item=371320464250&ipn=psmain&icep_vectorid=229466&kwid=902099&mtid=824&kw=lg 1x 50kΩ Trimmer: http://rover.ebay.com/rover/1/711-53200-19255-0/1?icep_ff3=2&pub=5575101368&toolid=10001&campid=5337582279&customid=&icep_item=191984937826&ipn=psmain&icep_vectorid=229466&kwid=902099&mtid=824&kw=lg 1x IRLZ44N MOSFET: http://rover.ebay.com/rover/1/711-53200-19255-0/1?icep_ff3=2&pub=5575101368&toolid=10001&campid=5337582279&customid=&icep_item=191984937826&ipn=psmain&icep_vectorid=229466&kwid=902099&mtid=824&kw=lg 1x LM2940CT 5.0 Voltage Regulator: http://rover.ebay.com/rover/1/711-53200-19255-0/1?icep_ff3=2&pub=5575101368&toolid=10001&campid=5337582279&customid=&icep_item=271206338246&ipn=psmain&icep_vectorid=229466&kwid=902099&mtid=824&kw=lg 1x 220nF, 1x 22µF Capacitor: http://rover.ebay.com/rover/1/711-53200-19255-0/1?icep_ff3=2&pub=5575101368&toolid=10001&campid=5337582279&customid=&icep_item=252360072794&ipn=psmain&icep_vectorid=229466&kwid=902099&mtid=824&kw=lg 1x Piezoelectric Transducer: http://rover.ebay.com/rover/1/711-53200-19255-0/1?icep_ff3=2&pub=5575101368&toolid=10001&campid=5337582279&customid=&icep_item=262603564359&ipn=psmain&icep_vectorid=229466&kwid=902099&mtid=824&kw=lg 1x Key Switch: http://rover.ebay.com/rover/1/711-53200-19255-0/1?icep_ff3=2&pub=5575101368&toolid=10001&campid=5337582279&customid=&icep_item=321806404014&ipn=psmain&icep_vectorid=229466&kwid=902099&mtid=824&kw=lg In this project I will combine a SIM5320 3G module with an Arduino and a piezoelectric transducer as a shock sensor in order to create a security tracking system that will send you the location of your precious vehicle via SMS when it is moved around without you knowing it. Music: 2011 Lookalike by Bartlebeats Killing Time, Kevin MacLeod (incompetech.com) You want to support my videos? You can browse and buy tools&materials from my Amazon Store. This way I get a small commission: Amazon.de: http://astore.amazon.de/great043-21 Amazon.com:http://astore.amazon.com/gre09a-20 Amazon.co.uk: http://astore.amazon.co.uk/gre0b-21 Or you feel super generous and want to use this Amazon link as your Amazon home page. And do not worry, your purchases are all anonym and the prices are all the same: Amazon.de:http://www.amazon.de/?_encoding=UTF8&camp=1638&creative=19454&linkCode=ur2&site-redirect=de&tag=great043-21&linkId=ORZEQZEOVJAFURCZ Amazon.com:http://www.amazon.com/?_encoding=UTF8&camp=1789&creative=390957&linkCode=ur2&tag=gre09a-20&linkId=I5NDCEAVCD2OWM4S
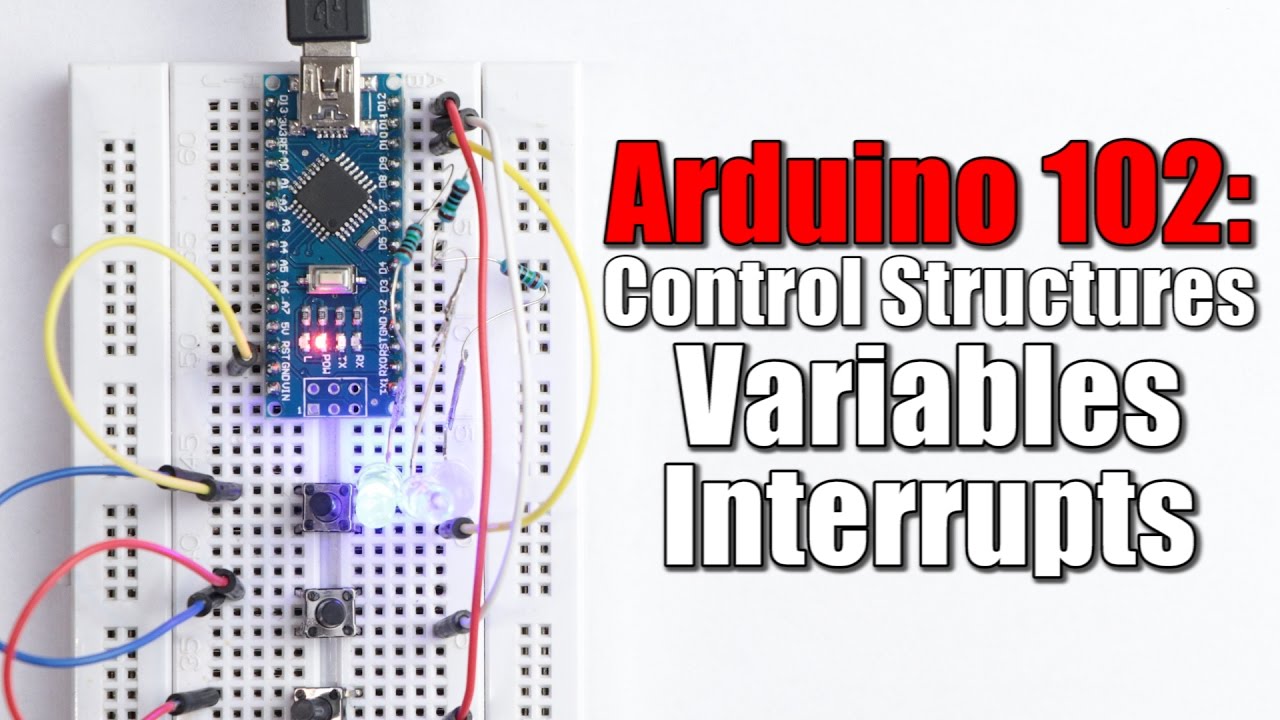
YT3birSKLLU | 12 Mar 2017
Support me for more videos: https://www.patreon.com/GreatScott Previous video: https://youtu.be/r9GMUYa_DvY Arduino Basics 101: https://youtu.be/BtLwoNJ6klE Facebook: https://www.facebook.com/greatscottlab Twitter: https://twitter.com/GreatScottLab You can get Arduino boards here: Ebay: Arduino Uno: http://rover.ebay.com/rover/1/711-53200-19255-0/1?icep_ff3=2&pub=5575101368&toolid=10001&campid=5337582279&customid=&icep_item=281638689314&ipn=psmain&icep_vectorid=229466&kwid=902099&mtid=824&kw=lg Arduino Nano: http://rover.ebay.com/rover/1/711-53200-19255-0/1?icep_ff3=2&pub=5575101368&toolid=10001&campid=5337582279&customid=&icep_item=162002876661&ipn=psmain&icep_vectorid=229466&kwid=902099&mtid=824&kw=lg Arduino Pro Mini: http://rover.ebay.com/rover/1/711-53200-19255-0/1?icep_ff3=2&pub=5575101368&toolid=10001&campid=5337582279&customid=&icep_item=331809989705&ipn=psmain&icep_vectorid=229466&kwid=902099&mtid=824&kw=lg FTDI board: http://rover.ebay.com/rover/1/711-53200-19255-0/1?icep_ff3=2&pub=5575101368&toolid=10001&campid=5337582279&customid=&icep_item=381374421597&ipn=psmain&icep_vectorid=229466&kwid=902099&mtid=824&kw=lg Amazon.com: Arduino Uno: http://amzn.to/2lw4DEt Arduino Nano: http://amzn.to/2kBp43B Arduino Pro Mini: http://amzn.to/2kVVFxc FTDI board: http://amzn.to/2mbPm8V Amazon.de: Arduino Uno: http://amzn.to/2ljDLFL Arduino Nano: http://amzn.to/2ljnq3J Arduino Pro Mini: http://amzn.to/2kMv0ly FTDI board: http://amzn.to/2ljvuRY In this second epsiode of the Arduino Basics video series I will talk about control structures like if, for, while and switch and how to use them in combination with variables to create more advanced code. At the end I will also talk about why interrupts are so important and how to use them as well. Music: In the Hall of the Mountain King, Kevin MacLeod Ecstatic Wave, Jens Kiilstofte https://machinimasound.com/music You want to support my videos? You can browse and buy tools&materials from my Amazon Store. This way I get a small commission: Amazon.de: http://astore.amazon.de/great043-21 Amazon.com:http://astore.amazon.com/gre09a-20 Amazon.co.uk: http://astore.amazon.co.uk/gre0b-21 Or you feel super generous and want to use this Amazon link as your Amazon home page. And do not worry, your purchases are all anonym and the prices are all the same: Amazon.de:http://www.amazon.de/?_encoding=UTF8&camp=1638&creative=19454&linkCode=ur2&site-redirect=de&tag=great043-21&linkId=ORZEQZEOVJAFURCZ Amazon.com:http://www.amazon.com/?_encoding=UTF8&camp=1789&creative=390957&linkCode=ur2&tag=gre09a-20&linkId=I5NDCEAVCD2OWM4S

r9GMUYa_DvY | 05 Mar 2017
Part 1: https://youtu.be/gYA6vmKwyUs Make your own Li-Ion Battery Pack: https://youtu.be/hwhqn4BmC2I Support me for more videos: https://www.patreon.com/GreatScott Facebook: https://www.facebook.com/greatscottlab Twitter: https://twitter.com/GreatScottLab More project information (parts list, schematic, pictures,....) on Instructables: https://www.instructables.com/id/DIY-Portable-LED-Panel/ Parts list (see Instructables for Ebay and Amazon.de parts list): Amazon.com: 1x Buck/Boost Converter: http://amzn.to/2n2asa1 1x XT60 Connector: http://amzn.to/2mTdajb 1x Balance Connector: http://amzn.to/2mTiwLi 2x TLC555: http://amzn.to/2n2j14N 2x TC4420 MOSFET Driver IC: http://amzn.to/2lNW5Gn 2x IRLZ44N MOSFET: http://amzn.to/2m7UZ9u 3x PCB Terminal: http://amzn.to/2mTnJmn 1x DC Jack: http://amzn.to/2lsV7TQ 4x 47µF Capacitor: http://amzn.to/2lsRMUK 2x 100nF, 2x 1nF Capacitor: http://amzn.to/2lsRMUK 4x 1N4148 Diode: http://amzn.to/2lsKbFS 2x 50kΩ Potentiometer: http://amzn.to/2mH1MtJ 2x 10Ω, 2x470Ω Resistor: http://amzn.to/2lsGIqt 1x DPDT Switch: http://amzn.to/2n247M7 1x LiPo Voltage Tester: http://amzn.to/2mTjCXq In this project I will show you how to create a powerful and robust 70W LED panel that can be powered by a Li-Ion or Li-Po battery pack. The control circuit can dim the pure white and warm white 5630 LED strips individually and does not cause any flicker problems due to the fast pulse frequency. Music: In the Hall of the Mountain King, Kevin MacLeod Killing Time, Kevin MacLeod (incompetech.com) You want to support my videos? You can browse and buy tools&materials from my Amazon Store. This way I get a small commission: Amazon.de: http://astore.amazon.de/great043-21 Amazon.com:http://astore.amazon.com/gre09a-20 Amazon.co.uk: http://astore.amazon.co.uk/gre0b-21 Or you feel super generous and want to use this Amazon link as your Amazon home page. And do not worry, your purchases are all anonym and the prices are all the same: Amazon.de:http://www.amazon.de/?_encoding=UTF8&camp=1638&creative=19454&linkCode=ur2&site-redirect=de&tag=great043-21&linkId=ORZEQZEOVJAFURCZ Amazon.com:http://www.amazon.com/?_encoding=UTF8&camp=1789&creative=390957&linkCode=ur2&tag=gre09a-20&linkId=I5NDCEAVCD2OWM4S
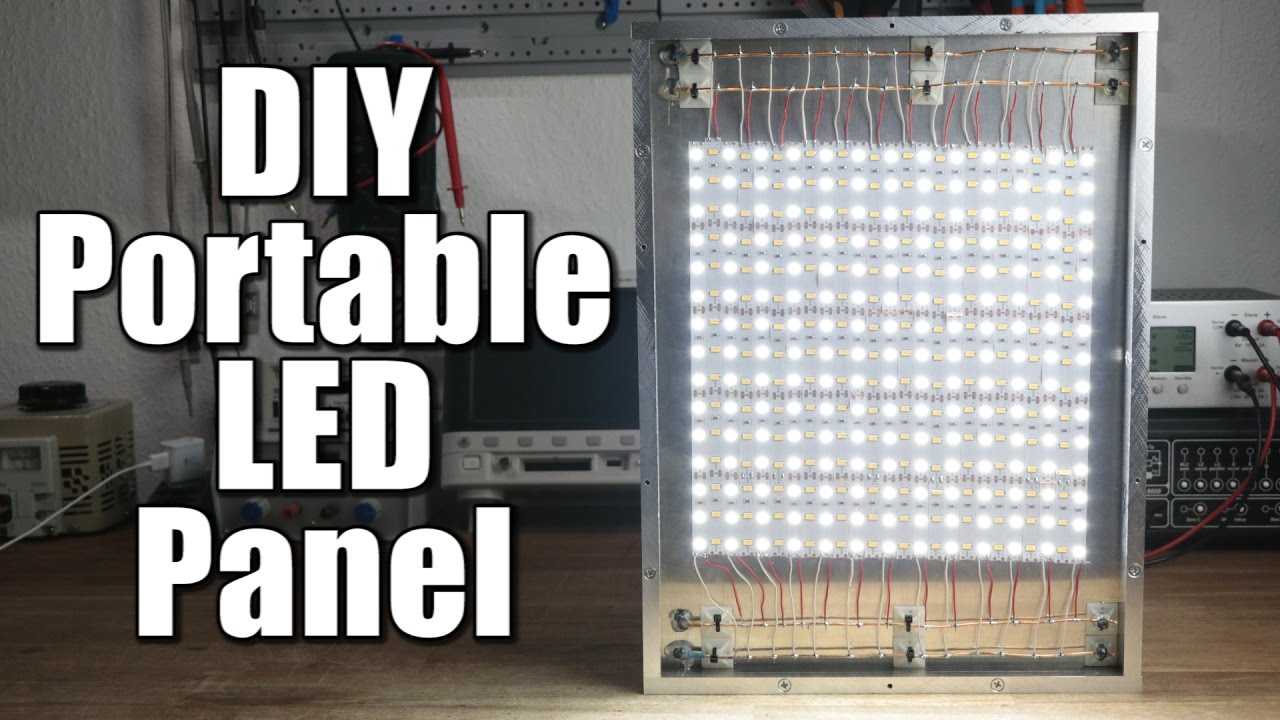
gYA6vmKwyUs | 26 Feb 2017
Previous video: https://youtu.be/BtLwoNJ6klE Support me for more videos: https://www.patreon.com/GreatScott Facebook: https://www.facebook.com/greatscottlab Twitter: https://twitter.com/GreatScottLab More project information (parts list, schematic, pictures,....) on Instructables: https://www.instructables.com/id/DIY-Portable-LED-Panel/ Parts list (incomplete, see Instructables for more information): Ebay: 10m 5630 LED Strip (Germany): http://rover.ebay.com/rover/1/711-53200-19255-0/1?icep_ff3=2&pub=5575101368&toolid=10001&campid=5337582279&customid=&icep_item=282294940785&ipn=psmain&icep_vectorid=229466&kwid=902099&mtid=824&kw=lg 10m 5630 LED Strip (Worldwide): http://rover.ebay.com/rover/1/711-53200-19255-0/1?icep_ff3=2&pub=5575101368&toolid=10001&campid=5337582279&customid=&icep_item=182028302443&ipn=psmain&icep_vectorid=229466&kwid=902099&mtid=824&kw=lg 300x400x2mm Aluminum Plate (Germany): http://rover.ebay.com/rover/1/711-53200-19255-0/1?icep_ff3=2&pub=5575101368&toolid=10001&campid=5337582279&customid=&icep_item=222394849150&ipn=psmain&icep_vectorid=229466&kwid=902099&mtid=824&kw=lg 1000x1x2cm Aluminum Flat Bar (Germany): http://rover.ebay.com/rover/1/711-53200-19255-0/1?icep_ff3=2&pub=5575101368&toolid=10001&campid=5337582279&customid=&icep_item=182410094953&ipn=psmain&icep_vectorid=229466&kwid=902099&mtid=824&kw=lg Amazon.com: 5m 5630 LED Strip Warm White: http://amzn.to/2lYb2J5 5m 5630 LED Strip Pure White: http://amzn.to/2lIPwXK Amazon.de: 5m 5630 LED Strip Warm White: http://amzn.to/2lnctgR 5m 5630 LED Strip Pure White: http://amzn.to/2lnmVoA Hardware Store: Screws & Nuts (as shown in the video), acrylic glass, aluminum plate, aluminum flat bars, handles In this project I will show you how to create a powerful and robust 70W LED panel that can be powered by a Li-Ion or Li-Po battery pack. The control circuit can dim the pure white and warm white 5630 LED strips individually and does not cause any flicker problems due to the fast pulse frequency. Music: 2011 Lookalike by Bartlebeats Ecstatic Wave, Jens Kiilstofte https://machinimasound.com/music You want to support my videos? You can browse and buy tools&materials from my Amazon Store. This way I get a small commission: Amazon.de: http://astore.amazon.de/great043-21 Amazon.com:http://astore.amazon.com/gre09a-20 Amazon.co.uk: http://astore.amazon.co.uk/gre0b-21 Or you feel super generous and want to use this Amazon link as your Amazon home page. And do not worry, your purchases are all anonym and the prices are all the same: Amazon.de:http://www.amazon.de/?_encoding=UTF8&camp=1638&creative=19454&linkCode=ur2&site-redirect=de&tag=great043-21&linkId=ORZEQZEOVJAFURCZ Amazon.com:http://www.amazon.com/?_encoding=UTF8&camp=1789&creative=390957&linkCode=ur2&tag=gre09a-20&linkId=I5NDCEAVCD2OWM4S

BtLwoNJ6klE | 19 Feb 2017
Previous video: https://youtu.be/Nd_Kc7BXa54 Make your own Coilgun: https://youtu.be/PMU9TQUDhow DIY Buck/Boost Converter (Flyback) || How to step up/down DC voltage efficiently: https://youtu.be/ZiD_X-uo_TQ Facebook: https://www.facebook.com/greatscottlab Twitter: https://twitter.com/GreatScottLab Support me for more videos: https://www.patreon.com/GreatScott You can get Arduino boards here: Ebay: Arduino Uno: http://rover.ebay.com/rover/1/711-53200-19255-0/1?icep_ff3=2&pub=5575101368&toolid=10001&campid=5337582279&customid=&icep_item=281638689314&ipn=psmain&icep_vectorid=229466&kwid=902099&mtid=824&kw=lg Arduino Nano: http://rover.ebay.com/rover/1/711-53200-19255-0/1?icep_ff3=2&pub=5575101368&toolid=10001&campid=5337582279&customid=&icep_item=162002876661&ipn=psmain&icep_vectorid=229466&kwid=902099&mtid=824&kw=lg Arduino Pro Mini: http://rover.ebay.com/rover/1/711-53200-19255-0/1?icep_ff3=2&pub=5575101368&toolid=10001&campid=5337582279&customid=&icep_item=331809989705&ipn=psmain&icep_vectorid=229466&kwid=902099&mtid=824&kw=lg FTDI board: http://rover.ebay.com/rover/1/711-53200-19255-0/1?icep_ff3=2&pub=5575101368&toolid=10001&campid=5337582279&customid=&icep_item=381374421597&ipn=psmain&icep_vectorid=229466&kwid=902099&mtid=824&kw=lg Amazon.com: Arduino Uno: http://amzn.to/2lw4DEt Arduino Nano: http://amzn.to/2kBp43B Arduino Pro Mini: http://amzn.to/2kVVFxc FTDI board: http://amzn.to/2mbPm8V Amazon.de: Arduino Uno: http://amzn.to/2ljDLFL Arduino Nano: http://amzn.to/2ljnq3J Arduino Pro Mini: http://amzn.to/2kMv0ly FTDI board: http://amzn.to/2ljvuRY In this first epsiode of this Arduino Basics video series I will talk about the main functions of the ATmega328P Arduino boards and the fundamental code commands that you will need to create very basic Arduino sketches. Music: 2011 Lookalike by Bartlebeats Ecstatic Wave, Jens Kiilstofte https://machinimasound.com/music You want to support my videos? You can browse and buy tools&materials from my Amazon Store. This way I get a small commission: Amazon.de: http://astore.amazon.de/great043-21 Amazon.com:http://astore.amazon.com/gre09a-20 Amazon.co.uk: http://astore.amazon.co.uk/gre0b-21 Or you feel super generous and want to use this Amazon link as your Amazon home page. And do not worry, your purchases are all anonym and the prices are all the same: Amazon.de:http://www.amazon.de/?_encoding=UTF8&camp=1638&creative=19454&linkCode=ur2&site-redirect=de&tag=great043-21&linkId=ORZEQZEOVJAFURCZ Amazon.com:http://www.amazon.com/?_encoding=UTF8&camp=1789&creative=390957&linkCode=ur2&tag=gre09a-20&linkId=I5NDCEAVCD2OWM4S
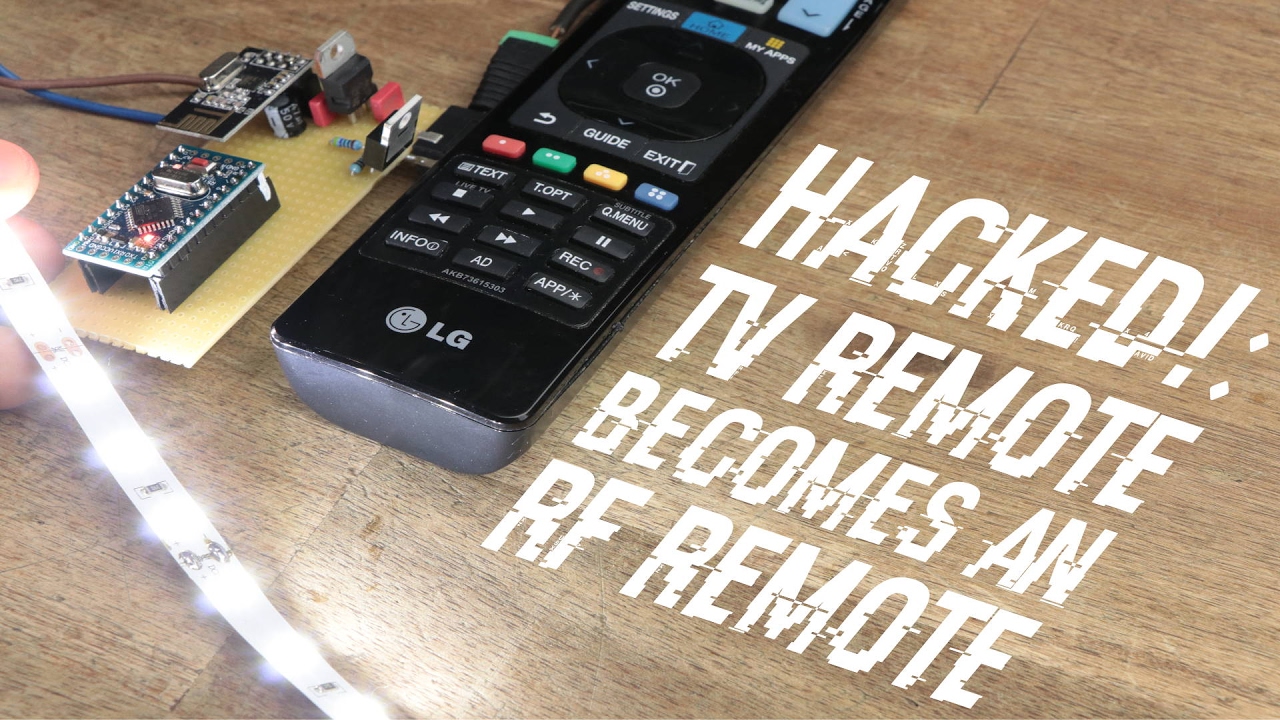
Nd_Kc7BXa54 | 12 Feb 2017
More project information (parts list, pictures, schematic,...) on Instructables: https://www.instructables.com/id/TV-Remote-Becomes-an-RF-Remote-NRF24L01-Tutorial/ Previous video: https://youtu.be/hwhqn4BmC2I Control your LEDs with your TV remote?! || Arduino IR Tutorial: https://youtu.be/ftdJ0R_5NZk Facebook: https://www.facebook.com/greatscottlab Twitter: https://twitter.com/GreatScottLab Support me for more videos: https://www.patreon.com/GreatScott?ty=h Parts list (Ebay and Amazon.de on Instructables): Amazon.com: RF Receiver: 1x Arduino Pro Mini: http://amzn.to/2kkzYFU 1x nRF24L01+: http://amzn.to/2kHaoya 1x DC Jack: http://amzn.to/2kgHQ05 1x 3.3V Voltage Regulator: http://amzn.to/2kH6HIJ 1x IRLZ44N MOSFET: http://amzn.to/2kkuz1B 1x 470Ω, 2x10kΩ Resistor: http://amzn.to/2lEDyML 2x 100nF Capacitor: http://amzn.to/2kkuF9t 1x 47µF Capcitor: http://amzn.to/2kkAHH8 RF Transmitter: 1x Arduino Pro Mini: http://amzn.to/2kkzYFU 1x nRF24L01+: http://amzn.to/2kHaoya 1x 47µF Capcitor: http://amzn.to/2kkAHH8 3x 1N4148 Diode: http://amzn.to/2kWC1lA 3x Tactile Switch: http://amzn.to/2kkpTJe In this episode of HACKED! I will show you how I used the popular nRF24L01+ RF IC to adjust the brightness of an LED strip wirelessly through three useless buttons of a TV remote. Music: 2011 Lookalike by Bartlebeats You want to support my videos? You can browse and buy tools&materials from my Amazon Store. This way I get a small commission: Amazon.de: http://astore.amazon.de/great043-21 Amazon.com:http://astore.amazon.com/gre09a-20 Amazon.co.uk: http://astore.amazon.co.uk/gre0b-21 Or you feel super generous and want to use this Amazon link as your Amazon home page. And do not worry, your purchases are all anonym and the prices are all the same: Amazon.de:http://www.amazon.de/?_encoding=UTF8&camp=1638&creative=19454&linkCode=ur2&site-redirect=de&tag=great043-21&linkId=ORZEQZEOVJAFURCZ Amazon.com:http://www.amazon.com/?_encoding=UTF8&camp=1789&creative=390957&linkCode=ur2&tag=gre09a-20&linkId=I5NDCEAVCD2OWM4S
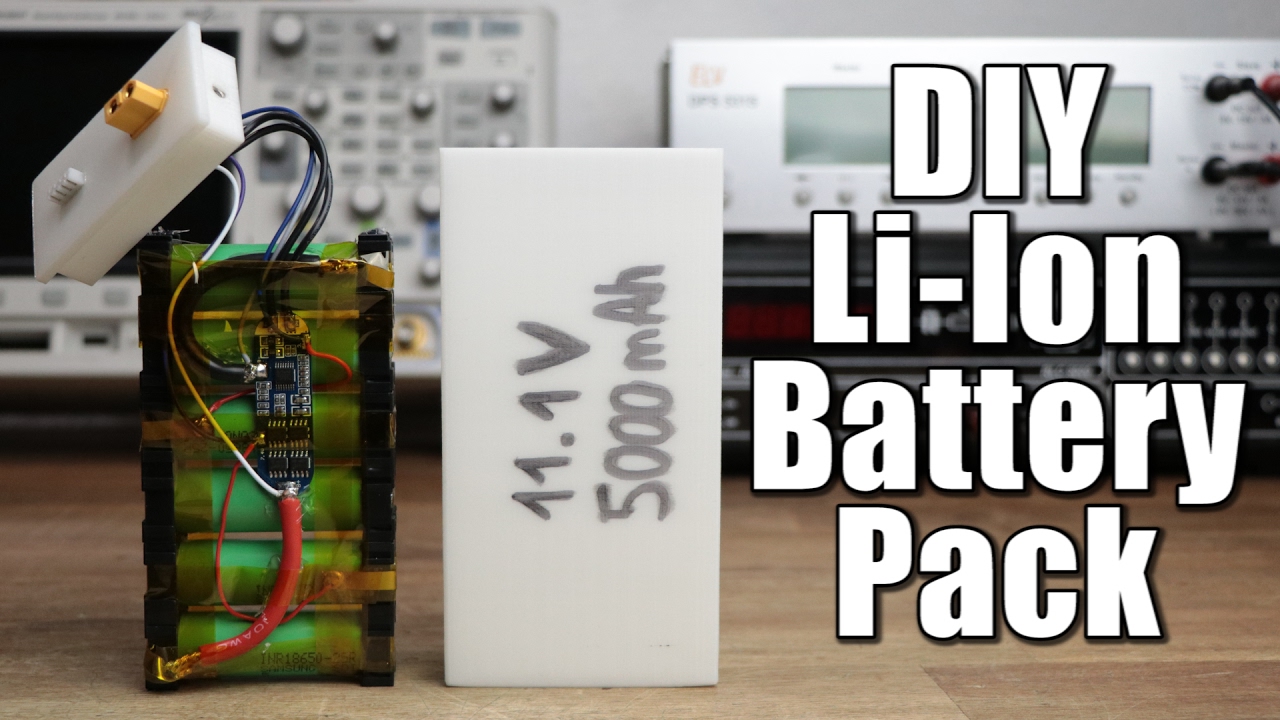
hwhqn4BmC2I | 05 Feb 2017
More project information (parts list, pictures,....) on Instructables: https://www.instructables.com/id/Make-Your-Own-Li-Ion-Battery-Pack Previous video: https://youtu.be/EnfjYwe2A0w Battery Type Comparison: https://youtu.be/LqgP16JQ24I How dangerous are LiPo batteries?: https://youtu.be/osfgkFyq7lA Facebook: https://www.facebook.com/greatscottlab Twitter: https://twitter.com/GreatScottLab Support me for more videos: https://www.patreon.com/GreatScott?ty=h Parts list (Amazon.de on Instructables): Ebay: 6x INR18650-25R Li-Ion Battery (USA): http://rover.ebay.com/rover/1/711-53200-19255-0/1?icep_ff3=2&pub=5575101368&toolid=10001&campid=5337582279&customid=&icep_item=121922976796&ipn=psmain&icep_vectorid=229466&kwid=902099&mtid=824&kw=lg 6x INR18650-25R Li-Ion Battery (Germany): http://rover.ebay.com/rover/1/707-53477-19255-0/1?icep_ff3=2&pub=5575101368&toolid=10001&campid=5337582279&customid=&icep_item=302018502238&ipn=psmain&icep_vectorid=229487&kwid=902099&mtid=824&kw=lg 6x 18650 Spacer: http://rover.ebay.com/rover/1/711-53200-19255-0/1?icep_ff3=2&pub=5575101368&toolid=10001&campid=5337582279&customid=&icep_item=401155991785&ipn=psmain&icep_vectorid=229466&kwid=902099&mtid=824&kw=lg Nickel Ribbon (8mm, 0.15mm): http://rover.ebay.com/rover/1/711-53200-19255-0/1?icep_ff3=2&pub=5575101368&toolid=10001&campid=5337582279&customid=&icep_item=122317325253&ipn=psmain&icep_vectorid=229466&kwid=902099&mtid=824&kw=lg 1x XT60 Connector: http://rover.ebay.com/rover/1/711-53200-19255-0/1?icep_ff3=2&pub=5575101368&toolid=10001&campid=5337582279&customid=&icep_item=162302113666&ipn=psmain&icep_vectorid=229466&kwid=902099&mtid=824&kw=lg 1x 3S Balance Connector: http://rover.ebay.com/rover/1/711-53200-19255-0/1?icep_ff3=2&pub=5575101368&toolid=10001&campid=5337582279&customid=&icep_item=290961637927&ipn=psmain&icep_vectorid=229466&kwid=902099&mtid=824&kw=lg 1x 3S BMS: http://rover.ebay.com/rover/1/711-53200-19255-0/1?icep_ff3=2&pub=5575101368&toolid=10001&campid=5337582279&customid=&icep_item=191960551187&ipn=psmain&icep_vectorid=229466&kwid=902099&mtid=824&kw=lg Kapton Tape: http://rover.ebay.com/rover/1/711-53200-19255-0/1?icep_ff3=2&pub=5575101368&toolid=10001&campid=5337582279&customid=&icep_item=201548322346&ipn=psmain&icep_vectorid=229466&kwid=902099&mtid=824&kw=lg 16 AWG Wire: http://rover.ebay.com/rover/1/711-53200-19255-0/1?icep_ff3=2&pub=5575101368&toolid=10001&campid=5337582279&customid=&icep_item=291844418801&ipn=psmain&icep_vectorid=229466&kwid=902099&mtid=824&kw=lg Amazon.com: 6x INR18650-25R Li-Ion Battery: http://amzn.to/2lbWame 6x 18650 Spacer: http://amzn.to/2kC5x24 Nickel Ribbon (8mm, 0.15mm): http://amzn.to/2l7rB5t 1x XT60 Connector: http://amzn.to/2lbQCbu 1x 3S Balance Connector: http://amzn.to/2kGDDBC 1x 3S BMS: http://amzn.to/2jPbNUE Kapton Tape: http://amzn.to/2lbKcJp 16 AWG Wire: http://amzn.to/2lbPuVt In this project I will show you how to combine common 18650 Li-Ion batteries in order to create a battery pack that features a higher voltage, a bigger capacity and most importantly useful safety measures. These can prevent an overcharge, overdischarge and even a short circuit of the batteries. Music: 2011 Lookalike by Bartlebeats Killing Time, Kevin MacLeod (incompetech.com) You want to support my videos? You can browse and buy tools&materials from my Amazon Store. This way I get a small commission: Amazon.de: http://astore.amazon.de/great043-21 Amazon.com:http://astore.amazon.com/gre09a-20 Amazon.co.uk: http://astore.amazon.co.uk/gre0b-21 Or you feel super generous and want to use this Amazon link as your Amazon home page. And do not worry, your purchases are all anonym and the prices are all the same: Amazon.de:http://www.amazon.de/?_encoding=UTF8&camp=1638&creative=19454&linkCode=ur2&site-redirect=de&tag=great043-21&linkId=ORZEQZEOVJAFURCZ Amazon.com:http://www.amazon.com/?_encoding=UTF8&camp=1789&creative=390957&linkCode=ur2&tag=gre09a-20&linkId=I5NDCEAVCD2OWM4S

EnfjYwe2A0w | 29 Jan 2017
Previous video: https://youtu.be/pDtqxf7BLiM Electronic Basics #10: DAC: https://youtu.be/Y2OPnrgb0pY Facebook: https://www.facebook.com/greatscottlab Twitter: https://twitter.com/GreatScottLab Support me for more videos: https://www.patreon.com/GreatScott?ty=h ADS7816 + AnalogReadSpeed Code: http://www.mediafire.com/file/3n0ylrhqz1d6ty5/ADS7816_AnalogReadSpeed.rar In this episode of Electronic Basics I will tell you about the most important specifications of an ADC, how an approximate successive ADC works and why it is difficult to build one by yourself. You want to support my videos? You can browse and buy tools&materials from my Amazon Store. This way I get a small commission: Amazon.de: http://astore.amazon.de/great043-21 Amazon.com:http://astore.amazon.com/gre09a-20 Amazon.co.uk: http://astore.amazon.co.uk/gre0b-21 Or you feel super generous and want to use this Amazon link as your Amazon home page. And do not worry, your purchases are all anonym and the prices are all the same: Amazon.de:http://www.amazon.de/?_encoding=UTF8&camp=1638&creative=19454&linkCode=ur2&site-redirect=de&tag=great043-21&linkId=ORZEQZEOVJAFURCZ Amazon.com:http://www.amazon.com/?_encoding=UTF8&camp=1789&creative=390957&linkCode=ur2&tag=gre09a-20&linkId=I5NDCEAVCD2OWM4S

pDtqxf7BLiM | 22 Jan 2017
Previous video: https://youtu.be/_v5Hg2zfLjs Facebook: https://www.facebook.com/greatscottlab Twitter: https://twitter.com/GreatScottLab Support me for more videos: https://www.patreon.com/GreatScott?ty=h You can get a Koowheel Electric Skateboard here: Amazon.com: http://amzn.to/2jMDWKO Amazon.de: https://www.amazon.de/dp/B01N3L1U18?th=1 Ebay.de: http://rover.ebay.com/rover/1/707-53477-19255-0/1?icep_ff3=2&pub=5575101368&toolid=10001&campid=5337582279&customid=&icep_item=322395825169&ipn=psmain&icep_vectorid=229487&kwid=902099&mtid=824&kw=lg Ebay.com: http://rover.ebay.com/rover/1/711-53200-19255-0/1?icep_ff3=2&pub=5575101368&toolid=10001&campid=5337582279&customid=&icep_item=222370061444&ipn=psmain&icep_vectorid=229466&kwid=902099&mtid=824&kw=lg Thanks to Koowheelboard (https://www.facebook.com/koowheelboard/) for providing the tested unit. In this video I will take a closer look at the 600$ Koowheel Electric Skateboard and test its specifications like the battery range and the maximum speed. Also I will have a look at its insides and tell you at the end whether it is worth the money. Music: 2011 Lookalike by Bartlebeats Killing Time, Kevin MacLeod (incompetech.com) You want to support my videos? You can browse and buy tools&materials from my Amazon Store. This way I get a small commission: Amazon.de: http://astore.amazon.de/great043-21 Amazon.com:http://astore.amazon.com/gre09a-20 Amazon.co.uk: http://astore.amazon.co.uk/gre0b-21 Or you feel super generous and want to use this Amazon link as your Amazon home page. And do not worry, your purchases are all anonym and the prices are all the same: Amazon.de:http://www.amazon.de/?_encoding=UTF8&camp=1638&creative=19454&linkCode=ur2&site-redirect=de&tag=great043-21&linkId=ORZEQZEOVJAFURCZ Amazon.com:http://www.amazon.com/?_encoding=UTF8&camp=1789&creative=390957&linkCode=ur2&tag=gre09a-20&linkId=I5NDCEAVCD2OWM4S

_v5Hg2zfLjs | 15 Jan 2017
Previous video (DIY Arc Lighter): https://youtu.be/lk_1lzMiUVc HACKED! CCFL Inverter: https://youtu.be/SK0p1PFiXI4 Facebook: https://www.facebook.com/greatscottlab Twitter: https://twitter.com/GreatScottLab Support me for more videos: https://www.patreon.com/GreatScott?ty=h Induction Heater featured in the video: Ebay: http://rover.ebay.com/rover/1/711-53200-19255-0/1?icep_ff3=2&pub=5575101368&toolid=10001&campid=5337582279&customid=&icep_item=301926758672&ipn=psmain&icep_vectorid=229466&kwid=902099&mtid=824&kw=lg Amazon.com: http://amzn.to/2jn3ldY Amazon.de: http://amzn.to/2iu1VKq Parts list: Amazon.com: 2x IRF540 MOSFET: http://amzn.to/2jMgQAE 2x 330nF Capacitor: http://amzn.to/2iu5wYV 2x UF4007 Diode: http://amzn.to/2iVW8Sc 2x 220Ω Resistor: http://amzn.to/2iW4BVz 2x 0.1mH Inductor: http://amzn.to/2jmTMvx Ebay: 2x IRF540 MOSFET: http://rover.ebay.com/rover/1/711-53200-19255-0/1?icep_ff3=2&pub=5575101368&toolid=10001&campid=5337582279&customid=&icep_item=280527967293&ipn=psmain&icep_vectorid=229466&kwid=902099&mtid=824&kw=lg 2x 330nF Capacitor: http://rover.ebay.com/rover/1/711-53200-19255-0/1?icep_ff3=2&pub=5575101368&toolid=10001&campid=5337582279&customid=&icep_item=151105121917&ipn=psmain&icep_vectorid=229466&kwid=902099&mtid=824&kw=lg 2x UF4007 Diode: http://rover.ebay.com/rover/1/711-53200-19255-0/1?icep_ff3=2&pub=5575101368&toolid=10001&campid=5337582279&customid=&icep_item=400985207396&ipn=psmain&icep_vectorid=229466&kwid=902099&mtid=824&kw=lg 2x 220Ω Resistor: http://rover.ebay.com/rover/1/711-53200-19255-0/1?icep_ff3=2&pub=5575101368&toolid=10001&campid=5337582279&customid=&icep_item=201414925357&ipn=psmain&icep_vectorid=229466&kwid=902099&mtid=824&kw=lg 2x 0.1mH Inductor: http://rover.ebay.com/rover/1/711-53200-19255-0/1?icep_ff3=2&pub=5575101368&toolid=10001&campid=5337582279&customid=&icep_item=131689117589&ipn=psmain&icep_vectorid=229466&kwid=902099&mtid=824&kw=lg Amazon.de: 2x IRF540 MOSFET: http://amzn.to/2jSHvjo 2x 330nF Capacitor: http://amzn.to/2iu9QHI 2x UF4007 Diode: http://amzn.to/2hlNgBY 2x 220Ω Resistor: http://amzn.to/2jq1XI7 2x 0.1mH Inductor: - In this video I will show you how a common induction heater works, what kind of materials it can heat up and how you can easily create your own. Music: 2011 Lookalike by Bartlebeats You want to support my videos? You can browse and buy tools&materials from my Amazon Store. This way I get a small commission: Amazon.de: http://astore.amazon.de/great043-21 Amazon.com:http://astore.amazon.com/gre09a-20 Amazon.co.uk: http://astore.amazon.co.uk/gre0b-21 Or you feel super generous and want to use this Amazon link as your Amazon home page. And do not worry, your purchases are all anonym and the prices are all the same: Amazon.de:http://www.amazon.de/?_encoding=UTF8&camp=1638&creative=19454&linkCode=ur2&site-redirect=de&tag=great043-21&linkId=ORZEQZEOVJAFURCZ Amazon.com:http://www.amazon.com/?_encoding=UTF8&camp=1789&creative=390957&linkCode=ur2&tag=gre09a-20&linkId=I5NDCEAVCD2OWM4S
lk_1lzMiUVc | 08 Jan 2017
WARNING!: This project uses High Voltage! Follow the instructions at your own risk! Previous video: https://youtu.be/GopZJKdCqrA Facebook: https://www.facebook.com/greatscottlab Twitter: https://twitter.com/GreatScottLab Support me for more videos: https://www.patreon.com/GreatScott?ty=h More project information (Parts list, schematic, pictures,....) on Instructables: http://www.instructables.com/id/DIY-Arc-Lighter/ Parts list (Amazon.de on Instructables): Ebay: 1x CCFL Inverter (for Germany/Austria): http://rover.ebay.com/rover/1/707-53477-19255-0/1?icep_ff3=2&pub=5575101368&toolid=10001&campid=5337582279&customid=&icep_item=131817499887&ipn=psmain&icep_vectorid=229487&kwid=902099&mtid=824&kw=lg 1x CCFL Inverter (Worldwide): http://rover.ebay.com/rover/1/711-53200-19255-0/1?icep_ff3=2&pub=5575101368&toolid=10001&campid=5337582279&customid=&icep_item=282306181691&ipn=psmain&icep_vectorid=229466&kwid=902099&mtid=824&kw=lg 2x 220nF Capacitor: http://rover.ebay.com/rover/1/711-53200-19255-0/1?icep_ff3=2&pub=5575101368&toolid=10001&campid=5337582279&customid=&icep_item=151164655314&ipn=psmain&icep_vectorid=229466&kwid=902099&mtid=824&kw=lg 2x IRLU3110Z MOSFET: http://rover.ebay.com/rover/1/711-53200-19255-0/1?icep_ff3=2&pub=5575101368&toolid=10001&campid=5337582279&customid=&icep_item=361451053196&ipn=psmain&icep_vectorid=229466&kwid=902099&mtid=824&kw=lg 2x UF4007 Diode: http://rover.ebay.com/rover/1/711-53200-19255-0/1?icep_ff3=2&pub=5575101368&toolid=10001&campid=5337582279&customid=&icep_item=400985207396&ipn=psmain&icep_vectorid=229466&kwid=902099&mtid=824&kw=lg 2x 220Ω Resistor: http://rover.ebay.com/rover/1/711-53200-19255-0/1?icep_ff3=2&pub=5575101368&toolid=10001&campid=5337582279&customid=&icep_item=201414925357&ipn=psmain&icep_vectorid=229466&kwid=902099&mtid=824&kw=lg 1x 0.1mH Inductor: http://rover.ebay.com/rover/1/711-53200-19255-0/1?icep_ff3=2&pub=5575101368&toolid=10001&campid=5337582279&customid=&icep_item=281770277470&ipn=psmain&icep_vectorid=229466&kwid=902099&mtid=824&kw=lg 1x 3.7V 220mAh 15C LiPo Battery: http://rover.ebay.com/rover/1/711-53200-19255-0/1?icep_ff3=2&pub=5575101368&toolid=10001&campid=5337582279&customid=&icep_item=201463507644&ipn=psmain&icep_vectorid=229466&kwid=902099&mtid=824&kw=lg 1x TP4056 Charging Board: http://rover.ebay.com/rover/1/711-53200-19255-0/1?icep_ff3=2&pub=5575101368&toolid=10001&campid=5337582279&customid=&icep_item=281228327511&ipn=psmain&icep_vectorid=229466&kwid=902099&mtid=824&kw=lg 1x Tactile Push Button: http://rover.ebay.com/rover/1/711-53200-19255-0/1?icep_ff3=2&pub=5575101368&toolid=10001&campid=5337582279&customid=&icep_item=311004201893&ipn=psmain&icep_vectorid=229466&kwid=902099&mtid=824&kw=lg Amazon.com: 1x CCFL Inverter: http://amzn.to/2j5g2HR 2x 220nF Capacitor: http://amzn.to/2j54Vyw 2x IRLU3110Z MOSFET: - 2x UF4007 Diode: http://amzn.to/2iVW8Sc 2x 220Ω Resistor: http://amzn.to/2iW4BVz 1x 0.1mH Inductor: http://amzn.to/2iqCM4k 1x 3.7V 220mAh 15C LiPo Battery: http://amzn.to/2i6D4PZ 1x TP4056 Charging Board: http://amzn.to/2j55yrS 1x Tactile Push Button: http://amzn.to/2iqMmnz In this project I will show you how to create an oscillator circuit for a CCFL transformer and combine it with a couple of complementary parts like a LiPo battery, a switch and a charging board in order to make a portable arc lighter. Music: 2011 Lookalike by Bartlebeats Killing Time, Kevin MacLeod (incompetech.com) You want to support my videos? You can browse and buy tools&materials from my Amazon Store. This way I get a small commission: Amazon.de: http://astore.amazon.de/great043-21 Amazon.com:http://astore.amazon.com/gre09a-20 Amazon.co.uk: http://astore.amazon.co.uk/gre0b-21 Or you feel super generous and want to use this Amazon link as your Amazon home page. And do not worry, your purchases are all anonym and the prices are all the same: Amazon.de:http://www.amazon.de/?_encoding=UTF8&camp=1638&creative=19454&linkCode=ur2&site-redirect=de&tag=great043-21&linkId=ORZEQZEOVJAFURCZ Amazon.com:http://www.amazon.com/?_encoding=UTF8&camp=1789&creative=390957&linkCode=ur2&tag=gre09a-20&linkId=I5NDCEAVCD2OWM4S

GopZJKdCqrA | 01 Jan 2017
Previous video: https://youtu.be/SK0p1PFiXI4 Facebook: https://www.facebook.com/greatscottlab Twitter: https://twitter.com/GreatScottLab Support me for more videos: https://www.patreon.com/GreatScott?ty=h You can get the presented Function Generators here: 7$ Function Generator: Ebay: http://rover.ebay.com/rover/1/711-53200-19255-0/1?icep_ff3=2&pub=5575101368&toolid=10001&campid=5337606358&customid=&icep_item=131932524140&ipn=psmain&icep_vectorid=229466&kwid=902099&mtid=824&kw=lg Amazon.com: http://amzn.to/2hD0J7h Amazon.de: http://amzn.to/2hGWvjK 107$ Function Generator: Ebay: http://rover.ebay.com/rover/1/711-53200-19255-0/1?icep_ff3=2&pub=5575101368&toolid=10001&campid=5337606358&customid=&icep_item=261114462307&ipn=psmain&icep_vectorid=229466&kwid=902099&mtid=824&kw=lg In this episode of VS I will take a look at a 7$ function generator kit based around an XR2206 IC. I will also compare it to a 107$ function generator that I have been using for over a year and tell you their advantages and disadvantages. Music: 2011 Lookalike by Bartlebeats You want to support my videos? You can browse and buy tools&materials from my Amazon Store. This way I get a small commission: Amazon.de: http://astore.amazon.de/great043-21 Amazon.com:http://astore.amazon.com/gre09a-20 Amazon.co.uk: http://astore.amazon.co.uk/gre0b-21 Or you feel super generous and want to use this Amazon link as your Amazon home page. And do not worry, your purchases are all anonym and the prices are all the same: Amazon.de:http://www.amazon.de/?_encoding=UTF8&camp=1638&creative=19454&linkCode=ur2&site-redirect=de&tag=great043-21&linkId=ORZEQZEOVJAFURCZ Amazon.com:http://www.amazon.com/?_encoding=UTF8&camp=1789&creative=390957&linkCode=ur2&tag=gre09a-20&linkId=I5NDCEAVCD2OWM4S
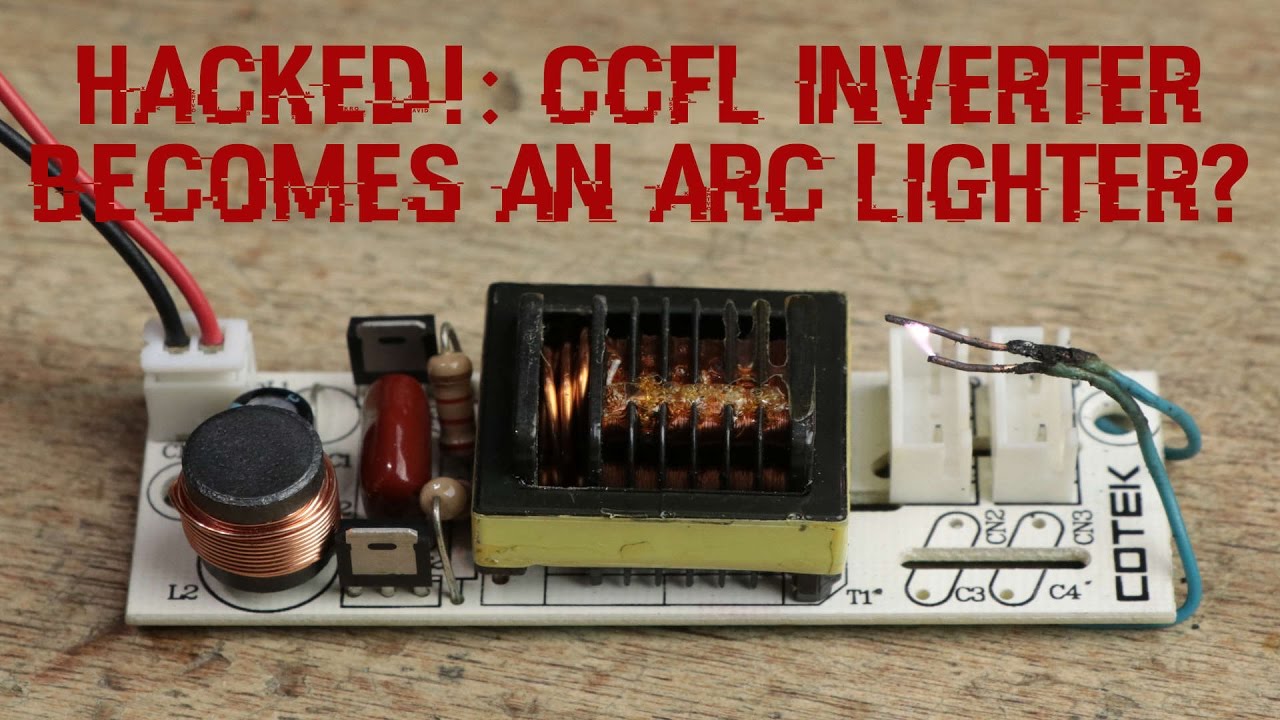
SK0p1PFiXI4 | 25 Dec 2016
WARNING!: The presented circuit uses high voltage. Do not try to replicate it! Previous video: https://youtu.be/JvcR2td1Cso Wireless energy project: https://youtu.be/3E5PUnYlaTM Facebook: https://www.facebook.com/greatscottlab Twitter: https://twitter.com/GreatScottLab Support me for more videos: https://www.patreon.com/GreatScott?ty=h You can get Arc lighters here: Amazon.com: http://amzn.to/2itnJX8 Amazon.de: http://amzn.to/2hoJkDR Ebay: http://rover.ebay.com/rover/1/711-53200-19255-0/1?icep_ff3=2&pub=5575101368&toolid=10001&campid=5337582279&customid=&icep_item=201627991208&ipn=psmain&icep_vectorid=229466&kwid=902099&mtid=824&kw=lg In this episode of HACKED! I will show you how to convert an ordinary CCFL inverter circuit into an arc lighter circuit that can create electric arcs over a distance of 5mm. Music: 2011 Lookalike by Bartlebeats Killing Time, Kevin MacLeod (incompetech.com) You want to support my videos? You can browse and buy tools&materials from my Amazon Store. This way I get a small commission: Amazon.de: http://astore.amazon.de/great043-21 Amazon.com:http://astore.amazon.com/gre09a-20 Amazon.co.uk: http://astore.amazon.co.uk/gre0b-21 Or you feel super generous and want to use this Amazon link as your Amazon home page. And do not worry, your purchases are all anonym and the prices are all the same: Amazon.de:http://www.amazon.de/?_encoding=UTF8&camp=1638&creative=19454&linkCode=ur2&site-redirect=de&tag=great043-21&linkId=ORZEQZEOVJAFURCZ Amazon.com:http://www.amazon.com/?_encoding=UTF8&camp=1789&creative=390957&linkCode=ur2&tag=gre09a-20&linkId=I5NDCEAVCD2OWM4S
JvcR2td1Cso | 18 Dec 2016
Previous video: https://youtu.be/3E5PUnYlaTM Facebook: https://www.facebook.com/greatscottlab Twitter: https://twitter.com/GreatScottLab Support me for more videos: https://www.patreon.com/GreatScott?ty=h Project information (wiring diagram, pictures, ....) on Instructables: http://www.instructables.com/id/Make-Your-Own-Ambient-Lighting-With-the-Raspberry-/ More information about the Hyperion Software: https://hyperion-project.org/ Parts list: (Amazon.de on Instructables) Amazon.com: APA102 LED Strip: http://amzn.to/2hVy8yp 1x HDMI Splitter: http://amzn.to/2gYYWfL 1x HDMI 2 AV Converter: http://amzn.to/2gYSpRW 1x Raspberry Pi Zero: http://amzn.to/2gYWRjN 1x 5V 8A Power Supply: http://amzn.to/2gP1nOl 1x USB Video Grabber: http://amzn.to/2gZ0FSd 1x USB Hub: http://amzn.to/2gOMUlB 1x WiFi Dongle: http://amzn.to/2hx7SJW Wago Terminal: http://amzn.to/2gOTCIv Velcro Tape: http://amzn.to/2i39QyH Ebay: APA102 LED Strip: http://rover.ebay.com/rover/1/711-53200-19255-0/1?icep_ff3=2&pub=5575101368&toolid=10001&campid=5337582279&customid=&icep_item=371569867434&ipn=psmain&icep_vectorid=229466&kwid=902099&mtid=824&kw=lg 1x HDMI Splitter: http://rover.ebay.com/rover/1/711-53200-19255-0/1?icep_ff3=2&pub=5575101368&toolid=10001&campid=5337582279&customid=&icep_item=371599469279&ipn=psmain&icep_vectorid=229466&kwid=902099&mtid=824&kw=lg 1x HDMI 2 AV Converter: http://rover.ebay.com/rover/1/711-53200-19255-0/1?icep_ff3=2&pub=5575101368&toolid=10001&campid=5337582279&customid=&icep_item=381214237639&ipn=psmain&icep_vectorid=229466&kwid=902099&mtid=824&kw=lg 1x Raspberry Pi Zero: http://rover.ebay.com/rover/1/711-53200-19255-0/1?icep_ff3=2&pub=5575101368&toolid=10001&campid=5337582279&customid=&icep_item=231988882861&ipn=psmain&icep_vectorid=229466&kwid=902099&mtid=824&kw=lg 1x 5V 8A Power Supply: http://rover.ebay.com/rover/1/711-53200-19255-0/1?icep_ff3=2&pub=5575101368&toolid=10001&campid=5337582279&customid=&icep_item=322286626497&ipn=psmain&icep_vectorid=229466&kwid=902099&mtid=824&kw=lg 1x USB Video Grabber: http://rover.ebay.com/rover/1/711-53200-19255-0/1?icep_ff3=2&pub=5575101368&toolid=10001&campid=5337582279&customid=&icep_item=201121611217&ipn=psmain&icep_vectorid=229466&kwid=902099&mtid=824&kw=lg 1x USB Hub: http://rover.ebay.com/rover/1/711-53200-19255-0/1?icep_ff3=2&pub=5575101368&toolid=10001&campid=5337582279&customid=&icep_item=291403013226&ipn=psmain&icep_vectorid=229466&kwid=902099&mtid=824&kw=lg 1x WiFi Dongle: http://rover.ebay.com/rover/1/711-53200-19255-0/1?icep_ff3=2&pub=5575101368&toolid=10001&campid=5337582279&customid=&icep_item=282170608578&ipn=psmain&icep_vectorid=229466&kwid=902099&mtid=824&kw=lg Wago Terminal: http://rover.ebay.com/rover/1/711-53200-19255-0/1?icep_ff3=2&pub=5575101368&toolid=10001&campid=5337582279&customid=&icep_item=182264101485&ipn=psmain&icep_vectorid=229466&kwid=902099&mtid=824&kw=lg Velcro Tape: http://rover.ebay.com/rover/1/711-53200-19255-0/1?icep_ff3=2&pub=5575101368&toolid=10001&campid=5337582279&customid=&icep_item=371422542049&ipn=psmain&icep_vectorid=229466&kwid=902099&mtid=824&kw=lg In this project I will show you how to combine a Raspberry Pi Zero with a couple of complementary parts in order to add an ambient lighting effect to your TV which enhances the viewing experience. Music: 2011 Lookalike by Bartlebeats Ecstatic Wave, Jens Kiilstofte https://machinimasound.com/music You want to support my videos? You can browse and buy tools&materials from my Amazon Store. This way I get a small commission: Amazon.de: http://astore.amazon.de/great043-21 Amazon.com:http://astore.amazon.com/gre09a-20 Amazon.co.uk: http://astore.amazon.co.uk/gre0b-21 Or you feel super generous and want to use this Amazon link as your Amazon home page. And do not worry, your purchases are all anonym and the prices are all the same: Amazon.de:http://www.amazon.de/?_encoding=UTF8&camp=1638&creative=19454&linkCode=ur2&site-redirect=de&tag=great043-21&linkId=ORZEQZEOVJAFURCZ Amazon.com:http://www.amazon.com/?_encoding=UTF8&camp=1789&creative=390957&linkCode=ur2&tag=gre09a-20&linkId=I5NDCEAVCD2OWM4S
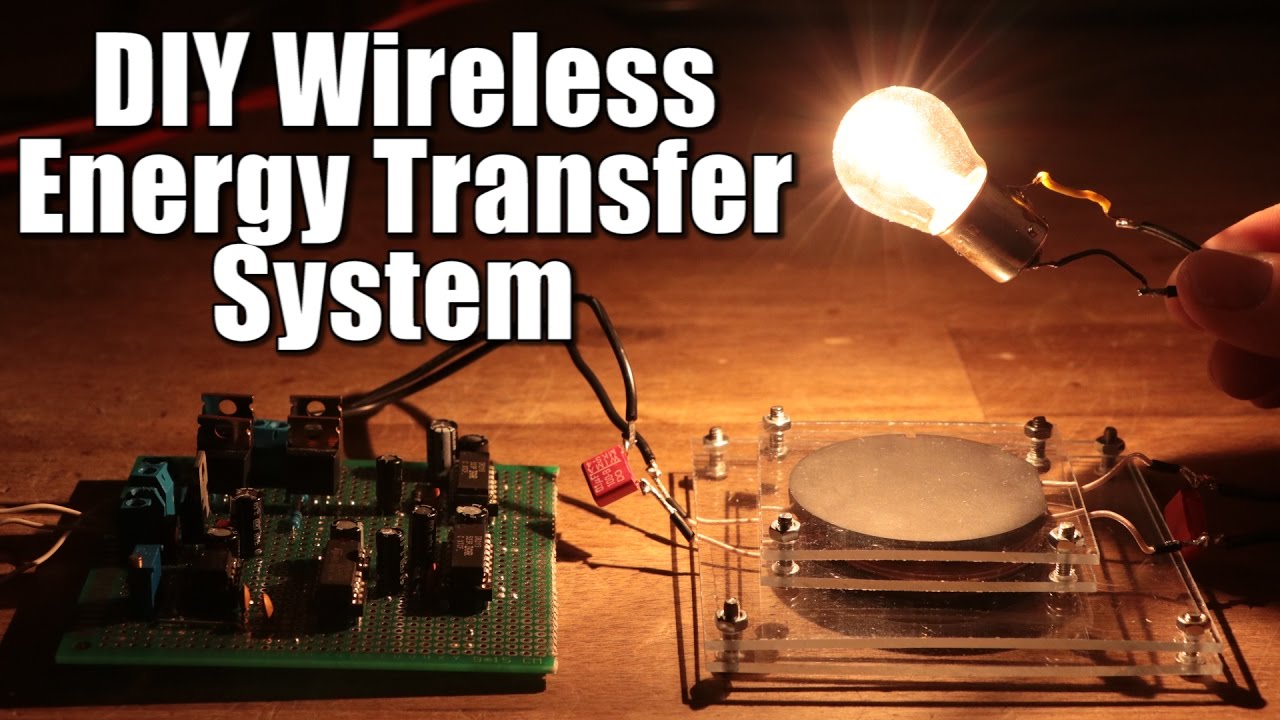
3E5PUnYlaTM | 11 Dec 2016
Project file on Free Circuit Editor: https://easyeda.com/GreatScott/IR2113_H_Bridge-09ef385286f74867988316035c669a17 Project file on Free Circuit Editor: https://easyeda.com/editor#id=233142f5526243bcaf6d2870710b041f Previous video: https://youtu.be/fLaexx-NMj8 Previous Wireless Energy Transfer video: https://youtu.be/ExU32UyGX6w Facebook: https://www.facebook.com/greatscottlab Twitter: https://twitter.com/GreatScottLab Support me for more videos: https://www.patreon.com/GreatScott?ty=h Project information (schematic, pictures, ....) on Instructables: http://www.instructables.com/id/DIY-Wireless-Energy-Transfer-System/ Würth Elektronik Article: http://www.we-online.com/web/de/index.php/download/media/07_electronic_components/download_center_1/application_notes_berichte/kabellose_energieuebertragung/Spulen_fuer_die_kabellose_Energieuebertragung.pdf Thanks to EasyEDA for sponsoring this video. Check out their free circuit design tool here: https://easyeda.com Parts list: (see Instructables article for Amazon.de links) Amazon.com: 4x IRLZ44N MOSFET: http://amzn.to/2hd5iIO 2x IR2113 MOSFET Driver IC: http://amzn.to/2hlFisB 1x Resistor Kit: http://amzn.to/2hiDNOy 1x Capacitor Kit: http://amzn.to/2hiFGbd 1x Electrolytic Capacitor Kit: http://amzn.to/2hd45kL 2x UF4007 Diode: http://amzn.to/2hiDi6Q 3x Screw Terminal: http://amzn.to/2hiVqxt 1x 7805 Voltage regulator: http://amzn.to/2hrV2gJ 1x TLC555 IC: http://amzn.to/2hiALqB 1x 74HC4049 IC: http://amzn.to/2goQsuA 1x 10k Trimmer: http://amzn.to/2hrV7kx Ebay: 4x IRLZ44N MOSFET: http://rover.ebay.com/rover/1/711-53200-19255-0/1?icep_ff3=2&pub=5575101368&toolid=10001&campid=5337582279&customid=&icep_item=261074291323&ipn=psmain&icep_vectorid=229466&kwid=902099&mtid=824&kw=lg 2x IR2113 MOSFET Driver IC: http://rover.ebay.com/rover/1/711-53200-19255-0/1?icep_ff3=2&pub=5575101368&toolid=10001&campid=5337582279&customid=&icep_item=191509157025&ipn=psmain&icep_vectorid=229466&kwid=902099&mtid=824&kw=lg 1x Resistor Kit: http://rover.ebay.com/rover/1/711-53200-19255-0/1?icep_ff3=2&pub=5575101368&toolid=10001&campid=5337582279&customid=&icep_item=271598211084&ipn=psmain&icep_vectorid=229466&kwid=902099&mtid=824&kw=lg 1x Capacitor Kit: http://rover.ebay.com/rover/1/711-53200-19255-0/1?icep_ff3=2&pub=5575101368&toolid=10001&campid=5337582279&customid=&icep_item=221372015123&ipn=psmain&icep_vectorid=229466&kwid=902099&mtid=824&kw=lg 1x Electrolytic Capacitor Kit: http://rover.ebay.com/rover/1/711-53200-19255-0/1?icep_ff3=2&pub=5575101368&toolid=10001&campid=5337582279&customid=&icep_item=401206644592&ipn=psmain&icep_vectorid=229466&kwid=902099&mtid=824&kw=lg 2x UF4007 Diode: http://rover.ebay.com/rover/1/711-53200-19255-0/1?icep_ff3=2&pub=5575101368&toolid=10001&campid=5337582279&customid=&icep_item=390221404783&ipn=psmain&icep_vectorid=229466&kwid=902099&mtid=824&kw=lg 3x Screw Terminal: http://rover.ebay.com/rover/1/711-53200-19255-0/1?icep_ff3=2&pub=5575101368&toolid=10001&campid=5337582279&customid=&icep_item=181846953484&ipn=psmain&icep_vectorid=229466&kwid=902099&mtid=824&kw=lg 1x 7805 Voltage regulator: http://rover.ebay.com/rover/1/711-53200-19255-0/1?icep_ff3=2&pub=5575101368&toolid=10001&campid=5337582279&customid=&icep_item=301723629766&ipn=psmain&icep_vectorid=229466&kwid=902099&mtid=824&kw=lg 1x TLC555 IC: http://rover.ebay.com/rover/1/711-53200-19255-0/1?icep_ff3=2&pub=5575101368&toolid=10001&campid=5337582279&customid=&icep_item=170881262435&ipn=psmain&icep_vectorid=229466&kwid=902099&mtid=824&kw=lg 1x 74HC4049 IC: http://rover.ebay.com/rover/1/711-53200-19255-0/1?icep_ff3=2&pub=5575101368&toolid=10001&campid=5337582279&customid=&icep_item=122111180187&ipn=psmain&icep_vectorid=229466&kwid=902099&mtid=824&kw=lg 1x 10k Trimmer: http://rover.ebay.com/rover/1/711-53200-19255-0/1?icep_ff3=2&pub=5575101368&toolid=10001&campid=5337582279&customid=&icep_item=191547047312&ipn=psmain&icep_vectorid=229466&kwid=902099&mtid=824&kw=lg In this project I will show you how to create an appropriate coil and an inverter circuit for a wireless energy transfer system that can easily transfer a power of 20W. Music: 2011 Lookalike by Bartlebeats Killing Time, Kevin MacLeod (incompetech.com) You want to support my videos? You can browse and buy tools&materials from my Amazon Store. This way I get a small commission: Amazon.de: http://astore.amazon.de/great043-21 Amazon.com:http://astore.amazon.com/gre09a-20 Amazon.co.uk: http://astore.amazon.co.uk/gre0b-21 Or you feel super generous and want to use this Amazon link as your Amazon home page. And do not worry, your purchases are all anonym and the prices are all the same: Amazon.de:http://www.amazon.de/?_encoding=UTF8&camp=1638&creative=19454&linkCode=ur2&site-redirect=de&tag=great043-21&linkId=ORZEQZEOVJAFURCZ Amazon.com:http://www.amazon.com/?_encoding=UTF8&camp=1789&creative=390957&linkCode=ur2&tag=gre09a-20&linkId=I5NDCEAVCD2OWM4S
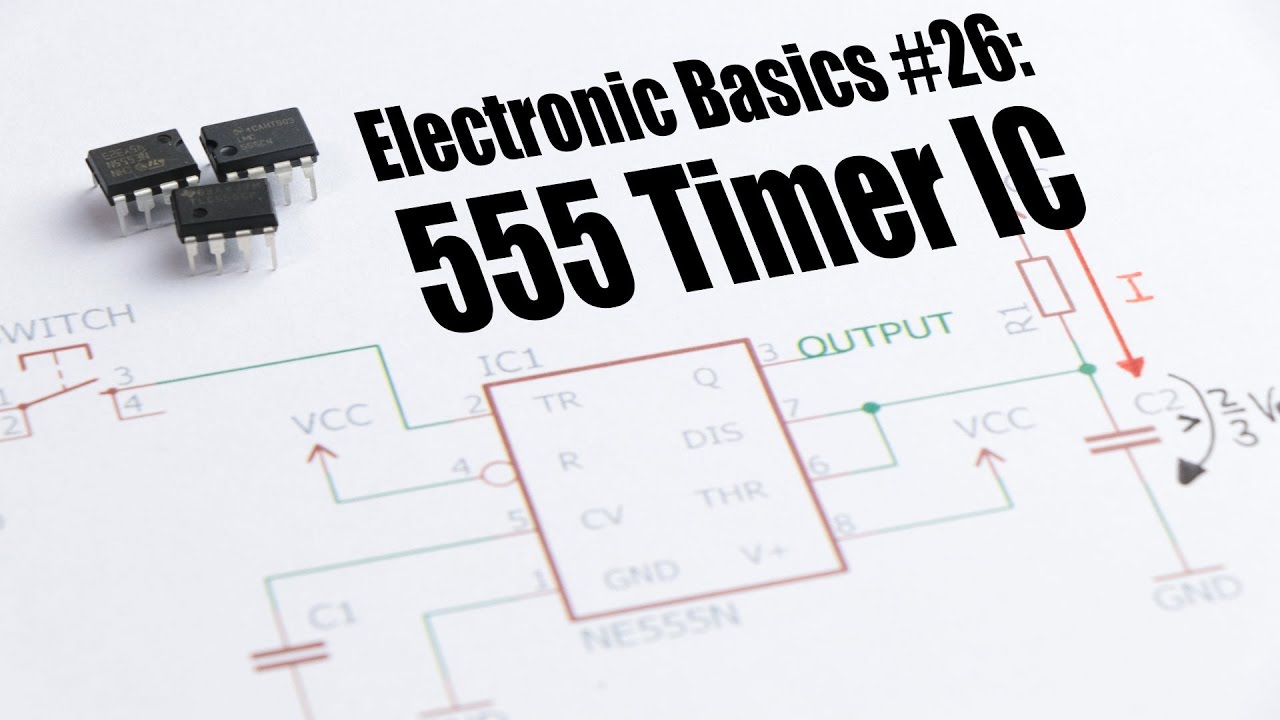
fLaexx-NMj8 | 04 Dec 2016
Previous video: https://youtu.be/lrugreN2K4w Facebook: https://www.facebook.com/greatscottlab Twitter: https://twitter.com/GreatScottLab Support me for more videos: https://www.patreon.com/GreatScott?ty=h You can get your 555 Timer ICs here: Amazon.com: NE555 (TTL) : http://amzn.to/2gUOSF0 TLC555 (CMOS): http://amzn.to/2gCDwVY Ebay: NE555 (TTL): http://rover.ebay.com/rover/1/711-53200-19255-0/1?icep_ff3=2&pub=5575101368&toolid=10001&campid=5337582279&customid=&icep_item=381374644111&ipn=psmain&icep_vectorid=229466&kwid=902099&mtid=824&kw=lg TLC555 (CMOS): http://rover.ebay.com/rover/1/711-53200-19255-0/1?icep_ff3=2&pub=5575101368&toolid=10001&campid=5337582279&customid=&icep_item=170881262435&ipn=psmain&icep_vectorid=229466&kwid=902099&mtid=824&kw=lg Amazon.de: NE555 (TTL): http://amzn.to/2gCxMvf TLC555 (CMOS): http://amzn.to/2gCxOTT In this episode of Electronic Basics I will show you what make the popular 555 Timer IC tick and how we can use it in our circuits as a monostable, bistable and astable multivibrator in order to create delays or even PWM Signals. Music: In the Hall of the Mountain King, Kevin MacLeod Ecstatic Wave, Jens Kiilstofte https://machinimasound.com/music You want to support my videos? You can browse and buy tools&materials from my Amazon Store. This way I get a small commission: Amazon.de: http://astore.amazon.de/great043-21 Amazon.com:http://astore.amazon.com/gre09a-20 Amazon.co.uk: http://astore.amazon.co.uk/gre0b-21 Or you feel super generous and want to use this Amazon link as your Amazon home page. And do not worry, your purchases are all anonym and the prices are all the same: Amazon.de:http://www.amazon.de/?_encoding=UTF8&camp=1638&creative=19454&linkCode=ur2&site-redirect=de&tag=great043-21&linkId=ORZEQZEOVJAFURCZ Amazon.com:http://www.amazon.com/?_encoding=UTF8&camp=1789&creative=390957&linkCode=ur2&tag=gre09a-20&linkId=I5NDCEAVCD2OWM4S

lrugreN2K4w | 27 Nov 2016
Project file on the free design tool: https://easyeda.com/GreatScott/PowerMeter-b6051723377f4cb2aedb33d67a445473 https://easyeda.com/GreatScott/PortablePowerMeter-c701429e989f4ab09048d70b92534ef3 Previous video: https://youtu.be/ExU32UyGX6w Facebook: https://www.facebook.com/greatscottlab Twitter: https://twitter.com/GreatScottLab Support me for more videos: https://www.patreon.com/GreatScott?ty=h Project information (schematic, code, ....) on Instructables: http://www.instructables.com/id/Make-Your-Own-Power-MeterLogger Thanks to EasyEDA for sponsoring this video. Check out their free circuit design tool here: https://easyeda.com Parts list: Amazon.com: 1x LiPo Battery: http://amzn.to/2gz4yvd 1x TP4056 Board: http://amzn.to/2gzdIb4 1x Arduino Pro Mini: http://amzn.to/2gvfXuQ 1x INA219 Board: http://amzn.to/2gvflW7 1x OLED LCD: http://amzn.to/2fobopO 1x SD Card PCB: http://amzn.to/2fodhmu 1x Switch: http://amzn.to/2gz9ZtW Ebay: 1x TP4056 Board:http://rover.ebay.com/rover/1/711-53200-19255-0/1?icep_ff3=2&pub=5575101368&toolid=10001&campid=5337582279&customid=&icep_item=162193089913&ipn=psmain&icep_vectorid=229466&kwid=902099&mtid=824&kw=lg 1x Arduino Pro Mini:http://rover.ebay.com/rover/1/711-53200-19255-0/1?icep_ff3=2&pub=5575101368&toolid=10001&campid=5337582279&customid=&icep_item=191679508570&ipn=psmain&icep_vectorid=229466&kwid=902099&mtid=824&kw=lg 1x INA219 Board:http://rover.ebay.com/rover/1/711-53200-19255-0/1?icep_ff3=2&pub=5575101368&toolid=10001&campid=5337582279&customid=&icep_item=191918441110&ipn=psmain&icep_vectorid=229466&kwid=902099&mtid=824&kw=lg 1x OLED LCD:http://rover.ebay.com/rover/1/711-53200-19255-0/1?icep_ff3=2&pub=5575101368&toolid=10001&campid=5337582279&customid=&icep_item=201428440360&ipn=psmain&icep_vectorid=229466&kwid=902099&mtid=824&kw=lg 1x SD Card PCB:http://rover.ebay.com/rover/1/711-53200-19255-0/1?icep_ff3=2&pub=5575101368&toolid=10001&campid=5337582279&customid=&icep_item=381828460786&ipn=psmain&icep_vectorid=229466&kwid=902099&mtid=824&kw=lg 1x Switch:http://rover.ebay.com/rover/1/711-53200-19255-0/1?icep_ff3=2&pub=5575101368&toolid=10001&campid=5337582279&customid=&icep_item=171907372012&ipn=psmain&icep_vectorid=229466&kwid=902099&mtid=824&kw=lg In this project I will show you how I combined an Arduino, an INA219 power monitor IC, an OLED LCD and a Micro SD Card PCB in order to create a power meter/logger that has more functions than the popular USB Power Meter. Music: 2011 Lookalike by Bartlebeats Killing Time, Kevin MacLeod (incompetech.com) You want to support my videos? You can browse and buy tools&materials from my Amazon Store. This way I get a small commission: Amazon.de: http://astore.amazon.de/great043-21 Amazon.com:http://astore.amazon.com/gre09a-20 Amazon.co.uk: http://astore.amazon.co.uk/gre0b-21 Or you feel super generous and want to use this Amazon link as your Amazon home page. And do not worry, your purchases are all anonym and the prices are all the same: Amazon.de:http://www.amazon.de/?_encoding=UTF8&camp=1638&creative=19454&linkCode=ur2&site-redirect=de&tag=great043-21&linkId=ORZEQZEOVJAFURCZ Amazon.com:http://www.amazon.com/?_encoding=UTF8&camp=1789&creative=390957&linkCode=ur2&tag=gre09a-20&linkId=I5NDCEAVCD2OWM4S
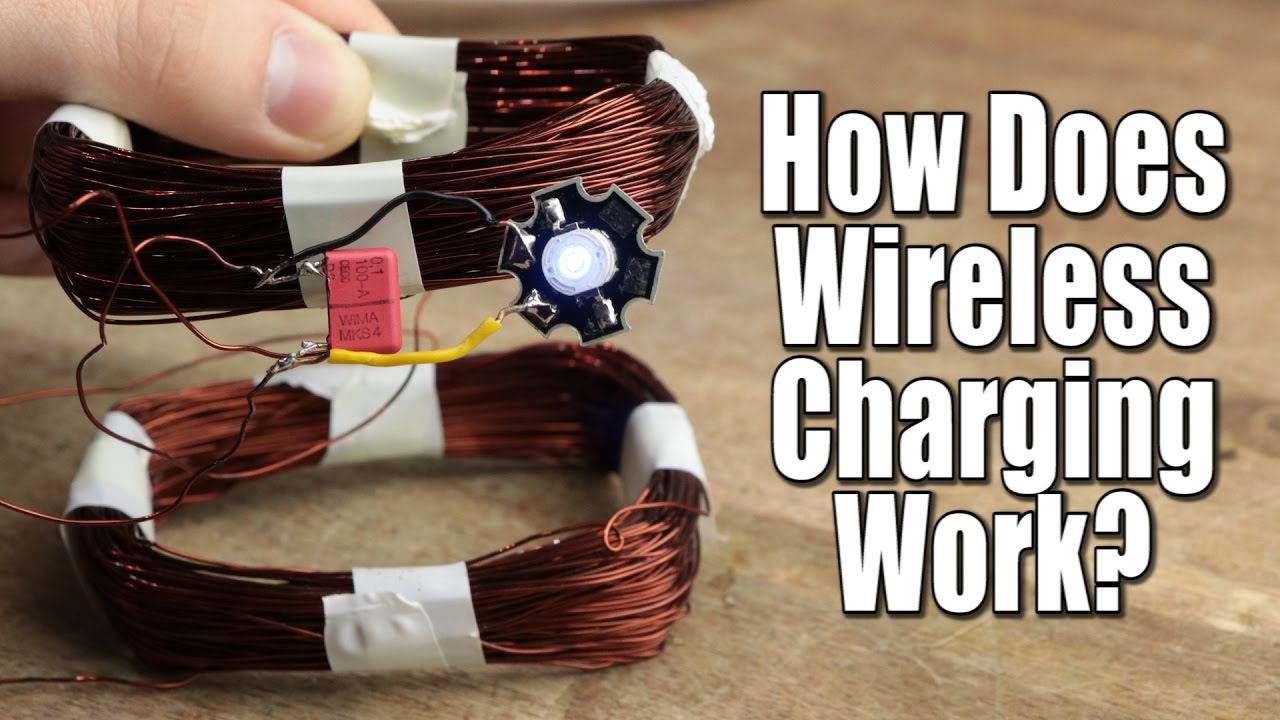
ExU32UyGX6w | 20 Nov 2016
Previous video: https://youtu.be/86kVe5lm7xE Facebook: https://www.facebook.com/greatscottlab Twitter: https://twitter.com/GreatScottLab Support me for more videos: https://www.patreon.com/GreatScott?ty=h In this video I will show you the operational behaviour of a transformer and how we can alter it in theory and praxis in order to create a crude wireless energy transfer system. Along the way I will also talk about the QI standard and some of the disadvantages of wireless charging. Music: 2011 Lookalike by Bartlebeats You want to support my videos? You can browse and buy tools&materials from my Amazon Store. This way I get a small commission: Amazon.de: http://astore.amazon.de/great043-21 Amazon.com:http://astore.amazon.com/gre09a-20 Amazon.co.uk: http://astore.amazon.co.uk/gre0b-21 Or you feel super generous and want to use this Amazon link as your Amazon home page. And do not worry, your purchases are all anonym and the prices are all the same: Amazon.de:http://www.amazon.de/?_encoding=UTF8&camp=1638&creative=19454&linkCode=ur2&site-redirect=de&tag=great043-21&linkId=ORZEQZEOVJAFURCZ Amazon.com:http://www.amazon.com/?_encoding=UTF8&camp=1789&creative=390957&linkCode=ur2&tag=gre09a-20&linkId=I5NDCEAVCD2OWM4S

86kVe5lm7xE | 13 Nov 2016
Previous video: https://youtu.be/LqgP16JQ24I Facebook: https://www.facebook.com/greatscottlab Twitter: https://twitter.com/GreatScottLab Support me for more videos: https://www.patreon.com/GreatScott?ty=h More information (complete parts list, pictures,....) on Instructables: http://www.instructables.com/id/Make-Your-Own-Simple-Cheap-Portable-Bluetooth-Spea/ Part list: Ebay: 2x Li-Ion Battery: - 1x Bluetooth board: http://rover.ebay.com/rover/1/711-53200-19255-0/1?icep_ff3=2&pub=5575101368&toolid=10001&campid=5337582279&customid=&icep_item=351804941744&ipn=psmain&icep_vectorid=229466&kwid=902099&mtid=824&kw=lg 1x SPDT Switch: http://rover.ebay.com/rover/1/711-53200-19255-0/1?icep_ff3=2&pub=5575101368&toolid=10001&campid=5337582279&customid=&icep_item=221889604591&ipn=psmain&icep_vectorid=229466&kwid=902099&mtid=824&kw=lg 1x TP4056 board: http://rover.ebay.com/rover/1/711-53200-19255-0/1?icep_ff3=2&pub=5575101368&toolid=10001&campid=5337582279&customid=&icep_item=162193089913&ipn=psmain&icep_vectorid=229466&kwid=902099&mtid=824&kw=lg 1x Micro USB Breakout: http://rover.ebay.com/rover/1/711-53200-19255-0/1?icep_ff3=2&pub=5575101368&toolid=10001&campid=5337582279&customid=&icep_item=391199617691&ipn=psmain&icep_vectorid=229466&kwid=902099&mtid=824&kw=lg 1x MT3608 Boost Converter: http://rover.ebay.com/rover/1/711-53200-19255-0/1?icep_ff3=2&pub=5575101368&toolid=10001&campid=5337582279&customid=&icep_item=171907688472&ipn=psmain&icep_vectorid=229466&kwid=902099&mtid=824&kw=lg 1x RGB LED: http://rover.ebay.com/rover/1/711-53200-19255-0/1?icep_ff3=2&pub=5575101368&toolid=10001&campid=5337582279&customid=&icep_item=281233876083&ipn=psmain&icep_vectorid=229466&kwid=902099&mtid=824&kw=lg Amazon.com: 2x Li-Ion Battery: http://amzn.to/2eUuthD 1x Bluetooth board: http://amzn.to/2eUrCp1 1x SPDT Switch: http://amzn.to/2fJI5ek 1x TP4056 board: http://amzn.to/2eucBvk 1x Micro USB Breakout: http://amzn.to/2fw3nvH 1x MT3608 Boost Converter: http://amzn.to/2g3hjRX 1x RGB LED: http://amzn.to/2eQgQgl Amazon.de: 2x Li-Ion Battery: http://amzn.to/2eUzhDP 1x Bluetooth board: http://amzn.to/2eUto9y 1x SPDT Switch: http://amzn.to/2eUxqyK 1x TP4056 board: http://amzn.to/2eUvMNO 1x Micro USB Breakout: http://amzn.to/2eUtzSu 1x MT3608 Boost Converter: http://amzn.to/2eUzFCh 1x RGB LED: http://amzn.to/2eUB5gb In this project I will show you how to build a simple portable bluetooth speaker that can play its tunes up to 30 hours continuously. Most of the used components can be found for only 22$ in total which makes this a pretty low budget project. Music: 2011 Lookalike by Bartlebeats Killing Time, Kevin MacLeod (incompetech.com) You want to support my videos? You can browse and buy tools&materials from my Amazon Store. This way I get a small commission: Amazon.de: http://astore.amazon.de/great043-21 Amazon.com:http://astore.amazon.com/gre09a-20 Amazon.co.uk: http://astore.amazon.co.uk/gre0b-21 Or you feel super generous and want to use this Amazon link as your Amazon home page. And do not worry, your purchases are all anonym and the prices are all the same: Amazon.de:http://www.amazon.de/?_encoding=UTF8&camp=1638&creative=19454&linkCode=ur2&site-redirect=de&tag=great043-21&linkId=ORZEQZEOVJAFURCZ Amazon.com:http://www.amazon.com/?_encoding=UTF8&camp=1789&creative=390957&linkCode=ur2&tag=gre09a-20&linkId=I5NDCEAVCD2OWM4S

LqgP16JQ24I | 06 Nov 2016
Previous video: https://youtu.be/bhWTfATkg6w Li-Ion video: https://youtu.be/bNNWbm681AI LiPo video: https://youtu.be/osfgkFyq7lA Facebook: https://www.facebook.com/greatscottlab Twitter: https://twitter.com/GreatScottLab Support me for more videos: https://www.patreon.com/GreatScott?ty=h You can get the batteries and the presented charger here: Lead Acid: http://amzn.to/2fuBvqN NiMH: http://amzn.to/2foXgd0 Li-Ion: http://amzn.to/2fdTSkL LiPo: http://amzn.to/2foXHnj Charger: http://amzn.to/2eCcTPl In this VS episode I will compare the gravimetric and volumetric energy density and the price of lead acid, NiMH, Li-Ion and LiPo batteries with one another. I will also talk about how dangerous each battery type can be and what kind of battery you should get for your next project. Music: 2011 Lookalike by Bartlebeats Killing Time, Kevin MacLeod (incompetech.com) You want to support my videos? You can browse and buy tools&materials from my Amazon Store. This way I get a small commission: Amazon.de: http://astore.amazon.de/great043-21 Amazon.com:http://astore.amazon.com/gre09a-20 Amazon.co.uk: http://astore.amazon.co.uk/gre0b-21 Or you feel super generous and want to use this Amazon link as your Amazon home page. And do not worry, your purchases are all anonym and the prices are all the same: Amazon.de:http://www.amazon.de/?_encoding=UTF8&camp=1638&creative=19454&linkCode=ur2&site-redirect=de&tag=great043-21&linkId=ORZEQZEOVJAFURCZ Amazon.com:http://www.amazon.com/?_encoding=UTF8&camp=1789&creative=390957&linkCode=ur2&tag=gre09a-20&linkId=I5NDCEAVCD2OWM4S

bhWTfATkg6w | 30 Oct 2016
Previous video: https://youtu.be/J8atdmEqZsc Part 1: https://youtu.be/_MtN_s4tVK0 Facebook: https://www.facebook.com/greatscottlab Twitter: https://twitter.com/GreatScottLab Support me for more videos: https://www.patreon.com/GreatScott?ty=h The button wells were created by wermy: http://market.sudomod.com/3d-printed-gbz-button-wells/ Detailed information (pictures, schematics, config files,....) on Instructables: http://www.instructables.com/id/DIY-Raspberry-Pi-Zero-Handheld-Game-Console/ Parts list (not complete, see Instructables for more information) Amazon.com: Raspberry Pi Zero: http://amzn.to/2eerQcv NiMH batteries (I recommend Eneloop): http://amzn.to/2e5U0nn 3.5 inch LCD: http://amzn.to/2ejaPsm PAM8403 Audio Amp: http://amzn.to/2dVwn1r Housing: http://amzn.to/2ej97qY Ebay: Raspberry Pi Zero: http://rover.ebay.com/rover/1/711-53200-19255-0/1?icep_ff3=2&pub=5575101368&toolid=10001&campid=5337582279&customid=&icep_item=231988882861&ipn=psmain&icep_vectorid=229466&kwid=902099&mtid=824&kw=lg NiMH batteries (I recommend Eneloop): http://rover.ebay.com/rover/1/711-53200-19255-0/1?icep_ff3=2&pub=5575101368&toolid=10001&campid=5337582279&customid=&icep_item=162133873802&ipn=psmain&icep_vectorid=229466&kwid=902099&mtid=824&kw=lg 3.5 inch LCD: http://rover.ebay.com/rover/1/711-53200-19255-0/1?icep_ff3=2&pub=5575101368&toolid=10001&campid=5337582279&customid=&icep_item=181624579344&ipn=psmain&icep_vectorid=229466&kwid=902099&mtid=824&kw=lg PAM8403 Audio Amp: http://rover.ebay.com/rover/1/711-53200-19255-0/1?icep_ff3=2&pub=5575101368&toolid=10001&campid=5337582279&customid=&icep_item=161995184749&ipn=psmain&icep_vectorid=229466&kwid=902099&mtid=824&kw=lg Housing: http://rover.ebay.com/rover/1/711-53200-19255-0/1?icep_ff3=2&pub=5575101368&toolid=10001&campid=5337582279&customid=&icep_item=222166648981&ipn=psmain&icep_vectorid=229466&kwid=902099&mtid=824&kw=lg Amazon.de: Raspberry Pi Zero: http://amzn.to/2eFXSgR NiMH batteries (I recommend Eneloop): http://amzn.to/2e9uw7R 3.5 inch LCD: http://amzn.to/2eG1LCv PAM8403 Audio Amp: http://amzn.to/2e9qVXc Housing: http://amzn.to/2eFYXF8 In this project I will show you how I used a Raspberry Pi Zero, NiMH batteries, a homemade over-discharge protection circuit, a rearview lcd and an audio amp to create a handheld game console that can play retro games. Music: In the Hall of the Mountain King, Kevin MacLeod Ecstatic Wave, Jens Kiilstofte https://machinimasound.com/music You want to support my videos? You can browse and buy tools&materials from my Amazon Store. This way I get a small commission: Amazon.de: http://astore.amazon.de/great043-21 Amazon.com:http://astore.amazon.com/gre09a-20 Amazon.co.uk: http://astore.amazon.co.uk/gre0b-21 Or you feel super generous and want to use this Amazon link as your Amazon home page. And do not worry, your purchases are all anonym and the prices are all the same: Amazon.de:http://www.amazon.de/?_encoding=UTF8&camp=1638&creative=19454&linkCode=ur2&site-redirect=de&tag=great043-21&linkId=ORZEQZEOVJAFURCZ Amazon.com:http://www.amazon.com/?_encoding=UTF8&camp=1789&creative=390957&linkCode=ur2&tag=gre09a-20&linkId=I5NDCEAVCD2OWM4S

J8atdmEqZsc | 23 Oct 2016
Previous video: https://youtu.be/_MtN_s4tVK0 Facebook: https://www.facebook.com/greatscottlab Twitter: https://twitter.com/GreatScottLab Support me for more videos: https://www.patreon.com/GreatScott?ty=h You can get your Servo here: Amazon.com: http://amzn.to/2exBC7b http://amzn.to/2dA7gNX Continuous Rotation 360 degree Servo: http://amzn.to/2exARee Amazon.de: http://amzn.to/2ezNyV0 http://amzn.to/2f5oO9X Continuous Rotation 360 degree Servo: http://amzn.to/2ezQktA Ebay: http://rover.ebay.com/rover/1/711-53200-19255-0/1?icep_ff3=2&pub=5575101368&toolid=10001&campid=5337582279&customid=&icep_item=182180902598&ipn=psmain&icep_vectorid=229466&kwid=902099&mtid=824&kw=lg http://rover.ebay.com/rover/1/711-53200-19255-0/1?icep_ff3=2&pub=5575101368&toolid=10001&campid=5337582279&customid=&icep_item=311619663165&ipn=psmain&icep_vectorid=229466&kwid=902099&mtid=824&kw=lg Continuous Rotation 360 degree Servo: http://rover.ebay.com/rover/1/711-53200-19255-0/1?icep_ff3=2&pub=5575101368&toolid=10001&campid=5337582279&customid=&icep_item=172343602782&ipn=psmain&icep_vectorid=229466&kwid=902099&mtid=824&kw=lg In this episode of Electronic Basics I will show you how a common Servo works and how you can control one in your next project with and without a microcontroller. Music: Killing Time, Kevin MacLeod (incompetech.com) You want to support my videos? You can browse and buy tools&materials from my Amazon Store. This way I get a small commission: Amazon.de: http://astore.amazon.de/great043-21 Amazon.com:http://astore.amazon.com/gre09a-20 Amazon.co.uk: http://astore.amazon.co.uk/gre0b-21 Or you feel super generous and want to use this Amazon link as your Amazon home page. And do not worry, your purchases are all anonym and the prices are all the same: Amazon.de:http://www.amazon.de/?_encoding=UTF8&camp=1638&creative=19454&linkCode=ur2&site-redirect=de&tag=great043-21&linkId=ORZEQZEOVJAFURCZ Amazon.com:http://www.amazon.com/?_encoding=UTF8&camp=1789&creative=390957&linkCode=ur2&tag=gre09a-20&linkId=I5NDCEAVCD2OWM4S

_MtN_s4tVK0 | 16 Oct 2016
Previous video: https://youtu.be/ZiD_X-uo_TQ Part 2: https://youtu.be/bhWTfATkg6w Facebook: https://www.facebook.com/greatscottlab Twitter: https://twitter.com/GreatScottLab Support me for more videos: https://www.patreon.com/GreatScott?ty=h Other Handheld Game Console projects shown in the video: https://www.raspberrypi.org/blog/game-boy-zero/ https://learn.adafruit.com/pigrrl-zero/overview Detailed information (pictures, schematics, config files,....) on Instructables: http://www.instructables.com/id/DIY-Raspberry-Pi-Zero-Handheld-Game-Console/ Parts list (not complete, see Instructables for more information): Amazon.com: Raspberry Pi Zero: http://amzn.to/2eerQcv NiMH batteries (I recommend Eneloop): http://amzn.to/2e5U0nn 3.5 inch LCD: http://amzn.to/2ejaPsm PAM8403 Audio Amp: http://amzn.to/2dVwn1r Housing: http://amzn.to/2ej97qY Ebay: Raspberry Pi Zero: http://rover.ebay.com/rover/1/711-53200-19255-0/1?icep_ff3=2&pub=5575101368&toolid=10001&campid=5337582279&customid=&icep_item=231988882861&ipn=psmain&icep_vectorid=229466&kwid=902099&mtid=824&kw=lg NiMH batteries (I recommend Eneloop): http://rover.ebay.com/rover/1/711-53200-19255-0/1?icep_ff3=2&pub=5575101368&toolid=10001&campid=5337582279&customid=&icep_item=162133873802&ipn=psmain&icep_vectorid=229466&kwid=902099&mtid=824&kw=lg 3.5 inch LCD: http://rover.ebay.com/rover/1/711-53200-19255-0/1?icep_ff3=2&pub=5575101368&toolid=10001&campid=5337582279&customid=&icep_item=181624579344&ipn=psmain&icep_vectorid=229466&kwid=902099&mtid=824&kw=lg PAM8403 Audio Amp: http://rover.ebay.com/rover/1/711-53200-19255-0/1?icep_ff3=2&pub=5575101368&toolid=10001&campid=5337582279&customid=&icep_item=161995184749&ipn=psmain&icep_vectorid=229466&kwid=902099&mtid=824&kw=lg Housing: http://rover.ebay.com/rover/1/711-53200-19255-0/1?icep_ff3=2&pub=5575101368&toolid=10001&campid=5337582279&customid=&icep_item=222166648981&ipn=psmain&icep_vectorid=229466&kwid=902099&mtid=824&kw=lg Amazon.de: Raspberry Pi Zero: http://amzn.to/2eFXSgR NiMH batteries (I recommend Eneloop): http://amzn.to/2e9uw7R 3.5 inch LCD: http://amzn.to/2eG1LCv PAM8403 Audio Amp: http://amzn.to/2e9qVXc Housing: http://amzn.to/2eFYXF8 In this project I will show you how I used a Raspberry Pi Zero, NiMH batteries, a homemade over-discharge protection circuit, a rearview lcd and an audio amp to create a handheld game console that can play retro games. Music: 2011 Lookalike by Bartlebeats Ecstatic Wave, Jens Kiilstofte https://machinimasound.com/music You want to support my videos? You can browse and buy tools&materials from my Amazon Store. This way I get a small commission: Amazon.de: http://astore.amazon.de/great043-21 Amazon.com:http://astore.amazon.com/gre09a-20 Amazon.co.uk: http://astore.amazon.co.uk/gre0b-21 Or you feel super generous and want to use this Amazon link as your Amazon home page. And do not worry, your purchases are all anonym and the prices are all the same: Amazon.de:http://www.amazon.de/?_encoding=UTF8&camp=1638&creative=19454&linkCode=ur2&site-redirect=de&tag=great043-21&linkId=ORZEQZEOVJAFURCZ Amazon.com:http://www.amazon.com/?_encoding=UTF8&camp=1789&creative=390957&linkCode=ur2&tag=gre09a-20&linkId=I5NDCEAVCD2OWM4S
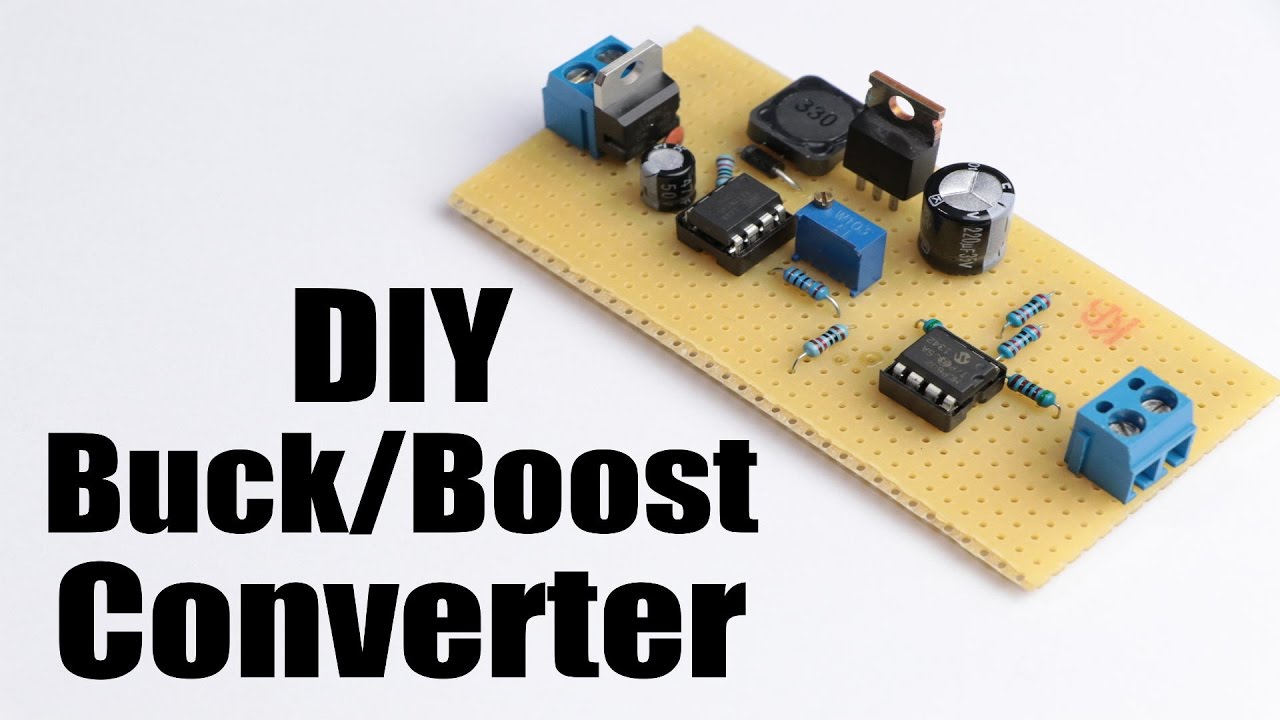
ZiD_X-uo_TQ | 09 Oct 2016
Project file on the free design tool: https://easyeda.com/GreatScott/ATtiny_Buck_Boost_Converter-RXig0YIif Previous video: https://youtu.be/fe_t5PEudgA Buck Converter video: https://youtu.be/m8rK9gU30v4 Boost Converter video: https://youtu.be/QnUhjnbZ0T8 ATtiny Programming Shield: https://youtu.be/9LjfkjwMqXI Facebook: https://www.facebook.com/greatscottlab Twitter: https://twitter.com/GreatScottLab Support me for more videos: https://www.patreon.com/GreatScott?ty=h Project information (schematic, code, ....) on Instructables: http://www.instructables.com/id/DIY-BuckBoost-Converter-Flyback Thanks to EasyEDA for sponsoring this video. Check out their free circuit design tool here: https://easyeda.com Parts list (Amazon.de on Instructables): Amazon.com: 1x ATtiny85: http://amzn.to/2e1mPzU 1x MCP602: http://amzn.to/2e1nlxU 1x 7805 5V regulator: http://amzn.to/2dWCU8M 1x IRLZ44N: http://amzn.to/2dBwI9o 1x 100kΩ Potentiometer: http://amzn.to/2d4qCu8 1x 0.03mH Inductor: http://amzn.to/2dBwAXv 1x 1N5819 Schottky Diode: http://amzn.to/2doeIwg 2x Screw Terminals: http://amzn.to/2dBxeV0 2x 100nF Capacitor: http://amzn.to/2dByyqF 1x 100µF, 1x 220µF Capacitor: http://amzn.to/2efYRDU 2x 10kΩ, 2x 5.1kΩ, 2x 20kΩ, 1x10Ω Resistor: http://amzn.to/2efWS2P Ebay: 1x ATtiny85: http://rover.ebay.com/rover/1/711-53200-19255-0/1?icep_ff3=2&pub=5575101368&toolid=10001&campid=5337582279&customid=&icep_item=201250561025&ipn=psmain&icep_vectorid=229466&kwid=902099&mtid=824&kw=lg 1x MCP602: http://rover.ebay.com/rover/1/711-53200-19255-0/1?icep_ff3=2&pub=5575101368&toolid=10001&campid=5337582279&customid=&icep_item=181846803759&ipn=psmain&icep_vectorid=229466&kwid=902099&mtid=824&kw=lg 1x 7805 5V regulator: http://rover.ebay.com/rover/1/711-53200-19255-0/1?icep_ff3=2&pub=5575101368&toolid=10001&campid=5337582279&customid=&icep_item=281678007991&ipn=psmain&icep_vectorid=229466&kwid=902099&mtid=824&kw=lg 1x IRLZ44N: http://rover.ebay.com/rover/1/711-53200-19255-0/1?icep_ff3=2&pub=5575101368&toolid=10001&campid=5337582279&customid=&icep_item=261074291323&ipn=psmain&icep_vectorid=229466&kwid=902099&mtid=824&kw=lg 1x 100kΩ Potentiometer: http://rover.ebay.com/rover/1/711-53200-19255-0/1?icep_ff3=2&pub=5575101368&toolid=10001&campid=5337582279&customid=&icep_item=191984937391&ipn=psmain&icep_vectorid=229466&kwid=902099&mtid=824&kw=lg 1x 0.03mH Inductor: http://rover.ebay.com/rover/1/711-53200-19255-0/1?icep_ff3=2&pub=5575101368&toolid=10001&campid=5337582279&customid=&icep_item=400985381578&ipn=psmain&icep_vectorid=229466&kwid=902099&mtid=824&kw=lg 1x 1N5819 Schottky Diode: http://rover.ebay.com/rover/1/711-53200-19255-0/1?icep_ff3=2&pub=5575101368&toolid=10001&campid=5337582279&customid=&icep_item=130703663173&ipn=psmain&icep_vectorid=229466&kwid=902099&mtid=824&kw=lg 2x Screw Terminals: http://rover.ebay.com/rover/1/711-53200-19255-0/1?icep_ff3=2&pub=5575101368&toolid=10001&campid=5337582279&customid=&icep_item=181846953484&ipn=psmain&icep_vectorid=229466&kwid=902099&mtid=824&kw=lg 2x 100nF Capacitor: http://rover.ebay.com/rover/1/711-53200-19255-0/1?icep_ff3=2&pub=5575101368&toolid=10001&campid=5337582279&customid=&icep_item=222272460844&ipn=psmain&icep_vectorid=229466&kwid=902099&mtid=824&kw=lg 1x 100µF, 1x 220µF Capacitor: http://rover.ebay.com/rover/1/711-53200-19255-0/1?icep_ff3=2&pub=5575101368&toolid=10001&campid=5337582279&customid=&icep_item=182051237506&ipn=psmain&icep_vectorid=229466&kwid=902099&mtid=824&kw=lg 2x 10kΩ, 2x 5.1kΩ, 2x 20kΩ, 1x10Ω Resistor: http://rover.ebay.com/rover/1/711-53200-19255-0/1?icep_ff3=2&pub=5575101368&toolid=10001&campid=5337582279&customid=&icep_item=271598211084&ipn=psmain&icep_vectorid=229466&kwid=902099&mtid=824&kw=lg In this project video I will show you how a buck/boost converter (flyback) works and how you can easily build one that can step up and step down DC voltage efficiently. Music: 2011 Lookalike by Bartlebeats Killing Time, Kevin MacLeod (incompetech.com) You want to support my videos? You can browse and buy tools&materials from my Amazon Store. This way I get a small commission: Amazon.de: http://astore.amazon.de/great043-21 Amazon.com:http://astore.amazon.com/gre09a-20 Amazon.co.uk: http://astore.amazon.co.uk/gre0b-21 Or you feel super generous and want to use this Amazon link as your Amazon home page. And do not worry, your purchases are all anonym and the prices are all the same: Amazon.de:http://www.amazon.de/?_encoding=UTF8&camp=1638&creative=19454&linkCode=ur2&site-redirect=de&tag=great043-21&linkId=ORZEQZEOVJAFURCZ Amazon.com:http://www.amazon.com/?_encoding=UTF8&camp=1789&creative=390957&linkCode=ur2&tag=gre09a-20&linkId=I5NDCEAVCD2OWM4S

uRcefMXR0Js | 05 Oct 2016
Facebook: https://www.facebook.com/greatscottlab Twitter: https://twitter.com/GreatScottLab Support me for more videos: https://www.patreon.com/GreatScott?ty=h Questions: 1. How is everything going, with your study and such? 0:23 2. What is the best place to get electronic components in Germany? 0:42 3. Is your work bench always so clean? 0:58 4. What is your shooting video gear? 1:17 5. Which lights do you use for your videos & do you ever want to livestram? 1:37 6. a bit of Loctite? Lol I guess a bit means the opposite in German! 2:05 7. What about that drone and when will you make a PCB milling video with your CNC? 2:18 8. What is your view on smart electronics and also view on Apple products? 2:48 9. Top three comments of the month! 3:23 Music: Killing Time, Kevin MacLeod (incompetech.com) You want to support my videos? You can browse and buy tools&materials from my Amazon Store. This way I get a small commission: Amazon.de: http://astore.amazon.de/great043-21 Amazon.com:http://astore.amazon.com/gre09a-20 Amazon.co.uk: http://astore.amazon.co.uk/gre0b-21 Or you feel super generous and want to use this Amazon link as your Amazon home page. And do not worry, your purchases are all anonym and the prices are all the same: Amazon.de:http://www.amazon.de/?_encoding=UTF8&camp=1638&creative=19454&linkCode=ur2&site-redirect=de&tag=great043-21&linkId=ORZEQZEOVJAFURCZ Amazon.com:http://www.amazon.com/?_encoding=UTF8&camp=1789&creative=390957&linkCode=ur2&tag=gre09a-20&linkId=I5NDCEAVCD2OWM4S
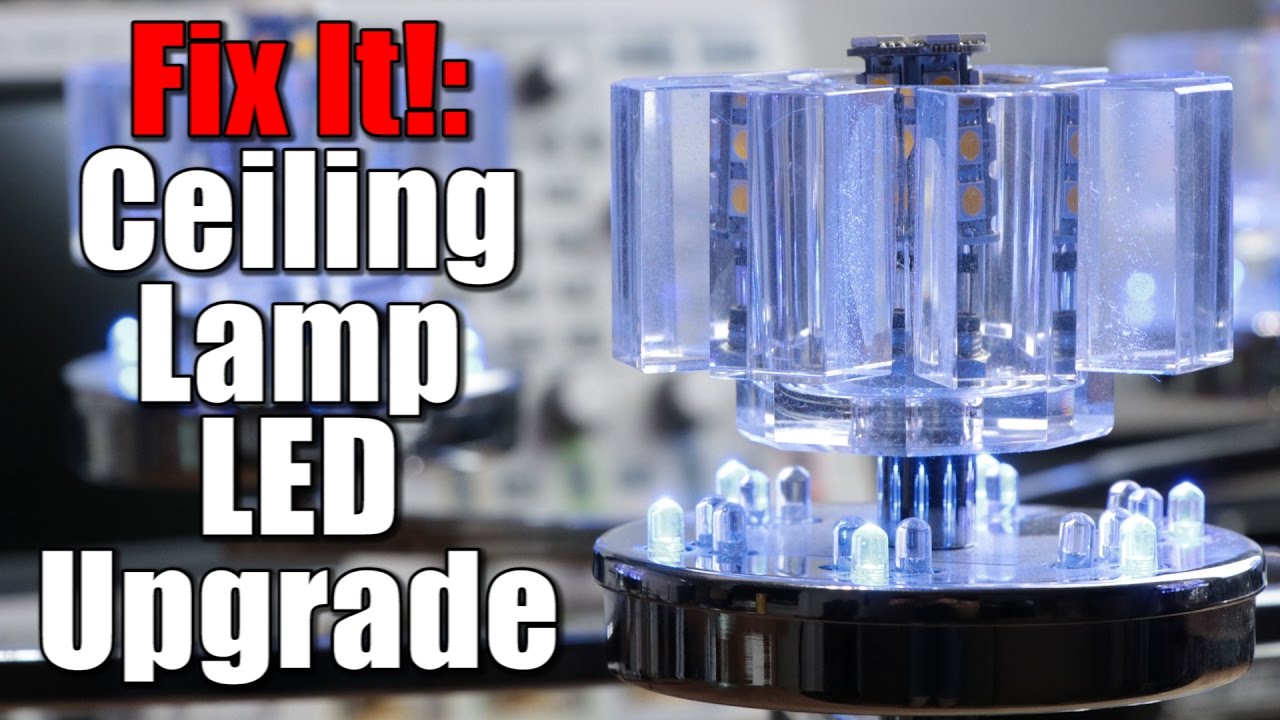
fe_t5PEudgA | 02 Oct 2016
Previous video: https://youtu.be/Fm8IR-lBfRQ Twitter: https://twitter.com/GreatScottLab Support me for more videos: https://www.patreon.com/GreatScott?ty=h In this episode of Fix It! I will show you how I modified an old ceiling lamp of mine in order to illuminate G4 LED light bulbs instead of the classical halogen light bulbs. This modification will save me a bit of electrical power. Music: 2011 Lookalike by Bartlebeats You want to support my videos? You can browse and buy tools&materials from my Amazon Store. This way I get a small commission: Amazon.de: http://astore.amazon.de/great043-21 Amazon.com:http://astore.amazon.com/gre09a-20 Amazon.co.uk: http://astore.amazon.co.uk/gre0b-21 Or you feel super generous and want to use this Amazon link as your Amazon home page. And do not worry, your purchases are all anonym and the prices are all the same: Amazon.de:http://www.amazon.de/?_encoding=UTF8&camp=1638&creative=19454&linkCode=ur2&site-redirect=de&tag=great043-21&linkId=ORZEQZEOVJAFURCZ Amazon.com:http://www.amazon.com/?_encoding=UTF8&camp=1789&creative=390957&linkCode=ur2&tag=gre09a-20&linkId=I5NDCEAVCD2OWM4S
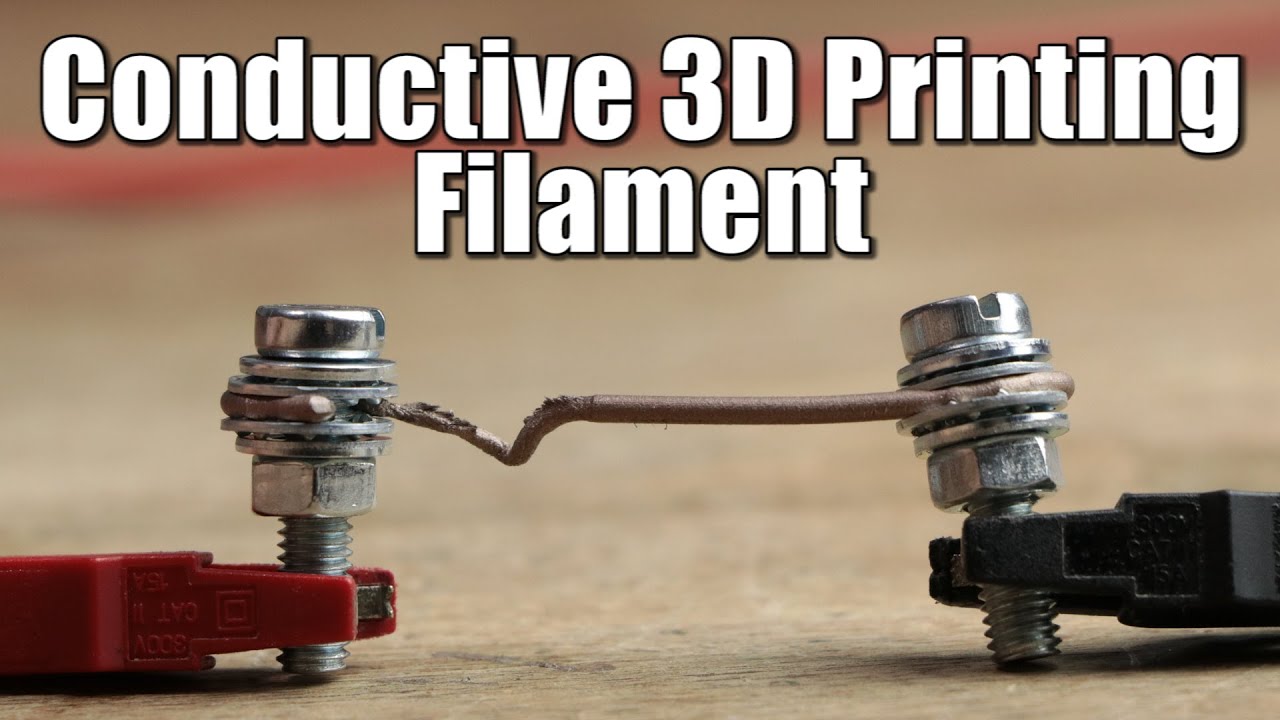
Fm8IR-lBfRQ | 25 Sep 2016
Previous video: https://youtu.be/XtpOl8FpkB8 Twitter: https://twitter.com/GreatScottLab Support me for more videos: https://www.patreon.com/GreatScott?ty=h In this video I will have a look at the currently most promising conductive 3D printing filament in order to find out how easy it is to print with, how high its resistance is and how much power it can handle. Music: 2011 Lookalike by Bartlebeats Killing Time, Kevin MacLeod (incompetech.com) You want to support my videos? You can browse and buy tools&materials from my Amazon Store. This way I get a small commission: Amazon.de: http://astore.amazon.de/great043-21 Amazon.com:http://astore.amazon.com/gre09a-20 Amazon.co.uk: http://astore.amazon.co.uk/gre0b-21 Or you feel super generous and want to use this Amazon link as your Amazon home page. And do not worry, your purchases are all anonym and the prices are all the same: Amazon.de:http://www.amazon.de/?_encoding=UTF8&camp=1638&creative=19454&linkCode=ur2&site-redirect=de&tag=great043-21&linkId=ORZEQZEOVJAFURCZ Amazon.com:http://www.amazon.com/?_encoding=UTF8&camp=1789&creative=390957&linkCode=ur2&tag=gre09a-20&linkId=I5NDCEAVCD2OWM4S
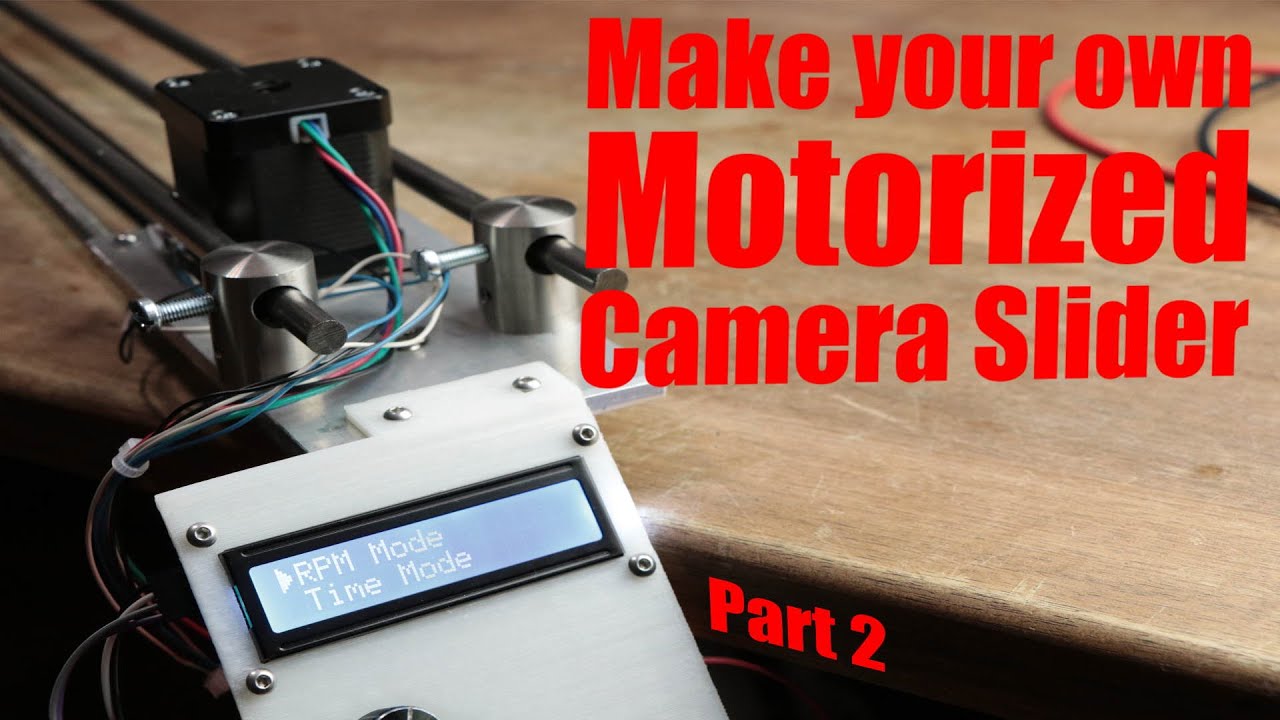
XtpOl8FpkB8 | 18 Sep 2016
Project file on the free design tool: https://easyeda.com/GreatScott/MotorizedCameraSlider-vaYyw53fr Previous video: https://youtu.be/bkqoKWP4Oy4 Part 1: https://youtu.be/2n3viPBmx-E DIY FM Radio: https://youtu.be/RqyhvlMKt14 Second channel: https://www.youtube.com/channel/UChDhmjwek68frAz_p4ySBuQ Facebook: https://www.facebook.com/greatscottlab Twitter: https://twitter.com/GreatScottLab Support me for more videos: https://www.patreon.com/GreatScott?ty=h Project information (schematic, code, ....) on Instructables: http://www.instructables.com/id/Make-Your-Own-Motorized-Camera-Slider/ Thanks to EasyEDA for sponsoring this video. Check out their free circuit design tool here: https://easyeda.com Parts list (only electronics): Amazon.com: 1x Arduino Nano: http://amzn.to/2cHpj7Q 1x A4988 Stepper Motor IC: http://amzn.to/2cNzXZ3 1x 74HC14N Schmitt trigger IC: http://amzn.to/2cHMwVV 1x 16x2 I2C LCD: http://amzn.to/2cHnNmj 1x Stepper Motor: http://amzn.to/2cvhxQ3 1x Rotary Encoder: http://amzn.to/2cHppwe 2x Limit Switches: http://amzn.to/2cJY3Tl Ebay: 1x Arduino Nano: http://rover.ebay.com/rover/1/711-53200-19255-0/1?icep_ff3=2&pub=5575101368&toolid=10001&campid=5337582279&customid=&icep_item=162008656870&ipn=psmain&icep_vectorid=229466&kwid=902099&mtid=824&kw=lg 1x A4988 Stepper Motor IC: http://rover.ebay.com/rover/1/711-53200-19255-0/1?icep_ff3=2&pub=5575101368&toolid=10001&campid=5337582279&customid=&icep_item=221921771439&ipn=psmain&icep_vectorid=229466&kwid=902099&mtid=824&kw=lg 1x 74HC14N Schmitt trigger IC: http://rover.ebay.com/rover/1/711-53200-19255-0/1?icep_ff3=2&pub=5575101368&toolid=10001&campid=5337582279&customid=&icep_item=171446168073&ipn=psmain&icep_vectorid=229466&kwid=902099&mtid=824&kw=lg 1x 16x2 I2C LCD: http://rover.ebay.com/rover/1/711-53200-19255-0/1?icep_ff3=2&pub=5575101368&toolid=10001&campid=5337582279&customid=&icep_item=310565065847&ipn=psmain&icep_vectorid=229466&kwid=902099&mtid=824&kw=lg 1x Stepper Motor: http://rover.ebay.com/rover/1/711-53200-19255-0/1?icep_ff3=2&pub=5575101368&toolid=10001&campid=5337582279&customid=&icep_item=281906191797&ipn=psmain&icep_vectorid=229466&kwid=902099&mtid=824&kw=lg 1x Rotary Encoder: http://rover.ebay.com/rover/1/711-53200-19255-0/1?icep_ff3=2&pub=5575101368&toolid=10001&campid=5337582279&customid=&icep_item=400985436283&ipn=psmain&icep_vectorid=229466&kwid=902099&mtid=824&kw=lg 2x Limit Switches: http://rover.ebay.com/rover/1/711-53200-19255-0/1?icep_ff3=2&pub=5575101368&toolid=10001&campid=5337582279&customid=&icep_item=131876599744&ipn=psmain&icep_vectorid=229466&kwid=902099&mtid=824&kw=lg Amazon.de: 1x Arduino Nano: http://amzn.to/2daPPYy 1x A4988 Stepper Motor IC: http://amzn.to/2cjhhBj 1x 74HC14N Schmitt trigger IC: http://amzn.to/2daPTrg 1x 16x2 I2C LCD: http://amzn.to/2cA2jqL 1x Stepper Motor: http://amzn.to/2cQlwGp 1x Rotary Encoder: http://amzn.to/2cA2WRe 2x Limit Switches: http://amzn.to/2cA2rGS In this project I will show you how I repurposed two old camera tripods in order to create a motorized camera slider. The mechanical system consist mostly of aluminium and steel which makes the slider sturdy and pretty decent looking. The electrical system consists of an Arduino Nano with LCD, rotary encoder, limit switches and stepper motor. Music: In the Hall of the Mountain King, Kevin MacLeod Ecstatic Wave, Jens Kiilstofte https://machinimasound.com/music You want to support my videos? You can browse and buy tools&materials from my Amazon Store. This way I get a small commission: Amazon.de: http://astore.amazon.de/great043-21 Amazon.com:http://astore.amazon.com/gre09a-20 Amazon.co.uk: http://astore.amazon.co.uk/gre0b-21 Or you feel super generous and want to use this Amazon link as your Amazon home page. And do not worry, your purchases are all anonym and the prices are all the same: Amazon.de:http://www.amazon.de/?_encoding=UTF8&camp=1638&creative=19454&linkCode=ur2&site-redirect=de&tag=great043-21&linkId=ORZEQZEOVJAFURCZ Amazon.com:http://www.amazon.com/?_encoding=UTF8&camp=1789&creative=390957&linkCode=ur2&tag=gre09a-20&linkId=I5NDCEAVCD2OWM4S
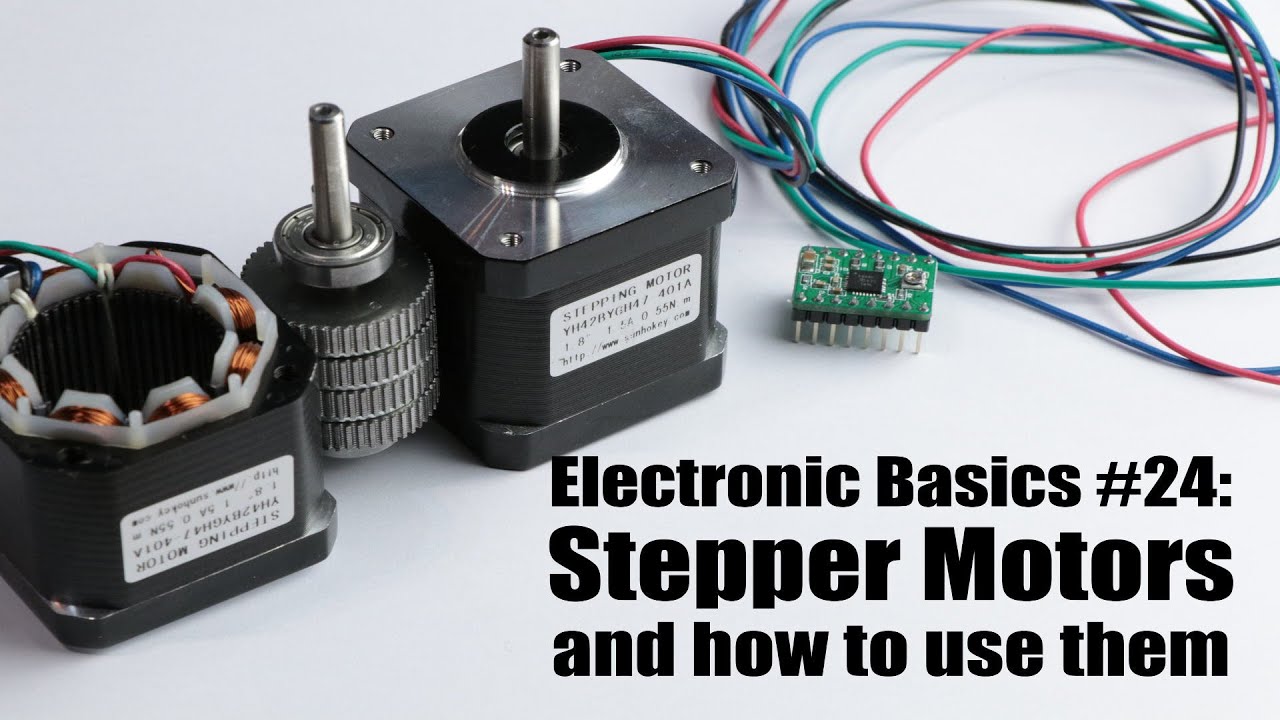
bkqoKWP4Oy4 | 11 Sep 2016
Previous video: https://youtu.be/2n3viPBmx-E Twitter: https://twitter.com/GreatScottLab Support me for more videos: https://www.patreon.com/GreatScott?ty=h You can get your Stepper Motor and Driver circuit here: Amazon.com: Stepper Motor: http://amzn.to/2cvhxQ3 A4988 Driver: http://amzn.to/2cNzXZ3 Amazon.de: Stepper Motor: http://amzn.to/2cQlwGp A4988 Driver: http://amzn.to/2cjhhBj Ebay: Stepper Motor: http://rover.ebay.com/rover/1/711-53200-19255-0/1?icep_ff3=2&pub=5575101368&toolid=10001&campid=5337582279&customid=&icep_item=281906191797&ipn=psmain&icep_vectorid=229466&kwid=902099&mtid=824&kw=lg A4988 Driver: http://rover.ebay.com/rover/1/711-53200-19255-0/1?icep_ff3=2&pub=5575101368&toolid=10001&campid=5337582279&customid=&icep_item=221921771439&ipn=psmain&icep_vectorid=229466&kwid=902099&mtid=824&kw=lg In this episode of Electronic Basics I will show you how a modern and also cmmon hybrid synchronous stepper motor works, why they are so often used and how you can control them with and without a µC. Music: 2011 Lookalike by Bartlebeats Killing Time, Kevin MacLeod (incompetech.com) You want to support my videos? You can browse and buy tools&materials from my Amazon Store. This way I get a small commission: Amazon.de: http://astore.amazon.de/great043-21 Amazon.com:http://astore.amazon.com/gre09a-20 Amazon.co.uk: http://astore.amazon.co.uk/gre0b-21 Or you feel super generous and want to use this Amazon link as your Amazon home page. And do not worry, your purchases are all anonym and the prices are all the same: Amazon.de:http://www.amazon.de/?_encoding=UTF8&camp=1638&creative=19454&linkCode=ur2&site-redirect=de&tag=great043-21&linkId=ORZEQZEOVJAFURCZ Amazon.com:http://www.amazon.com/?_encoding=UTF8&camp=1789&creative=390957&linkCode=ur2&tag=gre09a-20&linkId=I5NDCEAVCD2OWM4S

2n3viPBmx-E | 04 Sep 2016
Previous video: https://youtu.be/KXRmdDAWHMg Twitter: https://twitter.com/GreatScottLab Support me for more videos: https://www.patreon.com/GreatScott?ty=h Parts list (only for the mechanical build): Amazon.com: 4x Ball Bearing Slide Bushing: http://amzn.to/2bPalMg 2x Flanged Ball Bearing: http://amzn.to/2bPaGPg Timing Belt: http://amzn.to/2c3ycZi 1x Pulley: http://amzn.to/2bW7ZZu 2x 1/4" to 3/8" Convert Screw Adapter: http://amzn.to/2ceUbvj 1x Tripod Ball Head: http://amzn.to/2c43AG5 Ebay: 4x Ball Bearing Slide Bushing: http://rover.ebay.com/rover/1/711-53200-19255-0/1?icep_ff3=2&pub=5575101368&toolid=10001&campid=5337582279&customid=&icep_item=121389221857&ipn=psmain&icep_vectorid=229466&kwid=902099&mtid=824&kw=lg 2x Flanged Ball Bearing: http://rover.ebay.com/rover/1/711-53200-19255-0/1?icep_ff3=2&pub=5575101368&toolid=10001&campid=5337582279&customid=&icep_item=371411571683&ipn=psmain&icep_vectorid=229466&kwid=902099&mtid=824&kw=lg Timing Belt: http://rover.ebay.com/rover/1/711-53200-19255-0/1?icep_ff3=2&pub=5575101368&toolid=10001&campid=5337582279&customid=&icep_item=331826373742&ipn=psmain&icep_vectorid=229466&kwid=902099&mtid=824&kw=lg 1x Pulley: http://rover.ebay.com/rover/1/711-53200-19255-0/1?icep_ff3=2&pub=5575101368&toolid=10001&campid=5337582279&customid=&icep_item=331839986494&ipn=psmain&icep_vectorid=229466&kwid=902099&mtid=824&kw=lg 2x 1/4" to 3/8" Convert Screw Adapter: http://rover.ebay.com/rover/1/711-53200-19255-0/1?icep_ff3=2&pub=5575101368&toolid=10001&campid=5337582279&customid=&icep_item=230634060998&ipn=psmain&icep_vectorid=229466&kwid=902099&mtid=824&kw=lg 1x Tripod Ball Head: http://rover.ebay.com/rover/1/711-53200-19255-0/1?icep_ff3=2&pub=5575101368&toolid=10001&campid=5337582279&customid=&icep_item=251774538285&ipn=psmain&icep_vectorid=229466&kwid=902099&mtid=824&kw=lg Amazon.de: 4x Ball Bearing Slide Bushing: http://amzn.to/2bOa5QE 2x Flanged Ball Bearing: http://amzn.to/2bVxr2B Timing Belt: http://amzn.to/2bOa5Qx 1x Pulley: http://amzn.to/2bOa5Qx 2x 1/4" to 3/8" Convert Screw Adapter: http://amzn.to/2bO9tdJ 1x Tripod Ball Head: http://amzn.to/2bO9z50 + http://amzn.to/2bVxHi4 Crossbar Holder: http://amzn.to/2cA0yK6 Home Improvement Store: 6mm Aluminium, 4mm Aluminium, 8mm 2m stainless steel pipe, 8mm 2m stainless steel rod, bolt+nuts+washers In this project I will show you how I repurposed two old camera tripods in order to create a motorized camera slider. The mechanical system consist mostly of aluminium and steel which makes the slider sturdy and pretty decent looking. The electrical system consists of an Arduino Nano with LCD, rotary encoder, limit switches and stepper motor. Music: 2011 Lookalike by Bartlebeats You want to support my videos? You can browse and buy tools&materials from my Amazon Store. This way I get a small commission: Amazon.de: http://astore.amazon.de/great043-21 Amazon.com:http://astore.amazon.com/gre09a-20 Amazon.co.uk: http://astore.amazon.co.uk/gre0b-21 Or you feel super generous and want to use this Amazon link as your Amazon home page. And do not worry, your purchases are all anonym and the prices are all the same: Amazon.de:http://www.amazon.de/?_encoding=UTF8&camp=1638&creative=19454&linkCode=ur2&site-redirect=de&tag=great043-21&linkId=ORZEQZEOVJAFURCZ Amazon.com:http://www.amazon.com/?_encoding=UTF8&camp=1789&creative=390957&linkCode=ur2&tag=gre09a-20&linkId=I5NDCEAVCD2OWM4S

KXRmdDAWHMg | 28 Aug 2016
Previous video: https://youtu.be/lzXMImK_wyM Twitter: https://twitter.com/GreatScottLab Support me for more videos: https://www.patreon.com/GreatScott?ty=h In this video I will have a look at two chinese power saver devices, explain how they work and why those might not be a good option to save power. Along the way I will talk about reactive power and distortion reactive power. Music: 2011 Lookalike by Bartlebeats Killing Time, Kevin MacLeod (incompetech.com) You want to support my videos? You can browse and buy tools&materials from my Amazon Store. This way I get a small commission: Amazon.de: http://astore.amazon.de/great043-21 Amazon.com:http://astore.amazon.com/gre09a-20 Amazon.co.uk: http://astore.amazon.co.uk/gre0b-21 Or you feel super generous and want to use this Amazon link as your Amazon home page. And do not worry, your purchases are all anonym and the prices are all the same: Amazon.de:http://www.amazon.de/?_encoding=UTF8&camp=1638&creative=19454&linkCode=ur2&site-redirect=de&tag=great043-21&linkId=ORZEQZEOVJAFURCZ Amazon.com:http://www.amazon.com/?_encoding=UTF8&camp=1789&creative=390957&linkCode=ur2&tag=gre09a-20&linkId=I5NDCEAVCD2OWM4S
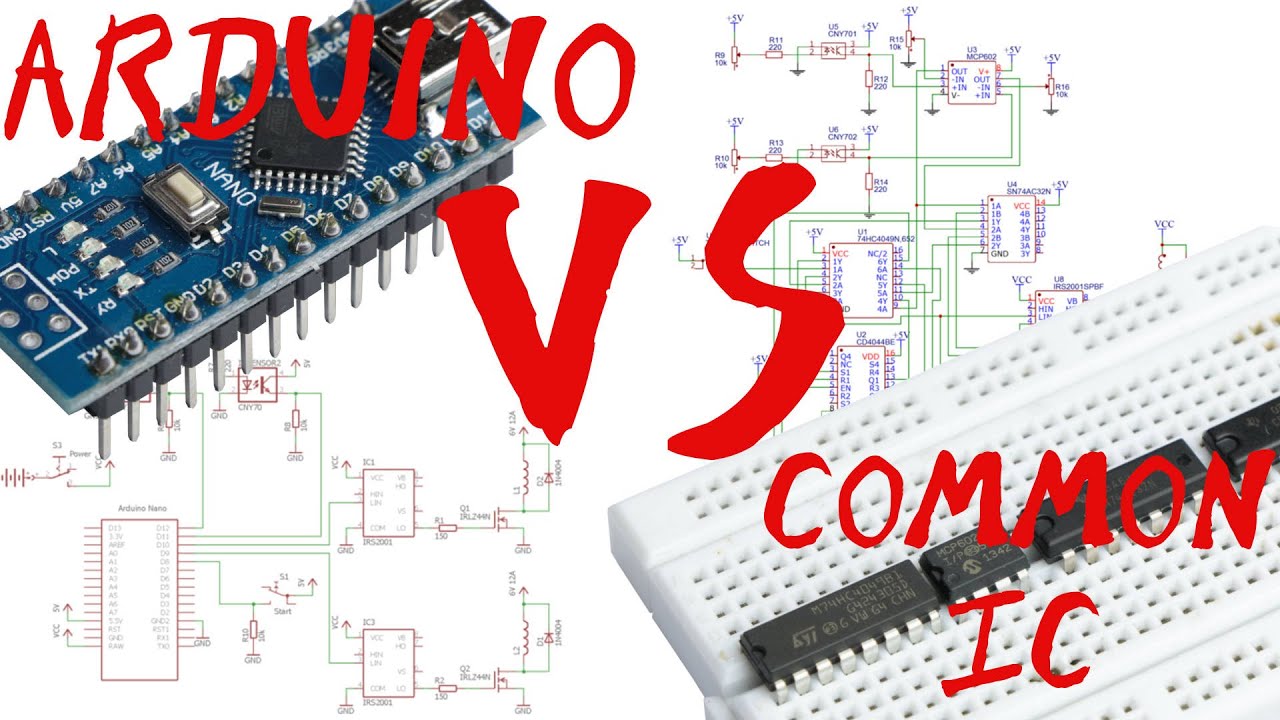
lzXMImK_wyM | 21 Aug 2016
Project files on EasyEDA: https://easyeda.com/GreatScott/CoilGun_LogicSchematic-eu0UcuoFX Previous video: https://youtu.be/o6_UYb6I4x4 Coilgun video: https://youtu.be/PMU9TQUDhow Facebook: https://www.facebook.com/greatscottlab Twitter: https://twitter.com/GreatScottLab Support me for more videos: https://www.patreon.com/GreatScott?ty=h Thanks to EasyEDA for sponsoring this video. Check out their free circuit design tool here: https://easyeda.com In this VS epsiode I will create a circuit with common ICs that can replace the function of the Arduino in my coilgun project. Along the way I will present you the pros and cons of such an IC design. Music: 2011 Lookalike by Bartlebeats You want to support my videos? You can browse and buy tools&materials from my Amazon Store. This way I get a small commission: Amazon.de: http://astore.amazon.de/great043-21 Amazon.com:http://astore.amazon.com/gre09a-20 Amazon.co.uk: http://astore.amazon.co.uk/gre0b-21 Or you feel super generous and want to use this Amazon link as your Amazon home page. And do not worry, your purchases are all anonym and the prices are all the same: Amazon.de:http://www.amazon.de/?_encoding=UTF8&camp=1638&creative=19454&linkCode=ur2&site-redirect=de&tag=great043-21&linkId=ORZEQZEOVJAFURCZ Amazon.com:http://www.amazon.com/?_encoding=UTF8&camp=1789&creative=390957&linkCode=ur2&tag=gre09a-20&linkId=I5NDCEAVCD2OWM4S

o6_UYb6I4x4 | 17 Aug 2016
Previous video: https://youtu.be/PMU9TQUDhow Make your own 10x10 LED Matrix: https://youtu.be/D_QBlFIQk-o Facebook: https://www.facebook.com/greatscottlab Twitter: https://twitter.com/GreatScottLab Support me for more videos: https://www.patreon.com/GreatScott?ty=h Tyler Jones Channel: https://www.youtube.com/user/topidude Matrix Control Software Download: https://drive.google.com/file/d/0B3WGFfMxBANHVlJZTXRDb1RDTVE/view In this video I will show you how to easily create animations for your LED Matrix (2x2 - 16x16) with the help of a software. It can even generate Arduino Code so that you can playback the created animations without the software running. Music: 2011 Lookalike by Bartlebeats You want to support my videos? You can browse and buy tools&materials from my Amazon Store. This way I get a small commission: Amazon.de: http://astore.amazon.de/great043-21 Amazon.com:http://astore.amazon.com/gre09a-20 Amazon.co.uk: http://astore.amazon.co.uk/gre0b-21 Or you feel super generous and want to use this Amazon link as your Amazon home page. And do not worry, your purchases are all anonym and the prices are all the same: Amazon.de:http://www.amazon.de/?_encoding=UTF8&camp=1638&creative=19454&linkCode=ur2&site-redirect=de&tag=great043-21&linkId=ORZEQZEOVJAFURCZ Amazon.com:http://www.amazon.com/?_encoding=UTF8&camp=1789&creative=390957&linkCode=ur2&tag=gre09a-20&linkId=I5NDCEAVCD2OWM4S

PMU9TQUDhow | 14 Aug 2016
Previous video: https://youtu.be/XUY0-doBx1U Facebook: https://www.facebook.com/greatscottlab Twitter: https://twitter.com/GreatScottLab Support me for more videos: https://www.patreon.com/GreatScott?ty=h More project information (code, pictures,....) on Instructables: http://www.instructables.com/id/Make-Your-Own-Coilgun Parts list: Amazon.com: 1x Enameled Copper Wire: http://amzn.to/2aTWPta 1x 5V 12A Power Supply: http://amzn.to/2brWBIG 1x Arduino Nano: http://amzn.to/2aRFYlc 1x Tactile Switch: http://amzn.to/2b7a0nl 2x IRS2001 MOSFET driver IC: http://amzn.to/2aRGyzp 2x IRLZ44N: http://amzn.to/2bqOw3N 2x 1N4004 Diode: http://amzn.to/2brWpZQ 2x CNY70 Optical Sensor: http://amzn.to/2brWQmO 2x 10kΩ potentiometer: http://amzn.to/2b3zzH0 3x 10kΩ, 2x220Ω, 2x150Ω Resistor: http://amzn.to/2b7aKZL 1x 9V Battery Clip: http://amzn.to/2bqNYuZ 1x 9V Battery: http://amzn.to/2bhbN8b 2x PCB Terminal: http://amzn.to/2bqNGnD Ebay: 1x Enameled Copper Wire: http://rover.ebay.com/rover/1/711-53200-19255-0/1?icep_ff3=2&pub=5575101368&toolid=10001&campid=5337582279&customid=&icep_item=221991521587&ipn=psmain&icep_vectorid=229466&kwid=902099&mtid=824&kw=lg 1x 5V 12A Power Supply: http://rover.ebay.com/rover/1/711-53200-19255-0/1?icep_ff3=2&pub=5575101368&toolid=10001&campid=5337582279&customid=&icep_item=231017751909&ipn=psmain&icep_vectorid=229466&kwid=902099&mtid=824&kw=lg 1x Arduino Nano: http://rover.ebay.com/rover/1/711-53200-19255-0/1?icep_ff3=2&pub=5575101368&toolid=10001&campid=5337582279&customid=&icep_item=181846906547&ipn=psmain&icep_vectorid=229466&kwid=902099&mtid=824&kw=lg 1x Tactile Switch: http://rover.ebay.com/rover/1/711-53200-19255-0/1?icep_ff3=2&pub=5575101368&toolid=10001&campid=5337582279&customid=&icep_item=311474322258&ipn=psmain&icep_vectorid=229466&kwid=902099&mtid=824&kw=lg 2x IRS2001 MOSFET driver IC: http://rover.ebay.com/rover/1/711-53200-19255-0/1?icep_ff3=2&pub=5575101368&toolid=10001&campid=5337582279&customid=&icep_item=191933638046&ipn=psmain&icep_vectorid=229466&kwid=902099&mtid=824&kw=lg 2x IRLZ44N: http://rover.ebay.com/rover/1/711-53200-19255-0/1?icep_ff3=2&pub=5575101368&toolid=10001&campid=5337582279&customid=&icep_item=261074291323&ipn=psmain&icep_vectorid=229466&kwid=902099&mtid=824&kw=lg 2x 1N4004 Diode: http://rover.ebay.com/rover/1/711-53200-19255-0/1?icep_ff3=2&pub=5575101368&toolid=10001&campid=5337582279&customid=&icep_item=131752125946&ipn=psmain&icep_vectorid=229466&kwid=902099&mtid=824&kw=lg 2x CNY70 Optical Sensor: http://rover.ebay.com/rover/1/711-53200-19255-0/1?icep_ff3=2&pub=5575101368&toolid=10001&campid=5337582279&customid=&icep_item=191674492734&ipn=psmain&icep_vectorid=229466&kwid=902099&mtid=824&kw=lg 2x 10kΩ potentiometer: http://rover.ebay.com/rover/1/711-53200-19255-0/1?icep_ff3=2&pub=5575101368&toolid=10001&campid=5337582279&customid=&icep_item=281978367083&ipn=psmain&icep_vectorid=229466&kwid=902099&mtid=824&kw=lg 3x 10kΩ, 2x220Ω, 2x150Ω Resistor: http://rover.ebay.com/rover/1/711-53200-19255-0/1?icep_ff3=2&pub=5575101368&toolid=10001&campid=5337582279&customid=&icep_item=162134893020&ipn=psmain&icep_vectorid=229466&kwid=902099&mtid=824&kw=lg 1x 9V Battery Clip: http://rover.ebay.com/rover/1/711-53200-19255-0/1?icep_ff3=2&pub=5575101368&toolid=10001&campid=5337582279&customid=&icep_item=191773028301&ipn=psmain&icep_vectorid=229466&kwid=902099&mtid=824&kw=lg 1x 9V Battery: http://rover.ebay.com/rover/1/711-53200-19255-0/1?icep_ff3=2&pub=5575101368&toolid=10001&campid=5337582279&customid=&icep_item=252498957979&ipn=psmain&icep_vectorid=229466&kwid=902099&mtid=824&kw=lg 2x PCB Terminal: http://rover.ebay.com/rover/1/711-53200-19255-0/1?icep_ff3=2&pub=5575101368&toolid=10001&campid=5337582279&customid=&icep_item=271560005137&ipn=psmain&icep_vectorid=229466&kwid=902099&mtid=824&kw=lg In this video I will show you how to turn on and off coils precisely in order to create a coilgun. In my case it is a pretty harmless "gun" that can accelerate ferromagnetic projectiles to safe speed levels. Music: 2011 Lookalike by Bartlebeats You want to support my videos? You can browse and buy tools&materials from my Amazon Store. This way I get a small commission: Amazon.de: http://astore.amazon.de/great043-21 Amazon.com:http://astore.amazon.com/gre09a-20 Amazon.co.uk: http://astore.amazon.co.uk/gre0b-21 Or you feel super generous and want to use this Amazon link as your Amazon home page. And do not worry, your purchases are all anonym and the prices are all the same: Amazon.de:http://www.amazon.de/?_encoding=UTF8&camp=1638&creative=19454&linkCode=ur2&site-redirect=de&tag=great043-21&linkId=ORZEQZEOVJAFURCZ Amazon.com:http://www.amazon.com/?_encoding=UTF8&camp=1789&creative=390957&linkCode=ur2&tag=gre09a-20&linkId=I5NDCEAVCD2OWM4S
k6gdC3PTTQQ | 07 Aug 2016
Facebook: https://www.facebook.com/greatscottlab Twitter: https://twitter.com/GreatScottLab Support me for more videos: https://www.patreon.com/GreatScott?ty=h Questions: 1. Are there any circuit building programs, that you know of, that have a decent component database and that calculates values like voltage and amps and have a theoretical oscilloscope? 0:28 2. I have a lot of old TVs, laptops and tablets…I want to make y couple into screen that will playback video off of my car entertainment deck which is a joying 135. Is it possible? 0:48 3. What type of soldering iron do you use? 1:21 4. Have you ever considered buying different SBCs? Have you ever thought about creating your own SBC? 1:29 5. You have a 3D Printer. Can’t you make a casing? 1:48 6. When I search for Arduino on Amazon/Ebay, most of them are only Arduino compatible. Are there any big differences? What would you recommend? 2:12 7. How do you find out about ICs? What resources do you use? 2:48 8. ur a lefty? I am. My ee techer thought I was holding the iron wrong before she knew I was lefty. 3:00 9. Are you involved in any local makerspaces, electronics clubs, etc.? 3:12 Top three comments of the month 3:24 Music: Killing Time, Kevin MacLeod (incompetech.com) You want to support my videos? You can browse and buy tools&materials from my Amazon Store. This way I get a small commission: Amazon.de: http://astore.amazon.de/great043-21 Amazon.com:http://astore.amazon.com/gre09a-20 Amazon.co.uk: http://astore.amazon.co.uk/gre0b-21 Or you feel super generous and want to use this Amazon link as your Amazon home page. And do not worry, your purchases are all anonym and the prices are all the same: Amazon.de:http://www.amazon.de/?_encoding=UTF8&camp=1638&creative=19454&linkCode=ur2&site-redirect=de&tag=great043-21&linkId=ORZEQZEOVJAFURCZ Amazon.com:http://www.amazon.com/?_encoding=UTF8&camp=1789&creative=390957&linkCode=ur2&tag=gre09a-20&linkId=I5NDCEAVCD2OWM4S

XUY0-doBx1U | 31 Jul 2016
Previous video: https://youtu.be/o4_NeqlJgOs Facebook: https://www.facebook.com/greatscottlab Twitter: https://twitter.com/GreatScottLab Support me for more videos: https://www.patreon.com/GreatScott?ty=h Thanks to EasyEDA for sponsoring this video. Check out their free circuit design tool here: https://easyeda.com Project files on EasyEDA: https://easyeda.com/GreatScott/IRRemote-j0cMKIGfh More project information (code, pictures,....) on Instructables: http://www.instructables.com/id/How-to-Add-an-IR-Remote-to-a-Speaker-System Parts list: Amazon.com: 1x Perfboard with copper dots: http://amzn.to/2am6I2D 1x Arduino Pro Mini: http://amzn.to/2anrUm9 1x ATmega328-PU: http://amzn.to/2adv5tJ 1x 16MHz Crystal: http://amzn.to/2adv2Ok 2x 22pF Capacitor: http://amzn.to/2aduKXY 5x 10kΩ, 1x100Ω, 3x2kΩ Resistor: http://amzn.to/2anrWKB 1x IR LED: http://amzn.to/2aIpBcC 4x Tactile Switch: http://amzn.to/2aIpZYB 3x BC637 NPN BJT: http://amzn.to/2anrsEv 1x Button Cell Holder: http://amzn.to/2anrLit 1x Button Cell: http://amzn.to/2amsRYI Amazon.de: 1x Perfboard with copper dots: http://amzn.to/2aAt9xO 1x Arduino Pro Mini: http://amzn.to/2aCkv3s 1x ATmega328-PU: http://amzn.to/2aCkIUm 1x 16MHz Crystal: http://amzn.to/2aAtcJW 2x 22pF Capacitor: http://amzn.to/2aAtcJW 5x 10kΩ, 1x100Ω, 3x2kΩ Resistor: http://amzn.to/2aAsWdV 1x IR LED: http://amzn.to/2aAsH2N 4x Tactile Switch: http://amzn.to/2aAtmB2 3x BC637 NPN BJT: http://amzn.to/2aCkPzl 1x Button Cell Holder: http://amzn.to/2aAt9Ot 1x Button Cell: http://amzn.to/2aCkKeP Ebay: 1x Perfboard with copper dots: http://rover.ebay.com/rover/1/711-53200-19255-0/1?icep_ff3=2&pub=5575101368&toolid=10001&campid=5337582279&customid=&icep_item=122012966276&ipn=psmain&icep_vectorid=229466&kwid=902099&mtid=824&kw=lg 1x Arduino Pro Mini: http://rover.ebay.com/rover/1/711-53200-19255-0/1?icep_ff3=2&pub=5575101368&toolid=10001&campid=5337582279&customid=&icep_item=191679508570&ipn=psmain&icep_vectorid=229466&kwid=902099&mtid=824&kw=lg 1x ATmega328-PU: http://rover.ebay.com/rover/1/711-53200-19255-0/1?icep_ff3=2&pub=5575101368&toolid=10001&campid=5337582279&customid=&icep_item=141871645094&ipn=psmain&icep_vectorid=229466&kwid=902099&mtid=824&kw=lg 1x 16MHz Crystal: http://rover.ebay.com/rover/1/711-53200-19255-0/1?icep_ff3=2&pub=5575101368&toolid=10001&campid=5337582279&customid=&icep_item=381374783753&ipn=psmain&icep_vectorid=229466&kwid=902099&mtid=824&kw=lg 2x 22pF Capacitor: http://rover.ebay.com/rover/1/711-53200-19255-0/1?icep_ff3=2&pub=5575101368&toolid=10001&campid=5337582279&customid=&icep_item=321688041876&ipn=psmain&icep_vectorid=229466&kwid=902099&mtid=824&kw=lg 5x 10kΩ, 1x100Ω, 3x2kΩ Resistor: http://rover.ebay.com/rover/1/711-53200-19255-0/1?icep_ff3=2&pub=5575101368&toolid=10001&campid=5337582279&customid=&icep_item=162134893020&ipn=psmain&icep_vectorid=229466&kwid=902099&mtid=824&kw=lg 1x IR LED: http://rover.ebay.com/rover/1/711-53200-19255-0/1?icep_ff3=2&pub=5575101368&toolid=10001&campid=5337582279&customid=&icep_item=201567087974&ipn=psmain&icep_vectorid=229466&kwid=902099&mtid=824&kw=lg 4x Tactile Switch: http://rover.ebay.com/rover/1/711-53200-19255-0/1?icep_ff3=2&pub=5575101368&toolid=10001&campid=5337582279&customid=&icep_item=231657583372&ipn=psmain&icep_vectorid=229466&kwid=902099&mtid=824&kw=lg 3x BC637 NPN BJT: http://rover.ebay.com/rover/1/711-53200-19255-0/1?icep_ff3=2&pub=5575101368&toolid=10001&campid=5337582279&customid=&icep_item=171396673545&ipn=psmain&icep_vectorid=229466&kwid=902099&mtid=824&kw=lg 1x Button Cell Holder: http://rover.ebay.com/rover/1/711-53200-19255-0/1?icep_ff3=2&pub=5575101368&toolid=10001&campid=5337582279&customid=&icep_item=171578538214&ipn=psmain&icep_vectorid=229466&kwid=902099&mtid=824&kw=lg 1x Button Cell: http://rover.ebay.com/rover/1/711-53200-19255-0/1?icep_ff3=2&pub=5575101368&toolid=10001&campid=5337582279&customid=&icep_item=222076646694&ipn=psmain&icep_vectorid=229466&kwid=902099&mtid=824&kw=lg In this episode of HACKED! I will show you how I created an additional circuit for my speaker system in order to control it wirelessly with a homemade IR remote. Music: 2011 Lookalike by Bartlebeats You want to support my videos? You can browse and buy tools&materials from my Amazon Store. This way I get a small commission: Amazon.de: http://astore.amazon.de/great043-21 Amazon.com:http://astore.amazon.com/gre09a-20 Amazon.co.uk: http://astore.amazon.co.uk/gre0b-21 Or you feel super generous and want to use this Amazon link as your Amazon home page. And do not worry, your purchases are all anonym and the prices are all the same: Amazon.de:http://www.amazon.de/?_encoding=UTF8&camp=1638&creative=19454&linkCode=ur2&site-redirect=de&tag=great043-21&linkId=ORZEQZEOVJAFURCZ Amazon.com:http://www.amazon.com/?_encoding=UTF8&camp=1789&creative=390957&linkCode=ur2&tag=gre09a-20&linkId=I5NDCEAVCD2OWM4S
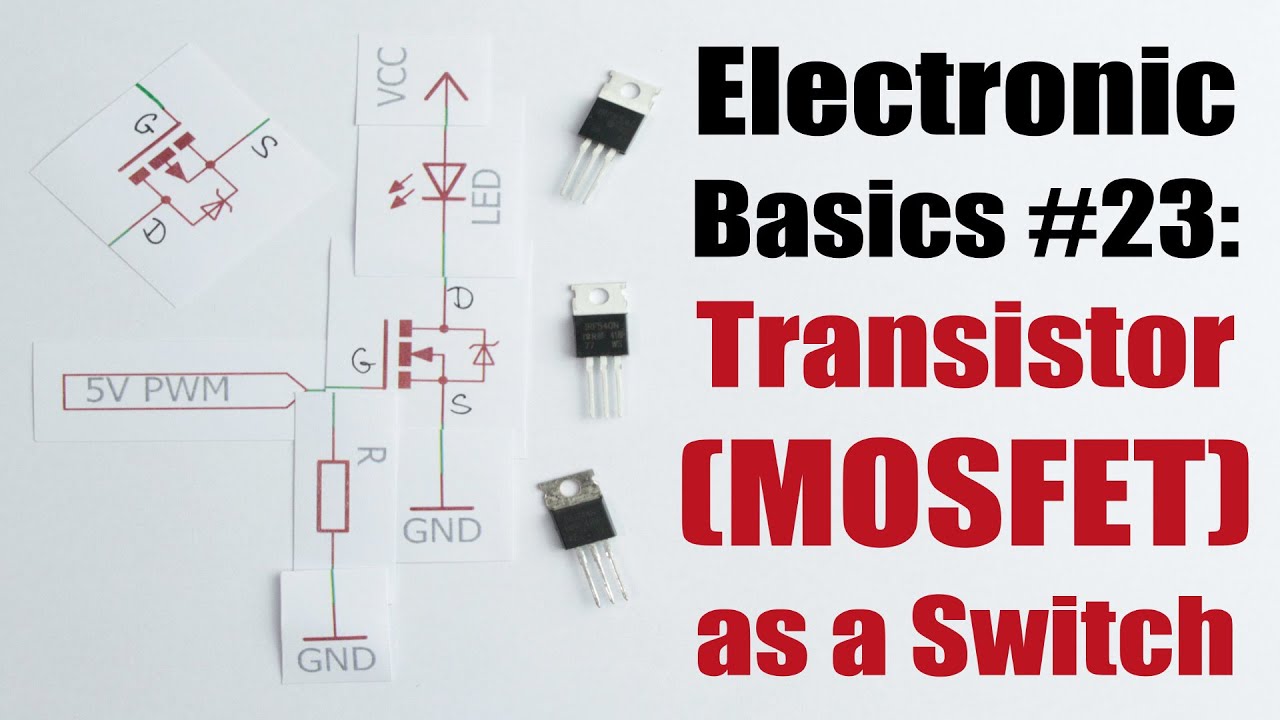
o4_NeqlJgOs | 24 Jul 2016
Electronic Basics BJT: https://youtu.be/WRm2oUw4owE Previous video: https://youtu.be/ttwsMwG_Gco Twitter: https://twitter.com/GreatScottLab Support me for more videos: https://www.patreon.com/GreatScott?ty=h My favorite N-channel MOSFET: http://rover.ebay.com/rover/1/711-53200-19255-0/1?icep_ff3=2&pub=5575101368&toolid=10001&campid=5337582279&customid=&icep_item=261074291323&ipn=psmain&icep_vectorid=229466&kwid=902099&mtid=824&kw=lg My favorite P-channel MOSFET: http://rover.ebay.com/rover/1/711-53200-19255-0/1?icep_ff3=2&pub=5575101368&toolid=10001&campid=5337582279&customid=&icep_item=201415050673&ipn=psmain&icep_vectorid=229466&kwid=902099&mtid=824&kw=lg More information about MOSFETs: http://www.st.com/content/ccc/resource/technical/document/application_note/68/cd/c6/ab/ef/17/41/06/CD00003900.pdf/files/CD00003900.pdf/jcr:content/translations/en.CD00003900.pdf http://www.vishay.com/docs/68214/turnonprocess.pdf http://www.infineon.com/dgdl/mosfet.pdf?fileId=5546d462533600a4015357444e913f4f In this episode of Electronic Basics I will show you how to use N-channel and P-channel MOSFETs as switches in order to turn on and off your electronic load with a control signal. This way you can, for example, use your Arduino to control loads that require more current than the output of the Arduino can handle. Music: Killing Time, Kevin MacLeod (incompetech.com) You want to support my videos? You can browse and buy tools&materials from my Amazon Store. This way I get a small commission: Amazon.de: http://astore.amazon.de/great043-21 Amazon.com:http://astore.amazon.com/gre09a-20 Amazon.co.uk: http://astore.amazon.co.uk/gre0b-21 Or you feel super generous and want to use this Amazon link as your Amazon home page. And do not worry, your purchases are all anonym and the prices are all the same: Amazon.de:http://www.amazon.de/?_encoding=UTF8&camp=1638&creative=19454&linkCode=ur2&site-redirect=de&tag=great043-21&linkId=ORZEQZEOVJAFURCZ Amazon.com:http://www.amazon.com/?_encoding=UTF8&camp=1789&creative=390957&linkCode=ur2&tag=gre09a-20&linkId=I5NDCEAVCD2OWM4S

ttwsMwG_Gco | 17 Jul 2016
Previous video: https://youtu.be/jq7cqmDtZDc Facebook: https://www.facebook.com/greatscottlab Twitter: https://twitter.com/GreatScottLab Support me for more videos: https://www.patreon.com/GreatScott?ty=h Parts list, pictures, schematic on Instructables: http://www.instructables.com/id/Make-Your-Own-Crude-Shaking-Torch-Emergency-Flashl Parts list: See the parts list from the previous video to find the components for the joule thief. Amazon.com: PVC Pipe: http://amzn.to/29RX6dn Neodymium Magnets: - 2W10 Bridge Rectifier: http://amzn.to/29N6Ncv Slide Switch: http://amzn.to/29DUTTQ 1.5F 5.5V Supercapacitor: http://amzn.to/29Qg0Ca Ebay: PVC Pipe: http://rover.ebay.com/rover/1/711-53200-19255-0/1?icep_ff3=2&pub=5575101368&toolid=10001&campid=5337582279&customid=&icep_item=282079081206&ipn=psmain&icep_vectorid=229466&kwid=902099&mtid=824&kw=lg Neodymium Magnets: http://rover.ebay.com/rover/1/711-53200-19255-0/1?icep_ff3=2&pub=5575101368&toolid=10001&campid=5337582279&customid=&icep_item=121878422447&ipn=psmain&icep_vectorid=229466&kwid=902099&mtid=824&kw=lg 2W10 Bridge Rectifier: http://rover.ebay.com/rover/1/711-53200-19255-0/1?icep_ff3=2&pub=5575101368&toolid=10001&campid=5337582279&customid=&icep_item=291768010215&ipn=psmain&icep_vectorid=229466&kwid=902099&mtid=824&kw=lg Slide Switch: http://rover.ebay.com/rover/1/711-53200-19255-0/1?icep_ff3=2&pub=5575101368&toolid=10001&campid=5337582279&customid=&icep_item=252083251383&ipn=psmain&icep_vectorid=229466&kwid=902099&mtid=824&kw=lg 1.5F 5.5V Supercapacitor: http://rover.ebay.com/rover/1/711-53200-19255-0/1?icep_ff3=2&pub=5575101368&toolid=10001&campid=5337582279&customid=&icep_item=371160797535&ipn=psmain&icep_vectorid=229466&kwid=902099&mtid=824&kw=lg Amazon.de: PVC Pipe: http://amzn.to/2a7w17F Neodymium Magnets: http://amzn.to/2a7w97e 2W10 Bridge Rectifier: http://amzn.to/2a7vPoP Slide Switch: http://amzn.to/2a7vT83 1.5F 5.5V Supercapacitor: http://amzn.to/2a7whDz In this video I will show you how I combined a joule thief circuit with a coil and a magnet in order to create a shaking torch which is an emergency flashlight that does not require batteries. Music: 2011 Lookalike by Bartlebeats Killing Time, Kevin MacLeod (incompetech.com) You want to support my videos? You can browse and buy tools&materials from my Amazon Store. This way I get a small commission: Amazon.de: http://astore.amazon.de/great043-21 Amazon.com:http://astore.amazon.com/gre09a-20 Amazon.co.uk: http://astore.amazon.co.uk/gre0b-21 Or you feel super generous and want to use this Amazon link as your Amazon home page. And do not worry, your purchases are all anonym and the prices are all the same: Amazon.de:http://www.amazon.de/?_encoding=UTF8&camp=1638&creative=19454&linkCode=ur2&site-redirect=de&tag=great043-21&linkId=ORZEQZEOVJAFURCZ Amazon.com:http://www.amazon.com/?_encoding=UTF8&camp=1789&creative=390957&linkCode=ur2&tag=gre09a-20&linkId=I5NDCEAVCD2OWM4S
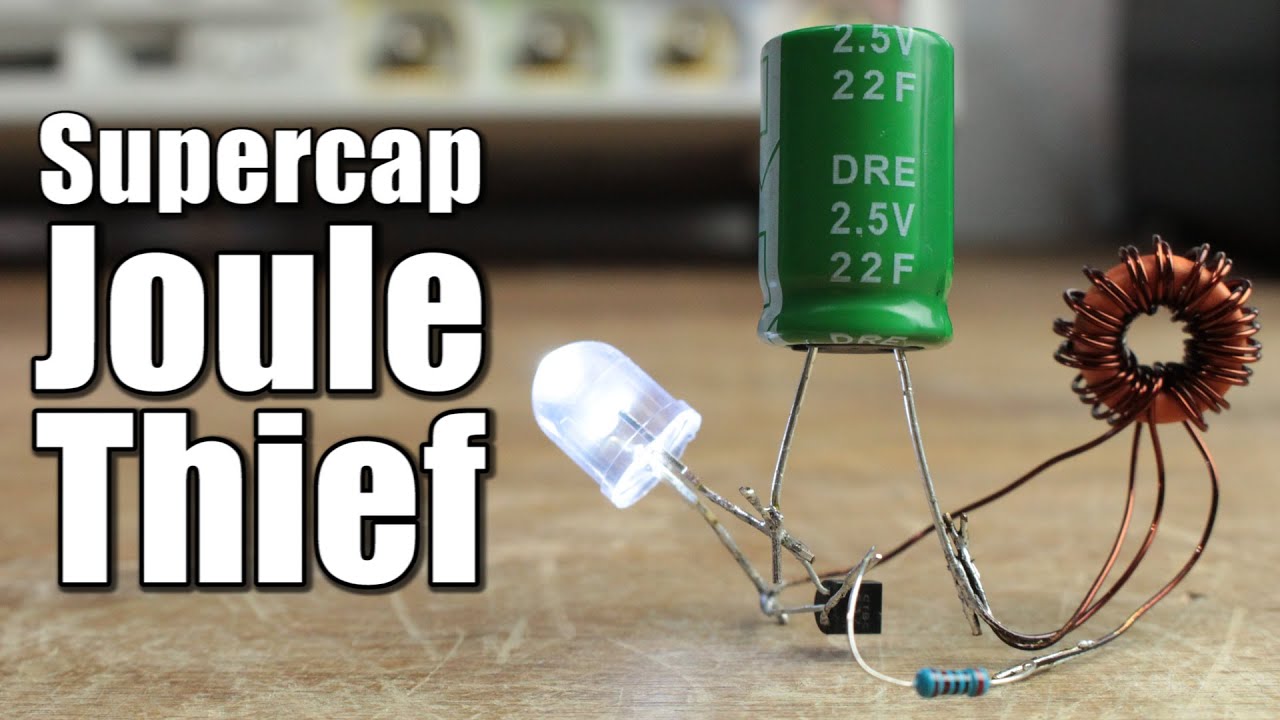
jq7cqmDtZDc | 10 Jul 2016
Previous video: https://youtu.be/WRm2oUw4owE Facebook: https://www.facebook.com/greatscottlab Twitter: https://twitter.com/GreatScottLab Support me for more videos: https://www.patreon.com/GreatScott?ty=h Parts list, schematic on Instructables: http://www.instructables.com/id/Supercapacitor-Joule-Thief Parts list: Amazon.com: BC637 NPN BJT: http://amzn.to/29sefq0 1kΩ or 2kΩ Resistor: http://amzn.to/29A1HAK Ferrite Toroid Core: http://amzn.to/29yiRiM Enameled copper wire: http://amzn.to/29wGG8f LED: http://amzn.to/29seXnf Supercapacitor: http://amzn.to/29qPAm7 Ebay: BC637 NPN BJT: http://rover.ebay.com/rover/1/711-53200-19255-0/1?icep_ff3=2&pub=5575101368&toolid=10001&campid=5337582279&customid=&icep_item=171396673545&ipn=psmain&icep_vectorid=229466&kwid=902099&mtid=824&kw=lg 1kΩ or 2kΩ Resistor: http://rover.ebay.com/rover/1/711-53200-19255-0/1?icep_ff3=2&pub=5575101368&toolid=10001&campid=5337582279&customid=&icep_item=271598211084&ipn=psmain&icep_vectorid=229466&kwid=902099&mtid=824&kw=lg Ferrite Toroid Core: http://rover.ebay.com/rover/1/711-53200-19255-0/1?icep_ff3=2&pub=5575101368&toolid=10001&campid=5337582279&customid=&icep_item=310577907012&ipn=psmain&icep_vectorid=229466&kwid=902099&mtid=824&kw=lg Enameled copper wire: http://rover.ebay.com/rover/1/711-53200-19255-0/1?icep_ff3=2&pub=5575101368&toolid=10001&campid=5337582279&customid=&icep_item=261087234154&ipn=psmain&icep_vectorid=229466&kwid=902099&mtid=824&kw=lg LED: http://rover.ebay.com/rover/1/711-53200-19255-0/1?icep_ff3=2&pub=5575101368&toolid=10001&campid=5337582279&customid=&icep_item=221299391249&ipn=psmain&icep_vectorid=229466&kwid=902099&mtid=824&kw=lg Supercapacitor: http://rover.ebay.com/rover/1/711-53200-19255-0/1?icep_ff3=2&pub=5575101368&toolid=10001&campid=5337582279&customid=&icep_item=281482528995&ipn=psmain&icep_vectorid=229466&kwid=902099&mtid=824&kw=lg Amazon.de: BC637 NPN BJT: http://amzn.to/29sfdTa 1kΩ or 2kΩ Resistor: http://amzn.to/1E9uEhN Ferrite Toroid Core: http://amzn.to/29sg9XB Enameled copper wire: http://amzn.to/29sfxkU LED: http://amzn.to/29sfTYR Supercapacitor: http://amzn.to/29MqJOG In this video I will show you how I created a very popular and easy to build circuit, the joule thief, in order to power LEDs with voltages from 0.5V to 2.5V. Music: 2011 Lookalike by Bartlebeats You want to support my videos? You can browse and buy tools&materials from my Amazon Store. This way I get a small commission: Amazon.de: http://astore.amazon.de/great043-21 Amazon.com:http://astore.amazon.com/gre09a-20 Amazon.co.uk: http://astore.amazon.co.uk/gre0b-21 Or you feel super generous and want to use this Amazon link as your Amazon home page. And do not worry, your purchases are all anonym and the prices are all the same: Amazon.de:http://www.amazon.de/?_encoding=UTF8&camp=1638&creative=19454&linkCode=ur2&site-redirect=de&tag=great043-21&linkId=ORZEQZEOVJAFURCZ Amazon.com:http://www.amazon.com/?_encoding=UTF8&camp=1789&creative=390957&linkCode=ur2&tag=gre09a-20&linkId=I5NDCEAVCD2OWM4S

Qhh8S68Kfzo | 03 Jul 2016
Facebook: https://www.facebook.com/greatscottlab Twitter: https://twitter.com/GreatScottLab Support me for more videos: https://www.patreon.com/GreatScott?ty=h Trashcan Boombox video: https://www.youtube.com/watch?v=kSg_Uc7U95E Questions: 1. When you realized you like electronics? In school with final project? or you was a little boy with take apart electronic boxes? - 0:27 2. I would be very pleased if you talk about li ion battery measurement in percentage. Thank you! - 1:02 3. Why didn’t you choose to use a class D amplifier board, which is much more efficient than a car head unit? - 1:23 4. I am lazy can I buy one if you make it? - 1:44 5. Kannste mir mal erklären.....? - 2:00 6. Please more Fix It! videos. Troubleshooting, repairing videos. - 2:23 7. What about BJT as amplifier? Will you make a video? - 2:33 8. I really like how all of your videos are edited. How do you approach pre-production? Do you write a script first and then film? How often do you have to go back and film extra bits? 2:52 9. Top three comments of the month. 3:42 Music: Killing Time, Kevin MacLeod (incompetech.com) You want to support my videos? You can browse and buy tools&materials from my Amazon Store. This way I get a small commission: Amazon.de: http://astore.amazon.de/great043-21 Amazon.com:http://astore.amazon.com/gre09a-20 Amazon.co.uk: http://astore.amazon.co.uk/gre0b-21 Or you feel super generous and want to use this Amazon link as your Amazon home page. And do not worry, your purchases are all anonym and the prices are all the same: Amazon.de:http://www.amazon.de/?_encoding=UTF8&camp=1638&creative=19454&linkCode=ur2&site-redirect=de&tag=great043-21&linkId=ORZEQZEOVJAFURCZ Amazon.com:http://www.amazon.com/?_encoding=UTF8&camp=1789&creative=390957&linkCode=ur2&tag=gre09a-20&linkId=I5NDCEAVCD2OWM4S

WRm2oUw4owE | 26 Jun 2016
Previous video: https://youtu.be/D_QBlFIQk-o OpAmp video: https://youtu.be/kqCV-HGJc6A Facebook: https://www.facebook.com/greatscottlab Twitter: https://twitter.com/GreatScottLab Support me for more videos: https://www.patreon.com/GreatScott?ty=h In this episode of Electronic Basics I will show you how to use NPN and PNP Bipolar Junction Transistors as switches in order to turn on and off your electronic load with a control signal. This way you can, for example, use your Arduino to control loads that require more current than the output of the Arduino can handle. Music: Killing Time, Kevin MacLeod (incompetech.com) You want to support my videos? You can browse and buy tools&materials from my Amazon Store. This way I get a small commission: Amazon.de: http://astore.amazon.de/great043-21 Amazon.com:http://astore.amazon.com/gre09a-20 Amazon.co.uk: http://astore.amazon.co.uk/gre0b-21 Or you feel super generous and want to use this Amazon link as your Amazon home page. And do not worry, your purchases are all anonym and the prices are all the same: Amazon.de:http://www.amazon.de/?_encoding=UTF8&camp=1638&creative=19454&linkCode=ur2&site-redirect=de&tag=great043-21&linkId=ORZEQZEOVJAFURCZ Amazon.com:http://www.amazon.com/?_encoding=UTF8&camp=1789&creative=390957&linkCode=ur2&tag=gre09a-20&linkId=I5NDCEAVCD2OWM4S

D_QBlFIQk-o | 19 Jun 2016
Previous video: https://youtu.be/fQXBNkaB1tU Facebook: https://www.facebook.com/greatscottlab Twitter: https://twitter.com/GreatScottLab Support me for more videos: https://www.patreon.com/GreatScott?ty=h More project information (code, pictures,....) on Instructables: http://www.instructables.com/id/Make-Your-Own-10x10-LED-Matrix Parts list: Amazon.com: WS2812B LEDs: http://amzn.to/1QdVLya 5V 4A Power Supply: http://amzn.to/1UhdJfB DC Jack: http://amzn.to/1UhdwZz Arduino Nano: http://amzn.to/1UhcMUn Ebay: WS2812B LEDs: http://rover.ebay.com/rover/1/711-53200-19255-0/1?icep_ff3=2&pub=5575101368&toolid=10001&campid=5337582279&customid=&icep_item=371432213255&ipn=psmain&icep_vectorid=229466&kwid=902099&mtid=824&kw=lg 5V 4A Power Supply: http://rover.ebay.com/rover/1/711-53200-19255-0/1?icep_ff3=2&pub=5575101368&toolid=10001&campid=5337582279&customid=&icep_item=370941760364&ipn=psmain&icep_vectorid=229466&kwid=902099&mtid=824&kw=lg DC Jack: http://rover.ebay.com/rover/1/711-53200-19255-0/1?icep_ff3=2&pub=5575101368&toolid=10001&campid=5337582279&customid=&icep_item=331577448279&ipn=psmain&icep_vectorid=229466&kwid=902099&mtid=824&kw=lg Arduino Nano: http://rover.ebay.com/rover/1/711-53200-19255-0/1?icep_ff3=2&pub=5575101368&toolid=10001&campid=5337582279&customid=&icep_item=181846906547&ipn=psmain&icep_vectorid=229466&kwid=902099&mtid=824&kw=lg Amazon.de: WS2812B LEDs: http://amzn.to/28IM7Qt 5V 4A Power Supply: http://amzn.to/21tIke1 DC Jack: http://amzn.to/1NtXgmx Arduino Nano: http://amzn.to/1Nigytq Foam Board: http://amzn.to/1YANoOH Home Improvement Store: 4mm beech plywood 2.5mm opal acrylic glass stiff 1.5mm^2 wire flexible 0.75mm^2 wire In this project I will show you how to combine commonly available WS2812B RGB LEDs with an Arduino Nano in order to create a colorful 10x10 LED Matrix. Music: 2011 Lookalike by Bartlebeats You want to support my videos? You can browse and buy tools&materials from my Amazon Store. This way I get a small commission: Amazon.de: http://astore.amazon.de/great043-21 Amazon.com:http://astore.amazon.com/gre09a-20 Amazon.co.uk: http://astore.amazon.co.uk/gre0b-21 Or you feel super generous and want to use this Amazon link as your Amazon home page. And do not worry, your purchases are all anonym and the prices are all the same: Amazon.de:http://www.amazon.de/?_encoding=UTF8&camp=1638&creative=19454&linkCode=ur2&site-redirect=de&tag=great043-21&linkId=ORZEQZEOVJAFURCZ Amazon.com:http://www.amazon.com/?_encoding=UTF8&camp=1789&creative=390957&linkCode=ur2&tag=gre09a-20&linkId=I5NDCEAVCD2OWM4S
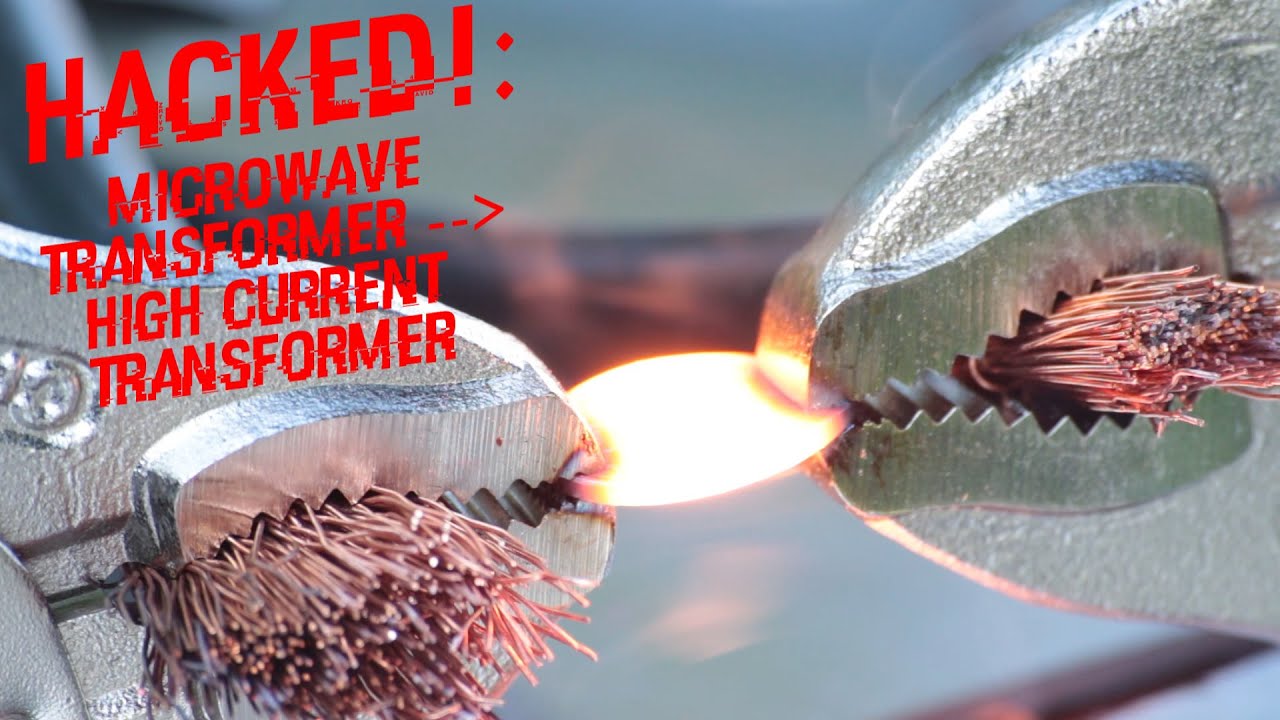
fQXBNkaB1tU | 12 Jun 2016
WARNING: This project uses mains voltage. Do not replicate it! Previous video: https://youtu.be/11Kr6W6jSdg Facebook: https://www.facebook.com/greatscottlab Twitter: https://twitter.com/GreatScottLab Support me for more videos: https://www.patreon.com/GreatScott?ty=h Picture I used to show off the weld: http://www.instructables.com/id/Electric-Skateboard-v20/ In this episode of HACKED! I want to create a weld for my electric longboard. But I do not have a welding machine. That is why I will repurpose an old transformer from a microwave into a high current transformer that should be capable of doing the job. Music: 2011 Lookalike by Bartlebeats You want to support my videos? You can browse and buy tools&materials from my Amazon Store. This way I get a small commission: Amazon.de: http://astore.amazon.de/great043-21 Amazon.com:http://astore.amazon.com/gre09a-20 Amazon.co.uk: http://astore.amazon.co.uk/gre0b-21 Or you feel super generous and want to use this Amazon link as your Amazon home page. And do not worry, your purchases are all anonym and the prices are all the same: Amazon.de:http://www.amazon.de/?_encoding=UTF8&camp=1638&creative=19454&linkCode=ur2&site-redirect=de&tag=great043-21&linkId=ORZEQZEOVJAFURCZ Amazon.com:http://www.amazon.com/?_encoding=UTF8&camp=1789&creative=390957&linkCode=ur2&tag=gre09a-20&linkId=I5NDCEAVCD2OWM4S

11Kr6W6jSdg | 05 Jun 2016
Previous video: https://youtu.be/NrQWxc4nv7E Facebook: https://www.facebook.com/greatscottlab Twitter: https://twitter.com/GreatScottLab Support me for more videos: https://www.patreon.com/GreatScott?ty=h In this Episode of Fix It! I will show you how I solved the humming problem of my brand-new Logitech Z200 speaker system. Music: 2011 Lookalike by Bartlebeats You want to support my videos? You can browse and buy tools&materials from my Amazon Store. This way I get a small commission: Amazon.de: http://astore.amazon.de/great043-21 Amazon.com:http://astore.amazon.com/gre09a-20 Amazon.co.uk: http://astore.amazon.co.uk/gre0b-21 Or you feel super generous and want to use this Amazon link as your Amazon home page. And do not worry, your purchases are all anonym and the prices are all the same: Amazon.de:http://www.amazon.de/?_encoding=UTF8&camp=1638&creative=19454&linkCode=ur2&site-redirect=de&tag=great043-21&linkId=ORZEQZEOVJAFURCZ Amazon.com:http://www.amazon.com/?_encoding=UTF8&camp=1789&creative=390957&linkCode=ur2&tag=gre09a-20&linkId=I5NDCEAVCD2OWM4S

GqVvFGTAy1A | 01 Jun 2016
Facebook: https://www.facebook.com/greatscottlab Twitter: https://twitter.com/GreatScottLab Support me for more videos: https://www.patreon.com/GreatScott?ty=h Questions: 1. I bought a 5v 15 amp power supply. Is it safe just to connect it to my raspberry pi's? Do I need to create some protecting circuit? 0:29 2. When are you going to upload a video about the quadcopter project? 0:57 3. Do you have any (tech) travel ambitions? Places to see or work in? 1:27 4. Are you in a rush? You speak way too fast? 2:01 5. Who on YouTube do you enjoy watching, diy electronics or otherwise? 2:25 6. What actually excites and enthuses you? 2:52 7. Has there been any issues with your delta printer? 3:06 8. Top three comments of the month 3:25 Music: Killing Time, Kevin MacLeod (incompetech.com) You want to support my videos? You can browse and buy tools&materials from my Amazon Store. This way I get a small commission: Amazon.de: http://astore.amazon.de/great043-21 Amazon.com:http://astore.amazon.com/gre09a-20 Amazon.co.uk: http://astore.amazon.co.uk/gre0b-21 Or you feel super generous and want to use this Amazon link as your Amazon home page. And do not worry, your purchases are all anonym and the prices are all the same: Amazon.de:http://www.amazon.de/?_encoding=UTF8&camp=1638&creative=19454&linkCode=ur2&site-redirect=de&tag=great043-21&linkId=ORZEQZEOVJAFURCZ Amazon.com:http://www.amazon.com/?_encoding=UTF8&camp=1789&creative=390957&linkCode=ur2&tag=gre09a-20&linkId=I5NDCEAVCD2OWM4S

NrQWxc4nv7E | 29 May 2016
Previous video: https://youtu.be/kqCV-HGJc6A Facebook: https://www.facebook.com/greatscottlab Twitter: https://twitter.com/GreatScottLab Support me for more videos: https://www.patreon.com/GreatScott?ty=h More project information (schematic, parts list,.....) on Instructables: http://www.instructables.com/id/Make-Your-Own-Boombox Parts list: Amazon.com: 1x Car Radio: http://amzn.to/1TOnFPC 2x Lead Acid Battery: http://amzn.to/1WsXNfD 1x Charging Controller: http://amzn.to/1WsX1zl 4x DPDT Switch: http://amzn.to/1U57g6I 2x Speaker: http://amzn.to/1WsX9i3 1x Speaker Terminal: http://amzn.to/1U57Zon 1x AC Socket: http://amzn.to/1U56AOK 1x 12V 10A Power Supply: http://amzn.to/1TOo1Wq 1x Antenna: http://amzn.to/1TOopUO Wago Terminals: http://amzn.to/1WsXtgJ Ebay: 1x Car Radio: http://rover.ebay.com/rover/1/711-53200-19255-0/1?icep_ff3=2&pub=5575101368&toolid=10001&campid=5337582279&customid=&icep_item=281807306959&ipn=psmain&icep_vectorid=229466&kwid=902099&mtid=824&kw=lg 2x Lead Acid Battery: http://rover.ebay.com/rover/1/711-53200-19255-0/1?icep_ff3=2&pub=5575101368&toolid=10001&campid=5337582279&customid=&icep_item=281832515461&ipn=psmain&icep_vectorid=229466&kwid=902099&mtid=824&kw=lg 1x Charging Controller: http://rover.ebay.com/rover/1/711-53200-19255-0/1?icep_ff3=2&pub=5575101368&toolid=10001&campid=5337582279&customid=&icep_item=141963170051&ipn=psmain&icep_vectorid=229466&kwid=902099&mtid=824&kw=lg 4x DPDT Switch: http://rover.ebay.com/rover/1/711-53200-19255-0/1?icep_ff3=2&pub=5575101368&toolid=10001&campid=5337582279&customid=&icep_item=321872652113&ipn=psmain&icep_vectorid=229466&kwid=902099&mtid=824&kw=lg 2x Speaker: http://rover.ebay.com/rover/1/711-53200-19255-0/1?icep_ff3=2&pub=5575101368&toolid=10001&campid=5337582279&customid=&icep_item=181997978800&ipn=psmain&icep_vectorid=229466&kwid=902099&mtid=824&kw=lg 1x Speaker Terminal: http://rover.ebay.com/rover/1/711-53200-19255-0/1?icep_ff3=2&pub=5575101368&toolid=10001&campid=5337582279&customid=&icep_item=151796352174&ipn=psmain&icep_vectorid=229466&kwid=902099&mtid=824&kw=lg 1x AC Socket: http://rover.ebay.com/rover/1/711-53200-19255-0/1?icep_ff3=2&pub=5575101368&toolid=10001&campid=5337582279&customid=&icep_item=310568164458&ipn=psmain&icep_vectorid=229466&kwid=902099&mtid=824&kw=lg 1x 12V 10A Power Supply: http://rover.ebay.com/rover/1/711-53200-19255-0/1?icep_ff3=2&pub=5575101368&toolid=10001&campid=5337582279&customid=&icep_item=351299826035&ipn=psmain&icep_vectorid=229466&kwid=902099&mtid=824&kw=lg 1x Antenna: http://rover.ebay.com/rover/1/711-53200-19255-0/1?icep_ff3=2&pub=5575101368&toolid=10001&campid=5337582279&customid=&icep_item=391239832586&ipn=psmain&icep_vectorid=229466&kwid=902099&mtid=824&kw=lg Wago Terminals: http://rover.ebay.com/rover/1/711-53200-19255-0/1?icep_ff3=2&pub=5575101368&toolid=10001&campid=5337582279&customid=&icep_item=310417612875&ipn=psmain&icep_vectorid=229466&kwid=902099&mtid=824&kw=lg In this project I will show you how to create a Boombox that mainly consists of a car radio, salvaged speakers and two 12V lead acid batteries. This upgraded version is louder and lighter than my previous Boombox and can play its tunes up to 9 hours continuously. Music: 2011 Lookalike by Bartlebeats Killing Time, Kevin MacLeod (incompetech.com) Ecstatic Wave by Jens Kiilstofte https://machinimasound.com/music/ecstatic-wave You want to support my videos? You can browse and buy tools&materials from my Amazon Store. This way I get a small commission: Amazon.de: http://astore.amazon.de/great043-21 Amazon.com:http://astore.amazon.com/gre09a-20 Amazon.co.uk: http://astore.amazon.co.uk/gre0b-21 Or you feel super generous and want to use this Amazon link as your Amazon home page. And do not worry, your purchases are all anonym and the prices are all the same: Amazon.de:http://www.amazon.de/?_encoding=UTF8&camp=1638&creative=19454&linkCode=ur2&site-redirect=de&tag=great043-21&linkId=ORZEQZEOVJAFURCZ Amazon.com:http://www.amazon.com/?_encoding=UTF8&camp=1789&creative=390957&linkCode=ur2&tag=gre09a-20&linkId=I5NDCEAVCD2OWM4S

kqCV-HGJc6A | 22 May 2016
Previous video: https://youtu.be/SpKK6o4ffts Facebook: https://www.facebook.com/greatscottlab Twitter: https://twitter.com/GreatScottLab Support me for more videos: https://www.patreon.com/GreatScott?ty=h In this episode of Electronic Basics I will explain the three golden rules when working with OpAmps and how to use them in order to understand and build all kind of OpAmp circuits. The main focus will be the noninverting and inverting amplifier and the comparator circuit. You want to support my videos? You can browse and buy tools&materials from my Amazon Store. This way I get a small commission: Amazon.de: http://astore.amazon.de/great043-21 Amazon.com:http://astore.amazon.com/gre09a-20 Amazon.co.uk: http://astore.amazon.co.uk/gre0b-21 Or you feel super generous and want to use this Amazon link as your Amazon home page. And do not worry, your purchases are all anonym and the prices are all the same: Amazon.de:http://www.amazon.de/?_encoding=UTF8&camp=1638&creative=19454&linkCode=ur2&site-redirect=de&tag=great043-21&linkId=ORZEQZEOVJAFURCZ Amazon.com:http://www.amazon.com/?_encoding=UTF8&camp=1789&creative=390957&linkCode=ur2&tag=gre09a-20&linkId=I5NDCEAVCD2OWM4S

SpKK6o4ffts | 18 May 2016
Thanks to EasyEDA for sponsoring this video Have a look if you are interested: https://easyeda.com/ Previous video: https://youtu.be/QnUhjnbZ0T8 Facebook: https://www.facebook.com/greatscottlab Twitter: https://twitter.com/GreatScottLab Support me for more videos: https://www.patreon.com/GreatScott?ty=h In this video I will create a PCB layout for my ATtiny Boost Converter with the help of the free Software EasyEDA. Along the way I will tell you what I like and don't like about the program. Music: 2011 Lookalike by Bartlebeats Killing Time, Kevin MacLeod (incompetech.com) You want to support my videos? You can browse and buy tools&materials from my Amazon Store. This way I get a small commission: Amazon.de: http://astore.amazon.de/great043-21 Amazon.com:http://astore.amazon.com/gre09a-20 Amazon.co.uk: http://astore.amazon.co.uk/gre0b-21 Or you feel super generous and want to use this Amazon link as your Amazon home page. And do not worry, your purchases are all anonym and the prices are all the same: Amazon.de:http://www.amazon.de/?_encoding=UTF8&camp=1638&creative=19454&linkCode=ur2&site-redirect=de&tag=great043-21&linkId=ORZEQZEOVJAFURCZ Amazon.com:http://www.amazon.com/?_encoding=UTF8&camp=1789&creative=390957&linkCode=ur2&tag=gre09a-20&linkId=I5NDCEAVCD2OWM4S
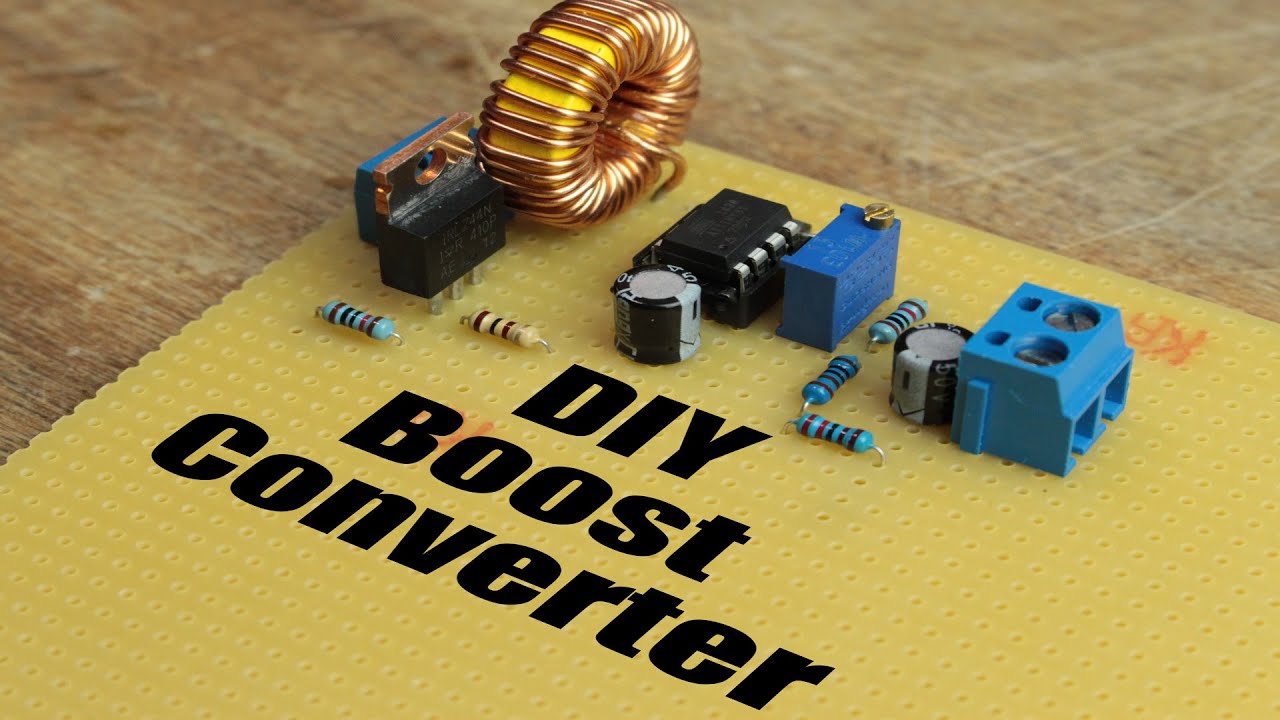
QnUhjnbZ0T8 | 15 May 2016
Previous video: https://youtu.be/Jyrpx9rEGMI Facebook: https://www.facebook.com/greatscottlab Twitter: https://twitter.com/GreatScottLab Support me for more videos: https://www.patreon.com/GreatScott?ty=h More project information (schematic, parts list, code,....) on Instructables: http://www.instructables.com/id/DIY-Boost-Converter-How-to-Step-Up-DC-Voltage-Effi Parts list: Amazon.com: 1x ATtiny85: http://amzn.to/1VXnHYs 1x IRLZ44N MOSFET: http://amzn.to/1OseN2X 1x 100µH Coil: http://amzn.to/1XbJMSb 2x 47µF Capacitor: http://amzn.to/1qlm6Oc 1x 100kΩ Potentiometer: http://amzn.to/1VXnEfe 1x 1N5819 Schottky Diode: http://amzn.to/1VXnDYN 2x 10kΩ, 1x 1kΩ, 1x 2.2kΩ, 1x 100Ω Resistor: http://amzn.to/1VXnAfN 2x PCB Terminal: http://amzn.to/1qlm0WQ Perfboard: http://amzn.to/1XbJBGA Ebay: 1x ATtiny85: http://rover.ebay.com/rover/1/711-53200-19255-0/1?icep_ff3=2&pub=5575101368&toolid=10001&campid=5337582279&customid=&icep_item=181723892216&ipn=psmain&icep_vectorid=229466&kwid=902099&mtid=824&kw=lg 1x IRLZ44N MOSFET: http://rover.ebay.com/rover/1/711-53200-19255-0/1?icep_ff3=2&pub=5575101368&toolid=10001&campid=5337582279&customid=&icep_item=151459679896&ipn=psmain&icep_vectorid=229466&kwid=902099&mtid=824&kw=lg 1x 100µH Coil: http://rover.ebay.com/rover/1/711-53200-19255-0/1?icep_ff3=2&pub=5575101368&toolid=10001&campid=5337582279&customid=&icep_item=191674515964&ipn=psmain&icep_vectorid=229466&kwid=902099&mtid=824&kw=lg 2x 47µF Capacitor: http://rover.ebay.com/rover/1/711-53200-19255-0/1?icep_ff3=2&pub=5575101368&toolid=10001&campid=5337582279&customid=&icep_item=321434192964&ipn=psmain&icep_vectorid=229466&kwid=902099&mtid=824&kw=lg 1x 100kΩ Potentiometer: http://rover.ebay.com/rover/1/711-53200-19255-0/1?icep_ff3=2&pub=5575101368&toolid=10001&campid=5337582279&customid=&icep_item=281034196884&ipn=psmain&icep_vectorid=229466&kwid=902099&mtid=824&kw=lg 1x 1N5819 Schottky Diode: http://rover.ebay.com/rover/1/711-53200-19255-0/1?icep_ff3=2&pub=5575101368&toolid=10001&campid=5337582279&customid=&icep_item=130703663173&ipn=psmain&icep_vectorid=229466&kwid=902099&mtid=824&kw=lg 2x 10kΩ, 1x 1kΩ, 1x 2.2kΩ, 1x 100Ω Resistor: http://rover.ebay.com/rover/1/711-53200-19255-0/1?icep_ff3=2&pub=5575101368&toolid=10001&campid=5337582279&customid=&icep_item=271598211084&ipn=psmain&icep_vectorid=229466&kwid=902099&mtid=824&kw=lg 2x PCB Terminal: http://rover.ebay.com/rover/1/711-53200-19255-0/1?icep_ff3=2&pub=5575101368&toolid=10001&campid=5337582279&customid=&icep_item=181846953484&ipn=psmain&icep_vectorid=229466&kwid=902099&mtid=824&kw=lg Perfboard: http://rover.ebay.com/rover/1/711-53200-19255-0/1?icep_ff3=2&pub=5575101368&toolid=10001&campid=5337582279&customid=&icep_item=171887662582&ipn=psmain&icep_vectorid=229466&kwid=902099&mtid=824&kw=lg In this video I will show you an efficient and common way how to step up DC voltages. At the end of the video I will also demonstrate how easy it can be to build a boost converter with the help of an ATtiny85. Music: 2011 Lookalike by Bartlebeats You want to support my videos? You can browse and buy tools&materials from my Amazon Store. This way I get a small commission: Amazon.de: http://astore.amazon.de/great043-21 Amazon.com:http://astore.amazon.com/gre09a-20 Amazon.co.uk: http://astore.amazon.co.uk/gre0b-21 Or you feel super generous and want to use this Amazon link as your Amazon home page. And do not worry, your purchases are all anonym and the prices are all the same: Amazon.de:http://www.amazon.de/?_encoding=UTF8&camp=1638&creative=19454&linkCode=ur2&site-redirect=de&tag=great043-21&linkId=ORZEQZEOVJAFURCZ Amazon.com:http://www.amazon.com/?_encoding=UTF8&camp=1789&creative=390957&linkCode=ur2&tag=gre09a-20&linkId=I5NDCEAVCD2OWM4S

Jyrpx9rEGMI | 08 May 2016
Previous video: https://youtu.be/m8rK9gU30v4 Facebook: https://www.facebook.com/greatscottlab Twitter: https://twitter.com/GreatScottLab Support me for more videos: https://www.patreon.com/GreatScott?ty=h More project information (schematic, parts list,....) on Instructables: http://www.instructables.com/id/Make-Your-Own-LED-Sign-VU-Meter In this project I will show you how to create a custom LED sign that reacts to the loudness of your music, just like a VU meter does. Parts list: Amazon.com: 1x Stripboard: http://amzn.to/1q6WVz3 100x 5mm Green LED: http://amzn.to/1q6X3yr 1x Perfboard with copper dots: http://amzn.to/274wjQY 1x 3.5mm Audio Jack: http://amzn.to/274wv2p 1x DC Jack: http://amzn.to/1q6X999 2x LM324 OpAmp: http://amzn.to/1q6X9pK 1x 47µF Capacitor: http://amzn.to/1rAYQx7 1x 100kΩ Potentiometer: http://amzn.to/1OiIKgt 7x IRFD220 N-channel MOSFET: http://amzn.to/274wH1M 11x 10kΩ, 1x 47kΩ, 4x 1kΩ, 2x3.3kΩ, 3x 4.7kΩ, 2x 2kΩ, 1x 6.8kΩ, 1x 2.2kΩ, 1x 51kΩ Resistor: http://amzn.to/1OiIOws 1x 12V 2A Power Supply: http://amzn.to/1q6Xl8q 1x: Buck Converter: http://amzn.to/1rAYZ3t Ebay: 1x Stripboard: - 100x 5mm Green LED: http://rover.ebay.com/rover/1/711-53200-19255-0/1?icep_ff3=2&pub=5575101368&toolid=10001&campid=5337582279&customid=&icep_item=310704471546&ipn=psmain&icep_vectorid=229466&kwid=902099&mtid=824&kw=lg 1x Perfboard with copper dots: http://rover.ebay.com/rover/1/711-53200-19255-0/1?icep_ff3=2&pub=5575101368&toolid=10001&campid=5337582279&customid=&icep_item=321668061833&ipn=psmain&icep_vectorid=229466&kwid=902099&mtid=824&kw=lg 1x 3.5mm Audio Jack: http://rover.ebay.com/rover/1/711-53200-19255-0/1?icep_ff3=2&pub=5575101368&toolid=10001&campid=5337582279&customid=&icep_item=231724077290&ipn=psmain&icep_vectorid=229466&kwid=902099&mtid=824&kw=lg 1x DC Jack: http://rover.ebay.com/rover/1/711-53200-19255-0/1?icep_ff3=2&pub=5575101368&toolid=10001&campid=5337582279&customid=&icep_item=322098317351&ipn=psmain&icep_vectorid=229466&kwid=902099&mtid=824&kw=lg 2x LM324 OpAmp: http://rover.ebay.com/rover/1/711-53200-19255-0/1?icep_ff3=2&pub=5575101368&toolid=10001&campid=5337582279&customid=&icep_item=171433680505&ipn=psmain&icep_vectorid=229466&kwid=902099&mtid=824&kw=lg 1x 47µF Capacitor: http://rover.ebay.com/rover/1/711-53200-19255-0/1?icep_ff3=2&pub=5575101368&toolid=10001&campid=5337582279&customid=&icep_item=161737167271&ipn=psmain&icep_vectorid=229466&kwid=902099&mtid=824&kw=lg 1x 100kΩ Potentiometer: http://rover.ebay.com/rover/1/711-53200-19255-0/1?icep_ff3=2&pub=5575101368&toolid=10001&campid=5337582279&customid=&icep_item=201546691455&ipn=psmain&icep_vectorid=229466&kwid=902099&mtid=824&kw=lg 7x IRFD220 N-channel MOSFET: http://rover.ebay.com/rover/1/711-53200-19255-0/1?icep_ff3=2&pub=5575101368&toolid=10001&campid=5337582279&customid=&icep_item=291550093314&ipn=psmain&icep_vectorid=229466&kwid=902099&mtid=824&kw=lg 11x 10kΩ, 1x 47kΩ, 4x 1kΩ, 2x3.3kΩ, 3x 4.7kΩ, 2x 2kΩ, 1x 6.8kΩ, 1x 2.2kΩ, 1x 51kΩ Resistor: http://rover.ebay.com/rover/1/711-53200-19255-0/1?icep_ff3=2&pub=5575101368&toolid=10001&campid=5337582279&customid=&icep_item=271598211084&ipn=psmain&icep_vectorid=229466&kwid=902099&mtid=824&kw=lg 1x 12V 2A Power Supply: http://rover.ebay.com/rover/1/711-53200-19255-0/1?icep_ff3=2&pub=5575101368&toolid=10001&campid=5337582279&customid=&icep_item=221808912575&ipn=psmain&icep_vectorid=229466&kwid=902099&mtid=824&kw=lg 1x: Buck Converter: http://rover.ebay.com/rover/1/711-53200-19255-0/1?icep_ff3=2&pub=5575101368&toolid=10001&campid=5337582279&customid=&icep_item=321476590827&ipn=psmain&icep_vectorid=229466&kwid=902099&mtid=824&kw=lg Music: 2011 Lookalike by Bartlebeats Killing Time, Kevin MacLeod (incompetech.com) You want to support my videos? You can browse and buy tools&materials from my Amazon Store. This way I get a small commission: Amazon.de: http://astore.amazon.de/great043-21 Amazon.com:http://astore.amazon.com/gre09a-20 Amazon.co.uk: http://astore.amazon.co.uk/gre0b-21 Or you feel super generous and want to use this Amazon link as your Amazon home page. And do not worry, your purchases are all anonym and the prices are all the same: Amazon.de:http://www.amazon.de/?_encoding=UTF8&camp=1638&creative=19454&linkCode=ur2&site-redirect=de&tag=great043-21&linkId=ORZEQZEOVJAFURCZ Amazon.com:http://www.amazon.com/?_encoding=UTF8&camp=1789&creative=390957&linkCode=ur2&tag=gre09a-20&linkId=I5NDCEAVCD2OWM4S
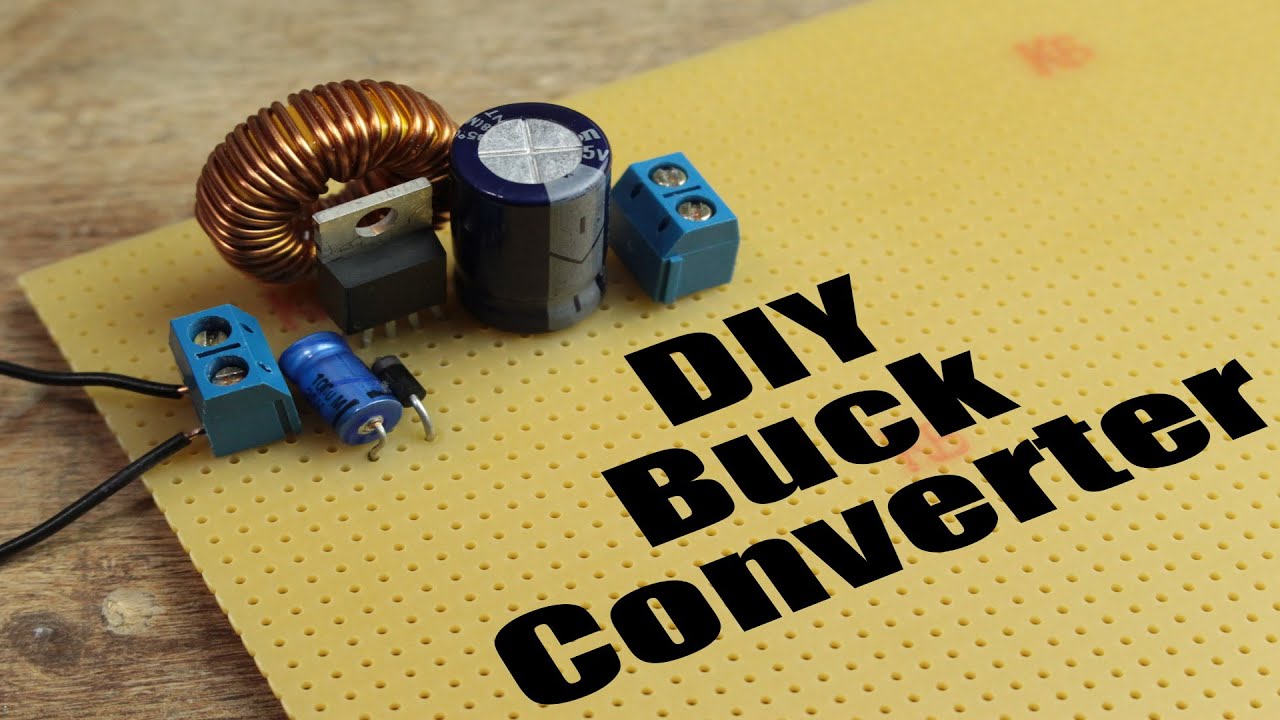
m8rK9gU30v4 | 01 May 2016
Previous video: https://youtu.be/AD772QQZ0Gc Facebook: https://www.facebook.com/greatscottlab Twitter: https://twitter.com/GreatScottLab Support me for more videos: https://www.patreon.com/GreatScott?ty=h Parts list (for the LM2576 IC): Amazon.com: 1x LM2576: http://amzn.to/1WzKrMV 1x 100µH Inductor: http://amzn.to/1VG32bf 1x 1000µF Capacitor: http://amzn.to/23gQZ3i 1x 100µF Capacitor: http://amzn.to/23gQZjR 1x 1N5822 Schottky Diode: http://amzn.to/23gQZAn Ebay: 1x LM2576: http://rover.ebay.com/rover/1/711-53200-19255-0/1?icep_ff3=2&pub=5575101368&toolid=10001&campid=5337582279&customid=&icep_item=271435589946&ipn=psmain&icep_vectorid=229466&kwid=902099&mtid=824&kw=lg 1x 100µH Inductor: http://rover.ebay.com/rover/1/711-53200-19255-0/1?icep_ff3=2&pub=5575101368&toolid=10001&campid=5337582279&customid=&icep_item=131689117589&ipn=psmain&icep_vectorid=229466&kwid=902099&mtid=824&kw=lg 1x 1000µF Capacitor: http://rover.ebay.com/rover/1/711-53200-19255-0/1?icep_ff3=2&pub=5575101368&toolid=10001&campid=5337582279&customid=&icep_item=201546672797&ipn=psmain&icep_vectorid=229466&kwid=902099&mtid=824&kw=lg 1x 100µF Capacitor: http://rover.ebay.com/rover/1/711-53200-19255-0/1?icep_ff3=2&pub=5575101368&toolid=10001&campid=5337582279&customid=&icep_item=291497780128&ipn=psmain&icep_vectorid=229466&kwid=902099&mtid=824&kw=lg 1x 1N5822 Schottky Diode: http://rover.ebay.com/rover/1/711-53200-19255-0/1?icep_ff3=2&pub=5575101368&toolid=10001&campid=5337582279&customid=&icep_item=221890516022&ipn=psmain&icep_vectorid=229466&kwid=902099&mtid=824&kw=lg Amazon.de: 1x LM2576: http://amzn.to/1W0M7kq 1x 100µH Inductor: http://amzn.to/1W0MhYZ 1x 1000µF Capacitor: http://amzn.to/1pVxEHN 1x 100µF Capacitor: http://amzn.to/1W0Mj35 1x 1N5822 Schottky Diode: http://amzn.to/1W0Monp In this video I will show you an efficient and common way how to step down DC voltages. At the end of the video I will also demonstrate how easy it can be to build a buck converter with the help of the LM2576 IC. Music: 2011 Lookalike by Bartlebeats You want to support my videos? You can browse and buy tools&materials from my Amazon Store. This way I get a small commission: Amazon.de: http://astore.amazon.de/great043-21 Amazon.com:http://astore.amazon.com/gre09a-20 Amazon.co.uk: http://astore.amazon.co.uk/gre0b-21 Or you feel super generous and want to use this Amazon link as your Amazon home page. And do not worry, your purchases are all anonym and the prices are all the same: Amazon.de:http://www.amazon.de/?_encoding=UTF8&camp=1638&creative=19454&linkCode=ur2&site-redirect=de&tag=great043-21&linkId=ORZEQZEOVJAFURCZ Amazon.com:http://www.amazon.com/?_encoding=UTF8&camp=1789&creative=390957&linkCode=ur2&tag=gre09a-20&linkId=I5NDCEAVCD2OWM4S

GNjTLt1_wDM | 27 Apr 2016
Facebook: https://www.facebook.com/greatscottlab Twitter: https://twitter.com/GreatScottLab Support me for more videos: https://www.patreon.com/GreatScott?ty=h Questions: 1. How are your previous project doing? Do you still use them? Are they issues you noticed while using them? Any Improvements you’ve done or would like to do? 0:28 2. How do you think the GPIO on your OctoPrint Raspberry Pi can be used to improve the 3D Printing experience? 1:21 3. What about a workshop tour? 1:41 4. What projects have you thought up that are currently out of your reach? For example too expensive or too time consuming 2:00 5. Have you used your X-Carve to mill any PCBs? If so how were the results? I’d love to see some pictures 2:51 6. Logic or microcontroller? 3:32 7. Can you explain the difference between a relay, a triac and a solid state relay? 4:10 8. Worst comment of the month 4:45 9. Best comment of the month 5:50 Music: Killing Time, Kevin MacLeod (incompetech.com) You want to support my videos? You can browse and buy tools&materials from my Amazon Store. This way I get a small commission: Amazon.de: http://astore.amazon.de/great043-21 Amazon.com:http://astore.amazon.com/gre09a-20 Amazon.co.uk: http://astore.amazon.co.uk/gre0b-21 Or you feel super generous and want to use this Amazon link as your Amazon home page. And do not worry, your purchases are all anonym and the prices are all the same: Amazon.de:http://www.amazon.de/?_encoding=UTF8&camp=1638&creative=19454&linkCode=ur2&site-redirect=de&tag=great043-21&linkId=ORZEQZEOVJAFURCZ Amazon.com:http://www.amazon.com/?_encoding=UTF8&camp=1789&creative=390957&linkCode=ur2&tag=gre09a-20&linkId=I5NDCEAVCD2OWM4S

AD772QQZ0Gc | 24 Apr 2016
Previous video: https://youtu.be/9-p22NllgPk Previous Laser Diode video: https://youtu.be/AwcQsbgy7AY Facebook: https://www.facebook.com/greatscottlab Twitter: https://twitter.com/GreatScottLab Support me for more videos: https://www.patreon.com/GreatScott?ty=h In this episode of HACKED! I will show you what I salvaged from an old PS3 and solve the comment mystery from my previous laser diode video which says that a Blu-Ray laser diode can burn things. Music: 2011 Lookalike by Bartlebeats Killing Time, Kevin MacLeod (incompetech.com) You want to support my videos? You can browse and buy tools&materials from my Amazon Store. This way I get a small commission: Amazon.de: http://astore.amazon.de/great043-21 Amazon.com:http://astore.amazon.com/gre09a-20 Amazon.co.uk: http://astore.amazon.co.uk/gre0b-21 Or you feel super generous and want to use this Amazon link as your Amazon home page. And do not worry, your purchases are all anonym and the prices are all the same: Amazon.de:http://www.amazon.de/?_encoding=UTF8&camp=1638&creative=19454&linkCode=ur2&site-redirect=de&tag=great043-21&linkId=ORZEQZEOVJAFURCZ Amazon.com:http://www.amazon.com/?_encoding=UTF8&camp=1789&creative=390957&linkCode=ur2&tag=gre09a-20&linkId=I5NDCEAVCD2OWM4S

9-p22NllgPk | 17 Apr 2016
Previous video: https://youtu.be/4N1uLth1o9o Facebook: https://www.facebook.com/greatscottlab Twitter: https://twitter.com/GreatScottLab Support me for more videos: https://www.patreon.com/GreatScott?ty=h More project information on Instructables: http://www.instructables.com/id/Make-Your-Own-Crude-Projector/ Parts list: Amazon.com 1x 30W LED kit: http://amzn.to/1XCSyHj with http://amzn.to/1XCSDdW or http://amzn.to/1XCSxDm 1x 800x480 7in LCD kit: http://amzn.to/268JEHm 1x Fresnel Lens: http://amzn.to/1qz4WNy 1x Magnifying Lens: http://amzn.to/1XCSWpp Ebay: 1x 30W LED kit: http://rover.ebay.com/rover/1/711-53200-19255-0/1?icep_ff3=2&pub=5575101368&toolid=10001&campid=5337582279&customid=&icep_item=360512097608&ipn=psmain&icep_vectorid=229466&kwid=902099&mtid=824&kw=lg 1x 800x480 7in LCD kit: http://rover.ebay.com/rover/1/711-53200-19255-0/1?icep_ff3=2&pub=5575101368&toolid=10001&campid=5337582279&customid=&icep_item=321988152298&ipn=psmain&icep_vectorid=229466&kwid=902099&mtid=824&kw=lg 1x Fresnel Lens: http://rover.ebay.com/rover/1/711-53200-19255-0/1?icep_ff3=2&pub=5575101368&toolid=10001&campid=5337582279&customid=&icep_item=321771598374&ipn=psmain&icep_vectorid=229466&kwid=902099&mtid=824&kw=lg 1x Magnifying Lens: http://rover.ebay.com/rover/1/711-53200-19255-0/1?icep_ff3=2&pub=5575101368&toolid=10001&campid=5337582279&customid=&icep_item=321753846262&ipn=psmain&icep_vectorid=229466&kwid=902099&mtid=824&kw=lg Amazon.de: 1x 30W LED kit: http://amzn.to/1W9mPi5 1x 800x480 7in LCD kit: http://amzn.to/1VwSvzE 1x Fresnel Lens: - 1x Magnifying Lens: http://amzn.to/1W9nksC In this video I will show you how I converted an old LCD kit into a crude projector with the help of a couple complementary parts. Music: 2011 Lookalike by Bartlebeats Ecstatic Wave by Jens Kiilstofte https://machinimasound.com/music/ecstatic-wave You want to support my videos? You can browse and buy tools&materials from my Amazon Store. This way I get a small commission: Amazon.de: http://astore.amazon.de/great043-21 Amazon.com:http://astore.amazon.com/gre09a-20 Amazon.co.uk: http://astore.amazon.co.uk/gre0b-21 Or you feel super generous and want to use this Amazon link as your Amazon home page. And do not worry, your purchases are all anonym and the prices are all the same: Amazon.de:http://www.amazon.de/?_encoding=UTF8&camp=1638&creative=19454&linkCode=ur2&site-redirect=de&tag=great043-21&linkId=ORZEQZEOVJAFURCZ Amazon.com:http://www.amazon.com/?_encoding=UTF8&camp=1789&creative=390957&linkCode=ur2&tag=gre09a-20&linkId=I5NDCEAVCD2OWM4S

4N1uLth1o9o | 10 Apr 2016
Previous video: https://youtu.be/Ijm2q8J4biM Diode Video: https://youtu.be/46WSCihjoRI Facebook: https://www.facebook.com/greatscottlab Twitter: https://twitter.com/GreatScottLab Support me for more videos: https://www.patreon.com/GreatScott?ty=h Schematic+Code: http://www.mediafire.com/download/a02ri3n58qccc86/Electronic+Basics+%2320+Thyristor%2C+Triac.rar Parts list: Amazon.com: 1x Full Bridge Rectifier: http://amzn.to/1SHD8gX 1x Arduino Nano: http://amzn.to/1qBzGOv 1x 4N25: http://amzn.to/1qgvaEC 1x MOC3020: http://amzn.to/1qBzS00 1xTIC216M: http://amzn.to/1qgvdjH 3x 330Ω, 1x 220Ω , 1x 1kΩ Resistor: http://amzn.to/1SHDnsc 1x 500k Potentiometer: http://amzn.to/1SHDnIP Ebay: 1x Full Bridge Rectifier: http://rover.ebay.com/rover/1/711-53200-19255-0/1?icep_ff3=2&pub=5575101368&toolid=10001&campid=5337582279&customid=&icep_item=381568561785&ipn=psmain&icep_vectorid=229466&kwid=902099&mtid=824&kw=lg 1x Arduino Nano: http://rover.ebay.com/rover/1/711-53200-19255-0/1?icep_ff3=2&pub=5575101368&toolid=10001&campid=5337582279&customid=&icep_item=171982902871&ipn=psmain&icep_vectorid=229466&kwid=902099&mtid=824&kw=lg 1x 4N25: http://rover.ebay.com/rover/1/711-53200-19255-0/1?icep_ff3=2&pub=5575101368&toolid=10001&campid=5337582279&customid=&icep_item=400985457838&ipn=psmain&icep_vectorid=229466&kwid=902099&mtid=824&kw=lg 1x MOC3020: http://rover.ebay.com/rover/1/711-53200-19255-0/1?icep_ff3=2&pub=5575101368&toolid=10001&campid=5337582279&customid=&icep_item=181724839594&ipn=psmain&icep_vectorid=229466&kwid=902099&mtid=824&kw=lg 1xTIC216M: http://rover.ebay.com/rover/1/711-53200-19255-0/1?icep_ff3=2&pub=5575101368&toolid=10001&campid=5337582279&customid=&icep_item=231242767720&ipn=psmain&icep_vectorid=229466&kwid=902099&mtid=824&kw=lg 3x 330Ω, 1x 220Ω , 1x 1kΩ Resistor: http://rover.ebay.com/rover/1/711-53200-19255-0/1?icep_ff3=2&pub=5575101368&toolid=10001&campid=5337582279&customid=&icep_item=261374861457&ipn=psmain&icep_vectorid=229466&kwid=902099&mtid=824&kw=lg 1x 500k Potentiometer: http://rover.ebay.com/rover/1/711-53200-19255-0/1?icep_ff3=2&pub=5575101368&toolid=10001&campid=5337582279&customid=&icep_item=171414127743&ipn=psmain&icep_vectorid=229466&kwid=902099&mtid=824&kw=lg Amazon.de: 1x Full Bridge Rectifier: http://amzn.to/1SpIexP 1x Arduino Nano: http://amzn.to/1Nigytq 1x 4N25: http://amzn.to/1SpIjBB 1x MOC3020: http://amzn.to/1SpIk8M 1xTIC216M: http://amzn.to/1MnGNnu 3x 330Ω, 1x 220Ω , 1x 1kΩ Resistor: http://amzn.to/1E9uEhN 1x 500k Potentiometer: http://amzn.to/1SpIsFp In this episode of electronic basics I will present the most important facts about a controllable diode, the thyristor. I will also build a small experimental circuit to control AC voltage with the help of a triac. Music: Killing Time, Kevin MacLeod (incompetech.com) You want to support my videos? You can browse and buy tools&materials from my Amazon Store. This way I get a small commission: Amazon.de: http://astore.amazon.de/great043-21 Amazon.com:http://astore.amazon.com/gre09a-20 Amazon.co.uk: http://astore.amazon.co.uk/gre0b-21 Or you feel super generous and want to use this Amazon link as your Amazon home page. And do not worry, your purchases are all anonym and the prices are all the same: Amazon.de:http://www.amazon.de/?_encoding=UTF8&... Amazon.com:http://www.amazon.com/?_encoding=UTF8...
Ijm2q8J4biM | 03 Apr 2016
Previous video: https://youtu.be/57carjNxI9A Facebook: https://www.facebook.com/greatscottlab Twitter: https://twitter.com/GreatScottLab Support me for more videos: https://www.patreon.com/GreatScott?ty=h Designs (.stl files): http://www.mediafire.com/download/m75v2xzzsnsrs7m/.stl+files.rar Parts list: Amazon.com: 1x Mini buck converter: http://amzn.to/1RGmajc 2x 0.5W 10mm white LEDs: http://amzn.to/1RGmfmW 4x 22Ω Resistors: http://amzn.to/1V2nq5V 2x Wago terminals: http://amzn.to/1RGnQJl 1x Raspberry Pi (2 or 3): http://amzn.to/1RGmkHo 1x Raspberry Pi camera: http://amzn.to/2324mcN Ebay: 1x Mini buck converter: http://rover.ebay.com/rover/1/711-53200-19255-0/1?icep_ff3=2&pub=5575101368&toolid=10001&campid=5337582279&customid=&icep_item=331288864626&ipn=psmain&icep_vectorid=229466&kwid=902099&mtid=824&kw=lg 2x 0.5W 10mm white LEDs: http://rover.ebay.com/rover/1/711-53200-19255-0/1?icep_ff3=2&pub=5575101368&toolid=10001&campid=5337582279&customid=&icep_item=250672018304&ipn=psmain&icep_vectorid=229466&kwid=902099&mtid=824&kw=lg 4x 22Ω Resistors: http://rover.ebay.com/rover/1/711-53200-19255-0/1?icep_ff3=2&pub=5575101368&toolid=10001&campid=5337582279&customid=&icep_item=250867360251&ipn=psmain&icep_vectorid=229466&kwid=902099&mtid=824&kw=lg 2x Wago terminals: http://rover.ebay.com/rover/1/711-53200-19255-0/1?icep_ff3=2&pub=5575101368&toolid=10001&campid=5337582279&customid=&icep_item=171568387235&ipn=psmain&icep_vectorid=229466&kwid=902099&mtid=824&kw=lg 1x Raspberry Pi (2 or 3): http://rover.ebay.com/rover/1/711-53200-19255-0/1?icep_ff3=2&pub=5575101368&toolid=10001&campid=5337582279&customid=&icep_item=181465245825&ipn=psmain&icep_vectorid=229466&kwid=902099&mtid=824&kw=lg 1x Raspberry Pi camera: http://rover.ebay.com/rover/1/711-53200-19255-0/1?icep_ff3=2&pub=5575101368&toolid=10001&campid=5337582279&customid=&icep_item=121199265209&ipn=psmain&icep_vectorid=229466&kwid=902099&mtid=824&kw=lg Amazon.de: 1x Mini buck converter: http://amzn.to/221PLZ5 2x 0.5W 10mm white LEDs: - 4x 22Ω Resistors: http://amzn.to/2323iWs 2x Wago terminals: http://amzn.to/2323ogN 1x Raspberry Pi (2 or 3): http://amzn.to/2323vc9 1x Raspberry Pi camera: http://amzn.to/2323zbU In this video I will show you how to free your 3D Printer from your main computer through the help of a Raspberry Pi, the software OctoPrint and a couple of 3D printed housings. Music: 2011 Lookalike by Bartlebeats You want to support my videos? You can browse and buy tools&materials from my Amazon Store. This way I get a small commission: Amazon.de: http://astore.amazon.de/great043-21 Amazon.com:http://astore.amazon.com/gre09a-20 Amazon.co.uk: http://astore.amazon.co.uk/gre0b-21 Or you feel super generous and want to use this Amazon link as your Amazon home page. And do not worry, your purchases are all anonym and the prices are all the same: Amazon.de:http://www.amazon.de/?_encoding=UTF8&camp=1638&creative=19454&linkCode=ur2&site-redirect=de&tag=great043-21&linkId=ORZEQZEOVJAFURCZ Amazon.com:http://www.amazon.com/?_encoding=UTF8&camp=1789&creative=390957&linkCode=ur2&tag=gre09a-20&linkId=I5NDCEAVCD2OWM4S

57carjNxI9A | 27 Mar 2016
Previous video: https://youtu.be/osfgkFyq7lA Facebook: https://www.facebook.com/greatscottlab Twitter: https://twitter.com/GreatScottLab Support me for more videos: https://www.patreon.com/GreatScott?ty=h More project information (schematic, code, parts list,....) on Instructables: http://www.instructables.com/id/How-to-Make-a-Fan-POV-Display Parts list (see Instructables for a detailed one): Amazon.com: 1x Arduino Pro Mini: http://amzn.to/1XQDzsZ 1x FTDI Breakout: http://amzn.to/1RzVqjb 5x 5mm LED Red: http://amzn.to/1UKHFVH 5x 200Ω, 1x 10kΩ Resistor: http://amzn.to/1XQDRjI 1x Slide Switch: http://amzn.to/1UKIcXH 1x 80mAh LiPo Battery + Protection circuit: http://amzn.to/1UnP79D 1x U18 Hall Effect sensor: http://amzn.to/1XQEJEY 1x Fan: http://amzn.to/1UnPHUV Ebay: 1x Arduino Pro Mini: http://rover.ebay.com/rover/1/711-53200-19255-0/1?icep_ff3=2&pub=5575101368&toolid=10001&campid=5337582279&customid=&icep_item=191679508570&ipn=psmain&icep_vectorid=229466&kwid=902099&mtid=824&kw=lg 1x FTDI Breakout: http://rover.ebay.com/rover/1/711-53200-19255-0/1?icep_ff3=2&pub=5575101368&toolid=10001&campid=5337582279&customid=&icep_item=271928980888&ipn=psmain&icep_vectorid=229466&kwid=902099&mtid=824&kw=lg 5x 5mm LED Red: http://rover.ebay.com/rover/1/711-53200-19255-0/1?icep_ff3=2&pub=5575101368&toolid=10001&campid=5337582279&customid=&icep_item=162015734629&ipn=psmain&icep_vectorid=229466&kwid=902099&mtid=824&kw=lg 5x 200Ω, 1x 10kΩ Resistor: http://rover.ebay.com/rover/1/711-53200-19255-0/1?icep_ff3=2&pub=5575101368&toolid=10001&campid=5337582279&customid=&icep_item=271598211084&ipn=psmain&icep_vectorid=229466&kwid=902099&mtid=824&kw=lg 1x Slide Switch: http://rover.ebay.com/rover/1/711-53200-19255-0/1?icep_ff3=2&pub=5575101368&toolid=10001&campid=5337582279&customid=&icep_item=201114089818&ipn=psmain&icep_vectorid=229466&kwid=902099&mtid=824&kw=lg 1x 80mAh LiPo Battery + Protection circuit: http://rover.ebay.com/rover/1/711-53200-19255-0/1?icep_ff3=2&pub=5575101368&toolid=10001&campid=5337582279&customid=&icep_item=171266693580&ipn=psmain&icep_vectorid=229466&kwid=902099&mtid=824&kw=lg 1x U18 Hall Effect sensor: In this episode of HACKED! I will show you how I transformed an ordinary old Fan into a LED POV Display which can present you light patterns, words or even the time. Music: 2011 Lookalike by Bartlebeats Killing Time, Kevin MacLeod (incompetech.com) You want to support my videos? You can browse and buy tools&materials from my Amazon Store. This way I get a small commission: Amazon.de: http://astore.amazon.de/great043-21 Amazon.com:http://astore.amazon.com/gre09a-20 Amazon.co.uk: http://astore.amazon.co.uk/gre0b-21 Or you feel super generous and want to use this Amazon link as your Amazon home page. And do not worry, your purchases are all anonym and the prices are all the same: Amazon.de:http://www.amazon.de/?_encoding=UTF8&camp=1638&creative=19454&linkCode=ur2&site-redirect=de&tag=great043-21&linkId=ORZEQZEOVJAFURCZ Amazon.com:http://www.amazon.com/?_encoding=UTF8&camp=1789&creative=390957&linkCode=ur2&tag=gre09a-20&linkId=I5NDCEAVCD2OWM4S

osfgkFyq7lA | 20 Mar 2016
Previous video: https://youtu.be/UtYbd89kVgY Facebook: https://www.facebook.com/greatscottlab Twitter: https://twitter.com/GreatScottLab Support me for more videos: https://www.patreon.com/GreatScott?ty=h In this video I will show you how important protection circuits are for LiPo batteries and what will happen if you accidentally overcharge or overdischarge your battery or even create a short circuit. Music: 2011 Lookalike by Bartlebeats Internet Sources: http://www.rchelicopterfun.com/rc-lipo-batteries.html http://www.epectec.com/batteries/cell-comparison.html You want to support my videos? You can browse and buy tools&materials from my Amazon Store. This way I get a small commission: Amazon.de: http://astore.amazon.de/great043-21 Amazon.com:http://astore.amazon.com/gre09a-20 Amazon.co.uk: http://astore.amazon.co.uk/gre0b-21 Or you feel super generous and want to use this Amazon link as your Amazon home page. And do not worry, your purchases are all anonym and the prices are all the same: Amazon.de:http://www.amazon.de/?_encoding=UTF8&camp=1638&creative=19454&linkCode=ur2&site-redirect=de&tag=great043-21&linkId=ORZEQZEOVJAFURCZ Amazon.com:http://www.amazon.com/?_encoding=UTF8&camp=1789&creative=390957&linkCode=ur2&tag=gre09a-20&linkId=I5NDCEAVCD2OWM4S
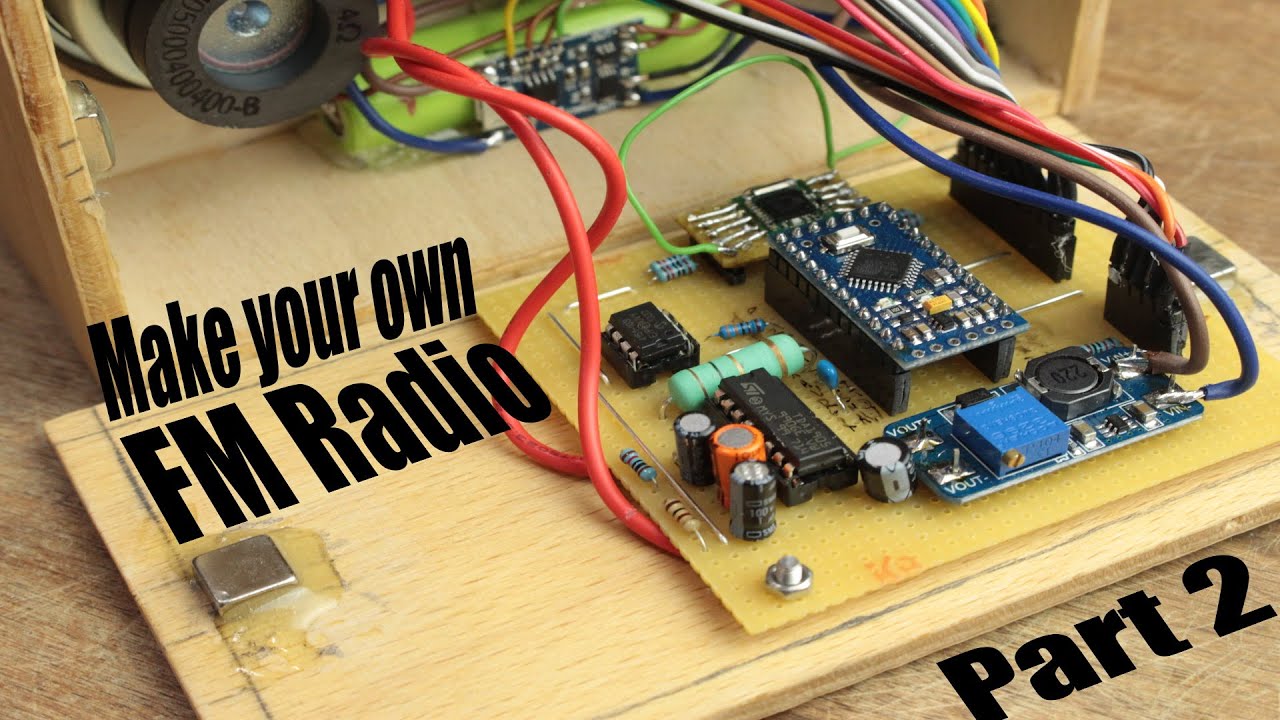
UtYbd89kVgY | 13 Mar 2016
Part 1: https://youtu.be/RqyhvlMKt14 Facebook: https://www.facebook.com/greatscottlab Twitter: https://twitter.com/GreatScottLab Support me for more videos: https://www.patreon.com/GreatScott?ty=h More project information (schematic, parts list, code,...) on Instructables: http://www.instructables.com/id/Make-Your-Own-FM-Radio/ In this Project I will show you how to transform a TEA5767 and an Arduino Pro Mini into a functional and decent looking FM Radio through the help of a couple complementary parts. Music: In the Hall of the Mountain King, Kevin MacLeod Aduro, Jens Kiilstofte https://machinimasound.com/music Killing Time, Kevin MacLeod (incompetech.com) You want to support my videos? You can browse and buy tools&materials from my Amazon Store. This way I get a small commission: Amazon.de: http://astore.amazon.de/great043-21 Amazon.com:http://astore.amazon.com/gre09a-20 Amazon.co.uk: http://astore.amazon.co.uk/gre0b-21 Or you feel super generous and want to use this Amazon link as your Amazon home page. And do not worry, your purchases are all anonym and the prices are all the same: Amazon.de:http://www.amazon.de/?_encoding=UTF8&camp=1638&creative=19454&linkCode=ur2&site-redirect=de&tag=great043-21&linkId=ORZEQZEOVJAFURCZ Amazon.com:http://www.amazon.com/?_encoding=UTF8&camp=1789&creative=390957&linkCode=ur2&tag=gre09a-20&linkId=I5NDCEAVCD2OWM4S

RqyhvlMKt14 | 06 Mar 2016
Previous video (I2C video): https://youtu.be/_fgWQ3TIhyE Part 2: https://youtu.be/UtYbd89kVgY Facebook: https://www.facebook.com/greatscottlab Twitter: https://twitter.com/GreatScottLab Support me for more videos: https://www.patreon.com/GreatScott?ty=h More project information (schematic, parts list, code,...) on Instructables: http://www.instructables.com/id/Make-Your-Own-FM-Radio/ In this Project I will show you how to transform a TEA5767 and an Arduino Pro Mini into a functional and decent looking FM Radio through the help of a couple complementary parts. Music: 2011 Lookalike by Bartlebeats Estatic Wave, Jens Kiilstofte https://machinimasound.com/music You want to support my videos? You can browse and buy tools&materials from my Amazon Store. This way I get a small commission: Amazon.de: http://astore.amazon.de/great043-21 Amazon.com:http://astore.amazon.com/gre09a-20 Amazon.co.uk: http://astore.amazon.co.uk/gre0b-21 Or you feel super generous and want to use this Amazon link as your Amazon home page. And do not worry, your purchases are all anonym and the prices are all the same: Amazon.de:http://www.amazon.de/?_encoding=UTF8&camp=1638&creative=19454&linkCode=ur2&site-redirect=de&tag=great043-21&linkId=ORZEQZEOVJAFURCZ Amazon.com:http://www.amazon.com/?_encoding=UTF8&camp=1789&creative=390957&linkCode=ur2&tag=gre09a-20&linkId=I5NDCEAVCD2OWM4S
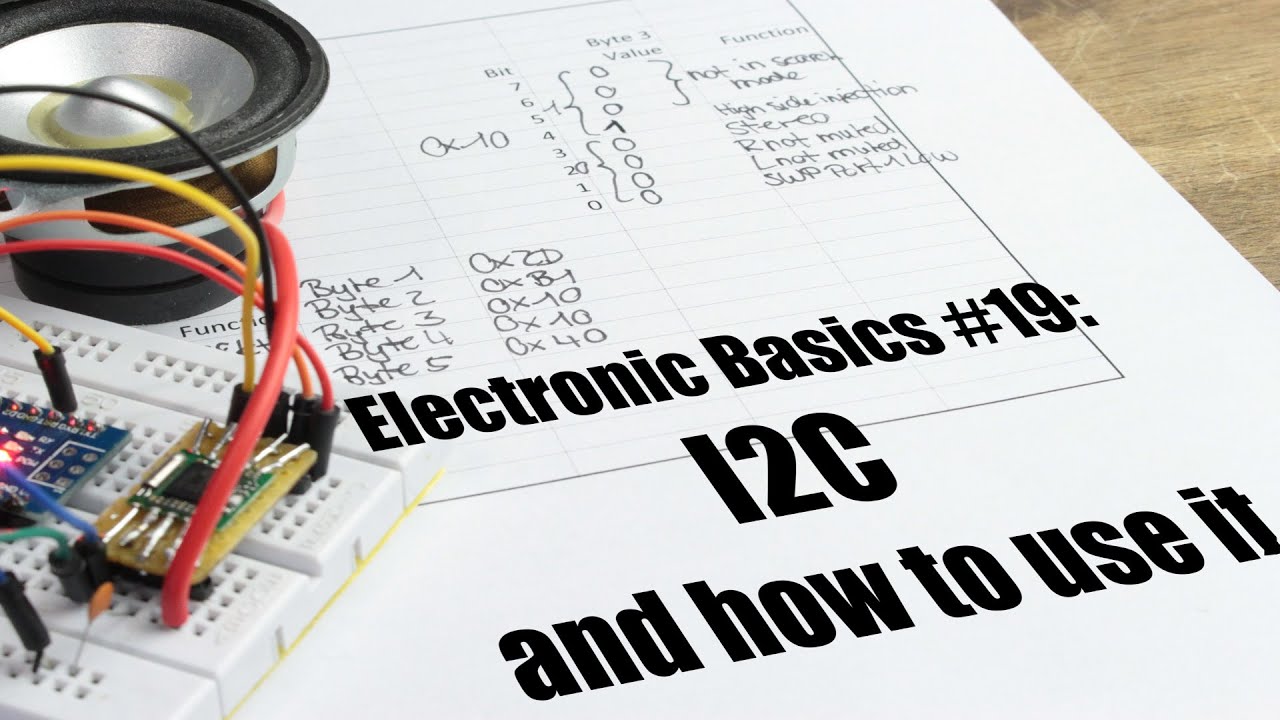
_fgWQ3TIhyE | 28 Feb 2016
Previous video: https://youtu.be/VjOGB6U_amY Facebook: https://www.facebook.com/greatscottlab Twitter: https://twitter.com/GreatScottLab Support me for more videos: https://www.patreon.com/GreatScott?ty=h In this episode of Electronic Basics I will present you the most important facts about the communication protocol I2C and how to use it with an Arduino. Music: Killing Time, Kevin MacLeod (incompetech.com) You want to support my videos? You can browse and buy tools&materials from my Amazon Store. This way I get a small commission: Amazon.de: http://astore.amazon.de/great043-21 Amazon.com:http://astore.amazon.com/gre09a-20 Amazon.co.uk: http://astore.amazon.co.uk/gre0b-21 Or you feel super generous and want to use this Amazon link as your Amazon home page. And do not worry, your purchases are all anonym and the prices are all the same: Amazon.de:http://www.amazon.de/?_encoding=UTF8&camp=1638&creative=19454&linkCode=ur2&site-redirect=de&tag=great043-21&linkId=ORZEQZEOVJAFURCZ Amazon.com:http://www.amazon.com/?_encoding=UTF8&camp=1789&creative=390957&linkCode=ur2&tag=gre09a-20&linkId=I5NDCEAVCD2OWM4S

VjOGB6U_amY | 21 Feb 2016
Previous video: https://youtu.be/0Xo0oKr8Thc RepRap Prusa I3 Kit video: https://youtu.be/id90y5fkirE Facebook: https://www.facebook.com/greatscottlab Twitter: https://twitter.com/GreatScottLab Support me for more videos: https://www.patreon.com/GreatScott?ty=h DIY Delta 3D Printer kit: http://amzn.to/1SaYabJ http://goo.gl/jsIJfU In this video I will show you what challenges I faced while assembling a diy delta 3d printer kit. I will talk about the basic function principle, how it compares to an ordinary XYZ 3d printer and the most important things you should look out if you want to own such a delta printer as well. Music: 2011 Lookalike by Bartlebeats You want to support my videos? You can browse and buy tools&materials from my Amazon Store. This way I get a small commission: Amazon.de: http://astore.amazon.de/great043-21 Amazon.com:http://astore.amazon.com/gre09a-20 Amazon.co.uk: http://astore.amazon.co.uk/gre0b-21 Or you feel super generous and want to use this Amazon link as your Amazon home page. And do not worry, your purchases are all anonym and the prices are all the same: Amazon.de:http://www.amazon.de/?_encoding=UTF8&camp=1638&creative=19454&linkCode=ur2&site-redirect=de&tag=great043-21&linkId=ORZEQZEOVJAFURCZ Amazon.com:http://www.amazon.com/?_encoding=UTF8&camp=1789&creative=390957&linkCode=ur2&tag=gre09a-20&linkId=I5NDCEAVCD2OWM4S Amazon.co.uk:http://www.amazon.co.uk/ref=as_li_ss_tl?_encoding=UTF8&camp=1634&creative=19450&linkCode=ur2&tag=gre0b-21

0Xo0oKr8Thc | 14 Feb 2016
Previous video: https://youtu.be/x19kwG-wJRI Facebook: https://www.facebook.com/greatscottlab Twitter: https://twitter.com/GreatScottLab Support me for more videos: https://www.patreon.com/GreatScott?ty=h G&C Supermarket: http://goo.gl/1ZGWGU Amp Hour interview: http://www.theamphour.com/284-an-inte... Questions: 1. What type videos do you enjoy making the most and which type of videos are most demanding to create? 0:55 2. When are we going to see you new 3D printer in action or review? 1:21 3. What are you studying? 2:00 4. Do you have any experience soldering wires to a XT60 connector? Is there a trick involved because my solder never sticks to them? 2:07 5. How does constant voltage VS constant current work? 2:27 6. Where do you get your silvered copper wire from? 3:15 7. Do you prefer LED lights for your house light? 3:26 8. Can you do a video about thyristors? 3:37 9. Have you heards about the ESP32? 3:46 10. Except for eBay, where do you buy most of the parts you need for your projects? 3:54 11. What's the title of your bachelor thesis at university? 4:14 12. What are your favorite projects? 4:26 13. Have you ever blown up a circuit? 4:45 14. What wire strippers and soldering iron do you use? 4:56 15. Can you make the Q&A video in German? 5:05 16. Bro, what's your real name? 5:09 17. Are you planning to make videos with German voice? 5:15 18. Can you make a post office box so that we can send you stuff? 5:21 You want to support my videos? You can browse and buy tools&materials from my Amazon Store. This way I get a small commission: Amazon.de: http://astore.amazon.de/great043-21 Amazon.com:http://astore.amazon.com/gre09a-20 Amazon.co.uk: http://astore.amazon.co.uk/gre0b-21 Or you feel super generous and want to use this Amazon link as your Amazon home page. And do not worry, your purchases are all anonym and the prices are all the same: Amazon.de:http://www.amazon.de/?_encoding=UTF8&camp=1638&creative=19454&linkCode=ur2&site-redirect=de&tag=great043-21&linkId=ORZEQZEOVJAFURCZ Amazon.com:http://www.amazon.com/?_encoding=UTF8&camp=1789&creative=390957&linkCode=ur2&tag=gre09a-20&linkId=I5NDCEAVCD2OWM4S

x19kwG-wJRI | 07 Feb 2016
Previous video: https://youtu.be/UjG2QGOC4aA Facebook: https://www.facebook.com/greatscottlab Twitter: https://twitter.com/GreatScottLab Support me for more videos: https://www.patreon.com/GreatScott?ty=h Get you DIY Oscilloscope here: Amazon.com: http://amzn.to/1UUZzSo Amazon.de: http://amzn.to/1UUZqhU Ebay: http://rover.ebay.com/rover/1/711-53200-19255-0/1?icep_ff3=2&pub=5575101368&toolid=10001&campid=5337582279&customid=&icep_item=291521813263&ipn=psmain&icep_vectorid=229466&kwid=902099&mtid=824&kw=lg Aliexpress: http://s.click.aliexpress.com/e/ujQFiyvfI In this VS episode I will compare a popular DIY oscilloscope kit with a regular DS oscilloscope. Music: 2011 Lookalike by Bartlebeats Killing Time, Kevin MacLeod (incompetech.com) You want to support my videos? You can browse and buy tools&materials from my Amazon Store. This way I get a small commission: Amazon.de: http://astore.amazon.de/great043-21 Amazon.com:http://astore.amazon.com/gre09a-20 Amazon.co.uk: http://astore.amazon.co.uk/gre0b-21 Or you feel super generous and want to use this Amazon link as your Amazon home page. And do not worry, your purchases are all anonym and the prices are all the same: Amazon.de:http://www.amazon.de/?_encoding=UTF8&camp=1638&creative=19454&linkCode=ur2&site-redirect=de&tag=great043-21&linkId=ORZEQZEOVJAFURCZ Amazon.com:http://www.amazon.com/?_encoding=UTF8&camp=1789&creative=390957&linkCode=ur2&tag=gre09a-20&linkId=I5NDCEAVCD2OWM4S

UjG2QGOC4aA | 31 Jan 2016
Previous video: https://youtu.be/UteZJ_7C4Mg Facebook: https://www.facebook.com/greatscottlab Twitter: https://twitter.com/GreatScottLab Support me for more videos: https://www.patreon.com/GreatScott?ty=h More project information (pictures, parts list,....) on Instructables: http://www.instructables.com/id/Convert-Your-Old-Laptop-Battery-Into-a-Power-Bank Parts: (take a look at the Instructables article for ebay links): Amazon.com: 1x TP4056: http://amzn.to/1SRDXZc 1x Micro USB Breakout: http://amzn.to/1NJd4if 1x Toggle Switch: http://amzn.to/1SRE1Zb 1x XL6009 Boost Converter: http://amzn.to/1PNqz8a 1x 5mm Red LED: http://amzn.to/1SRE9HY 2x 5mm Green LED: http://amzn.to/1NJdftY 1x 2.2kΩ Resistor: http://amzn.to/1PNqL7A 1x Female USB Port: http://amzn.to/1PNqKAt Amazon.de: 1x TP4056: http://amzn.to/1NnD3hB 1x Micro USB Breakout: http://amzn.to/1PNqUYL 1x Toggle Switch: http://amzn.to/1KiXL53 1x XL6009 Boost Converter: http://amzn.to/1PNr1TX 1x 5mm Red LED: http://amzn.to/1PNrrd5 2x 5mm Green LED: http://amzn.to/1PNrvcL 1x 2.2kΩ Resistor: http://amzn.to/1E9uEhN 1x Female USB Port: http://amzn.to/1PNrxBt Aliexpress: 1x TP4056: http://s.click.aliexpress.com/e/bYFYV7imu 1x Micro USB Breakout: http://s.click.aliexpress.com/e/B66yb2vju 1x Toggle Switch: http://s.click.aliexpress.com/e/AEEY7EyfQ 1x XL6009 Boost Converter: http://s.click.aliexpress.com/e/vbi6YvRzR 1x 5mm Red LED: http://s.click.aliexpress.com/e/ByJ2rzrbE 2x 5mm Green LED: http://s.click.aliexpress.com/e/vRfUzjeU7 1x 2.2kΩ Resistor: http://s.click.aliexpress.com/e/vFqzvVNna 1x Female USB Port: http://s.click.aliexpress.com/e/YnUFiyfqz In this episode of HACKED! I will convert a battery from an old laptop into a power bank which can charge my phone 4 to 5 times with a single charge. Music: 2011 Lookalike by Bartlebeats Aduro, Jens Kiilstofte Estatic Wave, Jens Kiilstofte https://machinimasound.com/music You want to support my videos? You can browse and buy tools&materials from my Amazon Store. This way I get a small commission: Amazon.de: http://astore.amazon.de/great043-21 Amazon.com:http://astore.amazon.com/gre09a-20 Amazon.co.uk: http://astore.amazon.co.uk/gre0b-21 Or you feel super generous and want to use this Amazon link as your Amazon home page. And do not worry, your purchases are all anonym and the prices are all the same: Amazon.de:http://www.amazon.de/?_encoding=UTF8&camp=1638&creative=19454&linkCode=ur2&site-redirect=de&tag=great043-21&linkId=ORZEQZEOVJAFURCZ Amazon.com:http://www.amazon.com/?_encoding=UTF8&camp=1789&creative=390957&linkCode=ur2&tag=gre09a-20&linkId=I5NDCEAVCD2OWM4S

UteZJ_7C4Mg | 24 Jan 2016
Previous video: https://youtu.be/g0F-rFhNZGU Facebook: https://www.facebook.com/greatscottlab Twitter: https://twitter.com/GreatScottLab Support me for more videos: https://www.patreon.com/GreatScott?ty=h In this Electronic Basics episode I will talk about how brushless motors work together with an ESC in order to create rotary movement. Along the way I also explain how a DC motor works. You want to support my videos? You can browse and buy tools&materials from my Amazon Store. This way I get a small commission: Amazon.de: http://astore.amazon.de/great043-21 Amazon.com:http://astore.amazon.com/gre09a-20 Amazon.co.uk: http://astore.amazon.co.uk/gre0b-21 Or you feel super generous and want to use this Amazon link as your Amazon home page. And do not worry, your purchases are all anonym and the prices are all the same: Amazon.de:http://www.amazon.de/?_encoding=UTF8&camp=1638&creative=19454&linkCode=ur2&site-redirect=de&tag=great043-21&linkId=ORZEQZEOVJAFURCZ Amazon.com:http://www.amazon.com/?_encoding=UTF8&camp=1789&creative=390957&linkCode=ur2&tag=gre09a-20&linkId=I5NDCEAVCD2OWM4S

zaTskMjpXtA | 10 Jan 2016
Part 1: https://youtu.be/4_ImE0sRnfM Part 2: https://youtu.be/N83c8PjmLcw How to program an ATtiny: https://youtu.be/9LjfkjwMqXI Facebook: https://www.facebook.com/greatscottlab Twitter: https://twitter.com/GreatScottLab Support me for more videos: https://www.patreon.com/GreatScott?ty=h More project information (schematics, code, parts list,....) on Instructables: http://www.instructables.com/id/Make-Your-Own-Electric-Motorized-Longboard In this video series I will show you how to build an electric motorized longboard from scratch. It can reach speeds up to 34km/h and travel up to 20km with a single charge. The estimated costs are around 300$ which makes it a good alternative to commercial solutions. Parts (not complete, see Instructables link for more information): Ebay: 1x Longboard Kit: http://rover.ebay.com/rover/1/711-53200-19255-0/1?icep_ff3=2&pub=5575101368&toolid=10001&campid=5337582279&customid=&icep_item=281633308770&ipn=psmain&icep_vectorid=229466&kwid=902099&mtid=824&kw=lg 1x 400kV 1560W Motor: http://rover.ebay.com/rover/1/711-53200-19255-0/1?icep_ff3=2&pub=5575101368&toolid=10001&campid=5337582279&customid=&icep_item=181700328609&ipn=psmain&icep_vectorid=229466&kwid=902099&mtid=824&kw=lg or http://rover.ebay.com/rover/1/711-53200-19255-0/1?icep_ff3=2&pub=5575101368&toolid=10001&campid=5337582279&customid=&icep_item=171981608183&ipn=psmain&icep_vectorid=229466&kwid=902099&mtid=824&kw=lg 1x Gear System: http://rover.ebay.com/rover/1/711-53200-19255-0/1?icep_ff3=2&pub=5575101368&toolid=10001&campid=5337582279&customid=&icep_item=181970599036&ipn=psmain&icep_vectorid=229466&kwid=902099&mtid=824&kw=lg http://rover.ebay.com/rover/1/711-53200-19255-0/1?icep_ff3=2&pub=5575101368&toolid=10001&campid=5337582279&customid=&icep_item=181603550769&ipn=psmain&icep_vectorid=229466&kwid=902099&mtid=824&kw=lg http://rover.ebay.com/rover/1/711-53200-19255-0/1?icep_ff3=2&pub=5575101368&toolid=10001&campid=5337582279&customid=&icep_item=262052317344&ipn=psmain&icep_vectorid=229466&kwid=902099&mtid=824&kw=lg 2x 22.2V 5000mAh LiPo Battery: http://rover.ebay.com/rover/1/711-53200-19255-0/1?icep_ff3=2&pub=5575101368&toolid=10001&campid=5337582279&customid=&icep_item=221559238493&ipn=psmain&icep_vectorid=229466&kwid=902099&mtid=824&kw=lg 1x 70A ESC: http://rover.ebay.com/rover/1/711-53200-19255-0/1?icep_ff3=2&pub=5575101368&toolid=10001&campid=5337582279&customid=&icep_item=221747617871&ipn=psmain&icep_vectorid=229466&kwid=902099&mtid=824&kw=lg or 1x 80A ESC: http://rover.ebay.com/rover/1/711-53200-19255-0/1?icep_ff3=2&pub=5575101368&toolid=10001&campid=5337582279&customid=&icep_item=171981608183&ipn=psmain&icep_vectorid=229466&kwid=902099&mtid=824&kw=lg Amazon.com: 1x Longboard Kit: http://amzn.to/1NI310k 1x Grip Tape: http://amzn.to/1klBGqh Amazon.de: 1x Longboard Kit: http://amzn.to/1TEUgpy 1x Grip Tape: http://amzn.to/1klBxTE Music: In the Hall of the Mountain King, Kevin MacLeod Aduro, Jens Kiilstofte Estatic Wave, Jens Kiilstofte https://machinimasound.com/music You want to support my videos? You can browse and buy tools&materials from my Amazon Store. This way I get a small commission: Amazon.de: http://astore.amazon.de/great043-21 Amazon.com:http://astore.amazon.com/gre09a-20 Amazon.co.uk: http://astore.amazon.co.uk/gre0b-21 Or you feel super generous and want to use this Amazon link as your Amazon home page. And do not worry, your purchases are all anonym and the prices are all the same: Amazon.de:http://www.amazon.de/?_encoding=UTF8&camp=1638&creative=19454&linkCode=ur2&site-redirect=de&tag=great043-21&linkId=ORZEQZEOVJAFURCZ Amazon.com:http://www.amazon.com/?_encoding=UTF8&camp=1789&creative=390957&linkCode=ur2&tag=gre09a-20&linkId=I5NDCEAVCD2OWM4S

N83c8PjmLcw | 03 Jan 2016
Part 1: https://youtu.be/4_ImE0sRnfM Huge LED Sign Video: https://youtu.be/tXfMg8y1Fs4 Facebook: https://www.facebook.com/greatscottlab Twitter: https://twitter.com/GreatScottLab Support me for more videos: https://www.patreon.com/GreatScott?ty=h More project information (schematics, code, parts list,....) on Instructables: http://www.instructables.com/id/Make-Your-Own-Electric-Motorized-Longboard In this video series I will show you how to build an electric motorized longboard from scratch. It can reach speeds up to 34km/h and travel up to 20km with a single charge. The estimated costs are around 300$ which makes it a good alternative to commercial solutions. Parts (not complete, see Instructables link for more information): Ebay: 1x Longboard Kit: http://rover.ebay.com/rover/1/711-53200-19255-0/1?icep_ff3=2&pub=5575101368&toolid=10001&campid=5337582279&customid=&icep_item=281633308770&ipn=psmain&icep_vectorid=229466&kwid=902099&mtid=824&kw=lg 1x 400kV 1560W Motor: http://rover.ebay.com/rover/1/711-53200-19255-0/1?icep_ff3=2&pub=5575101368&toolid=10001&campid=5337582279&customid=&icep_item=172050461940&ipn=psmain&icep_vectorid=229466&kwid=902099&mtid=824&kw=lg or http://rover.ebay.com/rover/1/711-53200-19255-0/1?icep_ff3=2&pub=5575101368&toolid=10001&campid=5337582279&customid=&icep_item=171981608183&ipn=psmain&icep_vectorid=229466&kwid=902099&mtid=824&kw=lg 1x Gear System: http://rover.ebay.com/rover/1/711-53200-19255-0/1?icep_ff3=2&pub=5575101368&toolid=10001&campid=5337582279&customid=&icep_item=181970599036&ipn=psmain&icep_vectorid=229466&kwid=902099&mtid=824&kw=lg http://rover.ebay.com/rover/1/711-53200-19255-0/1?icep_ff3=2&pub=5575101368&toolid=10001&campid=5337582279&customid=&icep_item=181603550769&ipn=psmain&icep_vectorid=229466&kwid=902099&mtid=824&kw=lg http://rover.ebay.com/rover/1/711-53200-19255-0/1?icep_ff3=2&pub=5575101368&toolid=10001&campid=5337582279&customid=&icep_item=262052317344&ipn=psmain&icep_vectorid=229466&kwid=902099&mtid=824&kw=lg 2x 22.2V 5000mAh LiPo Battery: http://rover.ebay.com/rover/1/711-53200-19255-0/1?icep_ff3=2&pub=5575101368&toolid=10001&campid=5337582279&customid=&icep_item=221559238493&ipn=psmain&icep_vectorid=229466&kwid=902099&mtid=824&kw=lg 1x 70A ESC: http://rover.ebay.com/rover/1/711-53200-19255-0/1?icep_ff3=2&pub=5575101368&toolid=10001&campid=5337582279&customid=&icep_item=221747617871&ipn=psmain&icep_vectorid=229466&kwid=902099&mtid=824&kw=lg or 1x 80A ESC: http://rover.ebay.com/rover/1/711-53200-19255-0/1?icep_ff3=2&pub=5575101368&toolid=10001&campid=5337582279&customid=&icep_item=171981608183&ipn=psmain&icep_vectorid=229466&kwid=902099&mtid=824&kw=lg Amazon.com: 1x Longboard Kit: http://amzn.to/1NI310k 1x Grip Tape: http://amzn.to/1klBGqh Amazon.de: 1x Longboard Kit: http://amzn.to/1TEUgpy 1x Grip Tape: http://amzn.to/1klBxTE Music: In the Hall of the Mountain King, Kevin MacLeod Killing Time, Kevin MacLeod (incompetech.com) You want to support my videos? You can browse and buy tools&materials from my Amazon Store. This way I get a small commission: Amazon.de: http://astore.amazon.de/great043-21 Amazon.com:http://astore.amazon.com/gre09a-20 Amazon.co.uk: http://astore.amazon.co.uk/gre0b-21 Or you feel super generous and want to use this Amazon link as your Amazon home page. And do not worry, your purchases are all anonym and the prices are all the same: Amazon.de:http://www.amazon.de/?_encoding=UTF8&camp=1638&creative=19454&linkCode=ur2&site-redirect=de&tag=great043-21&linkId=ORZEQZEOVJAFURCZ Amazon.com:http://www.amazon.com/?_encoding=UTF8&camp=1789&creative=390957&linkCode=ur2&tag=gre09a-20&linkId=I5NDCEAVCD2OWM4S

4_ImE0sRnfM | 27 Dec 2015
Previous video: https://youtu.be/-B5vGQqgoNQ Facebook: https://www.facebook.com/greatscottlab Twitter: https://twitter.com/GreatScottLab Support me for more videos: https://www.patreon.com/GreatScott?ty=h Longboard Templates: https://www.silverfishlongboarding.com/forum/churchill-manufacturing/176915-churchill-mfg-lost-longboard-templates-found-uncut-pressed-blanks.html More project information (schematics, code, parts list,....) on Instructables: http://www.instructables.com/id/Make-Your-Own-Electric-Motorized-Longboard In this video series I will show you how to build an electric motorized longboard from scratch. It can reach speeds up to 34km/h and travel up to 20km with a single charge. The estimated costs are around 300$ which makes it a good alternative to commercial solutions. Parts (not complete, see Instructables link for more information): Ebay: 1x Longboard Kit: http://rover.ebay.com/rover/1/711-53200-19255-0/1?icep_ff3=2&pub=5575101368&toolid=10001&campid=5337582279&customid=&icep_item=281633308770&ipn=psmain&icep_vectorid=229466&kwid=902099&mtid=824&kw=lg 1x 400kV 1560W Motor: http://rover.ebay.com/rover/1/711-53200-19255-0/1?icep_ff3=2&pub=5575101368&toolid=10001&campid=5337582279&customid=&icep_item=172050461940&ipn=psmain&icep_vectorid=229466&kwid=902099&mtid=824&kw=lg or http://rover.ebay.com/rover/1/711-53200-19255-0/1?icep_ff3=2&pub=5575101368&toolid=10001&campid=5337582279&customid=&icep_item=171981608183&ipn=psmain&icep_vectorid=229466&kwid=902099&mtid=824&kw=lg 1x Gear System: http://rover.ebay.com/rover/1/711-53200-19255-0/1?icep_ff3=2&pub=5575101368&toolid=10001&campid=5337582279&customid=&icep_item=181970599036&ipn=psmain&icep_vectorid=229466&kwid=902099&mtid=824&kw=lg http://rover.ebay.com/rover/1/711-53200-19255-0/1?icep_ff3=2&pub=5575101368&toolid=10001&campid=5337582279&customid=&icep_item=181603550769&ipn=psmain&icep_vectorid=229466&kwid=902099&mtid=824&kw=lg http://rover.ebay.com/rover/1/711-53200-19255-0/1?icep_ff3=2&pub=5575101368&toolid=10001&campid=5337582279&customid=&icep_item=262052317344&ipn=psmain&icep_vectorid=229466&kwid=902099&mtid=824&kw=lg 2x 22.2V 5000mAh LiPo Battery: http://rover.ebay.com/rover/1/711-53200-19255-0/1?icep_ff3=2&pub=5575101368&toolid=10001&campid=5337582279&customid=&icep_item=221559238493&ipn=psmain&icep_vectorid=229466&kwid=902099&mtid=824&kw=lg 1x 70A ESC: http://rover.ebay.com/rover/1/711-53200-19255-0/1?icep_ff3=2&pub=5575101368&toolid=10001&campid=5337582279&customid=&icep_item=221747617871&ipn=psmain&icep_vectorid=229466&kwid=902099&mtid=824&kw=lg or 1x 80A ESC: http://rover.ebay.com/rover/1/711-53200-19255-0/1?icep_ff3=2&pub=5575101368&toolid=10001&campid=5337582279&customid=&icep_item=171981608183&ipn=psmain&icep_vectorid=229466&kwid=902099&mtid=824&kw=lg Amazon.com: 1x Longboard Kit: http://amzn.to/1NI310k 1x Grip Tape: http://amzn.to/1klBGqh Amazon.de: 1x Longboard Kit: http://amzn.to/1TEUgpy 1x Grip Tape: http://amzn.to/1klBxTE Music: 2011 Lookalike by Bartlebeats You want to support my videos? You can browse and buy tools&materials from my Amazon Store. This way I get a small commission: Amazon.de: http://astore.amazon.de/great043-21 Amazon.com:http://astore.amazon.com/gre09a-20 Amazon.co.uk: http://astore.amazon.co.uk/gre0b-21 Or you feel super generous and want to use this Amazon link as your Amazon home page. And do not worry, your purchases are all anonym and the prices are all the same: Amazon.de:http://www.amazon.de/?_encoding=UTF8&camp=1638&creative=19454&linkCode=ur2&site-redirect=de&tag=great043-21&linkId=ORZEQZEOVJAFURCZ Amazon.com:http://www.amazon.com/?_encoding=UTF8&camp=1789&creative=390957&linkCode=ur2&tag=gre09a-20&linkId=I5NDCEAVCD2OWM4S

-B5vGQqgoNQ | 20 Dec 2015
Part 1: https://youtu.be/xpdpDo-gR3Q 5x5x5 RGB LED Cube video: https://youtu.be/jX1GaPgSheI Kevin Darrahs video: https://youtu.be/zGgUfAB4m24 ESP8266 Firmware update: http://bbs.ai-thinker.com/forum.php?mod=viewthread&tid=984&extra=page%3D1 Facebook: https://www.facebook.com/greatscottlab Twitter: https://twitter.com/GreatScottLab Support me for more videos: https://www.patreon.com/GreatScott?ty=h More project information (parts list, schematic,....) on Instructables: http://www.instructables.com/id/DIY-Big-7-Segment-Internet-Display In this two part video series I will show you how I combined 4 inch 7-segment displays and an ESP8266 Wifi module to create an 8 digit display that can present your most important data from the internet. Music: In the Hall of the Mountain King, Kevin MacLeod Killing Time, Kevin MacLeod (incompetech.com) Estatic Wave, Jens Kiilstofte You want to support my videos? You can browse and buy tools&materials from my Amazon Store. This way I get a small commission: Amazon.de: http://astore.amazon.de/great043-21 Amazon.com:http://astore.amazon.com/gre09a-20 Amazon.co.uk: http://astore.amazon.co.uk/gre0b-21 Or you feel super generous and want to use this Amazon link as your Amazon home page. And do not worry, your purchases are all anonym and the prices are all the same: Amazon.de:http://www.amazon.de/?_encoding=UTF8&camp=1638&creative=19454&linkCode=ur2&site-redirect=de&tag=great043-21&linkId=ORZEQZEOVJAFURCZ Amazon.com:http://www.amazon.com/?_encoding=UTF8&camp=1789&creative=390957&linkCode=ur2&tag=gre09a-20&linkId=I5NDCEAVCD2OWM4S

xpdpDo-gR3Q | 13 Dec 2015
Previous video: https://youtu.be/xdhVs0Oc2yA Facebook: https://www.facebook.com/greatscottlab Twitter: https://twitter.com/GreatScottLab Support me for more videos: https://www.patreon.com/GreatScott?ty=h Thanks to http://www.pcbcart.com/ for sponsoring this video Coupon Code to save 15% up to 200$ off on your first order: PCBGSL In this two part video series I will show you how I combined 4 inch 7-segment displays and an ESP8266 Wifi module to create an 8 digit display that can present your most important data from the internet. Music: 2011 Lookalike by Bartlebeats You want to support my videos? You can browse and buy tools&materials from my Amazon Store. This way I get a small commission: Amazon.de: http://astore.amazon.de/great043-21 Amazon.com:http://astore.amazon.com/gre09a-20 Amazon.co.uk: http://astore.amazon.co.uk/gre0b-21 Or you feel super generous and want to use this Amazon link as your Amazon home page. And do not worry, your purchases are all anonym and the prices are all the same: Amazon.de:http://www.amazon.de/?_encoding=UTF8&camp=1638&creative=19454&linkCode=ur2&site-redirect=de&tag=great043-21&linkId=ORZEQZEOVJAFURCZ Amazon.com:http://www.amazon.com/?_encoding=UTF8&camp=1789&creative=390957&linkCode=ur2&tag=gre09a-20&linkId=I5NDCEAVCD2OWM4S

xdhVs0Oc2yA | 06 Dec 2015
Previous video: https://youtu.be/h_F3J4vyzNk Facebook: https://www.facebook.com/greatscottlab Twitter: https://twitter.com/GreatScottLab Support me for more videos: https://www.patreon.com/GreatScott?ty=h Roseapple Pi Website: http://roseapplepi.org/ Lemaker Guitar Website: http://www.lemaker.org/product-guitar-index.html In this mini review I will have a look at the rather new Roseapple Pi single board computer. Is it another copy of the Raspberry Pi formula or does it really make sense to get one? Let's find it out. Music: 2011 Lookalike by Bartlebeats You want to support my videos? You can browse and buy tools&materials from my Amazon Store. This way I get a small commission: Amazon.de: http://astore.amazon.de/great043-21 Amazon.com:http://astore.amazon.com/gre09a-20 Amazon.co.uk: http://astore.amazon.co.uk/gre0b-21 Or you feel super generous and want to use this Amazon link as your Amazon home page. And do not worry, your purchases are all anonym and the prices are all the same: Amazon.de:http://www.amazon.de/?_encoding=UTF8&camp=1638&creative=19454&linkCode=ur2&site-redirect=de&tag=great043-21&linkId=ORZEQZEOVJAFURCZ Amazon.com:http://www.amazon.com/?_encoding=UTF8&camp=1789&creative=390957&linkCode=ur2&tag=gre09a-20&linkId=I5NDCEAVCD2OWM4S
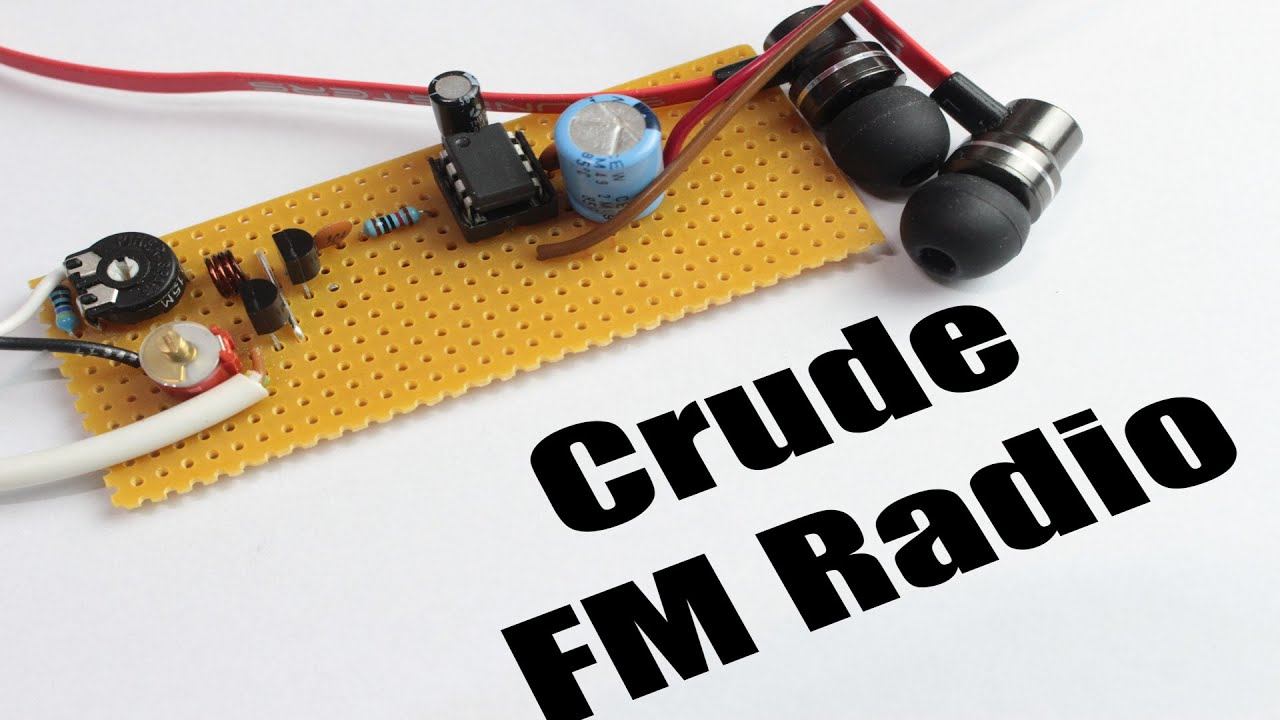
h_F3J4vyzNk | 29 Nov 2015
WARNING: Always check your local laws before using a frequency to transmit your RF FM signal. RF Transmitter: http://rover.ebay.com/rover/1/711-53200-19255-0/1?icep_ff3=2&pub=5575101368&toolid=10001&campid=5337582279&customid=&icep_item=291570941442&ipn=psmain&icep_vectorid=229466&kwid=902099&mtid=824&kw=lg Previous video: https://youtu.be/eYVOdlK15Og Facebook: https://www.facebook.com/greatscottlab Twitter: https://twitter.com/GreatScottLab Support me for more videos: https://www.patreon.com/GreatScott?ty=h More project information (parts list, schematic, .....) on Instructables: http://www.instructables.com/id/Build-your-own-Crude-FM-Radio/ Parts: Amazon.de: 1x LM386: http://amzn.to/1PkTgbX 1x 10kΩ, 1x 4.7kΩ Resistor: http://amzn.to/1A2KZzi 1x Variable Capacitor (1-30pF): http://amzn.to/1PkTwYi 2x BF199 Transistor: - 1x 25kΩ Potentiometer: http://amzn.to/1IrYFpR 2x 100nF Capacitor: http://amzn.to/1IrYXgf 1x 10µF, 1x 470µF Capacitor: http://amzn.to/1IrZ4Ze Amazon.com: 1x LM386: http://amzn.to/1Oo2iUa 1x 10kΩ, 1x 4.7kΩ Resistor: http://amzn.to/1Oo2mmI 1x Variable Capacitor (1-30pF): http://amzn.to/1Tlg49S 2x BF199 Transistor: http://amzn.to/1Oo2t1M 1x 25kΩ Potentiometer: http://amzn.to/1Oo2y5p 2x 100nF Capacitor: http://amzn.to/1TlgaOO 1x 10µF, 1x 470µF Capacitor: http://amzn.to/1Oo2GlB Ebay: 1x LM386: http://rover.ebay.com/rover/1/711-53200-19255-0/1?icep_ff3=2&pub=5575101368&toolid=10001&campid=5337582279&customid=&icep_item=130948512594&ipn=psmain&icep_vectorid=229466&kwid=902099&mtid=824&kw=lg 1x 10kΩ, 1x 4.7kΩ Resistor: http://rover.ebay.com/rover/1/711-53200-19255-0/1?icep_ff3=2&pub=5575101368&toolid=10001&campid=5337582279&customid=&icep_item=271598211084&ipn=psmain&icep_vectorid=229466&kwid=902099&mtid=824&kw=lg 1x Variable Capacitor (1-30pF): http://rover.ebay.com/rover/1/711-53200-19255-0/1?icep_ff3=2&pub=5575101368&toolid=10001&campid=5337582279&customid=&icep_item=130854092221&ipn=psmain&icep_vectorid=229466&kwid=902099&mtid=824&kw=lg 2x BF199 Transistor: http://rover.ebay.com/rover/1/711-53200-19255-0/1?icep_ff3=2&pub=5575101368&toolid=10001&campid=5337582279&customid=&icep_item=280930961746&ipn=psmain&icep_vectorid=229466&kwid=902099&mtid=824&kw=lg 1x 25kΩ Potentiometer: http://rover.ebay.com/rover/1/711-53200-19255-0/1?icep_ff3=2&pub=5575101368&toolid=10001&campid=5337582279&customid=&icep_item=301052121341&ipn=psmain&icep_vectorid=229466&kwid=902099&mtid=824&kw=lg 2x 100nF Capacitor: http://rover.ebay.com/rover/1/711-53200-19255-0/1?icep_ff3=2&pub=5575101368&toolid=10001&campid=5337582279&customid=&icep_item=201143962266&ipn=psmain&icep_vectorid=229466&kwid=902099&mtid=824&kw=lg 1x 10µF, 1x 470µF Capacitor: http://rover.ebay.com/rover/1/711-53200-19255-0/1?icep_ff3=2&pub=5575101368&toolid=10001&campid=5337582279&customid=&icep_item=131544080386&ipn=psmain&icep_vectorid=229466&kwid=902099&mtid=824&kw=lg In this video I will demonstrate how a RF FM transmitter works and how this principle compares to the older AM. I will also show you how to build a simple and crude FM receiver which can even sometimes let you listen to your favorite radio stations. Music: 2011 Lookalike by Bartlebeats Killing Time, Kevin MacLeod (incompetech.com) You want to support my videos? You can browse and buy tools&materials from my Amazon Store. This way I get a small commission: Amazon.de: http://astore.amazon.de/great043-21 Amazon.com:http://astore.amazon.com/gre09a-20 Amazon.co.uk: http://astore.amazon.co.uk/gre0b-21 Or you feel super generous and want to use this Amazon link as your Amazon home page. And do not worry, your purchases are all anonym and the prices are all the same: Amazon.de:http://www.amazon.de/?_encoding=UTF8&camp=1638&creative=19454&linkCode=ur2&site-redirect=de&tag=great043-21&linkId=ORZEQZEOVJAFURCZ Amazon.com:http://www.amazon.com/?_encoding=UTF8&camp=1789&creative=390957&linkCode=ur2&tag=gre09a-20&linkId=I5NDCEAVCD2OWM4S

eYVOdlK15Og | 22 Nov 2015
Previous video: https://youtu.be/tXfMg8y1Fs4 Electronic Basics #14: Capacitors: https://youtu.be/otQGdPLyF3w Electronic Basics #12: Coils / Inductors (Part 1): https://youtu.be/kdrP9WbJIb8 Facebook: https://www.facebook.com/greatscottlab Twitter: https://twitter.com/GreatScottLab Support me for more videos: https://www.patreon.com/GreatScott?ty=h In this episode of electronic basics I will talk about how important oscillators are in circuits and how the three main principles work in order to create them. These are RC relaxation circuits, LC tank circuits and crystal oscillators. You want to support my videos? You can browse and buy tools&materials from my Amazon Store. This way I get a small commission: Amazon.de: http://astore.amazon.de/great043-21 Amazon.com:http://astore.amazon.com/gre09a-20 Amazon.co.uk: http://astore.amazon.co.uk/gre0b-21 Or you feel super generous and want to use this Amazon link as your Amazon home page. And do not worry, your purchases are all anonym and the prices are all the same: Amazon.de:http://www.amazon.de/?_encoding=UTF8&camp=1638&creative=19454&linkCode=ur2&site-redirect=de&tag=great043-21&linkId=ORZEQZEOVJAFURCZ Amazon.com:http://www.amazon.com/?_encoding=UTF8&camp=1789&creative=390957&linkCode=ur2&tag=gre09a-20&linkId=I5NDCEAVCD2OWM4S

tXfMg8y1Fs4 | 15 Nov 2015
Previous video: https://youtu.be/trmxzUVT2eE Facebook: https://www.facebook.com/greatscottlab Twitter: https://twitter.com/GreatScottLab Support me for more videos: https://www.patreon.com/GreatScott?ty=h More information on Instructables: http://www.instructables.com/id/How-to-make-a-Huge-Light-Up-LED-Sign/ Parts List: Home Improvement Store: 250x90 1.6mm thick MDF board 150x90 1.6mm thick MDF board "big ass screws" aka 6.0x100 "screws for the wood sqaure" aka 5.0x45 "screws for the acrylic glass" aka 3.5x12 4x spruce wood 34x54x2500 wallpaper, terminals, mounting clamps, acrylic glass Amazon.de: 1x Spray Adhesive: http://amzn.to/1lpFtEa 1x 5m RGB LED Strip: http://amzn.to/1lpFyaL 2x 5m warm white LED Strip: http://amzn.to/1lpFEiP 1x Foam Tape: http://amzn.to/1lpFI1U Amazon.com: 1x Spray Adhesive: http://amzn.to/1H2Xp17 1x 5m RGB LED Strip: http://amzn.to/1H2Xpyb 2x 5m warm white LED Strip: http://amzn.to/1H2XwKc 1x Foam Tape: http://amzn.to/1LgliNA Ebay: 1x Spray Adhesive: http://rover.ebay.com/rover/1/711-53200-19255-0/1?icep_ff3=2&pub=5575101368&toolid=10001&campid=5337582279&customid=&icep_item=301443804108&ipn=psmain&icep_vectorid=229466&kwid=902099&mtid=824&kw=lg 1x 5m RGB LED Strip: http://rover.ebay.com/rover/1/711-53200-19255-0/1?icep_ff3=2&pub=5575101368&toolid=10001&campid=5337582279&customid=&icep_item=161255347539&ipn=psmain&icep_vectorid=229466&kwid=902099&mtid=824&kw=lg 2x 5m warm white LED Strip: http://rover.ebay.com/rover/1/711-53200-19255-0/1?icep_ff3=2&pub=5575101368&toolid=10001&campid=5337582279&customid=&icep_item=381217842760&ipn=psmain&icep_vectorid=229466&kwid=902099&mtid=824&kw=lg 1x Foam Tape: http://rover.ebay.com/rover/1/711-53200-19255-0/1?icep_ff3=2&pub=5575101368&toolid=10001&campid=5337582279&customid=&icep_item=321220564286&ipn=psmain&icep_vectorid=229466&kwid=902099&mtid=824&kw=lg In this video I will show you how to build a huge sign with a custom lettering that can light up through the help of RGB LEDs. But the sign can also be used as your primary light source in your room by using warm white LED strips. Music: 2011 Lookalike by Bartlebeats Aduro by Jens Kiilstofte https://machinimasound.com/music/ You want to support my videos? You can browse and buy tools&materials from my Amazon Store. This way I get a small commission: Amazon.de: http://astore.amazon.de/great043-21 Amazon.com:http://astore.amazon.com/gre09a-20 Amazon.co.uk: http://astore.amazon.co.uk/gre0b-21 Or you feel super generous and want to use this Amazon link as your Amazon home page. And do not worry, your purchases are all anonym and the prices are all the same: Amazon.de:http://www.amazon.de/?_encoding=UTF8&camp=1638&creative=19454&linkCode=ur2&site-redirect=de&tag=great043-21&linkId=ORZEQZEOVJAFURCZ Amazon.com:http://www.amazon.com/?_encoding=UTF8&camp=1789&creative=390957&linkCode=ur2&tag=gre09a-20&linkId=I5NDCEAVCD2OWM4S
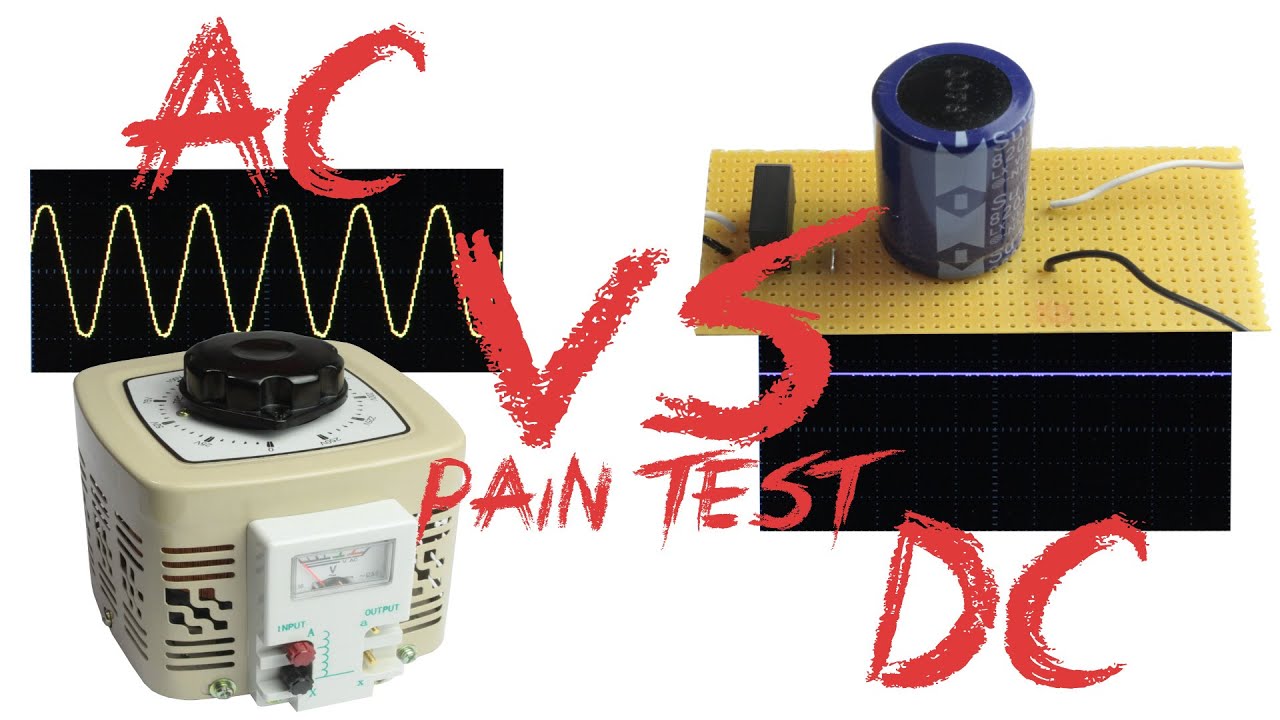
trmxzUVT2eE | 08 Nov 2015
Previous video: https://youtu.be/R-arZ31-zJo Facebook: https://www.facebook.com/greatscottlab Twitter: https://twitter.com/GreatScottLab Support me for more videos: https://www.patreon.com/GreatScott?ty=h During this experiment I will find out what voltage levels of AC and DC can be dangerous for the human body. Music: 2011 Lookalike by Bartlebeats You want to support my videos? You can browse and buy tools&materials from my Amazon Store. This way I get a small commission: Amazon.de: http://astore.amazon.de/great043-21 Amazon.com:http://astore.amazon.com/gre09a-20 Amazon.co.uk: http://astore.amazon.co.uk/gre0b-21 Or you feel super generous and want to use this Amazon link as your Amazon home page. And do not worry, your purchases are all anonym and the prices are all the same: Amazon.de:http://www.amazon.de/?_encoding=UTF8&camp=1638&creative=19454&linkCode=ur2&site-redirect=de&tag=great043-21&linkId=ORZEQZEOVJAFURCZ Amazon.com:http://www.amazon.com/?_encoding=UTF8&camp=1789&creative=390957&linkCode=ur2&tag=gre09a-20&linkId=I5NDCEAVCD2OWM4S
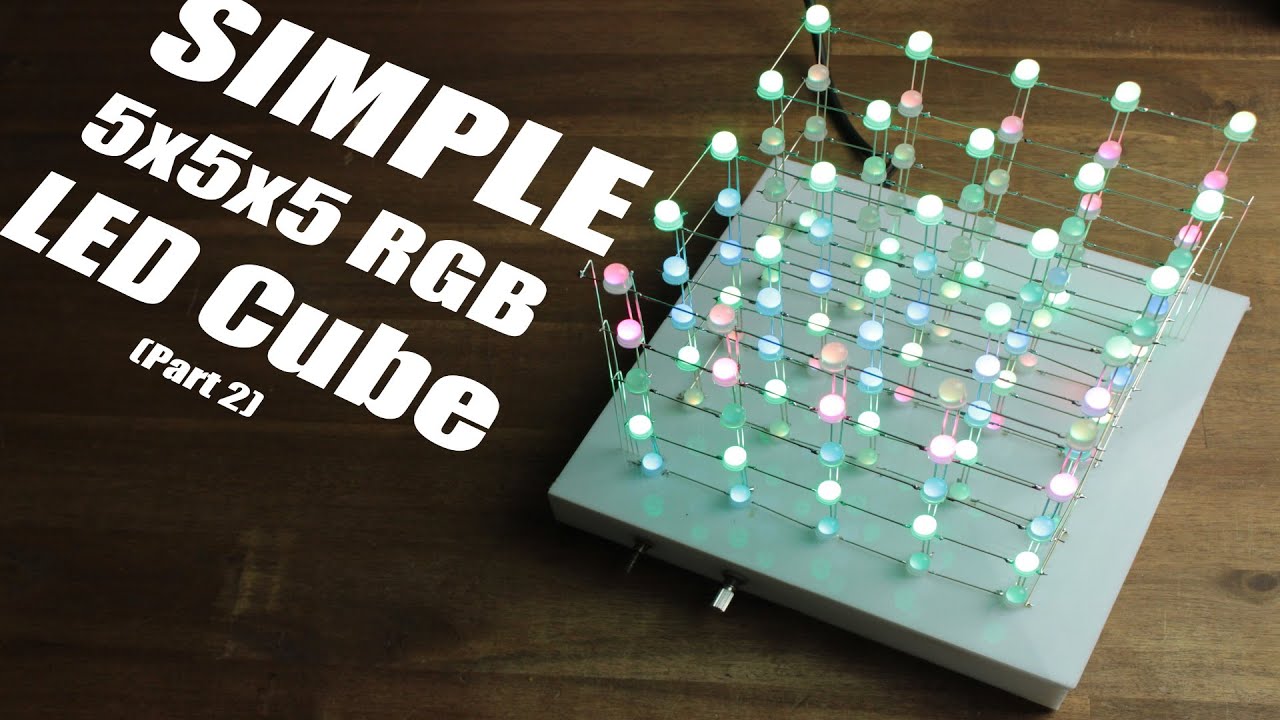
R-arZ31-zJo | 01 Nov 2015
Part 1: https://youtu.be/jX1GaPgSheI Facebook: https://www.facebook.com/greatscottlab Twitter: https://twitter.com/GreatScottLab Support me for more videos: https://www.patreon.com/GreatScott?ty=h More information on Instructables: http://www.instructables.com/id/Make-your-own-SIMPLE-5x5x5-RGB-LED-Cube/ In this 2 part video series I will show you how to build a simpler version of a 5x5x5 RGB LED Cube. The driver circuit only consists of an Arduino Nano and the programming is rather simple due to the FastLED library. Parts List: Amazon.com: 1x Arduino Nano: http://amzn.to/1XrlQJy 150x PL9823 8mm LED: - 1x Veroboard: http://amzn.to/1GzYz3C 3x PCB terminal: http://amzn.to/205FEEt 2x Female header: http://amzn.to/1Wc1DVD 1x Toggle Switch: http://amzn.to/1Wc1Hom 1x 10k Potentiometer: http://amzn.to/1PKY1Le 1x DC Jack: http://amzn.to/1PKY2iw Silvered Copper wire: http://amzn.to/1NtWK8d 1x 5V Power Supply: http://amzn.to/1HkBI7k Amazon.de: 1x Arduino Nano: http://amzn.to/1k2lfiB 150x PL9823 8mm LED: http://amzn.to/1NtX4DR 1x Veroboard: http://amzn.to/1Ky7A8A 3x PCB terminal: http://amzn.to/1GzZAZw 2x Female header: http://amzn.to/1IMwUZK 1x Toggle Switch: http://amzn.to/1GlYVHo 1x 10k Potentiometer: http://amzn.to/1k2lsT2 1x DC Jack: http://amzn.to/1NtXgmx Silvered Copper wire: http://amzn.to/1Ppyh3B 1x 5V Power Supply: http://amzn.to/1RGHOo5 Ebay: 1x Arduino Nano: http://rover.ebay.com/rover/1/711-53200-19255-0/1?icep_ff3=2&pub=5575101368&toolid=10001&campid=5337582279&customid=&icep_item=161403910939&ipn=psmain&icep_vectorid=229466&kwid=902099&mtid=824&kw=lg 150x PL9823 8mm LED: http://rover.ebay.com/rover/1/711-53200-19255-0/1?icep_ff3=2&pub=5575101368&toolid=10001&campid=5337582279&customid=&icep_item=151842150521&ipn=psmain&icep_vectorid=229466&kwid=902099&mtid=824&kw=lg 1x Veroboard: http://rover.ebay.com/rover/1/711-53200-19255-0/1?icep_ff3=2&pub=5575101368&toolid=10001&campid=5337582279&customid=&icep_item=281765908639&ipn=psmain&icep_vectorid=229466&kwid=902099&mtid=824&kw=lg 3x PCB terminal: http://rover.ebay.com/rover/1/711-53200-19255-0/1?icep_ff3=2&pub=5575101368&toolid=10001&campid=5337582279&customid=&icep_item=181846953484&ipn=psmain&icep_vectorid=229466&kwid=902099&mtid=824&kw=lg 2x Female header: http://rover.ebay.com/rover/1/711-53200-19255-0/1?icep_ff3=2&pub=5575101368&toolid=10001&campid=5337582279&customid=&icep_item=180974322541&ipn=psmain&icep_vectorid=229466&kwid=902099&mtid=824&kw=lg 1x Toggle Switch: http://rover.ebay.com/rover/1/711-53200-19255-0/1?icep_ff3=2&pub=5575101368&toolid=10001&campid=5337582279&customid=&icep_item=201414875998&ipn=psmain&icep_vectorid=229466&kwid=902099&mtid=824&kw=lg 1x 10k Potentiometer: http://rover.ebay.com/rover/1/711-53200-19255-0/1?icep_ff3=2&pub=5575101368&toolid=10001&campid=5337582279&customid=&icep_item=171907082305&ipn=psmain&icep_vectorid=229466&kwid=902099&mtid=824&kw=lg 1x DC Jack: http://rover.ebay.com/rover/1/711-53200-19255-0/1?icep_ff3=2&pub=5575101368&toolid=10001&campid=5337582279&customid=&icep_item=331577448279&ipn=psmain&icep_vectorid=229466&kwid=902099&mtid=824&kw=lg Silvered Copper wire: http://rover.ebay.com/rover/1/711-53200-19255-0/1?icep_ff3=2&pub=5575101368&toolid=10001&campid=5337582279&customid=&icep_item=261621376445&ipn=psmain&icep_vectorid=229466&kwid=902099&mtid=824&kw=lg 1x 5V Power Supply: http://rover.ebay.com/rover/1/711-53200-19255-0/1?icep_ff3=2&pub=5575101368&toolid=10001&campid=5337582279&customid=&icep_item=121154069983&ipn=psmain&icep_vectorid=229466&kwid=902099&mtid=824&kw=lg Aliexpress: 1x Arduino Nano: http://s.click.aliexpress.com/e/QBqzZvFEQ 150x PL9823 8mm LED: - 1x Veroboard: http://s.click.aliexpress.com/e/zNJu7aqRZ 3x PCB terminal: http://s.click.aliexpress.com/e/aYrJEmyja 2x Female header: http://s.click.aliexpress.com/e/yBUrz7eUj 1x Toggle Switch: http://s.click.aliexpress.com/e/EYvnMFMnI 1x 10k Potentiometer: http://s.click.aliexpress.com/e/3rjYbiQba 1x DC Jack: http://s.click.aliexpress.com/e/I6Y3jaeyr Silvered Copper wire: http://s.click.aliexpress.com/e/bIyFYrZVR 1x 5V Power Supply: http://s.click.aliexpress.com/e/rzfeMVzJI Music: In the Hall of the Mountain King, Kevin MacLeod (incompetech.com) You want to support my videos? You can browse and buy tools&materials from my Amazon Store. This way I get a small commission: Amazon.de: http://astore.amazon.de/great043-21 Amazon.com:http://astore.amazon.com/gre09a-20 Amazon.co.uk: http://astore.amazon.co.uk/gre0b-21 Or you feel super generous and want to use this Amazon link as your Amazon home page. And do not worry, your purchases are all anonym and the prices are all the same: Amazon.de:http://www.amazon.de/?_encoding=UTF8&camp=1638&creative=19454&linkCode=ur2&site-redirect=de&tag=great043-21&linkId=ORZEQZEOVJAFURCZ Amazon.com:http://www.amazon.com/?_encoding=UTF8&camp=1789&creative=390957&linkCode=ur2&tag=gre09a-20&linkId=I5NDCEAVCD2OWM4S

jX1GaPgSheI | 25 Oct 2015
Previous video: https://youtu.be/7w5I-KbJ1Sg Part 2: https://youtu.be/R-arZ31-zJo Facebook: https://www.facebook.com/greatscottlab Twitter: https://twitter.com/GreatScottLab Support me for more videos: https://www.patreon.com/GreatScott?ty=h More information on Instructables: http://www.instructables.com/id/Make-your-own-SIMPLE-5x5x5-RGB-LED-Cube/ In this 2 part video series I will show you how to build a simpler version of a 5x5x5 RGB LED Cube. The driver circuit only consists of an Arduino Nano and the programming is rather simple due to the FastLED library. Parts List: Amazon.com: 1x Arduino Nano: http://amzn.to/1XrlQJy 150x PL9823 8mm LED: - 1x Veroboard: http://amzn.to/1GzYz3C 3x PCB terminal: http://amzn.to/205FEEt 2x Female header: http://amzn.to/1Wc1DVD 1x Toggle Switch: http://amzn.to/1Wc1Hom 1x 10k Potentiometer: http://amzn.to/1PKY1Le 1x DC Jack: http://amzn.to/1PKY2iw Silvered Copper wire: http://amzn.to/1NtWK8d 1x 5V Power Supply: http://amzn.to/1HkBI7k Amazon.de: 1x Arduino Nano: http://amzn.to/1k2lfiB 150x PL9823 8mm LED: http://amzn.to/1NtX4DR 1x Veroboard: http://amzn.to/1Ky7A8A 3x PCB terminal: http://amzn.to/1GzZAZw 2x Female header: http://amzn.to/1IMwUZK 1x Toggle Switch: http://amzn.to/1GlYVHo 1x 10k Potentiometer: http://amzn.to/1k2lsT2 1x DC Jack: http://amzn.to/1NtXgmx Silvered Copper wire: http://amzn.to/1Ppyh3B 1x 5V Power Supply: http://amzn.to/1RGHOo5 Ebay: 1x Arduino Nano: http://rover.ebay.com/rover/1/711-53200-19255-0/1?icep_ff3=2&pub=5575101368&toolid=10001&campid=5337582279&customid=&icep_item=161403910939&ipn=psmain&icep_vectorid=229466&kwid=902099&mtid=824&kw=lg 150x PL9823 8mm LED: http://rover.ebay.com/rover/1/711-53200-19255-0/1?icep_ff3=2&pub=5575101368&toolid=10001&campid=5337582279&customid=&icep_item=151842150521&ipn=psmain&icep_vectorid=229466&kwid=902099&mtid=824&kw=lg 1x Veroboard: http://rover.ebay.com/rover/1/711-53200-19255-0/1?icep_ff3=2&pub=5575101368&toolid=10001&campid=5337582279&customid=&icep_item=281765908639&ipn=psmain&icep_vectorid=229466&kwid=902099&mtid=824&kw=lg 3x PCB terminal: http://rover.ebay.com/rover/1/711-53200-19255-0/1?icep_ff3=2&pub=5575101368&toolid=10001&campid=5337582279&customid=&icep_item=181846953484&ipn=psmain&icep_vectorid=229466&kwid=902099&mtid=824&kw=lg 2x Female header: http://rover.ebay.com/rover/1/711-53200-19255-0/1?icep_ff3=2&pub=5575101368&toolid=10001&campid=5337582279&customid=&icep_item=180974322541&ipn=psmain&icep_vectorid=229466&kwid=902099&mtid=824&kw=lg 1x Toggle Switch: http://rover.ebay.com/rover/1/711-53200-19255-0/1?icep_ff3=2&pub=5575101368&toolid=10001&campid=5337582279&customid=&icep_item=201414875998&ipn=psmain&icep_vectorid=229466&kwid=902099&mtid=824&kw=lg 1x 10k Potentiometer: http://rover.ebay.com/rover/1/711-53200-19255-0/1?icep_ff3=2&pub=5575101368&toolid=10001&campid=5337582279&customid=&icep_item=171907082305&ipn=psmain&icep_vectorid=229466&kwid=902099&mtid=824&kw=lg 1x DC Jack: http://rover.ebay.com/rover/1/711-53200-19255-0/1?icep_ff3=2&pub=5575101368&toolid=10001&campid=5337582279&customid=&icep_item=331577448279&ipn=psmain&icep_vectorid=229466&kwid=902099&mtid=824&kw=lg Silvered Copper wire: http://rover.ebay.com/rover/1/711-53200-19255-0/1?icep_ff3=2&pub=5575101368&toolid=10001&campid=5337582279&customid=&icep_item=261621376445&ipn=psmain&icep_vectorid=229466&kwid=902099&mtid=824&kw=lg 1x 5V Power Supply: http://rover.ebay.com/rover/1/711-53200-19255-0/1?icep_ff3=2&pub=5575101368&toolid=10001&campid=5337582279&customid=&icep_item=121154069983&ipn=psmain&icep_vectorid=229466&kwid=902099&mtid=824&kw=lg Aliexpress: 1x Arduino Nano: http://s.click.aliexpress.com/e/QBqzZvFEQ 150x PL9823 8mm LED: - 1x Veroboard: http://s.click.aliexpress.com/e/zNJu7aqRZ 3x PCB terminal: http://s.click.aliexpress.com/e/aYrJEmyja 2x Female header: http://s.click.aliexpress.com/e/yBUrz7eUj 1x Toggle Switch: http://s.click.aliexpress.com/e/EYvnMFMnI 1x 10k Potentiometer: http://s.click.aliexpress.com/e/3rjYbiQba 1x DC Jack: http://s.click.aliexpress.com/e/I6Y3jaeyr Silvered Copper wire: http://s.click.aliexpress.com/e/bIyFYrZVR 1x 5V Power Supply: http://s.click.aliexpress.com/e/rzfeMVzJI Music: 2011 Lookalike by Bartlebeats Aduro by Jens Kiilstofte Ecstatic Wave by Jens Kiilstofte https://machinimasound.com/music/ You want to support my videos? You can browse and buy tools&materials from my Amazon Store. This way I get a small commission: Amazon.de: http://astore.amazon.de/great043-21 Amazon.com:http://astore.amazon.com/gre09a-20 Amazon.co.uk: http://astore.amazon.co.uk/gre0b-21 Or you feel super generous and want to use this Amazon link as your Amazon home page. And do not worry, your purchases are all anonym and the prices are all the same: Amazon.de:http://www.amazon.de/?_encoding=UTF8&camp=1638&creative=19454&linkCode=ur2&site-redirect=de&tag=great043-21&linkId=ORZEQZEOVJAFURCZ Amazon.com:http://www.amazon.com/?_encoding=UTF8&camp=1789&creative=390957&linkCode=ur2&tag=gre09a-20&linkId=I5NDCEAVCD2OWM4S

7w5I-KbJ1Sg | 18 Oct 2015
Previous video: https://youtu.be/BHFI9nGY8Qs Facebook: https://www.facebook.com/greatscottlab Twitter: https://twitter.com/GreatScottLab Support me for more videos: https://www.patreon.com/GreatScott?ty=h In this video I will show you the main applications for resistors in schematics. I will talk about current limiting resistors, voltage dividers, current shunts and other various tasks. Music: Killing Time Kevin MacLeod (incompetech.com) You want to support my videos? You can browse and buy tools&materials from my Amazon Store. This way I get a small commission: Amazon.de: http://astore.amazon.de/great043-21 Amazon.com:http://astore.amazon.com/gre09a-20 Amazon.co.uk: http://astore.amazon.co.uk/gre0b-21 Or you feel super generous and want to use this Amazon link as your Amazon home page. And do not worry, your purchases are all anonym and the prices are all the same: Amazon.de:http://www.amazon.de/?_encoding=UTF8&camp=1638&creative=19454&linkCode=ur2&site-redirect=de&tag=great043-21&linkId=ORZEQZEOVJAFURCZ Amazon.com:http://www.amazon.com/?_encoding=UTF8&camp=1789&creative=390957&linkCode=ur2&tag=gre09a-20&linkId=I5NDCEAVCD2OWM4S Amazon.co.uk:http://www.amazon.co.uk/ref=as_li_ss_tl?_encoding=UTF8&camp=1634&creative=19450&linkCode=ur2&tag=gre0b-21

BHFI9nGY8Qs | 11 Oct 2015
Part 1: https://youtu.be/1Kp_yWY2tdU 15x10 LED Matrix: https://youtu.be/LJQ2KS1CJjg Facebook: https://www.facebook.com/greatscottlab Twitter: https://twitter.com/GreatScottLab Support me for more videos: https://www.patreon.com/GreatScott?ty=h More project information (schematic, Arduino code, reference pictures) are on Instructables: http://www.instructables.com/id/DIY-Cooler/ Wouldn't it be nice to have a cold beverage right next to you. In this video series I will show you how to achieve this luxury by building a homemade cooler which decreases the temperature of your beverages down to 8 degree Celsius. Parts list: Amazon.com: 1x Arduino Nano: http://amzn.to/1M6B3we 1x 2 Channel Relay Board: http://amzn.to/1MU2FTD 1x DS18B20: http://amzn.to/1MU2IPw 2x TEC1-12706 Peltier Modules: http://amzn.to/1MaRUJX 2x CPU Heatsinks: http://amzn.to/1M6BiHy Amazon.de: 1x Arduino Nano: http://amzn.to/1VAMOeT 1x 2 Channel Relay Board: http://amzn.to/1OSHt3C 1x DS18B20: http://amzn.to/1NLT3NJ 2x TEC1-12706 Peltier Modules: http://amzn.to/1OSHwfI 2x CPU Heatsinks: http://amzn.to/1OSHxQN Ebay: 1x Arduino Nano: http://rover.ebay.com/rover/1/711-53200-19255-0/1?icep_ff3=2&pub=5575101368&toolid=10001&campid=5337582279&customid=&icep_item=171819393779&ipn=psmain&icep_vectorid=229466&kwid=902099&mtid=824&kw=lg 1x 2 Channel Relay Board: http://rover.ebay.com/rover/1/711-53200-19255-0/1?icep_ff3=2&pub=5575101368&toolid=10001&campid=5337582279&customid=&icep_item=261617541155&ipn=psmain&icep_vectorid=229466&kwid=902099&mtid=824&kw=lg 1x DS18B20: http://rover.ebay.com/rover/1/711-53200-19255-0/1?icep_ff3=2&pub=5575101368&toolid=10001&campid=5337582279&customid=&icep_item=170821333658&ipn=psmain&icep_vectorid=229466&kwid=902099&mtid=824&kw=lg 2x TEC1-12706 Peltier Modules: http://rover.ebay.com/rover/1/711-53200-19255-0/1?icep_ff3=2&pub=5575101368&toolid=10001&campid=5337582279&customid=&icep_item=400985207907&ipn=psmain&icep_vectorid=229466&kwid=902099&mtid=824&kw=lg 2x CPU Heatsinks: http://rover.ebay.com/rover/1/711-53200-19255-0/1?icep_ff3=2&pub=5575101368&toolid=10001&campid=5337582279&customid=&icep_item=171943645968&ipn=psmain&icep_vectorid=229466&kwid=902099&mtid=824&kw=lg Aliexpress: 1x Arduino Nano: http://s.click.aliexpress.com/e/QBqzZvFEQ 1x 2 Channel Relay Board: http://s.click.aliexpress.com/e/7EuRJei6u 1x DS18B20: http://s.click.aliexpress.com/e/nAI6IImiu 2x TEC1-12706 Peltier Modules: http://s.click.aliexpress.com/e/qjYfQvr3B 2x CPU Heatsinks: http://s.click.aliexpress.com/e/Ur7EUj2Bm Music: 2011 Lookalike by Bartlebeats In the Hall of the Mountain King, Kevin MacLeod (incompetech.com) You want to support my videos? You can browse and buy tools&materials from my Amazon Store. This way I get a small commission: Amazon.de: http://astore.amazon.de/great043-21 Amazon.com:http://astore.amazon.com/gre09a-20 Amazon.co.uk: http://astore.amazon.co.uk/gre0b-21 Or you feel super generous and want to use this Amazon link as your Amazon home page. And do not worry, your purchases are all anonym and the prices are all the same: Amazon.de:http://www.amazon.de/?_encoding=UTF8&camp=1638&creative=19454&linkCode=ur2&site-redirect=de&tag=great043-21&linkId=ORZEQZEOVJAFURCZ Amazon.com:http://www.amazon.com/?_encoding=UTF8&camp=1789&creative=390957&linkCode=ur2&tag=gre09a-20&linkId=I5NDCEAVCD2OWM4S Amazon.co.uk:http://www.amazon.co.uk/ref=as_li_ss_tl?_encoding=UTF8&camp=1634&creative=19450&linkCode=ur2&tag=gre0b-21

1Kp_yWY2tdU | 05 Oct 2015
Part 2: https://youtu.be/BHFI9nGY8Qs Previous video: https://youtu.be/Nzy914jLU_w Facebook: https://www.facebook.com/greatscottlab Twitter: https://twitter.com/GreatScottLab Support me for more videos: https://www.patreon.com/GreatScott?ty=h More project information (schematic, Arduino code, reference pictures) are on Instructables: http://www.instructables.com/id/DIY-Cooler/ Wouldn't it be nice to have a cold beverage right next to you. In this video series I will show you how to achieve this luxury by building a homemade cooler which decreases the temperature of your beverages down to 8 degree Celsius. Parts list: Amazon.com: 1x Arduino Nano: http://amzn.to/1M6B3we 1x 2 Channel Relay Board: http://amzn.to/1MU2FTD 1x DS18B20: http://amzn.to/1MU2IPw 2x TEC1-12706 Peltier Modules: http://amzn.to/1MaRUJX 2x CPU Heatsinks: http://amzn.to/1M6BiHy Amazon.de: 1x Arduino Nano: http://amzn.to/1VAMOeT 1x 2 Channel Relay Board: http://amzn.to/1OSHt3C 1x DS18B20: http://amzn.to/1NLT3NJ 2x TEC1-12706 Peltier Modules: http://amzn.to/1OSHwfI 2x CPU Heatsinks: http://amzn.to/1OSHxQN Ebay: 1x Arduino Nano: http://rover.ebay.com/rover/1/711-53200-19255-0/1?icep_ff3=2&pub=5575101368&toolid=10001&campid=5337582279&customid=&icep_item=171819393779&ipn=psmain&icep_vectorid=229466&kwid=902099&mtid=824&kw=lg 1x 2 Channel Relay Board: http://rover.ebay.com/rover/1/711-53200-19255-0/1?icep_ff3=2&pub=5575101368&toolid=10001&campid=5337582279&customid=&icep_item=261617541155&ipn=psmain&icep_vectorid=229466&kwid=902099&mtid=824&kw=lg 1x DS18B20: http://rover.ebay.com/rover/1/711-53200-19255-0/1?icep_ff3=2&pub=5575101368&toolid=10001&campid=5337582279&customid=&icep_item=170821333658&ipn=psmain&icep_vectorid=229466&kwid=902099&mtid=824&kw=lg 2x TEC1-12706 Peltier Modules: http://rover.ebay.com/rover/1/711-53200-19255-0/1?icep_ff3=2&pub=5575101368&toolid=10001&campid=5337582279&customid=&icep_item=400985207907&ipn=psmain&icep_vectorid=229466&kwid=902099&mtid=824&kw=lg 2x CPU Heatsinks: http://rover.ebay.com/rover/1/711-53200-19255-0/1?icep_ff3=2&pub=5575101368&toolid=10001&campid=5337582279&customid=&icep_item=171943645968&ipn=psmain&icep_vectorid=229466&kwid=902099&mtid=824&kw=lg Aliexpress: 1x Arduino Nano: http://s.click.aliexpress.com/e/QBqzZvFEQ 1x 2 Channel Relay Board: http://s.click.aliexpress.com/e/7EuRJei6u 1x DS18B20: http://s.click.aliexpress.com/e/nAI6IImiu 2x TEC1-12706 Peltier Modules: http://s.click.aliexpress.com/e/qjYfQvr3B 2x CPU Heatsinks: http://s.click.aliexpress.com/e/Ur7EUj2Bm Music: 2011 Lookalike by Bartlebeats Aduro by Jens Kiilstofte Ecstatic Wave by Jens Kiilstofte https://machinimasound.com/music/ You want to support my videos? You can browse and buy tools&materials from my Amazon Store. This way I get a small commission: Amazon.de: http://astore.amazon.de/great043-21 Amazon.com:http://astore.amazon.com/gre09a-20 Amazon.co.uk: http://astore.amazon.co.uk/gre0b-21 Or you feel super generous and want to use this Amazon link as your Amazon home page. And do not worry, your purchases are all anonym and the prices are all the same: Amazon.de:http://www.amazon.de/?_encoding=UTF8&camp=1638&creative=19454&linkCode=ur2&site-redirect=de&tag=great043-21&linkId=ORZEQZEOVJAFURCZ Amazon.com:http://www.amazon.com/?_encoding=UTF8&camp=1789&creative=390957&linkCode=ur2&tag=gre09a-20&linkId=I5NDCEAVCD2OWM4S Amazon.co.uk:http://www.amazon.co.uk/ref=as_li_ss_tl?_encoding=UTF8&camp=1634&creative=19450&linkCode=ur2&tag=gre0b-21

Nzy914jLU_w | 27 Sep 2015
Previous video: https://youtu.be/1U4fep_qAeo Facebook: https://www.facebook.com/greatscottlab Twitter: https://twitter.com/GreatScottLab Support me for more videos: https://www.patreon.com/GreatScott?ty=h Get your boards here to support my channel: Raspberry Pi 2: Amazon.com: http://amzn.to/1R9nWKJ Amazon.de: http://amzn.to/1R9nPP6 Amazon.co.uk: http://amzn.to/1KGOPA3 Orange Pi 2: http://www.aliexpress.com/store/product/Orange-pi-2-Beyond-cubieboard-and-pcduino-Compatible-with-banana-pi-pro-and-Raspberry-Pi-2/1553371_32303641825.html BPi-M2: AliExpress: http://s.click.aliexpress.com/e/623fqB6u3 Amazon.de: http://amzn.to/1KYdLYt Amazon.com: http://amzn.to/1FsuAKJ In this VS episode I will compare the hardware (CPU, RAM, GPU,....), the software and community aspects of the three most powerful single board computers from the fruit companies. Music: 2011 Lookalike by Bartlebeats Killing Time Kevin MacLeod (incompetech.com) You want to support my videos? You can browse and buy tools&materials from my Amazon Store. This way I get a small commission: Amazon.de: http://astore.amazon.de/great043-21 Amazon.com:http://astore.amazon.com/gre09a-20 Amazon.co.uk: http://astore.amazon.co.uk/gre0b-21 Or you feel super generous and want to use this Amazon link as your Amazon home page. And do not worry, your purchases are all anonym and the prices are all the same: Amazon.de:http://www.amazon.de/?_encoding=UTF8&camp=1638&creative=19454&linkCode=ur2&site-redirect=de&tag=great043-21&linkId=ORZEQZEOVJAFURCZ Amazon.com:http://www.amazon.com/?_encoding=UTF8&camp=1789&creative=390957&linkCode=ur2&tag=gre09a-20&linkId=I5NDCEAVCD2OWM4S Amazon.co.uk:http://www.amazon.co.uk/ref=as_li_ss_tl?_encoding=UTF8&camp=1634&creative=19450&linkCode=ur2&tag=gre0b-21
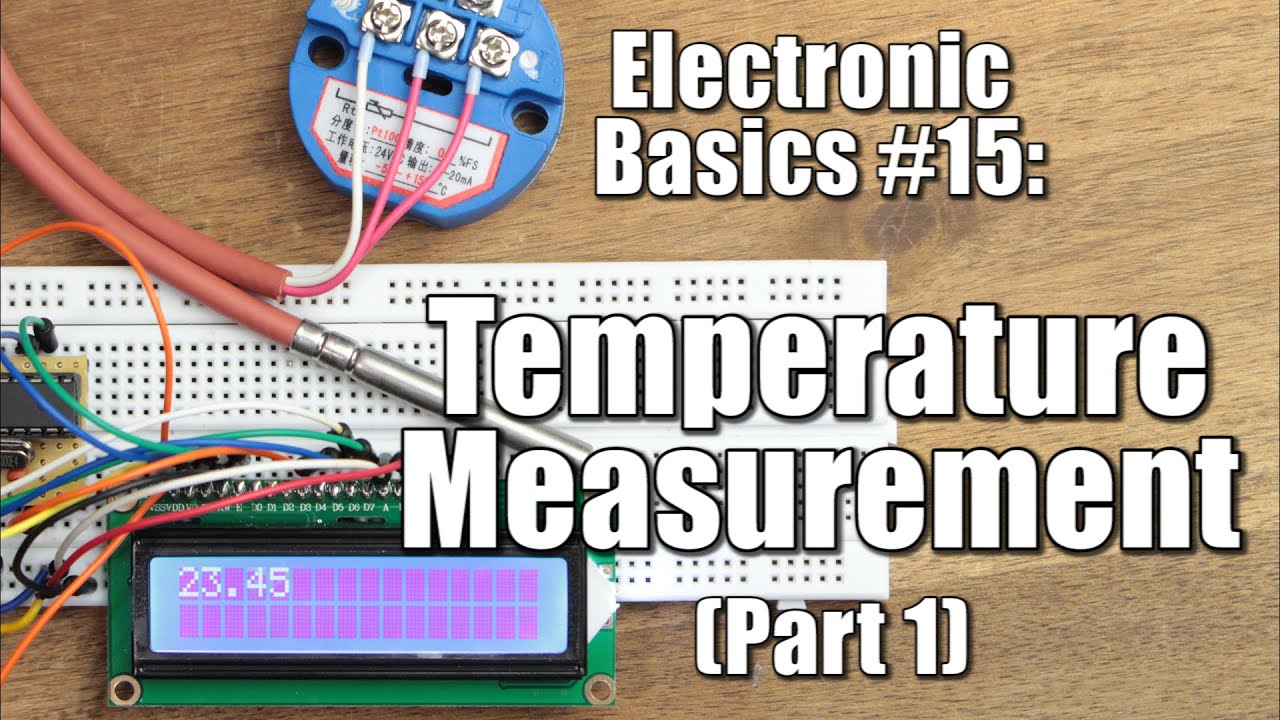
1U4fep_qAeo | 20 Sep 2015
Previous video: https://youtu.be/ScZfuQxoI_s Facebook: https://www.facebook.com/greatscottlab Twitter: https://twitter.com/GreatScottLab Support me for more videos: https://www.patreon.com/GreatScott?ty=h More project information on Instructables (parts list, schematic, code): http://www.instructables.com/id/Temperature-Measurement-Tutorial-Part1/ Parts list: Ebay: NTC 1k: http://rover.ebay.com/rover/1/711-53200-19255-0/1?icep_ff3=2&pub=5575101368&toolid=10001&campid=5337582279&customid=&icep_item=251152134930&ipn=psmain&icep_vectorid=229466&kwid=902099&mtid=824&kw=lg NTC 10k: http://rover.ebay.com/rover/1/711-53200-19255-0/1?icep_ff3=2&pub=5575101368&toolid=10001&campid=5337582279&customid=&icep_item=280846915639&ipn=psmain&icep_vectorid=229466&kwid=902099&mtid=824&kw=lg NTC 100k (for 3D Printer): http://rover.ebay.com/rover/1/711-53200-19255-0/1?icep_ff3=2&pub=5575101368&toolid=10001&campid=5337582279&customid=&icep_item=281737701889&ipn=psmain&icep_vectorid=229466&kwid=902099&mtid=824&kw=lg PT100: http://rover.ebay.com/rover/1/711-53200-19255-0/1?icep_ff3=2&pub=5575101368&toolid=10001&campid=5337582279&customid=&icep_item=201377784513&ipn=psmain&icep_vectorid=229466&kwid=902099&mtid=824&kw=lg PT100 transmitters: http://rover.ebay.com/rover/1/711-53200-19255-0/1?icep_ff3=2&pub=5575101368&toolid=10001&campid=5337582279&customid=&icep_item=251423775769&ipn=psmain&icep_vectorid=229466&kwid=902099&mtid=824&kw=lg LM35: http://rover.ebay.com/rover/1/711-53200-19255-0/1?icep_ff3=2&pub=5575101368&toolid=10001&campid=5337582279&customid=&icep_item=201414905245&ipn=psmain&icep_vectorid=229466&kwid=902099&mtid=824&kw=lg DS18B20: http://rover.ebay.com/rover/1/711-53200-19255-0/1?icep_ff3=2&pub=5575101368&toolid=10001&campid=5337582279&customid=&icep_item=170821333658&ipn=psmain&icep_vectorid=229466&kwid=902099&mtid=824&kw=lg Amazon.com: NTC 1k: http://amzn.to/1WbxBTQ NTC 10k: http://amzn.to/1gDlkr7 NTC 100k (for 3D Printer):http://amzn.to/1MzBsbB PT100:http://amzn.to/1MzBK2b PT 100 transmitter: http://amzn.to/1iGv2uJ LM35: http://amzn.to/1Onmndo DS18B20:http://amzn.to/1iGvER7 Amazon.de: NTC 1k: http://amzn.to/1LGpNlt NTC 10k: http://amzn.to/1KCkAif NTC 100k (for 3D Printer): http://amzn.to/1KCkCqg PT100: http://amzn.to/1KCkDdY PT 100 transmitter: http://amzn.to/1LGpQhi LM35: http://amzn.to/1Onmndo DS18B20: http://amzn.to/1NLT3NJ Amazon.co.uk: NTC 1k: http://amzn.to/1LGpSpm NTC 10k: http://amzn.to/1NLT6cj NTC 100k (for 3D Printer): http://amzn.to/1LGpSWc PT100: http://amzn.to/1iq0Xiq PT 100 transmitter: http://amzn.to/1Onmp58 LM35: http://amzn.to/1WbxMyj DS18B20: http://amzn.to/1WbxMyz In this episode of electronic basics I will show you how the resistance of different materials is used to measure accurate temperatures. The video will include information about NTC thermistors, PT100, Wheatstone bridge, LM35 and DS18B20. And at the end I will show you how to build a simple thermometer. You want to support my videos? You can browse and buy tools&materials from my Amazon Store. This way I get a small commission: Amazon.de: http://astore.amazon.de/great043-21 Amazon.com:http://astore.amazon.com/gre09a-20 Amazon.co.uk: http://astore.amazon.co.uk/gre0b-21 Or you feel super generous and want to use this Amazon link as your Amazon home page. And do not worry, your purchases are all anonym and the prices are all the same: Amazon.de:http://www.amazon.de/?_encoding=UTF8&camp=1638&creative=19454&linkCode=ur2&site-redirect=de&tag=great043-21&linkId=ORZEQZEOVJAFURCZ Amazon.com:http://www.amazon.com/?_encoding=UTF8&camp=1789&creative=390957&linkCode=ur2&tag=gre09a-20&linkId=I5NDCEAVCD2OWM4S Amazon.co.uk:http://www.amazon.co.uk/ref=as_li_ss_tl?_encoding=UTF8&camp=1634&creative=19450&linkCode=ur2&tag=gre0b-21
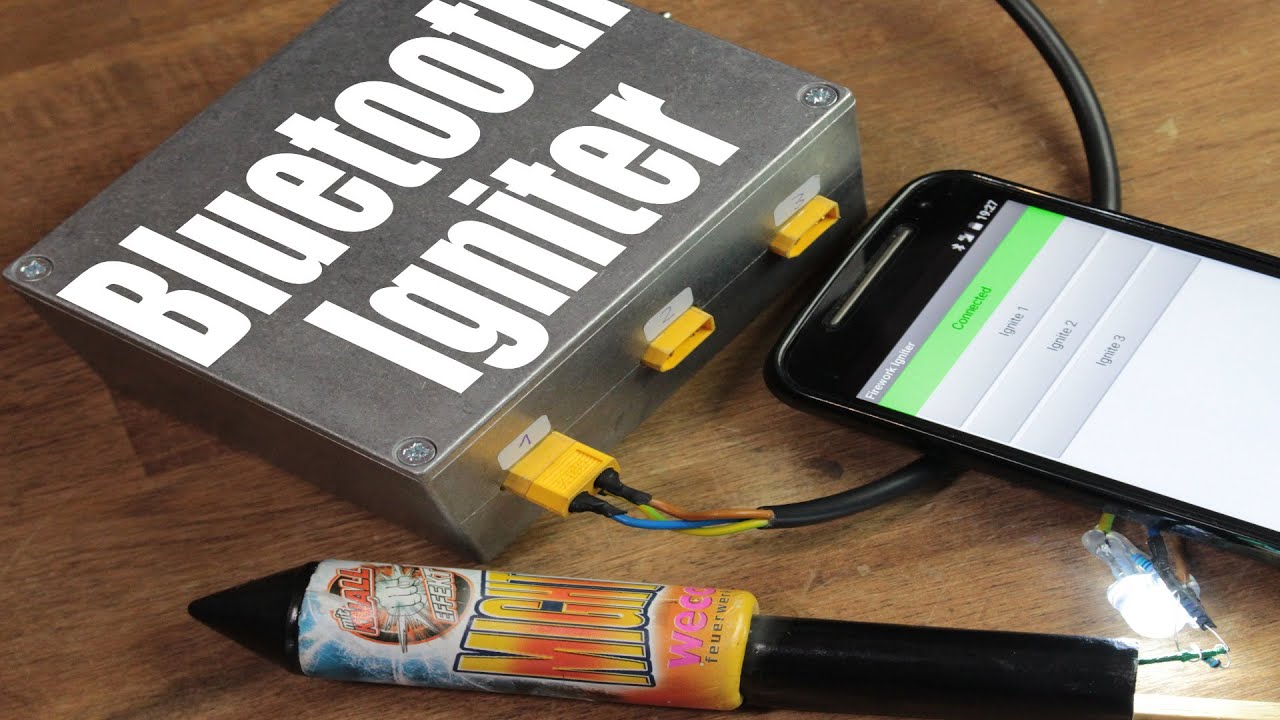
ScZfuQxoI_s | 12 Sep 2015
Previous video: https://youtu.be/-BIA35hdo-8 Facebook: https://www.facebook.com/greatscottlab Twitter: https://twitter.com/GreatScottLab Support me for more videos: https://www.patreon.com/GreatScott?ty=h More project information on Instructables (parts list, schematic, code): http://www.instructables.com/id/Remote-Bluetooth-Firework-Igniter/ MIT App Inventor: http://appinventor.mit.edu/explore/ Whatakuai Bluetooth structure for App Inventor: http://www.whatakuai.com/de/bluetooth-and-app-inventor/ Wouldn't it be nice to ignite more than one firework at the same time? Or even have a safe distance to more dangerous explosives. In this video I will show you how to build a circuit which can do just that with the help of the Bluetooth functionality of your smartphone. Music: 2011 Lookalike by Bartlebeats Killing Time Kevin MacLeod (incompetech.com) You want to support my videos? You can browse and buy tools&materials from my Amazon Store. This way I get a small commission: Amazon.de: http://astore.amazon.de/great043-21 Amazon.com:http://astore.amazon.com/gre09a-20 Amazon.co.uk: http://astore.amazon.co.uk/gre0b-21 Or you feel super generous and want to use this Amazon link as your Amazon home page. And do not worry, your purchases are all anonym and the prices are all the same: Amazon.de:http://www.amazon.de/?_encoding=UTF8&camp=1638&creative=19454&linkCode=ur2&site-redirect=de&tag=great043-21&linkId=ORZEQZEOVJAFURCZ Amazon.com:http://www.amazon.com/?_encoding=UTF8&camp=1789&creative=390957&linkCode=ur2&tag=gre09a-20&linkId=I5NDCEAVCD2OWM4S Amazon.co.uk:http://www.amazon.co.uk/ref=as_li_ss_tl?_encoding=UTF8&camp=1634&creative=19450&linkCode=ur2&tag=gre0b-21

-BIA35hdo-8 | 30 Aug 2015
Previous video: https://youtu.be/7Ao6KD8f9J4 Facebook: https://www.facebook.com/greatscottlab Twitter: https://twitter.com/GreatScottLab Support me for more videos: https://www.patreon.com/GreatScott?ty=h In this video I will answer the most asked questions that I found in the comment section of my other videos. Music: 2011 Lookalike by Bartlebeats You want to support my videos? You can browse and buy tools&materials from my Amazon Store. This way I get a small commission: Amazon.de: http://astore.amazon.de/great043-21 Amazon.com:http://astore.amazon.com/gre09a-20 Amazon.co.uk: http://astore.amazon.co.uk/gre0b-21 Or you feel super generous and want to use this Amazon link as your Amazon home page. And do not worry, your purchases are all anonym and the prices are all the same: Amazon.de:http://www.amazon.de/?_encoding=UTF8&camp=1638&creative=19454&linkCode=ur2&site-redirect=de&tag=great043-21&linkId=ORZEQZEOVJAFURCZ Amazon.com:http://www.amazon.com/?_encoding=UTF8&camp=1789&creative=390957&linkCode=ur2&tag=gre09a-20&linkId=I5NDCEAVCD2OWM4S Amazon.co.uk:http://www.amazon.co.uk/ref=as_li_ss_tl?_encoding=UTF8&camp=1634&creative=19450&linkCode=ur2&tag=gre0b-21
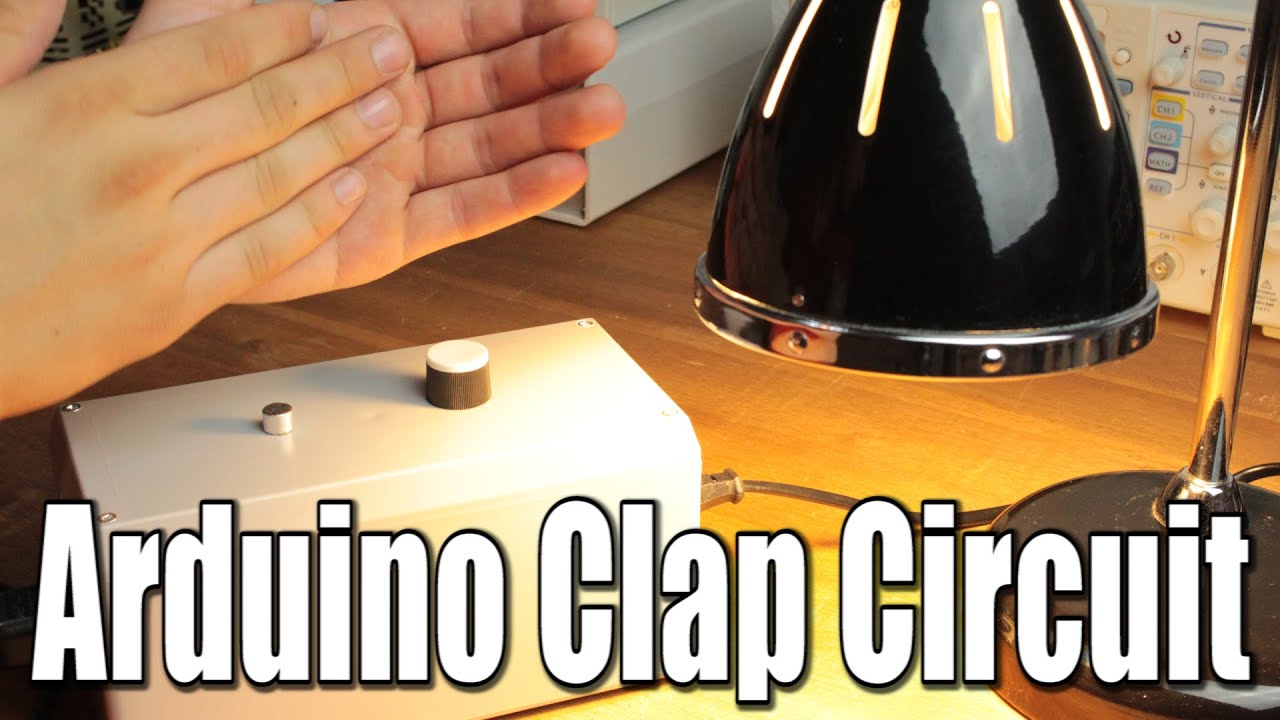
7Ao6KD8f9J4 | 23 Aug 2015
Previous video: https://youtu.be/vyuzImO9nQs Arduino IR Tutorial: https://youtu.be/ftdJ0R_5NZk Programming an ATtiny85: https://youtu.be/9LjfkjwMqXI Facebook: https://www.facebook.com/greatscottlab Twitter: https://twitter.com/GreatScottLab Support me for more videos: https://www.patreon.com/GreatScott?ty=h More project information on Instructables (parts list, schematic, code): http://www.instructables.com/id/Turn-your-lights-on-with-clapping/ The video I was watching in the beginning was made by Afrotechmods: https://www.youtube.com/user/Afrotechmods The circuit can only switch ON/OFF AC appliances with less than 200W of power. Wouldn't it be nice to turn on your lights without getting off the couch? In this video I am going to show you how to build a simple Arduino clap circuit which can turn on and off all kinds of AC appliances. Music: 2011 Lookalike by Bartlebeats Killing Time Kevin MacLeod (incompetech.com) You want to support my videos? You can browse and buy tools&materials from my Amazon Store. This way I get a small commission: Amazon.de: http://astore.amazon.de/great043-21 Amazon.com:http://astore.amazon.com/gre09a-20 Amazon.co.uk: http://astore.amazon.co.uk/gre0b-21 Or you feel super generous and want to use this Amazon link as your Amazon home page. And do not worry, your purchases are all anonym and the prices are all the same: Amazon.de:http://www.amazon.de/?_encoding=UTF8&camp=1638&creative=19454&linkCode=ur2&site-redirect=de&tag=great043-21&linkId=ORZEQZEOVJAFURCZ Amazon.com:http://www.amazon.com/?_encoding=UTF8&camp=1789&creative=390957&linkCode=ur2&tag=gre09a-20&linkId=I5NDCEAVCD2OWM4S Amazon.co.uk:http://www.amazon.co.uk/ref=as_li_ss_tl?_encoding=UTF8&camp=1634&creative=19450&linkCode=ur2&tag=gre0b-21
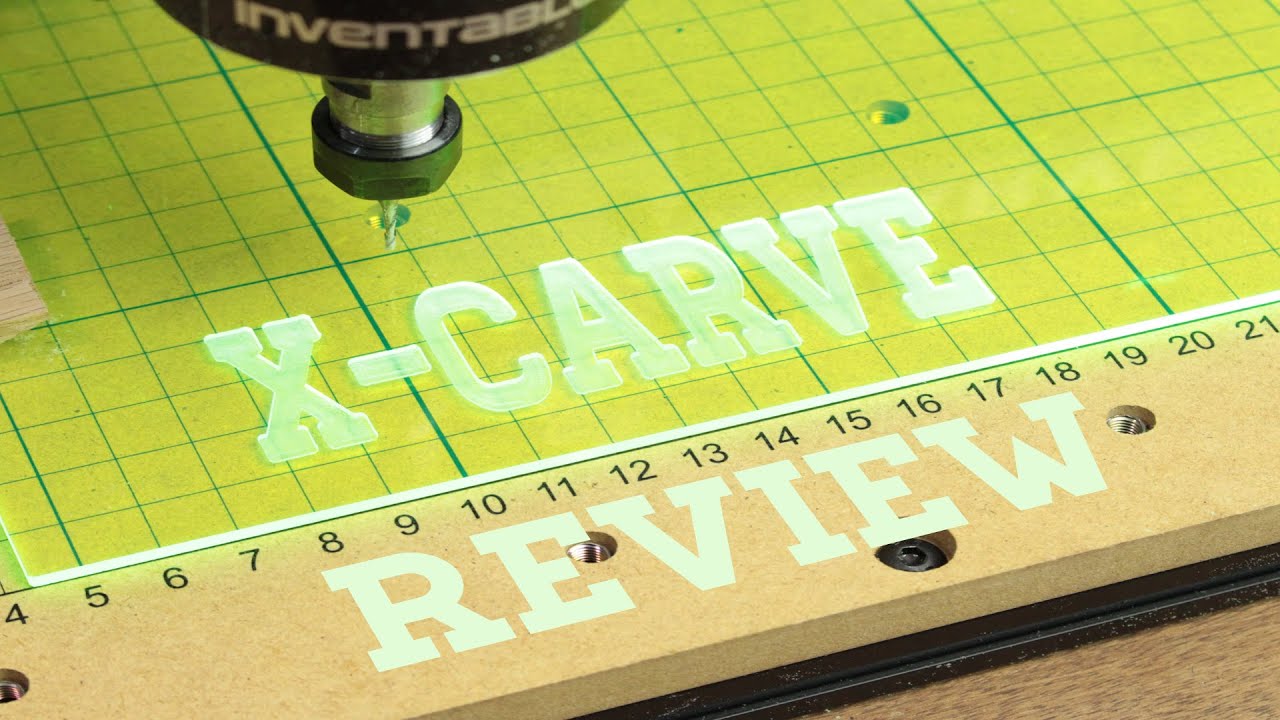
vyuzImO9nQs | 16 Aug 2015
Previous video: https://youtu.be/cz3DEP2LC_w Facebook: https://www.facebook.com/greatscottlab Twitter: https://twitter.com/GreatScottLab Support me for more videos: https://www.patreon.com/GreatScott?ty=h Inventables: https://www.inventables.com/ Thanks to Inventables for sponsoring this video. In this video I will show whether the DIY CNC Machine called X-Carve from Inventables is worth its price tag. I will talk about the problems their given instructions, the problems during the build and how easy or difficult is was to carve a design with their given software. Music: 2011 Lookalike by Bartlebeats You want to support my videos? You can browse and buy tools&materials from my Amazon Store. This way I get a small commission: Amazon.de: http://astore.amazon.de/great043-21 Amazon.com:http://astore.amazon.com/gre09a-20 Amazon.co.uk: http://astore.amazon.co.uk/gre0b-21 Or you feel super generous and want to use this Amazon link as your Amazon home page. And do not worry, your purchases are all anonym and the prices are all the same: Amazon.de:http://www.amazon.de/?_encoding=UTF8&camp=1638&creative=19454&linkCode=ur2&site-redirect=de&tag=great043-21&linkId=ORZEQZEOVJAFURCZ Amazon.com:http://www.amazon.com/?_encoding=UTF8&camp=1789&creative=390957&linkCode=ur2&tag=gre09a-20&linkId=I5NDCEAVCD2OWM4S Amazon.co.uk:http://www.amazon.co.uk/ref=as_li_ss_tl?_encoding=UTF8&camp=1634&creative=19450&linkCode=ur2&tag=gre0b-21

cz3DEP2LC_w | 09 Aug 2015
Previous video: https://youtu.be/otQGdPLyF3w Facebook: https://www.facebook.com/greatscottlab Twitter: https://twitter.com/GreatScottLab Support me for more videos: https://www.patreon.com/GreatScott?ty=h In this episode of HACKED! I will show you how I used the iron core of an old high voltage transformer and two selfmade coils to create hearable sounds. Speaker animation: http://animagraffs.com/loudspeaker/ Transformer simulation: https://phet.colorado.edu/en/simulation/generator Music: 2011 Lookalike by Bartlebeats You want to support my videos? You can browse and buy tools&materials from my Amazon Store. This way I get a small commission: Amazon.de: http://astore.amazon.de/great043-21 Amazon.com:http://astore.amazon.com/gre09a-20 Amazon.co.uk: http://astore.amazon.co.uk/gre0b-21 Or you feel super generous and want to use this Amazon link as your Amazon home page. And do not worry, your purchases are all anonym and the prices are all the same: Amazon.de:http://www.amazon.de/?_encoding=UTF8&camp=1638&creative=19454&linkCode=ur2&site-redirect=de&tag=great043-21&linkId=ORZEQZEOVJAFURCZ Amazon.com:http://www.amazon.com/?_encoding=UTF8&camp=1789&creative=390957&linkCode=ur2&tag=gre09a-20&linkId=I5NDCEAVCD2OWM4S Amazon.co.uk:http://www.amazon.co.uk/ref=as_li_ss_tl?_encoding=UTF8&camp=1634&creative=19450&linkCode=ur2&tag=gre0b-21
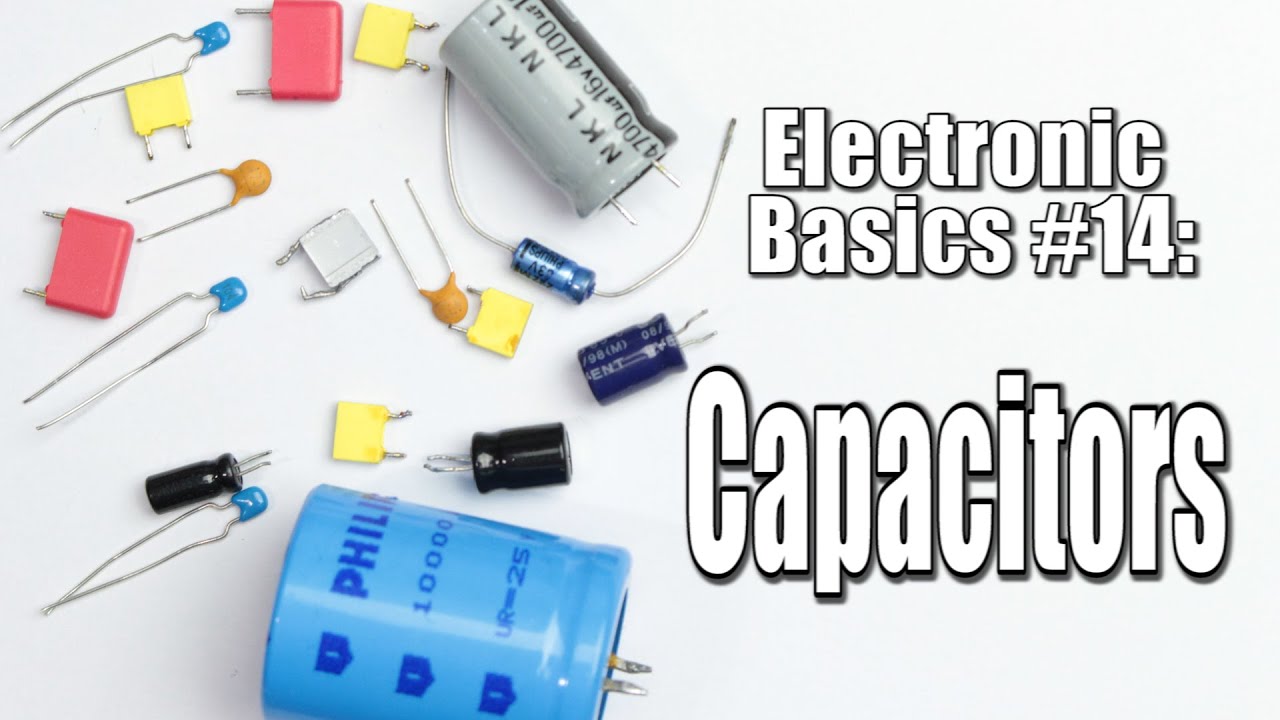
otQGdPLyF3w | 02 Aug 2015
Coils/Inductors Basics Part 1: https://youtu.be/kdrP9WbJIb8 Coils/Inductors Basics Part 2: https://youtu.be/XCnI6ZOYKes Previous video: https://youtu.be/W4EG9Ikv4gw Facebook: https://www.facebook.com/greatscottlab Twitter: https://twitter.com/GreatScottLab Support me for more videos: https://www.patreon.com/GreatScott?ty=h In this Basics video I will show you how a capacitors works, what the ratings on the electrolytic ones mean and how they behave in DC and AC circuits. You want to support my videos? You can browse and buy tools&materials from my Amazon Store. This way I get a small commission: Amazon.de: http://astore.amazon.de/great043-21 Amazon.com:http://astore.amazon.com/gre09a-20 Amazon.co.uk: http://astore.amazon.co.uk/gre0b-21 Or you feel super generous and want to use this Amazon link as your Amazon home page. And do not worry, your purchases are all anonym and the prices are all the same: Amazon.de:http://www.amazon.de/?_encoding=UTF8&camp=1638&creative=19454&linkCode=ur2&site-redirect=de&tag=great043-21&linkId=ORZEQZEOVJAFURCZ Amazon.com:http://www.amazon.com/?_encoding=UTF8&camp=1789&creative=390957&linkCode=ur2&tag=gre09a-20&linkId=I5NDCEAVCD2OWM4S Amazon.co.uk:http://www.amazon.co.uk/ref=as_li_ss_tl?_encoding=UTF8&camp=1634&creative=19450&linkCode=ur2&tag=gre0b-21
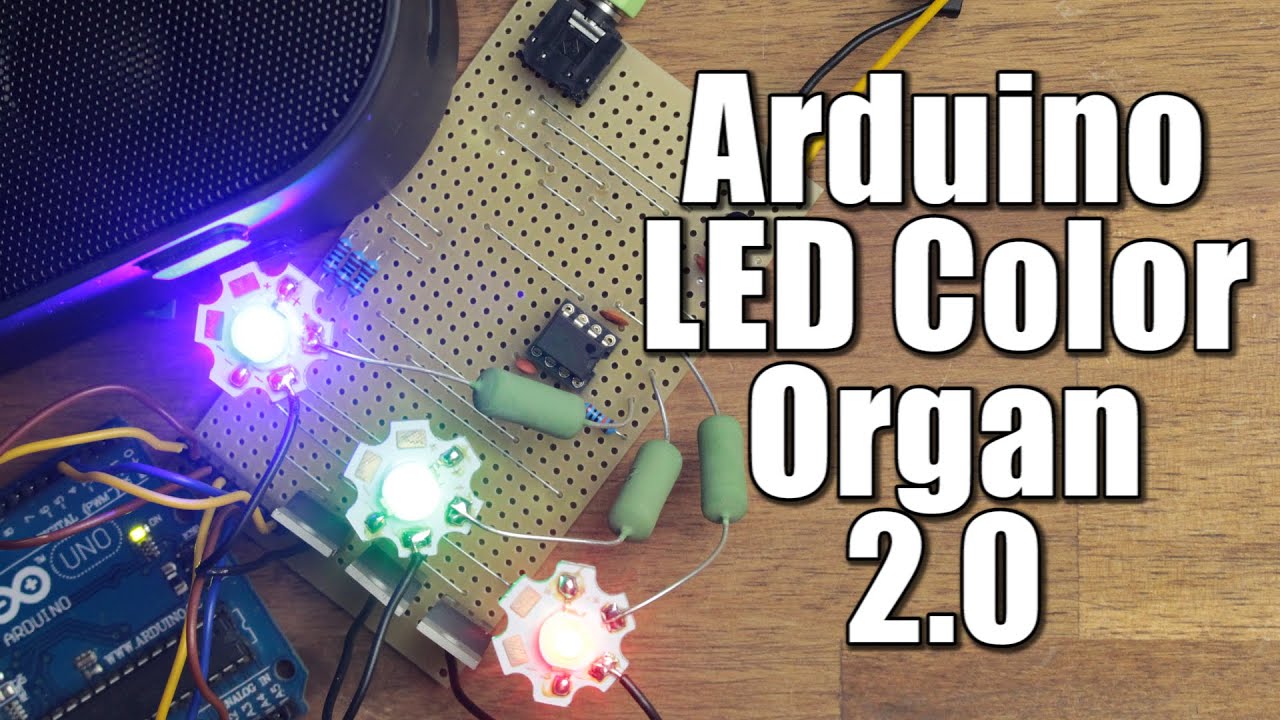
W4EG9Ikv4gw | 26 Jul 2015
Previous video: https://youtu.be/Nb78wF1Tkwc Facebook: https://www.facebook.com/greatscottlab Twitter: https://twitter.com/GreatScottLab Support me for more videos: https://www.patreon.com/GreatScott?ty=h GreatScott! LED Color Organ Kit: http://mklec.com/project-kits/diy-project-kits/greatscott-led-color-organ-arduino-kit More project information on instructables (schematic, layout, code,....): http://www.instructables.com/id/DIY-Arduino-LED-Color-Organ-20/ In this project I will revive my very first project and present you a better explanation how the circuit works and how you can build it easily on a breadboard or a stripboard. The finished color organ reacts to different frequency bands in your music with light shows. Parts list: Ebay: 1x Breadboard: http://rover.ebay.com/rover/1/711-53200-19255-0/1?icep_ff3=2&pub=5575101368&toolid=10001&campid=5337582279&customid=&icep_item=191602708832&ipn=psmain&icep_vectorid=229466&kwid=902099&mtid=824&kw=lg 1x Arduino UNO: http://rover.ebay.com/rover/1/711-53200-19255-0/1?icep_ff3=2&pub=5575101368&toolid=10001&campid=5337582279&customid=&icep_item=121553610522&ipn=psmain&icep_vectorid=229466&kwid=902099&mtid=824&kw=lg 1x 12V 2A Power Supply: http://rover.ebay.com/rover/1/711-53200-19255-0/1?icep_ff3=2&pub=5575101368&toolid=10001&campid=5337582279&customid=&icep_item=201159210635&ipn=psmain&icep_vectorid=229466&kwid=902099&mtid=824&kw=lg 1x Hookup Wire: http://rover.ebay.com/rover/1/711-53200-19255-0/1?icep_ff3=2&pub=5575101368&toolid=10001&campid=5337582279&customid=&icep_item=261961457837&ipn=psmain&icep_vectorid=229466&kwid=902099&mtid=824&kw=lg Amazon.com: 1x Breadboard: http://amzn.to/1OtODYv 1x Arduino UNO: http://amzn.to/1DGt2Go 1x 12V 2A Power Supply: http://amzn.to/1GQr32v 1x Hookup Wire: http://amzn.to/1OtOGU4 Amazon.de: 1x Breadboard: http://amzn.to/1gtbtB7 1x Arduino UNO: http://amzn.to/1KrlpIX 1x 12V 2A Power Supply: http://amzn.to/1S3jkdl 1x Hookup Wire: - Amazon.co.uk: 1x Breadboard: http://amzn.to/1Ix0qqw 1x Arduino UNO: http://amzn.to/1KrlTPn 1x 12V 2A Power Supply: http://amzn.to/1Ix0t5Y 1x Hookup Wire: http://amzn.to/1Krm11f Music: 2011 Lookalike by Bartlebeats You want to support my videos? You can browse and buy tools&materials from my Amazon Store. This way I get a small commission: Amazon.de: http://astore.amazon.de/great043-21 Amazon.com:http://astore.amazon.com/gre09a-20 Amazon.co.uk: http://astore.amazon.co.uk/gre0b-21 Or you feel super generous and want to use this Amazon link as your Amazon home page. And do not worry, your purchases are all anonym and the prices are all the same: Amazon.de:http://www.amazon.de/?_encoding=UTF8&camp=1638&creative=19454&linkCode=ur2&site-redirect=de&tag=great043-21&linkId=ORZEQZEOVJAFURCZ Amazon.com:http://www.amazon.com/?_encoding=UTF8&camp=1789&creative=390957&linkCode=ur2&tag=gre09a-20&linkId=I5NDCEAVCD2OWM4S Amazon.co.uk:http://www.amazon.co.uk/ref=as_li_ss_tl?_encoding=UTF8&camp=1634&creative=19450&linkCode=ur2&tag=gre0b-21

Nb78wF1Tkwc | 19 Jul 2015
Previous video: https://youtu.be/ZnMMmfxceug Facebook: https://www.facebook.com/greatscottlab Twitter: https://twitter.com/GreatScottLab Support me for more videos: https://www.patreon.com/GreatScott?ty=h In this video I will show you how to build a dirt cheap fume extractor and how you can fastly and easily desolder all kinds of components from old electronics circuits. I will also talk about what I think is even worth desoldering and which parts you should avoid Music: Killing Time, Kevin MacLeod (incompetech.com) 2011 Lookalike by Bartlebeats You want to support my videos? You can browse and buy tools&materials from my Amazon Store. This way I get a small commission: Amazon.de: http://astore.amazon.de/great043-21 Amazon.com:http://astore.amazon.com/gre09a-20 Amazon.co.uk: http://astore.amazon.co.uk/gre0b-21 Or you feel super generous and want to use this Amazon link as your Amazon home page. And do not worry, your purchases are all anonym and the prices are all the same: Amazon.de:http://www.amazon.de/?_encoding=UTF8&camp=1638&creative=19454&linkCode=ur2&site-redirect=de&tag=great043-21&linkId=ORZEQZEOVJAFURCZ Amazon.com:http://www.amazon.com/?_encoding=UTF8&camp=1789&creative=390957&linkCode=ur2&tag=gre09a-20&linkId=I5NDCEAVCD2OWM4S Amazon.co.uk:http://www.amazon.co.uk/ref=as_li_ss_tl?_encoding=UTF8&camp=1634&creative=19450&linkCode=ur2&tag=gre0b-21

LdeftXVQMeo | 12 Jul 2015
Patreon: https://www.patreon.com/GreatScott?ty=h Facebook: https://www.facebook.com/greatscottlab Twitter: https://twitter.com/GreatScottLab For the past two years I have created many videos about electronics projects, tutorials and everything in between which I think is interesting. But since I put a lot of money and time into each video I can not longer do it in this release schedule without any financial support. You want to support my videos? You can browse and buy tools&materials from my Amazon Store. This way I get a small commission: Amazon.de: http://astore.amazon.de/great043-21 Amazon.com:http://astore.amazon.com/gre09a-20 Amazon.co.uk: http://astore.amazon.co.uk/gre0b-21 Or you feel super generous and want to use this Amazon link as your Amazon home page. And do not worry, your purchases are all anonym and the prices are all the same: Amazon.de:http://www.amazon.de/?_encoding=UTF8&camp=1638&creative=19454&linkCode=ur2&site-redirect=de&tag=great043-21&linkId=ORZEQZEOVJAFURCZ Amazon.com:http://www.amazon.com/?_encoding=UTF8&camp=1789&creative=390957&linkCode=ur2&tag=gre09a-20&linkId=I5NDCEAVCD2OWM4S Amazon.co.uk:http://www.amazon.co.uk/ref=as_li_ss_tl?_encoding=UTF8&camp=1634&creative=19450&linkCode=ur2&tag=gre0b-21
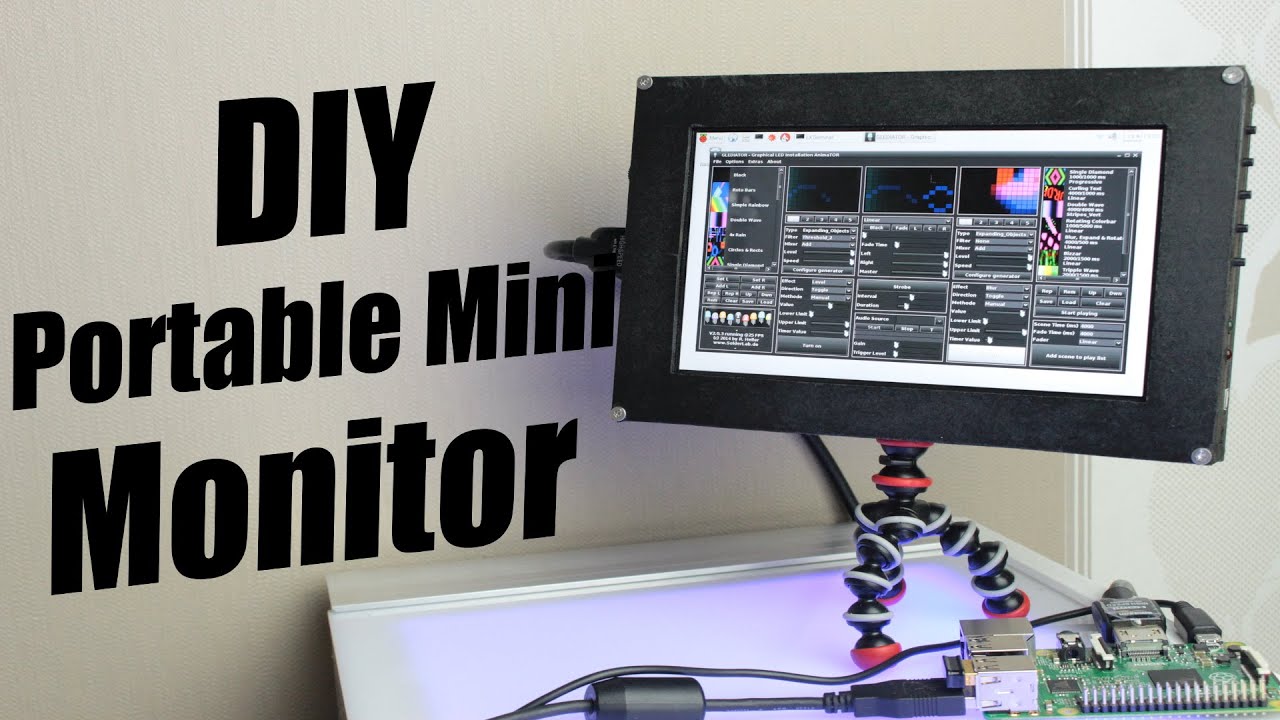
ZnMMmfxceug | 05 Jul 2015
Part 1: https://youtu.be/Ze2fC6w9r7M Facebook: https://www.facebook.com/greatscottlab Twitter: https://twitter.com/GreatScottLab Support me for more videos: https://www.patreon.com/GreatScott?ty=h More information (parts list, pictures) on Instructables: http://www.instructables.com/id/DIY-Portable-Mini-Monitor/ Parts list: Local Home Improvement Store: MDF 40cmx30cm 6mm thick Screws, Wood Glue, Black Spray Paint Ebay: 1x 1280x800 LCD Kit: http://rover.ebay.com/rover/1/711-53200-19255-0/1?icep_ff3=2&pub=5575101368&toolid=10001&campid=5337582279&customid=&icep_item=181145243253&ipn=psmain&icep_vectorid=229466&kwid=902099&mtid=824&kw=lg 5x Tactile Push Button: http://rover.ebay.com/rover/1/711-53200-19255-0/1?icep_ff3=2&pub=5575101368&toolid=10001&campid=5337582279&customid=&icep_item=251713140924&ipn=psmain&icep_vectorid=229466&kwid=902099&mtid=824&kw=lg 1x 5mm Green & Red LED: http://rover.ebay.com/rover/1/711-53200-19255-0/1?icep_ff3=2&pub=5575101368&toolid=10001&campid=5337582279&customid=&icep_item=301427801549&ipn=psmain&icep_vectorid=229466&kwid=902099&mtid=824&kw=lg 1x Slide Switch: http://rover.ebay.com/rover/1/711-53200-19255-0/1?icep_ff3=2&pub=5575101368&toolid=10001&campid=5337582279&customid=&icep_item=191221662060&ipn=psmain&icep_vectorid=229466&kwid=902099&mtid=824&kw=lg 1x TP4056 Single Cell Charger: http://rover.ebay.com/rover/1/711-53200-19255-0/1?icep_ff3=2&pub=5575101368&toolid=10001&campid=5337582279&customid=&icep_item=400665522246&ipn=psmain&icep_vectorid=229466&kwid=902099&mtid=824&kw=lg 1x XL6009 Boost Converter: http://rover.ebay.com/rover/1/711-53200-19255-0/1?icep_ff3=2&pub=5575101368&toolid=10001&campid=5337582279&customid=&icep_item=301433692822&ipn=psmain&icep_vectorid=229466&kwid=902099&mtid=824&kw=lg 2x 18650 2800mAh Li-Ion Batteries: http://rover.ebay.com/rover/1/711-53200-19255-0/1?icep_ff3=2&pub=5575101368&toolid=10001&campid=5337582279&customid=&icep_item=310657965123&ipn=psmain&icep_vectorid=229466&kwid=902099&mtid=824&kw=lg 1x Tripod Mount: http://rover.ebay.com/rover/1/711-53200-19255-0/1?icep_ff3=2&pub=5575101368&toolid=10001&campid=5337582279&customid=&icep_item=251808612309&ipn=psmain&icep_vectorid=229466&kwid=902099&mtid=824&kw=lg 1x Mini Tripod: http://rover.ebay.com/rover/1/711-53200-19255-0/1?icep_ff3=2&pub=5575101368&toolid=10001&campid=5337582279&customid=&icep_item=201373471231&ipn=psmain&icep_vectorid=229466&kwid=902099&mtid=824&kw=lg Amazon.com: 1x 1280x800 LCD Kit: - 5x Tactile Push Button: http://amzn.to/1dqjng5 1x 5mm Green & Red LED: http://amzn.to/1Jrmd2S 1x Slide Switch: http://amzn.to/1KiqwMp 1x TP4056 Single Cell Charger: - 1x XL6009 Boost Converter: http://amzn.to/1dqjXdT 2x 18650 2800mAh Li-Ion Batteries: http://amzn.to/1dqk09s 1x Tripod Mount: http://amzn.to/1SUC2AK 1x Mini Tripod: http://amzn.to/1SUC23I Amazon.de: 1x 1280x800 LCD Kit: - 5x Tactile Push Button: http://amzn.to/1SUCw9Z 1x 5mm Green & Red LED: http://amzn.to/1JrneYH 1x Slide Switch: http://amzn.to/1JfL4DS 1x TP4056 Single Cell Charger: http://amzn.to/1NnD3hB 1x XL6009 Boost Converter: http://amzn.to/1JfL9Y9 2x 18650 2800mAh Li-Ion Batteries: http://amzn.to/1NnD8SB 1x Tripod Mount: http://amzn.to/1NnDc4F 1x Mini Tripod: http://amzn.to/1NnDdFN Amazon.co.uk: 1x 1280x800 LCD Kit: - 5x Tactile Push Button: http://amzn.to/1NnDnwI 1x 5mm Green & Red LED: http://amzn.to/1JrnO90 1x Slide Switch: http://amzn.to/1NnDrgb 1x TP4056 Single Cell Charger: - 1x XL6009 Boost Converter: http://amzn.to/1JrnSWe 2x 18650 2800mAh Li-Ion Batteries: http://amzn.to/1JrnWoK 1x Tripod Mount: http://amzn.to/1Jro0F9 1x Mini Tripod: http://amzn.to/1NnDDfo Music: Killing Time, Kevin MacLeod (incompetech.com) In the Hall of the Mountain King, Kevin MacLeod You want to support my videos? You can browse and buy tools&materials from my Amazon Store. This way I get a small commission: Amazon.de: http://astore.amazon.de/great043-21 Amazon.com:http://astore.amazon.com/gre09a-20 Amazon.co.uk: http://astore.amazon.co.uk/gre0b-21 Or you feel super generous and want to use this Amazon link as your Amazon home page. And do not worry, your purchases are all anonym and the prices are all the same: Amazon.de:http://www.amazon.de/?_encoding=UTF8&camp=1638&creative=19454&linkCode=ur2&site-redirect=de&tag=great043-21&linkId=ORZEQZEOVJAFURCZ Amazon.com:http://www.amazon.com/?_encoding=UTF8&camp=1789&creative=390957&linkCode=ur2&tag=gre09a-20&linkId=I5NDCEAVCD2OWM4S Amazon.co.uk:http://www.amazon.co.uk/ref=as_li_ss_tl?_encoding=UTF8&camp=1634&creative=19450&linkCode=ur2&tag=gre0b-21

Ze2fC6w9r7M | 28 Jun 2015
Previous video: https://youtu.be/id90y5fkirE Part 2: https://youtu.be/ZnMMmfxceug Facebook: https://www.facebook.com/greatscottlab Twitter: https://twitter.com/GreatScottLab Support me for more videos: https://www.patreon.com/GreatScott?ty=h More information (parts list, pictures) on Instructables: http://www.instructables.com/id/DIY-Portable-Mini-Monitor/ Parts list: Local Home Improvement Store: MDF 40cmx30cm 6mm thick Screws, Wood Glue, Black Spray Paint Ebay: 1x 1280x800 LCD Kit: http://rover.ebay.com/rover/1/711-53200-19255-0/1?icep_ff3=2&pub=5575101368&toolid=10001&campid=5337582279&customid=&icep_item=181145243253&ipn=psmain&icep_vectorid=229466&kwid=902099&mtid=824&kw=lg 5x Tactile Push Button: http://rover.ebay.com/rover/1/711-53200-19255-0/1?icep_ff3=2&pub=5575101368&toolid=10001&campid=5337582279&customid=&icep_item=251713140924&ipn=psmain&icep_vectorid=229466&kwid=902099&mtid=824&kw=lg 1x 5mm Green & Red LED: http://rover.ebay.com/rover/1/711-53200-19255-0/1?icep_ff3=2&pub=5575101368&toolid=10001&campid=5337582279&customid=&icep_item=301427801549&ipn=psmain&icep_vectorid=229466&kwid=902099&mtid=824&kw=lg 1x Slide Switch: http://rover.ebay.com/rover/1/711-53200-19255-0/1?icep_ff3=2&pub=5575101368&toolid=10001&campid=5337582279&customid=&icep_item=191221662060&ipn=psmain&icep_vectorid=229466&kwid=902099&mtid=824&kw=lg 1x TP4056 Single Cell Charger: http://rover.ebay.com/rover/1/711-53200-19255-0/1?icep_ff3=2&pub=5575101368&toolid=10001&campid=5337582279&customid=&icep_item=400665522246&ipn=psmain&icep_vectorid=229466&kwid=902099&mtid=824&kw=lg 1x XL6009 Boost Converter: http://rover.ebay.com/rover/1/711-53200-19255-0/1?icep_ff3=2&pub=5575101368&toolid=10001&campid=5337582279&customid=&icep_item=301433692822&ipn=psmain&icep_vectorid=229466&kwid=902099&mtid=824&kw=lg 2x 18650 2800mAh Li-Ion Batteries: http://rover.ebay.com/rover/1/711-53200-19255-0/1?icep_ff3=2&pub=5575101368&toolid=10001&campid=5337582279&customid=&icep_item=310657965123&ipn=psmain&icep_vectorid=229466&kwid=902099&mtid=824&kw=lg 1x Tripod Mount: http://rover.ebay.com/rover/1/711-53200-19255-0/1?icep_ff3=2&pub=5575101368&toolid=10001&campid=5337582279&customid=&icep_item=251808612309&ipn=psmain&icep_vectorid=229466&kwid=902099&mtid=824&kw=lg 1x Mini Tripod: http://rover.ebay.com/rover/1/711-53200-19255-0/1?icep_ff3=2&pub=5575101368&toolid=10001&campid=5337582279&customid=&icep_item=201373471231&ipn=psmain&icep_vectorid=229466&kwid=902099&mtid=824&kw=lg Amazon.com: 1x 1280x800 LCD Kit: - 5x Tactile Push Button: http://amzn.to/1dqjng5 1x 5mm Green & Red LED: http://amzn.to/1Jrmd2S 1x Slide Switch: http://amzn.to/1KiqwMp 1x TP4056 Single Cell Charger: - 1x XL6009 Boost Converter: http://amzn.to/1dqjXdT 2x 18650 2800mAh Li-Ion Batteries: http://amzn.to/1dqk09s 1x Tripod Mount: http://amzn.to/1SUC2AK 1x Mini Tripod: http://amzn.to/1SUC23I Amazon.de: 1x 1280x800 LCD Kit: - 5x Tactile Push Button: http://amzn.to/1SUCw9Z 1x 5mm Green & Red LED: http://amzn.to/1JrneYH 1x Slide Switch: http://amzn.to/1JfL4DS 1x TP4056 Single Cell Charger: http://amzn.to/1NnD3hB 1x XL6009 Boost Converter: http://amzn.to/1JfL9Y9 2x 18650 2800mAh Li-Ion Batteries: http://amzn.to/1NnD8SB 1x Tripod Mount: http://amzn.to/1NnDc4F 1x Mini Tripod: http://amzn.to/1NnDdFN Amazon.co.uk: 1x 1280x800 LCD Kit: - 5x Tactile Push Button: http://amzn.to/1NnDnwI 1x 5mm Green & Red LED: http://amzn.to/1JrnO90 1x Slide Switch: http://amzn.to/1NnDrgb 1x TP4056 Single Cell Charger: - 1x XL6009 Boost Converter: http://amzn.to/1JrnSWe 2x 18650 2800mAh Li-Ion Batteries: http://amzn.to/1JrnWoK 1x Tripod Mount: http://amzn.to/1Jro0F9 1x Mini Tripod: http://amzn.to/1NnDDfo Music: 2011 Lookalike by Bartlebeats You want to support my videos? You can browse and buy tools&materials from my Amazon Store. This way I get a small commission: Amazon.de: http://astore.amazon.de/great043-21 Amazon.com:http://astore.amazon.com/gre09a-20 Amazon.co.uk: http://astore.amazon.co.uk/gre0b-21 Or you feel super generous and want to use this Amazon link as your Amazon home page. And do not worry, your purchases are all anonym and the prices are all the same: Amazon.de:http://www.amazon.de/?_encoding=UTF8&camp=1638&creative=19454&linkCode=ur2&site-redirect=de&tag=great043-21&linkId=ORZEQZEOVJAFURCZ Amazon.com:http://www.amazon.com/?_encoding=UTF8&camp=1789&creative=390957&linkCode=ur2&tag=gre09a-20&linkId=I5NDCEAVCD2OWM4S Amazon.co.uk:http://www.amazon.co.uk/ref=as_li_ss_tl?_encoding=UTF8&camp=1634&creative=19450&linkCode=ur2&tag=gre0b-21

id90y5fkirE | 21 Jun 2015
Previous video: https://youtu.be/AwcQsbgy7AY Facebook: https://www.facebook.com/greatscottlab Twitter: https://twitter.com/GreatScottLab Support me for more videos: https://www.patreon.com/GreatScott?ty=h Prusa I3 Printer: http://s.click.aliexpress.com/e/bMf62rjEY Since half an year I have been playing around with a Prusa I3 3D Printer. In this video I will present you all my experiences and problems I had with 3D Printing and the Prusa I3 kit itself. It should give you an overview of what you can expect from such a cheap kit. Music: 2011 Lookalike by Bartlebeats Killing Time, Kevin MacLeod (incompetech.com) You want to support my videos? You can browse and buy tools&materials from my Amazon Store. This way I get a small commission: Amazon.de: http://astore.amazon.de/great043-21 Amazon.com:http://astore.amazon.com/gre09a-20 Amazon.co.uk: http://astore.amazon.co.uk/gre0b-21 Or you feel super generous and want to use this Amazon link as your Amazon home page. And do not worry, your purchases are all anonym and the prices are all the same: Amazon.de:http://www.amazon.de/?_encoding=UTF8&camp=1638&creative=19454&linkCode=ur2&site-redirect=de&tag=great043-21&linkId=ORZEQZEOVJAFURCZ Amazon.com:http://www.amazon.com/?_encoding=UTF8&camp=1789&creative=390957&linkCode=ur2&tag=gre09a-20&linkId=I5NDCEAVCD2OWM4S Amazon.co.uk:http://www.amazon.co.uk/ref=as_li_ss_tl?_encoding=UTF8&camp=1634&creative=19450&linkCode=ur2&tag=gre0b-21

AwcQsbgy7AY | 14 Jun 2015
UPDATE: It works! Here is a small video where I use another laser diode: https://youtu.be/DSwHNE-rjv4 Previous video: https://youtu.be/XCnI6ZOYKes Constant Current Load video: https://youtu.be/8uBcywBUTkw Facebook: https://www.facebook.com/greatscottlab Twitter: https://twitter.com/GreatScottLab Parts list, Schematic, PCB Layout is on instructables: http://www.instructables.com/id/DIY-Laser-Diode-Driver-Constant-Current-Source/ Facebook: https://www.facebook.com/greatscottlab Twitter: https://twitter.com/GreatScottLab Support me for more videos: https://www.patreon.com/GreatScott?ty=h Parts list (only Ebay, Amazon is on instructables): 1x Laser Module:http://rover.ebay.com/rover/1/711-53200-19255-0/1?icep_ff3=2&pub=5575101368&toolid=10001&campid=5337582279&customid=&icep_item=221662321522&ipn=psmain&icep_vectorid=229466&kwid=902099&mtid=824&kw=lg 1x Vero Board:http://rover.ebay.com/rover/1/711-53200-19255-0/1?icep_ff3=2&pub=5575101368&toolid=10001&campid=5337582279&customid=&icep_item=361179677883&ipn=psmain&icep_vectorid=229466&kwid=902099&mtid=824&kw=lg 1x MCP602:http://rover.ebay.com/rover/1/711-53200-19255-0/1?icep_ff3=2&pub=5575101368&toolid=10001&campid=5337582279&customid=&icep_item=300980102106&ipn=psmain&icep_vectorid=229466&kwid=902099&mtid=824&kw=lg 1x 3.3Ω / 5W Resistor:http://rover.ebay.com/rover/1/711-53200-19255-0/1?icep_ff3=2&pub=5575101368&toolid=10001&campid=5337582279&customid=&icep_item=371274685766&ipn=psmain&icep_vectorid=229466&kwid=902099&mtid=824&kw=lg 1x 1kΩ Resistor:http://rover.ebay.com/rover/1/711-53200-19255-0/1?icep_ff3=2&pub=5575101368&toolid=10001&campid=5337582279&customid=&icep_item=371347239692&ipn=psmain&icep_vectorid=229466&kwid=902099&mtid=824&kw=lg 1x IRLZ44N N Channel MOSFET:http://rover.ebay.com/rover/1/711-53200-19255-0/1?icep_ff3=2&pub=5575101368&toolid=10001&campid=5337582279&customid=&icep_item=121372676978&ipn=psmain&icep_vectorid=229466&kwid=902099&mtid=824&kw=lg 2x Screw Terminal:http://rover.ebay.com/rover/1/711-53200-19255-0/1?icep_ff3=2&pub=5575101368&toolid=10001&campid=5337582279&customid=&icep_item=290747042111&ipn=psmain&icep_vectorid=229466&kwid=902099&mtid=824&kw=lg 1x 500kΩ Potentiometer:http://rover.ebay.com/rover/1/711-53200-19255-0/1?icep_ff3=2&pub=5575101368&toolid=10001&campid=5337582279&customid=&icep_item=371169999303&ipn=psmain&icep_vectorid=229466&kwid=902099&mtid=824&kw=lg 1x Laser Safety Glasses:http://rover.ebay.com/rover/1/711-53200-19255-0/1?icep_ff3=2&pub=5575101368&toolid=10001&campid=5337582279&customid=&icep_item=221311671880&ipn=psmain&icep_vectorid=229466&kwid=902099&mtid=824&kw=lg 1x Thermal Paste: http://rover.ebay.com/rover/1/711-53200-19255-0/1?icep_ff3=2&pub=5575101368&toolid=10001&campid=5337582279&customid=&icep_item=311249650420&ipn=psmain&icep_vectorid=229466&kwid=902099&mtid=824&kw=lg In this episode of HACKED! I will show you how I extracted a laser diode from a DVD Burner which should have the power to ignite a match. In order to power the diode correctly I will also demonstrate how I build a constant current source which delivers a precise and steady current to the load. Music: 2011 Lookalike by Bartlebeats You want to support my videos? You can browse and buy tools&materials from my Amazon Store. This way I get a small commission: Amazon.de: http://astore.amazon.de/great043-21 Amazon.com:http://astore.amazon.com/gre09a-20 Amazon.co.uk: http://astore.amazon.co.uk/gre0b-21 Or you feel super generous and want to use this Amazon link as your Amazon home page. And do not worry, your purchases are all anonym and the prices are all the same: Amazon.de:http://www.amazon.de/?_encoding=UTF8&camp=1638&creative=19454&linkCode=ur2&site-redirect=de&tag=great043-21&linkId=ORZEQZEOVJAFURCZ Amazon.com:http://www.amazon.com/?_encoding=UTF8&camp=1789&creative=390957&linkCode=ur2&tag=gre09a-20&linkId=I5NDCEAVCD2OWM4S Amazon.co.uk:http://www.amazon.co.uk/ref=as_li_ss_tl?_encoding=UTF8&camp=1634&creative=19450&linkCode=ur2&tag=gre0b-21
XCnI6ZOYKes | 07 Jun 2015
Part 1: https://youtu.be/kdrP9WbJIb8 Previous video: https://youtu.be/OramJZmoekA Facebook: https://www.facebook.com/greatscottlab Twitter: https://twitter.com/GreatScottLab Support me for more videos: https://www.patreon.com/GreatScott?ty=h Buy your transistor tester here: Ebay: http://rover.ebay.com/rover/1/711-53200-19255-0/1?icep_ff3=2&pub=5575101368&toolid=10001&campid=5337582279&customid=&icep_item=311343672563&ipn=psmain&icep_vectorid=229466&kwid=902099&mtid=824&kw=lg Amazon.com: http://amzn.to/1HUfgBs Amazon.de: http://amzn.to/1G4aR0E Amazon.co.uk: http://amzn.to/1Gt948J In this video I will explain what reactance means and how you can calculate the amount of reactance for a coil. I will also talk a bit about reactive power and phase shift. Music: In the Hall of the Mountain King, Kevin MacLeod Killing Time, Kevin MacLeod (incompetech.com) You want to support my videos? You can browse and buy tools&materials from my Amazon Store. This way I get a small commission: Amazon.de: http://astore.amazon.de/great043-21 Amazon.com:http://astore.amazon.com/gre09a-20 Amazon.co.uk: http://astore.amazon.co.uk/gre0b-21 Or you feel super generous and want to use this Amazon link as your Amazon home page. And do not worry, your purchases are all anonym and the prices are all the same: Amazon.de:http://www.amazon.de/?_encoding=UTF8&camp=1638&creative=19454&linkCode=ur2&site-redirect=de&tag=great043-21&linkId=ORZEQZEOVJAFURCZ Amazon.com:http://www.amazon.com/?_encoding=UTF8&camp=1789&creative=390957&linkCode=ur2&tag=gre09a-20&linkId=I5NDCEAVCD2OWM4S Amazon.co.uk:http://www.amazon.co.uk/ref=as_li_ss_tl?_encoding=UTF8&camp=1634&creative=19450&linkCode=ur2&tag=gre0b-21

OramJZmoekA | 24 May 2015
Previous video: https://youtu.be/kdrP9WbJIb8 Facebook: https://www.facebook.com/greatscottlab Twitter: https://twitter.com/GreatScottLab Support me for more videos: https://www.patreon.com/GreatScott?ty=h Instructables (more pics+parts list): http://www.instructables.com/id/Make-your-own-LED-Lighting-Panels/ In this small project I will show you how to build really awesome looking LED Lighting Panels which are a great alternative to usual lighting systems. The main components are all very common and easy to find. Music: 2011 Lookalike by Bartlebeats Ebay: 1x Warm white LED kit: http://rover.ebay.com/rover/1/711-53200-19255-0/1?icep_ff3=2&pub=5575101368&toolid=10001&campid=5337582279&customid=&icep_item=301471352201&ipn=psmain&icep_vectorid=229466&kwid=902099&mtid=824&kw=lg 1x Spray glue: http://rover.ebay.com/rover/1/711-53200-19255-0/1?icep_ff3=2&pub=5575101368&toolid=10001&campid=5337582279&customid=&icep_item=361262050944&ipn=psmain&icep_vectorid=229466&kwid=902099&mtid=824&kw=lg 12x Screw 4,0x50: visit your next hardware store 2x 18mm thick 120x40cm wood panel: visit your next hardware store 5m x 34x54mm wood laths: visit your next hardware store 3m x Wallpaper: visit your next hardware store 15m x 1,5mm^2 wire: http://rover.ebay.com/rover/1/711-53200-19255-0/1?icep_ff3=2&pub=5575101368&toolid=10001&campid=5337582279&customid=&icep_item=281110901889&ipn=psmain&icep_vectorid=229466&kwid=902099&mtid=824&kw=lg 4x compact connectors: http://rover.ebay.com/rover/1/711-53200-19255-0/1?icep_ff3=2&pub=5575101368&toolid=10001&campid=5337582279&customid=&icep_item=171397559694&ipn=psmain&icep_vectorid=229466&kwid=902099&mtid=824&kw=lg Amazon.com: 1x Warm white LED kit:http://amzn.to/1drGIPv 1x Spray glue:http://amzn.to/1FN4SjL 12x Screw 4,0x50: visit your next hardware store 2x 18mm thick 120x40cm wood panel: visit your next hardware store 5m x 34x54mm wood laths: visit your next hardware store 3m x Wallpaper: visit your next hardware store 15m x 1,5mm^2 wire:http://amzn.to/1Lu5iti 4x compact connectors:http://amzn.to/1PFzY1o Amazon.de: 1x Warm white LED kit: http://amzn.to/1Sx9IoV 1x Spray glue:http://amzn.to/1HDcfKT 12x Screw 4,0x50: visit your next hardware store 2x 18mm thick 120x40cm wood panel: visit your next hardware store 5m x 34x54mm wood laths: visit your next hardware store 3m x Wallpaper: visit your next hardware store 15m x 1,5mm^2 wire: http://amzn.to/1Lu3Qat 4x compact connectors: http://amzn.to/1Lu41md Amazon.co.uk: 1x Warm white LED kit: http://amzn.to/1SxbWEM 1x Spray glue:http://amzn.to/1Sxc1bA 12x Screw 4,0x50: visit your next hardware store 2x 18mm thick 120x40cm wood panel: visit your next hardware store 5m x 34x54mm wood laths: visit your next hardware store 3m x Wallpaper: visit your next hardware store 15m x 1,5mm^2 wire: http://amzn.to/1Lu5NDO 4x compact connectors: http://amzn.to/1Lu5Pvm You want to support my videos? You can browse and buy tools&materials from my Amazon Store. This way I get a small commission: Amazon.de: http://astore.amazon.de/great043-21 Amazon.com:http://astore.amazon.com/gre09a-20 Amazon.co.uk: http://astore.amazon.co.uk/gre0b-21 Or you feel super generous and want to use this Amazon link as your Amazon home page. And do not worry, your purchases are all anonym and the prices are all the same: Amazon.de:http://www.amazon.de/?_encoding=UTF8&camp=1638&creative=19454&linkCode=ur2&site-redirect=de&tag=great043-21&linkId=ORZEQZEOVJAFURCZ Amazon.com:http://www.amazon.com/?_encoding=UTF8&camp=1789&creative=390957&linkCode=ur2&tag=gre09a-20&linkId=I5NDCEAVCD2OWM4S Amazon.co.uk:http://www.amazon.co.uk/ref=as_li_ss_tl?_encoding=UTF8&camp=1634&creative=19450&linkCode=ur2&tag=gre0b-21

kdrP9WbJIb8 | 17 May 2015
Previous video: https://youtu.be/pxNLTRl36HQ Facebook: https://www.facebook.com/greatscottlab Twitter: https://twitter.com/GreatScottLab Support me for more videos: https://www.patreon.com/GreatScott?ty=h In this video I will explain why coils/inductors are so important in different DC circuits. I will talk about magnetic fields (MF), induction, Lenz Law and inductance. The example circuits include: boost converter, buck converter and flyback diode protection. You want to support my videos? You can browse and buy tools&materials from my Amazon Store. This way I get a small commission: Amazon.de: http://astore.amazon.de/great043-21 Amazon.com:http://astore.amazon.com/gre09a-20 Amazon.co.uk: http://astore.amazon.co.uk/gre0b-21 Or you feel super generous and want to use this Amazon link as your Amazon home page. And do not worry, your purchases are all anonym and the prices are all the same: Amazon.de:http://www.amazon.de/?_encoding=UTF8&camp=1638&creative=19454&linkCode=ur2&site-redirect=de&tag=great043-21&linkId=ORZEQZEOVJAFURCZ Amazon.com:http://www.amazon.com/?_encoding=UTF8&camp=1789&creative=390957&linkCode=ur2&tag=gre09a-20&linkId=I5NDCEAVCD2OWM4S Amazon.co.uk:http://www.amazon.co.uk/ref=as_li_ss_tl?_encoding=UTF8&camp=1634&creative=19450&linkCode=ur2&tag=gre0b-21

pxNLTRl36HQ | 10 May 2015
Previous video: https://youtu.be/wI-KYRdmx-E Facebook: https://www.facebook.com/greatscottlab Twitter: https://twitter.com/GreatScottLab Support me for more videos: https://www.patreon.com/GreatScott?ty=h EC Technology: http://www.iectechnology.com/ Buy the 22400mAh Power Bank here to support my channel: Amazon.com:http://amzn.to/1RrgcoI Amazon.de: http://amzn.to/1bHKcvn Amazon.co.uk: http://amzn.to/1Iu0qoZ EC Technology store on Amazon: Amazon US store: http://amzn.to/1Bq49fQ Amazon UK store: http://amzn.to/1rIZeZz Amazon GER store: http://amzn.to/11gK6Xm In this VS episode I will compare a 22400mAh power bank from EC Technology with a no name 50000mAh solar power bank. I will focus on the overall features, efficiency and true capacity of those power banks. Music: 2011 Lookalike by Bartlebeats Killing Time, Kevin MacLeod (incompetech.com) You want to support my videos? You can browse and buy tools&materials from my Amazon Store. This way I get a small commission: Amazon.de: http://astore.amazon.de/great043-21 Amazon.com:http://astore.amazon.com/gre09a-20 Amazon.co.uk: http://astore.amazon.co.uk/gre0b-21 Or you feel super generous and want to use this Amazon link as your Amazon home page. And do not worry, your purchases are all anonym and the prices are all the same: Amazon.de:http://www.amazon.de/?_encoding=UTF8&camp=1638&creative=19454&linkCode=ur2&site-redirect=de&tag=great043-21&linkId=ORZEQZEOVJAFURCZ Amazon.com:http://www.amazon.com/?_encoding=UTF8&camp=1789&creative=390957&linkCode=ur2&tag=gre09a-20&linkId=I5NDCEAVCD2OWM4S Amazon.co.uk:http://www.amazon.co.uk/ref=as_li_ss_tl?_encoding=UTF8&camp=1634&creative=19450&linkCode=ur2&tag=gre0b-21

wI-KYRdmx-E | 03 May 2015
Previous video: https://youtu.be/pvHIV0bNRe4 Facebook: https://www.facebook.com/greatscottlab Twitter: https://twitter.com/GreatScottLab Support me for more videos: https://www.patreon.com/GreatScott?ty=h More information (parts list, more picture) on Instructables: http://www.instructables.com/id/Build-your-own-Variable-Lab-Bench-Power-Supply/ In this video I will show you how I combined a LTC3780, which is a powerful 130W Step Up/Step Down converter, with a 12V 5A power supply to create an adjustable lab bench power supply (0.8V-29.4V || 0.3A-6A). The performance is quite good in comparison with other models which cost around the same. Music: 2011 Lookalike by Bartlebeats Parts list: Ebay: LTC3780: http://rover.ebay.com/rover/1/711-53200-19255-0/1?icep_ff3=2&pub=5575101368&toolid=10001&campid=5337582279&customid=&icep_item=251768965445&ipn=psmain&icep_vectorid=229466&kwid=902099&mtid=824&kw=lg Amazon.com: 1x LTC 3780: http://amzn.to/1DMl7G4 1x 12V 5A Power Supply: http://amzn.to/1DMlfp5 1x AC Input: http://amzn.to/1DMlgJI 1x AC Switch: http://amzn.to/1DMliRZ 1x Voltage/Current Display: http://amzn.to/1c9uGK1 2x Binding post: http://amzn.to/1GRcw9X 1x 200kΩ Potentiometer: http://amzn.to/1JJFlbK 1x 500kΩ Potentiometer: http://amzn.to/1E6t89w 2x Knobs: http://amzn.to/1JigGYH Amazon.de: 1x LTC 3780: - 1x 12V 5A Power Supply: http://amzn.to/1FIc4vK 1x AC Input: http://amzn.to/1FIc7b5 1x AC Switch: http://amzn.to/1FIceDs 1x Voltage/Current Display: http://amzn.to/1AwUnt8 2x Binding post: http://amzn.to/1ENKLzo 1x 200kΩ Potentiometer: http://amzn.to/1ENKQmP 1x 500kΩ Potentiometer: http://amzn.to/1AwUEfD 2x Knobs: http://amzn.to/1FIcuCC Amazon.co.uk: 1x LTC 3780: - 1x 12V 5A Power Supply: http://amzn.to/1FId7fh 1x AC Input: http://amzn.to/1R1lRl9 1x AC Switch: http://amzn.to/1AwWsoT 1x Voltage/Current Display: http://amzn.to/1AwWFsa 2x Binding post: http://amzn.to/1ENM3uh 1x 200kΩ Potentiometer: http://amzn.to/1FIdAyb 1x 500kΩ Potentiometer: http://amzn.to/1FIdBSx 2x Knobs: http://amzn.to/1AwXvoY You want to support my videos? You can browse and buy tools&materials from my Amazon Store. This way I get a small commission: Amazon.de: http://astore.amazon.de/great043-21 Amazon.com:http://astore.amazon.com/gre09a-20 Amazon.co.uk: http://astore.amazon.co.uk/gre0b-21 Or you feel super generous and want to use this Amazon link as your Amazon home page. And do not worry, your purchases are all anonym and the prices are all the same: Amazon.de:http://www.amazon.de/?_encoding=UTF8&camp=1638&creative=19454&linkCode=ur2&site-redirect=de&tag=great043-21&linkId=ORZEQZEOVJAFURCZ Amazon.com:http://www.amazon.com/?_encoding=UTF8&camp=1789&creative=390957&linkCode=ur2&tag=gre09a-20&linkId=I5NDCEAVCD2OWM4S Amazon.co.uk:http://www.amazon.co.uk/ref=as_li_ss_tl?_encoding=UTF8&camp=1634&creative=19450&linkCode=ur2&tag=gre0b-21

pvHIV0bNRe4 | 24 Apr 2015
Previous video: https://youtu.be/8uBcywBUTkw Facebook: https://www.facebook.com/greatscottlab Twitter: https://twitter.com/GreatScottLab Support me for more videos: https://www.patreon.com/GreatScott?ty=h More information (parts list, schematic, code) on Instructables: http://www.instructables.com/id/DIY-Motion-Detection-SMS-Alarm-System/ In this video I will combine a cheap PIR motion sensor with a TC35 GSM module to build an alarm system which sends you an "INTRUDER ALERT" SMS whenever somebody tries to steal your stuff. Music: 2011 Lookalike by Bartlebeats Parts list: Amazon.com: 1x Arduino Mini: http://amzn.to/1OKHvGk 1x FTDI breakout: http://amzn.to/1JxIo3i 1x Female headers: http://amzn.to/1Hwgnui 1x TC35 GMS module: http://amzn.to/1OKI1nC 1x PIR sensor: http://amzn.to/1OKI5E1 2x Toggle switch: http://amzn.to/1OKI9DH 1x Step Up converter (5V-12V): http://amzn.to/1GlXmct 1x Siren: http://amzn.to/1K9cUSa 1x BUZ11: http://amzn.to/1zQkryY 2x 10kΩ resistor: http://amzn.to/1GlXB7e 1x 5mm green LED: http://amzn.to/1OKIsyp 1x 220Ω resistor: http://amzn.to/1OKIvKH Amazon.de: 1x Arduino Mini: http://amzn.to/1HwhJ8d 1x FTDI breakout:http://amzn.to/1yX3CYp 1x Female headers:http://amzn.to/1IMwUZK 1x TC35 GMS module: http://amzn.to/1GlYJbc 1x PIR sensor: http://amzn.to/1GlYPPZ 2x Toggle switch:http://amzn.to/1GlYVHo 1x Step Up converter (5V-12V): http://amzn.to/1GlZ25z 1x Siren: http://amzn.to/1yX45tG 1x BUZ11: http://amzn.to/1HwifmH 2x 10kΩ resistor:http://amzn.to/1IMxsip 1x 5mm green LED: http://amzn.to/1HwinCA 1x 220Ω resistor: http://amzn.to/1IMxvdZ Music: 2011 Lookalike by Bartlebeats You want to support my videos? You can browse and buy tools&materials from my Amazon Store. This way I get a small commission: Amazon.de: http://astore.amazon.de/great043-21 Amazon.com:http://astore.amazon.com/gre09a-20 Amazon.co.uk: http://astore.amazon.co.uk/gre0b-21 Or you feel super generous and want to use this Amazon link as your Amazon home page. And do not worry, your purchases are all anonym and the prices are all the same: Amazon.de:http://www.amazon.de/?_encoding=UTF8&camp=1638&creative=19454&linkCode=ur2&site-redirect=de&tag=great043-21&linkId=ORZEQZEOVJAFURCZ Amazon.com:http://www.amazon.com/?_encoding=UTF8&camp=1789&creative=390957&linkCode=ur2&tag=gre09a-20&linkId=I5NDCEAVCD2OWM4S Amazon.co.uk:http://www.amazon.co.uk/ref=as_li_ss_tl?_encoding=UTF8&camp=1634&creative=19450&linkCode=ur2&tag=gre0b-21

8uBcywBUTkw | 10 Apr 2015
Previous video: https://youtu.be/gVGD-f8SQSI Facebook: https://www.facebook.com/greatscottlab Twitter: https://twitter.com/GreatScottLab Support me for more videos: https://www.patreon.com/GreatScott?ty=h More information (parts list, schematic, ......) on Instructables: http://www.instructables.com/id/DIY-Constant-current-load/ In this video I will show you how to measure the true capacity of Li-Ion batteries. I will also explain how a simple constant current load works and how to build one from very simple parts. Music: 2011 Lookalike by Bartlebeats You want to support my videos? You can browse and buy tools&materials from my Amazon Store. This way I get a small commission: Amazon.de: http://astore.amazon.de/great043-21 Amazon.com:http://astore.amazon.com/gre09a-20 Amazon.co.uk: http://astore.amazon.co.uk/gre0b-21 Or you feel super generous and want to use this Amazon link as your Amazon home page. And do not worry, your purchases are all anonym and the prices are all the same: Amazon.de:http://www.amazon.de/?_encoding=UTF8&camp=1638&creative=19454&linkCode=ur2&site-redirect=de&tag=great043-21&linkId=ORZEQZEOVJAFURCZ Amazon.com:http://www.amazon.com/?_encoding=UTF8&camp=1789&creative=390957&linkCode=ur2&tag=gre09a-20&linkId=I5NDCEAVCD2OWM4S Amazon.co.uk:http://www.amazon.co.uk/ref=as_li_ss_tl?_encoding=UTF8&camp=1634&creative=19450&linkCode=ur2&tag=gre0b-21
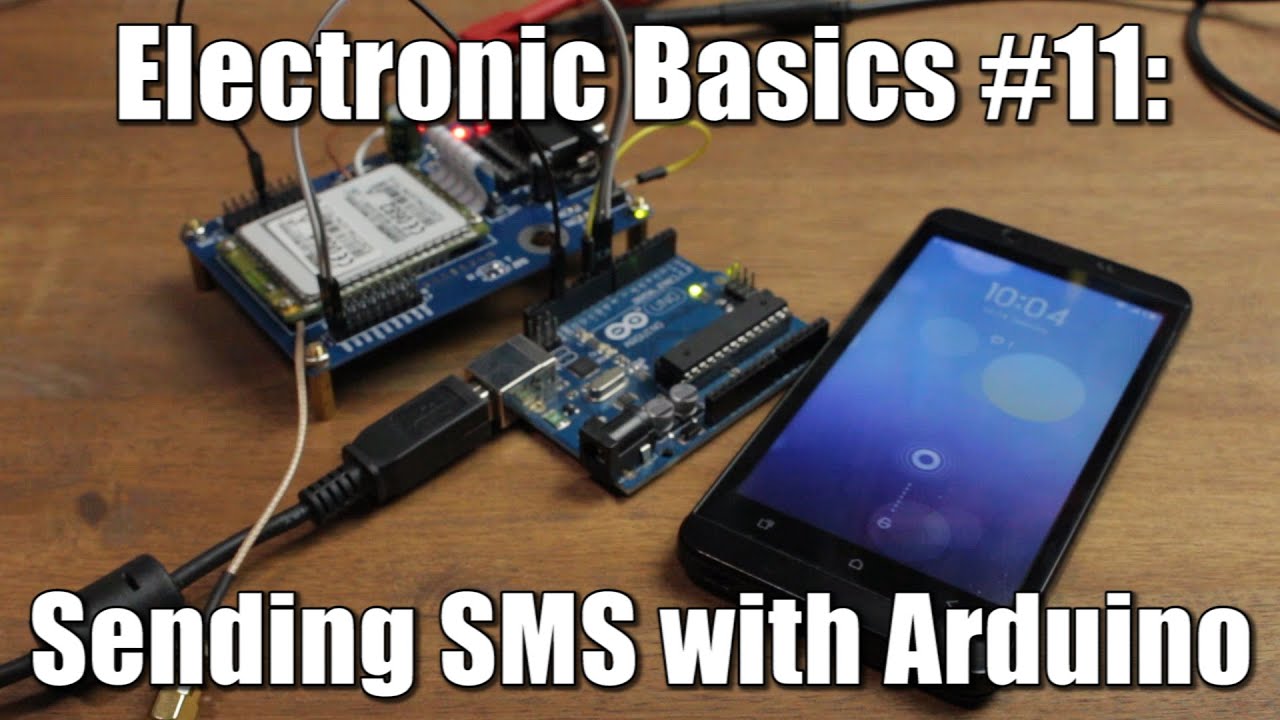
gVGD-f8SQSI | 27 Mar 2015
Previous video:https://youtu.be/4jc93BTGSmc Facebook: https://www.facebook.com/greatscottlab Twitter: https://twitter.com/GreatScottLab More information (parts list, code, ......) on Instructables:http://www.instructables.com/id/Sending-SMS-with-Arduino-TC35-GSM-Module/ AT command list: http://www.hughes.com/AT_Command_Reference.html TC35 manual: https://docs.google.com/document/d/1Nmkcos20_gqYwU-mR7i0QlRpGSKiNO6yEP1d-Kf2b2o/edit Order your TC35 GSM Module here: Ebay:http://rover.ebay.com/rover/1/711-53200-19255-0/1?icep_ff3=2&pub=5575101368&toolid=10001&campid=5337582279&customid=&icep_item=301441889426&ipn=psmain&icep_vectorid=229466&kwid=902099&mtid=824&kw=lg http://rover.ebay.com/rover/1/711-53200-19255-0/1?icep_ff3=2&pub=5575101368&toolid=10001&campid=5337582279&customid=&icep_item=301128531299&ipn=psmain&icep_vectorid=229466&kwid=902099&mtid=824&kw=lg Amazon.com:http://amzn.to/1OC6e2q Amazon.de: http://amzn.to/1NgHB9T In this video I will show you how to use a TC35 GSM module properly and how to use it with an Arduino Uno to send a SMS with it. Music: Killing Time, Kevin MacLeod (incompetech.com) Aduro by Jens Kiilstofte (https://machinimasound.com/music) You want to support my videos? You can browse and buy tools&materials from my Amazon Store. This way I get a small commission: Amazon.de: http://astore.amazon.de/great043-21 Amazon.com:http://astore.amazon.com/gre09a-20 Amazon.co.uk: http://astore.amazon.co.uk/gre0b-21 Or you feel super generous and want to use this Amazon link as your Amazon home page. And do not worry, your purchases are all anonym and the prices are all the same: Amazon.de:http://www.amazon.de/?_encoding=UTF8&camp=1638&creative=19454&linkCode=ur2&site-redirect=de&tag=great043-21&linkId=ORZEQZEOVJAFURCZ Amazon.com:http://www.amazon.com/?_encoding=UTF8&camp=1789&creative=390957&linkCode=ur2&tag=gre09a-20&linkId=I5NDCEAVCD2OWM4S Amazon.co.uk:http://www.amazon.co.uk/ref=as_li_ss_tl?_encoding=UTF8&camp=1634&creative=19450&linkCode=ur2&tag=gre0b-21
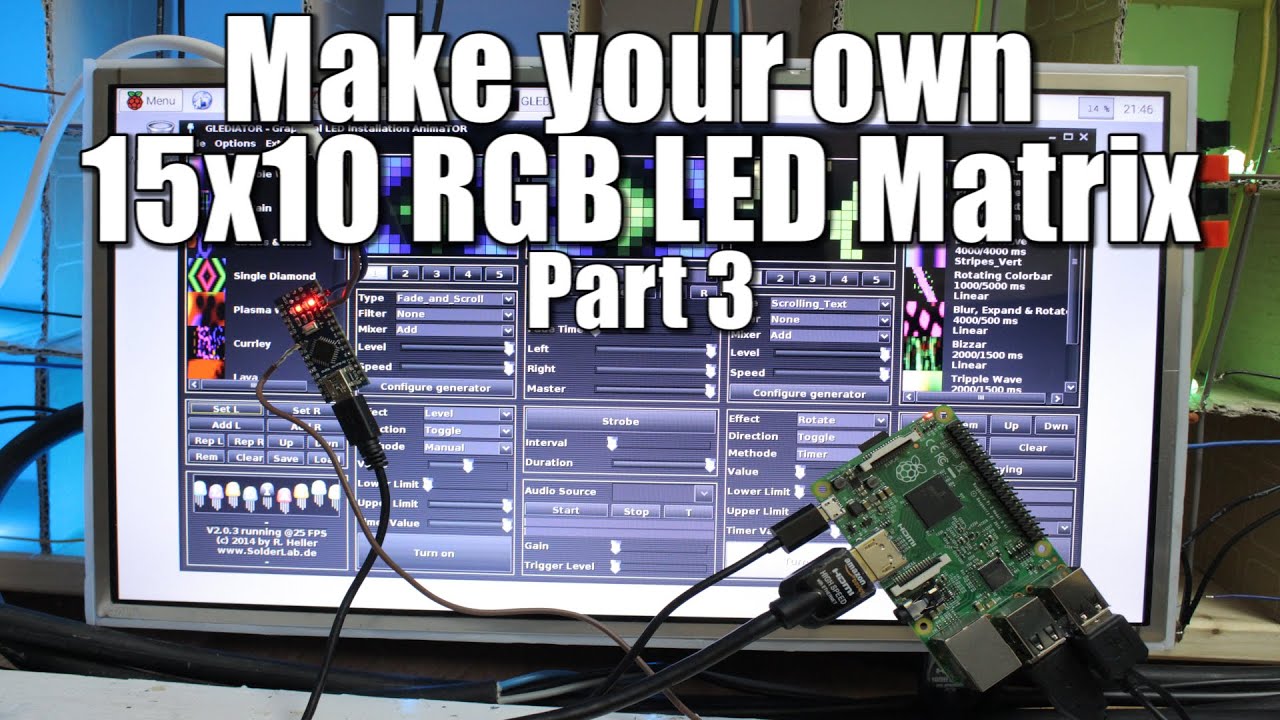
4jc93BTGSmc | 20 Mar 2015
Part 1:http://youtu.be/8pFcZ-ijrDY Part 2:https://youtu.be/LJQ2KS1CJjg Previous video:https://youtu.be/gZNA3k7g42k Facebook: https://www.facebook.com/greatscottlab Twitter: https://twitter.com/GreatScottLab More information (parts list, code, ......) on Instructables: http://www.instructables.com/id/Make-your-own-15x10-RGB-LED-Matrix/ Order your favorite single board here: Ebay: Raspberry Pi 2: http://rover.ebay.com/rover/1/711-53200-19255-0/1?icep_ff3=2&pub=5575101368&toolid=10001&campid=5337582279&customid=&icep_item=121560314098&ipn=psmain&icep_vectorid=229466&kwid=902099&mtid=824&kw=lg Banana Pi: http://rover.ebay.com/rover/1/711-53200-19255-0/1?icep_ff3=2&pub=5575101368&toolid=10001&campid=5337582279&customid=&icep_item=301360842170&ipn=psmain&icep_vectorid=229466&kwid=902099&mtid=824&kw=lg Banana Pro: http://rover.ebay.com/rover/1/711-53200-19255-0/1?icep_ff3=2&pub=5575101368&toolid=10001&campid=5337582279&customid=&icep_item=261717655710&ipn=psmain&icep_vectorid=229466&kwid=902099&mtid=824&kw=lg Orange Pi: http://rover.ebay.com/rover/1/711-53200-19255-0/1?icep_ff3=2&pub=5575101368&toolid=10001&campid=5337582279&customid=&icep_item=121595246909&ipn=psmain&icep_vectorid=229466&kwid=902099&mtid=824&kw=lg Amazon.com: Raspberry Pi 2: http://amzn.to/1bhOKcc Banana Pi: http://amzn.to/1vLDVBF Banana Pro: http://amzn.to/1BTcnk4 Orange Pi: - Amazon.de: Raspberry Pi 2:http://amzn.to/1F9l8u4 Banana Pi: http://amzn.to/1rSg2gq Banana Pro: http://amzn.to/1xjfkM5 Orange Pi: - Music: In the Hall of the Mountain King, Kevin MacLeod (incompetech.com) You want to support my videos? You can browse and buy tools&materials from my Amazon Store. This way I get a small commission: Amazon.de: http://astore.amazon.de/great043-21 Amazon.com:http://astore.amazon.com/gre09a-20 Amazon.co.uk: http://astore.amazon.co.uk/gre0b-21 Or you feel super generous and want to use this Amazon link as your Amazon home page. And do not worry, your purchases are all anonym and the prices are all the same: Amazon.de:http://www.amazon.de/?_encoding=UTF8&camp=1638&creative=19454&linkCode=ur2&site-redirect=de&tag=great043-21&linkId=ORZEQZEOVJAFURCZ Amazon.com:http://www.amazon.com/?_encoding=UTF8&camp=1789&creative=390957&linkCode=ur2&tag=gre09a-20&linkId=I5NDCEAVCD2OWM4S Amazon.co.uk:http://www.amazon.co.uk/ref=as_li_ss_tl?_encoding=UTF8&camp=1634&creative=19450&linkCode=ur2&tag=gre0b-21

gZNA3k7g42k | 06 Mar 2015
Facebook: https://www.facebook.com/greatscottlab Twitter: https://twitter.com/GreatScottLab Previous video: http://youtu.be/LJQ2KS1CJjg Banana Pi VS Raspberry Pi: http://youtu.be/hdYEvDbW6FY Buy your Raspberry Pi 2 here to support my channel: Amazon.com: http://amzn.to/1BW1xwR Amazon.de: http://amzn.to/1zUCpiK In this VS video I will compare the newly released Raspberry Pi 2 with two A20 SOC competitors. Let's find out which one is the best for your next project and which one has the best price-performance ratio. Music: 2011 Lookalike by Bartlebeats You want to support my videos? You can browse and buy tools&materials from my Amazon Store. This way I get a small commission: Amazon.de: http://astore.amazon.de/great043-21 Amazon.com:http://astore.amazon.com/gre09a-20 Amazon.co.uk: http://astore.amazon.co.uk/gre0b-21 Or you feel super generous and want to use this Amazon link as your Amazon home page. And do not worry, your purchases are all anonym and the prices are all the same: Amazon.de:http://www.amazon.de/?_encoding=UTF8&camp=1638&creative=19454&linkCode=ur2&site-redirect=de&tag=great043-21&linkId=ORZEQZEOVJAFURCZ Amazon.com:http://www.amazon.com/?_encoding=UTF8&camp=1789&creative=390957&linkCode=ur2&tag=gre09a-20&linkId=I5NDCEAVCD2OWM4S Amazon.co.uk:http://www.amazon.co.uk/ref=as_li_ss_tl?_encoding=UTF8&camp=1634&creative=19450&linkCode=ur2&tag=gre0b-21
LJQ2KS1CJjg | 20 Feb 2015
Part 1:http://youtu.be/8pFcZ-ijrDY Part 3:https://youtu.be/4jc93BTGSmc Facebook: https://www.facebook.com/greatscottlab Twitter: https://twitter.com/GreatScottLab Decoupling article: http://www.vagrearg.org/content/decoupling Code for the animations: https://www.mediafire.com/?kho5lfw25bh9y75 More information (parts list, code,....) on Instructables: http://www.instructables.com/id/Make-your-own-15x10-RGB-LED-Matrix/ Parts list: Ebay: 150x PL9823 RGB LED 8mm: http://rover.ebay.com/rover/1/711-53200-19255-0/1?icep_ff3=2&pub=5575101368&toolid=10001&campid=5337582279&customid=&icep_item=381165880223&ipn=psmain&icep_vectorid=229466&kwid=902099&mtid=824&kw=lg 150x 100nF Capacitor: http://rover.ebay.com/rover/1/711-53200-19255-0/1?icep_ff3=2&pub=5575101368&toolid=10001&campid=5337582279&customid=&icep_item=121345449251&ipn=psmain&icep_vectorid=229466&kwid=902099&mtid=824&kw=lg 1x 5V 12A Power Supply: http://rover.ebay.com/rover/1/711-53200-19255-0/1?icep_ff3=2&pub=5575101368&toolid=10001&campid=5337582279&customid=&icep_item=121171440130&ipn=psmain&icep_vectorid=229466&kwid=902099&mtid=824&kw=lg 1x Arduino Nano : http://rover.ebay.com/rover/1/711-53200-19255-0/1?icep_ff3=2&pub=5575101368&toolid=10001&campid=5337582279&customid=&icep_item=121192450386&ipn=psmain&icep_vectorid=229466&kwid=902099&mtid=824&kw=lg 1x 150Ω Resistor: http://rover.ebay.com/rover/1/711-53200-19255-0/1?icep_ff3=2&pub=5575101368&toolid=10001&campid=5337582279&customid=&icep_item=250861825576&ipn=psmain&icep_vectorid=229466&kwid=902099&mtid=824&kw=lg Amazon.com: 150x PL9823 RGB LED 8mm:- 150x 100nF Capacitor: http://amzn.to/1Djc7KO 1x 5V 12A Power Supply: http://amzn.to/1FCBP11 1x Arduino Nano : http://amzn.to/148B4MS 1x 150Ω Resistor:http://amzn.to/1CAc3dx Amazon.de: 150x PL9823 RGB LED 8mm: http://amzn.to/1BvtRl7 150x 100nF Capacitor: http://amzn.to/148xJNV 1x 5V 12A Power Supply: http://amzn.to/1CU84oT 1x Arduino Nano : http://amzn.to/1zLHZEi 1x150Ω Resistor: http://amzn.to/1bhKZ6C You also need: 15m 3x1.5 qmm NYM 15m 0.75 qmm solid wire 2m 5x2.5 qmm flexible wire Music: Killing Time, Kevin MacLeod (incompetech.com) In the Hall of the Mountain King, Kevin MacLeod (incompetech.com) You want to support my videos? You can browse and buy tools&materials from my Amazon Store. This way I get a small commission: Amazon.de: http://astore.amazon.de/great043-21 Amazon.com:http://astore.amazon.com/gre09a-20 Amazon.co.uk: http://astore.amazon.co.uk/gre0b-21 Or you feel super generous and want to use this Amazon link as your Amazon home page. And do not worry, your purchases are all anonym and the prices are all the same: Amazon.de:http://www.amazon.de/?_encoding=UTF8&camp=1638&creative=19454&linkCode=ur2&site-redirect=de&tag=great043-21&linkId=ORZEQZEOVJAFURCZ Amazon.com:http://www.amazon.com/?_encoding=UTF8&camp=1789&creative=390957&linkCode=ur2&tag=gre09a-20&linkId=I5NDCEAVCD2OWM4S Amazon.co.uk:http://www.amazon.co.uk/ref=as_li_ss_tl?_encoding=UTF8&camp=1634&creative=19450&linkCode=ur2&tag=gre0b-21
8pFcZ-ijrDY | 06 Feb 2015
Twitter: https://twitter.com/GreatScottLab Facebook: https://www.facebook.com/greatscottlab Previous video: http://youtu.be/Bw2p-Dmn48U Part 2: http://youtu.be/LJQ2KS1CJjg RGB LED Cube videos: https://www.youtube.com/playlist?list=PLAROrg3NQn7e4z4soOiMDMDvNZPEow0qi Multiplex video: http://youtu.be/uQMUPhyoXoE More information (parts list, code,....) on Instructables: http://www.instructables.com/id/Make-your-own-15x10-RGB-LED-Matrix/ In this first part of the 15x10 RGB Matrix trilogy I will tell you how I created the cardboard pattern which gives the LED light its pixel shape. Also I will tell you about the first attempt on how I tried to control the 150 LEDs. Music: 2011 Lookalike by Bartlebeats You want to support my videos? You can browse and buy tools&materials from my Amazon Store. This way I get a small commission: Amazon.de: http://astore.amazon.de/great043-21 Amazon.com:http://astore.amazon.com/gre09a-20 Amazon.co.uk: http://astore.amazon.co.uk/gre0b-21 Or you feel super generous and want to use this Amazon link as your Amazon home page. And do not worry, your purchases are all anonym and the prices are all the same: Amazon.de:http://www.amazon.de/?_encoding=UTF8&camp=1638&creative=19454&linkCode=ur2&site-redirect=de&tag=great043-21&linkId=ORZEQZEOVJAFURCZ Amazon.com:http://www.amazon.com/?_encoding=UTF8&camp=1789&creative=390957&linkCode=ur2&tag=gre09a-20&linkId=I5NDCEAVCD2OWM4S Amazon.co.uk:http://www.amazon.co.uk/ref=as_li_ss_tl?_encoding=UTF8&camp=1634&creative=19450&linkCode=ur2&tag=gre0b-21

Bw2p-Dmn48U | 23 Jan 2015
Twitter: https://twitter.com/GreatScottLab Facebook: https://www.facebook.com/greatscottlab More project info on Instructables (parts list,arduino code): http://www.instructables.com/id/Stay-warm-this-winter-CPU-Hand-Warmer/ Previous video: http://youtu.be/ftdJ0R_5NZk Get your Power Bank here (it supports my videos): Amazon.de: http://amzn.to/1ClWXpj Amazon.com: http://amzn.to/1zDbBcg In this small project I will show you how I repurposed an old AMD CPU to create a small, light and easy to use electric hand warmer. With the help of a small portable power bank this gadget can warm you up for around 2 and a half hours and can easily reach temperatures up to 60 degrees celcius. Music: 2011 Lookalike by Bartlebeats Aduro by Jens Kiilstofte https://machinimasound.com/music/aduro You want to support my videos? You can browse and buy tools&materials from my Amazon Store. This way I get a small commission: Amazon.de: http://astore.amazon.de/great043-21 Amazon.com:http://astore.amazon.com/gre09a-20 Amazon.co.uk: http://astore.amazon.co.uk/gre0b-21 Or you feel super generous and want to use this Amazon link as your Amazon home page. And do not worry, your purchases are all anonym and the prices are all the same: Amazon.de:http://www.amazon.de/?_encoding=UTF8&camp=1638&creative=19454&linkCode=ur2&site-redirect=de&tag=great043-21&linkId=ORZEQZEOVJAFURCZ Amazon.com:http://www.amazon.com/?_encoding=UTF8&camp=1789&creative=390957&linkCode=ur2&tag=gre09a-20&linkId=I5NDCEAVCD2OWM4S Amazon.co.uk:http://www.amazon.co.uk/ref=as_li_ss_tl?_encoding=UTF8&camp=1634&creative=19450&linkCode=ur2&tag=gre0b-21
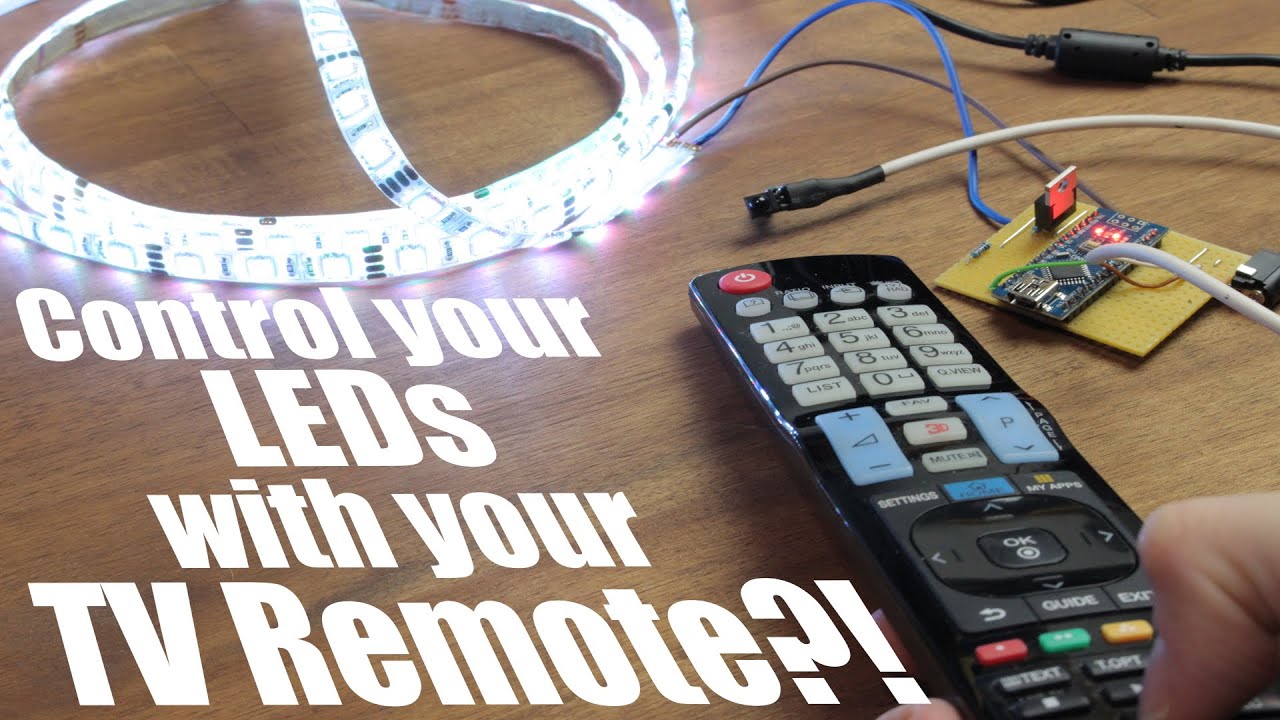
ftdJ0R_5NZk | 09 Jan 2015
Twitter: https://twitter.com/GreatScottLab Facebook: https://www.facebook.com/greatscottlab Previous video: http://youtu.be/bNNWbm681AI Arduino IR library: https://github.com/shirriff/Arduino-IRremote More project info on Instructables (parts list, schematic, arduino code): http://www.instructables.com/id/Control-your-LEDs-with-your-TV-remote-Arduino-IR-T/ Parts: Ebay: 1x Arduino Nano:http://rover.ebay.com/rover/1/711-53200-19255-0/1?icep_ff3=2&pub=5575101368&toolid=10001&campid=5337582279&customid=&icep_item=301292188973&ipn=psmain&icep_vectorid=229466&kwid=902099&mtid=824&kw=lg 2x 10k Resistor:http://rover.ebay.com/rover/1/711-53200-19255-0/1?icep_ff3=2&pub=5575101368&toolid=10001&campid=5337582279&customid=&icep_item=250861938185&ipn=psmain&icep_vectorid=229466&kwid=902099&mtid=824&kw=lg 1x 100µF Capacitor:http://rover.ebay.com/rover/1/711-53200-19255-0/1?icep_ff3=2&pub=5575101368&toolid=10001&campid=5337582279&customid=&icep_item=110946655519&ipn=psmain&icep_vectorid=229466&kwid=902099&mtid=824&kw=lg 1x DC Jack:http://rover.ebay.com/rover/1/711-53200-19255-0/1?icep_ff3=2&pub=5575101368&toolid=10001&campid=5337582279&customid=&icep_item=280806567763&ipn=psmain&icep_vectorid=229466&kwid=902099&mtid=824&kw=lg 1x IRLZ44N N-channel MOSFET:http://rover.ebay.com/rover/1/711-53200-19255-0/1?icep_ff3=2&pub=5575101368&toolid=10001&campid=5337582279&customid=&icep_item=121372676978&ipn=psmain&icep_vectorid=229466&kwid=902099&mtid=824&kw=lg 1x IR Receiver (TSOP4838):http://rover.ebay.com/rover/1/711-53200-19255-0/1?icep_ff3=2&pub=5575101368&toolid=10001&campid=5337582279&customid=&icep_item=271588502967&ipn=psmain&icep_vectorid=229466&kwid=902099&mtid=824&kw=lg 1x Veroboard:http://rover.ebay.com/rover/1/711-53200-19255-0/1?icep_ff3=2&pub=5575101368&toolid=10001&campid=5337582279&customid=&icep_item=250973269653&ipn=psmain&icep_vectorid=229466&kwid=902099&mtid=824&kw=lg RGB LED strip (common anode):http://rover.ebay.com/rover/1/711-53200-19255-0/1?icep_ff3=2&pub=5575101368&toolid=10001&campid=5337582279&customid=&icep_item=400798210156&ipn=psmain&icep_vectorid=229466&kwid=902099&mtid=824&kw=lg Power Supply (12V 3A):http://rover.ebay.com/rover/1/711-53200-19255-0/1?icep_ff3=2&pub=5575101368&toolid=10001&campid=5337582279&customid=&icep_item=371104329462&ipn=psmain&icep_vectorid=229466&kwid=902099&mtid=824&kw=lg Amazon.de: 1x Arduino Nano:http://amzn.to/1tgG8ux 2x 10k Resistor:http://amzn.to/1zknpuw 1x 100µF Capacitor:http://amzn.to/1wnBpS0 1x DC Jack:http://amzn.to/1x5ReSt 1x IRLZ44N N-channel MOSFET:http://amzn.to/1tgGBgl 1x IR Receiver (TSOP4838):http://amzn.to/1rkolRN 1x Veroboard:http://amzn.to/1rkoswO RGB LED strip (common anode):http://amzn.to/1A9iSPM Power Supply (12V 3A):http://amzn.to/1rkrmSn Amazon.com: 1x Arduino Nano:http://amzn.to/1xkMTNb 2x 10k Resistor:http://amzn.to/1A9l0H7 1x 100µF Capacitor: http://amzn.to/13xShyw 1x DC Jack:http://amzn.to/1rkq49Y 1x IRLZ44N N-channel MOSFET:http://amzn.to/1CQkAFh 1x IR Receiver (TSOP4838):http://amzn.to/13xSD8C 1x Veroboard:http://amzn.to/1AN5kJQ RGB LED strip (common anode):http://amzn.to/13xSXE8 Power Supply (12V 3A): http://amzn.to/1xgDwuY In this project I will show you how I repurposed the useless buttons on my TV remote to control the LEDs behind my TV. You can also use this technique to control all sorts of things with a bit of code editing. I will also talk a bit about the theory of how an infrared transmitter and an infrared receiver communicates with each other. Music: 2011 Lookalike by Bartlebeats You want to support my videos? You can browse and buy tools&materials from my Amazon Store. This way I get a small commission: Amazon.de: http://astore.amazon.de/great043-21 Amazon.com:http://astore.amazon.com/gre09a-20 Amazon.co.uk: http://astore.amazon.co.uk/gre0b-21 Or you feel super generous and want to use this Amazon link as your Amazon home page. And do not worry, your purchases are all anonym and the prices are all the same: Amazon.de:http://www.amazon.de/?_encoding=UTF8&camp=1638&creative=19454&linkCode=ur2&site-redirect=de&tag=great043-21&linkId=ORZEQZEOVJAFURCZ Amazon.com:http://www.amazon.com/?_encoding=UTF8&camp=1789&creative=390957&linkCode=ur2&tag=gre09a-20&linkId=I5NDCEAVCD2OWM4S Amazon.co.uk:http://www.amazon.co.uk/ref=as_li_ss_tl?_encoding=UTF8&camp=1634&creative=19450&linkCode=ur2&tag=gre0b-21
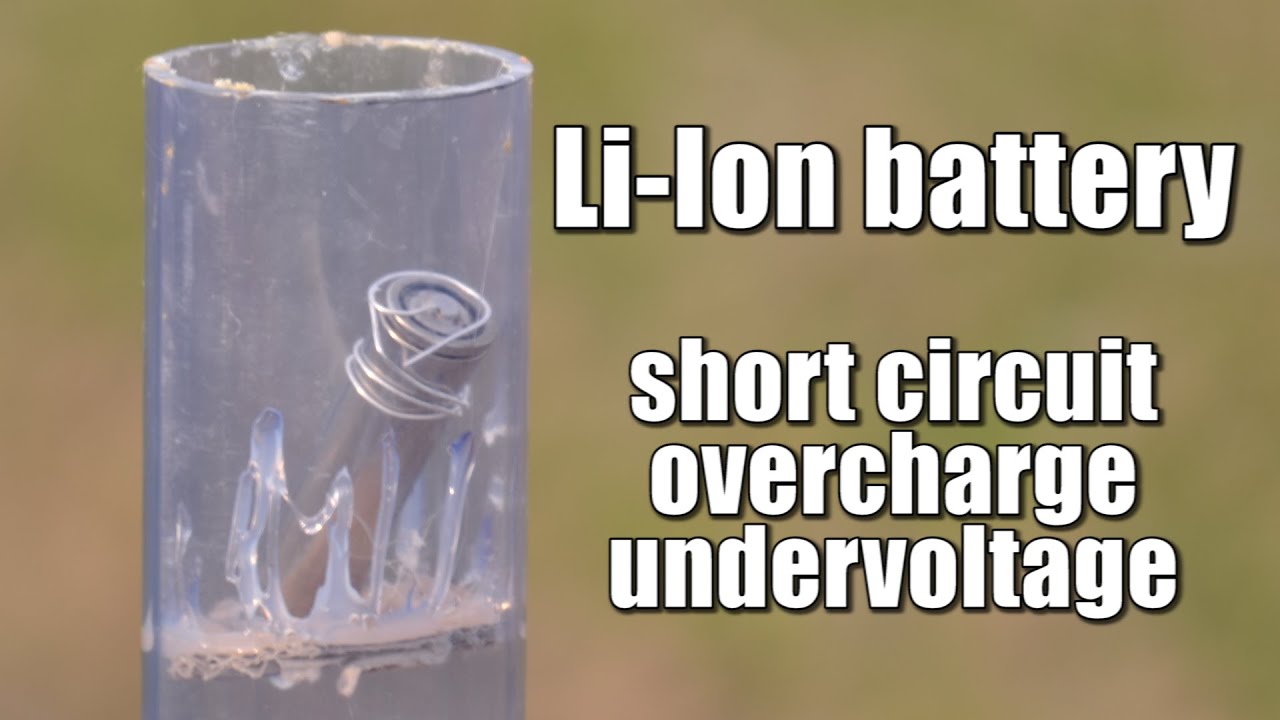
bNNWbm681AI | 30 Dec 2014
Twitter: https://twitter.com/GreatScottLab Facebook: https://www.facebook.com/greatscottlab Previous video:http://youtu.be/FOZIPIqhvwI In this small experiment I will show you what can happen if you handle fake Ultrafire Li-Ion batteries the wrong way. I will demonstrate a short circuit, overcharge and undervoltage. Let's find out whether something will explode. Music: 2011 Lookalike by Bartlebeats You want to support my videos? You can browse and buy tools&materials from my Amazon Store. This way I get a small commission: Amazon.de: http://astore.amazon.de/great043-21 Amazon.com:http://astore.amazon.com/gre09a-20 Amazon.co.uk: http://astore.amazon.co.uk/gre0b-21 Or you feel super generous and want to use this Amazon link as your Amazon home page. And do not worry, your purchases are all anonym and the prices are all the same: Amazon.de:http://www.amazon.de/?_encoding=UTF8&camp=1638&creative=19454&linkCode=ur2&site-redirect=de&tag=great043-21&linkId=ORZEQZEOVJAFURCZ Amazon.com:http://www.amazon.com/?_encoding=UTF8&camp=1789&creative=390957&linkCode=ur2&tag=gre09a-20&linkId=I5NDCEAVCD2OWM4S Amazon.co.uk:http://www.amazon.co.uk/ref=as_li_ss_tl?_encoding=UTF8&camp=1634&creative=19450&linkCode=ur2&tag=gre0b-21

FOZIPIqhvwI | 19 Dec 2014
Twitter: https://twitter.com/GreatScottLab Facebook: https://www.facebook.com/greatscottlab 15x10 RGB LED Matrix Demo: http://youtu.be/vjLGA3q26og Part 1: http://youtu.be/_NEK5YwKGKk 4x4x4 RGB LED Cube: http://youtu.be/EnM3p2TmWXc More project info on Instructables (parts list, schematic, arduino code): http://www.instructables.com/id/Make-your-own-LED-Bar/ In the second part of the LED Bar I will talk about how I made the light diffusion for the top shelf even better. But the main focus of this part will be the construction of a backplate for the bar, so that no light of the LED matrix can escape through the back. Music: In the Hall of the Mountain King, Kevin MacLeod (incompetech.com) You want to support my videos? You can browse and buy tools&materials from my Amazon Store. This way I get a small commission: Amazon.de: http://astore.amazon.de/great043-21 Amazon.com:http://astore.amazon.com/gre09a-20 Amazon.co.uk: http://astore.amazon.co.uk/gre0b-21 Or you feel super generous and want to use this Amazon link as your Amazon home page. And do not worry, your purchases are all anonym and the prices are all the same: Amazon.de:http://www.amazon.de/?_encoding=UTF8&camp=1638&creative=19454&linkCode=ur2&site-redirect=de&tag=great043-21&linkId=ORZEQZEOVJAFURCZ Amazon.com:http://www.amazon.com/?_encoding=UTF8&camp=1789&creative=390957&linkCode=ur2&tag=gre09a-20&linkId=I5NDCEAVCD2OWM4S Amazon.co.uk:http://www.amazon.co.uk/ref=as_li_ss_tl?_encoding=UTF8&camp=1634&creative=19450&linkCode=ur2&tag=gre0b-21
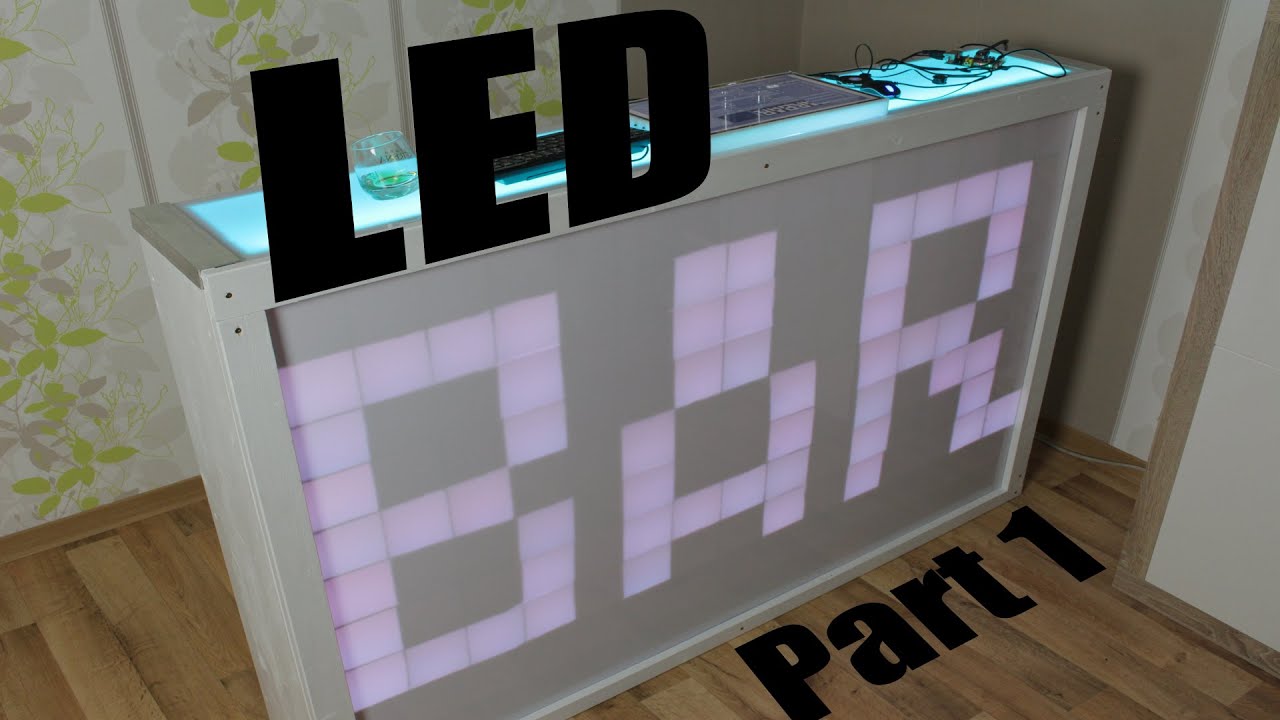
_NEK5YwKGKk | 12 Dec 2014
Twitter: https://twitter.com/GreatScottLab Facebook: https://www.facebook.com/greatscottlab 15x10 RGB LED Matrix Demo: http://youtu.be/vjLGA3q26og Previous video: http://youtu.be/Y2OPnrgb0pY Part 2 : http://youtu.be/FOZIPIqhvwI How to program your Attiny85:http://youtu.be/9LjfkjwMqXI More project info on Instructables (parts list, schematic, arduino code): http://www.instructables.com/id/Make-your-own-LED-Bar/ Parts: Ebay: on the instructables site Amazon.de: WS2812B LED Strip:http://amzn.to/136D2MW Hook up wire:http://amzn.to/1zohKWS 1x 5V 3A Power Supply:http://amzn.to/1Adjjq5 1x Attiny85:http://amzn.to/1GoUHyr 1x 8 Pin IC Socket:http://amzn.to/1Adjvpk 1x 10k Resistor:http://amzn.to/1Adkcis 2x 2 Pin Terminal:http://amzn.to/1wacxlE 1x Tactile Push Button:http://amzn.to/1GI7ydi 1x 10k Potentiometer:http://amzn.to/13qJa3M 1x PCB (copper lines):http://amzn.to/13qJijE 1x Power Switch:http://amzn.to/1wxW6zx 1x Push Button:http://amzn.to/1xlBrAs Amazon.com: WS2812B LED Strip:http://amzn.to/12VLG0Z Hook up wire:http://amzn.to/13qKjbz 1x 5V 3A Power Supply:http://amzn.to/12VM27U 1x Attiny85:http://amzn.to/1yUweAb 1x 8 Pin IC Socket:http://amzn.to/12VMmDt 1x 10k Resistor:http://amzn.to/1wAoOPa 2x 2 Pin Terminal:http://amzn.to/1zg2soq 1x Tactile Push Button:http://amzn.to/1zg2AEd 1x 10k Potentiometer:http://amzn.to/13qKTG7 1x PCB (copper lines):http://amzn.to/1zoklAf 1x Power Switch:http://amzn.to/1Adygs6 1x Push Button:http://amzn.to/1Gp2lsz In this project I show you how I build my LED Bar around my 15x10 RGB LED Matrix. I will mainly talk about the construction of the frame for the matrix and the wood construction for the bar itself. On the electronics side I will also talk about a small Attiny85 light controller to light up my WS2812B LED strip. Music: 2011 Lookalike by Bartlebeats Ecstatic Wave by Jens Kiilstofte https://machinimasound.com/music You want to support my videos? You can browse and buy tools&materials from my Amazon Store. This way I get a small commission: Amazon.de: http://astore.amazon.de/great043-21 Amazon.com:http://astore.amazon.com/gre09a-20 Amazon.co.uk: http://astore.amazon.co.uk/gre0b-21 Or you feel super generous and want to use this Amazon link as your Amazon home page. And do not worry, your purchases are all anonym and the prices are all the same: Amazon.de:http://www.amazon.de/?_encoding=UTF8&camp=1638&creative=19454&linkCode=ur2&site-redirect=de&tag=great043-21&linkId=ORZEQZEOVJAFURCZ Amazon.com:http://www.amazon.com/?_encoding=UTF8&camp=1789&creative=390957&linkCode=ur2&tag=gre09a-20&linkId=I5NDCEAVCD2OWM4S Amazon.co.uk:http://www.amazon.co.uk/ref=as_li_ss_tl?_encoding=UTF8&camp=1634&creative=19450&linkCode=ur2&tag=gre0b-21
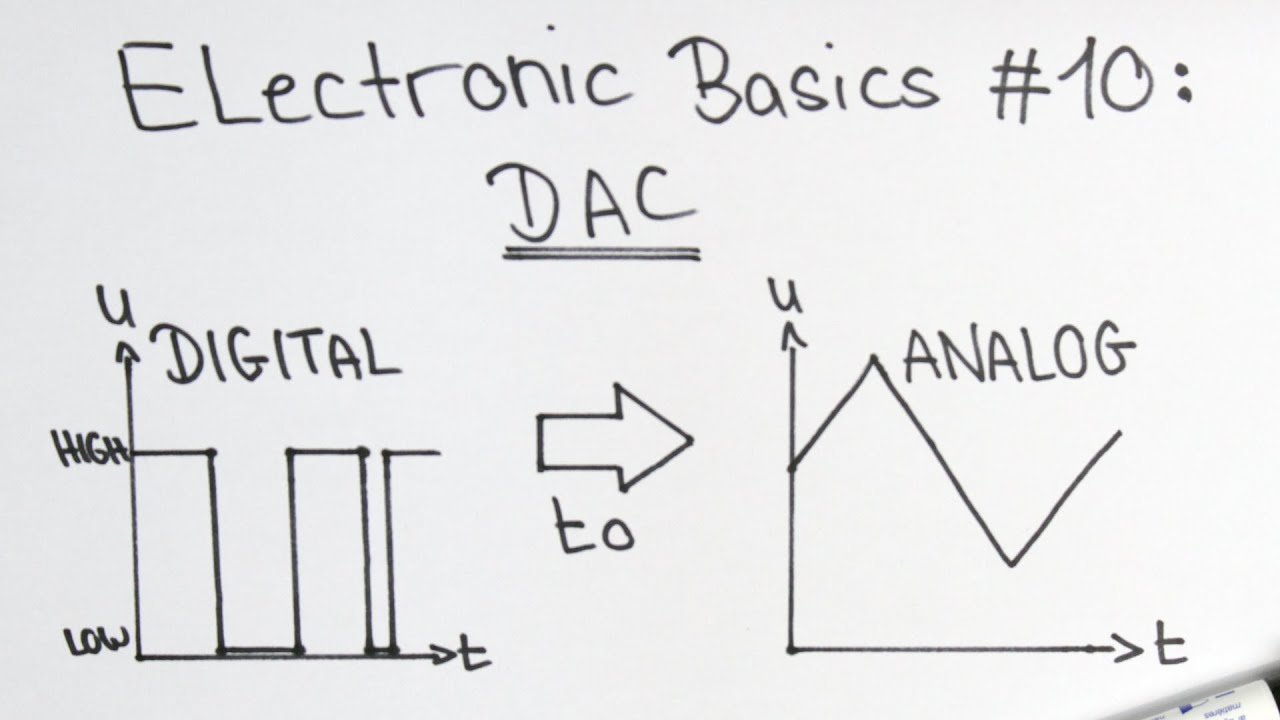
Y2OPnrgb0pY | 05 Dec 2014
Twitter: https://twitter.com/GreatScottLab Facebook: https://www.facebook.com/greatscottlab Previous video: http://youtu.be/np6yp-cN6iE In this video I will show you how a Digital to Analog converter works and how to use one. I will mainly talk about an 8bit R-2R DAC. But also a bit about voltage followers and I2C devices which can also do the job. You want to support my videos? You can browse and buy tools&materials from my Amazon Store. This way I get a small commission: Amazon.de: http://astore.amazon.de/great043-21 Amazon.com:http://astore.amazon.com/gre09a-20 Amazon.co.uk: http://astore.amazon.co.uk/gre0b-21 Or you feel super generous and want to use this Amazon link as your Amazon home page. And do not worry, your purchases are all anonym and the prices are all the same: Amazon.de:http://www.amazon.de/?_encoding=UTF8&camp=1638&creative=19454&linkCode=ur2&site-redirect=de&tag=great043-21&linkId=ORZEQZEOVJAFURCZ Amazon.com:http://www.amazon.com/?_encoding=UTF8&camp=1789&creative=390957&linkCode=ur2&tag=gre09a-20&linkId=I5NDCEAVCD2OWM4S Amazon.co.uk:http://www.amazon.co.uk/ref=as_li_ss_tl?_encoding=UTF8&camp=1634&creative=19450&linkCode=ur2&tag=gre0b-21

np6yp-cN6iE | 21 Nov 2014
Twitter: https://twitter.com/GreatScottLab Facebook: https://www.facebook.com/greatscottlab Previous video:http://youtu.be/9QZkCQSHnko More project info on Instructables (parts list, schematic, arduino code):http://www.instructables.com/id/HACKED-Looping-Louie-on-steroids/ Buy your Looping Louie game here: Amazon.de:http://amzn.to/1AsIY1e Amazon.com:http://amzn.to/1r4GgXi In this HACKED! episode I will show you how a normal "Looping Louie" kids game received a big speed boost by using a standalone Arduino and a motor driver. Music: 2011 Lookalike by Bartlebeats Ecstatic Wave by Jens Kiilstofte Aduro by Jens Kiilstofte https://machinimasound.com/music You want to support my videos? You can browse and buy tools&materials from my Amazon Store. This way I get a small commission: Amazon.de: http://astore.amazon.de/great043-21 Amazon.com:http://astore.amazon.com/gre09a-20 Amazon.co.uk: http://astore.amazon.co.uk/gre0b-21 Or you feel super generous and want to use this Amazon link as your Amazon home page. And do not worry, your purchases are all anonym and the prices are all the same: Amazon.de:http://www.amazon.de/?_encoding=UTF8&camp=1638&creative=19454&linkCode=ur2&site-redirect=de&tag=great043-21&linkId=ORZEQZEOVJAFURCZ Amazon.com:http://www.amazon.com/?_encoding=UTF8&camp=1789&creative=390957&linkCode=ur2&tag=gre09a-20&linkId=I5NDCEAVCD2OWM4S Amazon.co.uk:http://www.amazon.co.uk/ref=as_li_ss_tl?_encoding=UTF8&camp=1634&creative=19450&linkCode=ur2&tag=gre0b-21

9QZkCQSHnko | 09 Nov 2014
Twitter: https://twitter.com/GreatScottLab Facebook: https://www.facebook.com/greatscottlab Buy your ESP8266 here: Amazon.de:http://amzn.to/1tsLtYJ or http://amzn.to/1vBRee4 Amazon.com:http://amzn.to/1GDx320 or http://amzn.to/10FZ8Vl Ebay:http://goo.gl/yHukns or http://goo.gl/dH2ttJ Commands list, CustomFW, Uploading tool:http://www.electrodragon.com/w/Wi07c Update tutorial: http://defcon-cc.dyndns.org/wiki/ESP8266#Update Datasheet (english): https://nurdspace.nl/images/e/e0/ESP8266_Specifications_English.pdf ESP8266 Forum:http://www.esp8266.com/ Weather station: http://zeflo.com/2014/esp8266-weather-display/ Email notifier: http://hackaday.com/2014/11/03/checking-email-with-the-esp8266/ Online LED dimmer:https://github.com/imjosh/espLedDimmer In this small Tutorial/Review I will show what the ESP8266 is, what this module can do and how to handle it the correct way. Music: 2011 Lookalike by Bartlebeats You want to support my videos? You can browse and buy tools&materials from my Amazon Store. This way I get a small commission: Amazon.de: http://astore.amazon.de/great043-21 Amazon.com:http://astore.amazon.com/gre09a-20 Amazon.co.uk: http://astore.amazon.co.uk/gre0b-21 Or you feel super generous and want to use this Amazon link as your Amazon home page. And do not worry, your purchases are all anonym and the prices are all the same: Amazon.de:http://www.amazon.de/?_encoding=UTF8&camp=1638&creative=19454&linkCode=ur2&site-redirect=de&tag=great043-21&linkId=ORZEQZEOVJAFURCZ Amazon.com:http://www.amazon.com/?_encoding=UTF8&camp=1789&creative=390957&linkCode=ur2&tag=gre09a-20&linkId=I5NDCEAVCD2OWM4S Amazon.co.uk:http://www.amazon.co.uk/ref=as_li_ss_tl?_encoding=UTF8&camp=1634&creative=19450&linkCode=ur2&tag=gre0b-21
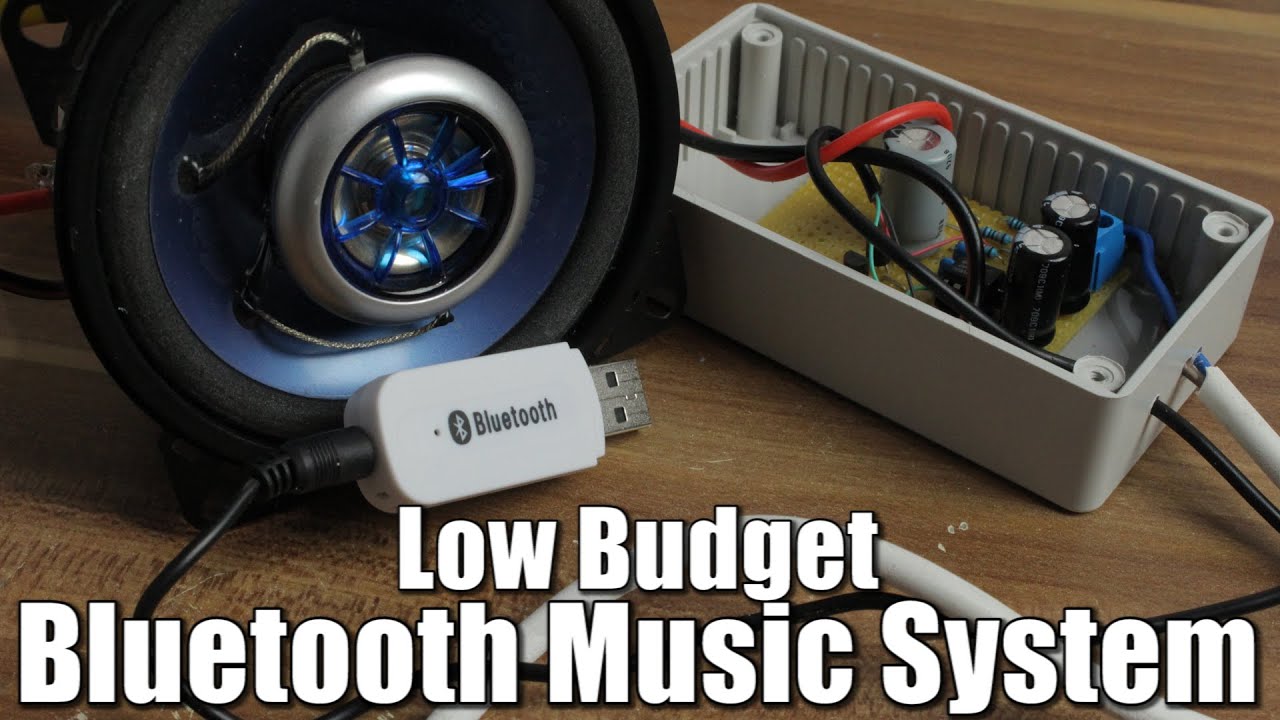
oGTXczCV30A | 31 Oct 2014
Twitter: https://twitter.com/GreatScottLab Facebook: https://www.facebook.com/greatscottlab More project info on Instructables:http://www.instructables.com/id/Make-your-own-Low-Budget-Bluetooth-Music-System/ Previous video: http://youtu.be/S6QAYTmUWOQ Afrotechmods Class D Amp Tutorial: http://youtu.be/O1UagNkcxi4 Amplifier Kit: Amazon.de:http://amzn.to/1q77lZn Amazon.com:http://amzn.to/1tnfQog Bluetooth Music receiver: Amazon.de:http://amzn.to/1nVWXIa Amazon.com:http://amzn.to/1nVXAl9 In this video I will show you how I combined an old speaker of mine with a cheap bluetooth receiver module. I made a small power amp for the speaker and put all the electronics in a hidden place. I hope you enjoy the video. Music: 2011 Lookalike by Bartlebeats Killing Time, Kevin MacLeod (incompetech.com) You want to support my videos? You can browse and buy tools&materials from my Amazon Store. This way I get a small commission: Amazon.de: http://astore.amazon.de/great043-21 Amazon.com:http://astore.amazon.com/gre09a-20 Amazon.co.uk: http://astore.amazon.co.uk/gre0b-21 Or you feel super generous and want to use this Amazon link as your Amazon home page. And do not worry, your purchases are all anonym and the prices are all the same: Amazon.de:http://www.amazon.de/?_encoding=UTF8&camp=1638&creative=19454&linkCode=ur2&site-redirect=de&tag=great043-21&linkId=ORZEQZEOVJAFURCZ Amazon.com:http://www.amazon.com/?_encoding=UTF8&camp=1789&creative=390957&linkCode=ur2&tag=gre09a-20&linkId=I5NDCEAVCD2OWM4S Amazon.co.uk:http://www.amazon.co.uk/ref=as_li_ss_tl?_encoding=UTF8&camp=1634&creative=19450&linkCode=ur2&tag=gre0b-21

S6QAYTmUWOQ | 17 Oct 2014
Twitter: https://twitter.com/GreatScottLab Facebook: https://www.facebook.com/greatscottlab More project info on Instructables:http://www.instructables.com/id/HACKED-Flickering-Light-Bulb-for-Halloween/ Previous video:http://youtu.be/cL8FHz-TOzQ How to program the Attiny85?:http://youtu.be/9LjfkjwMqXI Halloween 2013:http://youtu.be/OJt5Y_0y2Qo Code+Schematic:https://www.mediafire.com/?x60dmzf8k09yiam Time to scare some kids. In this video I will show you how I "hacked" a normal led light bulb. This way it will flicker like the lights in every horror movie when something bad is about to happen. Music: 2011 Lookalike by Bartlebeats You want to support my videos? You can browse and buy tools&materials from my Amazon Store. This way I get a small commission: Amazon.de: http://astore.amazon.de/great043-21 Amazon.com:http://astore.amazon.com/gre09a-20 Amazon.co.uk: http://astore.amazon.co.uk/gre0b-21 Or you feel super generous and want to use this Amazon link as your Amazon home page. And do not worry, your purchases are all anonym and the prices are all the same: Amazon.de:http://www.amazon.de/?_encoding=UTF8&camp=1638&creative=19454&linkCode=ur2&site-redirect=de&tag=great043-21&linkId=ORZEQZEOVJAFURCZ Amazon.com:http://www.amazon.com/?_encoding=UTF8&camp=1789&creative=390957&linkCode=ur2&tag=gre09a-20&linkId=I5NDCEAVCD2OWM4S Amazon.co.uk:http://www.amazon.co.uk/ref=as_li_ss_tl?_encoding=UTF8&camp=1634&creative=19450&linkCode=ur2&tag=gre0b-21

cL8FHz-TOzQ | 03 Oct 2014
Twitter: https://twitter.com/GreatScottLab Facebook: https://www.facebook.com/greatscottlab Previous video:http://youtu.be/46WSCihjoRI In this video I will show you the most basic tools and materials you will need to rebuild electronics projects from other people. But I will also talk about more advanced tools. This way you can start your own electronics projects. Music: Ecstatic Wave by Jens Kiilstofte https://machinimasound.com/music 2011 Lookalike by Bartlebeats You want to support my videos? You can browse and buy tools&materials from my Amazon Store. This way I get a small commission: Amazon.de: http://astore.amazon.de/great043-21 Amazon.com:http://astore.amazon.com/gre09a-20 Amazon.co.uk: http://astore.amazon.co.uk/gre0b-21 Or you feel super generous and want to use this Amazon link as your Amazon home page. And do not worry, your purchases are all anonym and the prices are all the same: Amazon.de:http://www.amazon.de/?_encoding=UTF8&camp=1638&creative=19454&linkCode=ur2&site-redirect=de&tag=great043-21&linkId=ORZEQZEOVJAFURCZ Amazon.com:http://www.amazon.com/?_encoding=UTF8&camp=1789&creative=390957&linkCode=ur2&tag=gre09a-20&linkId=I5NDCEAVCD2OWM4S Amazon.co.uk:http://www.amazon.co.uk/ref=as_li_ss_tl?_encoding=UTF8&camp=1634&creative=19450&linkCode=ur2&tag=gre0b-21

46WSCihjoRI | 26 Sep 2014
Twitter: https://twitter.com/GreatScottLab Facebook: https://www.facebook.com/greatscottlab Previous video: http://youtu.be/Qlayua3yjuE In this video I will tell you the most important facts about general purpose diodes and how to use them in DC and AC circuits. I also build a bridge rectifier and explain why you find them in almost every power supply. You want to support my videos? You can browse and buy tools&materials from my Amazon Store. This way I get a small commission: Amazon.de: http://astore.amazon.de/great043-21 Amazon.com:http://astore.amazon.com/gre09a-20 Amazon.co.uk: http://astore.amazon.co.uk/gre0b-21 Or you feel super generous and want to use this Amazon link as your Amazon home page. And do not worry, your purchases are all anonym and the prices are all the same: Amazon.de:http://www.amazon.de/?_encoding=UTF8&camp=1638&creative=19454&linkCode=ur2&site-redirect=de&tag=great043-21&linkId=ORZEQZEOVJAFURCZ Amazon.com:http://www.amazon.com/?_encoding=UTF8&camp=1789&creative=390957&linkCode=ur2&tag=gre09a-20&linkId=I5NDCEAVCD2OWM4S Amazon.co.uk:http://www.amazon.co.uk/ref=as_li_ss_tl?_encoding=UTF8&camp=1634&creative=19450&linkCode=ur2&tag=gre0b-21

V3q0tEflyq8 | 19 Sep 2014
Twitter: https://twitter.com/GreatScottLab Facebook: https://www.facebook.com/greatscottlab What do you find on the GreatScott! Youtube channel? Here is a small overview. Music: Carpeter by Bartlebeats
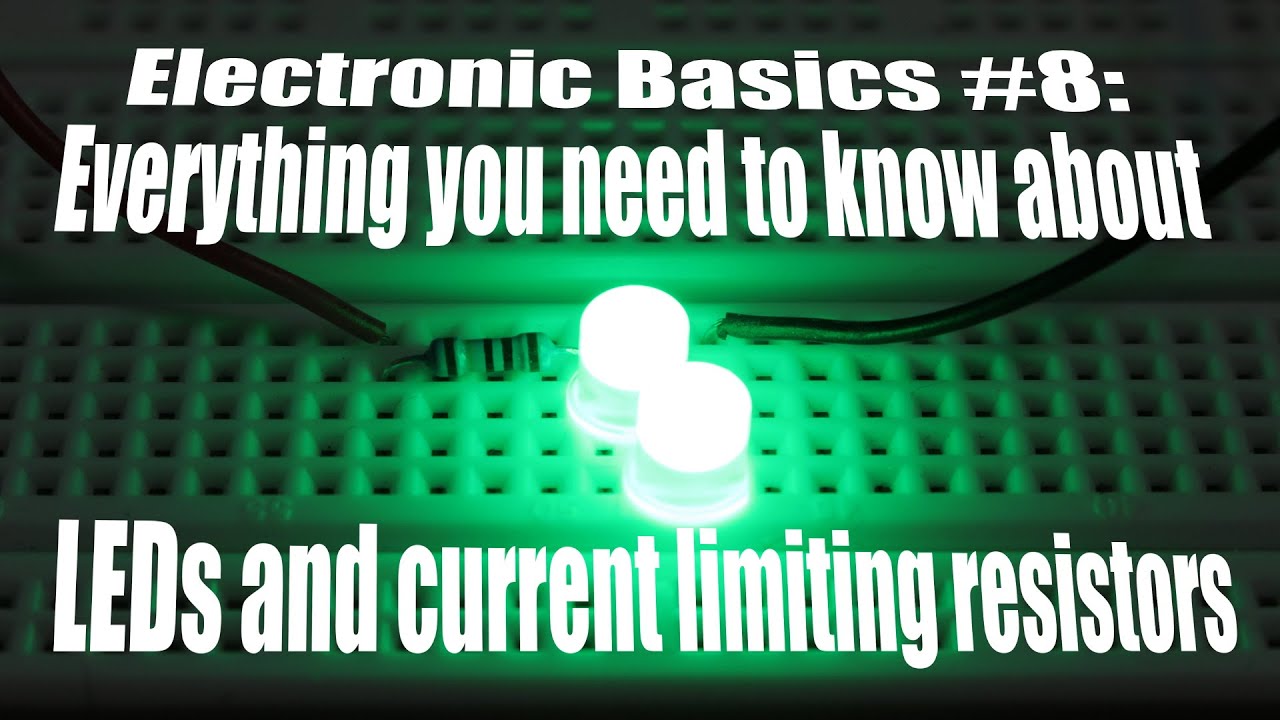
Qlayua3yjuE | 12 Sep 2014
Twitter: https://twitter.com/GreatScottLab Facebook: https://www.facebook.com/greatscottlab Previous video:http://youtu.be/6uInan-TjiA In this video I will show you how to control LEDs the correct way and how easy it is to blow them up by accident. And even though I tell you how to handle them correctly I am not a role model, because I often treat them the wrong way as well. Music: Aduro by Jens Kiilstofte Ecstatic Wave by Jens Kiilstofte https://machinimasound.com/music You want to support my videos? You can browse and buy tools&materials from my Amazon Store. This way I get a small commission: Amazon.de: http://astore.amazon.de/great043-21 Amazon.com:http://astore.amazon.com/gre09a-20 Amazon.co.uk: http://astore.amazon.co.uk/gre0b-21 Or you feel super generous and want to use this Amazon link as your Amazon home page. And do not worry, your purchases are all anonym and the prices are all the same: Amazon.de:http://www.amazon.de/?_encoding=UTF8&camp=1638&creative=19454&linkCode=ur2&site-redirect=de&tag=great043-21&linkId=ORZEQZEOVJAFURCZ Amazon.com:http://www.amazon.com/?_encoding=UTF8&camp=1789&creative=390957&linkCode=ur2&tag=gre09a-20&linkId=I5NDCEAVCD2OWM4S Amazon.co.uk:http://www.amazon.co.uk/ref=as_li_ss_tl?_encoding=UTF8&camp=1634&creative=19450&linkCode=ur2&tag=gre0b-21

6uInan-TjiA | 04 Sep 2014
Twitter: https://twitter.com/GreatScottLab Facebook: https://www.facebook.com/greatscottlab Part 1:http://youtu.be/YJgX9Na4rWw My Eagle files: http://www.mediafire.com/download/hmbc0gmsubobes5/NE555PWMBoard.rar Amazon.de: Iron(III) chloride: http://amzn.to/Whwhol Acetone: http://amzn.to/1r88TSx Dell C1660W: http://amzn.to/1o1tgzN Amazon.com: Ferric Chloride Copper Etchant Solution: http://amzn.to/1vks6nq Acetone: http://amzn.to/1vDi5nL Dell C1660W: http://amzn.to/1vksCSv In this small video series I will show you how to make your own single layer PCBs at home. In this part I will show you how I transfered my design to the copper board with the help of a laser printer and an iron. The method is called "toner transfer". Music: In the Hall of the Mountain King, Kevin MacLeod (incompetech.com) You want to support my videos? You can browse and buy tools&materials from my Amazon Store. This way I get a small commission: Amazon.de: http://astore.amazon.de/great043-21 Amazon.com:http://astore.amazon.com/gre09a-20 Amazon.co.uk: http://astore.amazon.co.uk/gre0b-21 Or you feel super generous and want to use this Amazon link as your Amazon home page. And do not worry, your purchases are all anonym and the prices are all the same: Amazon.de:http://www.amazon.de/?_encoding=UTF8&camp=1638&creative=19454&linkCode=ur2&site-redirect=de&tag=great043-21&linkId=ORZEQZEOVJAFURCZ Amazon.com:http://www.amazon.com/?_encoding=UTF8&camp=1789&creative=390957&linkCode=ur2&tag=gre09a-20&linkId=I5NDCEAVCD2OWM4S Amazon.co.uk:http://www.amazon.co.uk/ref=as_li_ss_tl?_encoding=UTF8&camp=1634&creative=19450&linkCode=ur2&tag=gre0b-21
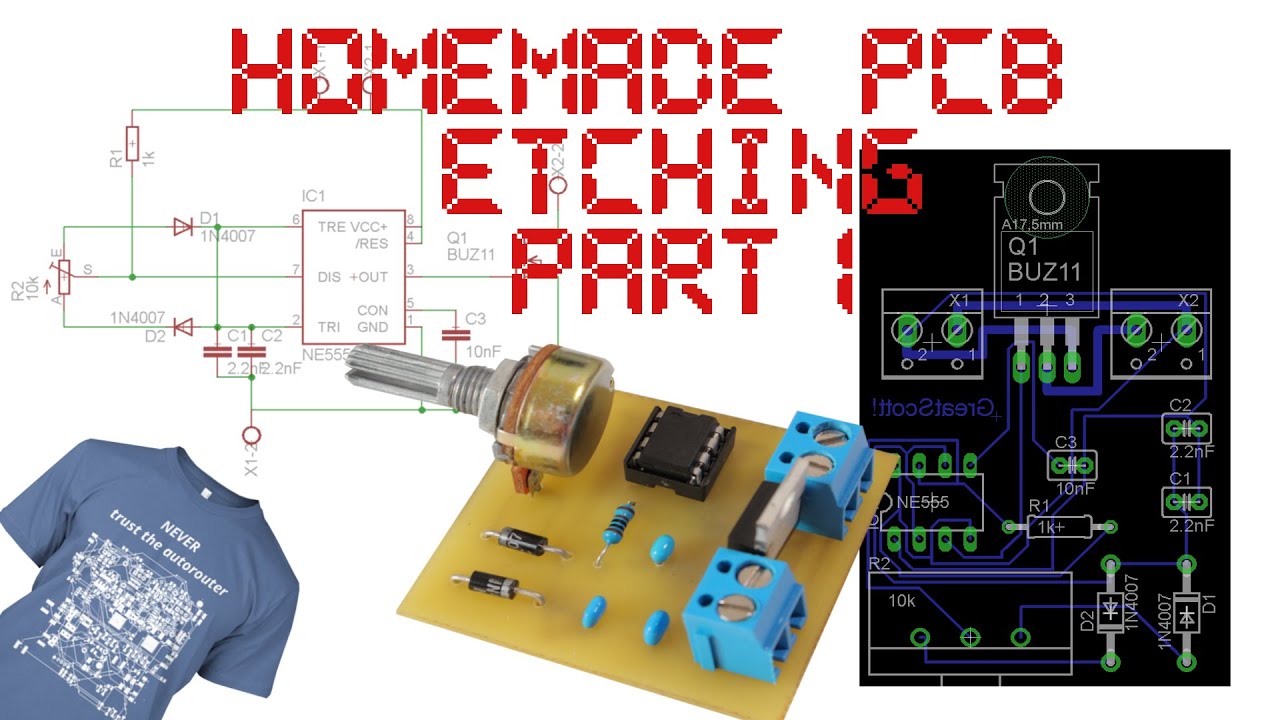
YJgX9Na4rWw | 29 Aug 2014
Twitter: https://twitter.com/GreatScottLab Facebook: https://www.facebook.com/greatscottlab Previous video:http://youtu.be/oaMJR1gpKD0 trace width calculator: http://circuitcalculator.com/wordpress/2006/01/31/pcb-trace-width-calculator/ My Eagle files: http://www.mediafire.com/download/hmbc0gmsubobes5/NE555PWMBoard.rar Download Eagle: http://www.cadsoftusa.com/download-eagle/?language=en mm to inches: http://www.mm-to-inch.com/ In this small video series I will show you how to make your own single layer PCBs at home. I will mostly talk about the design of the board itself in part 1. The main focus will be on the program Eagle from Cadsoft. You want to support my videos? You can browse and buy tools&materials from my Amazon Store. This way I get a small commission: Amazon.de: http://astore.amazon.de/great043-21 Amazon.com:http://astore.amazon.com/gre09a-20 Amazon.co.uk: http://astore.amazon.co.uk/gre0b-21 Or you feel super generous and want to use this Amazon link as your Amazon home page. And do not worry, your purchases are all anonym and the prices are all the same: Amazon.de:http://www.amazon.de/?_encoding=UTF8&camp=1638&creative=19454&linkCode=ur2&site-redirect=de&tag=great043-21&linkId=ORZEQZEOVJAFURCZ Amazon.com:http://www.amazon.com/?_encoding=UTF8&camp=1789&creative=390957&linkCode=ur2&tag=gre09a-20&linkId=I5NDCEAVCD2OWM4S Amazon.co.uk:http://www.amazon.co.uk/ref=as_li_ss_tl?_encoding=UTF8&camp=1634&creative=19450&linkCode=ur2&tag=gre0b-21
oaMJR1gpKD0 | 22 Aug 2014
Twitter: https://twitter.com/GreatScottLab Facebook: https://www.facebook.com/greatscottlab Previous video: http://youtu.be/hdYEvDbW6FY More project info on Instructables:http://www.instructables.com/id/HACKED-Portable-DVD-Player/ In this episode of HACKED! I will show you how I used the Datasheet of the components of a portable DVD player to input my own video signal. Music: Ecstatic Wave by Jens Kiilstofte https://machinimasound.com/music You want to support my videos? You can browse and buy tools&materials from my Amazon Store. This way I get a small commission: Amazon.de: http://astore.amazon.de/great043-21 Amazon.com:http://astore.amazon.com/gre09a-20 Amazon.co.uk: http://astore.amazon.co.uk/gre0b-21 Or you feel super generous and want to use this Amazon link as your Amazon home page. And do not worry, your purchases are all anonym and the prices are all the same: Amazon.de:http://www.amazon.de/?_encoding=UTF8&camp=1638&creative=19454&linkCode=ur2&site-redirect=de&tag=great043-21&linkId=ORZEQZEOVJAFURCZ Amazon.com:http://www.amazon.com/?_encoding=UTF8&camp=1789&creative=390957&linkCode=ur2&tag=gre09a-20&linkId=I5NDCEAVCD2OWM4S Amazon.co.uk:http://www.amazon.co.uk/ref=as_li_ss_tl?_encoding=UTF8&camp=1634&creative=19450&linkCode=ur2&tag=gre0b-21

hdYEvDbW6FY | 15 Aug 2014
Twitter: https://twitter.com/GreatScottLab Facebook: https://www.facebook.com/greatscottlab Previous video: http://youtu.be/hlhrS4_Y278 Amazon.de: Banana Pi: http://amzn.to/1AjhJDT Raspberry Pi (B+): http://amzn.to/1AjhNTT Amazon.com: Banana Pi: http://amzn.to/1yClHtF Raspberry Pi (B+): http://amzn.to/1ujI57f Get started with the Banana Pi: http://www.lemaker.org/ Fixed Android Image: https://mega.co.nz/#!rJ5mjDSL!EgGYJ6vICUzbERBllhXTElEhepFAFbBhr8eeAfZh5dw Want to buld the DIY Screen from this video?: http://youtu.be/6SOXMDb4cjI In this video I talk about the advantages and disadvantages of the Banana Pi in comparison to the Raspberry Pi (Model B). I also talk about how to get started with the Banana Pi and why it is useful in the coming years. You want to support my videos? You can browse and buy tools&materials from my Amazon Store. This way I get a small commission: Amazon.de: http://astore.amazon.de/great043-21 Amazon.com:http://astore.amazon.com/gre09a-20 Amazon.co.uk: http://astore.amazon.co.uk/gre0b-21 Or you feel super generous and want to use this Amazon link as your Amazon home page. And do not worry, your purchases are all anonym and the prices are all the same: Amazon.de:http://www.amazon.de/?_encoding=UTF8&camp=1638&creative=19454&linkCode=ur2&site-redirect=de&tag=great043-21&linkId=ORZEQZEOVJAFURCZ Amazon.com:http://www.amazon.com/?_encoding=UTF8&camp=1789&creative=390957&linkCode=ur2&tag=gre09a-20&linkId=I5NDCEAVCD2OWM4S Amazon.co.uk:http://www.amazon.co.uk/ref=as_li_ss_tl?_encoding=UTF8&camp=1634&creative=19450&linkCode=ur2&tag=gre0b-21

hlhrS4_Y278 | 08 Aug 2014
Twitter: https://twitter.com/GreatScottLab Facebook: https://www.facebook.com/greatscottlab Previous video:http://youtu.be/90g6RpvXBYY More project info on Instructables:http://www.instructables.com/id/Moped-ModTurn-SignalsUnder-Body-LightBrake-Light/ In this video I will show you how I updated the old lighting system of an old Moped (Simson S50). I replaced the old bulbs of the turn signals and brake light with LED. We also added under body lights. Music: Aduro by Jens Kiilstofte Ecstatic Wave by Jens Kiilstofte https://machinimasound.com/music You want to support my videos? You can browse and buy tools&materials from my Amazon Store. This way I get a small commission: Amazon.de: http://astore.amazon.de/great043-21 Amazon.com:http://astore.amazon.com/gre09a-20 Amazon.co.uk: http://astore.amazon.co.uk/gre0b-21 Or you feel super generous and want to use this Amazon link as your Amazon home page. And do not worry, your purchases are all anonym and the prices are all the same: Amazon.de:http://www.amazon.de/?_encoding=UTF8&camp=1638&creative=19454&linkCode=ur2&site-redirect=de&tag=great043-21&linkId=ORZEQZEOVJAFURCZ Amazon.com:http://www.amazon.com/?_encoding=UTF8&camp=1789&creative=390957&linkCode=ur2&tag=gre09a-20&linkId=I5NDCEAVCD2OWM4S Amazon.co.uk:http://www.amazon.co.uk/ref=as_li_ss_tl?_encoding=UTF8&camp=1634&creative=19450&linkCode=ur2&tag=gre0b-21

90g6RpvXBYY | 31 Jul 2014
Twitter: https://twitter.com/GreatScottLab Facebook: https://www.facebook.com/greatscottlab Previous video:http://youtu.be/xXs8Cxw4e2k In this video I explain when I like to use PWM and when it is useful to just put a potentiometer in series to you load. Both have their own advantages and disadvantages but none is perfect in all situations. Music: Killing Time, Kevin MacLeod (incompetech.com) You want to support my videos? You can browse and buy tools&materials from my Amazon Store. This way I get a small commission: Amazon.de: http://astore.amazon.de/great043-21 Amazon.com:http://astore.amazon.com/gre09a-20 Amazon.co.uk: http://astore.amazon.co.uk/gre0b-21 Or you feel super generous and want to use this Amazon link as your Amazon home page. And do not worry, your purchases are all anonym and the prices are all the same: Amazon.de:http://www.amazon.de/?_encoding=UTF8&camp=1638&creative=19454&linkCode=ur2&site-redirect=de&tag=great043-21&linkId=ORZEQZEOVJAFURCZ Amazon.com:http://www.amazon.com/?_encoding=UTF8&camp=1789&creative=390957&linkCode=ur2&tag=gre09a-20&linkId=I5NDCEAVCD2OWM4S Amazon.co.uk:http://www.amazon.co.uk/ref=as_li_ss_tl?_encoding=UTF8&camp=1634&creative=19450&linkCode=ur2&tag=gre0b-21

xXs8Cxw4e2k | 11 Jul 2014
Twitter: https://twitter.com/GreatScottLab Facebook: https://www.facebook.com/greatscottlab Previous video:http://youtu.be/-swETkSPyYM More project info on Instructables:http://www.instructables.com/id/Simple-Basement-Security-System/ In this video I will show you how to build a simple alarm system for you basement or any other room. I use a reed switch and a key switch as inputs for an Attiny85 to check whether an intruder has entered the room. You want to support my videos? You can browse and buy tools&materials from my Amazon Store. This way I get a small commission: Amazon.de: http://astore.amazon.de/great043-21 Amazon.com:http://astore.amazon.com/gre09a-20 Amazon.co.uk: http://astore.amazon.co.uk/gre0b-21 Or you feel super generous and want to use this Amazon link as your Amazon home page. And do not worry, your purchases are all anonym and the prices are all the same: Amazon.de:http://www.amazon.de/?_encoding=UTF8&camp=1638&creative=19454&linkCode=ur2&site-redirect=de&tag=great043-21&linkId=ORZEQZEOVJAFURCZ Amazon.com:http://www.amazon.com/?_encoding=UTF8&camp=1789&creative=390957&linkCode=ur2&tag=gre09a-20&linkId=I5NDCEAVCD2OWM4S Amazon.co.uk:http://www.amazon.co.uk/ref=as_li_ss_tl?_encoding=UTF8&camp=1634&creative=19450&linkCode=ur2&tag=gre0b-21

-swETkSPyYM | 27 Jun 2014
Twitter: https://twitter.com/GreatScottLab Facebook: https://www.facebook.com/greatscottlab Schematic: http://www.mediafire.com/view/bgeeix23hysq903/NE555.png PWM video: http://youtu.be/jQ3JHknsM4o Previous video: http://youtu.be/a6D6H6SLa_c More project info on Instructables:http://www.instructables.com/id/Stay-cool-this-summer-PC-Fan-Mod/ In this video I will show you how to modify a regular PC fan to use it as a portable fan. It is also quite useful as a fume extractor while soldering. Music: Ecstatic Wave by Jens Kiilstofte https://machinimasound.com/music You want to support my videos? You can browse and buy tools&materials from my Amazon Store. This way I get a small commission: Amazon.de: http://astore.amazon.de/great043-21 Amazon.com:http://astore.amazon.com/gre09a-20 Amazon.co.uk: http://astore.amazon.co.uk/gre0b-21 Or you feel super generous and want to use this Amazon link as your Amazon home page. And do not worry, your purchases are all anonym and the prices are all the same: Amazon.de:http://www.amazon.de/?_encoding=UTF8&camp=1638&creative=19454&linkCode=ur2&site-redirect=de&tag=great043-21&linkId=ORZEQZEOVJAFURCZ Amazon.com:http://www.amazon.com/?_encoding=UTF8&camp=1789&creative=390957&linkCode=ur2&tag=gre09a-20&linkId=I5NDCEAVCD2OWM4S Amazon.co.uk:http://www.amazon.co.uk/ref=as_li_ss_tl?_encoding=UTF8&camp=1634&creative=19450&linkCode=ur2&tag=gre0b-21

a6D6H6SLa_c | 13 Jun 2014
Twitter: https://twitter.com/GreatScottLab Facebook: https://www.facebook.com/greatscottlab Previous video:http://youtu.be/J3DYgzRvLT8 tronixstuff tutorial: http://goo.gl/ilE3NU DIY Kit with SAA1064: Amazon.de:http://amzn.to/1psVt7T Schematics: https://www.mediafire.com/?ara1c5qjnb1dkue In this video I will show you how to control two different kinds of 7 segment displays. You will get some information about a BCD-7Segment driver IC and the SAA1064. Music: Aduro by Jens Kiilstofte Ecstatic Wave by Jens Kiilstofte https://machinimasound.com/music You want to support my videos? You can browse and buy tools&materials from my Amazon Store. This way I get a small commission: Amazon.de: http://astore.amazon.de/great043-21 Amazon.com:http://astore.amazon.com/gre09a-20 Amazon.co.uk: http://astore.amazon.co.uk/gre0b-21 Or you feel super generous and want to use this Amazon link as your Amazon home page. And do not worry, your purchases are all anonym and the prices are all the same: Amazon.de:http://www.amazon.de/?_encoding=UTF8&camp=1638&creative=19454&linkCode=ur2&site-redirect=de&tag=great043-21&linkId=ORZEQZEOVJAFURCZ Amazon.com:http://www.amazon.com/?_encoding=UTF8&camp=1789&creative=390957&linkCode=ur2&tag=gre09a-20&linkId=I5NDCEAVCD2OWM4S Amazon.co.uk:http://www.amazon.co.uk/ref=as_li_ss_tl?_encoding=UTF8&camp=1634&creative=19450&linkCode=ur2&tag=gre0b-21

J3DYgzRvLT8 | 30 May 2014
Twitter: https://twitter.com/GreatScottLab Facebook: https://www.facebook.com/greatscottlab Previous video:http://youtu.be/tRDAzJrfZiM In this video I will show you how to use your Atmega328P without an Arduino Board. Music: Killing Time, Kevin MacLeod (incompetech.com) You want to support my videos? You can browse and buy tools&materials from my Amazon Store. This way I get a small commission: Amazon.de: http://astore.amazon.de/great043-21 Amazon.com:http://astore.amazon.com/gre09a-20 Amazon.co.uk: http://astore.amazon.co.uk/gre0b-21 Or you feel super generous and want to use this Amazon link as your Amazon home page. And do not worry, your purchases are all anonym and the prices are all the same: Amazon.de:http://www.amazon.de/?_encoding=UTF8&camp=1638&creative=19454&linkCode=ur2&site-redirect=de&tag=great043-21&linkId=ORZEQZEOVJAFURCZ Amazon.com:http://www.amazon.com/?_encoding=UTF8&camp=1789&creative=390957&linkCode=ur2&tag=gre09a-20&linkId=I5NDCEAVCD2OWM4S Amazon.co.uk:http://www.amazon.co.uk/ref=as_li_ss_tl?_encoding=UTF8&camp=1634&creative=19450&linkCode=ur2&tag=gre0b-21

tRDAzJrfZiM | 16 May 2014
Twitter: https://twitter.com/GreatScottLab Facebook: https://www.facebook.com/greatscottlab Previous video:http://youtu.be/XY_09deCmlo Previous Ambilight Project: http://youtu.be/kf2WNVrerck Amazon.de: BIGtec USB 2.0 Audio Video Grabber: http://amzn.to/1sXPKst HDMI Splitter: http://amzn.to/1sAL86B HDMI 2 AV Converter: http://amzn.to/1jQlcDE Amazon.com: USB Audio Video Grabber:http://amzn.to/YAQcj7 HDMI Splitter:http://amzn.to/1sHoFKP HDMI 2 AV Converter:http://amzn.to/1rDdq41 Amazon.co.uk: USB Audio Video Grabber: http://amzn.to/1EOxvJC HDMI Splitter: http://amzn.to/1RaA3rZ HDMI 2 AV Converter: http://amzn.to/1GNaxRj IMG Hyperion: https://mega.nz/#!s0FSEQjJ!3umd_zb9UushbVmKshxjHsOaBSgz6zTOO6-b-2Pq9W4 HyperCon: http://www.mediafire.com/download/n59cohr9j347oeu/HyperCon.jar.zip Android App: https://play.google.com/store/apps/details?id=nl.hyperion.hyperionpro&hl=com More project info on Instructables:http://www.instructables.com/id/DIY-Ambilight-with-Hyperion-Works-with-HDMIAV-Sour/ In this video I will show you how to build your own "Ambilight" Clone with Hyperion. This allows you to add Ambilight effects to HDMI and AV sources. Music: Ecstatic Wave by Jens Kiilstofte https://machinimasound.com/music/ecstatic-wave You want to support my videos? You can browse and buy tools&materials from my Amazon Store. This way I get a small commission: Amazon.de: http://astore.amazon.de/great043-21 Amazon.com:http://astore.amazon.com/gre09a-20 Amazon.co.uk: http://astore.amazon.co.uk/gre0b-21 Or you feel super generous and want to use this Amazon link as your Amazon home page. And do not worry, your purchases are all anonym and the prices are all the same: Amazon.de:http://www.amazon.de/?_encoding=UTF8&camp=1638&creative=19454&linkCode=ur2&site-redirect=de&tag=great043-21&linkId=ORZEQZEOVJAFURCZ Amazon.com:http://www.amazon.com/?_encoding=UTF8&camp=1789&creative=390957&linkCode=ur2&tag=gre09a-20&linkId=I5NDCEAVCD2OWM4S Amazon.co.uk:http://www.amazon.co.uk/ref=as_li_ss_tl?_encoding=UTF8&camp=1634&creative=19450&linkCode=ur2&tag=gre0b-21
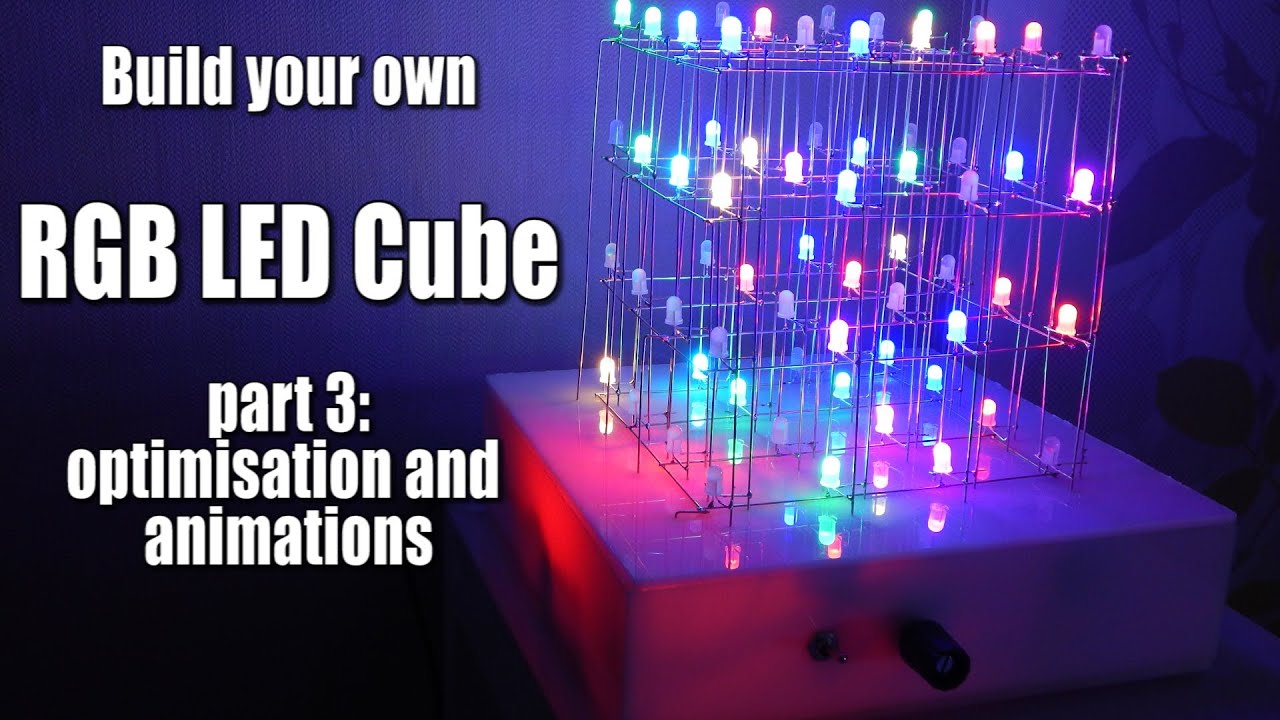
XY_09deCmlo | 03 May 2014
Twitter: https://twitter.com/GreatScottLab Facebook: https://www.facebook.com/greatscottlab Part 1:http://youtu.be/EnM3p2TmWXc Part 2:http://youtu.be/VkP48yrtdVo How to Multiplex:http://youtu.be/uQMUPhyoXoE More project info on Instructables:http://www.instructables.com/id/Build-your-own-4x4x4-RGB-LED-Cube/ New Arduino Code: http://www.mediafire.com/download/d135j9ka31dj1yl/RGB_LED_Cube_Code_v2_GreatScott!.rar In the last part of the RGB LED Cube build, I added a potentiometer to control the brightness of the cube and changed the IC sockets. Also I created some animations to showcase the possibilities of the cube. Feel free to make your own animations. Music: In the Hall of the Mountain King, Kevin MacLeod (incompetech.com) You want to support my videos? You can browse and buy tools&materials from my Amazon Store. This way I get a small commission: Amazon.de: http://astore.amazon.de/great043-21 Amazon.com:http://astore.amazon.com/gre09a-20 Amazon.co.uk: http://astore.amazon.co.uk/gre0b-21 Or you feel super generous and want to use this Amazon link as your Amazon home page. And do not worry, your purchases are all anonym and the prices are all the same: Amazon.de:http://www.amazon.de/?_encoding=UTF8&camp=1638&creative=19454&linkCode=ur2&site-redirect=de&tag=great043-21&linkId=ORZEQZEOVJAFURCZ Amazon.com:http://www.amazon.com/?_encoding=UTF8&camp=1789&creative=390957&linkCode=ur2&tag=gre09a-20&linkId=I5NDCEAVCD2OWM4S Amazon.co.uk:http://www.amazon.co.uk/ref=as_li_ss_tl?_encoding=UTF8&camp=1634&creative=19450&linkCode=ur2&tag=gre0b-21
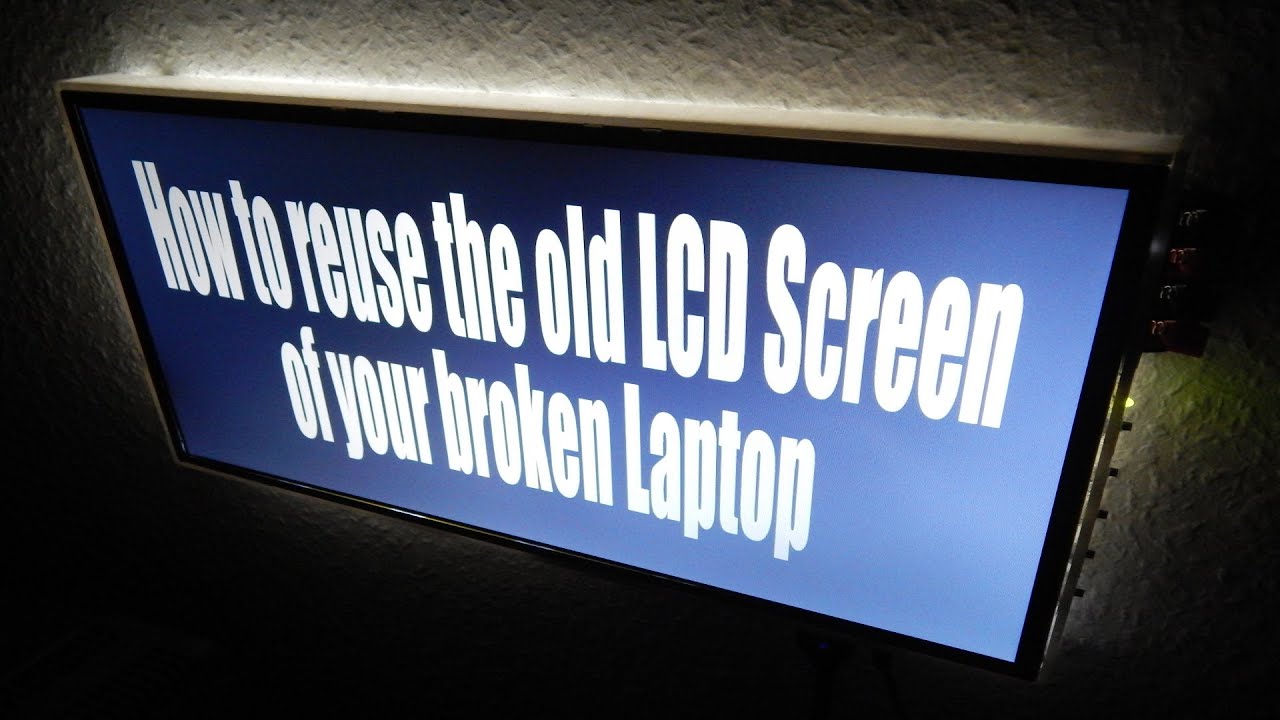
6SOXMDb4cjI | 19 Apr 2014
Twitter: https://twitter.com/GreatScottLab Facebook: https://www.facebook.com/greatscottlab Previous video:http://youtu.be/VkP48yrtdVo More project info on Instructables:http://www.instructables.com/id/How-to-reuse-the-old-LCD-Screen-of-your-broken-Lap/ My controller board:http://rover.ebay.com/rover/1/707-53477-19255-0/1?icep_ff3=2&pub=5575101368&toolid=10001&campid=5337582279&customid=&icep_item=161076658712&ipn=psmain&icep_vectorid=229487&kwid=902099&mtid=824&kw=lg Amazon.de:http://amzn.to/1py5xKJ or http://amzn.to/1s0lSYk Amazon.com: http://amzn.to/1xLbeuF Having a second monitor for your PC is really helpful sometimes. In this video I will turn the LCD Screen of a broken laptop into a nice looking second monitor for your PC, gaming console or raspberry pi. You want to support my videos? You can browse and buy tools&materials from my Amazon Store. This way I get a small commission: Amazon.de: http://astore.amazon.de/great043-21 Amazon.com:http://astore.amazon.com/gre09a-20 Amazon.co.uk: http://astore.amazon.co.uk/gre0b-21 Or you feel super generous and want to use this Amazon link as your Amazon home page. And do not worry, your purchases are all anonym and the prices are all the same: Amazon.de:http://www.amazon.de/?_encoding=UTF8&camp=1638&creative=19454&linkCode=ur2&site-redirect=de&tag=great043-21&linkId=ORZEQZEOVJAFURCZ Amazon.com:http://www.amazon.com/?_encoding=UTF8&camp=1789&creative=390957&linkCode=ur2&tag=gre09a-20&linkId=I5NDCEAVCD2OWM4S Amazon.co.uk:http://www.amazon.co.uk/ref=as_li_ss_tl?_encoding=UTF8&camp=1634&creative=19450&linkCode=ur2&tag=gre0b-21

VkP48yrtdVo | 05 Apr 2014
Twitter: https://twitter.com/GreatScottLab Facebook: https://www.facebook.com/greatscottlab Previous video:http://youtu.be/uQMUPhyoXoE Part 1:http://youtu.be/EnM3p2TmWXc How to Multiplex:http://youtu.be/uQMUPhyoXoE More project info on Instructables:http://www.instructables.com/id/Build-your-own-4x4x4-RGB-LED-Cube/ Arduino Code+Schematic:http://www.mediafire.com/download/d1irxfrmjic3txj/RGBLEDCube_GreatScott!.rar It is time to build the controller for the RGB LED Cube. After this video you will be able to build your very own Cube and use my first test animation to let it flash in a few different colors Music: In the Hall of the Mountain King, Kevin MacLeod (incompetech.com) You want to support my videos? You can browse and buy tools&materials from my Amazon Store. This way I get a small commission: Amazon.de: http://astore.amazon.de/great043-21 Amazon.com:http://astore.amazon.com/gre09a-20 Amazon.co.uk: http://astore.amazon.co.uk/gre0b-21 Or you feel super generous and want to use this Amazon link as your Amazon home page. And do not worry, your purchases are all anonym and the prices are all the same: Amazon.de:http://www.amazon.de/?_encoding=UTF8&camp=1638&creative=19454&linkCode=ur2&site-redirect=de&tag=great043-21&linkId=ORZEQZEOVJAFURCZ Amazon.com:http://www.amazon.com/?_encoding=UTF8&camp=1789&creative=390957&linkCode=ur2&tag=gre09a-20&linkId=I5NDCEAVCD2OWM4S Amazon.co.uk:http://www.amazon.co.uk/ref=as_li_ss_tl?_encoding=UTF8&camp=1634&creative=19450&linkCode=ur2&tag=gre0b-21

uQMUPhyoXoE | 22 Mar 2014
Twitter: https://twitter.com/GreatScottLab Facebook: https://www.facebook.com/greatscottlab Previous video:http://youtu.be/EnM3p2TmWXc Arduino Code+Schematic: http://www.mediafire.com/download/asi6yba4l8844qx/Electronic_Basics#5_Multiplexing.rar In this video i am going to show you how to control a huge amount of LEDs inside a matrix or a cube with only a few I/O pins of your Arduino. Music: Killing Time, Kevin MacLeod (incompetech.com) You want to support my videos? You can browse and buy tools&materials from my Amazon Store. This way I get a small commission: Amazon.de: http://astore.amazon.de/great043-21 Amazon.com:http://astore.amazon.com/gre09a-20 Amazon.co.uk: http://astore.amazon.co.uk/gre0b-21 Or you feel super generous and want to use this Amazon link as your Amazon home page. And do not worry, your purchases are all anonym and the prices are all the same: Amazon.de:http://www.amazon.de/?_encoding=UTF8&camp=1638&creative=19454&linkCode=ur2&site-redirect=de&tag=great043-21&linkId=ORZEQZEOVJAFURCZ Amazon.com:http://www.amazon.com/?_encoding=UTF8&camp=1789&creative=390957&linkCode=ur2&tag=gre09a-20&linkId=I5NDCEAVCD2OWM4S Amazon.co.uk:http://www.amazon.co.uk/ref=as_li_ss_tl?_encoding=UTF8&camp=1634&creative=19450&linkCode=ur2&tag=gre0b-21
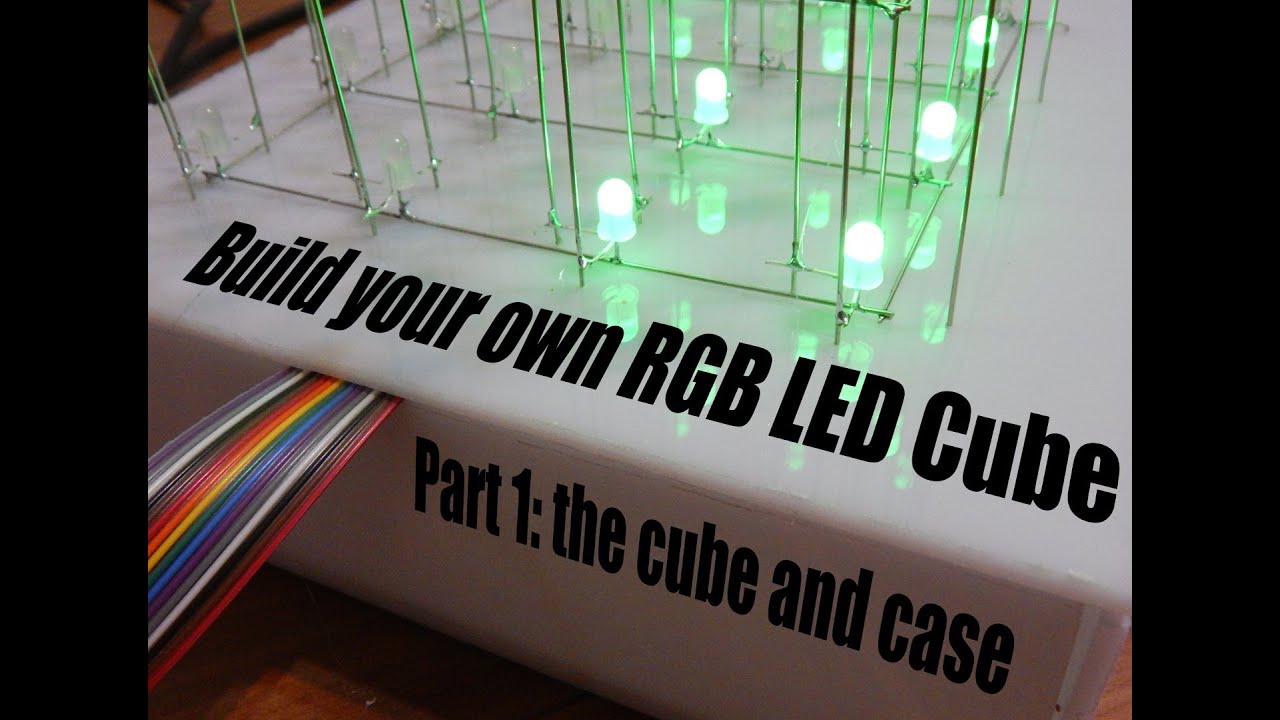
EnM3p2TmWXc | 08 Mar 2014
Twitter: https://twitter.com/GreatScottLab Facebook: https://www.facebook.com/greatscottlab Previous video:http://youtu.be/QoGnOoTICGY More project info on Instructables:http://www.instructables.com/id/Build-your-own-4x4x4-RGB-LED-Cube/ I wanted to build a new and better LED Cube since a long time. Now I finally made the first step by creating the 4x4x4 RGB LED Cube itself and the case for the upcoming electronics. Feel free to recreate the cube for yourself. You want to support my videos? You can browse and buy tools&materials from my Amazon Store. This way I get a small commission: Amazon.de: http://astore.amazon.de/great043-21 Amazon.com:http://astore.amazon.com/gre09a-20 Amazon.co.uk: http://astore.amazon.co.uk/gre0b-21 Or you feel super generous and want to use this Amazon link as your Amazon home page. And do not worry, your purchases are all anonym and the prices are all the same: Amazon.de:http://www.amazon.de/?_encoding=UTF8&camp=1638&creative=19454&linkCode=ur2&site-redirect=de&tag=great043-21&linkId=ORZEQZEOVJAFURCZ Amazon.com:http://www.amazon.com/?_encoding=UTF8&camp=1789&creative=390957&linkCode=ur2&tag=gre09a-20&linkId=I5NDCEAVCD2OWM4S Amazon.co.uk:http://www.amazon.co.uk/ref=as_li_ss_tl?_encoding=UTF8&camp=1634&creative=19450&linkCode=ur2&tag=gre0b-21
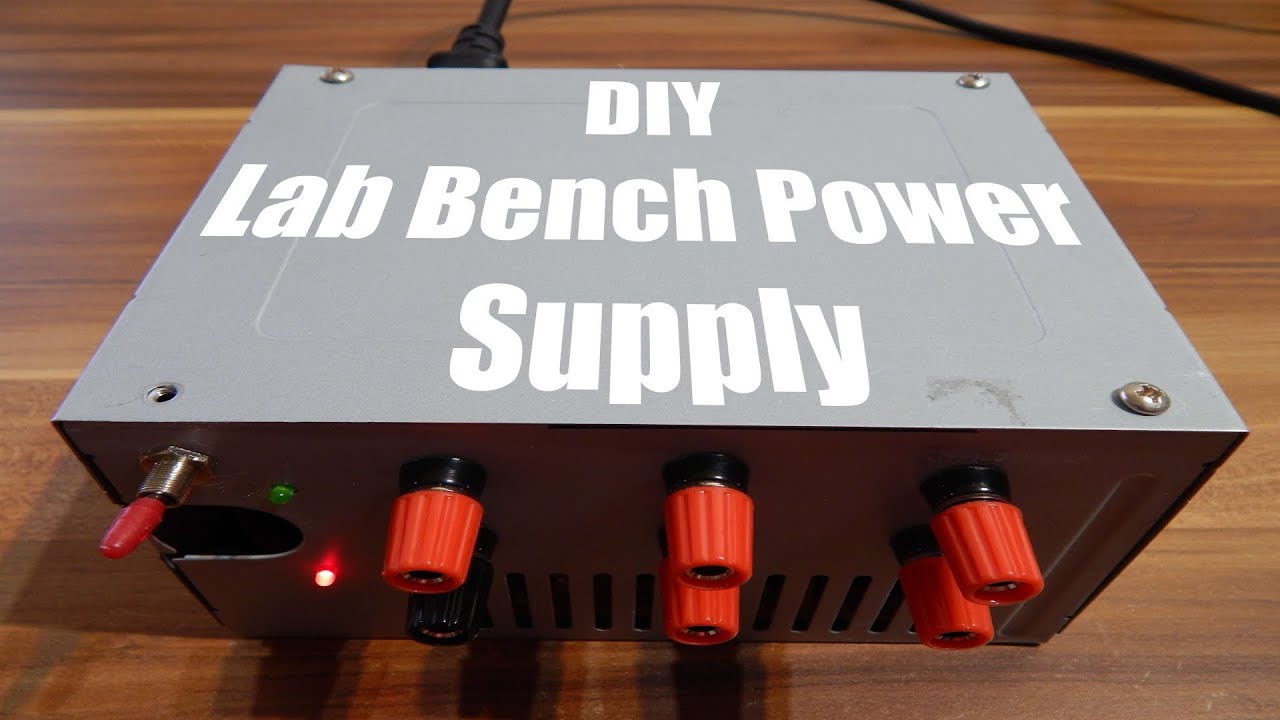
QoGnOoTICGY | 22 Feb 2014
Twitter: https://twitter.com/GreatScottLab Facebook: https://www.facebook.com/greatscottlab Previous video:http://youtu.be/x3KAXjnP06o More project info on Instructables:http://www.instructables.com/id/DIY-Lab-Bench-Power-Supply/ In this video I am going to show you how to convert an old ATX computer power supply into a powerful lab bench power supply with only some low priced parts and solder. Join me for this really useful build. You want to support my videos? You can browse and buy tools&materials from my Amazon Store. This way I get a small commission: Amazon.de: http://astore.amazon.de/great043-21 Amazon.com:http://astore.amazon.com/gre09a-20 Amazon.co.uk: http://astore.amazon.co.uk/gre0b-21 Or you feel super generous and want to use this Amazon link as your Amazon home page. And do not worry, your purchases are all anonym and the prices are all the same: Amazon.de:http://www.amazon.de/?_encoding=UTF8&camp=1638&creative=19454&linkCode=ur2&site-redirect=de&tag=great043-21&linkId=ORZEQZEOVJAFURCZ Amazon.com:http://www.amazon.com/?_encoding=UTF8&camp=1789&creative=390957&linkCode=ur2&tag=gre09a-20&linkId=I5NDCEAVCD2OWM4S Amazon.co.uk:http://www.amazon.co.uk/ref=as_li_ss_tl?_encoding=UTF8&camp=1634&creative=19450&linkCode=ur2&tag=gre0b-21
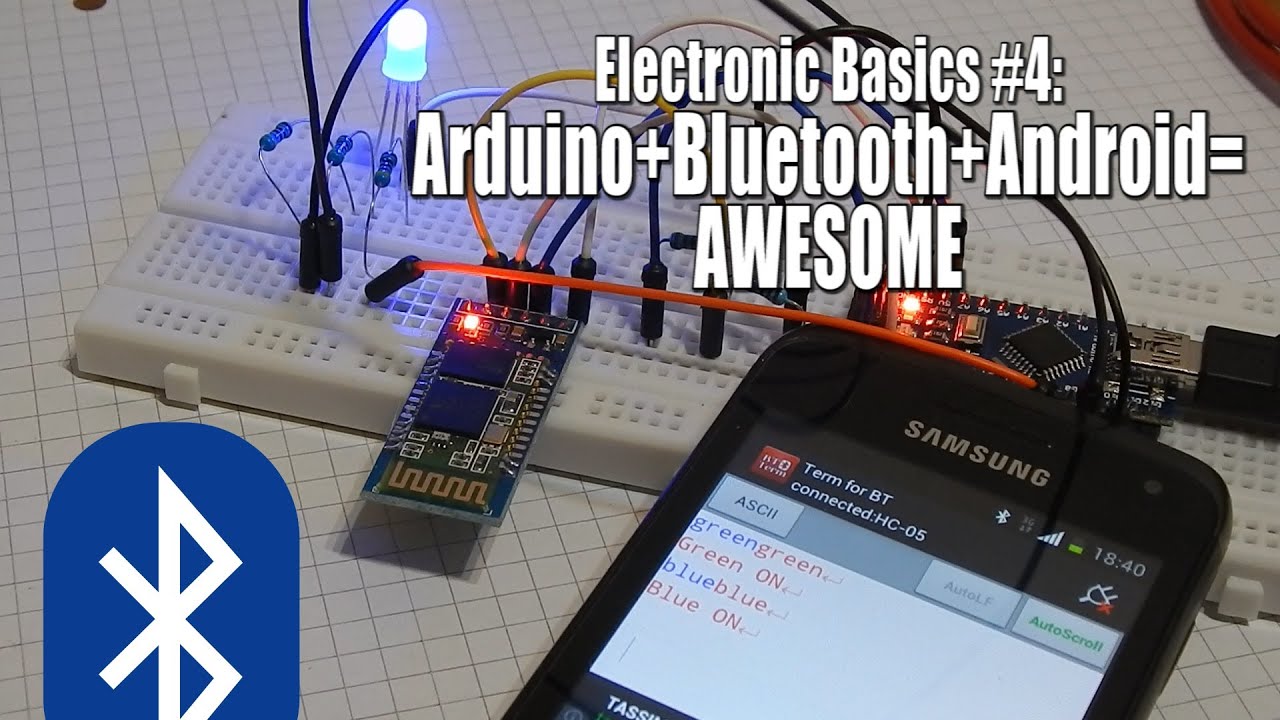
x3KAXjnP06o | 08 Feb 2014
Twitter: https://twitter.com/GreatScottLab Facebook: https://www.facebook.com/greatscottlab Previous video:http://youtu.be/9LjfkjwMqXI Amazon.de: Bluetooth module: http://amzn.to/1f3nUyT Arduino Nano: http://amzn.to/1d4H1w1 Amazon.com: Bluetooth module:http://amzn.to/Z0FW42 Arduino Nano:http://amzn.to/1vEGMz3 Arduino Sketch: http://www.mediafire.com/download/hx9kysd5vxhxuvv/ArduinoBluetoothGreatScott!.rar Adding bluetooth to your arduino project is simple and super awesome. I will show you how to control your gadgets with your android smartphone. Music: Killing Time, Kevin MacLeod (incompetech.com) You want to support my videos? You can browse and buy tools&materials from my Amazon Store. This way I get a small commission: Amazon.de: http://astore.amazon.de/great043-21 Amazon.com:http://astore.amazon.com/gre09a-20 Amazon.co.uk: http://astore.amazon.co.uk/gre0b-21 Or you feel super generous and want to use this Amazon link as your Amazon home page. And do not worry, your purchases are all anonym and the prices are all the same: Amazon.de:http://www.amazon.de/?_encoding=UTF8&camp=1638&creative=19454&linkCode=ur2&site-redirect=de&tag=great043-21&linkId=ORZEQZEOVJAFURCZ Amazon.com:http://www.amazon.com/?_encoding=UTF8&camp=1789&creative=390957&linkCode=ur2&tag=gre09a-20&linkId=I5NDCEAVCD2OWM4S Amazon.co.uk:http://www.amazon.co.uk/ref=as_li_ss_tl?_encoding=UTF8&camp=1634&creative=19450&linkCode=ur2&tag=gre0b-21
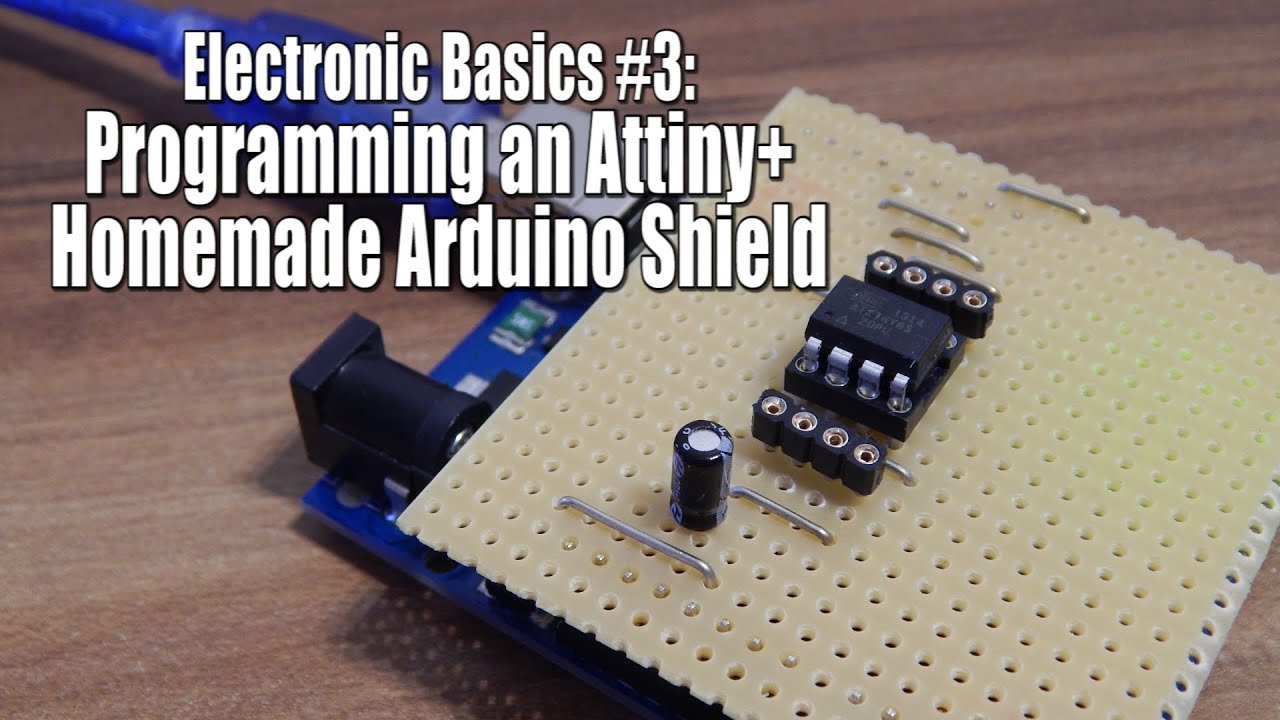
9LjfkjwMqXI | 25 Jan 2014
Twitter: https://twitter.com/GreatScottLab Facebook: https://www.facebook.com/greatscottlab Attiny Library: https://github.com/damellis/attiny/archive/master.zip Previous video:http://youtu.be/jQ3JHknsM4o If you are using only a couple of pins of the arduino for your current project, you might be able to shrink the IC. I am going to show you an easy way to use an Attiny instead of an Atmega328. Music: Killing Time, Kevin MacLeod (incompetech.com) You want to support my videos? You can browse and buy tools&materials from my Amazon Store. This way I get a small commission: Amazon.de: http://astore.amazon.de/great043-21 Amazon.com:http://astore.amazon.com/gre09a-20 Amazon.co.uk: http://astore.amazon.co.uk/gre0b-21 Or you feel super generous and want to use this Amazon link as your Amazon home page. And do not worry, your purchases are all anonym and the prices are all the same: Amazon.de:http://www.amazon.de/?_encoding=UTF8&camp=1638&creative=19454&linkCode=ur2&site-redirect=de&tag=great043-21&linkId=ORZEQZEOVJAFURCZ Amazon.com:http://www.amazon.com/?_encoding=UTF8&camp=1789&creative=390957&linkCode=ur2&tag=gre09a-20&linkId=I5NDCEAVCD2OWM4S Amazon.co.uk:http://www.amazon.co.uk/ref=as_li_ss_tl?_encoding=UTF8&camp=1634&creative=19450&linkCode=ur2&tag=gre0b-21
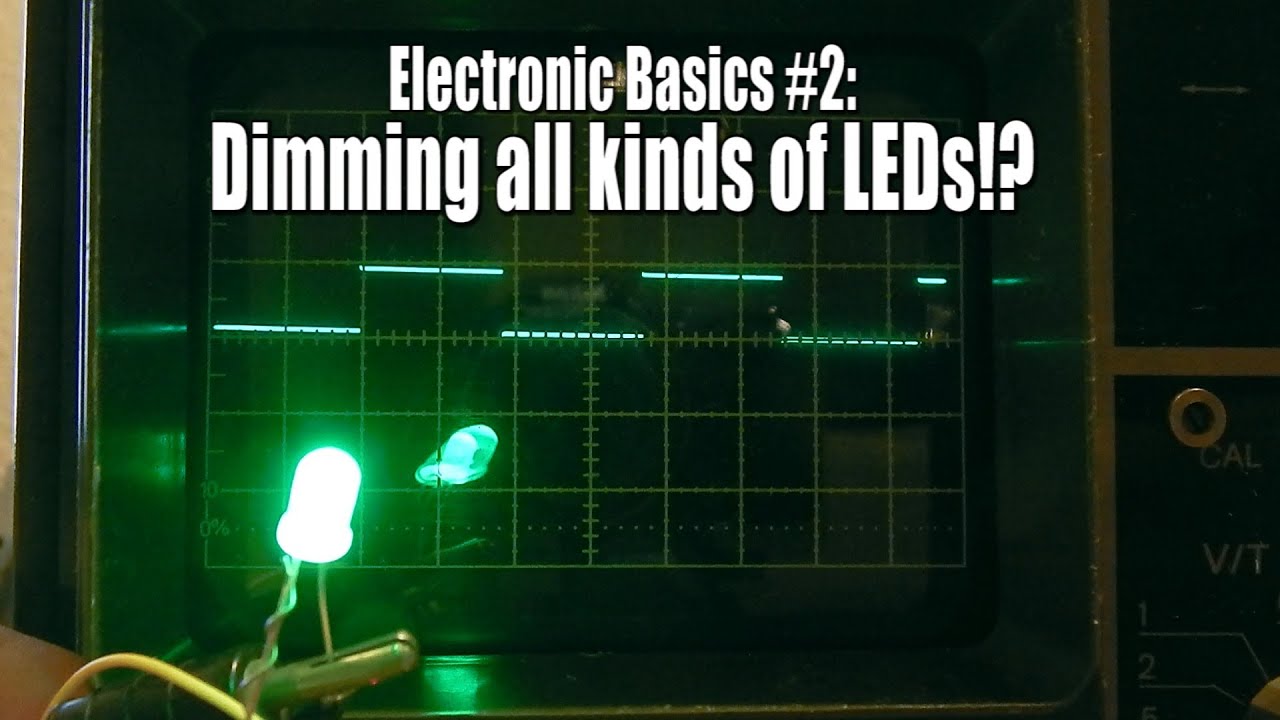
jQ3JHknsM4o | 11 Jan 2014
Twitter: https://twitter.com/GreatScottLab Facebook: https://www.facebook.com/greatscottlab Schematics and arduino sketch: http://www.mediafire.com/download/f3u02ds9268i43e/Electronic%20Basics%232%20PWM%20GreatScott!.rar Previous Video: http://youtu.be/8xLF2TtYUdk In this video I am talking about easy ways to dim different kinds of LEDs. You will learn the basic theory of PWM and how to build two circuits which generate those signals with or without an arduino. Music: Killing Time, Kevin MacLeod (incompetech.com) You want to support my videos? You can browse and buy tools&materials from my Amazon Store. This way I get a small commission: Amazon.de: http://astore.amazon.de/great043-21 Amazon.com:http://astore.amazon.com/gre09a-20 Amazon.co.uk: http://astore.amazon.co.uk/gre0b-21 Or you feel super generous and want to use this Amazon link as your Amazon home page. And do not worry, your purchases are all anonym and the prices are all the same: Amazon.de:http://www.amazon.de/?_encoding=UTF8&camp=1638&creative=19454&linkCode=ur2&site-redirect=de&tag=great043-21&linkId=ORZEQZEOVJAFURCZ Amazon.com:http://www.amazon.com/?_encoding=UTF8&camp=1789&creative=390957&linkCode=ur2&tag=gre09a-20&linkId=I5NDCEAVCD2OWM4S Amazon.co.uk:http://www.amazon.co.uk/ref=as_li_ss_tl?_encoding=UTF8&camp=1634&creative=19450&linkCode=ur2&tag=gre0b-21
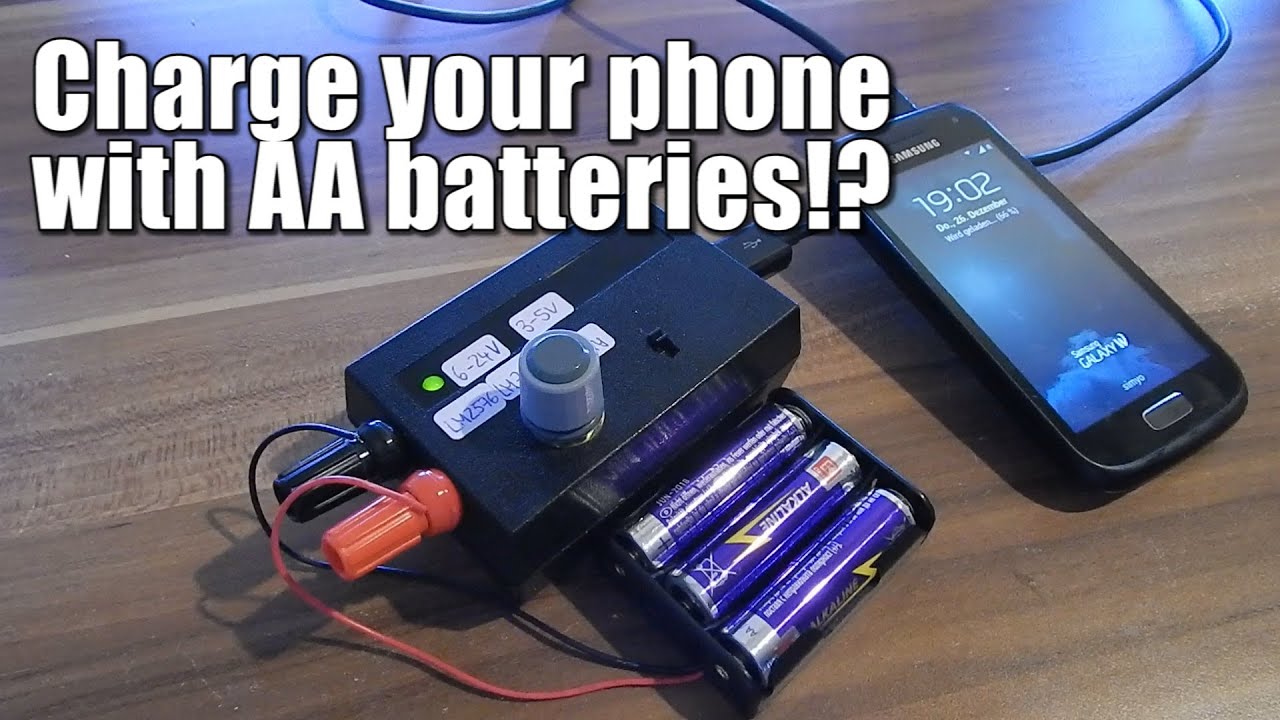
8xLF2TtYUdk | 28 Dec 2013
Twitter: https://twitter.com/GreatScottLab Facebook: https://www.facebook.com/greatscottlab More project info on Instructables:http://www.instructables.com/id/Charge-your-phone-with-AA-batteries/ Previous Video: http://youtu.be/Ya9RpvQyww4 Charge your phone with a car battery (6V-24V) || Voltage regulator: http://youtu.be/zjvZVBa6UX0 The last function of my usb phone charger is finished. Find out how i charge my phone with AA batteries. Music: Killing Time, Kevin MacLeod (incompetech.com) You want to support my videos? You can browse and buy tools&materials from my Amazon Store. This way I get a small commission: Amazon.de: http://astore.amazon.de/great043-21 Amazon.com:http://astore.amazon.com/gre09a-20 Amazon.co.uk: http://astore.amazon.co.uk/gre0b-21 Or you feel super generous and want to use this Amazon link as your Amazon home page. And do not worry, your purchases are all anonym and the prices are all the same: Amazon.de:http://www.amazon.de/?_encoding=UTF8&camp=1638&creative=19454&linkCode=ur2&site-redirect=de&tag=great043-21&linkId=ORZEQZEOVJAFURCZ Amazon.com:http://www.amazon.com/?_encoding=UTF8&camp=1789&creative=390957&linkCode=ur2&tag=gre09a-20&linkId=I5NDCEAVCD2OWM4S Amazon.co.uk:http://www.amazon.co.uk/ref=as_li_ss_tl?_encoding=UTF8&camp=1634&creative=19450&linkCode=ur2&tag=gre0b-21

Ya9RpvQyww4 | 18 Dec 2013
Twitter: https://twitter.com/GreatScottLab Facebook: https://www.facebook.com/greatscottlab Previous Video: http://youtu.be/U8FI1pRfekw It is almost Christmas and you do not have a Christmas tree yet!? You definitly found the right video. I am going to show you how to build your own mini LED Christmas tree. Music: Dance Of The Sugar Plum Fairies, Kevin MacLeod (incompetech.com) Deck the Halls B, Kevin MacLeod (incompetech.com) You want to support my videos? You can browse and buy tools&materials from my Amazon Store. This way I get a small commission: Amazon.de: http://astore.amazon.de/great043-21 Amazon.com:http://astore.amazon.com/gre09a-20 Amazon.co.uk: http://astore.amazon.co.uk/gre0b-21 Or you feel super generous and want to use this Amazon link as your Amazon home page. And do not worry, your purchases are all anonym and the prices are all the same: Amazon.de:http://www.amazon.de/?_encoding=UTF8&camp=1638&creative=19454&linkCode=ur2&site-redirect=de&tag=great043-21&linkId=ORZEQZEOVJAFURCZ Amazon.com:http://www.amazon.com/?_encoding=UTF8&camp=1789&creative=390957&linkCode=ur2&tag=gre09a-20&linkId=I5NDCEAVCD2OWM4S Amazon.co.uk:http://www.amazon.co.uk/ref=as_li_ss_tl?_encoding=UTF8&camp=1634&creative=19450&linkCode=ur2&tag=gre0b-21
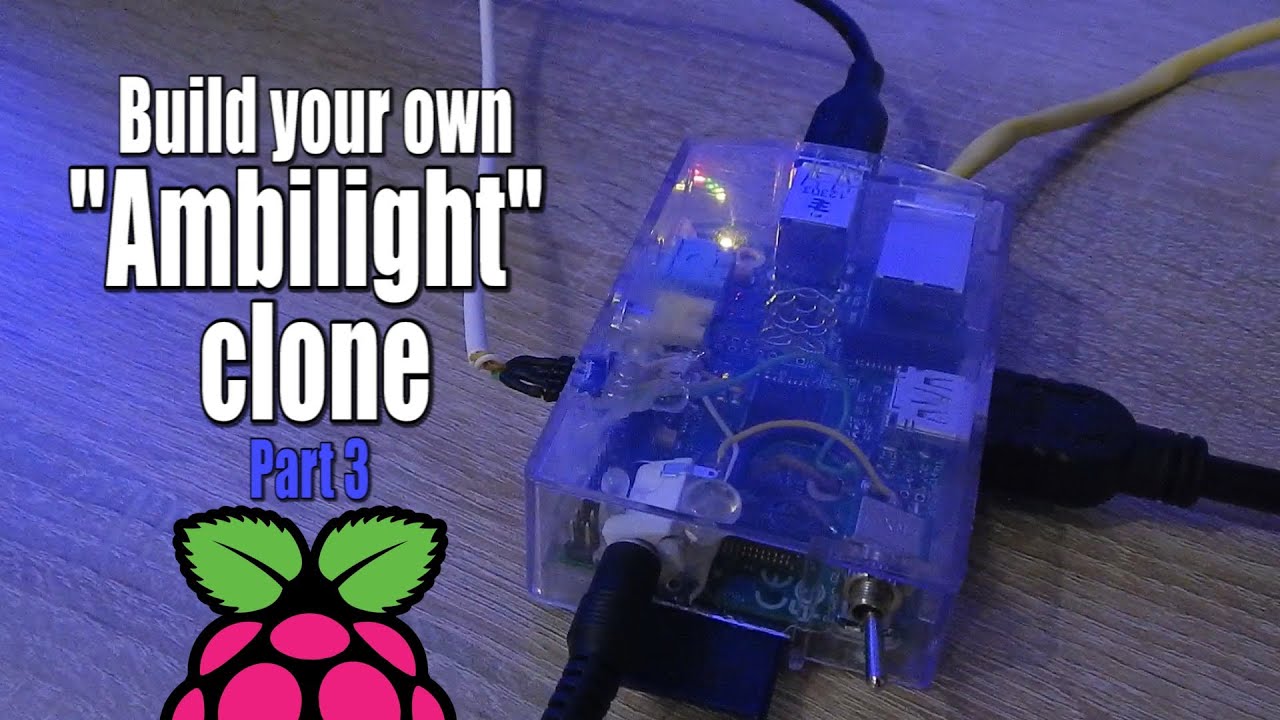
U8FI1pRfekw | 13 Dec 2013
Twitter: https://twitter.com/GreatScottLab Facebook: https://www.facebook.com/greatscottlab More project info on Instructables: http://www.instructables.com/id/Build-your-own-Ambilight-clone-with-the-Raspberry-/ Amazon.de: Raspberry Pi: http://amzn.to/18tArgk Raspberry Pi Kit: http://amzn.to/1g238SU WS 2801 LED strip: http://amzn.to/18tAcSn or WS2801 LED strip: http://amzn.to/ZB9ark Solder: http://amzn.to/NJ63Hk Wire: http://amzn.to/1sWaqiy Female headers: http://amzn.to/1sWaGxW Male headers: http://amzn.to/1sWaUFi Shrinking tube: http://amzn.to/1sWb2Vx 5V 3A Power supply: http://amzn.to/Q3HvtL Amazon.com: WS2801 LED strip:http://amzn.to/1CmmJsI or WS 2801 LED strip: http://amzn.to/10p2Enm Raspberry Pi: http://amzn.to/1vloS5l Solder: http://amzn.to/10pkxm0 Wire: http://amzn.to/1CIQzHI Female headers: http://amzn.to/1xLzDjR Shrinking tube: http://amzn.to/1xLzJb5 5V 3A Power supply: http://amzn.to/1r9O5JO Amazon.co.uk: WS2801 LED Strip: http://amzn.to/1GN4Naa or WS2801 LED Strip: http://amzn.to/1DQY8tx Raspberry Pi: http://amzn.to/1DQY8tx Solder: http://amzn.to/1DQYGj2 Wire: http://amzn.to/1DQYIrh Female headers: http://amzn.to/1GN5xMt Male headers: http://amzn.to/1GN5xMt Shrinking tube: http://amzn.to/1GN5znO 5V 3A Power supply: http://amzn.to/1RaueuQ Watch Part 1: http://youtu.be/kf2WNVrerck Watch Part 2: http://youtu.be/-T-BHX3sFqA The trilogy is complete. During this part, I added a main switch, a DC Jack and an easy solution to hook up the ambilight to the pi without using two power supplies. Join me for this last step in the "Ambilight" clone project. Music: In the Hall of the Mountain King, Kevin MacLeod (incompetech.com) You want to support my videos? You can browse and buy tools&materials from my Amazon Store. This way I get a small commission: Amazon.de: http://astore.amazon.de/great043-21 Amazon.com:http://astore.amazon.com/gre09a-20 Amazon.co.uk: http://astore.amazon.co.uk/gre0b-21 Or you feel super generous and want to use this Amazon link as your Amazon home page. And do not worry, your purchases are all anonym and the prices are all the same: Amazon.de:http://www.amazon.de/?_encoding=UTF8&camp=1638&creative=19454&linkCode=ur2&site-redirect=de&tag=great043-21&linkId=ORZEQZEOVJAFURCZ Amazon.com:http://www.amazon.com/?_encoding=UTF8&camp=1789&creative=390957&linkCode=ur2&tag=gre09a-20&linkId=I5NDCEAVCD2OWM4S Amazon.co.uk:http://www.amazon.co.uk/ref=as_li_ss_tl?_encoding=UTF8&camp=1634&creative=19450&linkCode=ur2&tag=gre0b-21

-T-BHX3sFqA | 29 Nov 2013
Twitter: https://twitter.com/GreatScottLab Facebook:https://www.facebook.com/greatscottlab More project info on Instructables: http://www.instructables.com/id/Build-your-own-Ambilight-clone-with-the-Raspberry-/ Amazon.de: Raspberry Pi: http://amzn.to/18tArgk Raspberry Pi Kit: http://amzn.to/1g238SU WS 2801 LED strip: http://amzn.to/18tAcSn or WS2801 LED strip: http://amzn.to/ZB9ark Solder: http://amzn.to/NJ63Hk Wire: http://amzn.to/1sWaqiy Female headers: http://amzn.to/1sWaGxW Male headers: http://amzn.to/1sWaUFi Shrinking tube: http://amzn.to/1sWb2Vx 5V 3A Power supply: http://amzn.to/Q3HvtL Amazon.com: WS2801 LED strip:http://amzn.to/1CmmJsI or WS 2801 LED strip: http://amzn.to/10p2Enm Raspberry Pi: http://amzn.to/1vloS5l Solder: http://amzn.to/10pkxm0 Wire: http://amzn.to/1CIQzHI Female headers: http://amzn.to/1xLzDjR Shrinking tube: http://amzn.to/1xLzJb5 5V 3A Power supply: http://amzn.to/1r9O5JO Amazon.co.uk: WS2801 LED Strip: http://amzn.to/1GN4Naa or WS2801 LED Strip: http://amzn.to/1DQY8tx Raspberry Pi: http://amzn.to/1DQY8tx Solder: http://amzn.to/1DQYGj2 Wire: http://amzn.to/1DQYIrh Female headers: http://amzn.to/1GN5xMt Male headers: http://amzn.to/1GN5xMt Shrinking tube: http://amzn.to/1GN5znO 5V 3A Power supply: http://amzn.to/1RaueuQ I wanted to build an "Ambilight" clone for my TV ever since i bought the Raspberry Pi one year ago. After I finally managed to order the necessary special WS2801 LED strip a couple weeks ago, I started the build and everything went better than expected. Join me for this awesome build. Music: In the Hall of the Mountain King, Kevin MacLeod (incompetech.com) You want to support my videos? You can browse and buy tools&materials from my Amazon Store. This way I get a small commission: Amazon.de: http://astore.amazon.de/great043-21 Amazon.com:http://astore.amazon.com/gre09a-20 Amazon.co.uk: http://astore.amazon.co.uk/gre0b-21 Or you feel super generous and want to use this Amazon link as your Amazon home page. And do not worry, your purchases are all anonym and the prices are all the same: Amazon.de:http://www.amazon.de/?_encoding=UTF8&camp=1638&creative=19454&linkCode=ur2&site-redirect=de&tag=great043-21&linkId=ORZEQZEOVJAFURCZ Amazon.com:http://www.amazon.com/?_encoding=UTF8&camp=1789&creative=390957&linkCode=ur2&tag=gre09a-20&linkId=I5NDCEAVCD2OWM4S Amazon.co.uk:http://www.amazon.co.uk/ref=as_li_ss_tl?_encoding=UTF8&camp=1634&creative=19450&linkCode=ur2&tag=gre0b-21
kf2WNVrerck | 22 Nov 2013
Twitter: https://twitter.com/GreatScottLab Facebook: https://www.facebook.com/greatscottlab More project info on Instructables: http://www.instructables.com/id/Build-your-own-Ambilight-clone-with-the-Raspberry-/ Amazon.de: Raspberry Pi: http://amzn.to/18tArgk Raspberry Pi Kit: http://amzn.to/1g238SU WS 2801 LED strip: http://amzn.to/18tAcSn or WS2801 LED strip: http://amzn.to/ZB9ark Solder: http://amzn.to/NJ63Hk Wire: http://amzn.to/1sWaqiy Female headers: http://amzn.to/1sWaGxW Male headers: http://amzn.to/1sWaUFi Shrinking tube: http://amzn.to/1sWb2Vx 5V 3A Power supply: http://amzn.to/Q3HvtL Amazon.com: WS2801 LED strip:http://amzn.to/1CmmJsI or WS 2801 LED strip: http://amzn.to/10p2Enm Raspberry Pi: http://amzn.to/1vloS5l Solder: http://amzn.to/10pkxm0 Wire: http://amzn.to/1CIQzHI Female headers: http://amzn.to/1xLzDjR Shrinking tube: http://amzn.to/1xLzJb5 5V 3A Power supply: http://amzn.to/1r9O5JO Amazon.co.uk: WS2801 LED Strip: http://amzn.to/1GN4Naa or WS2801 LED Strip: http://amzn.to/1DQY8tx Raspberry Pi: http://amzn.to/1DQY8tx Solder: http://amzn.to/1DQYGj2 Wire: http://amzn.to/1DQYIrh Female headers: http://amzn.to/1GN5xMt Male headers: http://amzn.to/1GN5xMt Shrinking tube: http://amzn.to/1GN5znO 5V 3A Power supply: http://amzn.to/1RaueuQ Previous Video: https://www.youtube.com/watch?v=CBah3vz5b-U I wanted to build an "Ambilight" clone for my TV ever since i bought the Raspberry Pi one year ago. After I finally managed to order the necessary special WS2801 LED strip a couple weeks ago, I started the build and everything went better than expected. Join me for this awesome build. You want to support my videos? You can browse and buy tools&materials from my Amazon Store. This way I get a small commission: Amazon.de: http://astore.amazon.de/great043-21 Amazon.com:http://astore.amazon.com/gre09a-20 Amazon.co.uk: http://astore.amazon.co.uk/gre0b-21 Or you feel super generous and want to use this Amazon link as your Amazon home page. And do not worry, your purchases are all anonym and the prices are all the same: Amazon.de:http://www.amazon.de/?_encoding=UTF8&camp=1638&creative=19454&linkCode=ur2&site-redirect=de&tag=great043-21&linkId=ORZEQZEOVJAFURCZ Amazon.com:http://www.amazon.com/?_encoding=UTF8&camp=1789&creative=390957&linkCode=ur2&tag=gre09a-20&linkId=I5NDCEAVCD2OWM4S Amazon.co.uk:http://www.amazon.co.uk/ref=as_li_ss_tl?_encoding=UTF8&camp=1634&creative=19450&linkCode=ur2&tag=gre0b-21
CBah3vz5b-U | 09 Nov 2013
Twitter: https://twitter.com/GreatScottLab Facebook: https://www.facebook.com/greatscottlab Previous Video:https://www.youtube.com/watch?v=rPyrQSo2c1I Buy Basic Multimeter: GER: http://amzn.to/1iZR98h USA: http://amzn.to/1rRFIaP First episode of new elelctronic knowledge serie. I am demonstrating you how to use a multimeter to measure voltage,current, resistance and continuity. And also how to change your fuse inside the multimeter. Music: Killing Time, Kevin MacLeod (incompetech.com) You want to support my videos? You can browse and buy tools&materials from my Amazon Store. This way I get a small commission: Amazon.de: http://astore.amazon.de/great043-21 Amazon.com:http://astore.amazon.com/gre09a-20 Amazon.co.uk: http://astore.amazon.co.uk/gre0b-21 Or you feel super generous and want to use this Amazon link as your Amazon home page. And do not worry, your purchases are all anonym and the prices are all the same: Amazon.de:http://www.amazon.de/?_encoding=UTF8&camp=1638&creative=19454&linkCode=ur2&site-redirect=de&tag=great043-21&linkId=ORZEQZEOVJAFURCZ Amazon.com:http://www.amazon.com/?_encoding=UTF8&camp=1789&creative=390957&linkCode=ur2&tag=gre09a-20&linkId=I5NDCEAVCD2OWM4S Amazon.co.uk:http://www.amazon.co.uk/ref=as_li_ss_tl?_encoding=UTF8&camp=1634&creative=19450&linkCode=ur2&tag=gre0b-21
rPyrQSo2c1I | 02 Nov 2013
Twitter: https://twitter.com/GreatScottLab Facebook:https://www.facebook.com/greatscottlab Previous Video: https://www.youtube.com/watch?v=OJt5Y_0y2Qo Build the cube in winter 2012. Took around 2 weeks of work. I used this tutorial for creating the cube: http://leyanda.de/light/ledcube.php I did NOT program the animations by myself. You can find the source code on leyanda.de Music: Latin Industries, Kevin MacLeod (incompetech.com) You want to support my videos? You can browse and buy tools&materials from my Amazon Store. This way I get a small commission: Amazon.de: http://astore.amazon.de/great043-21 Amazon.com:http://astore.amazon.com/gre09a-20 Amazon.co.uk: http://astore.amazon.co.uk/gre0b-21 Or you feel super generous and want to use this Amazon link as your Amazon home page. And do not worry, your purchases are all anonym and the prices are all the same: Amazon.de:http://www.amazon.de/?_encoding=UTF8&camp=1638&creative=19454&linkCode=ur2&site-redirect=de&tag=great043-21&linkId=ORZEQZEOVJAFURCZ Amazon.com:http://www.amazon.com/?_encoding=UTF8&camp=1789&creative=390957&linkCode=ur2&tag=gre09a-20&linkId=I5NDCEAVCD2OWM4S Amazon.co.uk:http://www.amazon.co.uk/ref=as_li_ss_tl?_encoding=UTF8&camp=1634&creative=19450&linkCode=ur2&tag=gre0b-21

OJt5Y_0y2Qo | 27 Oct 2013
Twitter: https://twitter.com/GreatScottLab Facebook:https://www.facebook.com/greatscottlab Arduino Sketch and Parts list: http://www.mediafire.com/download/464mu4e04re2rbv/Horrifying_electronic_Jack-o'-lantern_GreatScott!.rar Previous Video:https://www.youtube.com/watch?v=zjvZVBa6UX0 Halloween is almost here. I am showing you how to scare those brats with an simple electronic circuit and a Jack-o'-lantern. It will light up and produce an annoying sound when you get to close. Music: The House of Leaves, Kevin MacLeod (incompetech.com) Pamgaea, Kevin MacLeod (incompetech.com) You want to support my videos? You can browse and buy tools&materials from my Amazon Store. This way I get a small commission: Amazon.de: http://astore.amazon.de/great043-21 Amazon.com:http://astore.amazon.com/gre09a-20 Amazon.co.uk: http://astore.amazon.co.uk/gre0b-21 Or you feel super generous and want to use this Amazon link as your Amazon home page. And do not worry, your purchases are all anonym and the prices are all the same: Amazon.de:http://www.amazon.de/?_encoding=UTF8&camp=1638&creative=19454&linkCode=ur2&site-redirect=de&tag=great043-21&linkId=ORZEQZEOVJAFURCZ Amazon.com:http://www.amazon.com/?_encoding=UTF8&camp=1789&creative=390957&linkCode=ur2&tag=gre09a-20&linkId=I5NDCEAVCD2OWM4S Amazon.co.uk:http://www.amazon.co.uk/ref=as_li_ss_tl?_encoding=UTF8&camp=1634&creative=19450&linkCode=ur2&tag=gre0b-21
zjvZVBa6UX0 | 19 Oct 2013
Twitter: https://twitter.com/GreatScottLab Facebook: https://www.facebook.com/greatscottlab More project info on Instructables: http://www.instructables.com/id/Charge-your-phone-with-a-car-battery-6V-24V/ Previous Video:http://youtu.be/InrQvtUuS2w Charging your smartphone while camping outside is not always easy. I am showing you how to charge your phone by using a car battery and a moped battery. You can also use the gadget with any kind of 6V-24V power source. You want to support my videos? You can browse and buy tools&materials from my Amazon Store. This way I get a small commission: Amazon.de: http://astore.amazon.de/great043-21 Amazon.com:http://astore.amazon.com/gre09a-20 Amazon.co.uk: http://astore.amazon.co.uk/gre0b-21 Or you feel super generous and want to use this Amazon link as your Amazon home page. And do not worry, your purchases are all anonym and the prices are all the same: Amazon.de:http://www.amazon.de/?_encoding=UTF8&camp=1638&creative=19454&linkCode=ur2&site-redirect=de&tag=great043-21&linkId=ORZEQZEOVJAFURCZ Amazon.com:http://www.amazon.com/?_encoding=UTF8&camp=1789&creative=390957&linkCode=ur2&tag=gre09a-20&linkId=I5NDCEAVCD2OWM4S Amazon.co.uk:http://www.amazon.co.uk/ref=as_li_ss_tl?_encoding=UTF8&camp=1634&creative=19450&linkCode=ur2&tag=gre0b-21
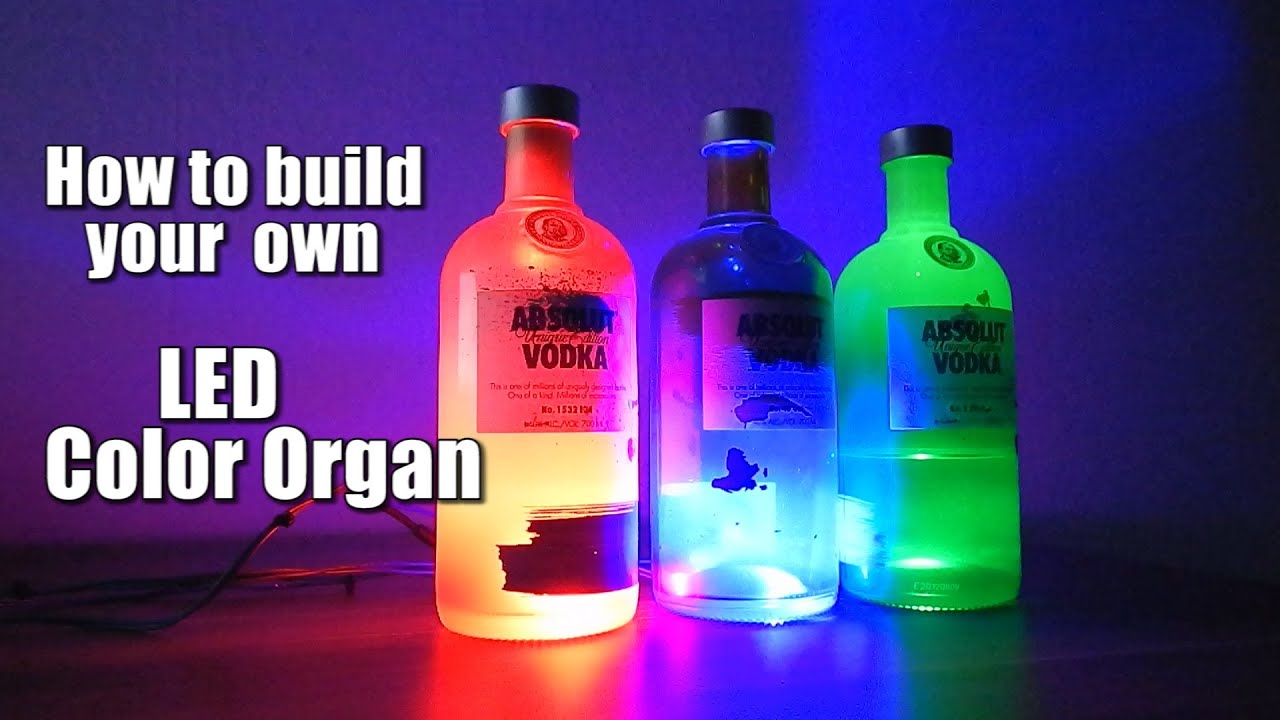
InrQvtUuS2w | 06 Oct 2013
Twitter: https://twitter.com/GreatScottLab Facebook: https://www.facebook.com/greatscottlab More project info on Instructables: http://www.instructables.com/id/How-to-build-your-own-LED-Color-Organ-Arduino-MSGE/ Parts: Ebay: List is on Instructables Amazon.de: Audio Jack: http://amzn.to/1gt9QTS Resistor Kit: http://amzn.to/1gt9XPf Power Supply (5V, 2A): http://amzn.to/1lEBiPl Arduino Uno: http://amzn.to/1iNrB3C Capacitor Kit: http://amzn.to/PD2jZj 1W High Power LED (green): http://amzn.to/1iNsl91 1W High Power LED (red): http://amzn.to/1iNsZmJ 1W High Power LED (blue): http://amzn.to/1gtbiFI Jumper Wires: http://amzn.to/NgYFSR Breadboard: http://amzn.to/1gtbtB7 Amazon.com: Audio Jack: http://amzn.to/1vAjQA1 Resistor Kit: http://amzn.to/1rTqrqr Power Supply (5V, 2A): http://amzn.to/1ujS7oN Arduino Uno: http://amzn.to/1pxcmKe Capacitor Kit: http://amzn.to/1E9G9Tc 1W High Power LED (green): http://amzn.to/1xLtV1h 1W High Power LED (red): http://amzn.to/1ujSMGM 1W High Power LED (blue): http://amzn.to/1r9EJ0I Jumper Wires: http://amzn.to/1rS1yen Breadboard: http://amzn.to/1uHHjSR MSGEQ7: http://amzn.to/1pMtTgy BUZ11 N Channel MOSFET: http://amzn.to/1vEYsuC I am showing you how to build a color organ while only using an Arduino Uno, one MSGEQ7 and five external electronic components. I am using three high power led and three MOSFET to visualize the three different frequency bands of the music. Join me for this awesome and educational build. You want to support my videos? You can browse and buy tools&materials from my Amazon Store. This way I get a small commission: Amazon.de: http://astore.amazon.de/great043-21 Amazon.com:http://astore.amazon.com/gre09a-20 Amazon.co.uk: http://astore.amazon.co.uk/gre0b-21 Or you feel super generous and want to use this Amazon link as your Amazon home page. And do not worry, your purchases are all anonym and the prices are all the same: Amazon.de:http://www.amazon.de/?_encoding=UTF8&camp=1638&creative=19454&linkCode=ur2&site-redirect=de&tag=great043-21&linkId=ORZEQZEOVJAFURCZ Amazon.com:http://www.amazon.com/?_encoding=UTF8&camp=1789&creative=390957&linkCode=ur2&tag=gre09a-20&linkId=I5NDCEAVCD2OWM4S Amazon.co.uk:http://www.amazon.co.uk/ref=as_li_ss_tl?_encoding=UTF8&camp=1634&creative=19450&linkCode=ur2&tag=gre0b-21